One of the most effective platforms for creating a strong online presence and reaching prospective clients is Facebook. With over 2.91 billion users on the platform, agents have the opportunity to capture the attention of their target audience through a well-curated realtor Facebook page. By choosing the right page name and profile photos, and including the right page information, you can generate leads and grow your business.
Agents who are not social media savvy can leverage marketing platforms like Real Geeks and use their Facebook Marketing tool to help with lead generation. The platform streamlines the creation of social media ads to drive more traffic to custom landing pages. The platform also includes custom IDX websites with high conversion rates and a customer relationship management tool to manage your leads.
Follow our step-by-step guide to learn how to create a real estate business Facebook page so you can grow your real estate business.
1. Sign Up for Facebook
Before creating a realtor Facebook page, agents must sign up for a personal page. Business pages are connected to personal pages on Facebook. If you already have a personal page, you can skip to the next step to create a new real estate Facebook page.

Facebook sign-up page (Source: Facebook)
To create a personal Facebook account, agents should go to Facebook.com and click on “Create Account.” Follow the prompts on the next screen, which should include inputting your name, email or phone number, password, and date of birth. Agents do not have to post or be active on their personal Facebook profile in order for their business page to be successful.
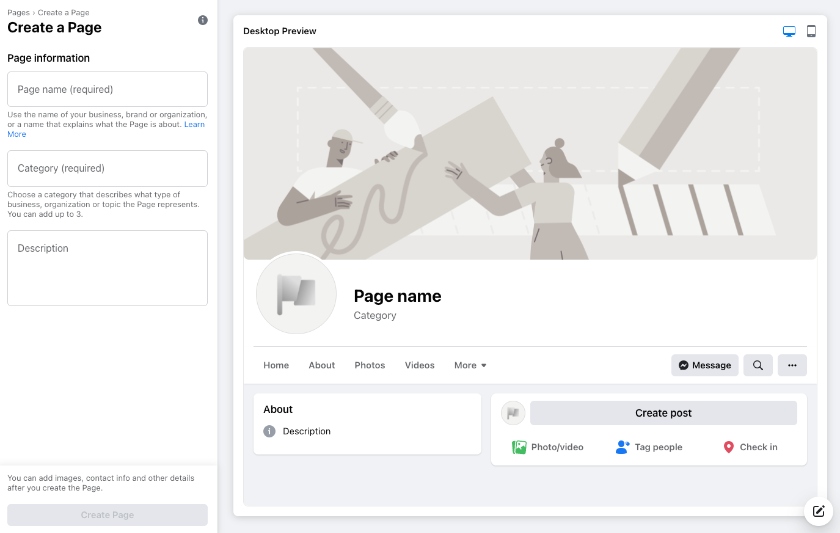
2. Create a Facebook Business Page
Real estate agents should log in to their personal Facebook account to create a Facebook business page. Creating a separate realtor Facebook page will distinguish your business from your personal social activities. A professional Facebook Business allows prospective clients to view your page information, whereas a personal page and its content are only available to those you are Facebook friends with.
Click on the “Pages” tab on the left-hand navigation pane. You should be directed to a blank preview of a business page with the prompt to enter a page name, category, and optional bio. Only these three elements are required to kick-start a business real estate agent Facebook page. Note that all of this information can be changed at a later date.
Selecting page name and category (Source: Facebook)
3. Choose a Page Name & Category
Selecting a name for your business page is a critical step. Your business name helps prospective clients find you more easily and showcases your distinctive real estate brand. So, you might be wondering, “What should I name my real estate Facebook page?”
Use your real estate business name, your personal name, or a play on both followed by “Realtor ” so page visitors are aware of your profession and can distinguish it from a personal page. However, there are many fun and interesting names you can choose for your business.
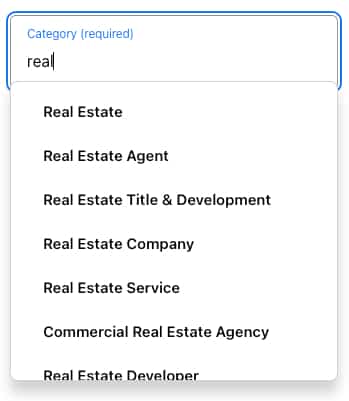
Realtor page category options (Source: Facebook)
For your business page category, type in “Real Estate” and choose the most relevant option from the list of approximately eight options. Agents can select up to three categories to describe their page. This categorization will make it easier for Facebook users to discover your page when searching for real estate services.
For individual real estate agents, the best categories to select would be “Real Estate,” “Real Estate Agent,” or “Real Estate Service.” If you have your own team or own a brokerage, including “Real Estate Company” as a category is a good option.
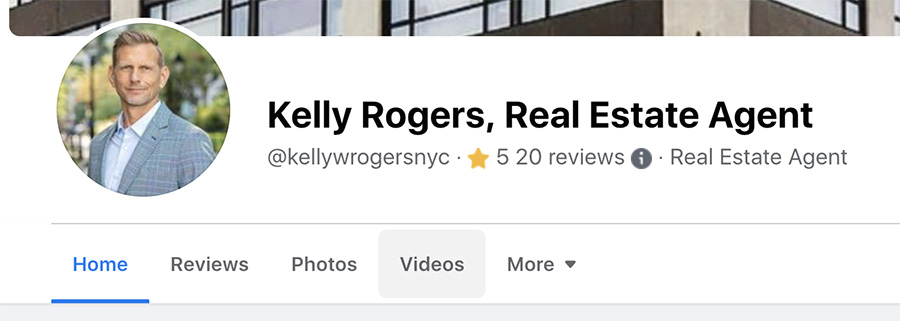
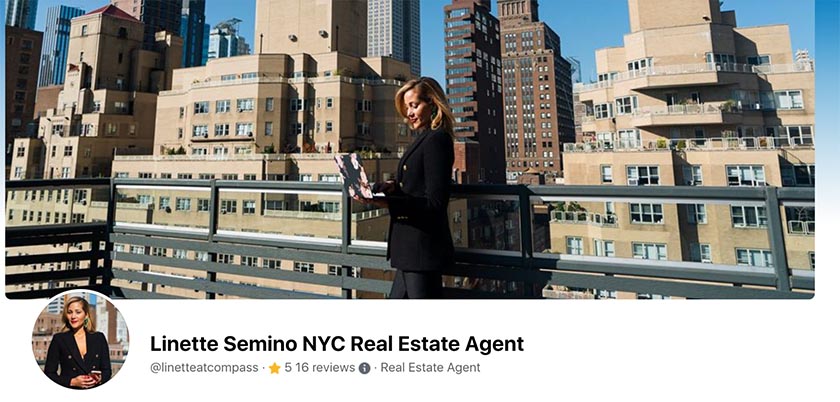
4. Add a Profile Picture & Cover Photo to Your Realtor Facebook Page
Once you’ve set up a new Facebook business page, you’ll be guided through a few prompts to finish setting up your page. Here, you’ll be asked to input contact, location, and business hours, along with adding a profile photo and cover photo. It’s essential to use a high-quality image that looks clear and sharp at various sizes to convey a sense of professionalism and trustworthiness and encourage prospective clients to explore your page and engage with your content.
Realtor Facebook page photos are crucial in creating a strong first impression and establishing your professional identity as a real estate agent. The recommended size for a profile picture is 180×180 pixels, but it will be displayed in different sizes on different devices. For example, your photo will be displayed at approximately 132×132 pixels on a desktop and even smaller on a smartphone.
Facebook profile example (Source: Facebook)
A Facebook cover photo is a large rectangular image at the top of your Facebook profile. The cover photo size is 820×312 pixels on desktop devices and 640×360 pixels on mobile devices. Facebook allows multiple cover photos, displayed in a slideshow format. Agents can use this space as an opportunity to highlight a stunning property, create a collage of your available listings, or a well-designed banner to represent your brand messaging.
Facebook real estate cover image example (Source: Facebook)
For help sizing your profile photo and cover photo, you can quickly enlist the assistance of a freelance graphic designer from Fiverr. Starting at just $5 per project, agents can leverage the assistance of freelance professionals to help with quick project-based needs. In addition to graphic design work, their freelancers can help with logo and web design as well.
5. Complete the ‘About’ Section
The next section agents should focus on completing is the “About” section. This section is critical in providing your page visitors with information about your business and services. Agents should include their business description, expertise, and offered services. Make sure you also add your contact information like business address, hours, phone number, email, and website so prospective clients have a way of reaching you.
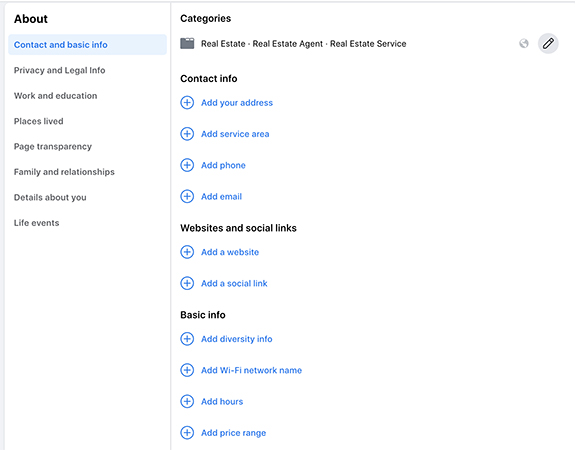
Page category information (Source: Facebook)
After you’ve filled out everything you can in the “About” Section, check your page’s health under the “Posts” tab. There, you’ll find page health ranking compared to similar Realtor Facebook pages. It’ll include action items like adding an action button or linking your WhatsApp account for a more robust page. These action items are listed to help you finish setting up your page, grow your audience, and help more people connect with you.

Facebook page health evaluation (Source: Facebook)
6. Add an Action Button
Right beneath your Facebook cover photo, there is an action button highlighted in blue. The action button is an effective way to persuade your page visitors to take a specific action like contacting you, visiting your website, or sending you a WhatsApp message. Agents should leverage the action button as a call-to-action opportunity. The call to action helps agents track the effectiveness of their Facebook page and measure the success of their social media marketing effort by monitoring clicks or conversions from these buttons.
Call now action button (Source: Facebook)
Facebook provides you with a few predefined action buttons to select from. Choose the appropriate one that best fits your real estate business and follow the prompts to direct the button to the right destination, such as your contact form, booking page, or website. A well-created action button makes it easy for potential clients to complete the desired action and helps generate leads and drive conversions for you.
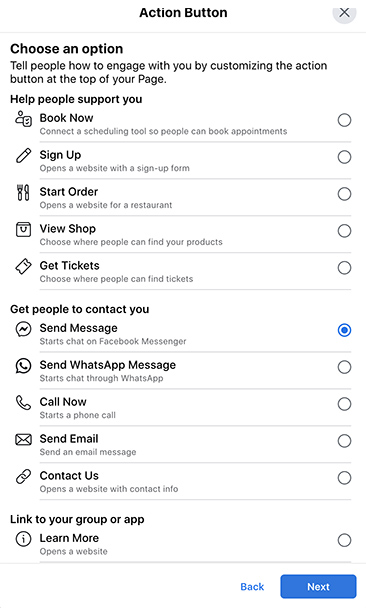
Selecting an action button (Source: Facebook)
7. Update Page Tabs
The top of each profile page has tabs to make it easier for visitors to find what they need when they are on your page. Facebook has a few default tabs like “Posts,” “Photos,” and “Videos,” but agents should consider customizing these sections so they are appropriate for your business.
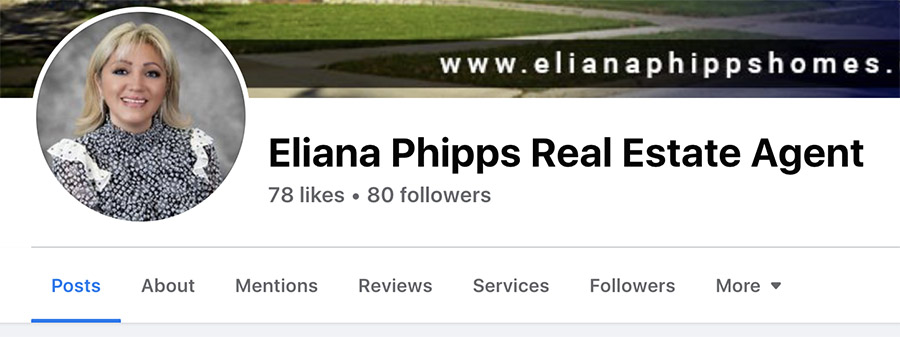
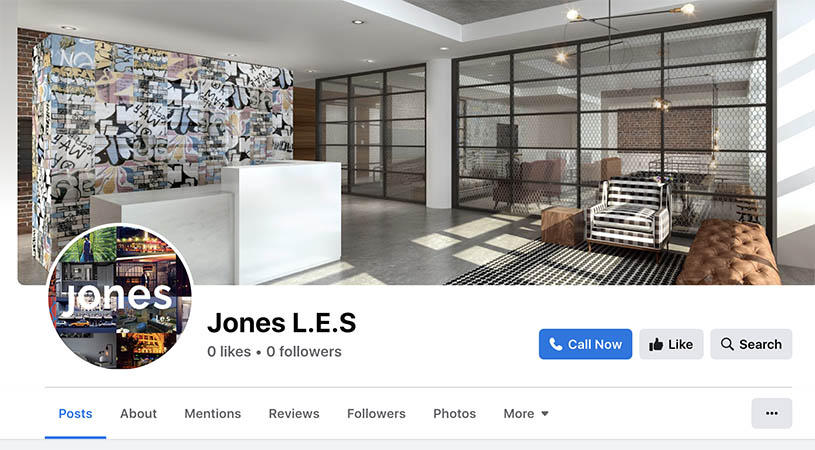
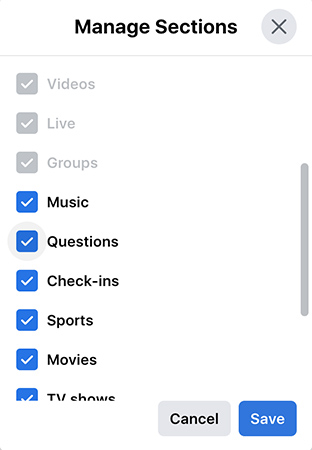
Page tabs examples (Source: Eliana Phipps Real Estate Agent)
For example, keep the “Question” tab but eliminate the “Sports” or “Movies” since you may not have any content for those. These tabs make it easy for potential clients to find relevant information and explore your page without having to scroll through your timeline to find out the information. Most real estate agent pages typically include posts, about, mentions, reviews, services, and followers tabs on their business pages.
Manage page tabs (Source: Facebook)
8. Preview & Publish Your Real Estate Facebook Page
After you’ve configured your page to the exact specifications you’re looking for, it’s time to publish your page. However, before you do that, take a moment to preview the page. Not only should you check that all the items you wanted to include are on the page, but also confirm your images are clear, grammar is correct, and that the site looks professional overall.
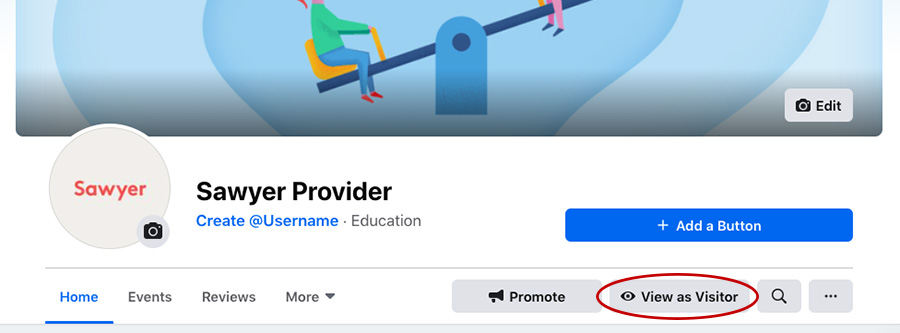
Facebook page buttons (Source: Sawyer)
Your visitors will be viewing and connecting with your page on desktop and mobile devices, so make sure to check the look and feel of your page on both mediums.
9. Invite Friends & Family to Like Your Page
When you’ve finished creating a real estate Facebook page, the easiest way to kick-start your page’s growth is by inviting your friends and family to like your page. You can also encourage your friends and family to share your page with their networks. This can help expand your reach and increase the likelihood of attracting potential clients and business referrals.
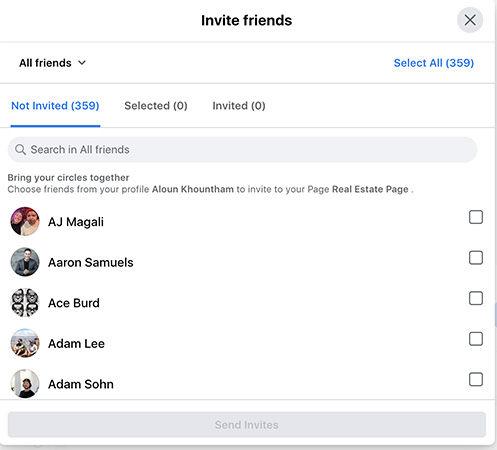
Inviting friends to like a page (Source: Facebook)
To invite friends and family, go to your Facebook page and click on “Invite friends to like your page.” It will prompt you to go to your personal Facebook page to select your connections. Personalize your invitation, so your Facebook friends don’t suspect it’s spam. In the provided section, provide a brief explanation of how your page will provide valuable real estate information, updates on your business, and property listings.
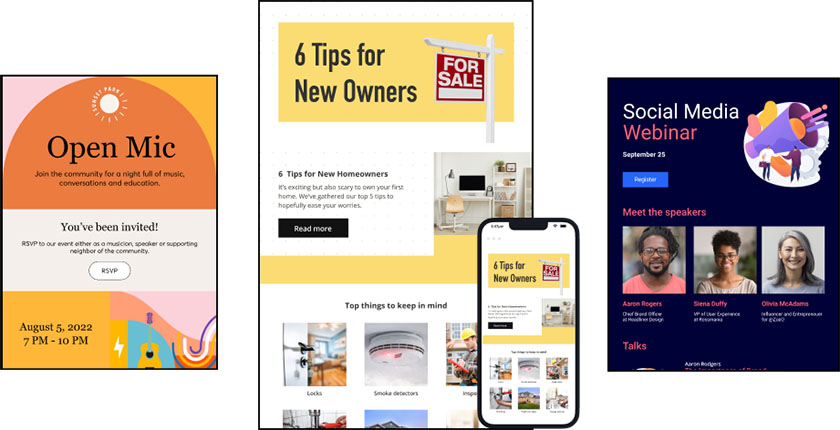
Industry base template examples (Source: Constant Contact)
Agents who do not have a large network of Facebook friends through their personal Facebook page can take the link to their business page and share that via email with their list of contacts. Constant Contact is an email marketing platform that lets you send, schedule, and follow up with your contacts. The platform has pre-made eye-catching email templates, so agents can easily send professional emails directing clients to their website, Realtor Facebook page, or landing pages.
10. Add Content to Your Real Estate Facebook Page
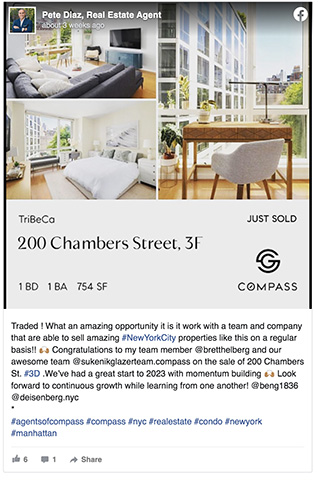
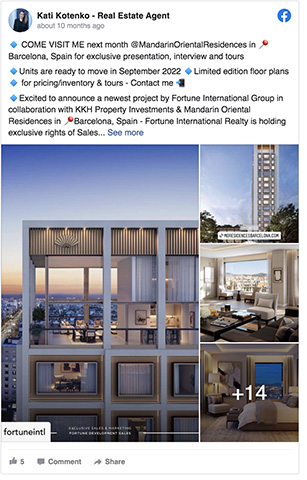
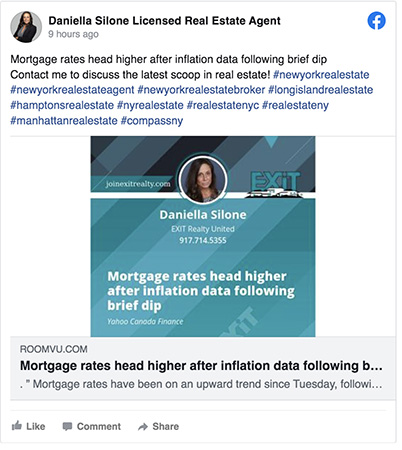
A successful Facebook business page will need consistent posting and audience engagement. According to HootSuite, it’s recommended that you post once per day but no more than twice a day to keep high engagement rates. Agents can share a mix of content, such as listings, blog posts, local market updates, and home-buying or selling tips.
Agents should also make an effort to engage with their followers by responding to comments and messages promptly. Successful real estate agents will showcase their attentiveness and approachability, you can foster trust and build relationships with potential clients through the social platform.
Scheduling posts in advance (Source: Later.com)
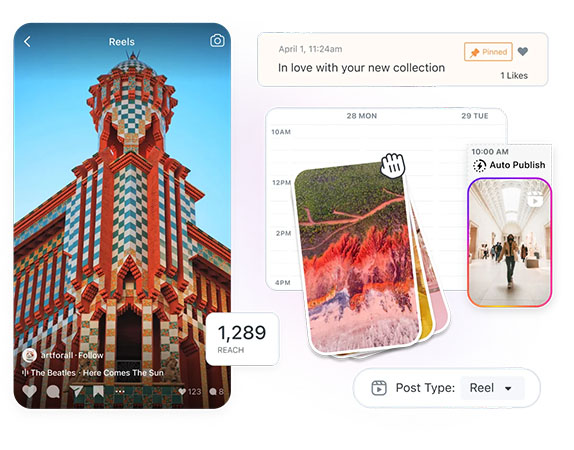
For assistance with posting Facebook content, Later.com has social media tools to help agents plan and publish content in advance. It integrates with Facebook to allow agents to easily design, edit and preview their content and schedule posts. Agents who have difficulty coming up with content ideas can leverage Later.com to find content that allows personalization to easily share on your social platforms like Instagram, Facebook, Twitter, and Pinterest.
If you’re unsure what to post, visit our article 13 Best Real Estate Facebook Posts (+ Examples & Ideas).
Bottom Line
Creating and maintaining a realtor Facebook page is an effective way to grow your real estate business and connect with prospective clients. By following these 10 steps, you’ll establish a strong online presence that helps you stand out in the competitive real estate market. Make sure to stay consistent with posting, engage with your audience, and leverage the online tools provided by Facebook to generate leads for your business.