Integrating WooCommerce, a popular and free ecommerce solution, and QuickBooks can save you hundreds of hours and prevent costly errors from transferring data manually. Intuit, which created QuickBooks, has a native connector, but there are third-party integrations as well.
Each plugin works differently—some offer two-way data transfer—and supports different versions of QuickBooks, so you need to choose the right one for your business needs. The four most popular plugin options for integrating WooCommerce with QuickBooks are:
We’ll walk through how to choose the best one for your business and the steps to set up each integration:
Step 1: Determine Your Data Transfer Needs
Data transfers work differently depending on which plugin you choose. There’s one-way data transfer, which moves data from one app to another, and two-way data sync, which offers real-time updates and data transfer from and to both apps.
Step 2: Choose a WooCommerce & QuickBooks Plugin
Since our last update, the OneSaas plugin has been replaced by Intuit’s connector. Support is still being directed to OneSaas. However, you can find the connector for free on Intuit’s app store. It integrates with QuickBooks Online only.
Zapier only offers one-way data transfer, and there’s a monthly fee ranging from free to $49 for small businesses. MyWorks and Webgility both offer two-way data sync and integrate with both online and desktop versions of QuickBooks. Only Webgility doesn’t have a free plan and is the most expensive as far as starting price.
WooCommerce & QuickBooks Integration Pricing
Monthly Fee* | Free | Free to $599 (price depends on tasks processed per month) | Free to $69 | $99 to $149 |
QuickBooks Product Supported | QuickBooks Online | QuickBooks Online | QuickBooks Online and Desktop | QuickBooks Online, Desktop, and POS |
Automated Sync Time | Unspecified | 1 minute to 15 minutes, depending on plan | 5 minutes to 1 hour, depending on plan | 15 minutes to 24 hours, depending on number of products |
Sales Channels | Unlimited | Unlimited | 25-plus expansions | 2 (additional $16/month) |
Monthly Orders | Unlimited | Depends on plan | 20-plus, depending on plan | 12,000 (additional 6,000 for $8/month) |
Two-way Sync | ✓ | ✕ | ✓ | ✓ |
* Based on an annual plan
Step 3: Integrate WooCommerce With QuickBooks Using Your Chosen Plugin
Choose Intuit, Zapier, MyWorks, or Webgility below for step-by-step integration instructions.
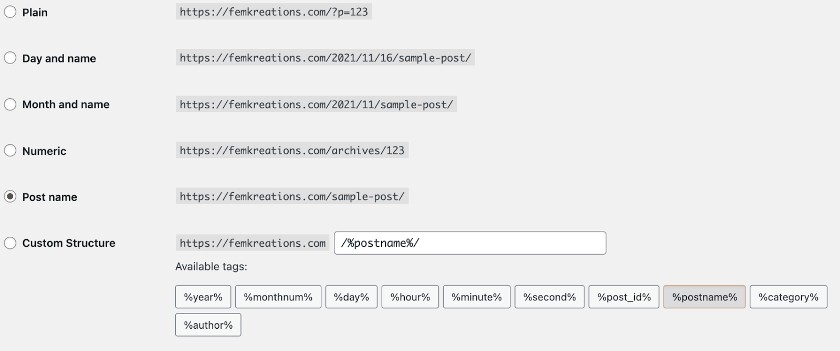
Intuit’s WooCommerce Connector (formerly OneSaas) is an excellent two-way integration—and it’s free. You need WooCommerce 3.5 or above, WordPress 4.4 or above, and pretty permalinks set up. (Go to Settings > Permalinks in WordPress. Use Post Name or Custom Structure to get pretty permalinks.)
Step 1: Connect to WooCommerce
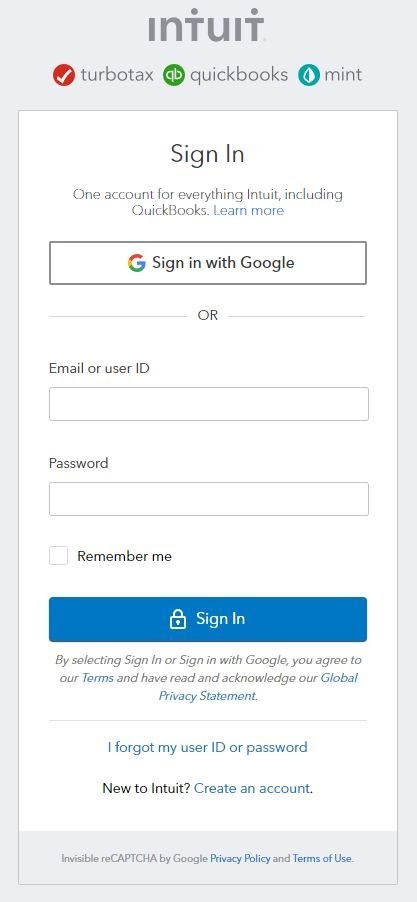
Sign in to your QuickBooks account.
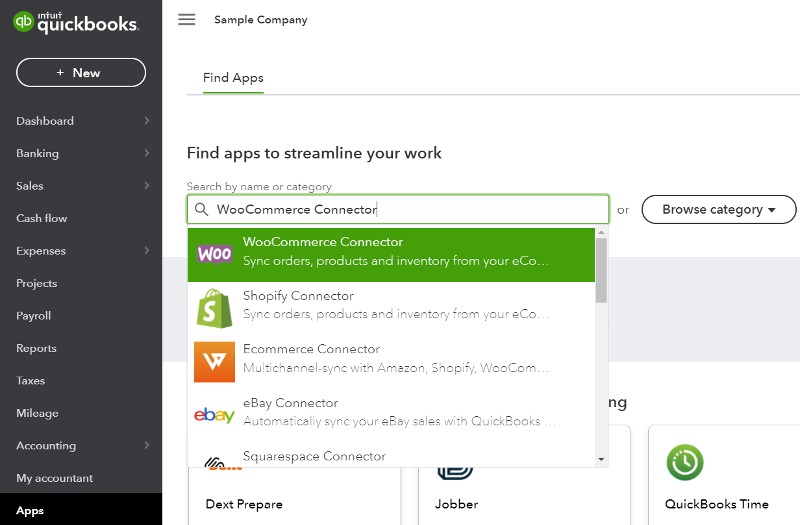
Install WooCommerce Connector, which you can find in the Apps section.
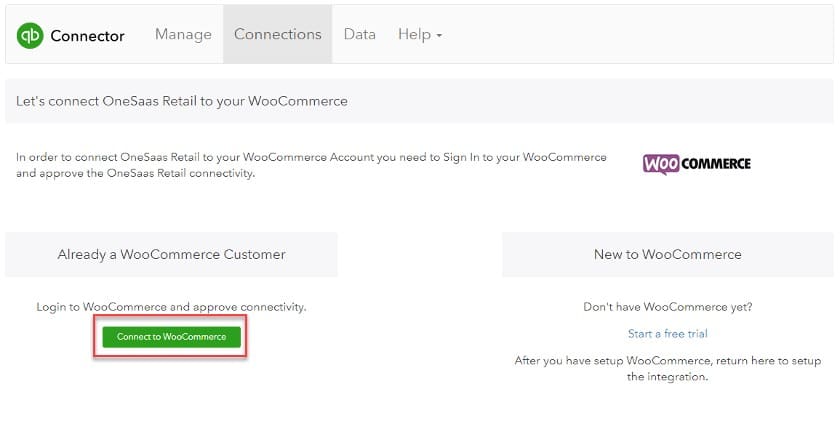
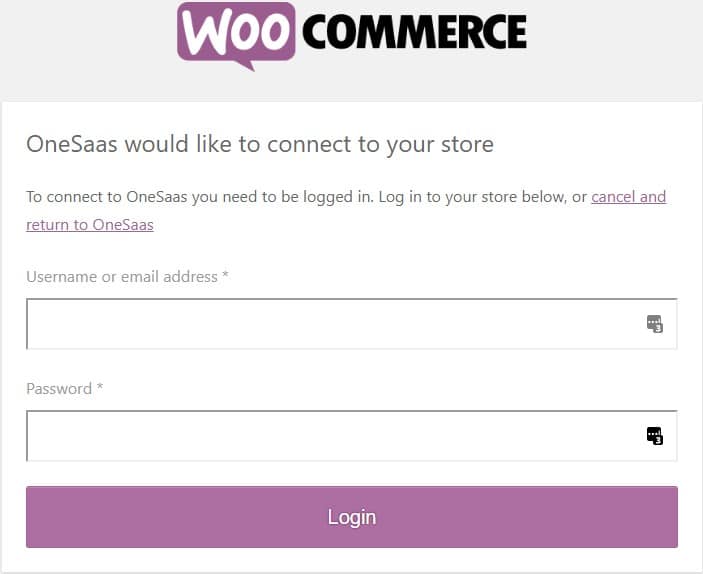
When prompted, click Connect. This will lead you to a page where you can log in to WooCommerce. If you don’t have a WooCommerce account, you can create one here.
To connect to WooCommerce, you’ll need to input your URL.
Next, enter your credentials and log in.
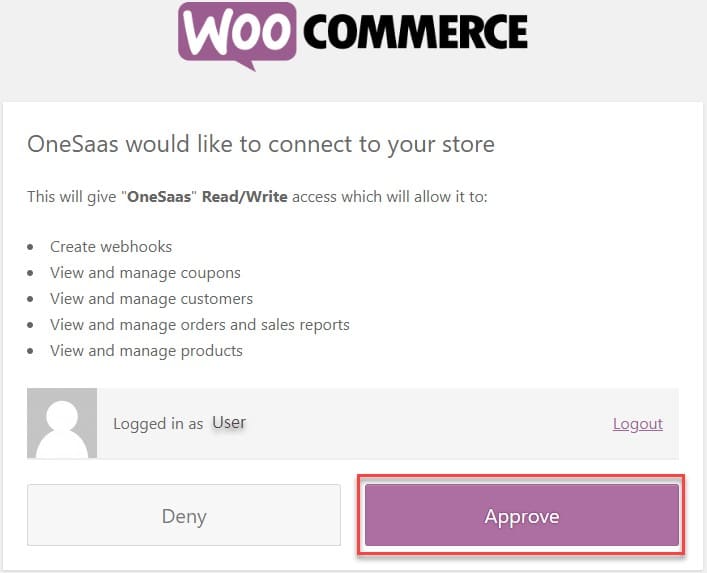
Then, approve the connection.
Step 2: Configure Workflows Between WooCommerce & QuickBooks
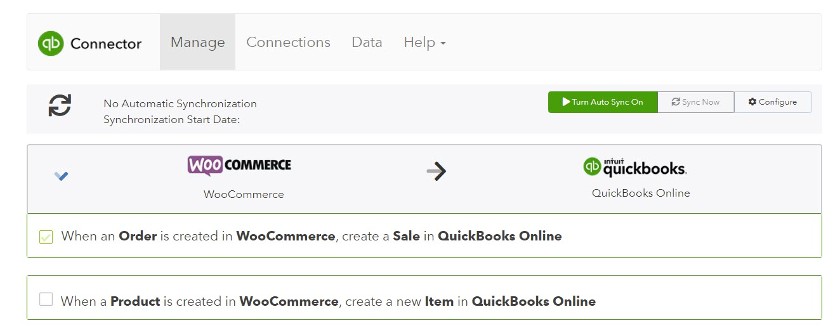
Once connected, click on Manage Connections in Connector.
If you’ve not set up your synchronizations, you’ll be prompted to do this first. This includes setting up your time zone, starting date, and email sync report options.
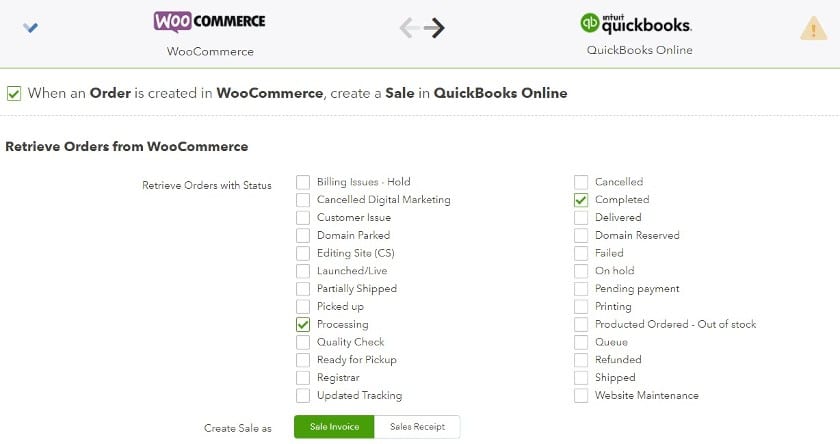
After this, you will be presented with three workflows: sending sales information from WooCommerce to QuickBooks, sending products from WooCommerce to QuickBooks, and updating WooCommerce with inventory you may have in QuickBooks. Choose as many of the workflows as you’d like, so data regarding orders, inventory, and products update in real-time.
Select your workflow, then start setting the parameters as directed by the app. These will include how you want information sent, how you want information identified―for example, you select prefix numbers to items retrieved from WooCommerce to identify them quickly in QuickBooks―how you want payment data registered, and more.
Tip:
One of the most important things to do is make sure you have both apps set up the way you want before transferring data using Connector, or you may run into issues.
For example, getting stock-level data from QuickBooks to WooCommerce is possible, but you need to make sure you have your inventory data set up in QuickBooks before you integrate and enable this function. If you don’t, you may zero out your stock levels in WooCommerce.
Step 3: Start Sync
The last step is to click the Sync Now button at the top of the Manage Tab.
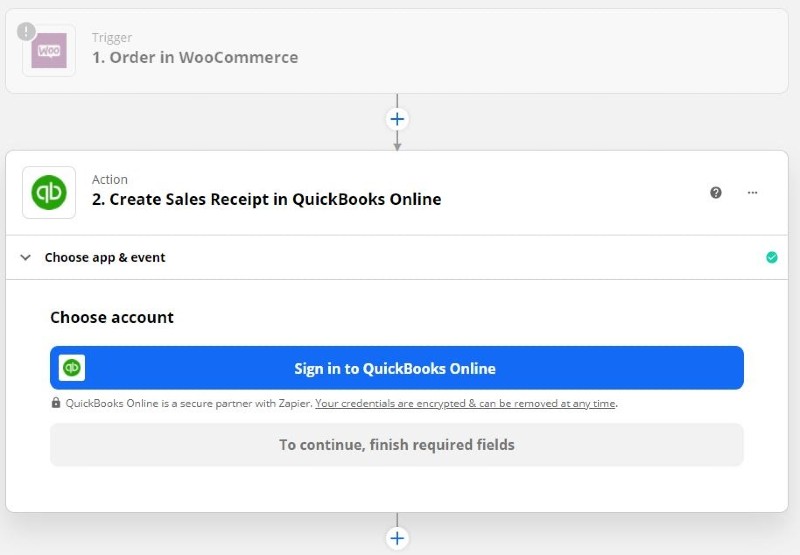
Zapier connects two systems, such as QuickBooks and WooCommerce, using mini-integrations called Zaps. Each Zap includes a Trigger and an Action. For example, a Trigger can be a new order being placed on WooCommerce, and an Action would create a QuickBooks Sales Receipt with that order information automatically.
The free option gives you five Zaps, or integrations, so you can set up Zapier as a one-way data transfer from WooCommerce to QuickBooks for free. However, you’re also limited to 100 tasks. A task is an instance of use, such as the transfer of data from WooCommerce to QuickBooks when a sale is made.
Here’s how to set up WooCommerce with QuickBooks using Zapier.
Step 1: Sign Up for a Zapier Account
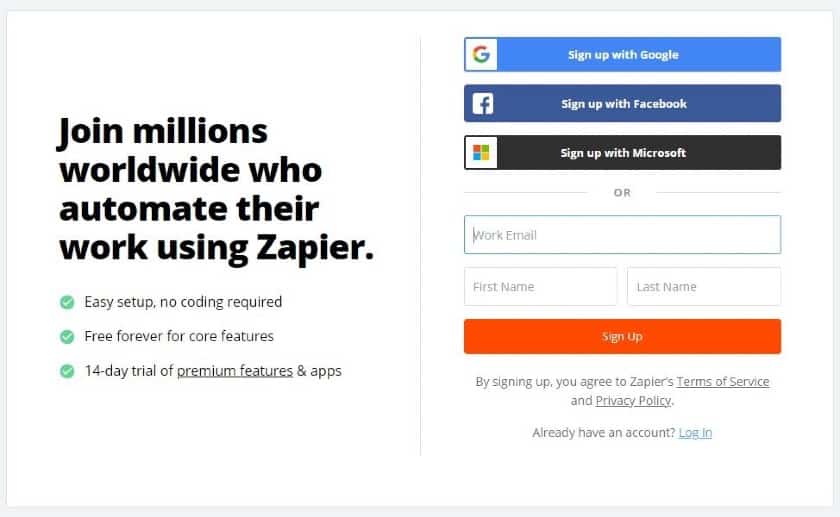
All you need to get started with Zapier is an email address, first and last name, and a password. You can also sign up using Google, Facebook, or Microsoft accounts. It’s free to get started, and plans vary by the number of tasks per month you use.
Step 2: Connect to WooCommerce
First, be sure you’ve installed the WooCommerce Zapier extension in WordPress. Go to WordPress Dashboard > Side Menu > WooCommerce > Extensions > WooCommerce.com Subscriptions screen and click the one-click Download button next to WooCommerce Zapier.
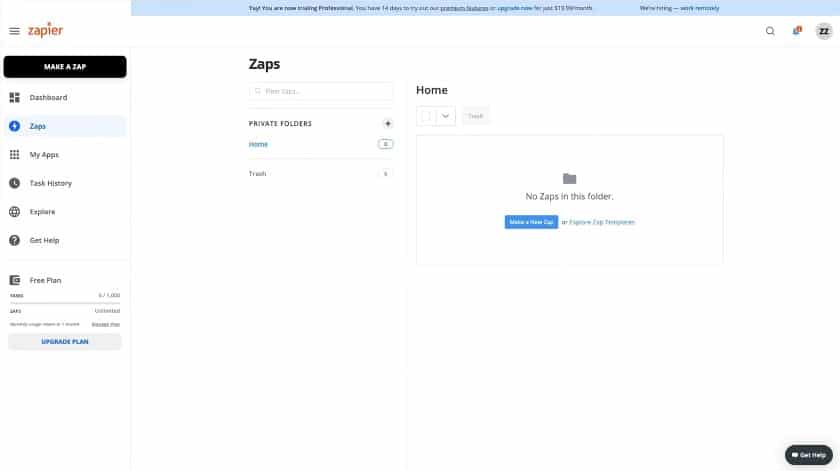
Next, log in to Zapier and click on Make a Zap to access the Zap editor. It will ask you to choose an app. Choose WooCommerce.
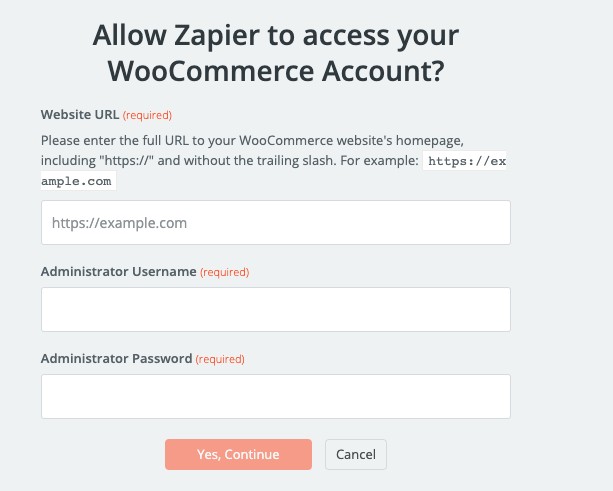
Next, allow access by entering your credentials.
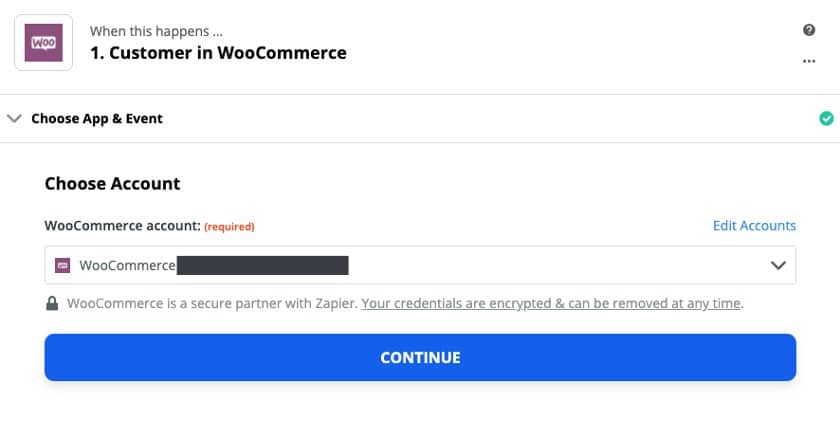
It should look like this once connected. Next, click Continue.
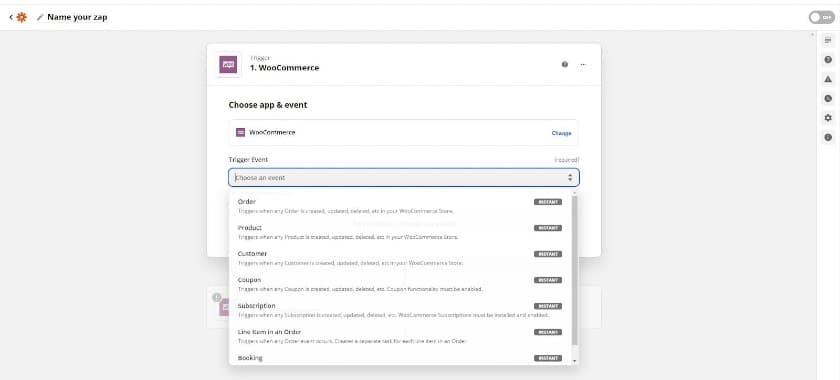
Step 3: Choose Your First Trigger
Data transfers move only from WooCommerce to QuickBooks Online. There are two types of triggers from which you can choose. “Instant” causes a transfer of data when an event occurs, such as an order, while “polling” searches for data on a timetable you set, like every 15 minutes. So, with an instant trigger, you’re charged with every sale. With a polling trigger, you’re charged whenever the poll detects sales.
For example, if you make 15 sales in a busy half hour, the instant trigger will run (and charge) you for a task 15 times. Meanwhile, a polling trigger will only charge you twice. However, you won’t have instant stock update with a polling trigger.
Step 4: Pick the Action You Want Zapier to Make
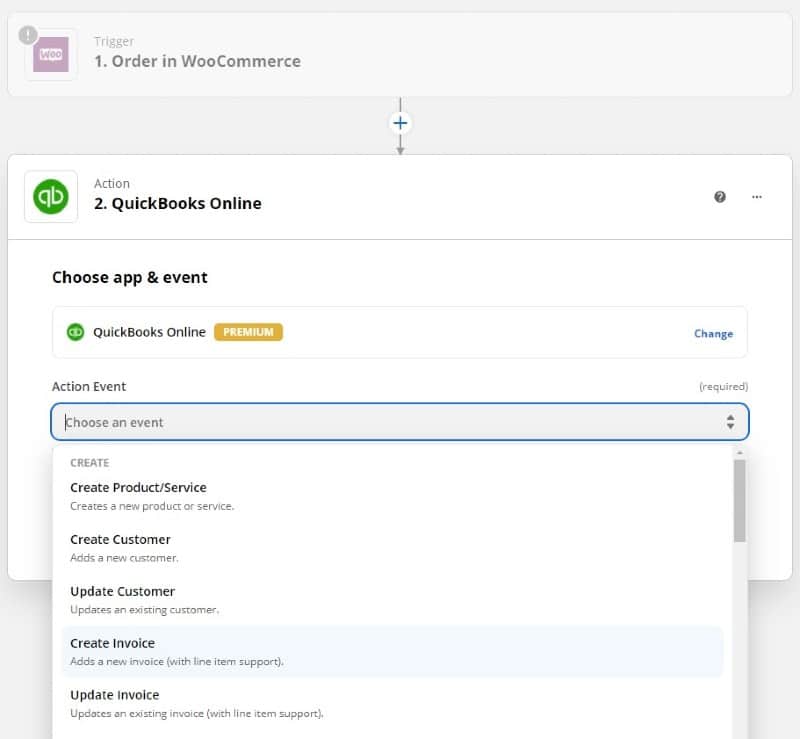
After choosing your first Trigger, you’ll be asked to pick an Action, where you can select QuickBooks Online. Then, select the action you want the integration to make, such as creating an invoice. Now, whenever an order comes through in WooCommerce, QuickBooks gets a command to create an invoice based on that order.
Step 5: Log In to QuickBooks
Once you’ve selected your action, you’ll be asked to sign into QuickBooks and verify access, just as you did with WooCommerce.
Step 6: Configure Your Zap
Zapier will lead you through the settings and information you need to set up your process. This varies depending on the task you want to accomplish.
Step 7: Test & Enable Your Zap
When you selected the action, Zapier will have pulled information from an event that happened in the past. It uses that to set up a test action so that you can review the results and make changes. Once you’re satisfied with your Zap, be sure to turn it on by clicking the button on the bottom.
MyWorks is a third-party plugin that works similarly to Intuit Connector with two big differences: it comes with a monthly fee and integrates with all of QuickBooks accounting solutions. So, if you’re using the desktop version of QuickBooks or the point of sale, then you may want to choose MyWorks for data syncing with WooCommerce.
Tip:
MyWorks paid accounts come with a setup call that includes screen share. All plans include access to videos, guides, and unlimited support. You don’t have to set it up on your own, or you can follow these directions knowing you can call them if you run into any trouble.
The following how-to is for QuickBooks Online. If you need QuickBooks Desktop, check out MyWorks’ how-to video here.
Step 1: Install & Activate the MyWorks Plugin
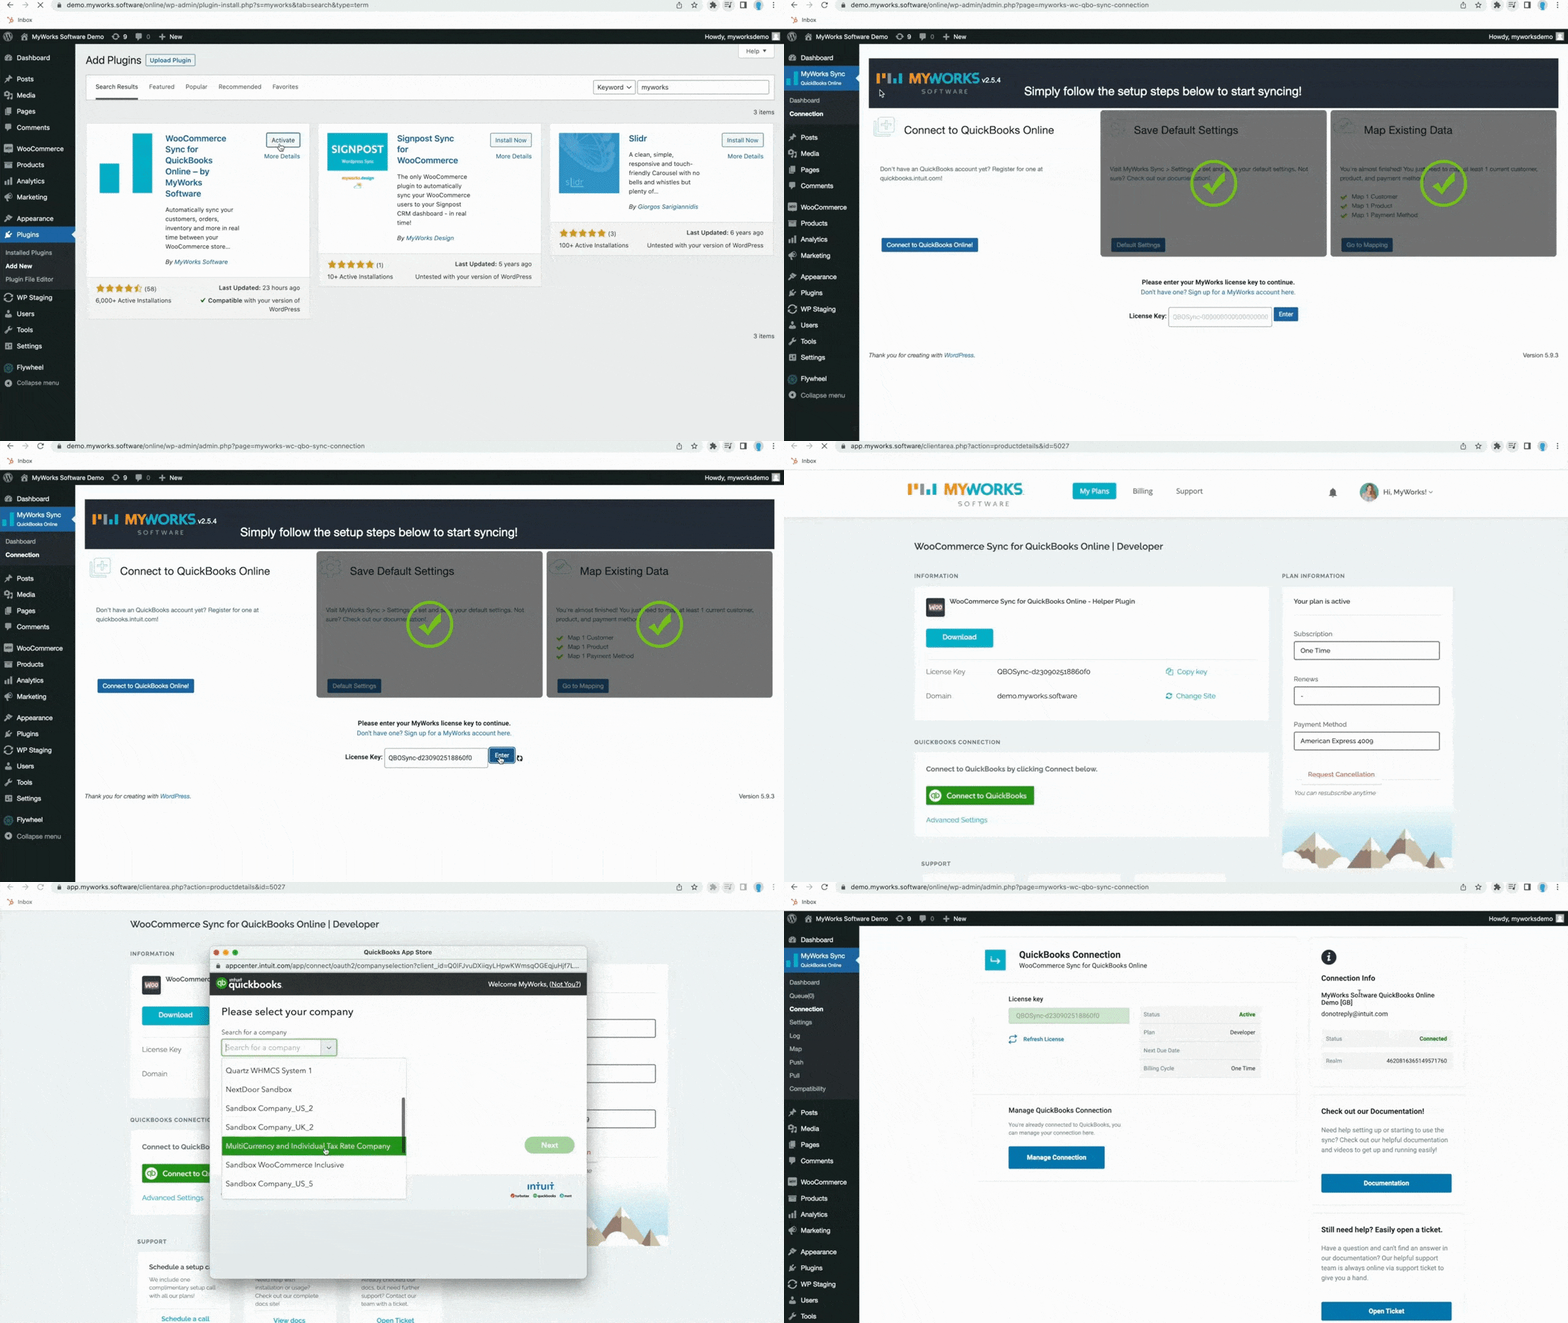
To install and activate the MyWorks Plugin, you need a MyWorks account. The app gives you a chance to sign up for one if you don’t have one yet and to get the license number.
From your WordPress WooCommerce dashboard, you download and install the plugin, then activate it. It will place a MyWorks Sync option at the top of your menu. Click on that to connect QuickBooks.
Tip:
Be sure to use your QuickBooks admin account when syncing, so that you provide access to all the information.
Step 2: Map Products Between QuickBooks & WooCommerce
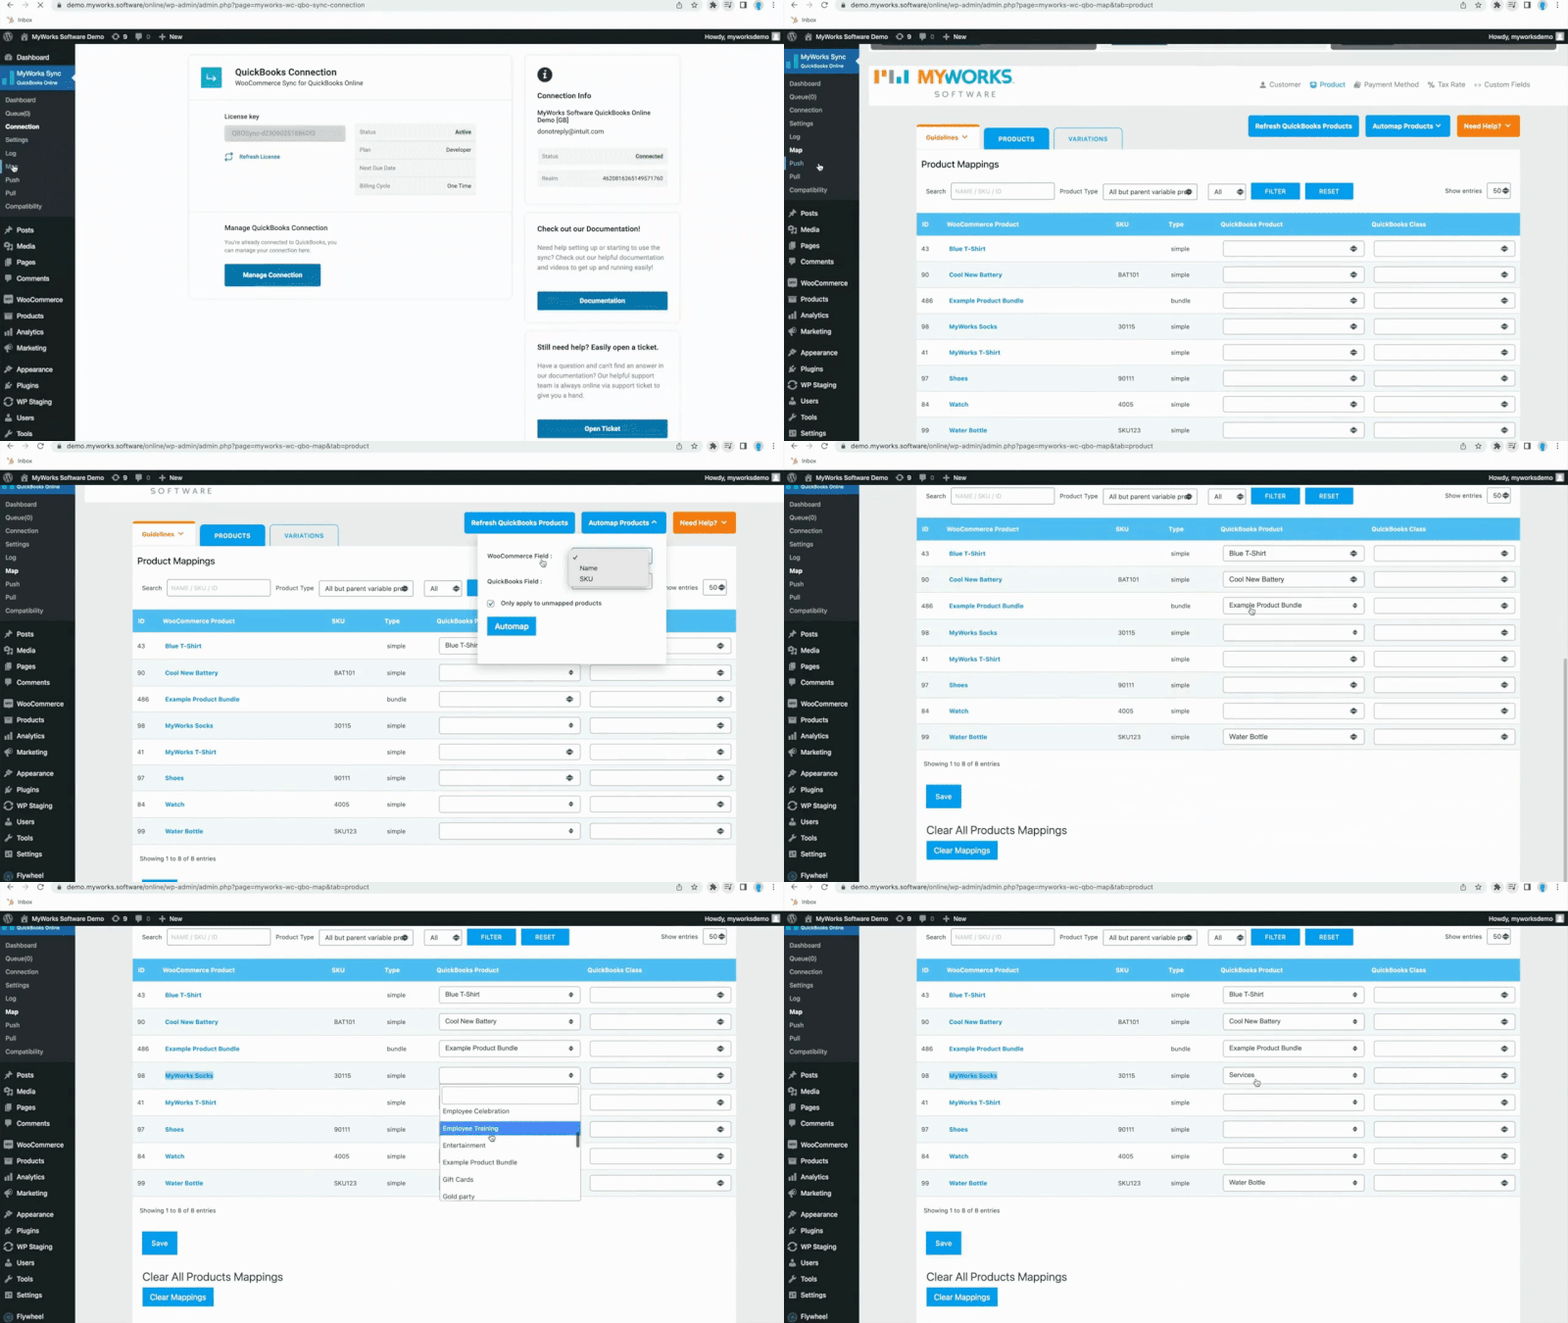
There are three ways to sync products between WooCommerce and QuickBooks:
- If you have products in WooCommerce but not QuickBooks, use the Push button
- If you have products in QuickBooks but not WooCommerce, use the Pull button
- If you already have products in both (perhaps even using a different integrator), then you use the Map button
Once you choose the correct sync, follow the directions in the wizard.
There are two ways to map: manually or automatically. To map automatically, you match a field from WooCommerce with a field from QuickBooks. If you already have all the products with a match between QuickBooks and WooCommerce, you’re ready to go.
Otherwise, you can then match manually any that MyWorks doesn’t find automatically. The GIF above shows products, but it works for variations, bundles, customers, taxes, and even custom fields. You need to contact customer support about syncing custom fields.
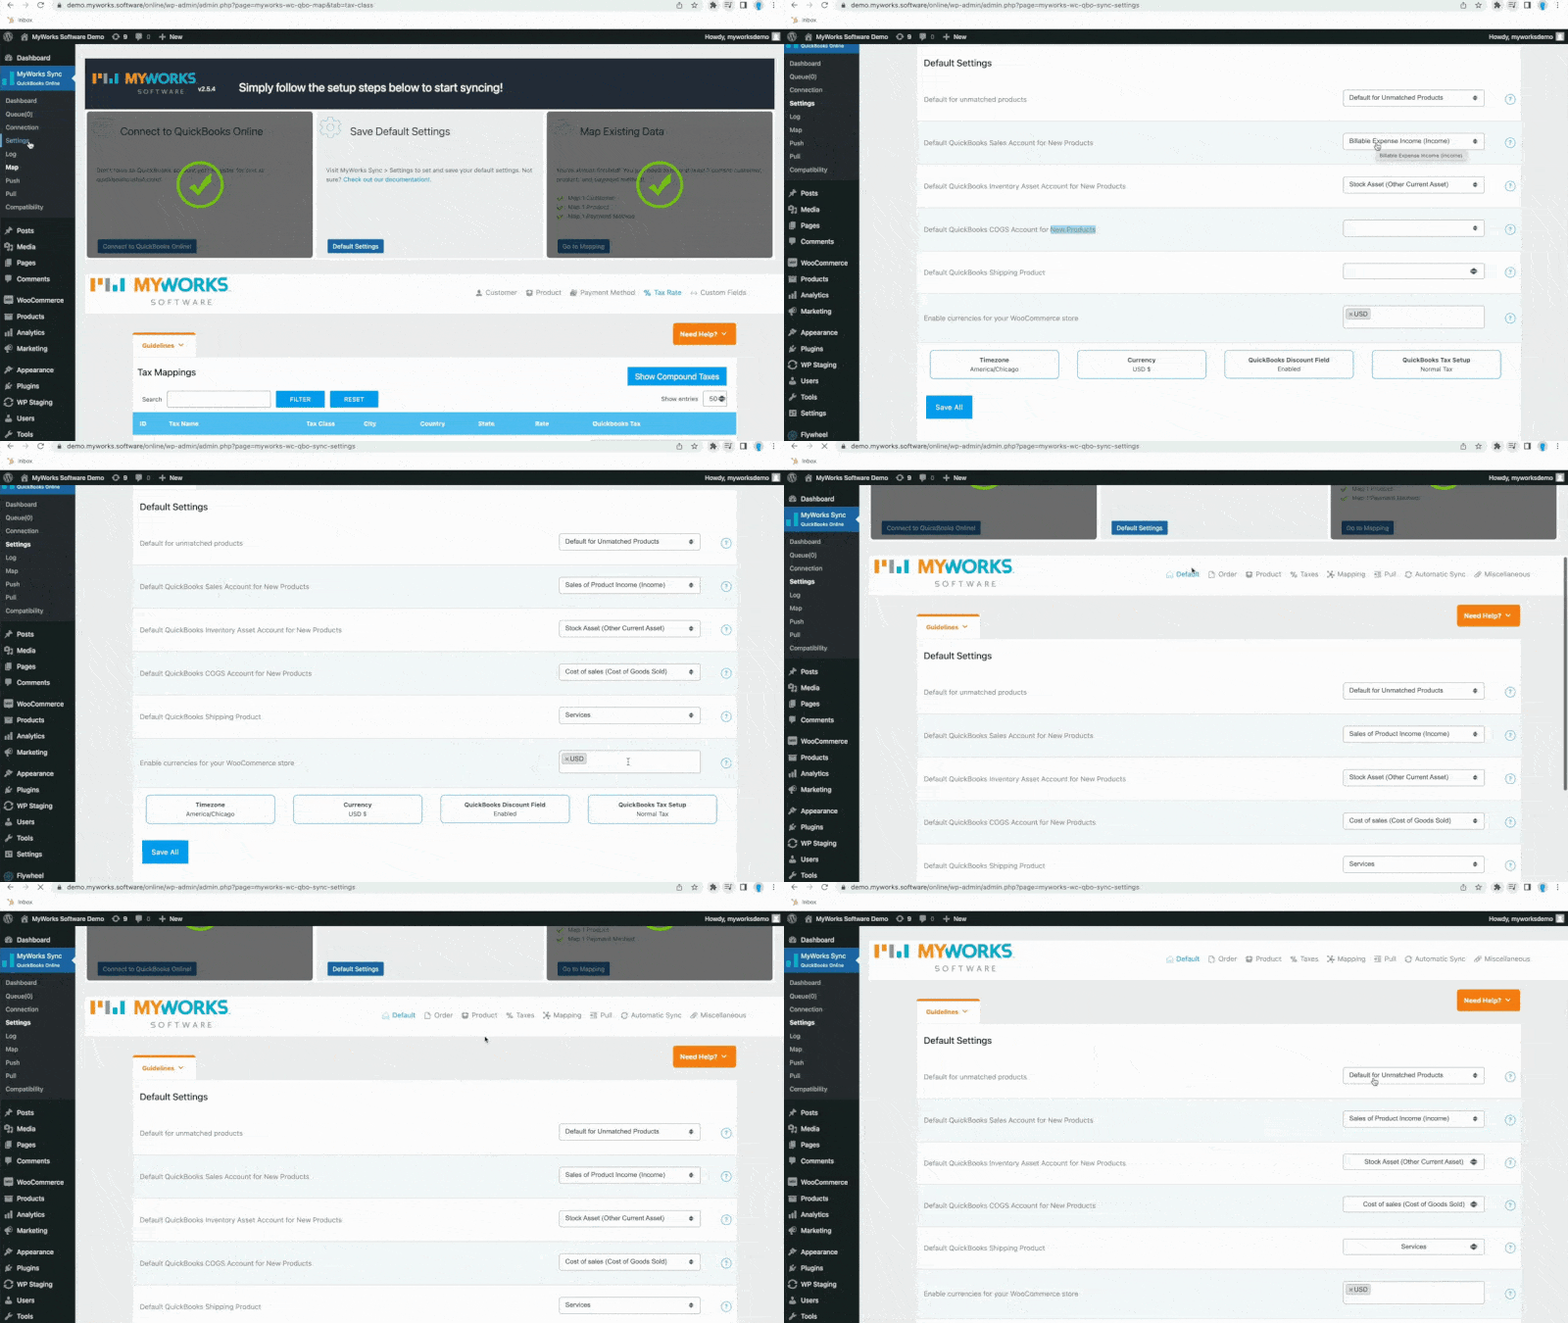
Step 3: Configure Settings for QuickBooks
Adjust your settings for QuickBooks as needed. You can change the time zone and currency, among other settings. MyWorks also requires that you set the default settings for syncing particular products. This includes designating places to put unmatched products and new products, for example.
Step 4: Change Automatic Sync Settings
The other options in the Settings tab only need to be accessed if you need to change how MyWorks normally syncs data. They don’t need to be addressed unless you’ve already started syncing data and need to make changes. You can learn more in this MyWorks video.
Webgility connects your WooCommerce with either QuickBooks Online or Desktop version, and QuickBooks POS. The third-party plugin creates a seamless sync between the programs, so your information in both QuickBooks and WooCommerce are always aligned. Webgility is a pricier solution than MyWorks but integrates with other sales channels, such as Amazon, Shopify, and BigCommerce.
Step 1: Install & Activate Webgility on WordPress
Sign up and pay for your Webgility plugin and download the file. Then, log in to your WordPress account and go to Plugins, and then click on “Add New.” Upload the file you’ve downloaded, and then find Webgility in your list of installed plugins. Click on “Activate.”
Once you’ve activated your Webgility plugin, you should see a unique URL. Copy that. You need it for the next section.
Step 2: Add the Generated URL to Webgility Dashboard
Tip:
If you didn’t load the Webgility plug-in, you’ll be directed to do so in this process.
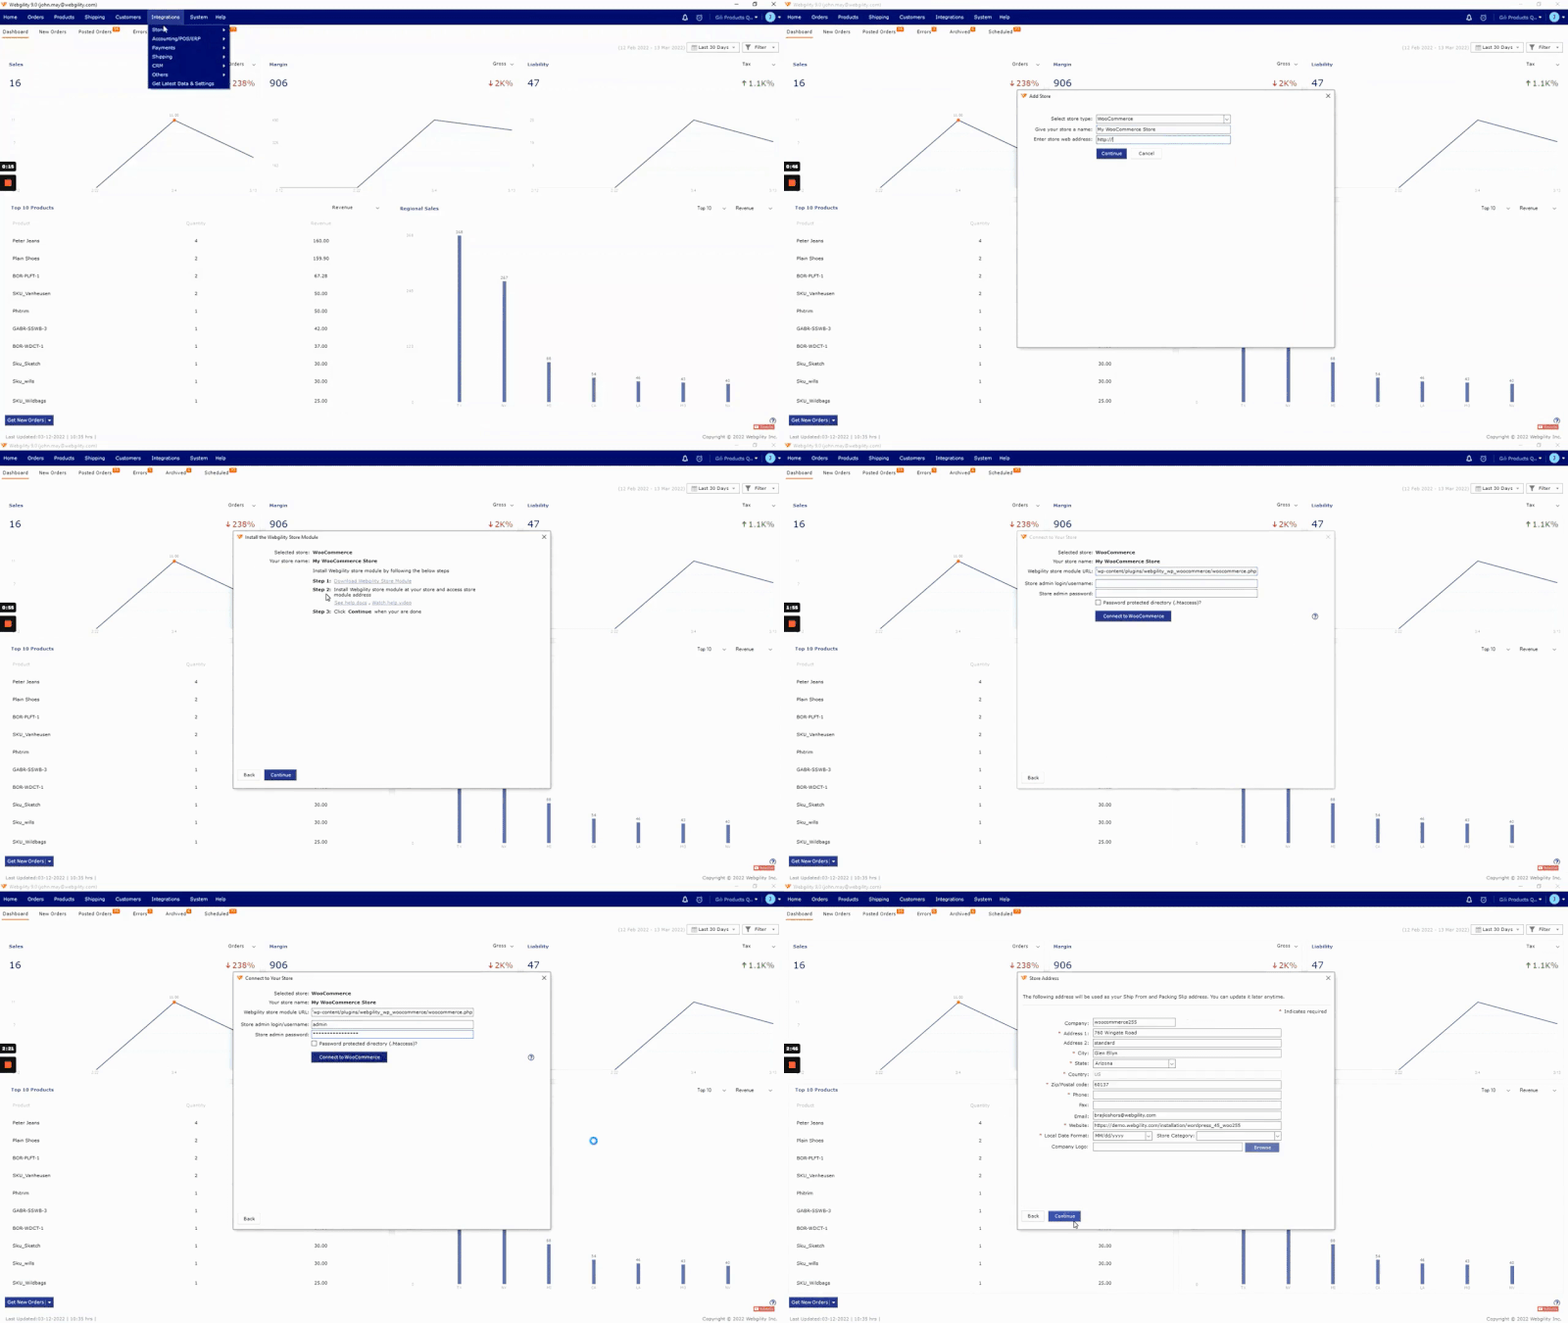
Switch over to your Webgility dashboard. Go to Integrations > Stores > Add. A screen will pop up where you add your store type—in this case, WooCommerce—a nickname for your store, and the URL you just copied from WordPress. Log in with your WooCommerce credentials to connect your store to Webgility. Then, you’ll add your business contact information, such as address, phone number, and website.
Step 3: Connect Webgility to QuickBooks
You’ll need your company file location for this process:
- For QuickBooks Pro, Premiere, or Enterprise, log in with your admin credentials and then find the company file using the browse button or click F2
- If you’re using QuickBooks POS, log in as the sysadmin and find the company file name in the upper left corner of the QuickBooks POS interface
- If you’re using QuickBooks Online, you don’t need a file location
Once logged in, go to the Webgility desktop, and add the company file name, along with the version of QuickBooks you’re using.
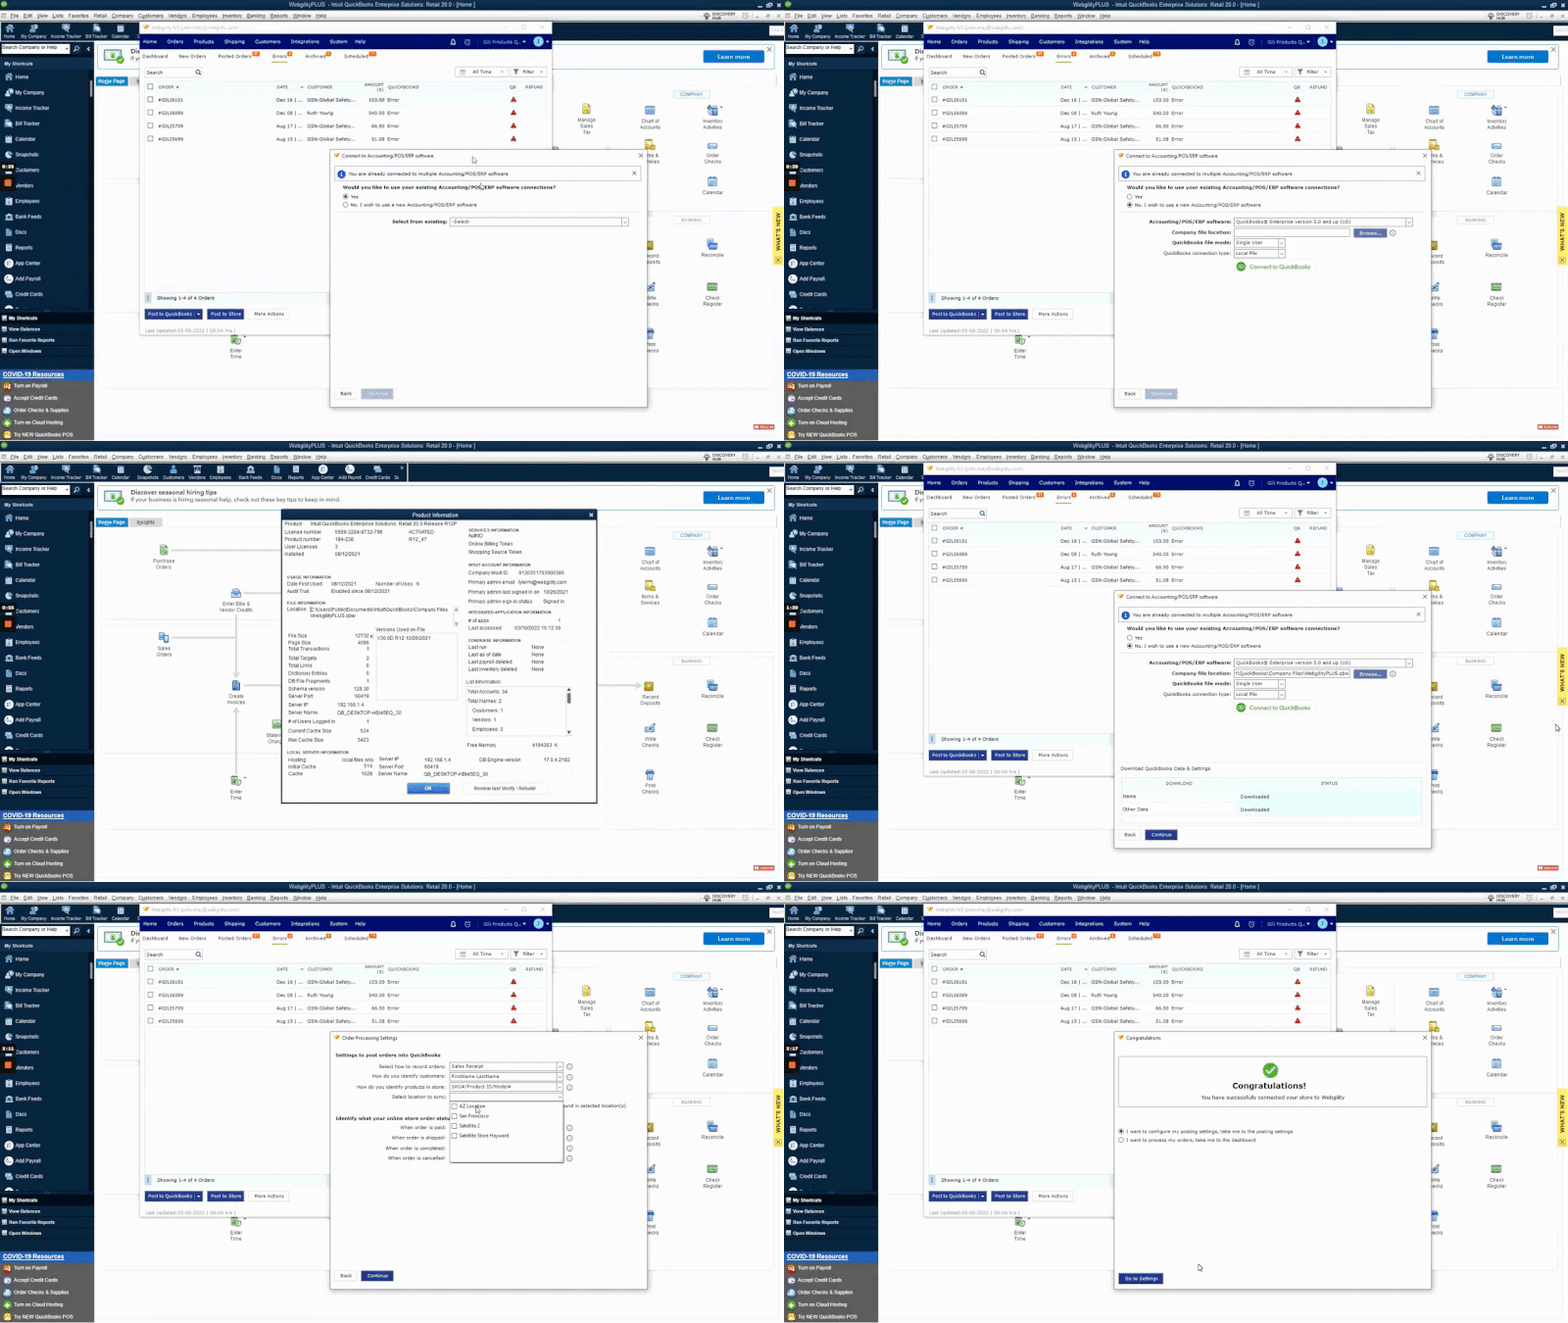
Once you’ve connected your store, you’ll be asked to connect an accounting software, which you can choose from the drop-down menu. Next, insert the company file location. Be sure you’re logged in as a single user. Then click connect.
After that, you’ll be asked to confirm some settings like sales tax, shipping fees, and payment providers.
Note: The Sync location is for Shopify users only, so you can ignore it.
Tip:
If asked, agree to always allow access even if QuickBooks isn’t running. This will ensure continual, near-real-time syncing of information.
Step 4: Sync Data from QuickBooks to WooCommerce
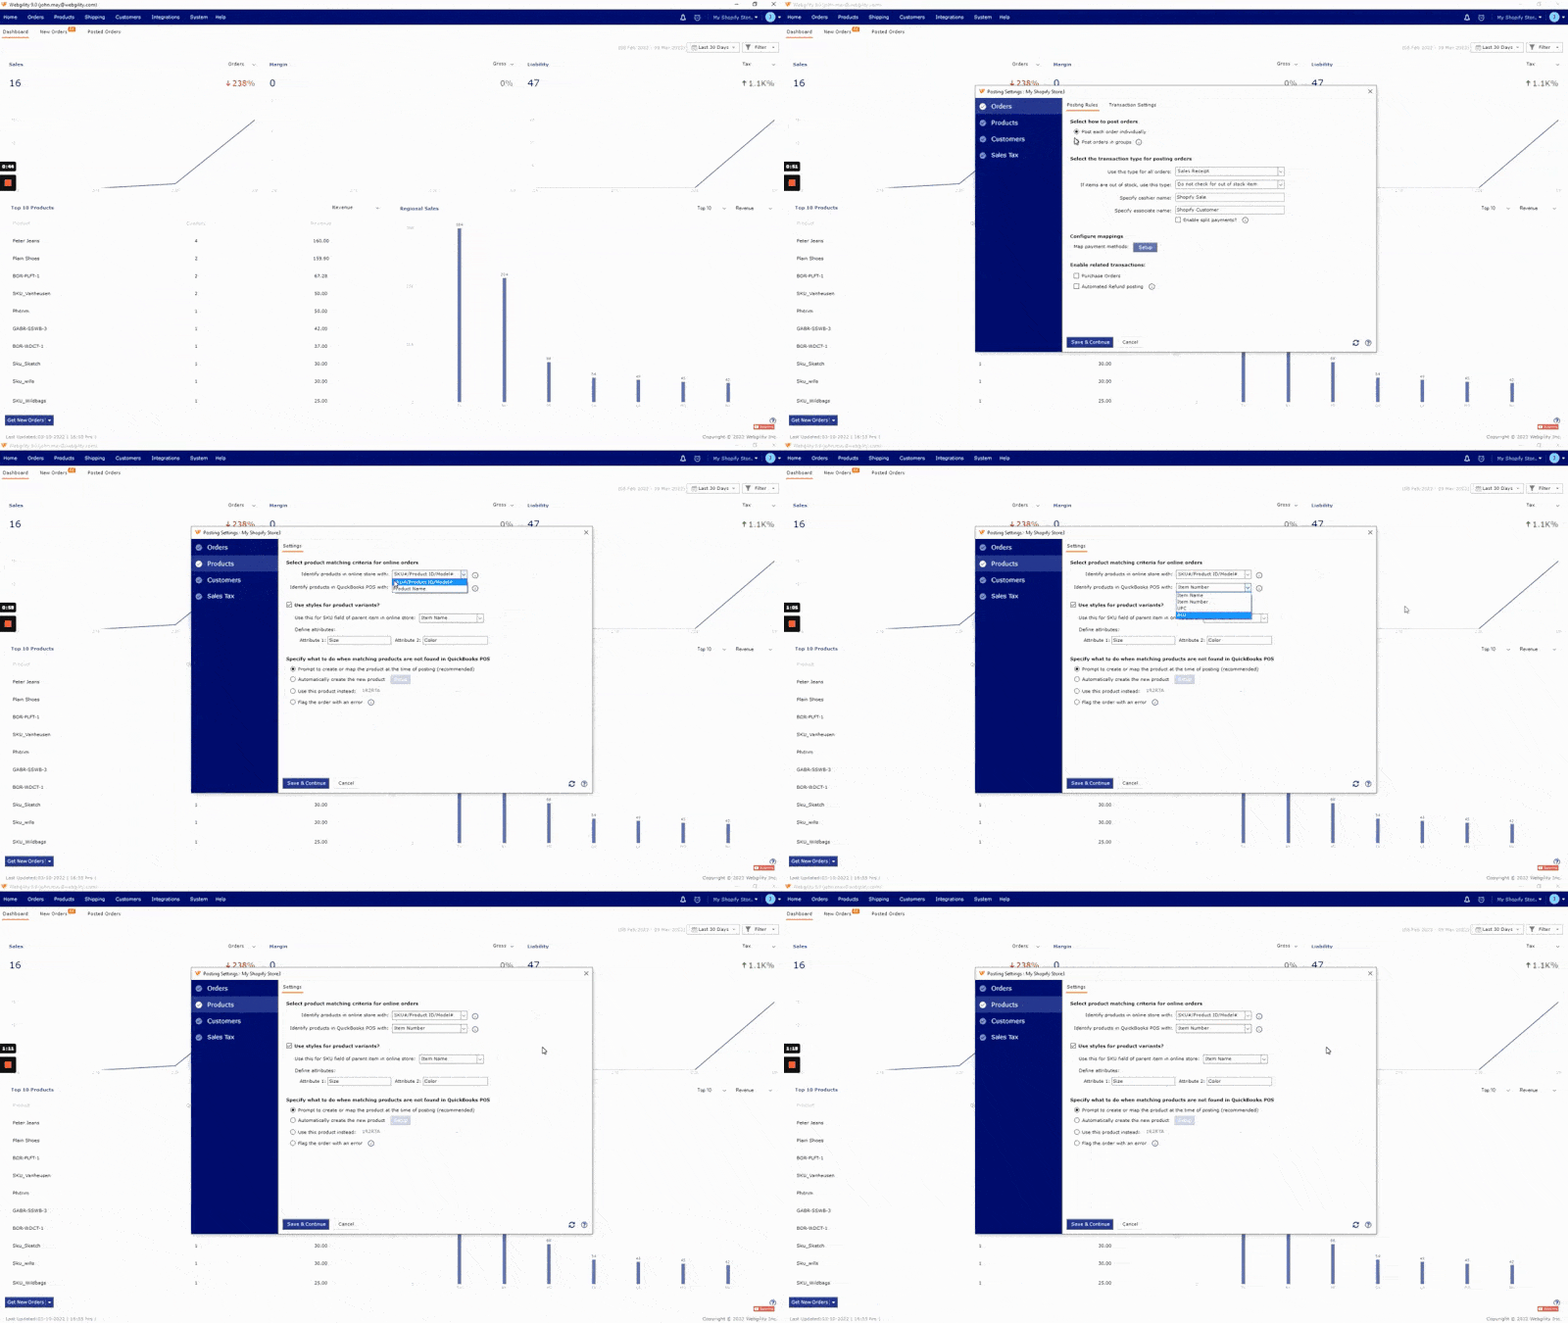
There are two ways to sync items between WooCommerce and QuickBooks: matching and mapping. Webgility recommends matching stock keeping units (SKUs) in WooCommerce to item numbers in QuickBooks.
Matching
Matching is used when your data shares similar criteria.
To match, you go to Integrations > Accounting > POS/ERP in your Webgility app. The popup window will lead you through the rest. You can map orders, products, customers, or sales tax. What you can match to varies on what QuickBooks program you’re using.
Mapping
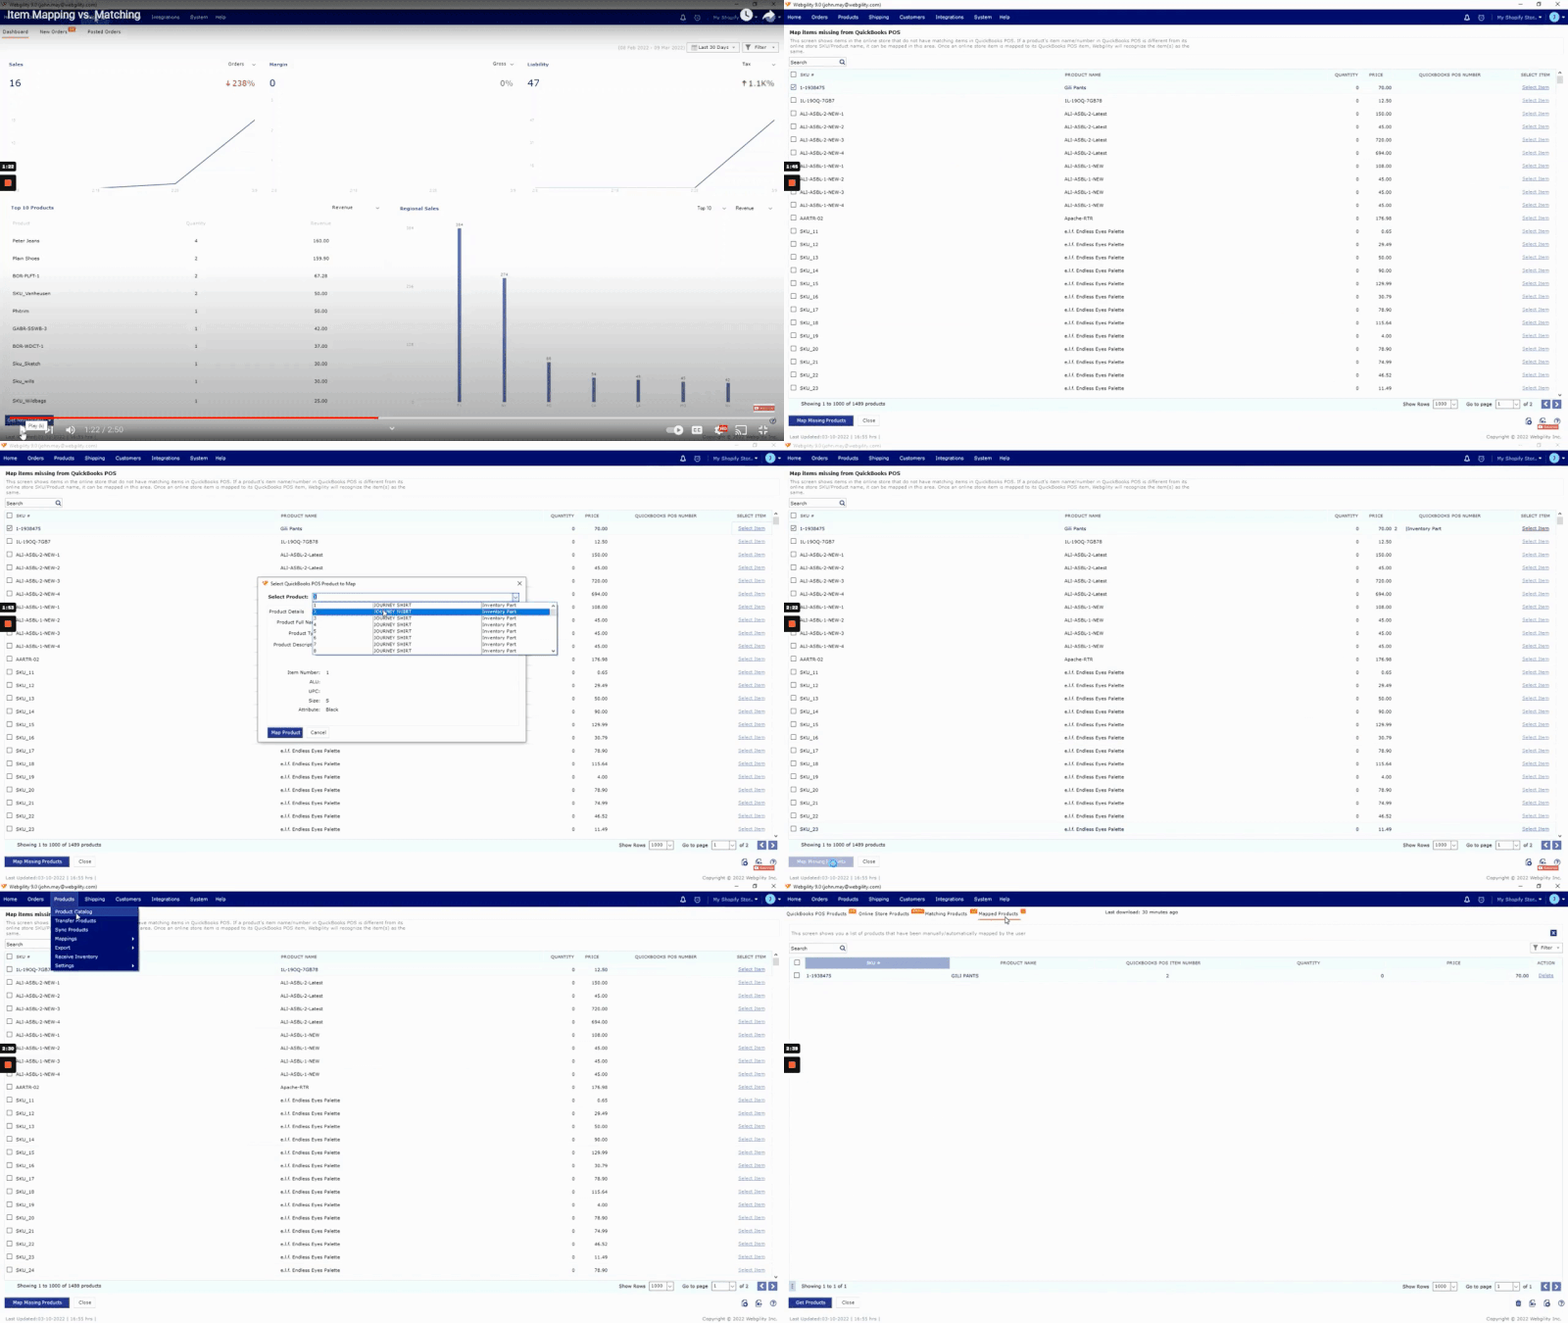
When items aren’t matched, don’t share similar criteria, or aren’t found in QuickBooks, then you need to map the items. This is a manual process of finding the unmatched items and assigning them to a corresponding item in QuickBooks.
In Webgility, go to Products > Mapping > Products. Then, click on each item individually, select the item, and match it to the appropriate item in QuickBooks. Do this for each item. Then, click on Map Missing Products. You’ll get a confirmation message. You can confirm it in the product catalog under Products.
Frequently Asked Questions (FAQs) About WooCommerce & QuickBooks
Yes, it does. You can integrate the two to share sales data and stock level updates.
The WooCommerce ecommerce platform offers an online store, virtual cash register, credit card processing, and inventory tracking. It’s where you have all the information about your products, sales, and returns. QuickBooks is one of the most popular small business accounting platforms, and it helps you track your sales, invoices, income, expenses, and purchasing. Together, they provide an inexpensive and user-friendly way to manage your retail business.
Intuit offers its own native plugin for integrating QuickBooks and WooCommerce. It’s free and allows data synchronization. There are also third-party connectors. Our article explores the best of these and how to implement them.
According to QuickBooks, you can save over 160 hours per month with a connection. Having automated synchronization also helps prevent errors and makes sure you are always up to date.
Bottom Line
WooCommerce and QuickBooks are powerful systems for managing your sales, inventory, and accounting, but if you use these two programs separately, you’ll have to do quite a bit of manual entry to reconcile your business data.
The best solution to save you time and sanity is to connect WooCommerce to QuickBooks, either with the native connector provided by Intuit or a third-party plugin.
Choosing the right WooCommerce and QuickBooks integration depends on a few things. Aside from the version of QuickBooks you’re using, you should consider how many orders you receive each month. If it’s less than 100, and you don’t track inventory or products in QuickBooks, Zapier’s free option can work for you. Otherwise, opt for the affordable MyWorks plugin to get two-way data sync. Webgility can be useful for connecting multiple stores to one QuickBooks account. Of course, for free and simple sharing of data, Intuit (QuickBooks’ home company) provides its own connector.
You May Also Like …
- Are you still using spreadsheets for tracking your ecommerce sales? Try one of the best ecommerce accounting solutions instead to save time.
- Outgrowing your current online store? It might be time to upgrade your ecommerce platform.
