


Today, we’ll show you a step-by-step tutorial on how to print checks in QuickBooks Desktop. We’ll go over two ways you can do that: writing and printing checks when bills are received and printing checks for bills already entered.
You can follow along on your QuickBooks Desktop account as we walk you through each step. You can also visit the Intuit website to buy QuickBooks Desktop, one of our best small business accounting software, which comes with a 60-day money-back guarantee.
How To Write & Print Checks When Bills Are Received in QuickBooks Desktop
Before you print your checks, make sure that you have your printer properly set up in QuickBooks Desktop.
To set up your printer:
- Step 1: Click on Printer Setup under the File menu.
- Step 2: Select Check/PayCheck from the Form Name drop-down list.
- Step 3: Select Voucher for the check style.
- Step 4: Choose Align, click on Print, adjust the horizontal and vertical settings, and then click OK.
- Step 5: Click Print Sample.
- Step 6: Click Align again and print another sample if you need to make additional adjustments.
Now that you have your printer set up, you can proceed to print your checks.
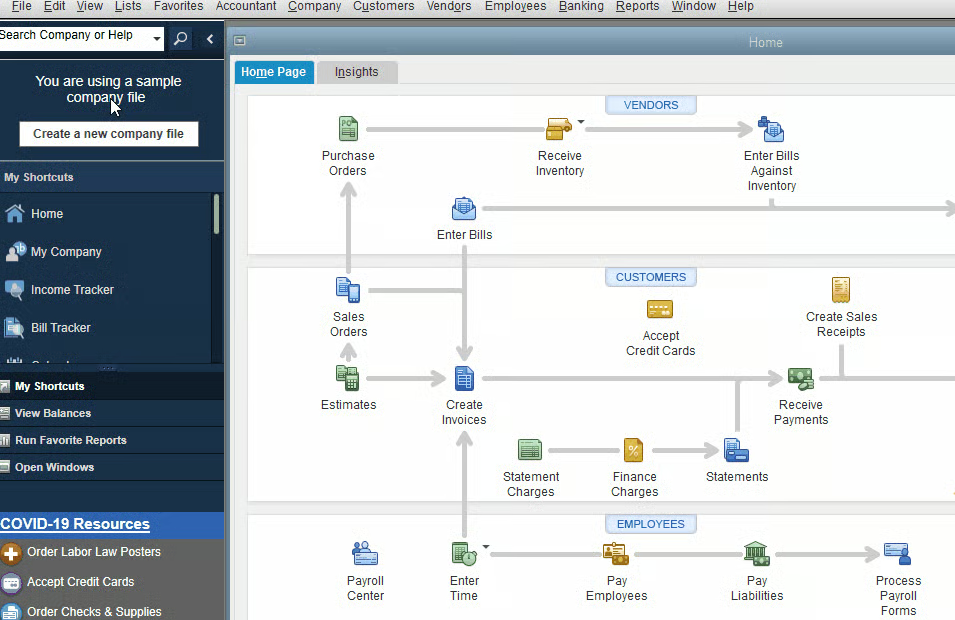
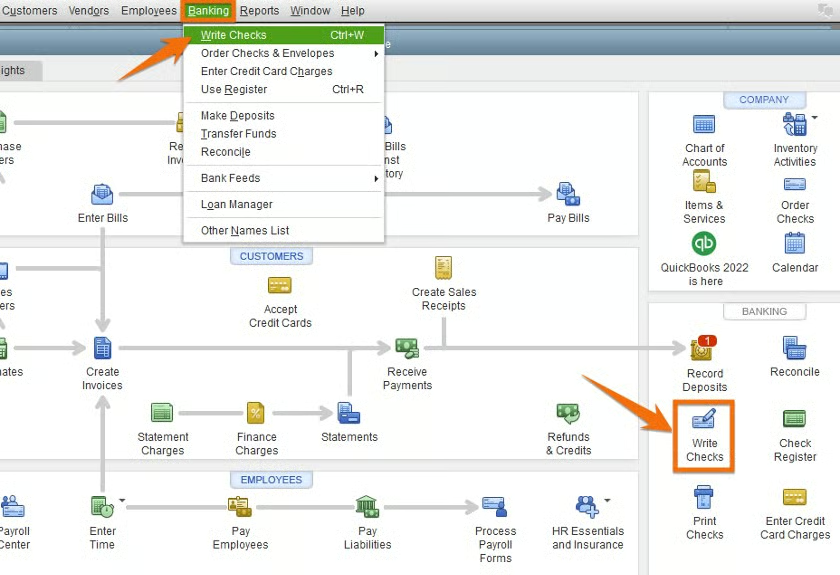
Click Banking from the main menu bar on the top of your dashboard, and then select Write Checks from the drop-down list. Alternatively, you can select Write Checks in the Banking section of your home page, as shown below.
QuickBooks Desktop will now display the Write Checks window. To create your check, you need to provide the information needed on QuickBooks Desktop.
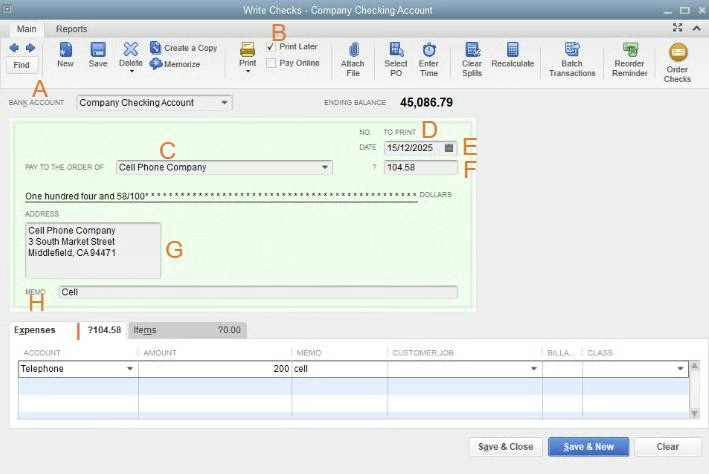
- Bank Account: Select the bank account from which the money will be deducted.
- Print Later: Check this box if you want to create the check now but print later as part of a batch. Checking this box will replace the check number on the check preview with the message “TO PRINT.”
- Pay to the Order of: Enter the Payee Name, and the address information will be completed automatically.
- No.: If you’re printing the check now, enter the number from the check you will place in the printer. If Print Later is checked, this will read “TO PRINT.”
- Date: Enter the date when you are issuing the check.
- Amount: Enter the amount.
- Address: This field is automatically populated based on the information entered during the payee setup.
- Memo: This field is optional, but you can use it to provide additional information, like the account number and the purpose of the payment.
- Expenses or Items tab: Assign the check to one or more QuickBooks Accounts or Items, similar to how a bill is entered.
Click the Save icon at the top of the Write Checks screen, but don’t close the screen yet.
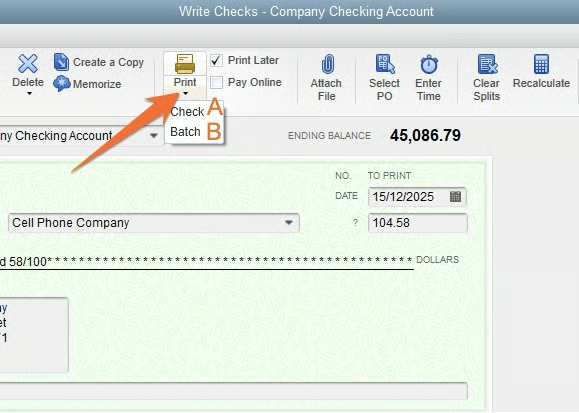
You can print checks individually or print multiple checks at a time. To choose, click the drop-down menu from the Print icon at the top of the Write Checks window, as shown below.
Individual Check
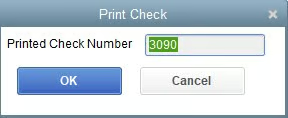
- Step 1: Enter the check number in the First Check Number field that matches the blank check in your printer:
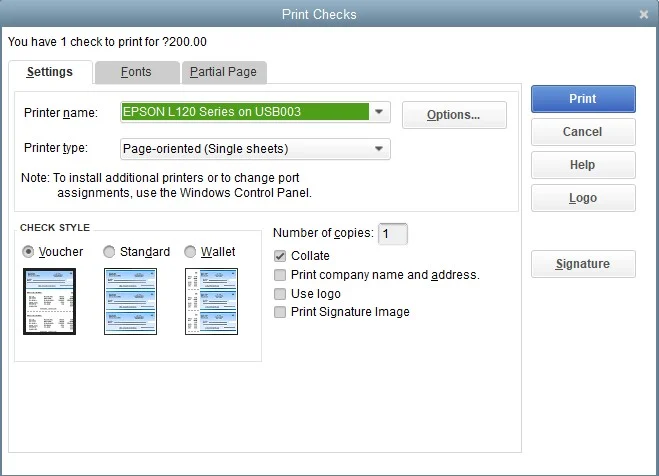
- Step 2: Choose the appropriate style: Voucher, Standard, or Wallet
- Step 3: Select the correct printer, and then click Print:
Batch-print Checks
After creating a check in Step 3, click Save & New and repeat the process to create all the required checks. Be sure all checks have the Print Later box marked at the top of the screen. From the final check, click the drop-down menu under the print icon and select Batch. The Select Checks to Print screen will show all checks that have been created but not yet printed.

- Step 1: Select the bank account from which the checks will be written.
- Step 2: Mark the checks you need to print by clicking on the box next to the check.
- Step 3: Enter the check number from your first blank check inserted in the printer in the First Check Number field and click OK.
From there, it is the same as printing a single check. Select your printer, then choose the check style, and then click Print.
How To Write & Print Checks for Bills Already Entered in QuickBooks Desktop
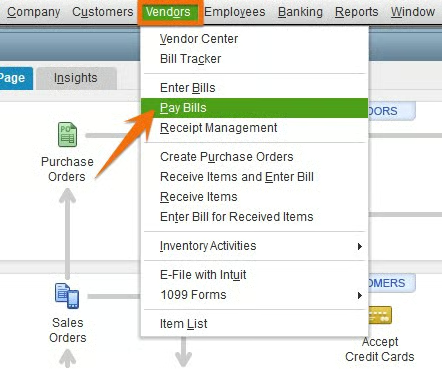
Select Pay Bills under the Vendors menu on your QuickBooks Desktop home page, as shown below.
A window showing the list of bills already entered in QuickBooks Desktop appears. From here, select the bill or bills you want to pay by clicking the checkbox on the left side.
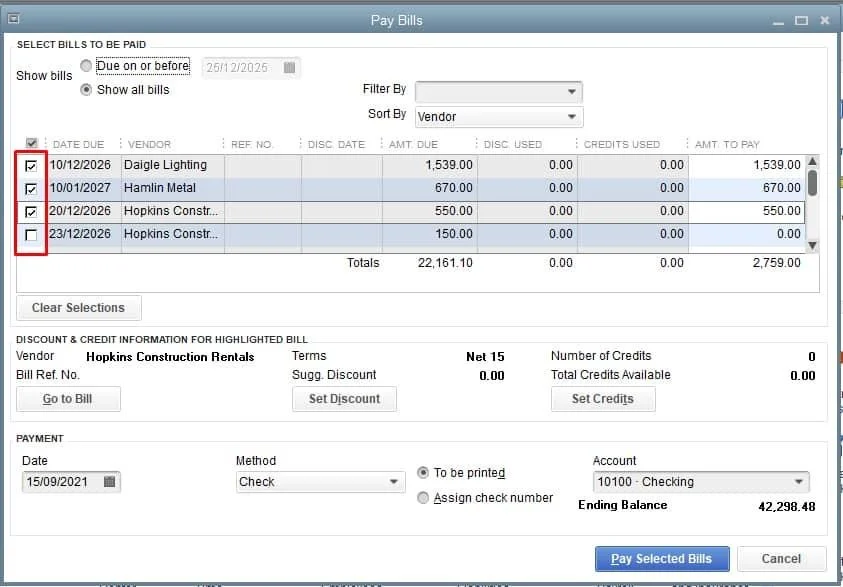
To create a check in QuickBooks Desktop, you need to enter the required information.
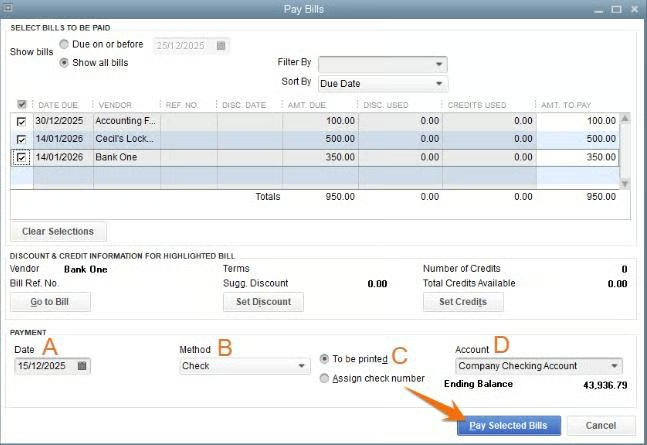
- Payment Date: Enter the date you create the check.
- Method: Choose check from the drop-down list.
- Check Number: You can assign a check number or click “To be Printed.” If you select “To be Printed,” the check number is assigned automatically when your check is printed.
- Account: Select the checking account from which the checks will be paid.
Click Pay Selected Bills to create the checks.
After clicking Pay Selected Bills, QuickBooks will show a payment summary. You have the option to:
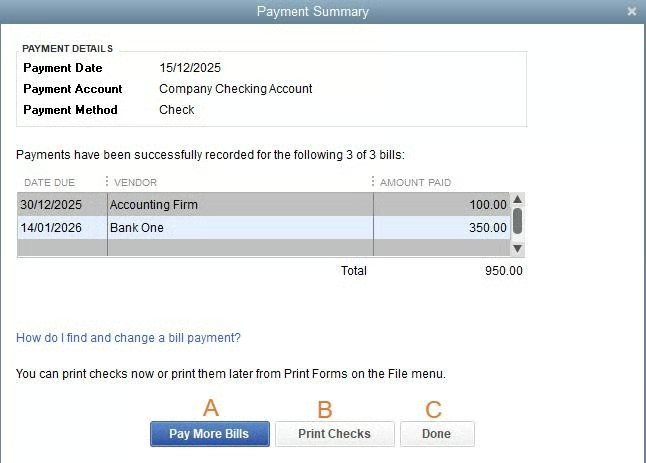
- Pay More Bills: Click here if you wish to create checks to pay additional bills
- Print Checks: If you’re ready to print your checks, tap Print Checks
- Done: If you want to print the checks later you can click Done.
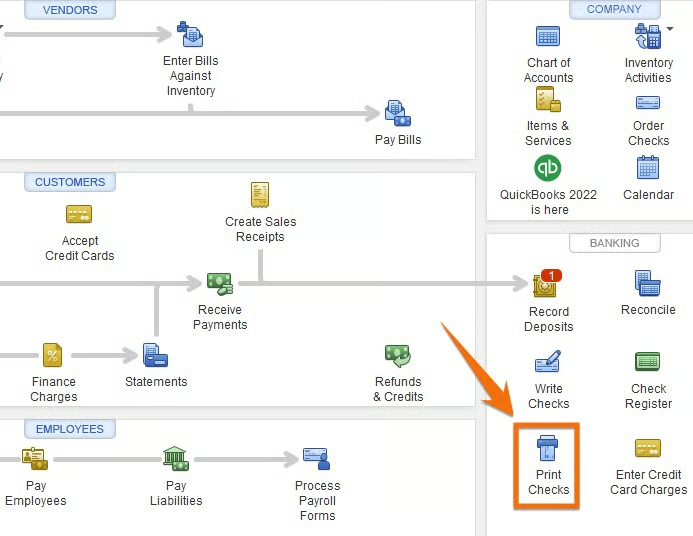
You can locate the unprinted checks later by clicking Print Checks in the Banking section of your home page.
After you click Print Checks, a window showing the list of unprinted checks will show up. Select the checks you want to print and click OK. Make sure that the number in the First Check Number field matches the number of the first check queued up in your printer.
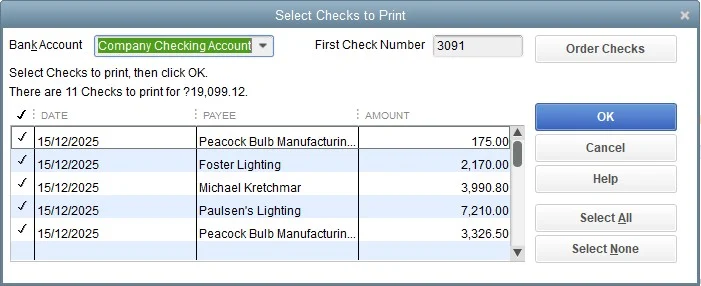
As in the earlier section, the final step is to select the check style, choose your printer, and then click Print.
After you click Print Checks, a window showing the list of unprinted checks will show up. Select the checks you want to print and click OK. Make sure that the number in the First Check Number field matches the number of the first check queued up in your printer.
As in the earlier section, the final step is to select the check style, choose your printer, and then click Print.
Why You Should Print Checks in QuickBooks Desktop
QuickBooks Desktop has many interesting features that simplify the process of printing checks. It allows you to
- Print checks one at a time or multiple checks in one batch
- Save a check to print later
- Print different types of checks
By printing checks directly from QuickBooks Desktop, the payee information is completed automatically from your vendor contact information. For bills that have already been entered, the amount is completed as well. You can pay multiple bills easily with the same check.
If you need to purchase checks, learn where to buy QuickBooks checks.
Wrap Up
Congratulations on learning the steps of printing checks in QuickBooks Desktop. If you’re thinking of taking your QuickBooks Desktop files to the cloud, check out our guide on how to convert QuickBooks Desktop to QuickBooks Online.