


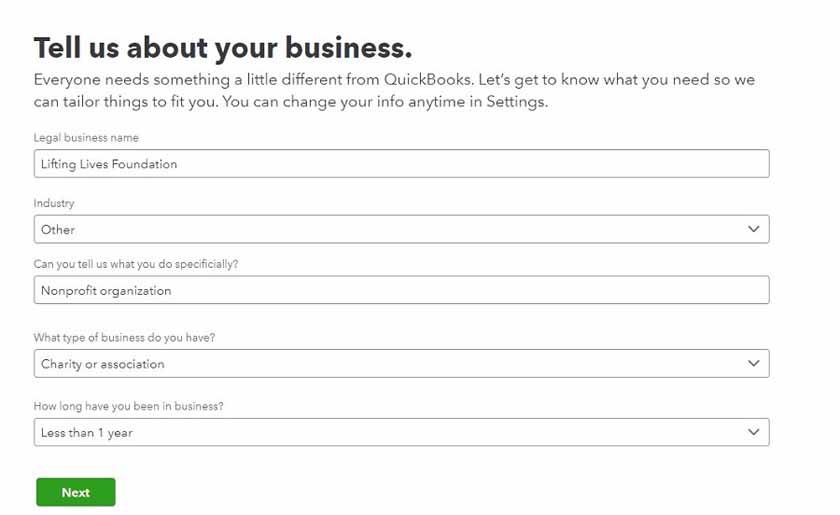
In this article, I’ll guide you through setting up QuickBooks Online for nonprofits, from getting a QuickBooks Online plan and modifying the account setting to creating products and services and setting up classes and locations. The process ensures your income and expense information is perfectly structured to match Form 990 — and with the proper setup, you can transfer numbers to Form 990 effortlessly, saving time and avoiding unnecessary adjustments.
If you don’t already use QuickBooks Online, you can start with the 30-day free trial — no credit card required — and then follow this step-by-step guide.
QuickBooks Online Plus and Advanced are the best plans to choose from because they are flexible enough to be configured for nonprofits. Most will be fine with Plus — unless your nonprofit needs over five users. If you’re unsure, start with Plus, as you can easily upgrade to Advanced.
Plus | QuickBooks Online Advanced | |
|---|---|---|
Best for | Nonprofits with a small accounting team | Large nonprofits |
Monthly Pricing | $99 | $235 |
Number of Users Included | 5 | 25 |
Number of Classes & Locations | Up to 40 | Unlimited |
Project Accounting | ✓ | ✓ |
Inventory Features | ✓ | ✓ |
Workflow Automation | ✕ | ✓ |
On-demand Training | ✕ | ✓ |
Dedicated Support Representative | ✕ | ✓ |
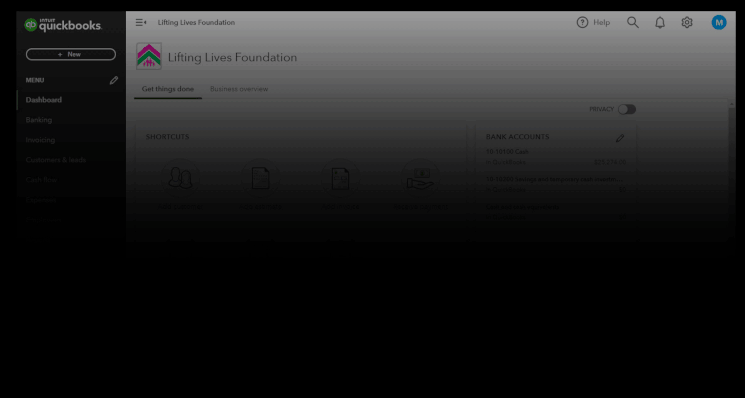
After initial setup, you’ll land on the dashboard. Beside your nonprofit’s name, click the + LOGO icon to add your logo. Then, click the gear icon (⚙) on the right to access the Account and Settings menu.
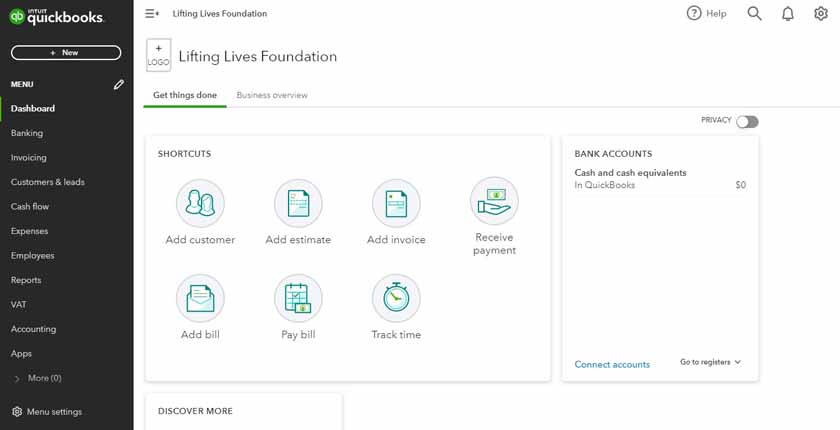
QuickBooks Online’s dashboard after initial setup (Source: QuickBooks)
Company name and type
If your legal name is different from the company name, you may change that. However, the most important thing is to change the tax form to “Nonprofit organization.” You can also add a logo under the Company Name settings.
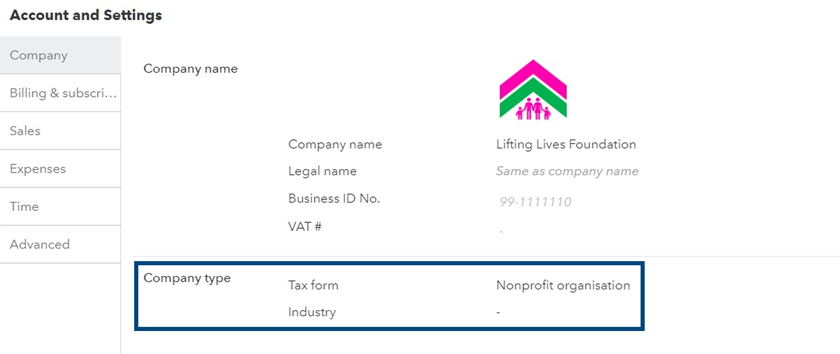
Changing the company name and type (Source: QuickBooks)
Advanced settings
After modifying Company settings, proceed to Advanced settings. You may explore other settings later as you navigate through QuickBooks Online.

Accounting settings (Source: QuickBooks)
- Accounting: QuickBooks Online defaults to a calendar year and the accrual method, but you can adjust these settings to align with your nonprofit’s fiscal year and accounting method. Ensure your chosen accounting method matches what’s reported on Form 990 Part XII, Line 1.
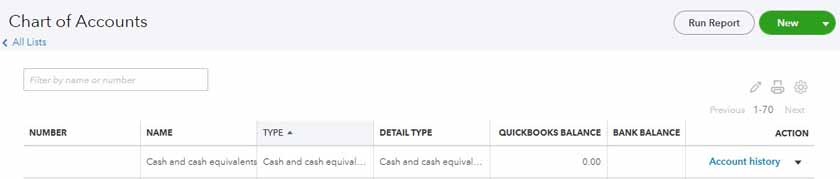
- Chart of accounts: You’ll want to enable account numbers because you’ll import a new set of accounts for nonprofits in the succeeding sections of this article.
Categories on QuickBooks (Source: QuickBooks)
- Track classes: Turn this feature on to use classes in tracking income and expenses based on Form 990’s classifications. Also, for the “Assign classes” option, select “One to each row in transaction” just in case a single entry must be spread across several classes.
- Track locations: Toggle this feature on to use locations for tracking program services.
Custom form styles
QuickBooks Online uses the terms “invoice” and “sales receipt.” These terms are inconsistent with a nonprofit’s purpose, so I’ll show you how to modify the look and feel of your invoices and receipts.
Navigating to the Custom forms style window
Under Account and Settings, go to Sales, then click the green Customize look and feel button. QuickBooks Online will bring you the Custom form styles window. By default, there is one form included, so you can edit the existing form or create a new one by clicking on the New style drop-down menu.
For demonstration, I created a new form for acknowledgment receipts (see image below). When you receive cash and noncash donations, the best term to use is “acknowledgment receipt” instead of “sales receipt.” To create one, click New Style and then Sales Receipt.
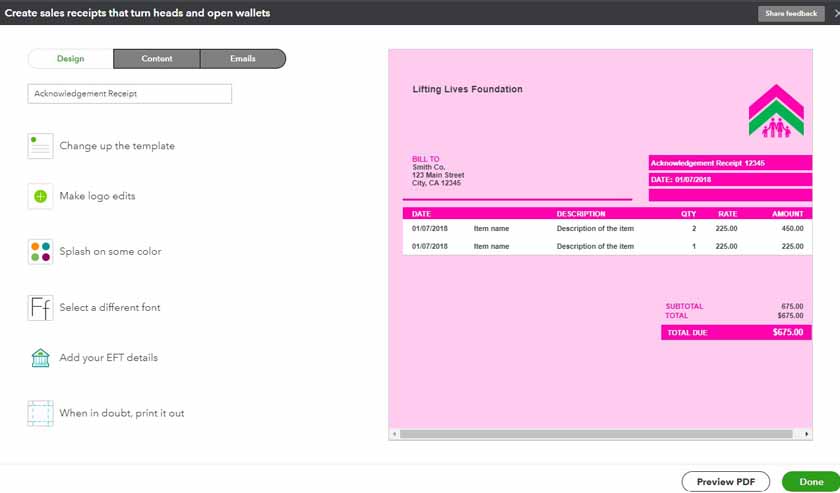
Customizing the design of the acknowledgment receipt (Source: QuickBooks)
Under the Design tab, you can modify the template, add a logo, change the color and font, and add EFT details. There are six invoice templates from which to choose, and I used the template Bold for this example.
Customizing the content of the acknowledgment receipt (Source: QuickBooks)
If you navigate to the Content tab, you can customize the information appearing in the form. Click the section of the form you want to change the content of. Once you’re good to go, click Done to save your new form. Perform the same process whenever you need more customized forms.
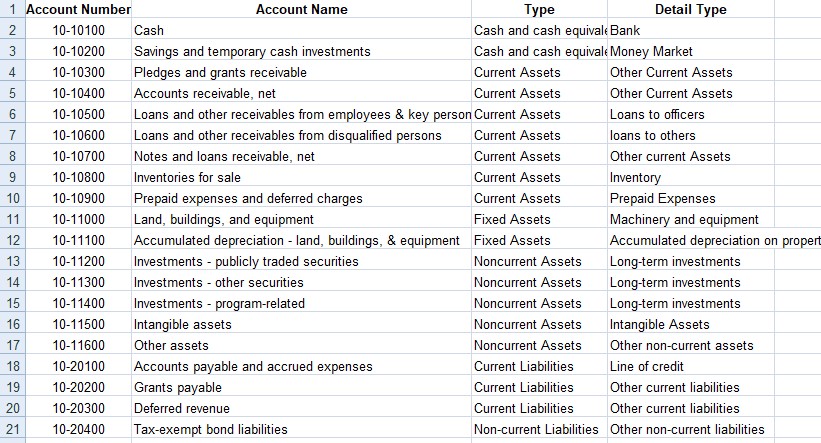
The next step is to set up a nonprofit chart of accounts aligned with Form 990 to streamline completing the return. I’ve included a sample codification system for those starting fresh, but if you already have one, you can skip this and jump to importing accounts.
Sample codification
I created a codification system based on Form 990’s part number, account category, account class, and account subclass. The account codes should consist of seven digits, like the example below.
08-40101
The codification system works this way:
Part of Form 990 | - | Account Category | Account Class | Account Subclass |
|---|---|---|---|---|
08 | - | 4 | 01 | 01 |
- Part: This number can help you identify which part of Form 990 a particular account belongs to. In this case, all
- balance sheet accounts (assets, liabilities, and net assets) belong to Part 10
- revenue accounts belong to Part 8
- expense accounts belong to Part 9
In the example above, the account belongs to Part 8 of Form 990, which is the Statement of Revenue.
- Account category: This number pertains to the major category of the account:
- 1 for assets
- 2 for liabilities
- 3 for net assets
- 4 for revenues
- 5 for expenses
In the sample above, the account category number shows that the account is a revenue account.
- Account class: This number refers to the major account groups under each account category. Account classes are also based on Form 990’s format. In the example above, class 01 refers to the part of Form 990’s contributions, gifts, grants, and other similar accounts.
- Account subclass: This number represents the specific accounts under each class, and you may create several subclasses if needed. It doesn’t matter if the subclasses aren’t present in Form 990 — as long as their parent account or account class reports the correct amount. In the example above, subclass 01 refers to Form 990 Part 10’s federated campaigns line items.
Chart of accounts
I created a chart of accounts patterned after Form 990 for ease of use. To better understand what I did, open your spreadsheet file and compare it against Form 990. Let’s use Part VIII of the Form 990 as an example.
Thank you for downloading!
All accounts that flow to Part VIII begin with the code 08. The names of each of these accounts match the line items in Part VIII. By matching Form 990, preparing the return will be simple. In Step 5, I’ll show you how to use classes to separate each of these accounts into their proper columns in Part VIII.

Chart of accounts headers
Now, let me show you how to import the chart of accounts.
On the left side menu, go to Accounting and then Chart of Accounts. Then, click the drop-down arrow in the green New button. Select Import.
Top portion of the chart of accounts (Source: QuickBooks)
Upload the Excel file that I provided, and ensure you’ve made the necessary adjustments needed. Click Browse to locate the file on your computer, then click Next.
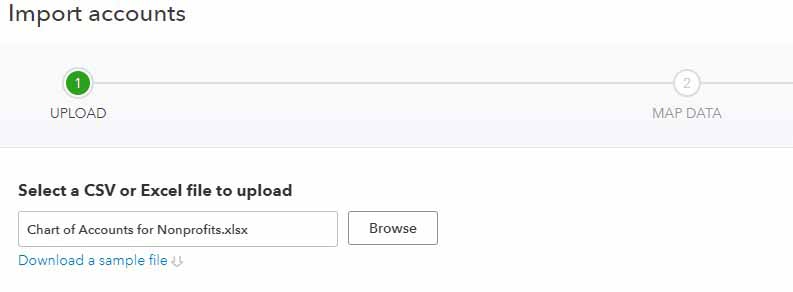
Uploading the chart of account file (Source: QuickBooks)
If you’ve done that correctly, there will be a green check mark, similar to what’s in the image below. Click Next.
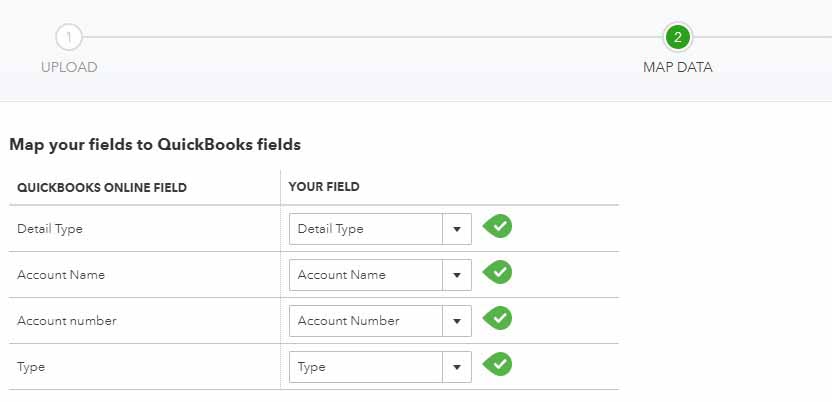
Mapping CSV Upload (Source: QuickBooks)
QuickBooks Online doesn’t recognize misspelled or undefined detail types. In the example below, the detail type “commission and fees” should be “commissions and fees.” Moreover, there is no detail type for “charitable contributions.”
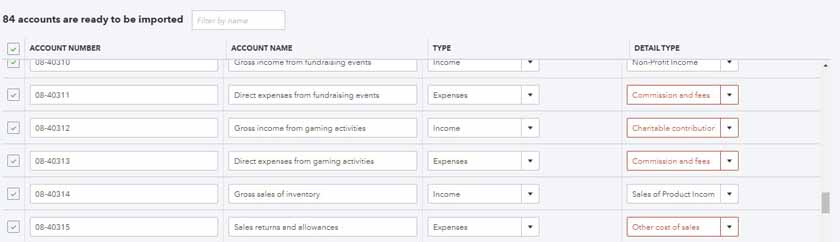
Fixing undefined detail types (Source: QuickBooks)
Click Import when all flagged accounts have been resolved. When a specific account is already on QuickBooks Online, you will see the alert below. If you want to import the account, change the account name. Otherwise, uncheck the box beside the account number.

Addressing missing accounts (Source: QuickBooks)
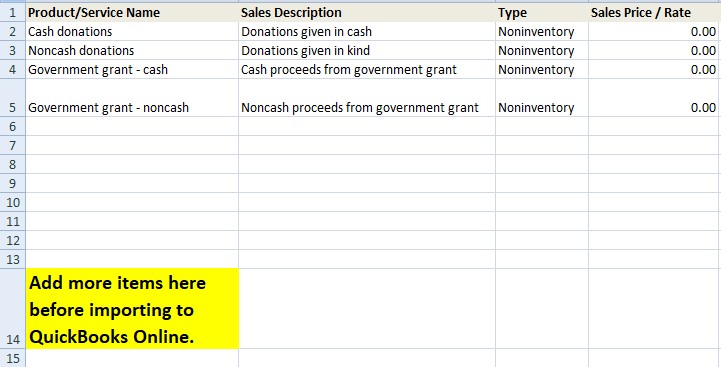
While you can create products and services directly from the invoice form, it’s better to set them up in advance. This allows you to define the description, type, and price properly since revenues must be linked to a product or service item rather than recorded directly to an account.
Download the spreadsheet file below so that you can import products and services to QuickBooks Online.
Thank you for downloading!
When you create service items, be sure to assign them to the account where you’d like them to appear on Form 990.
- If the service item will always be assigned the same class, then you can designate that class when creating the service item — and that class field will populate whenever that item is used automatically.
- If the service item could be used across multiple classes, then leave the class blank in the service item screen. You’ll have to assign the class as transactions are entered.

Importing products and services
Once you’ve added all the necessary service items to your spreadsheet, you need to import the spreadsheet to QuickBooks Online. This process is very similar to how you imported the chart of accounts in Step 3.
Classes and locations are crucial to tracking nonprofit activities based on Form 990. Take note that you can only apply classes to income and expense accounts, not assets and liabilities.
- Use classes to track categories of income and expenses, such as administrative, program service, fundraising, and so forth.
- Use locations to track the income and expenses of individual program services. You don’t need to set up locations if you only have one program service.
To add classes and locations, click the gear icon (⚙), then proceed to All lists.
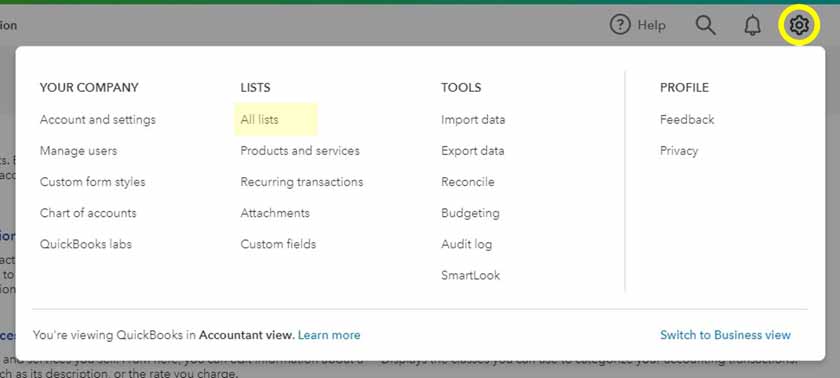
Settings menu (Source: QuickBooks)
You’ll arrive in the Lists window. Click Classes or Locations (see highlighted parts).
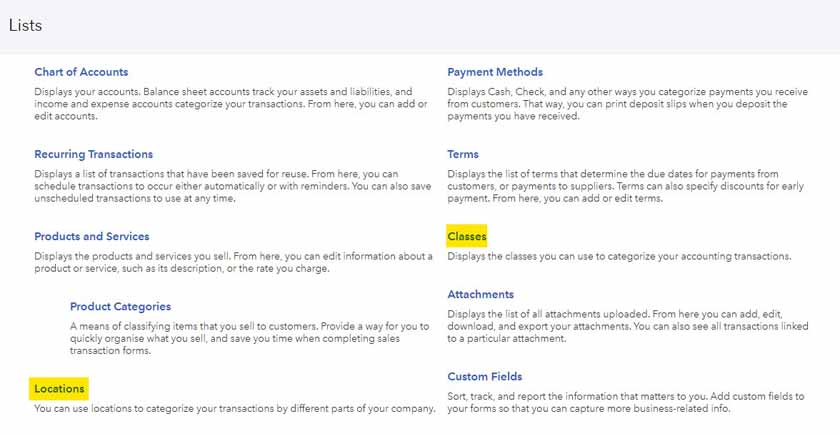
Lists menu (Source: QuickBooks)
Adding classes and locations
You need to add six classes: three income classes and three expense classes. These classes are based on the columns of Form 990.
Income Classes (Form 990, Part VIII):
- Related revenue.
- Unrelated revenue.
- Excluded revenue.
Expense Classes (Part 990, Part IX):
- Program service expenses.
- Management and general expenses.
- Fundraising expenses.
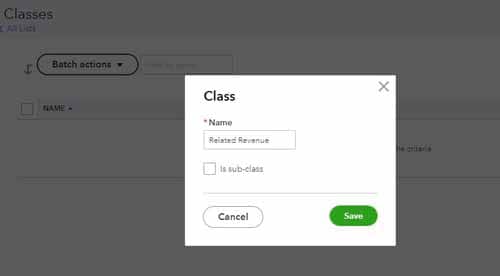
Adding a class (Source: QuickBooks)
Don’t be confused by the label “Location” — for this purpose, it is not to be used for an actual location. Instead, use the location for program services (e.g., community outreach or disaster relief).
You need to enter a separate location for each program service that you offer and need to summarize in Form 990, Part III. You can add as many as you like, depending on the number of program services you have.
Locations (Form 990, Part III)
- Program Service A
- Program Service B
- Program Service C
In your setup, you should provide the actual program service names for A, B, and C.
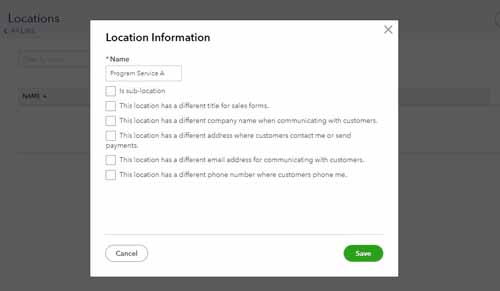
Adding locations (Source: QuickBooks)
Rules in classes and locations
Every time you enter an invoice, a bill, or a transaction, you must assign a class for each income or expense account in the transaction. For every line item assigned to the class “Program service expenses” or “Related Revenue,” you must also add a location, which is the exact program service to which the revenue or expense relates.
Unfortunately, you can only have one location per transaction. As such, you can’t record a single transaction that affects multiple program services.
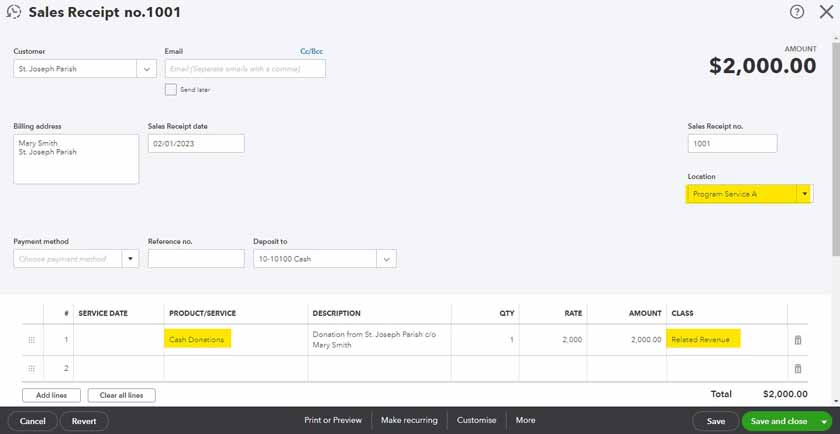
Sample cash donation (Source: QuickBooks)
In the image above, take note that I recorded “related revenue” for Program Service A. You can enter the class manually or it can auto-populate when you set a specific class for a particular product/service.
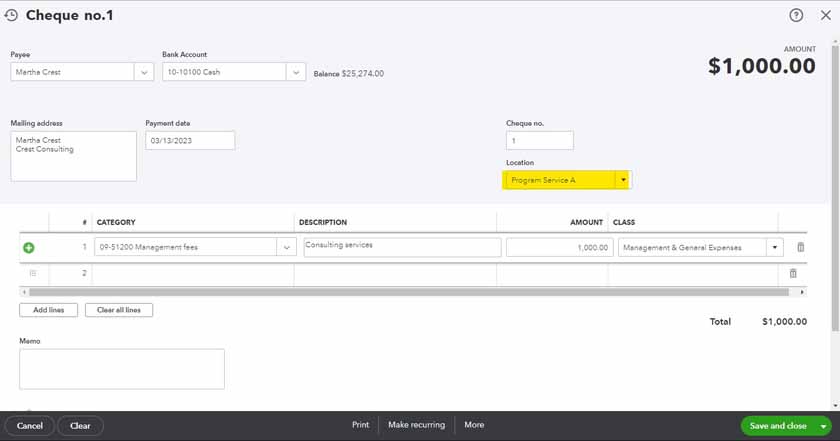
Writing a check and assigning it to a location (Source: QuickBooks)
All expenses must be assigned to a single location or program service (see image above) when issuing checks. However, each check can have multiple expense categories and multiple classes. You can even assign a single expense category to multiple classes by listing the expense category twice with different classes assigned to each line.
Remember that even though you can add multiple classes, all the classes must be related to the location (or for nonprofit accounting, the program service). It’s best to write separate checks for separate locations to avoid accounting difficulties, but if you do have a single check that must be split between program services, then you can do a journal entry.
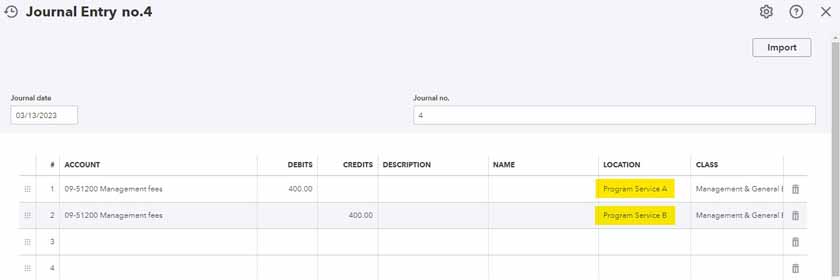
Creating journal entries with different classes (Source: QuickBooks)
The above journal entry transfers management fees from Program Service B to Program Service A. You can also use journal entries to allocate expense items among multiple classes, although you generally want that allocation when recording the original check or expense.
Tracking donor restrictions
Nonprofit accounting standards prescribe that nonprofits segregate net assets into two categories: with and without donor restrictions. Since QuickBooks Online doesn’t track restricted fund balances, I recommend tracking the donor restrictions in a separate spreadsheet.
You can use my sample spreadsheet below as a guide in tracking donor restrictions. There’s no need to be specific in the items you include in the spreadsheet — just don’t forget to match all transactions between QuickBooks Online and the spreadsheet.
Thank you for downloading!
Creating reports based on Form 990
In QuickBooks Online, you can create reports that you can use to fill out Form 990. Reports in QuickBooks Online can be customized by location and class to help you get all the information you need for the form. Although you can go ahead and generate an income statement, the format wouldn’t be in sync with Form 990.
Go to Reports and then select the Profit and Loss by Class report. QuickBooks Online will generate the generic report. Click Customize.
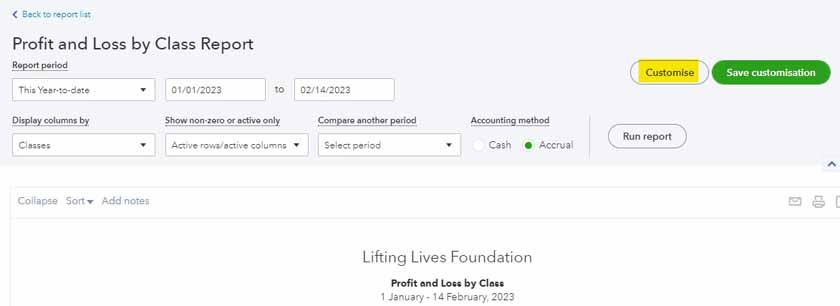
Creating a statement of revenue (Source: QuickBooks)
Proceed to Filter and tick Distribution Account and Class. Choose “All Income Accounts” for the distribution account and all the revenue classes (related revenue, unrelated revenue, and excluded revenue) for the class. Click the green Run report button to generate the report.
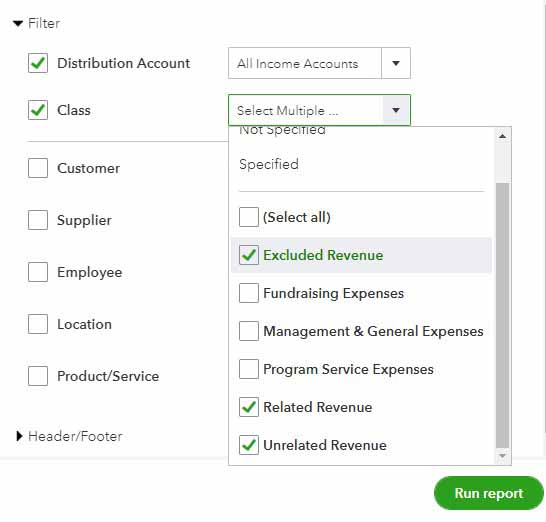
Filtering accounts in the statement of revenue (Source: QuickBooks)
Change the report name to “Statement of Revenue.” By default, the name is “Profit and Loss by Class.”
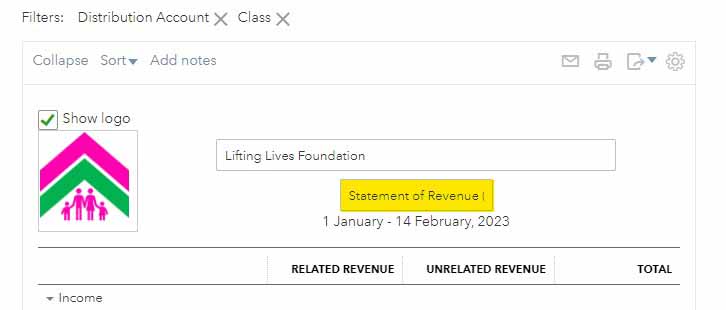
Customizing the report name (Source: QuickBooks)
Save your customized report so that you can use it later. Here is the sample statement of revenue:
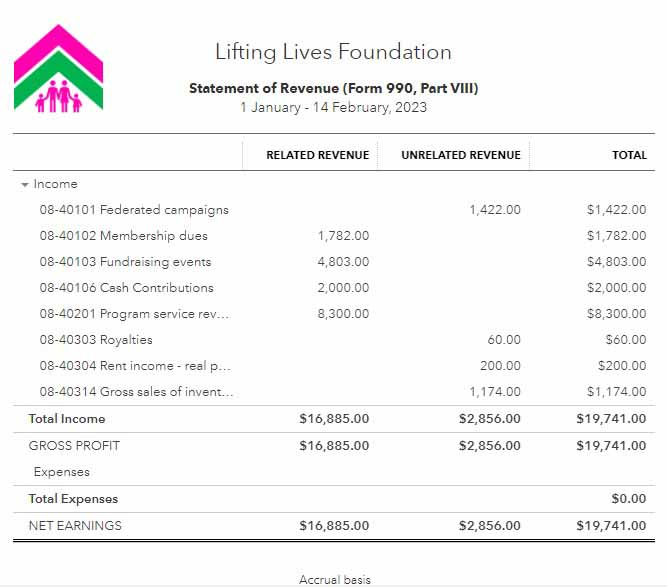
Sample statement of revenue from QuickBooks Online (Source: QuickBooks)
Get your copy of Form 990 and head Part VIII. You’ll realize how easy it will now be to transfer the numbers. Note that there is a Class for Column D (Excluded Revenue) in Form 990, but there is no activity recorded in that class yet, so it doesn’t appear in the statement of revenue above.
For the statement of functional expenses, the process is the same as what’s above. Customize the Profit and Loss by Class report by clicking the Customize button. Go to Filter and then tick Distribution Account and Class. Select “All Expense Accounts” for the distribution account and all expense classes (management and general expenses, program service expenses, and fundraising expenses).
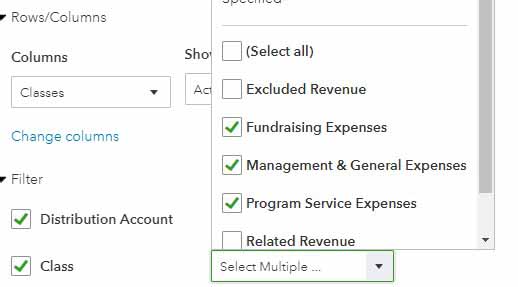
Expense classes for the statement of functional expenses (Source: QuickBooks)
Change the report’s title as well to make it similar to Part IX of Form 990. Here is the sample statement of functional expenses:
Sample statement of functional expenses (Source: QuickBooks)
Form 990 requires a comparative balance sheet (beginning and ending balances). You can generate a balance sheet in the Reports section and compare it with the previous year (see image below).

Creating a comparative balance sheet (Source: QuickBooks)
When filling out the balance sheet in Form 990, enter the previous year balances in column A of Form 990 and the current year balances in column B.
QuickBooks Online’s balance sheet will only show the balance of net assets. If your nonprofit is following ASC 958, refer to the donor restriction tracker above for segregating donations with and without restrictions.
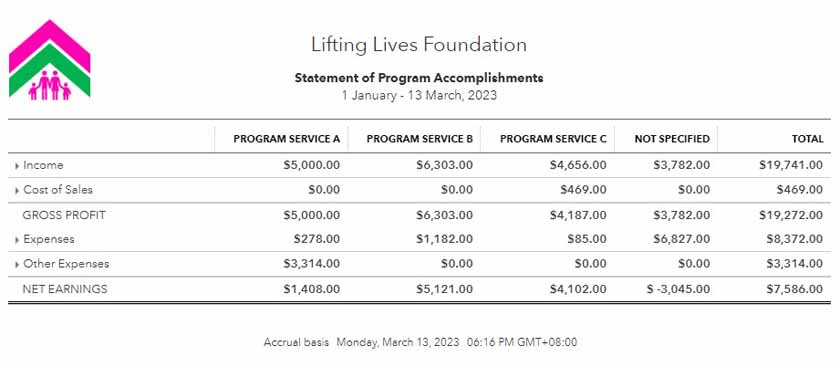
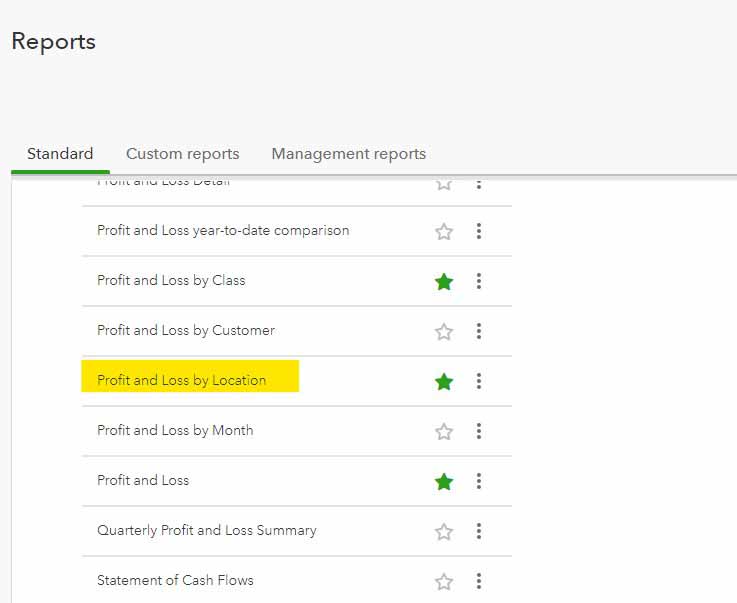
Part III requires total expenses and revenues for the three largest program services. Since individual program services are tracked as locations, you can easily retrieve the information for Part III by running an income statement by location report.
- Go to Reports and select the Profit and Loss by Location report.
Selecting the Profit and Loss by Location report (Source: QuickBooks)
- Change the report title to “Statement of Program Accomplishments.”
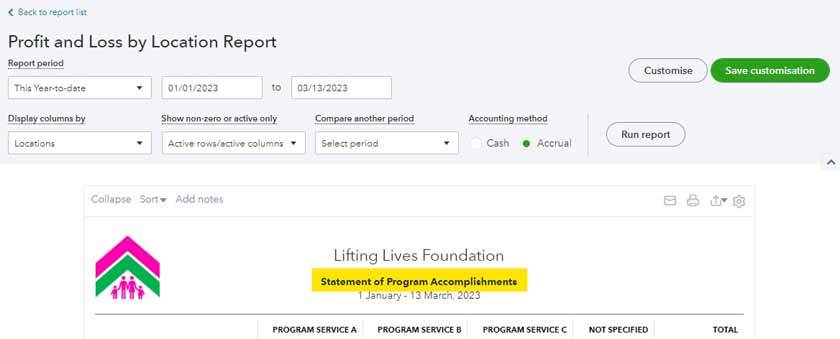
Changing the report’s title to Statement of Program Accomplishments (Source: QuickBooks)
Here is the sample statement of program accomplishments:
Sample statement of program accomplishments (Source: QuickBooks)
Frequently asked questions (FAQs)
Yes, QuickBooks Online is a great fit for nonprofits — as long as they don’t have a lot of restricted donations. QuickBooks Online can be set up to match the revenue and expense disclosure requirement of Form 990 exactly, but it can’t separate net assets by restrictions. If you only have a few restricted asset transactions, this can easily be tracked in a separate spreadsheet.
The best plan for nonprofits is QuickBooks Online Plus, as it lets you create 40 classes and locations. Classes can be used to separate revenue and expenses as required by Form 990, while locations can be used to track the activity of individual program services.
Bottom line
While QuickBooks Online lacks the ability to track donor restrictions, it remains to be convenient and affordable for nonprofits. Although it’s not primarily for nonprofits, a couple of tweaks can make it a great nonprofit accounting solution.