Using high-quality photos in real estate listings is one of the most powerful ways to attract more leads and drive sales. Real estate photography requires thoughtful composition, staging and preparation, camera settings, proper equipment, and ample lighting. It’s an art that goes beyond making a few clicks on your smartphone. We compiled effective real estate photography tips, showing you how to take good real estate photos to present the best views of every property, either by doing it yourself or hiring a professional.
Start learning how to take real estate photos and improve your photography by following these 11 proven real estate photography tips. Plus, we provided examples of the best real estate photos for you to get inspiration and list common real estate photography mistakes and how to avoid them:
1. Compose Each Photo Mindfully
Composition refers to how a photographer positions or arranges the visual elements within their photographic frame. One of the tips for successful real estate photography is to change the angle of your camera by just a few feet to significantly improve the photo’s quality.
To fit the entire room into the photo and at a pleasing angle, it’s best to take photos from the corners of the room. However, it’s essential to identify some of the most important rooms or features in the home and try taking photos from various angles. For example, taking head-on shots of key home features like fireplaces or the primary bed can be impactful.
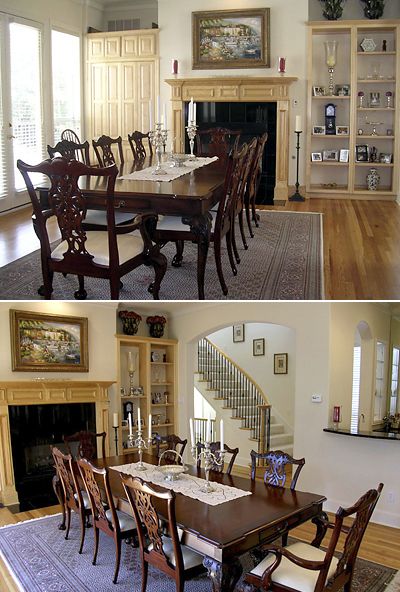
Two photos taken at the same location using different angles (Source: signalvnoise.com)
Another example of the importance of composition involves light sources. In the photo above, the first image feels particularly dark because its angle creates harsh shadows. In the second example, the photographer captures the brightest side of the room. This angle captures the large doorway into the next room and a beautiful staircase—making the entire room feel larger and more luxurious.
2. Use the Right Camera Settings
Even the best camera in the industry isn’t going to take high-quality pictures automatically. To use your photography equipment to the best of your ability, you need to get familiar with the settings and learn how to shoot real estate photography with the right amount of lighting and clarity in your photos.
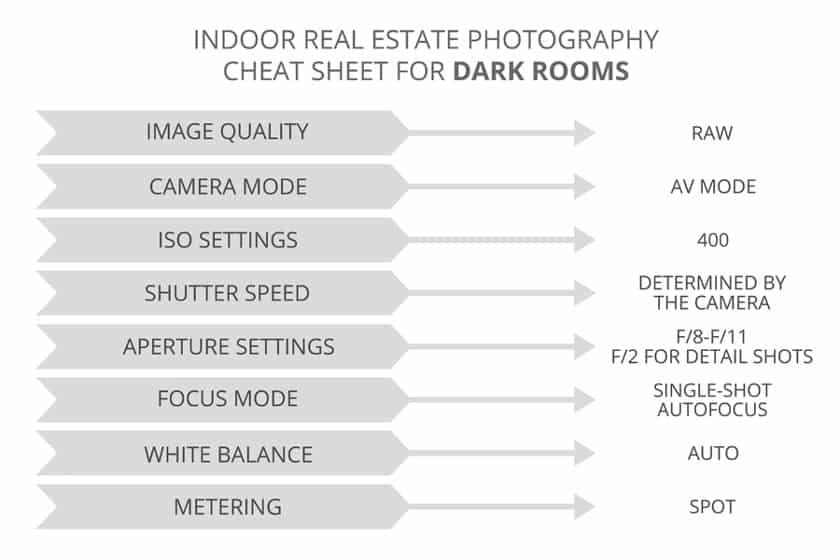
Recommended settings for poorly lighted rooms (Source: Shooting Spaces)
Generally, the three best camera settings for real estate photography are aperture, shutter speed, and ISO. Follow these general guidelines for each:
- Keep aperture (opening of the lens) between f/7.1 and f/9
- Shutter speed (length of time allowed to capture the photo) should stay between 1/60 and ½ a second
- Keep ISO (camera’s sensitivity to light) under 400
3. Plan Around the Weather & Natural Light
Lighting is one of the essential elements of all kinds of photography—drastically impacting the photos of a real estate listing. The best real estate pictures have plenty of natural light, so schedule your real estate photo shoot accordingly. The best time of day for natural lighting is often about half an hour before sunset or early morning.
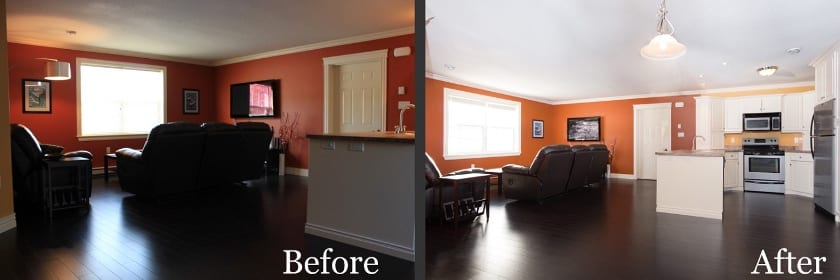
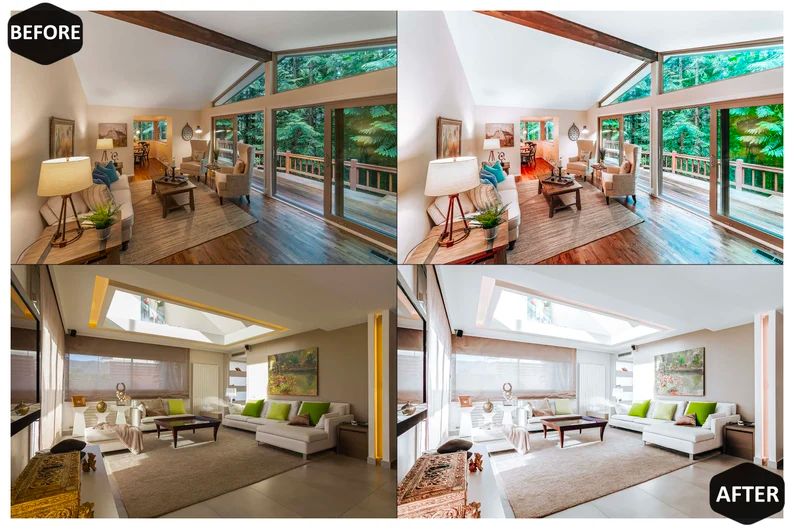
Notice how lighting can make a difference, as seen on the two images taken at the same location. (Source: Medium.com)
In addition, weather conditions can make or break your real estate photos. Wind, rain, snow, or fog should be taken very seriously because they impact the light inside the home. If you live in a location that is frequently rainy or cloudy, investing in studio lights may be your best option.
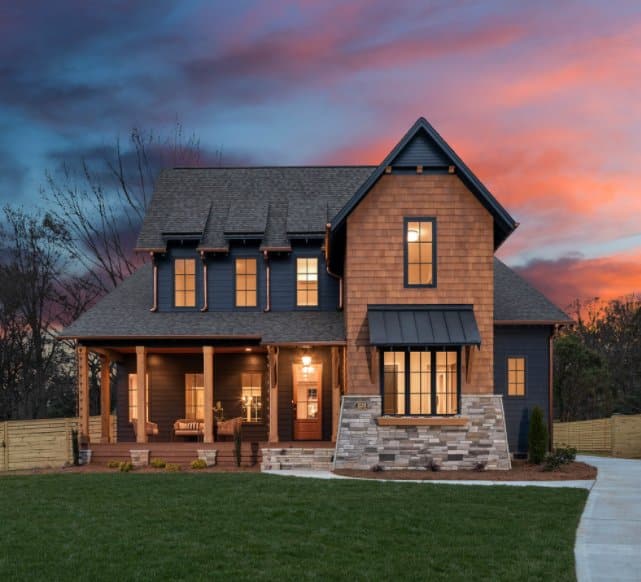
Home exterior photographed at dusk (Source: Houzz)
4. Prepare Each Room for the Photo
There’s nothing worse than scheduling a photography shoot at the right time and getting all the right angles, only to later realize that the bedding was wrinkled or you forgot to add fresh flowers to the table. Before snapping the photos, make sure you go into each room and check if it’s ready for the picture. This includes clearing off all surfaces, adding accents like fresh flowers or a bowl of fruit, and making sure the curtains are open and the toilet lid is closed.
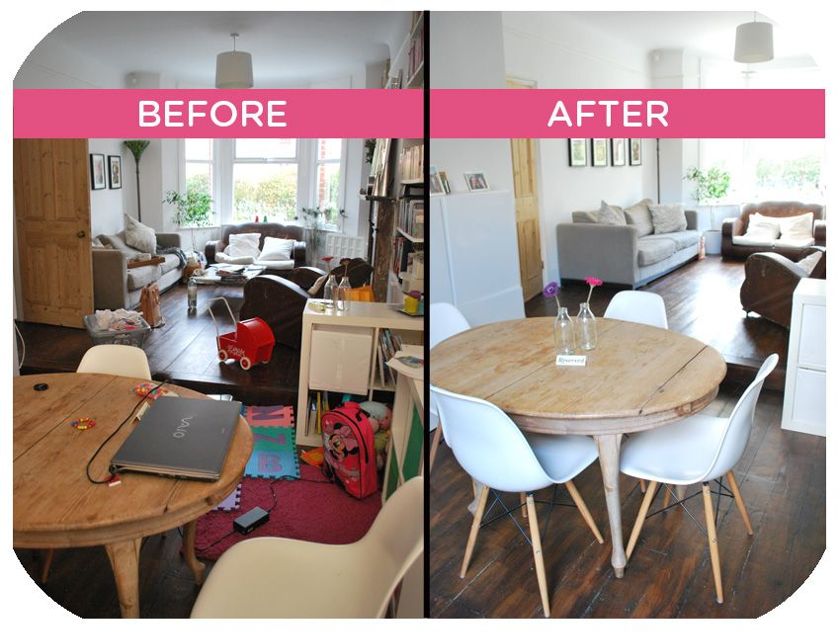
Stark comparison of a well-prepared setup versus one that’s been left as it is. (Source: Minimalism is Simple)
In addition, it’s important to identify each room’s selling point before taking the photo. Whether the room is particularly spacious, has plenty of natural light, or has a beautiful accent wall, real estate photography should showcase its features. In the example above, both photos are taken from the same angle. However, having all surfaces cleared of clutter draws the viewer’s eyes toward the room’s space and brightness rather than the clutter.
5. Hire a Photography or Editing Freelancer
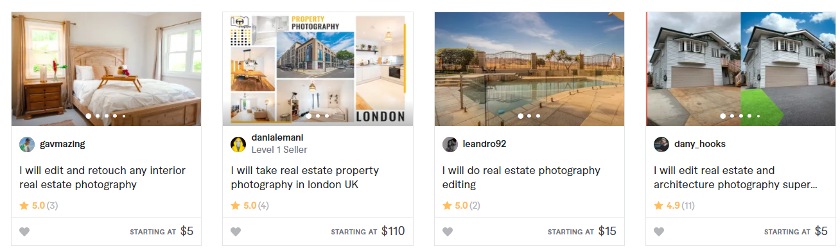
Sample real estate photography freelance services from Fiverr
When you want to take advantage of someone else’s photography expertise, consider utilizing an online marketplace like Fiverr. With Fiverr, you can search through freelancers with real estate photography and editing experience and view their expertise, previous work, and reviews. The platform can also help you connect with freelancers to help you edit your photos, whether you need lighting adjustments or the removal of objects.
6. Use Virtual Staging
Home staging is a popular method of making sure a real estate listing is displayed with its maximum appeal. Moreover, virtual staging is another key tool to boost the property’s real estate photography. Virtual staging can digitally furnish vacant properties or remove and replace existing furniture in a home for a fraction of the time and price of traditional staging.
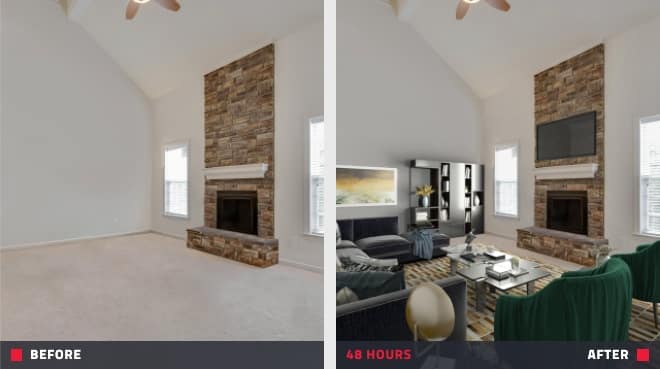
Virtual staging example (Source: Box Brownie)
Many high-quality virtual staging companies are available, which can help you to create floorplans and capture photos that will entice and attract potential leads. Check out the table below to know the best real estate virtual staging companies in 2023:
Company | ||||
|---|---|---|---|---|
Best For | Widest variety of photo editing options | All-in-one platform for photography, editing, and video staging | 3D floor plans and architectural renderings | Design quality and virtual furniture available for purchase |
Key Features |
|
|
|
|
Price Range (Depending on Services) | $1.60 to $280 | $39 to $250 | $29 to $300 | $1.50 to $39 |
Learn More |
7. Use Landscape Orientation
The human eye sees the world in about a 4:3 aspect ratio, but the most common ratio of a smartphone photo is 16:9. No matter how popular vertical smartphone photos become, horizontal listing photos can more accurately showcase the home.
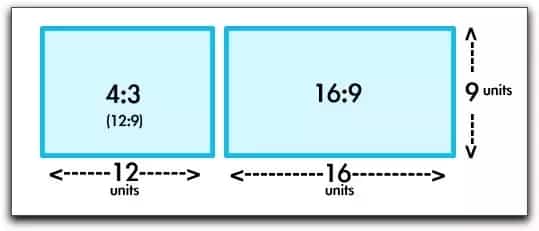
The aspect ratio 16:9 is mostly used for viewing on smartphones, widescreens, and monitors. (Source: Quora)
As you can see in the example below, wide photos have a surprisingly significant impact on each photo. On the left, the wider shot shows additional home features, a better balance of light, and an overall better composition, making viewers feel as if they’re standing in the space.

(Source: Justin Traina)
8. Make Photos Interactive Through Current Technologies
Real estate photography no longer means only shooting still photos of properties. Consider using new technology to add video and interactive elements to your listing photos through virtual tours and drone photography. As the technology grows, real estate video marketing is becoming more expected in online listings.
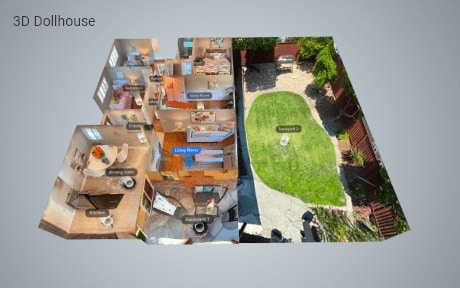
3D dollhouse (Source: Asteroom)
Virtual tours allow potential buyers to click through the property and view it as if they were physically present. It feels like a high-tech development, but it can be very easy to create one with a tool like Asteroom. Asteroom provides professionals for hire or do-it-yourself kits to create 3D tours, 2D floor plans, panoramic property photos, and even 3D dollhouse views.
9. Add a Pop of Color
Real estate and home staging professionals typically suggest using neutral color palettes in order to appeal to the maximum number of potential buyers. However, that doesn’t mean that the home should be void of all color. In fact, small pops of color have a major impact on real estate photography.
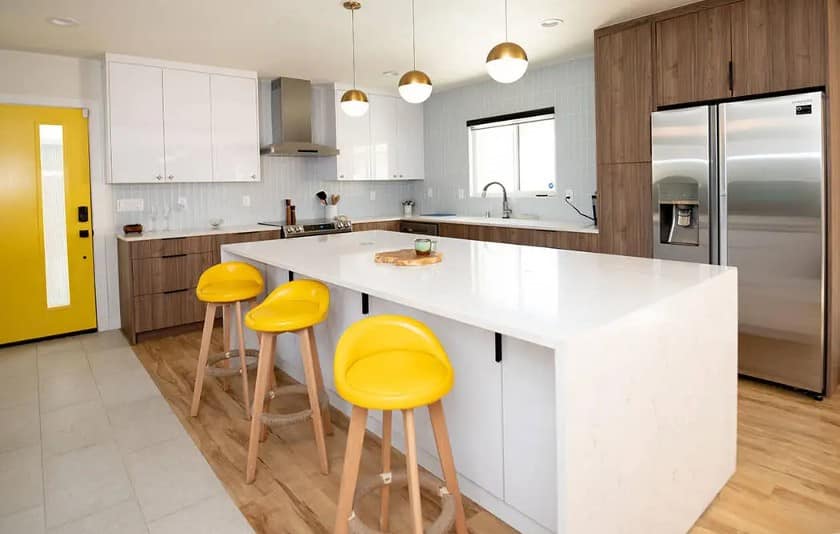
Bright yellow pop of color to make the image more visually appealing (Source: reviewjournal.com)
If the rooms you are photographing do not have any color, add a few throw pillows or a bright bouquet of flowers to make the photo stand out. In the example above, there is just one color that carries the load—bright yellow. Instead of adding something with a variety of colors, this is a great example of how you can do something simple and still make a big impact on the home’s photography.
10. Utilize Editing Presets
Another impactful shortcut is using preset editing options for real estate professionals who continue to learn how to photograph real estate. Presets automatically make photos look more professional with different lighting adjustments, temperature, and white balance combinations.
Lightroom preset (Source: Etsy)
There are many preset options available for free and for purchase in Photoshop or Lightroom. Instead of having to adjust multiple photo settings for each image, you can choose a specific lighting style for each property—creating a cohesive collection of photos instantly. Real estate presets can make an entire room feel brighter and more appealing without decreasing the photo’s clarity or overall quality.
11. Choose the Right Primary Image
After you’ve taken the photos, carefully choose the main photo for your real estate listing. With the majority of homebuyers browsing hundreds of listings, the influence of the primary image is crucial. It is often the determining factor in whether or not people will click on your listing and get more information—it’s the “money shot.” Therefore, take the time to look at every different angle and shot and even gather opinions from other real estate professionals.
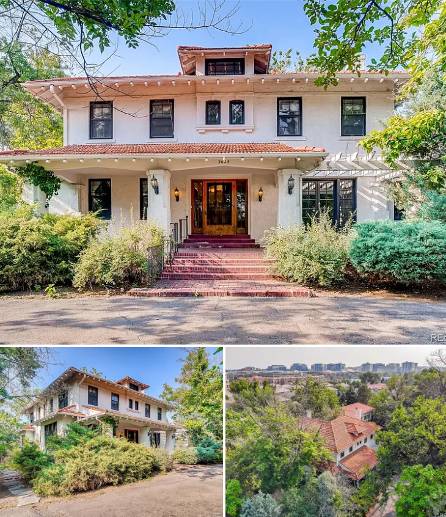
Primary image (Source: Zillow)
For example, this listing includes multiple shots of the home’s exterior but chooses the grandest photo for the primary image on Zillow. Since Zillow is by far the most popular real estate platform, with around 60 million monthly users, choosing which photo viewers will see first is essential.
It’s also important for the sale of the listing and the real estate agent’s business to take advantage of the massive amount of traffic on Zillow—attracting buyers and potential real estate leads. As a Zillow Premier Agent, you can automatically receive motivated buyer leads from other agents’ listings as well as your own.
Examples of the Best Real Estate Photos
The best way to learn how to avoid posting poor real estate listing photos is by looking through plenty of strong and weak examples. After reading the real estate photography tips above, look through the following examples to see how each tip can be implemented in your properties:
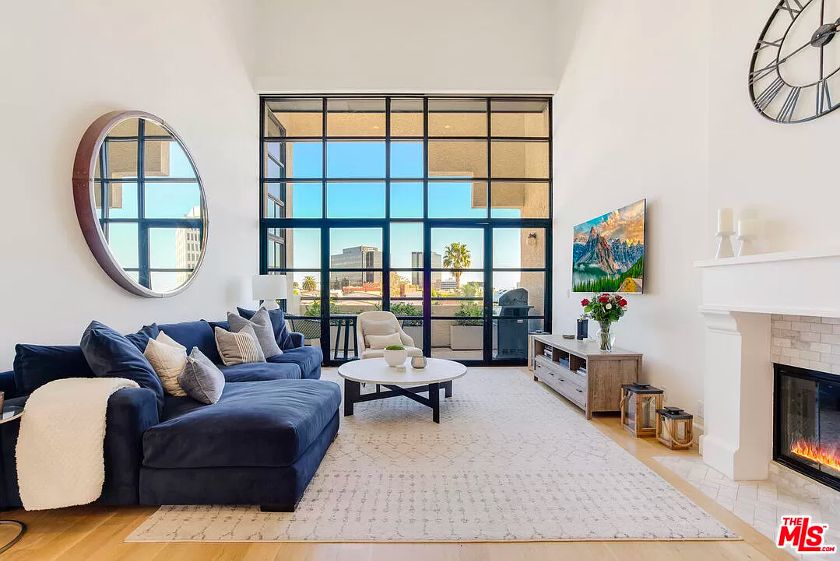
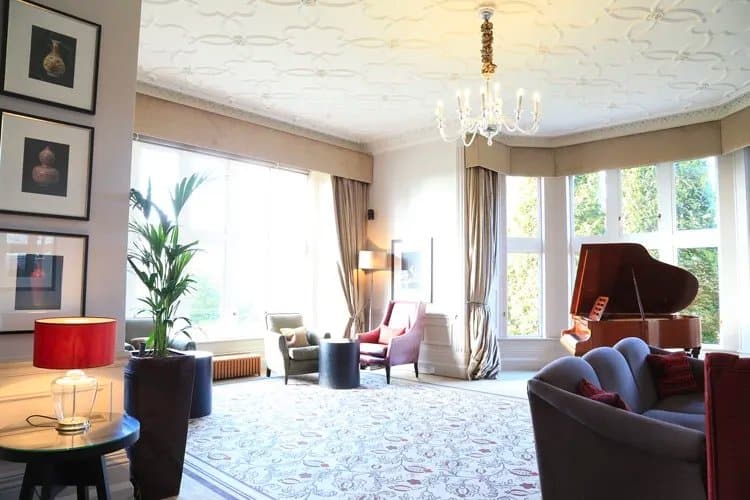
Head-on living room shot (Source: Zillow)
The photographer of this Los Angeles home did a great job preserving the natural lines within the home. Because of the angle of this shot, the photo naturally highlights a major home feature—the large windows and doors.
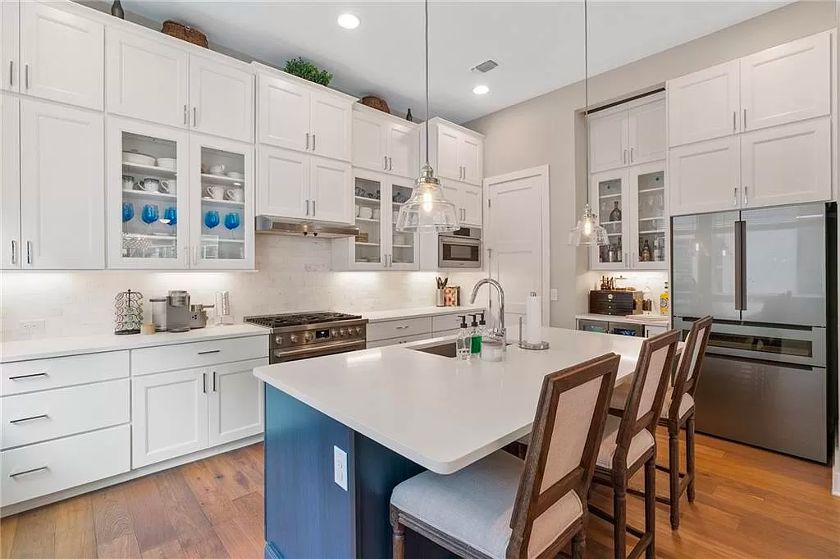
Wide kitchen photo (Source: Zillow)
This beautiful kitchen in Austin, Texas, was photographed from the corner of the room in order to showcase the entire space. This particular listing includes additional kitchen photos to highlight different elements of this recently updated kitchen. This primary photo is key to helping potential buyers understand the scale of the space.
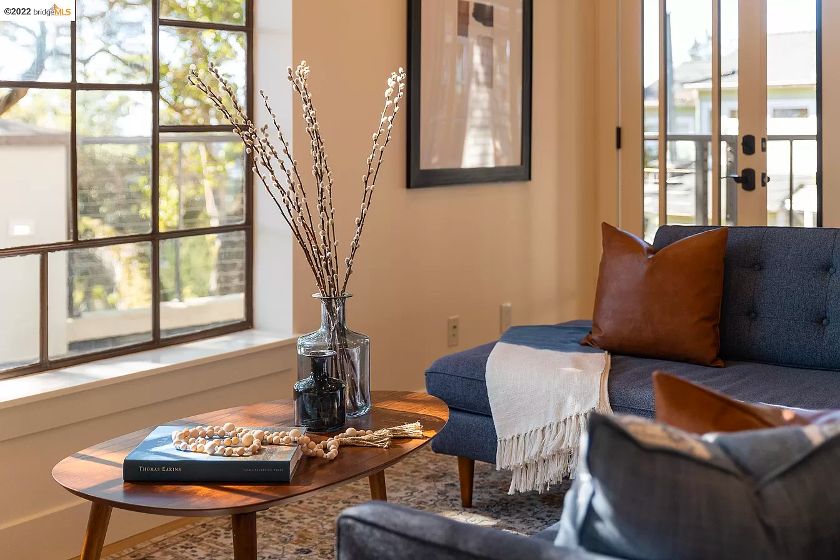
Artistic shots of a California home’s features (Source: Zillow)
The majority of real estate photography isn’t artistic because its primary purpose is to communicate and market a home. However, when you are marketing a property to high-end buyers, including a few strategic close-up shots can make the home feel even more special. This photographer includes artistic photos that communicate the feeling of the space.
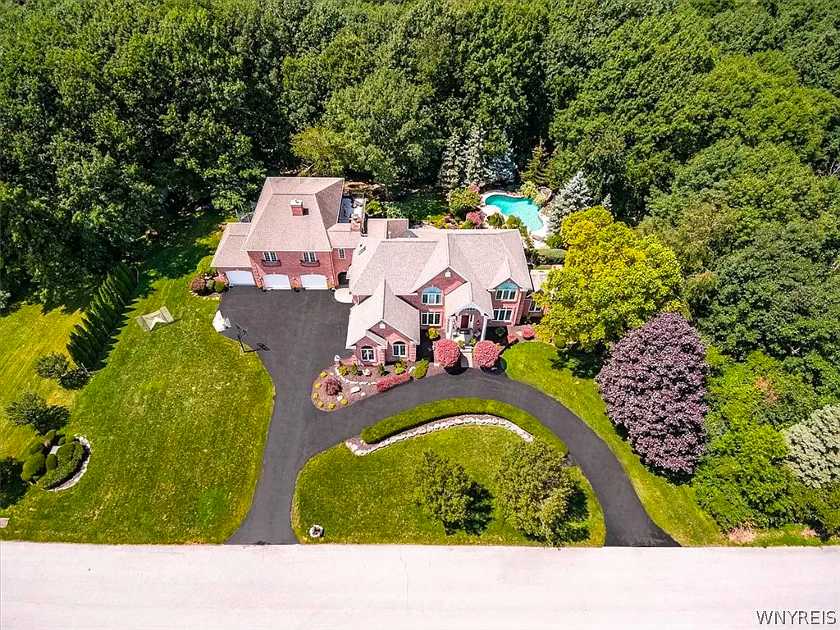
Aerial view of property in Williamsville, NY (Source: Zillow)
When you’re trying to show a large space through a collection of photos, it can be difficult for potential buyers to understand the property as a whole. Aerial photography helps viewers zoom out (literally) and see the property from a completely new angle. Plus, it stands out from a sea of living room and kitchen photos in every listing.
Real Estate Photography Mistakes & How to Avoid Them
Many real estate agents and photographers take great quality photos, but make a few key mistakes that drastically decrease the impact of their photos. Make sure to look over your photos and listings with a detailed eye each time, and learn from your mistakes to continually improve your craft.
Taking photos of each room at many angles is recommended, but that doesn’t mean you should use every photo. Nobody wants to dive through a library of 50 shots; they want to get a sense of the property and its main features before scheduling a tour. Instead, select the best image from each room. Two photos work effectively for any essential or unusually shaped spaces.
Even though you may have the best light, prime location, and your property is perfectly staged, it doesn’t mean the photoshoot will result in flawless images. It’s common for distortions to happen when using wide-angle photography. Be sure to review your real estate pictures closely and fix problem areas before publishing.
Post-production editing is essential to showcase every property’s best possible photos. However, a fine line exists between making the image look bright and open versus overexposed and unrealistic. For example, photos in bright sunlight tend to create darker shadows in some places. While you can increase the photo’s brightness or white balance to decrease these shadows, the result can look extremely washed out. The right real estate photo editing software can help you develop a good editing eye.
Sample overexposed photo from Digital Photography School
Hiring a real estate photographer is an ideal choice for many agents and brokers, but others find they can produce great listing photos with just a little time and effort. Don’t automatically assume you cannot produce high-quality photography without extensive experience or fancy equipment. Instead, practice on a few homes and try it out.
As a real estate agent, you are most familiar with the property. Hence, you’ll have initial ideas on how to best present the property and create quality photos.
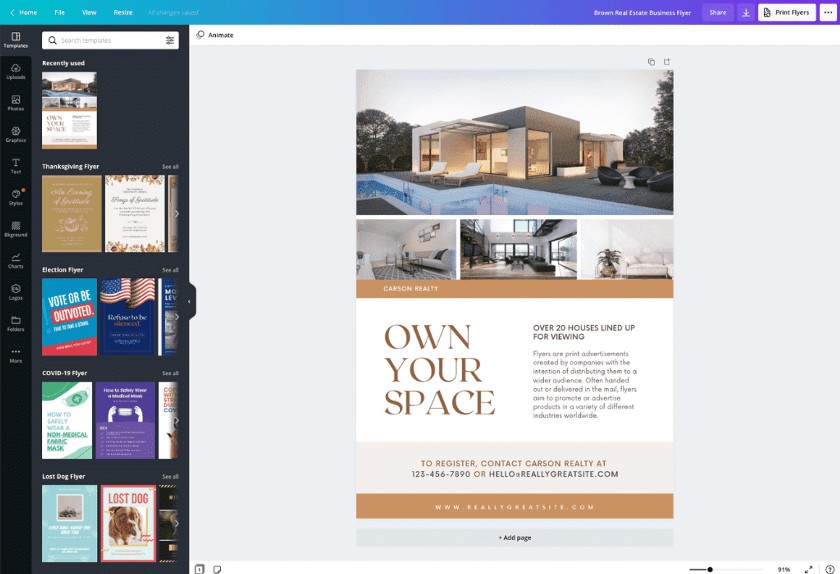
If you don’t already have a go-to photo editor, don’t hesitate to check out Canva. It includes basic lighting adjustments, an extensive number of filters, and editing tools like frames, shadows, and enhancement. It also contains thousands of free photos, fonts, and graphic elements to add and create marketing materials. You can even start using Canva for free.
Equipment to Assist With Professional Real Estate Photography
Even with the best real estate photography tips available, you need the right tools and equipment to make it happen. Many recent smartphones have incredible cameras, but professional tools are still the most reliable long-term investments in your real estate business.
The most important real estate equipment can include:
- DSLR camera: DSLR is short for a digital single-lens reflex camera. It allows you to use interchangeable lenses and adjust photos to focus and shoot faster. There are hundreds of different DSLR cameras that can do the job, but a few popular real estate photography cameras are the Canon EOS and Nikon D850.
- Tripod: Even if you have a steady hand, pictures taken without tripods are never going to be as clear as pictures taken with a tripod. Using a tripod can also help you position the photo at the perfect angle.
- Wide-angle lens: Using a wide-angle lens is essential to capture the full essence of any space. Wide-angle lenses allow for wider shots and provide a better sense of depth and detail.
- Remote trigger: A camera remote may seem like an unimportant detail, but it can massively simplify the process of setting up the perfect angle and settings.
- External flashes: Although natural light is always best, it isn’t always available. It’s extremely helpful to have high-quality external flashes that can help you produce a bright photo even in the gloomiest weather conditions.
- Flash diffusers: Flash diffusers prevent your flash from creating light that is too harsh by bouncing the light around the room. While having a flash and diffusers is not necessary for every climate, they can be key real estate marketing tools.
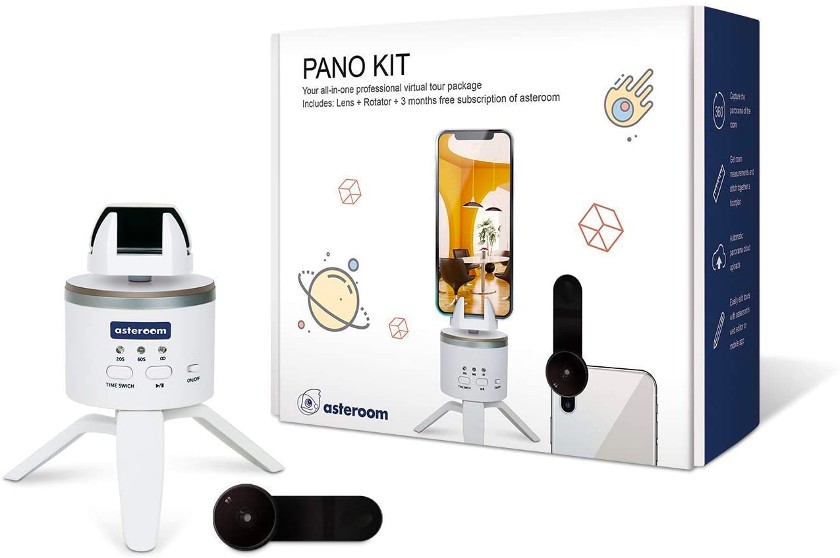
When you want to expand your real estate photography skillset and provide your own 3D images and tours, you’ll need specialized equipment. Asteroom provides a selection of 3D real estate photography kits, starting at around $109.99. Along with the kits, Asteroom also provides 3D tour hosting and an easy interface to produce them.
Bottom Line
Take your real estate marketing to the next level by learning how to take real estate photos with high-quality, carefully curated photographs. By making the most of local weather conditions, highlighting photogenic features, and using the right equipment, you’ll be able to make properties stand out from the competition. Once you take the photographs, use editing software or hire a professional to correct lighting and touch up your images. Pair these with detailed listings, and you’ll attract buyers quickly.