







I’ll show you how to do progress invoicing in QuickBooks Online, which allows you to issue partial invoices from a single estimate. I’ll walk you through all the steps—from turning on progress invoicing to creating an estimate and generating a progress invoice from that estimate. I’ll also show you how to specify how much of the estimate to invoice and how to invoice the remaining balance once the project is completed.
- Step 1: Turn On Progress Invoicing
- Step 2: Create an Estimate
- Step 3: Track Progress & Wait for Client Approval
- Step 4: Create the Progress Invoice
- Step 5: Create Another Progress Invoice or Invoice the Remaining Balance
- When to Use Progress Invoicing in QuickBooks Online
- Frequently Asked Questions (FAQs)
- Wrap Up
Step 1: Turn On Progress Invoicing
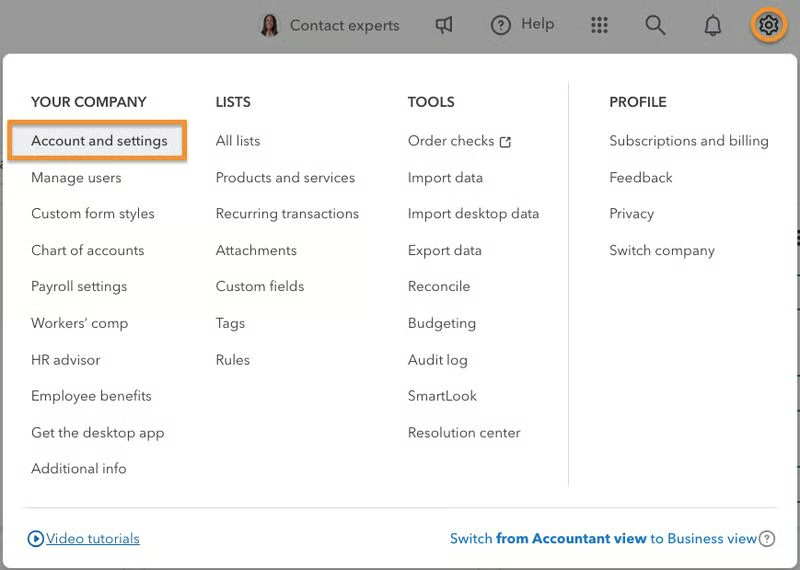
I clicked on the cog wheel icon (⚙︎) in the upper right corner of my QuickBooks Online dashboard and then selected Account and settings, as shown below.
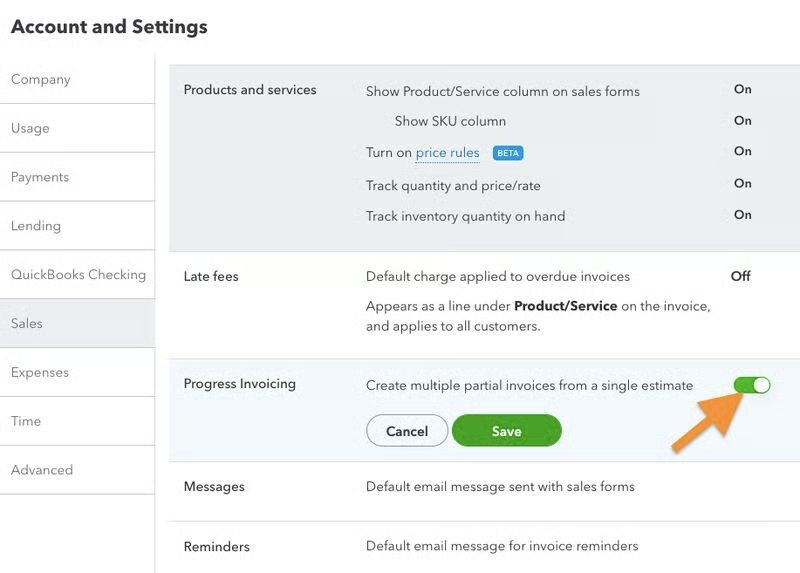
Next, I navigated to Sales from the left menu bar and then clicked anywhere in the Progress Invoicing section. I turned on QuickBooks Online progress invoicing by toggling the switch to on and then clicking Save to confirm the changes.
Step 2: Create an Estimate
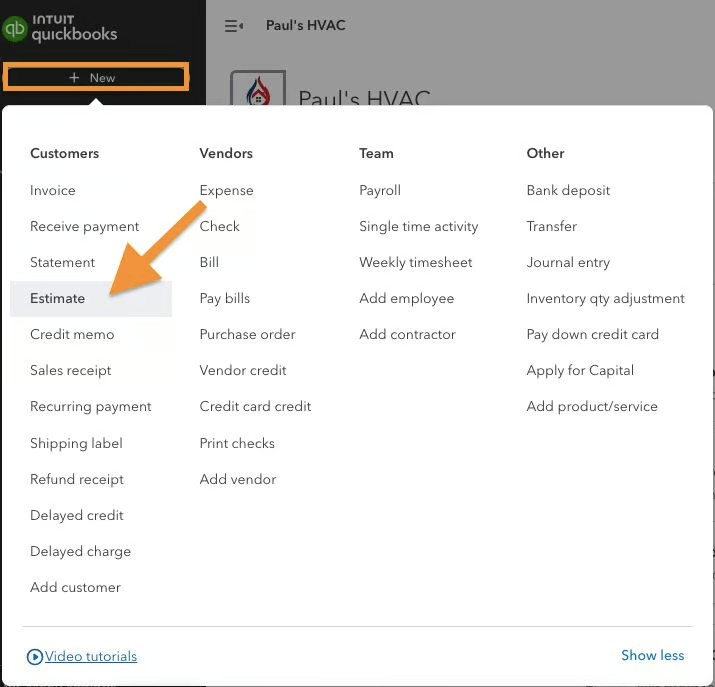
I clicked on +New in the upper left corner of my dashboard and then selected Estimate under the Customers column.
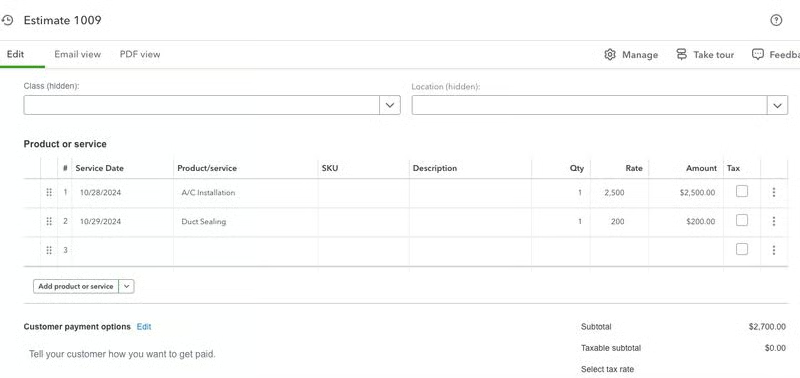
I proceeded to create the estimate by completing the estimate form. To do this, I provided important details, including the customer, service dates, and line items for each service. If you need a guide, I have a separate tutorial on how to create and send estimates in QuickBooks Online.
Below, I created an estimate for an A/C installation, which includes duct sealing as part of the service. To provide a clear breakdown, I used two separate line items in the estimate. The A/C installation costs $2,500, while the duct sealing service is $200. You won’t see the customer name in the form below, but I created the estimate for a customer named Chris Baker.
Once I completed the estimate form, I clicked Review and send and followed the prompts to email the estimate to the customer.
Step 3: Track Progress & Wait for Client Approval
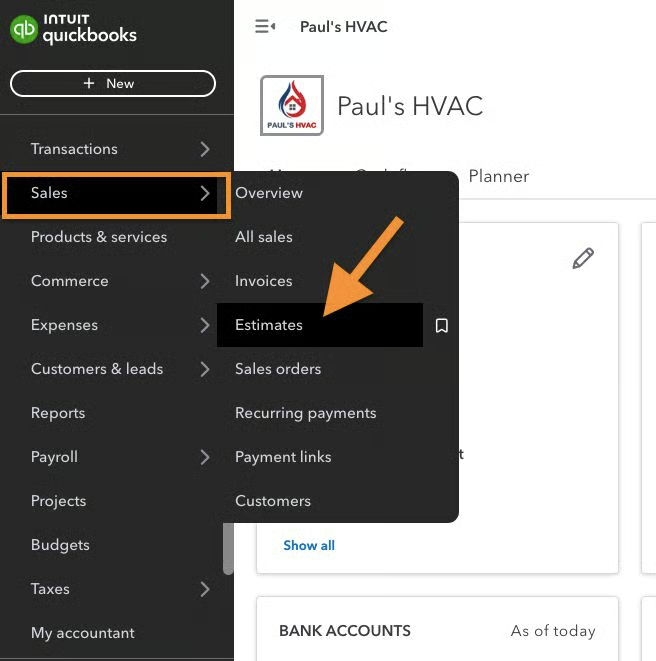
Now that I’ve sent the estimate to Chris Baker, I just need to wait for his approval. Note that you cannot bill a customer unless the estimate is approved. To track the status, click Sales in the left menu bar and then select Estimates, as shown below.
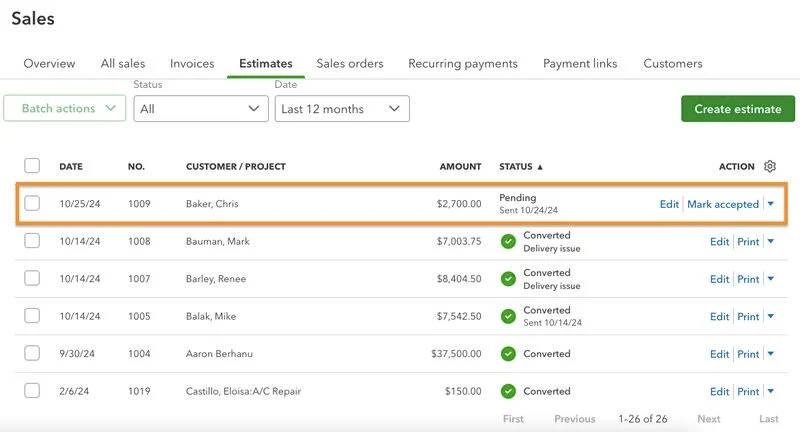
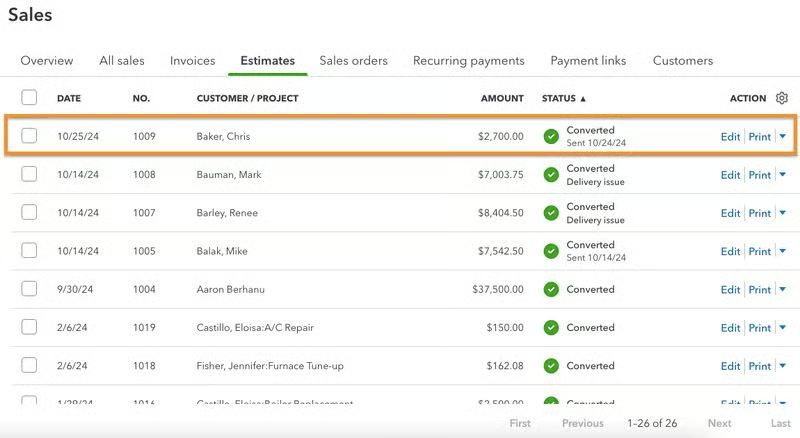
On the Estimates tab under the Sales menu, you can see the list of all the estimates you created in QuickBooks Online. In the screenshot below, I highlighted the estimate I just created for Chris Baker—and you can see under the Status column that the status is pending. This means that the customer hasn’t approved the estimate, so I can’t bill for it yet.
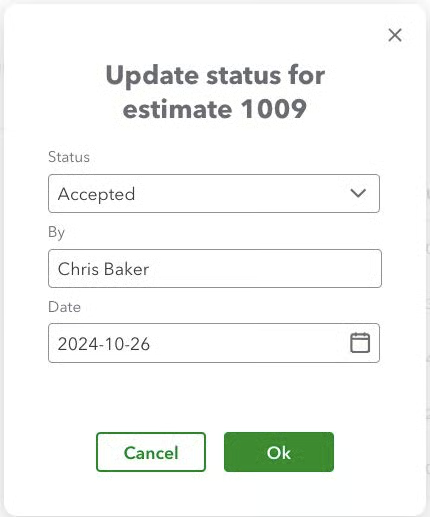
Once the client agrees to the estimate, you can mark the estimate as accepted. You can do this by clicking the Mark accepted button under the Action column (shown above). This takes you to a separate window where you can update the status of the estimate by specifying who accepted it and when it was accepted.
Step 4: Create the Progress Invoice
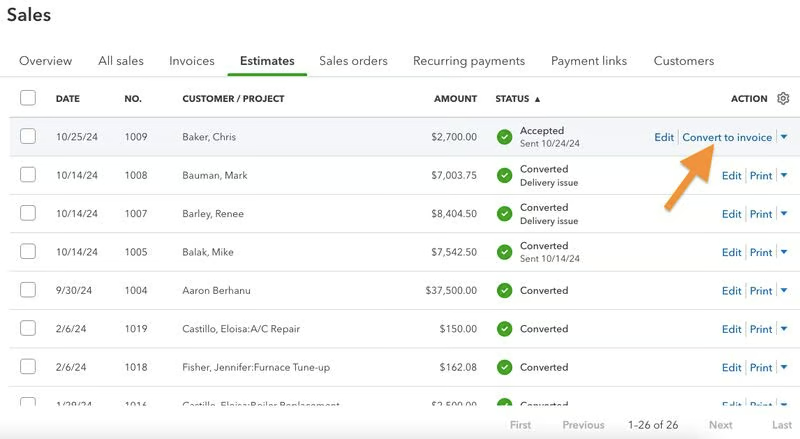
Now that the estimate is approved, you’ll see that the status will change to “Accepted.” This also means that I can now bill Chris Baker using a progress invoice. To do this, I clicked on Convert to invoice under the Action column.
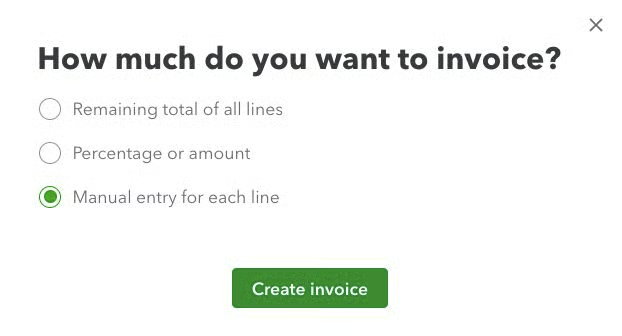
This opened up a separate window where I can specify how much of the estimate I want to invoice. There are three options to choose from:
- Remaining total of all lines: This allows you to invoice the customer for the remaining balance on all items in the estimate. Since I haven’t invoiced any amount of the estimate, I won’t be using this.
- Percentage or amount: Select this if you’re invoicing a specific percentage or dollar amount across all items in your estimate.
- Manual entry of each line: This option lets you set a custom amount for each line item. For my example, let’s select this option to see how to customize amounts for each line item using a percentage or a dollar.
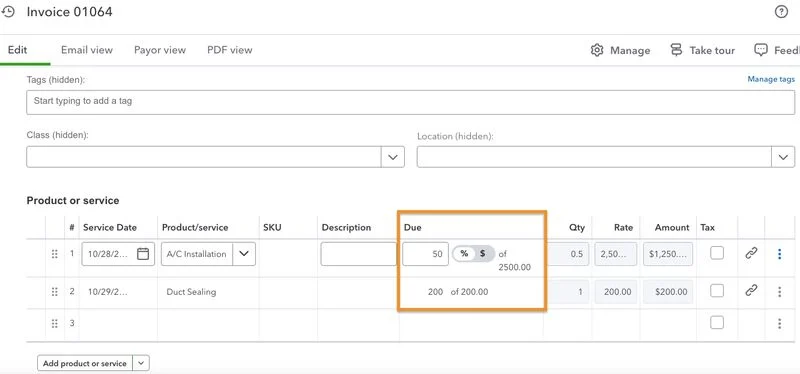
In the invoicing form, under the Due column, QuickBooks lets you specify either a percentage or a dollar amount for each line item. Below, I selected a percentage and entered 50% for the A/C installation item, so I’m billing half of the cost. Since the total is $2,500, this means I’m invoicing $1,250. For the duct sealing, I used dollars and entered the full amount, which was $200. That said, I only have a remaining balance of $1,250 for A/C installation.
Step 5: Create Another Progress Invoice or Invoice the Remaining Balance
If you haven’t completed the service and need to send another progress invoice, repeat the process from Step 4 to create the invoice. Note that the status of the estimate will remain “Accepted” until the entire amount is invoiced.
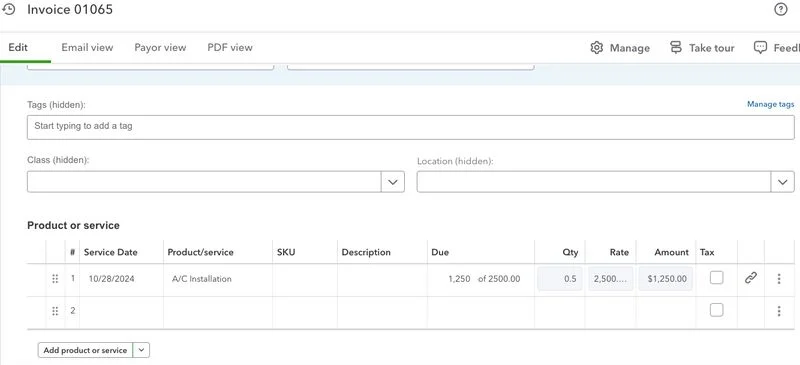
If you’re ready to invoice the remaining balance, click Convert to invoice (as shown earlier), but this time, select Remaining total of all line items. QuickBooks will automatically apply the remaining balance to the invoice. Below, we are now billing the remaining $1,250 in our estimate to Chris Baker.
Once the full amount of the estimate is invoiced, the status will update to “Converted,” meaning that the estimate has now been fully billed and turned into invoices.
When to Use Progress Invoicing in QuickBooks Online
Suppose you work on long-term projects or projects that involve various phases. In that case, I recommend using progress invoicing instead of waiting for the entire project to be completed before invoicing your client. It allows you to bill your clients incrementally as the service is completed.
In our A/C installation example, we were able to invoice 50% of the installation cost and the entire duct sealing service upfront instead of waiting for the full system installation.
Frequently Asked Questions (FAQs)
What is progress invoicing in QuickBooks Online?
It’s a feature that allows you to bill your clients incrementally for a project instead of waiting until the entire project is completed.
How do I track progress invoices in QuickBooks Online?
You can track progress invoices from the original estimate or generate an Estimates & Progress Invoicing Summary by Customer report to see the invoices and remaining amounts.
Wrap Up
You’ve just learned how to do progress invoicing in QuickBooks Online. If you want to learn more about using the other features of QuickBooks, explore our free QuickBooks Online tutorials.
