While you can use the predefined templates in QuickBooks Online to generate invoices, there are some instances where you need to create your own. We have prepared 10 free downloadable QuickBooks invoice templates that you can customize and import into the software. Each is customized to a specific industry, such as freelancers, law firms, wholesalers, and retailers. We’ll also teach you how to import these invoice templates to QuickBooks.
- Catering: Download invoice template
- Construction: Download invoice template
- Freelancers with fixed rates: Download invoice template
- Freelancers with hourly rates: Download invoice template
- Landscaping: Download invoice template
- Law firms: Download invoice template
- Nonprofit organizations: Download invoice template
- Property managers: Download invoice template
- Retailers: Download invoice template
- Wholesalers: Download invoice template
How To Import Invoice Templates into QuickBooks Online
From our selection of free invoice templates above, select and download the template you need based on your business or industry.
Customize the downloaded template by adding your company name, address, and logo for a more personal touch. Our invoice templates are completely editable, so you can personalize other items as well.
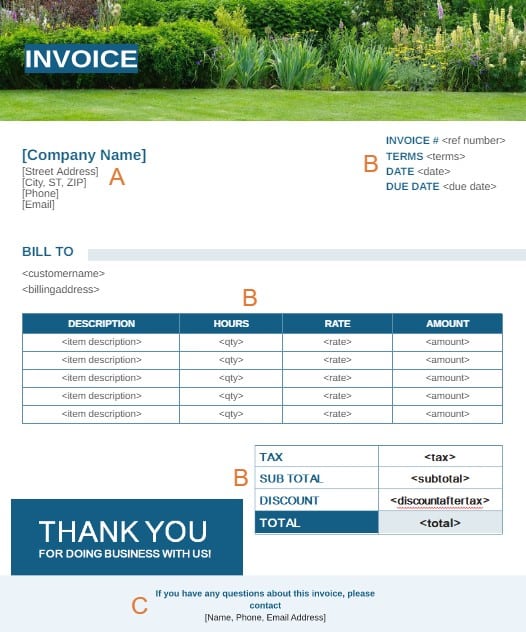
Customize your invoice template before importing it to QuickBooks Online
- Company Information: Indicate your company name, address, phone number, and email address.
- Form Fields: While our invoice templates already have all the essential fields, you can add fields if needed. However, if you need to include a special field, then you have to add it within your QuickBooks Online account, as discussed in the next step.
- Footer: Enter your name, phone number, and email address.
Tip:
Once you’ve imported your invoice template to QuickBooks Online, you cannot edit or customize it within QuickBooks. Any further changes will have to be made to the template and then imported as a new invoice template.
QuickBooks Online is extremely flexible, making it our overall best small business accounting software. However, some of the industry-specific invoice templates include fields that don’t come standard in QuickBooks but are very useful for that industry. For instance, the law firm invoice template includes a special field for case number, which is not found on QuickBooks’ list of default fields.
All QuickBooks Online plans (except Advanced) include up to three custom fields. If you need to add more fields, then you may have to upgrade to Advanced, which allows up to 12 active custom fields for each type of form.
Here are some of the custom fields added, or you may have to add them to your invoice template, depending on your industry.
Industry | Custom Fields |
|---|---|
Law Firm | Case number |
Construction | Labor fees |
Nonprofit | Donor ID |
Property Management | Customer ID |
Retail/Wholesale | Order number, serial number, and shipping method |
If you’re using a template with a special field or if you need to add one, then you must follow the steps below. Otherwise, you can proceed to Step 4.
Step 3.1: Click on the gear icon on the upper right side of your QuickBooks dashboard, and then select Account and settings under the Your Company column.
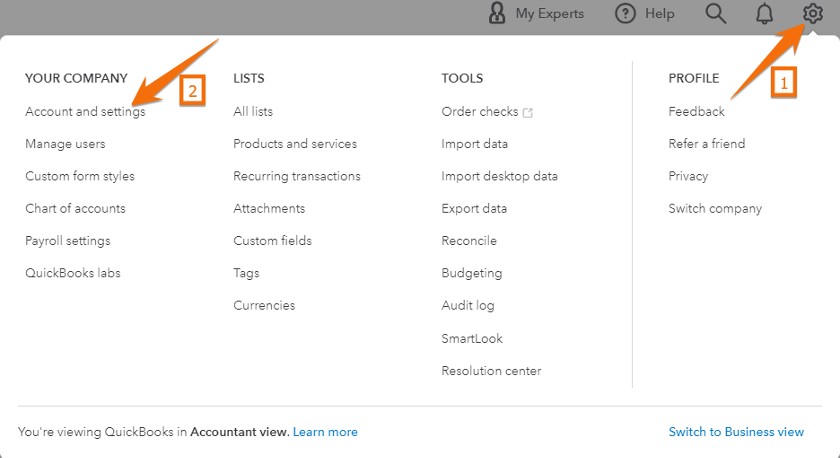
Navigate to Account and Settings
Step 3.2: Go to the Sales tab, and then choose Sales form content.
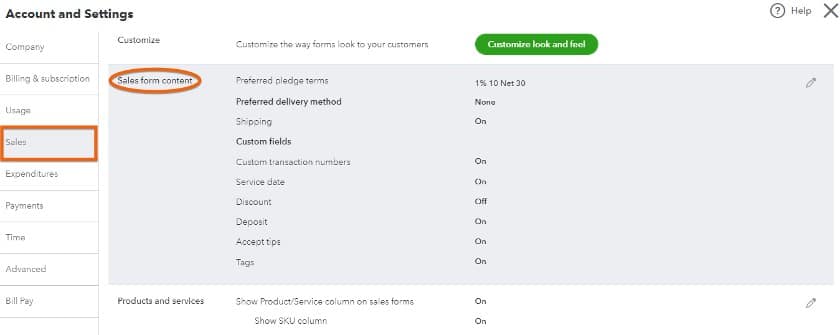
Go to Sales form Content
Step 3.3: Click on the small pencil icon or anywhere on the grayed Sales form content section and then hit Custom Fields.
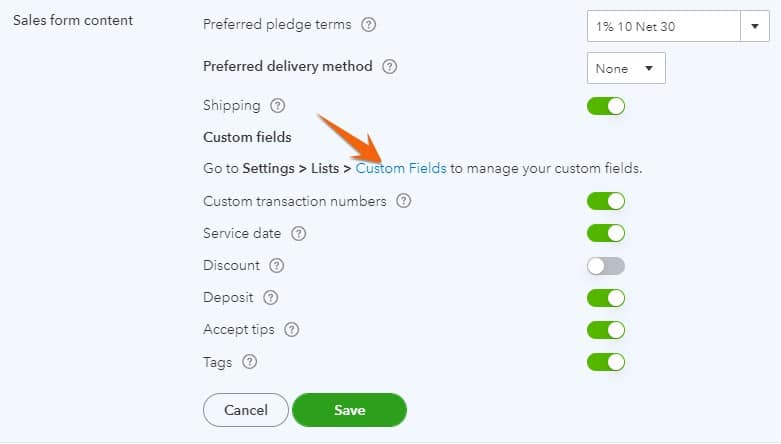
Click Custom Fields on the Sales form content section
Step 3.4: From the Custom fields screen, click on Add field, enter the field you wish to add, click on the All sales forms box, and then select Save.
Adding a custom field to apply in your template in QuickBooks Online
Step 3.5: You can make an existing active field “inactive” as needed so that you can add a new one. If you are not using the QuickBooks Online Advanced plan and have previously added three fields but need to add a new one, then you can make one inactive to add a new custom field. To do so, click on the small drop-down arrow next to the field, and then click the Make inactive button, as shown below.
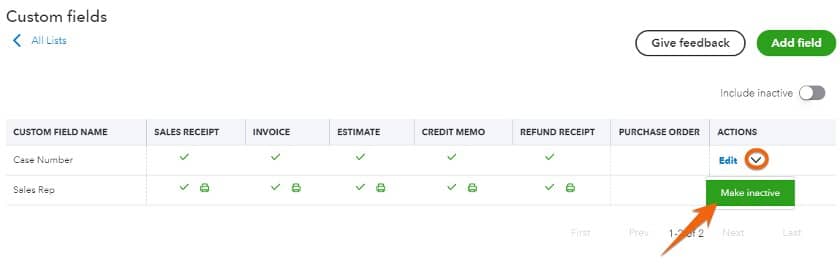
Making a custom field inactive in QuickBooks Online
Once you have customized the invoice template, you can import it to QuickBooks Online by following the steps below.
Step 4.1: Click on the gear icon on the upper right side of your QuickBooks Online dashboard, and then click Custom form styles under the Your Company column, as shown below.
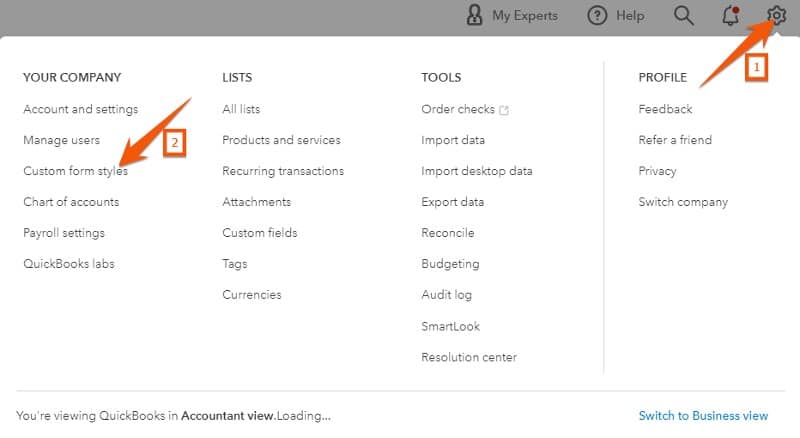
Navigate to Custom Form styles
Step 4.2: Click on the small dropdown arrow next to the New style button and then select Import style.
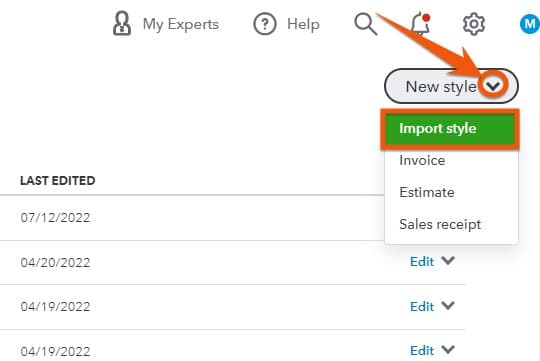
Select Import style
Step 4.3: QuickBooks will ask you to choose your form type. Choose Invoice and then click the green Next button.
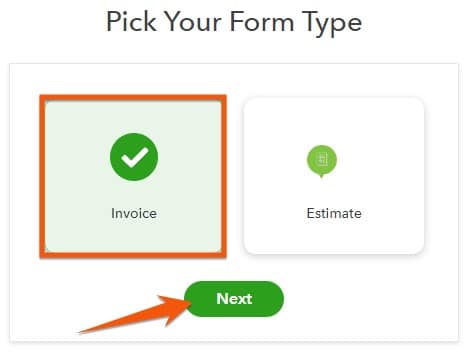
Pick invoices as the type of form to import
Step 4.4: After clicking Next, QuickBooks Online will ask you to upload the invoice template. Click Browse, locate your invoice template on your computer, and then click on Next.
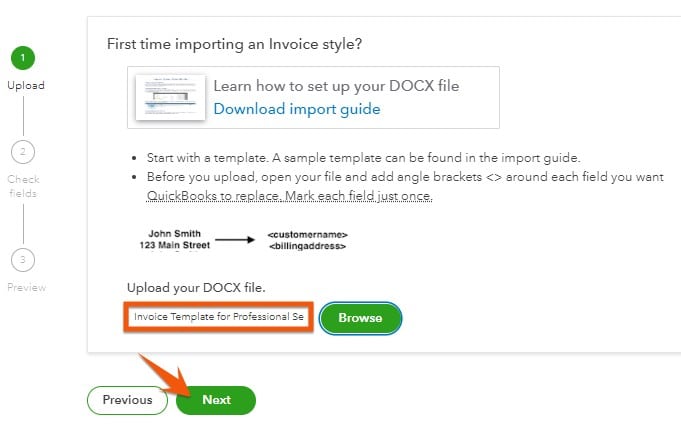
Browse the invoice template you wish to import
Once the file is imported, QuickBooks will initially map the fields from your template to the corresponding fields (called EZ Map fields) in QuickBooks Online. We have already reviewed the important mappings, so all the fields in the invoice template should be mapped successfully.
EZ Map fields are special keywords or fields in QuickBooks Online that help simplify the mapping of your custom form. When you upload your template, QuickBooks will find the fields enclosed in angle brackets and map them to the fields in QuickBooks. For instance, QuickBooks will match the keyword <shippingaddress> to the Shipping Address field in QuickBooks.
To identify accurate mappings, you should see a green check next to each field under the mapping status. You will also receive a “Success! Press Next below to continue!” prompt as in the screenshot below.
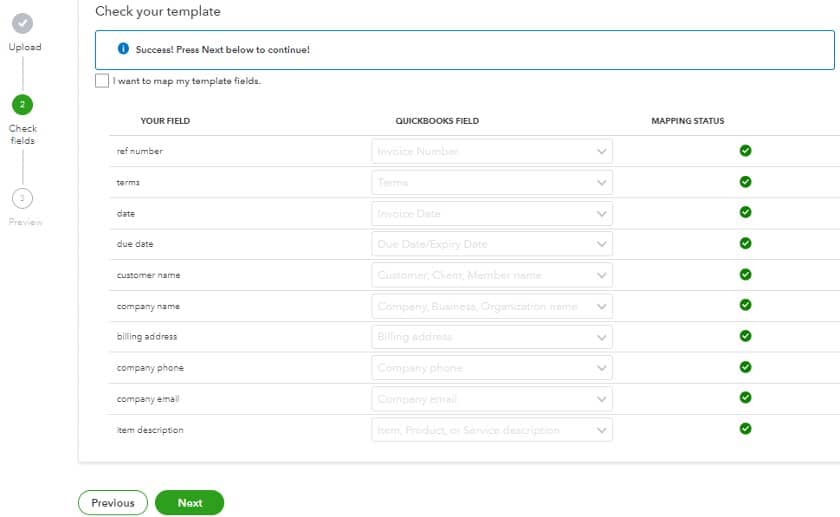
Mapping invoice template fields successfully to QuickBooks Online EZ Map fields
If the mapping is unsuccessful and it shows that the fields aren’t correctly mapped, then a special field might have been missed. Make sure you didn’t miss adding those special fields in your QuickBooks Online account, as discussed in Step 3.
If you’ve added the fields successfully, then all the fields will have been mapped successfully.
QuickBooks will show a preview of your imported invoice. Click on Save, provide a name for your invoice, and then click the green Save button.
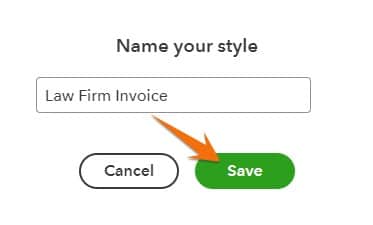
Name your invoice template
Once your invoice is saved, you should be able to see it on your invoice list.
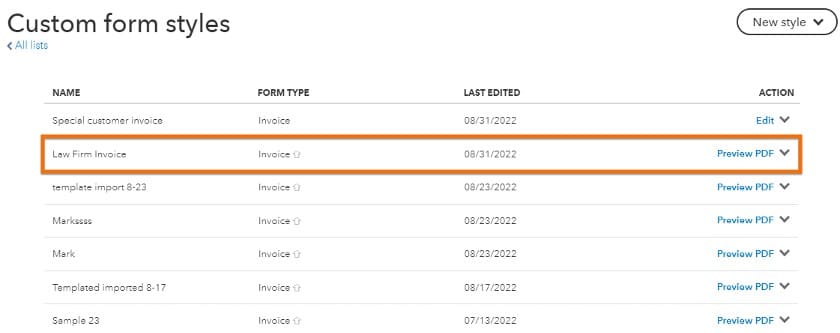
Invoice template saved successfully
Tip:
You should also consider using QuickBooks Online’s predefined templates and customize them to meet your business needs. QuickBooks Online allows you to customize invoices based on your industry, making it our overall best invoicing software. Check out our lesson on how to customize sales forms, which is part of our free QuickBooks Online tutorial series.
What To Include in Your QuickBooks Invoice
Your sales invoice should provide your customer with all the important details of the products and services that they have purchased from you. To see that payment isn’t delayed, you want to ensure that your contact information and your customer’s contact information are accurate. You should also include an invoice number, the invoice date, and the following:
- Your company name and contact information
- Invoice number and invoice date
- Payment terms
- The date payment is due
- What products/services you’re billing them for
- How much each product/service cost
- Acceptable payment methods
- Contact details for questions
Wrap Up
As discussed throughout this article, you have several options when selecting the right QuickBooks invoice templates for your business. You can choose from QuickBooks Online’s default templates or use our free downloadable invoice templates, which are ready to be imported to QuickBooks Online.