Learn about the basics of how to run payroll with OnPay. Follow along with our step-by-step instructions to help you along the way.
How To Run Payroll With OnPay: A Guide for Small Businesses
This article is part of a larger series on Payroll Services.
OnPay is a full-service payroll solution that lets you manage payroll including tax filings for wage-earning employees and contractors. It has a clear interface with large, colorful tabs, making it an easy-to-use solution for processing payroll. It also has some HR features and costs $49 monthly plus $6 per employee per month.
In this article, we go over the basic steps of how to process payroll with OnPay. If you need help getting your account set up and ready to go, check out our How to Set Up OnPay article that will walk you through everything you need to know, plus an instructional video. Sign up for a free OnPay trial today.
If you want to run your first payroll with more than just screenshots as support, follow along with our video on how to run payroll with OnPay.
Step 1. Get Familiar With Your Employer Dashboard
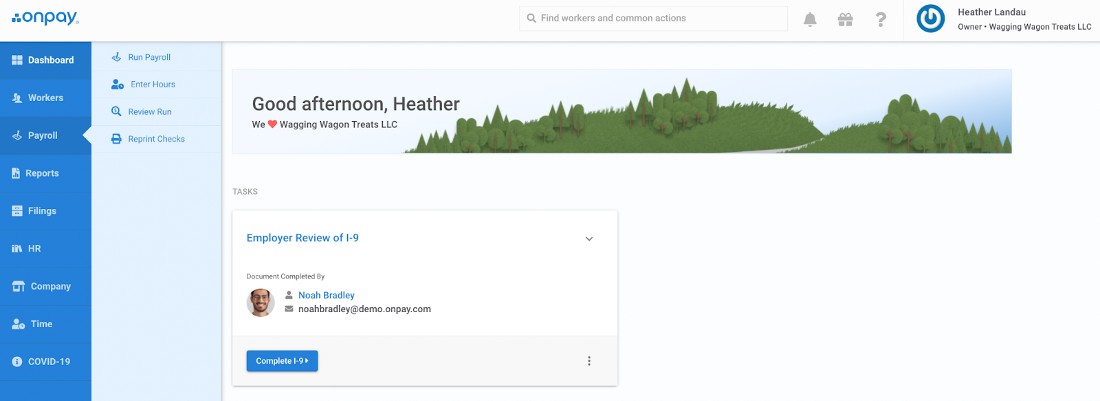
OnPay’s intuitive dashboard allows employers to customize their home screen so it can be used to help them best manage their payroll. Each section allows you to quickly jump into the most important aspects of payroll within seconds.
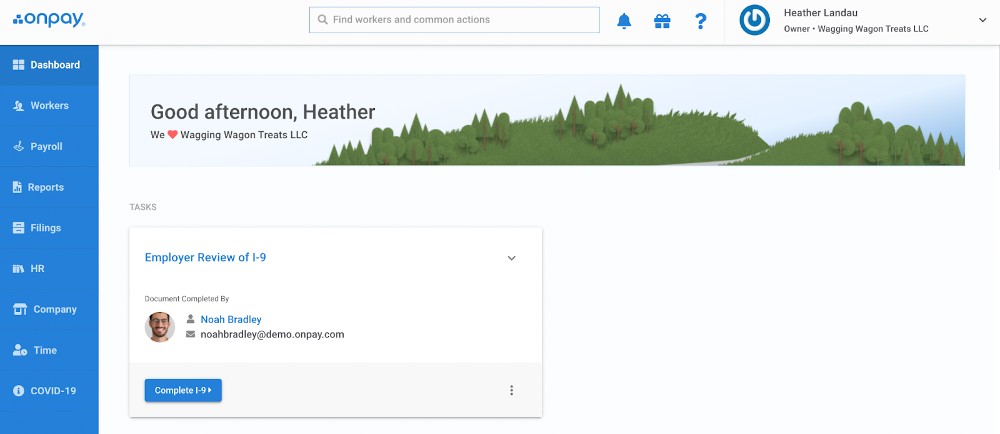
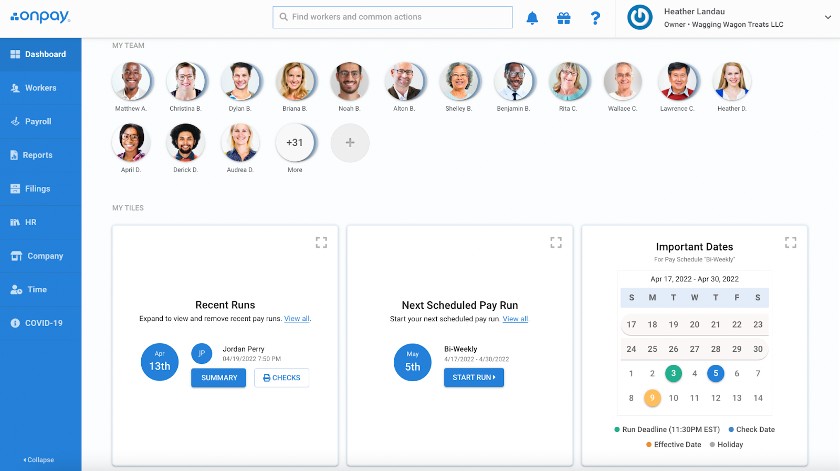
The first section shows all open tasks so that you’re always prompted with the most time-sensitive tasks to ensure you stay on track. You’ll then see your list of employees, giving you quick access to their profiles for any changes or updates that you need to make.
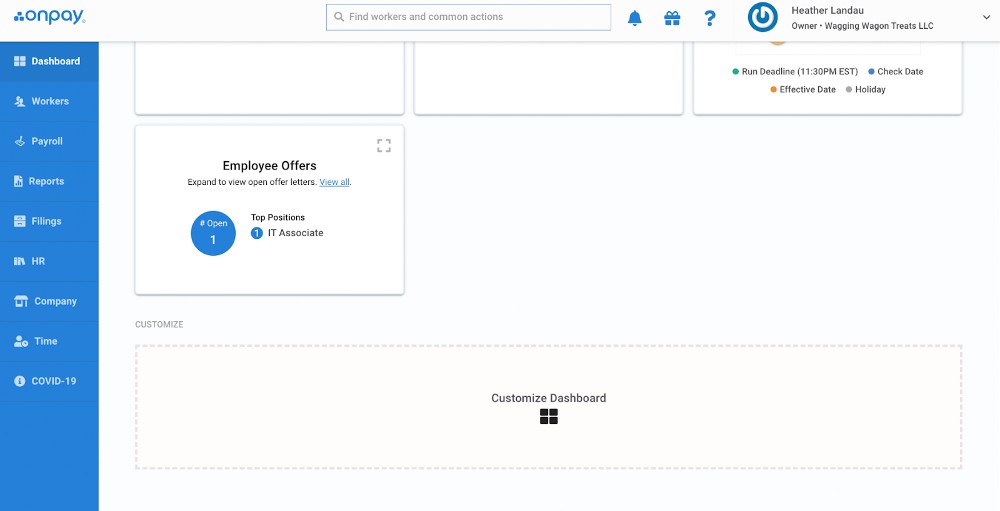
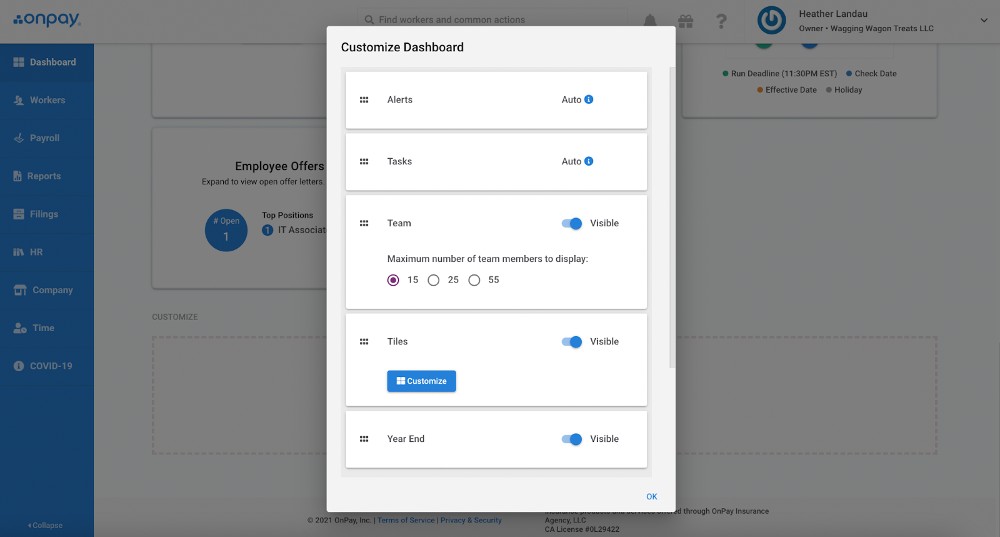
The lower half of the screen features a customizable “my tiles” section. These tiles allow you to click into your recent pay runs, view important payroll dates on the runway, and see any pending offers to prospective new employees. Below your tiles, you’ll see an option to customize your dashboard. In this customizable menu, you can choose which tiles are to be highlighted, how many employees are displayed, and what kind of alerts you’d like to receive from the system.
All of these features and customizable options make OnPay’s dashboard incredibly intuitive and easy to understand for all kinds of business owners.
Step 2. Navigate to the Payroll Section & Click “Run Payroll”
On the left-hand side of the screen you’ll see that there’s a simple-to-navigate menu that allows users to navigate the system with confidence. The third option from the top is “Payroll,” which will bring you to the most important payroll pages—Run Payroll, Enter Hours, Review Run, and Reprint Checks. The first option will bring you to the run payroll screen where you can begin entering all of the necessary information for the current pay cycle.
Step 3. Choose Pay Cycle (If Your Business Has More Than One)
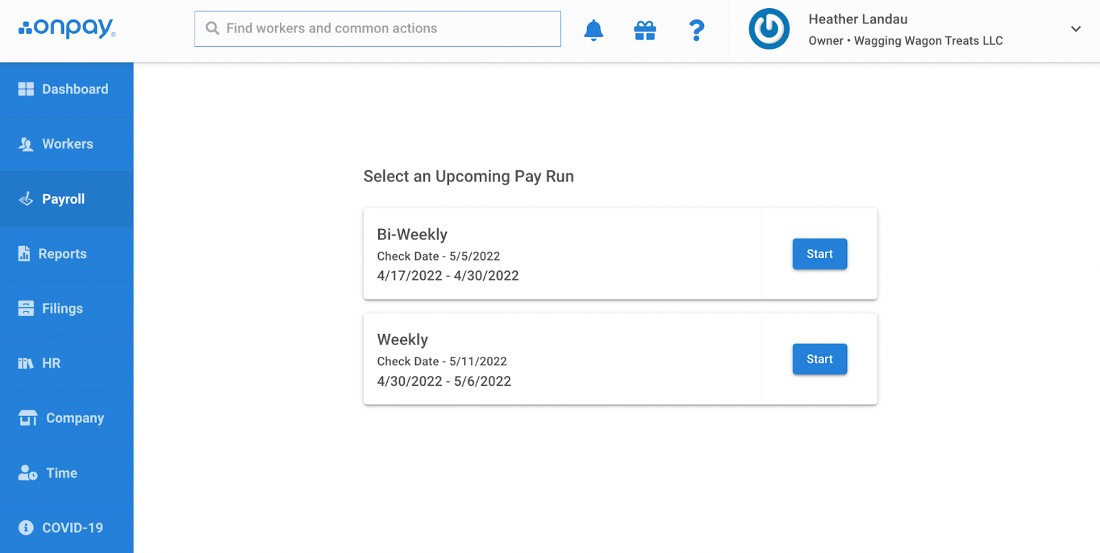
If your company only has one pay cycle set up, you’ll only see one option here. However, it’s a nice option that OnPay allows you to have multiple pay cycles. Some employers choose to pay different kinds of employees in varied ways; for example, all salaried employees could be paid on a biweekly cycle while all hourly employees are paid on a weekly cycle. If you do choose to set up multiple pay periods, OnPay makes it extremely easy. When you click on the “Run Payroll” button, you’ll always be prompted with an option to click on each of them.
Step 4. Enter Employee Hours
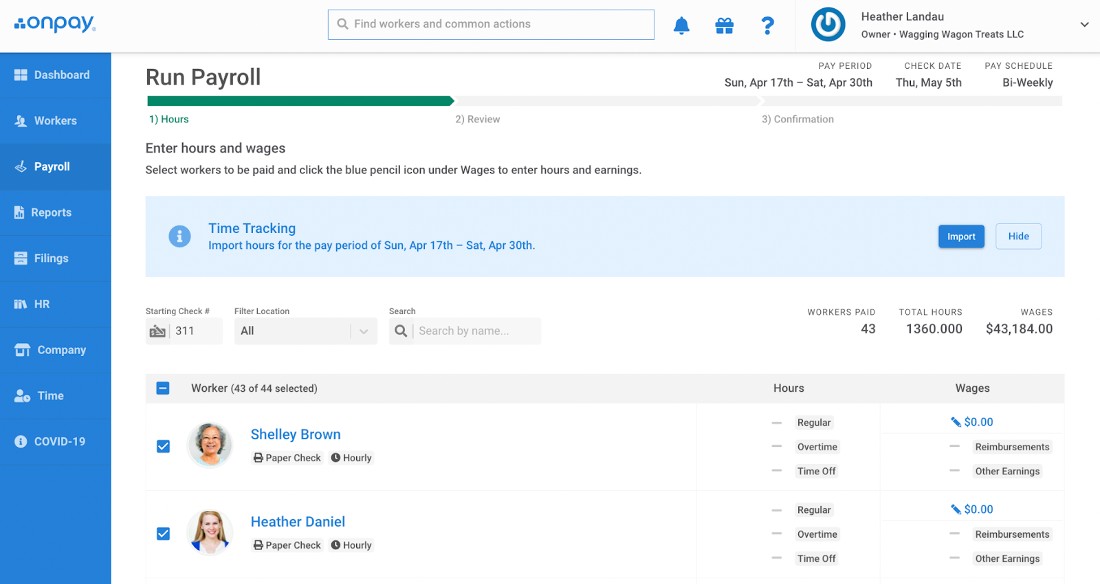
Once you click on the pay period you want to process, you’ll be brought to your list of employees that gives you the option to enter hours. There are different sections to enter regular hours, overtime hours, and reimbursements. If your employee is set up in the system as “salaried,” their salary amount will be there automatically (no manual entry required).
You’ll also be able to see whether the employee is set up to be paid via direct deposit or paper check, giving you the ability to update if you find that something is not looking accurate.
If there are any employees on your “Active Employee” list who are not going to be paid in a specific payroll, you can simply uncheck the box next to their name and photo and they will be excluded from the payroll.
Pro Tip: Don’t be afraid to leave the “Run Payroll” screen if you need to. All payroll information that you enter will be saved as you enter it, which will allow you to leave the payroll screen as you need to without worrying about losing your progress.
OnPay doesn’t offer the ability to set your payroll on “autopilot,” where your payroll would be run automatically for you, like other providers do. However, it does offer the ability to have the system populate the details from prior payrolls to make the process quicker.
Step 5. Review Pay Run
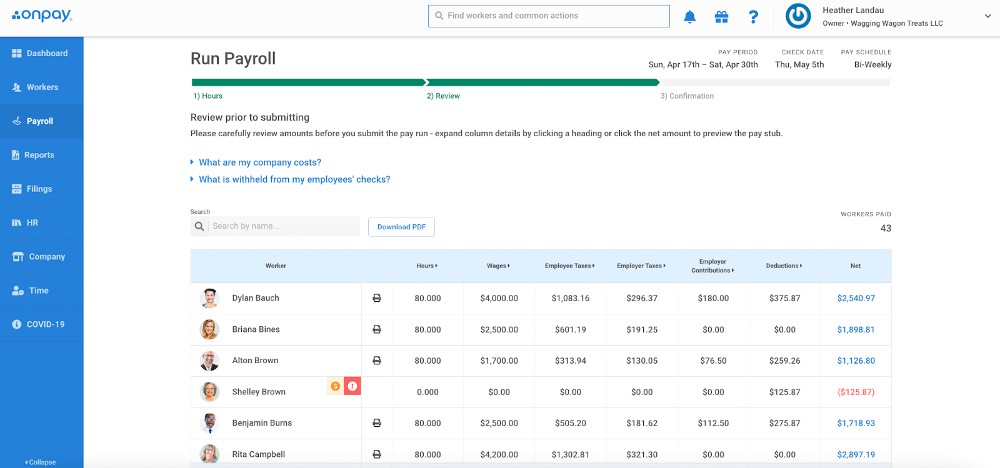
The review screen is a really helpful tool that business owners can use to ensure everything is entered accurately before pushing through any payments to employees. As you can see in the screenshot above, OnPay flags any payments that seem incorrect.
This can include negative payments and even payments that are notably higher or lower than normal. This allows you to review these flagged payments and click on them one by one to make any changes that are necessary.
In addition to any flagged transactions, the review page also gives you the ability to ensure that all totals are in line with what you’re expecting, and that the hours, taxes, reimbursements, and deductions are accurate.
Step 6. Submit Payroll
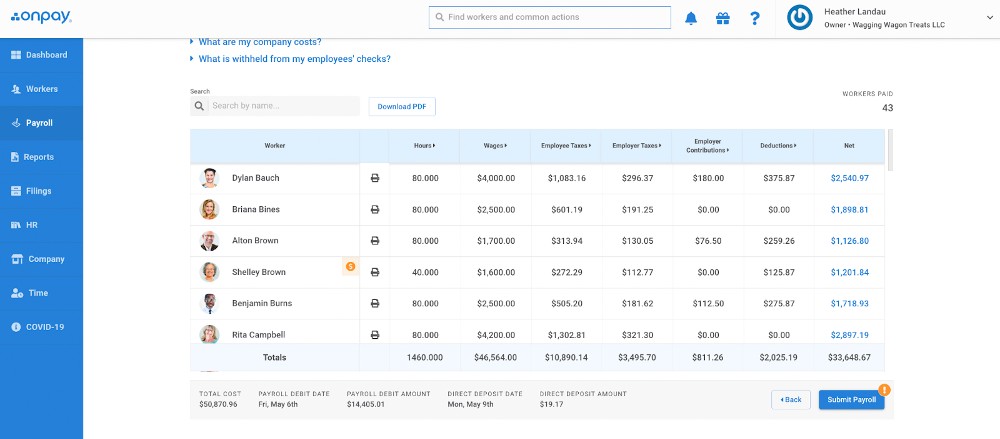
Once you’ve reviewed all payments included in the run payroll screen and are confident with all the numbers, you can go ahead and click “submit payroll” at the bottom of the screen. At this point, there’s nothing else that you’ll need to do to get payroll processed.
When you’ve submitted your payroll, you are good to go and payments are on their way!
Step 7: Run Reports
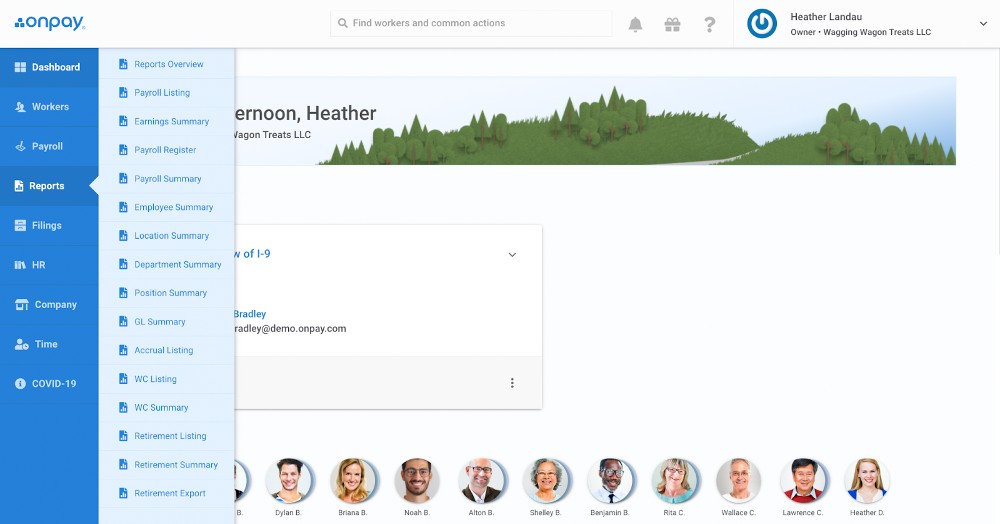
After processing your payroll, there are a ton of report options that you can run to help gain more insight regarding your payroll. Several default reports are available to be run in a matter of minutes—including everything from a payroll summary to a general ledger (GL) summary.
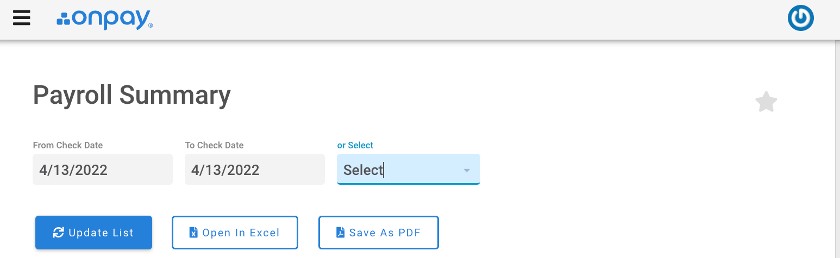
You can easily adjust the date range at the top of the screen, and with each change, there’s a very simple “Update List” button to refresh. You can view the report live in the browser or download the reports in Excel and PDF formats.
Bottom Line
OnPay’s intuitive dashboard and easy-to-navigate platform makes processing payroll quick and simple. All you need to do is enter the necessary pay information, and everything else is taken care of automatically. OnPay payroll ensures that your taxes are handled, deductions are withheld properly, and payments are issued accurately and timely.
You May Also Like …
- For additional payroll provider options, check out our best payroll services
- See our top tips on how to get the best payroll training