To track customer invoices and payments using Excel, you must first create an invoice tracker. Start by creating a spreadsheet with columns for relevant data, including invoice number, customer name, due date, and invoice amount. You can then use Excel’s features, such as data validation, formulas, and conditional formatting, to track invoices and payments effectively.
Our tutorial shows you how to create an Excel spreadsheet and how to keep track of invoices and payments using that spreadsheet. We also prepared a downloadable free invoice tracker template that you can use as a starting point.
Featured Partner
Step 1: Add the Column Headers
Open a new Excel spreadsheet file and then define the following column headers:
- Invoice #
- Date Issued
- Client Name
- Due Date
- Invoice Amount
- Payment Amount
- Days Overdue
- Outstanding
- Status
Your headers will look like this:
Sample headers for an invoice tracker in Excel
Step 2: Set Up the Formulas
Essentially, you’ll need to set up formulas to calculate the days overdue, outstanding balance, and subtotals.
Days Overdue
To calculate the number of overdue days, use a formula that subtracts the due date from the current date (today’s date). Excel’s IF formula can also help you determine if the invoice isn’t due yet or is already paid. The “Outstanding” cell will show a value of “-” if the invoice is not yet due. Otherwise, it will show the invoice amount if it’s already due.
A sample formula for the days overdue in our downloadable spreadsheet is shown below:
=IF(ISBLANK(E9),”-“,IF(D9=”Paid”,”-“,IF((TODAY()-E9)>0,TODAY()-E9,”-“)))
Formula Explanation
- The Excel version we used for our template doesn’t have the IFS function yet. If you’re using later versions, you can use IFS instead for a more streamlined conditional statement.
- The first condition checks whether cell E9 (Due Date) is blank, as represented by the ISBLANK function. If the condition is true, Excel will show “-” as a result. Otherwise, we go to the second condition.
- The second condition checks if cell D9 (Status) is equal to “Paid.” If the condition is true, Excel will show “-” as a result. Otherwise, we go to the third condition.
- The third condition checks if the difference between today’s date is greater than zero, as shown in TODAY()-E9. If the difference is a positive value, Excel will show the difference as Days Overdue. Otherwise, it will only show “-” as the result.
Outstanding Balance
The outstanding balance column is simply the difference between the Invoice Amount column (Column F) and Payment Amount column (Column G). For example, the formula should be F9-G9.
Subtotals
The SUBTOTAL function helps you compute the sum of filtered cells, which we’ll discuss in Step 3. In the bottom part of our template, you’ll see the subtotals for Invoice Amount, Payment Amount, and Outstanding Balance. Even if you filter the cells, such as filtering all invoices from one client, the SUBTOTAL function will only compute the sum based on the filter you selected.
The formula is:
=SUBTOTAL(9,F9:F45)
Formula Explanation
- The first argument in the SUBTOTAL function is the function number or function_num. There are 11 different functions available. But since we only want to get the sum, we place 9 in the function_num argument because it represents sum.
- The second argument is the reference or the range in which Excel will process based on the function_num. Since we want the sum, Excel will compute the sum of the reference for us.
Step 3: Create Filters
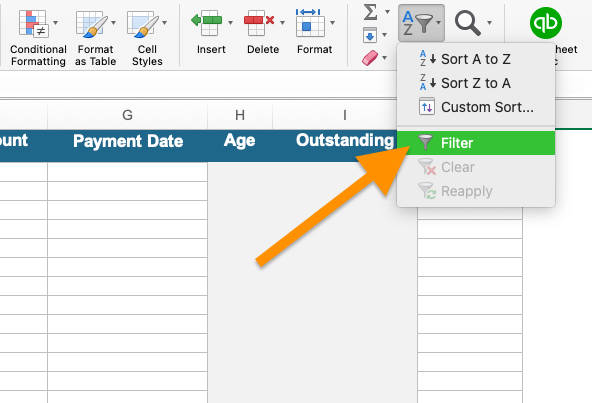
To track invoices and payments easily, you can set up filters for each column in Excel. This allows you to find specific records easily, identify outstanding invoices, and track payments. To do this, click on the filter icon.

Applying filters to headers in an Excel invoice tracker
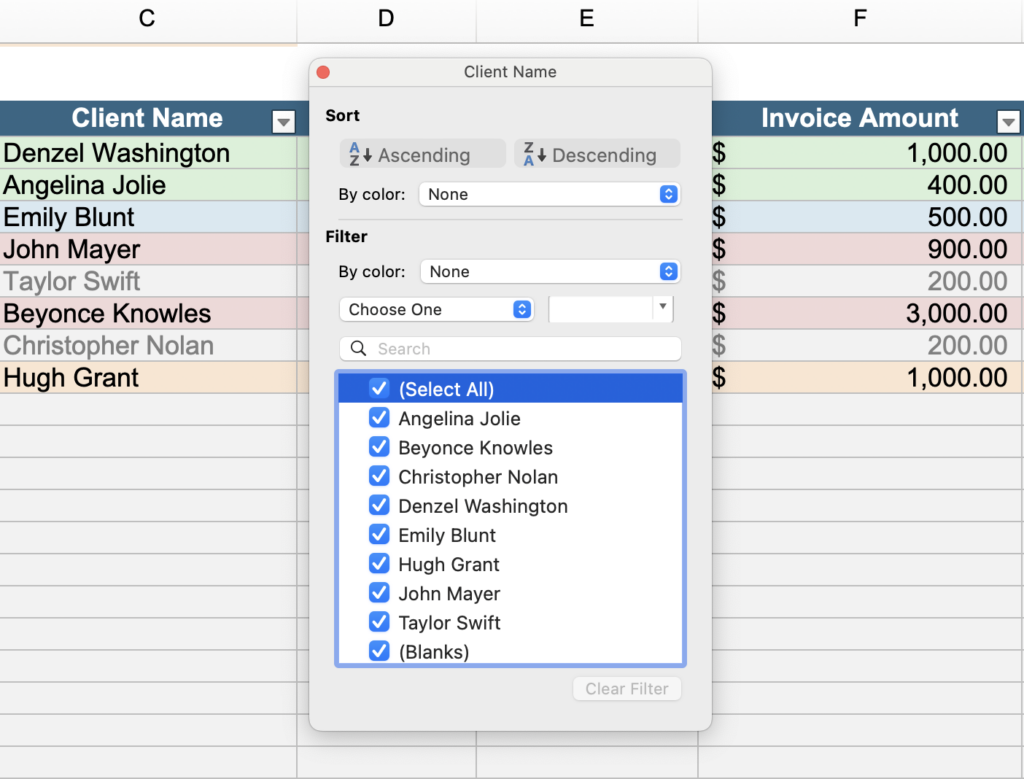
The filter will apply to all your headers automatically. You can then use these filters when looking for specific invoices and transactions later on, as shown in the image below:

Filtering Items in the Spreadsheet Using the Filter Feature
Feel free to check or uncheck items in the list, and Excel will show you what you want to see automatically.
Step 4: Enter The Data
Once you finalize your invoice tracker, you can now start entering your data. Essentially, you will be filling in all the fields, except “Days Overdue” and “Outstanding,” which will populate based on the formulas we entered automatically.
Here’s a sample filled invoice tracker:

Sample Excel invoice tracker with data
Step 5: Track Invoices and Payments
Now you can start tracking customer invoices and payments. Using the filters we’ve added, you can find specific invoices or transactions easily based on invoice number, customer name, or due date. If you click on the dropdown button in the headers, you can filter certain items and show only the items you want to see.

Tracking invoice and payments using the customer filter tool
Frequently Asked Questions (FAQs)
If you want flexibility in terms of data entry and want a simple and affordable solution for tracking invoices and payments, then Excel might be sufficient.
No, you can’t. However, you can use it to track overdue invoices and use the information to send automated email reminders or alerts.
Yes, you can use its built-in features—like formulas, tables, and charts—to generate invoice reports from your invoice tracker.
If you need more than just invoice tracking, you may consider an accounting software like QuickBooks Online. It helps you with other bookkeeping tasks, like bill management, bank reconciliation, sales tax tracking, and reporting. Read our QuickBooks Online review to learn more about its features.
Bottom Line
You’ve just learned how to create an Excel invoice tracker and how to keep track of payments and invoices using the tool.
If you think QuickBooks Online is more suitable for you, then you may want to check out our free QuickBooks Online tutorials to get the most out of the program.


