

This lesson covers how to create an invoice in QuickBooks Online. You’ll have to create an invoice on the spot using the new QuickBooks Online layout, check the invoice in different views before sending it, and then email it directly to your customer. We’ll also show you how to create an invoice from an existing estimate, which involves locating the estimate, converting it to an invoice, and sending it to your customer.
How To Create an Invoice From Scratch in QuickBooks Online
Step 1: Navigate to ‘Invoice’
Click + New at the top of the left menu bar of your QuickBooks Online dashboard and then select Invoice in the first column under Customers, as shown below.
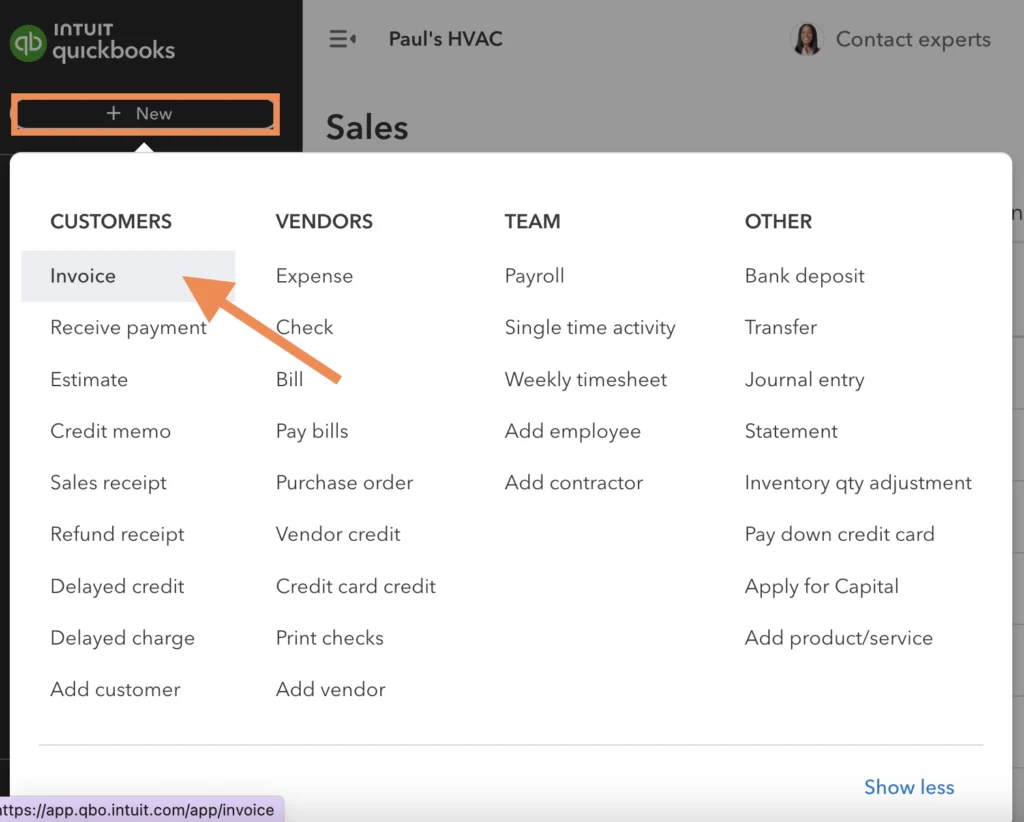
Click on “+ New,” and select “Invoice”
Step 2: Create Your Invoice on the Spot
To create a new QuickBooks Online invoice, ensure your QuickBooks is in the new layout. If not, you should see an Update layout option at the top right. Click on it, and QuickBooks will switch to the new layout.
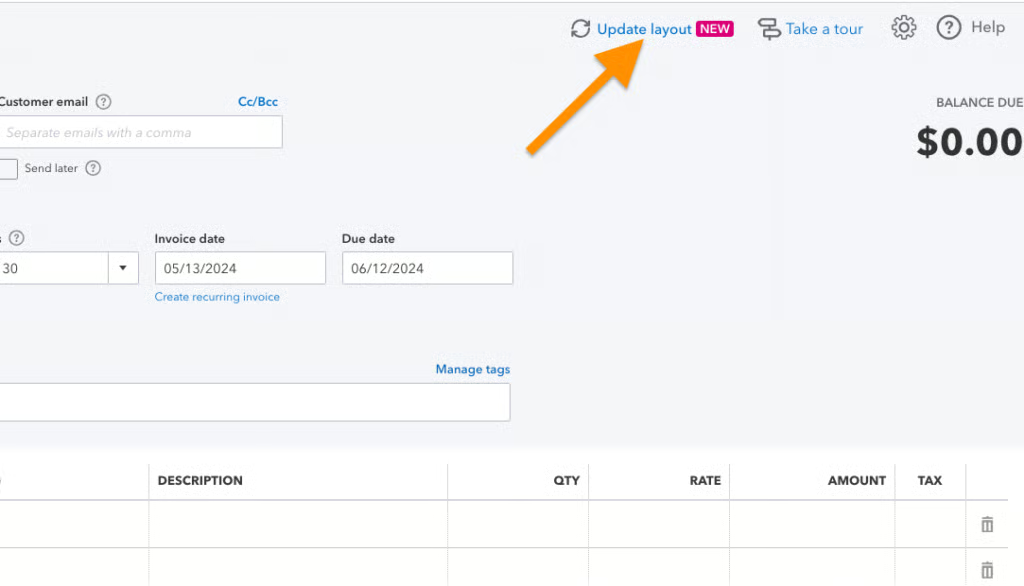
Switching to the new QuickBooks invoicing format
Next, proceed to complete the new invoicing form. In the top half portion, you’ll need to provide the following details:
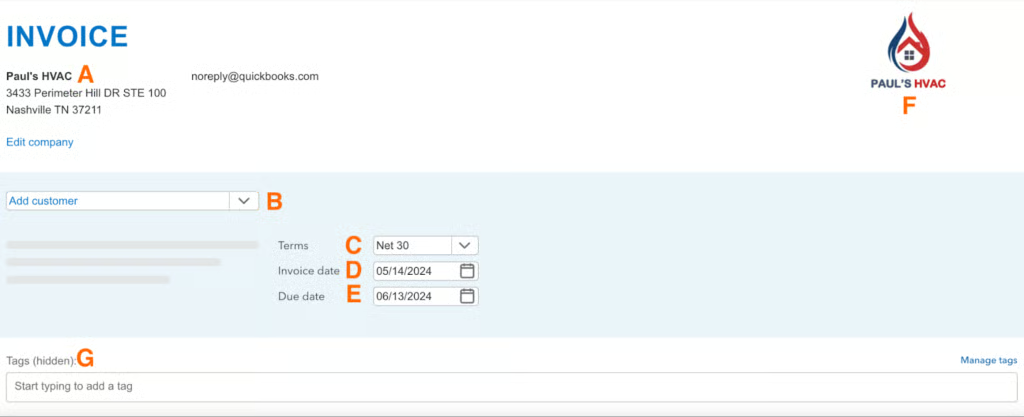
Top half portion of the new QuickBooks invoicing form
- Company information: This should automatically populate based on your company setup, as illustrated in our guide on setting up company information in QuickBooks Online. However, you can make changes on the spot by clicking the Edit company option.
- Customer: Select the customer who will receive the invoice. If this is a new customer, click Add new from the customer drop-down box and provide the necessary customer information, as explained in our tutorial on setting up customers in QuickBooks Online. Once a customer is selected, the fields for email, billing and shipping addresses, terms, and location should populate automatically.
- Terms: This will populate automatically based on the payment terms you’ve specified when recording the customer information. However, you may edit this field manually and select the appropriate payment term from the dropdown list.
- Invoice date: The invoice date should be the date you wish to send this invoice.
- Due date: Select the date by when the invoice should be paid.
- Logo: Click anywhere on the box and upload your logo from your computer—if you haven’t already done so as part of setting up your company information.
- Tags (Optional): Tags are customizable labels or identifiers that you can assign to a transaction, and they are useful for organizing data and tracking transactions.
Scroll down the invoicing form to find additional sections, including:
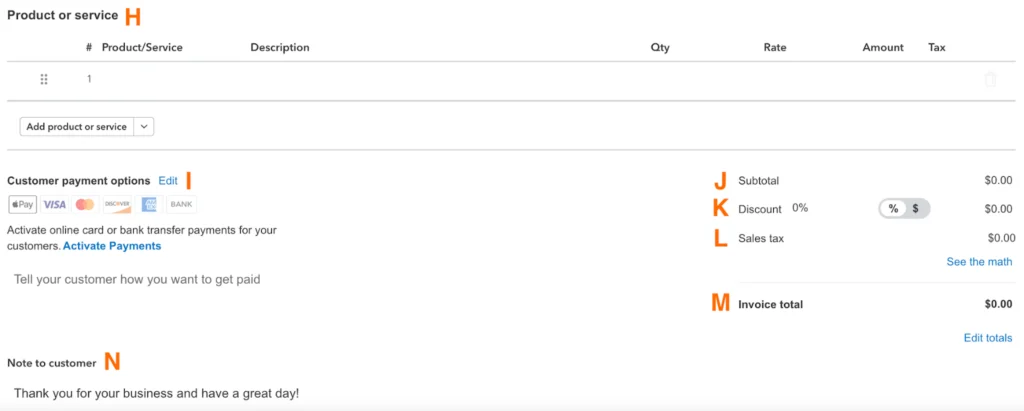
Bottom half portion of the new QuickBooks invoicing form
- Product/Service: Select the product or service that you provided from your list of products and services. If this is a new product or service, choose Add new and provide all the necessary information, as illustrated in our lesson on setting up the products and services list in QuickBooks Online. Once a product or service has been selected, the fields for description, rate, tax, and class should populate automatically. You may also edit these details on the fly if needed.
- Customer payment options: This is where you can specify how you want your customer to pay the invoice.
- Subtotals: This shows the amount of all the items or services before any discounts or taxes are applied.
- Discount: You can apply a discount to the invoice total, if applicable.
- Sales tax: This field displays the amount of sales tax applied to the invoice, if applicable.
- Invoice total: Here, you’ll see the total amount due on the invoice after any discounts and sales taxes are applied.
- Note to customer: You can include a personalized note (e.g., a thank you message) to your customer.
See Your Invoice in Three Different Views
While creating your QuickBooks Online invoice, you can review it in three different views. Simply click on the respective view option next to Edit at the top of the invoicing form.
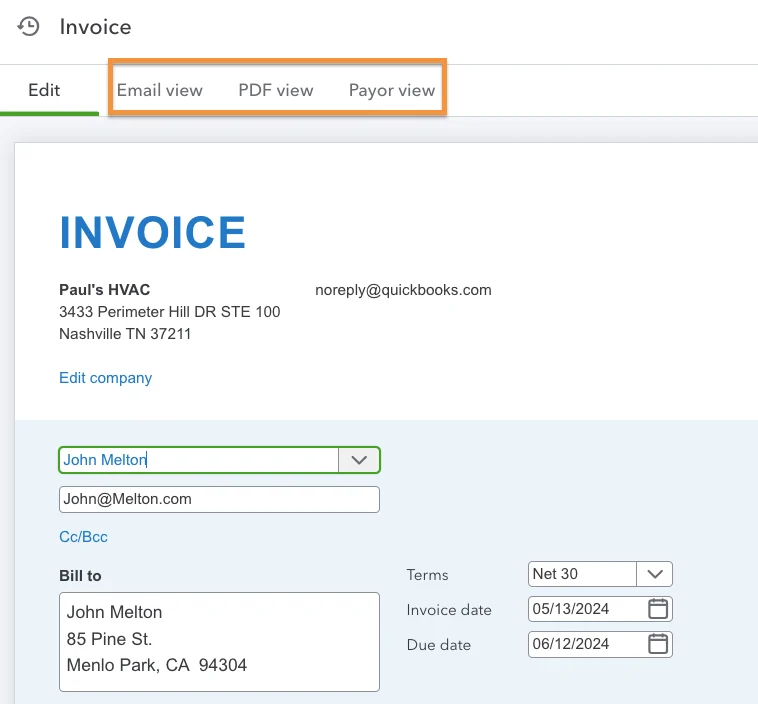
Seeing your invoice in different views
This is what the three different views look like:
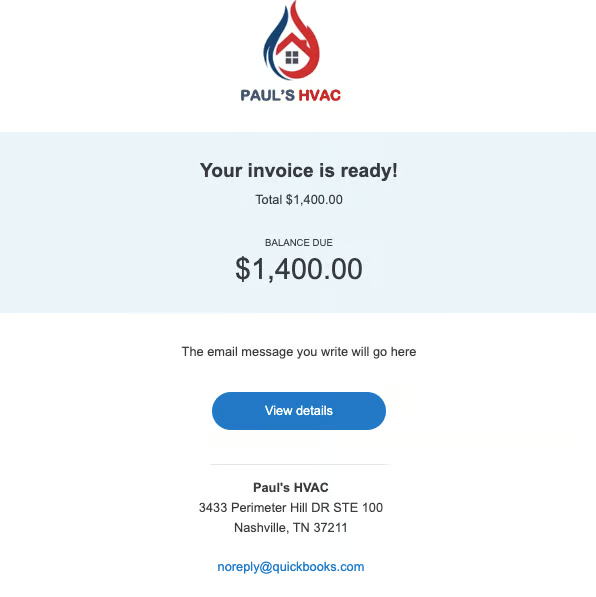
Email view: This is what your customer sees when you send the invoice to your customer via email. Sample email view of an invoice 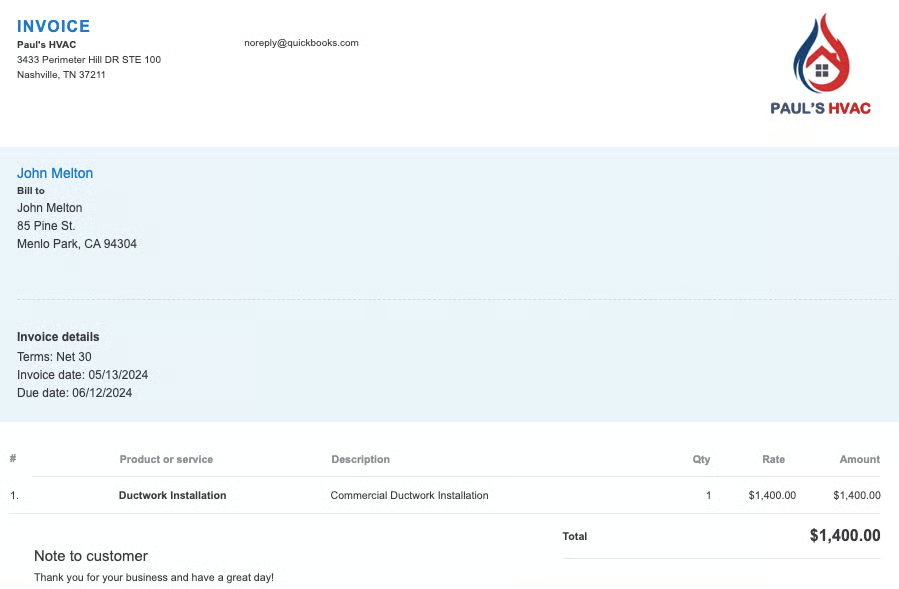
PDF view: This is the view of the invoice when you send it in a PDF format. Sample PDF view of an invoice 
Payor view: This is what the recipient sees when they are about to pay the invoice. Sample payor view of an invoice


Step 3: Save and Send Your Invoice
Once you’re satisfied with your invoice, you can send it right away to your customer by clicking the green Review and send button at the bottom of the form.
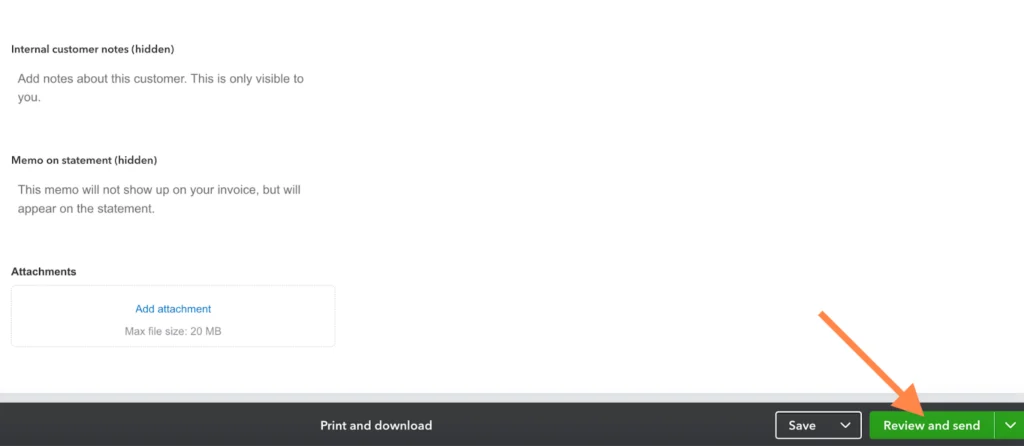
Preparing to send a QuickBooks Online invoice to your customer
If you wish to send it at a later time, you can click Save. If you need to print and download the invoice, click Print and download.
How To Convert an Estimate to an Invoice in QuickBooks Online
From the left menu bar, hover over Sales, then click Estimates, as shown below. The old version of QuickBooks didn’t have the Estimates drop-down menu, so you would need to navigate to Customers instead.
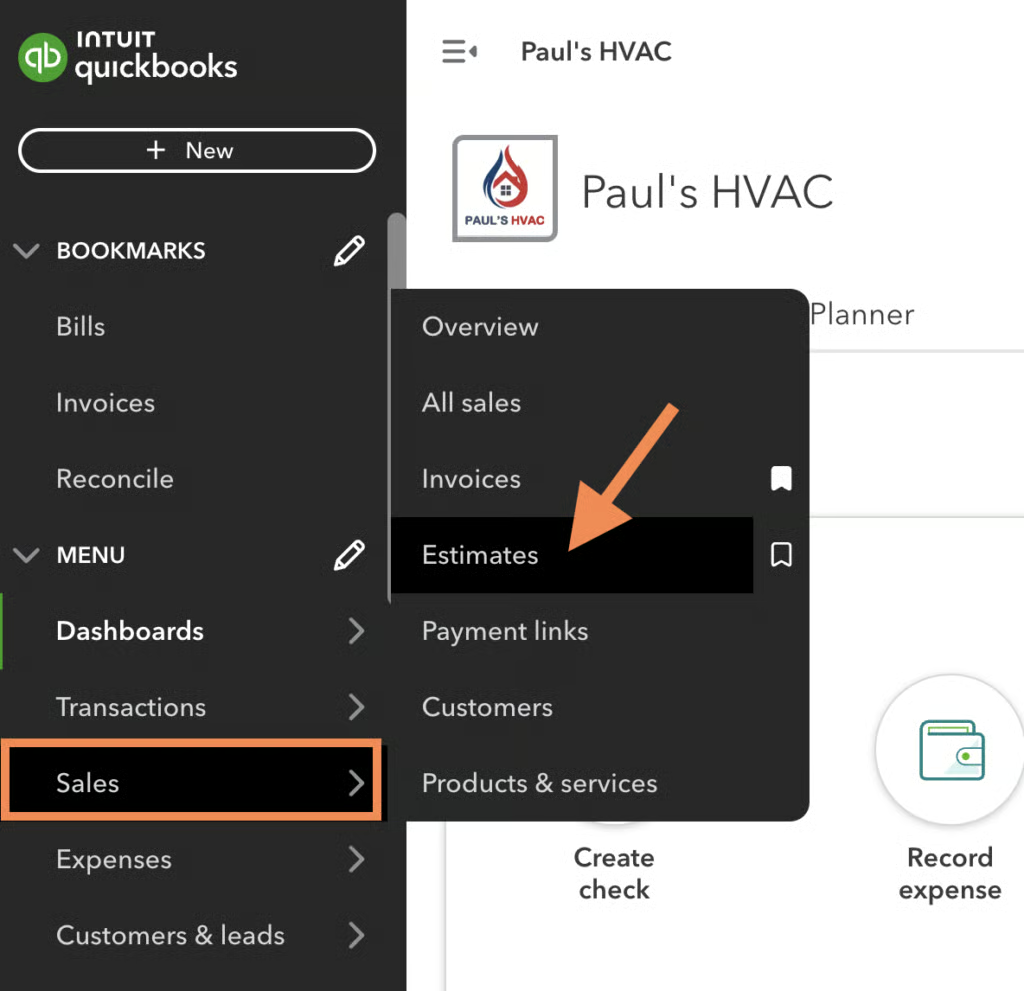
Navigate to Estimates in QuickBooks Online
From the Estimates tab, you’ll find a list of all your outstanding estimates. If you wish to see the content of your estimate, click anywhere on the estimate entry line. A new pop-up window will appear, displaying essential information about your estimate, including the amount, transaction date, and estimate activities.
If you don’t have an existing estimate and wish to create one, you can head to our tutorial on creating quotes, bids, and estimates in QuickBooks Online.
Click on Create invoice on the far right side of the estimate entry, as shown below. QuickBooks will then take you to the invoicing form where you can make the necessary adjustments before saving or sending the invoice to your customer.
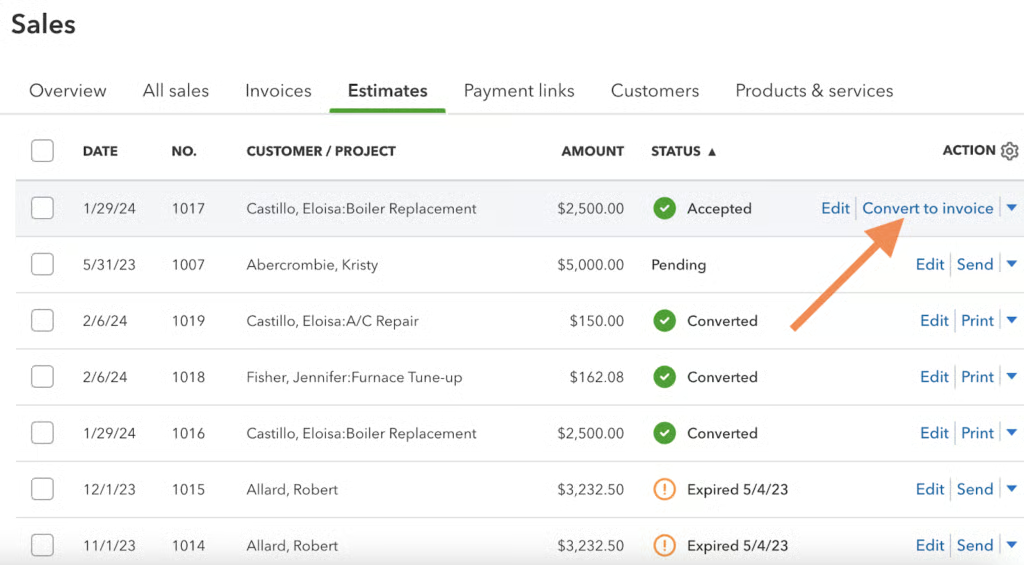
Converting an estimate to an invoice in QuickBooks Online
Once you provide all the required information, continue as you did in Step 3 of creating an invoice from scratch.
Benefits of QuickBooks Invoicing
- Create and send customized invoices easily: QuickBooks Online makes it easy to create and send invoices to your clients. The creation process is simple, and you can customize your invoices to make them as professional-looking and unique as possible. You can choose to upload your logo, change the font color and style, and add a personalized message.
- Track invoices and payments: QuickBooks lets you track all your invoices and payments made by your customers. When you create an invoice in QuickBooks, your financial statements reflect the income from the sale and the receivable owed to you from the customer. QuickBooks Online will track your accounts receivable and provide tools to help collect payment from your customers, including built-in payment links and automatic reminder emails.
With these benefits of QuickBooks Online invoicing, we awarded QuickBooks the leader in our evaluations of the
and
top small business accounting software
.
Frequently Asked Questions (FAQs)
You can create an invoice in QuickBooks in two ways: from scratch or from an existing estimate.
No, as all QuickBooks accounts will eventually be updated to the new invoice layout.
No, and you have to purchase a subscription. All QuickBooks Online plans, which run from $30 to $200 per month, allow you to create and send unlimited invoices. Our QuickBooks Online plans comparison can help you decide which fits your invoicing needs.
Wrap Up
Congratulations on learning how to create an invoice in QuickBooks Online. You can now create invoices from scratch or by converting accepted invoices. The next tutorial is on how to receive payments in QuickBooks Online.