


Expensify is a cloud-based expense management application that tracks expenses and allows employees to submit them for reimbursement. In our Expensify review, we tackle its features in expense tracking and reporting, expense policies, and approvals. It also has Expensify Cards, which enables you to issue prepaid cards to employees.
It offers a free plan for individuals, while pricing for businesses becomes free if more than 50% of total business expenses are on Expensify Cards. Otherwise, you’ll have to pay $20 or $36 per user, per month. Those who left positive Expensify reviews placed emphasis on its capability to streamline the expense workflow.
At Fit Small Business (FSB), we are committed to delivering thorough and dependable software reviews. In adherence to the FSB editorial policy, we seize every opportunity to try the accounting practice software we review firsthand, allowing us to test how the features work in real-world scenarios. This approach allows us to customize our reviews and provide more relevant insights and recommendations tailored to the unique needs of your accounting firm.
| Pricing & Scalability | Expensify offers different kinds of plans based on your needs.
|
|---|---|
| Discounts | 50% off under annual billing |
| Free Trial | 6 weeks |
| Money-back Guarantee | ✕ |
| Standout Features |
|
| Customer Support | Phone, chatbot, email, and knowledge base |
| Average User Reviews | Mostly positive; users find Expensify a time saver in processing expenses. |
- Companies using popular accounting software: Expensify integrates with top accounting software brands, such as QuickBooks, Xero, Oracle, and Sage.
- Companies with a high volume of expense transactions: Being a pre-accounting app, Expensify prepares expenses for the books by documenting receipts and approvals. It also speeds up reimbursements with its direct deposit feature and reduces the work volume of the accounts payable (A/P) clerk in generating reimbursement vouchers for manual reimbursements.
- Companies that want free corporate cards: Expensify offers a bundle for Collect and Control plans, which include the ability to issue unlimited Expensify cards.
- Automated expense reimbursement: Expensify lets you reimburse expenses via direct deposit through an automated clearing house (ACH). All you need to do is set up your bank account within Expensify, and you can send reimbursements automatically to the employees you owe.
Expensify Alternatives & Comparisons
| Monthly pricing | Enroll third-party corporate cards | Card feed transactions | Issue cards to employees | |
|---|---|---|---|---|
 | Starts free | ✓ | ✓ | ✓ |
 | Starts free | ✓ | ✓ | ✕ |
| Visit Zoho Expense | ||||
 | Starts at $8.99 per user | ✓ | ✓ | ✕ |
| Visit Fyle | ||||
| Starts at $38 for one user | ✕ | ✓ | ✕ | |
| Visit QuickBooks Online | ||||
| Best For | Use Cases | |
|---|---|---|
| Affordable expense tracking: Though Expensify boasts a free plan, it has limited features—and users are better off with the paid subscriptions. Meanwhile, Zoho Expense’s paid plans come at a better price point than Expensify’s paid tiers, and Zoho Expense’s features are comparable to Expensify. | Read our Zoho Expense review |
| Real-time Visa and Mastercard feeds: If you want real-time expense tracking, Fyle offers real-time feeds for Visa and Mastercard. This means that expenses charged to these cards appear real time—no waiting for several hours or days. | No review available |
| Those without accounting software: Expense trackers like Expensify can track expenses—but they’re not full accounting solutions. If you still don’t have accounting software, we suggest getting one, and our best recommendation is QuickBooks Online. It has expense tracking that’s already integrated into the accounting system. | Read our QuickBooks Online review |
Expensify Reviews From Users
| Users Like | Users Dislike |
|---|---|
| Clean interface | Problems in generating reports |
| Time saver for processing expenses | Sometimes is incorrect in optical character recognition (OCR) scans |
| Easy to scan receipts | Issues in uploading receipts |
Those who left feedback praised the platform for having a clean user interface (UI) and mentioned how Expensify helped streamline their processes, and one Expensify review highlights that SmartScans reduced data entry time when recording expenses. We agree that the UI design and overall user experience of the system are outstanding. However, some reviewers said that they found inefficiencies, such as the inability to upload credit card statements. There are also instances where some encountered duplicate entries for receipts.
Overall, Expensify offers a competent expense tracking solution. Its average ratings on user review sites are as follows:
- G2.com[1]: 4.5 out of 5 based on around 5,000 reviews
- GetApp[2]: 4.4 out of 5 based on around 1,000 reviews
Expensify Pricing
4.40 / 5
Expensify offers three plans for businesses. It took a slight dip in the pricing score because the rates per user are expensive. Competitors like Zoho Expense can offer the same set of features at a lower price point.
| Free | Collect | Control | |
|---|---|---|---|
| Monthly Price (Billed Annually) | $0 | $10 per user | $18 per user |
| Monthly Price (Billed Monthly) | $0 | $20 per user | $36 per user |
| Number of SmartScans | 25 per month | Unlimited | Unlimited |
| Number of Receipt Uploads | Unlimited | Unlimited | Unlimited |
| Expensify Cards | Unlimited | Unlimited | Unlimited |
| Third-party Corporate Cards | ✕ | ✓ | ✓ |
| Accounting Sync | ✕ | ✓ | ✓ |
| Smart Limits | ✕ | ✓ | ✓ |
| Expense Rules & Policies | ✕ | ✕ | ✓ |
| Multiple Approvers | ✕ | ✕ | ✓ |
Expensify Features
Below, we look at Expensify’s features, specifically in expense tracking and card features. These are the two major criteria in our rubric.
Expense Tracking Features
4.40 / 5
Expensify’s core feature is expense management—nothing more, nothing less. Its score in expense tracking is commendable but most of the great features are in the Control plan. We believe that not all small businesses can afford this plan.
Expensify focuses on expense recording, tracking, reporting, and reimbursement. If you maintain books and accounts for your business, you can integrate Expensify with your accounting software.
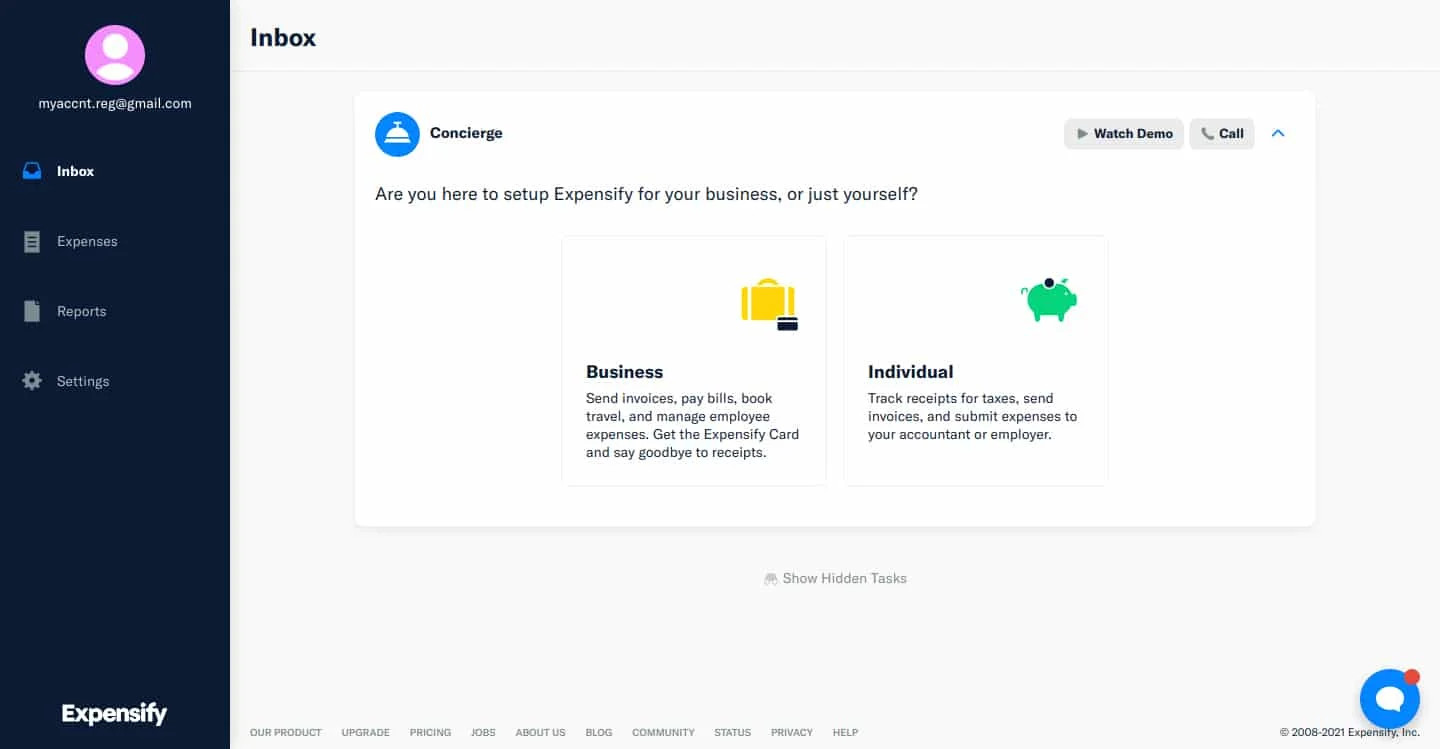
After logging in, the software will prompt you to set up your account. Expensify’s concierge will guide you during your first use of the app. It’ll provide tips and procedures to get you acquainted with its features. Regardless, you can always contact customer support by clicking the blue message bubble at the bottom-right corner of the screen.
Before you begin utilizing the app, it’s best to set up your expense policies. Expensify lets you set standard rates and quantities.
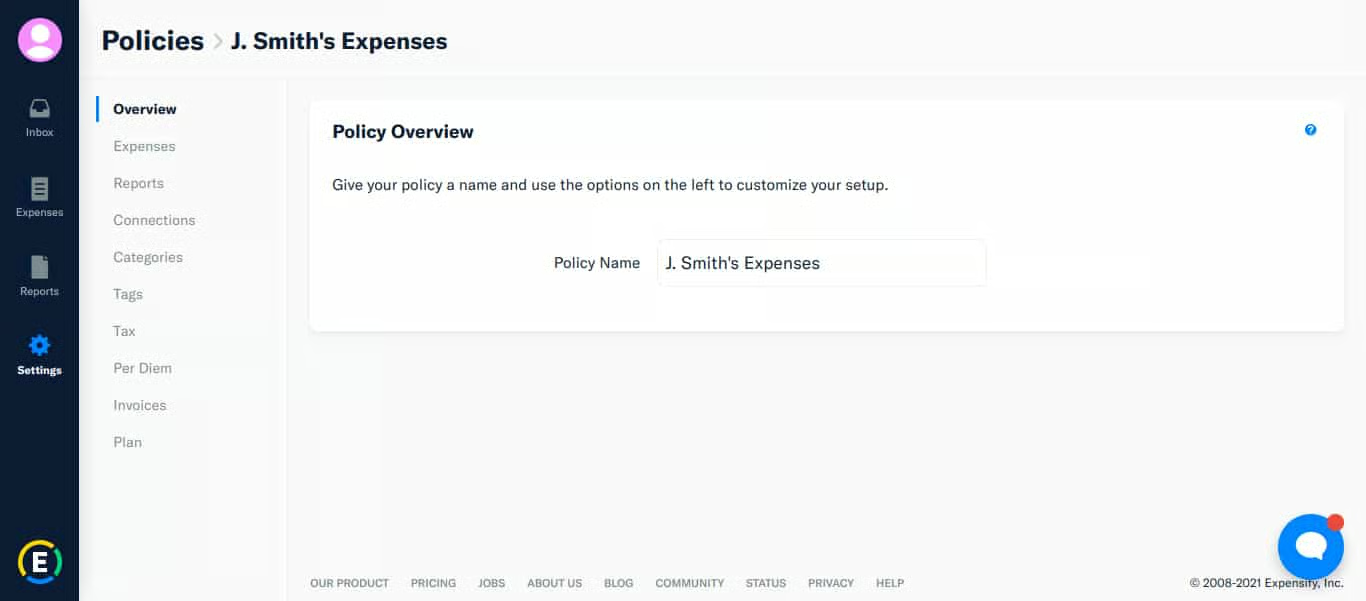
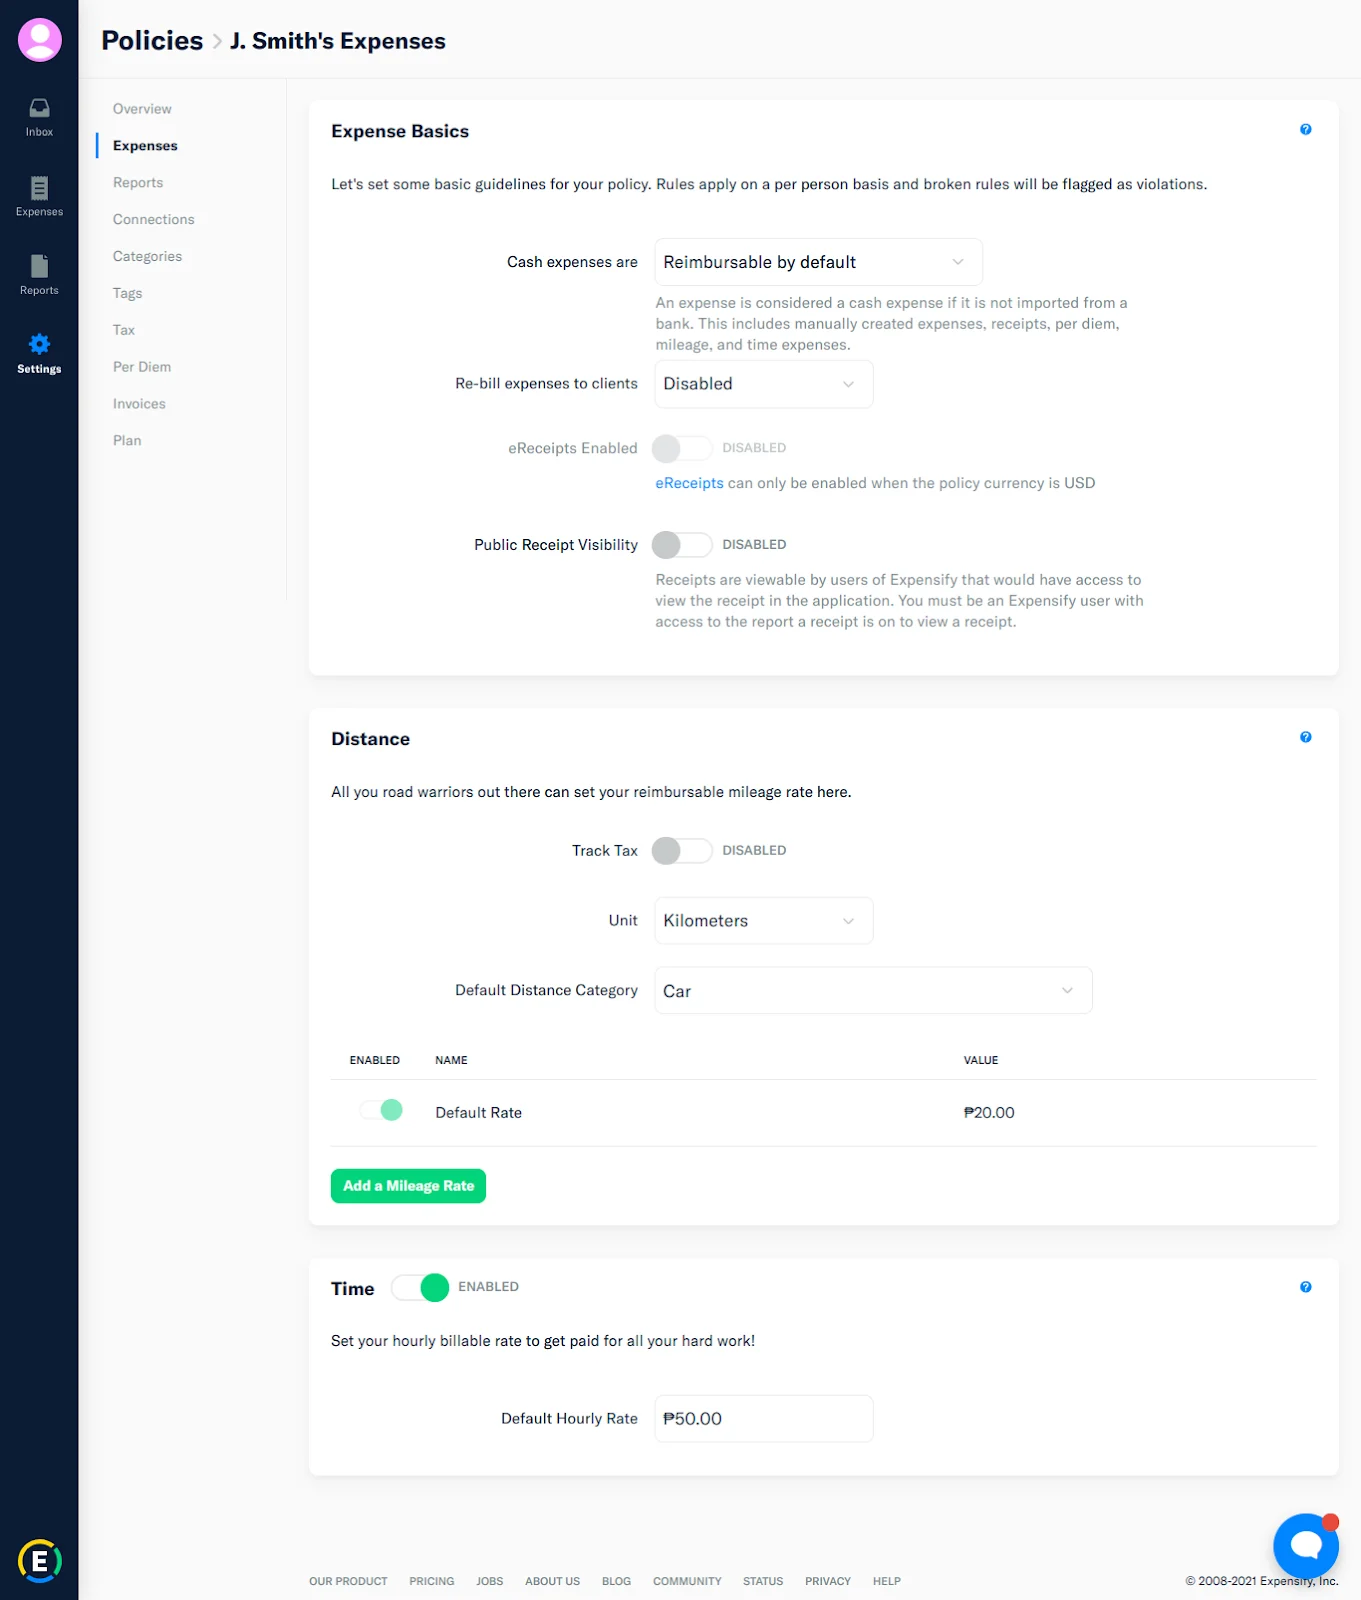
The Expense Policies screen will instruct Expensify on how to treat your transactions. You can set cash expenses as reimbursable or nonreimbursable by default. You can enable tax tracking for mileage, specify the unit of measure, and set mileage rates. Expensify has its default rate but you can add more rates as you see fit. Aside from mileage, you can also set your billable hourly rate.
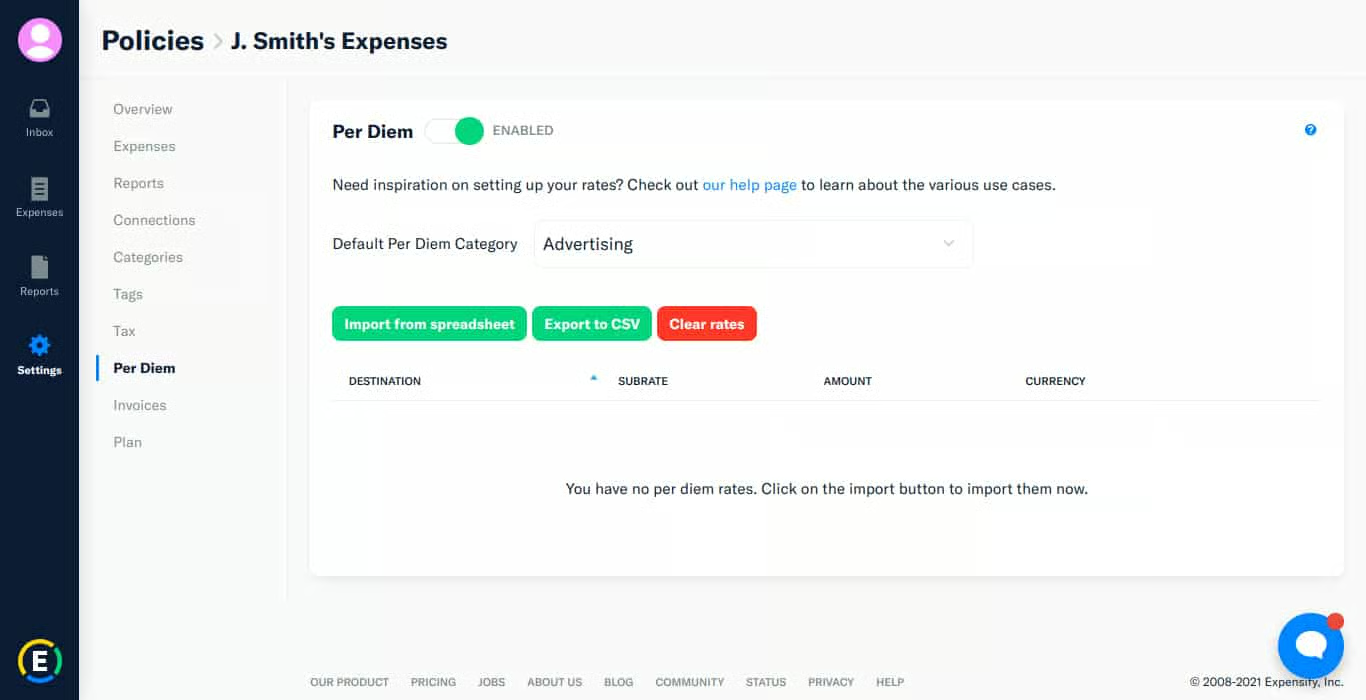
If your company allows per diem for employees, Expensify can automate it based on your per diem rates. You can import your rates from a spreadsheet, and Expensify will apply them to your future transactions. It also lets you set the per diem on a default category for easier pooling of per diem expenses.
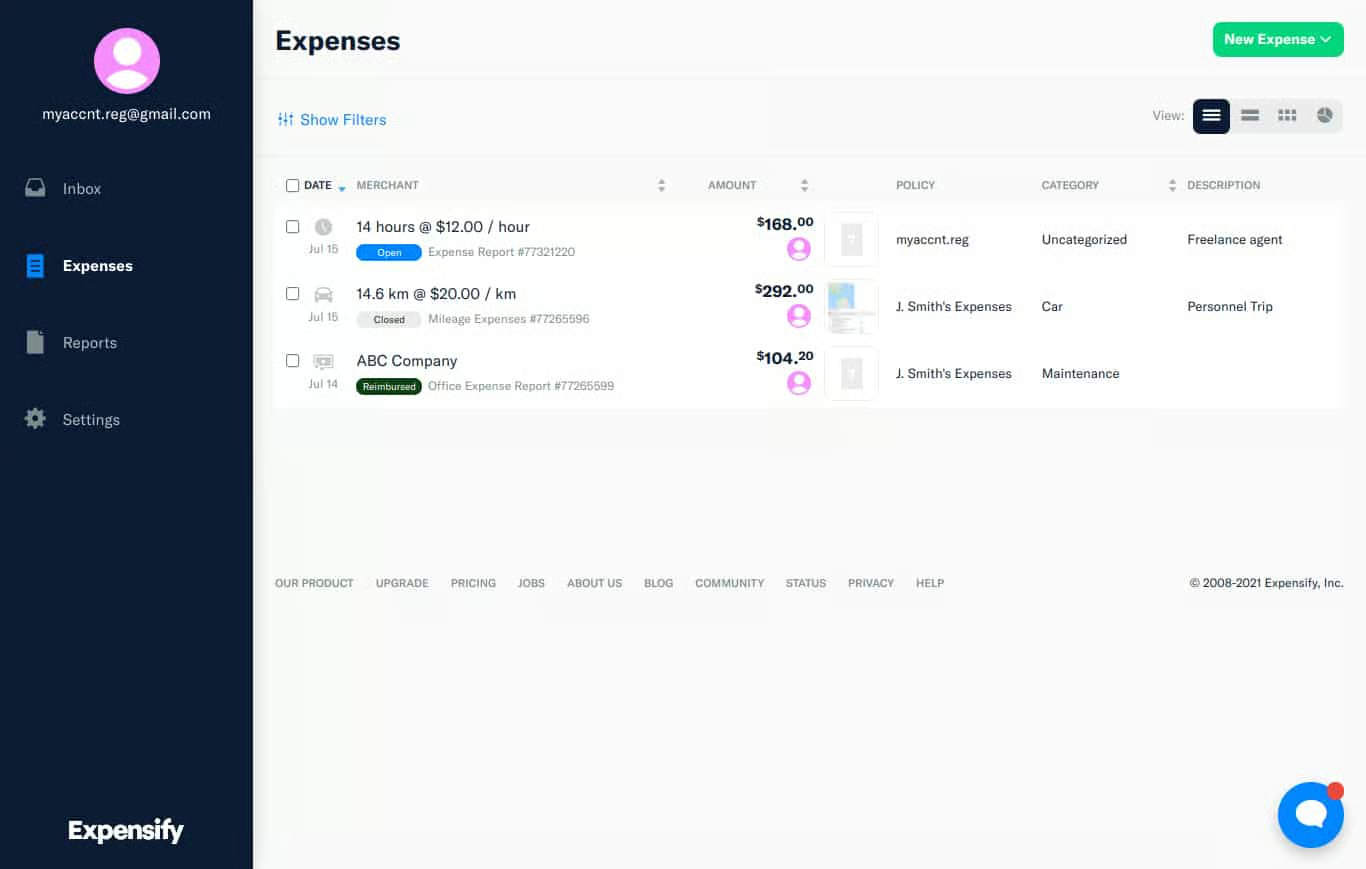
If you click Expenses in the left menu bar, it’ll bring you to the Expense tab. This will show you all expenses encoded in the system. Each expense is marked depending on its status:
- Unreported (white): Expense hasn’t yet been added to any report
- Open (light blue): Expense has been recorded and added to a report
- Processing (dark blue): Report has been submitted but not yet approved
- Approved (light green): Report has been approved but not yet reimbursed
- Closed (gray): Report has been approved but not reimbursed
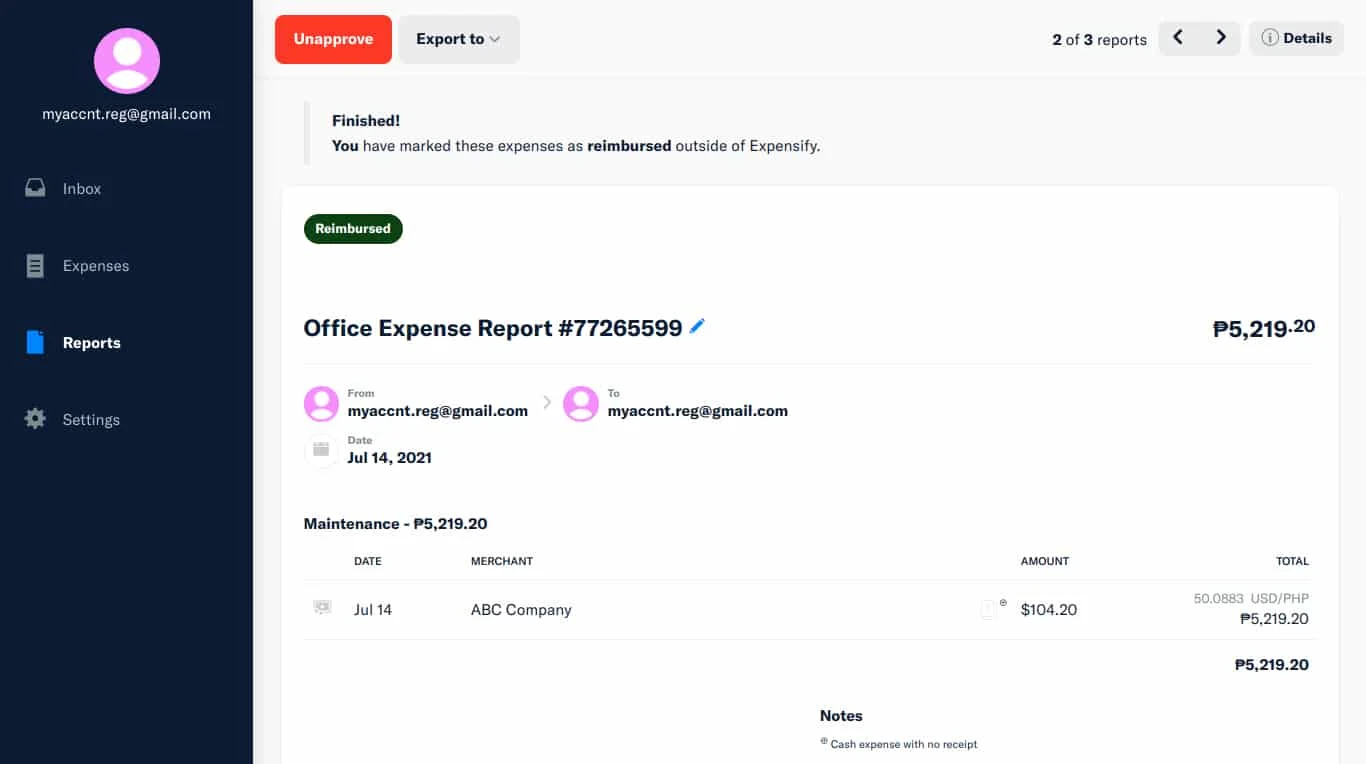
- Reimbursed (dark green): Expenses in an approved report have been reimbursed
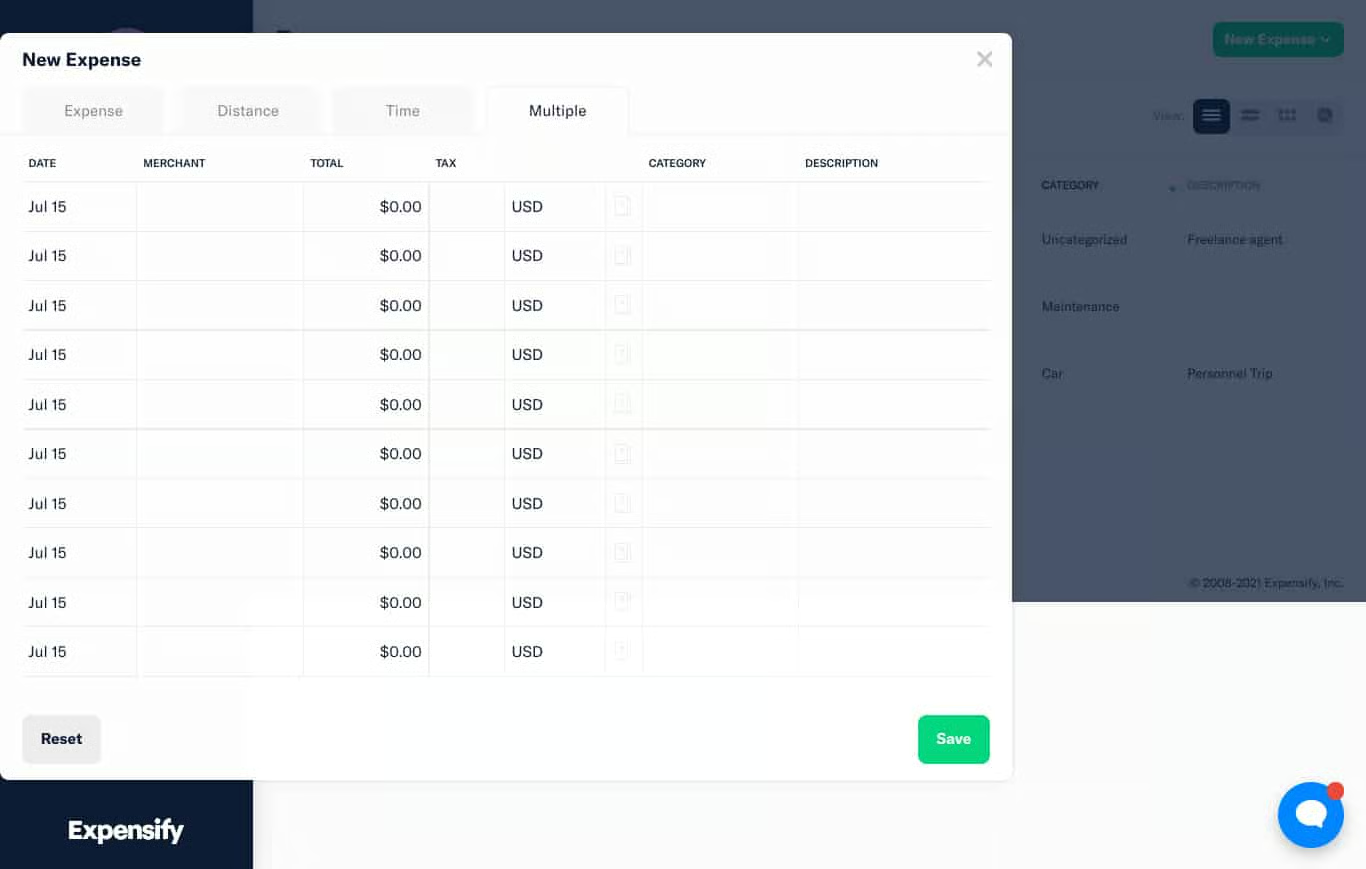
There are two ways to encode an expense: manually or via SmartScan. If you have to enter several expenses, you can add multiple entries in a single window as shown in the image below.
When encoding expenses manually, you can enter the merchant, applicable tax, amount paid, expense category, attendees, and a brief description of the expense. You can also add a PDF copy of the receipt or its image.
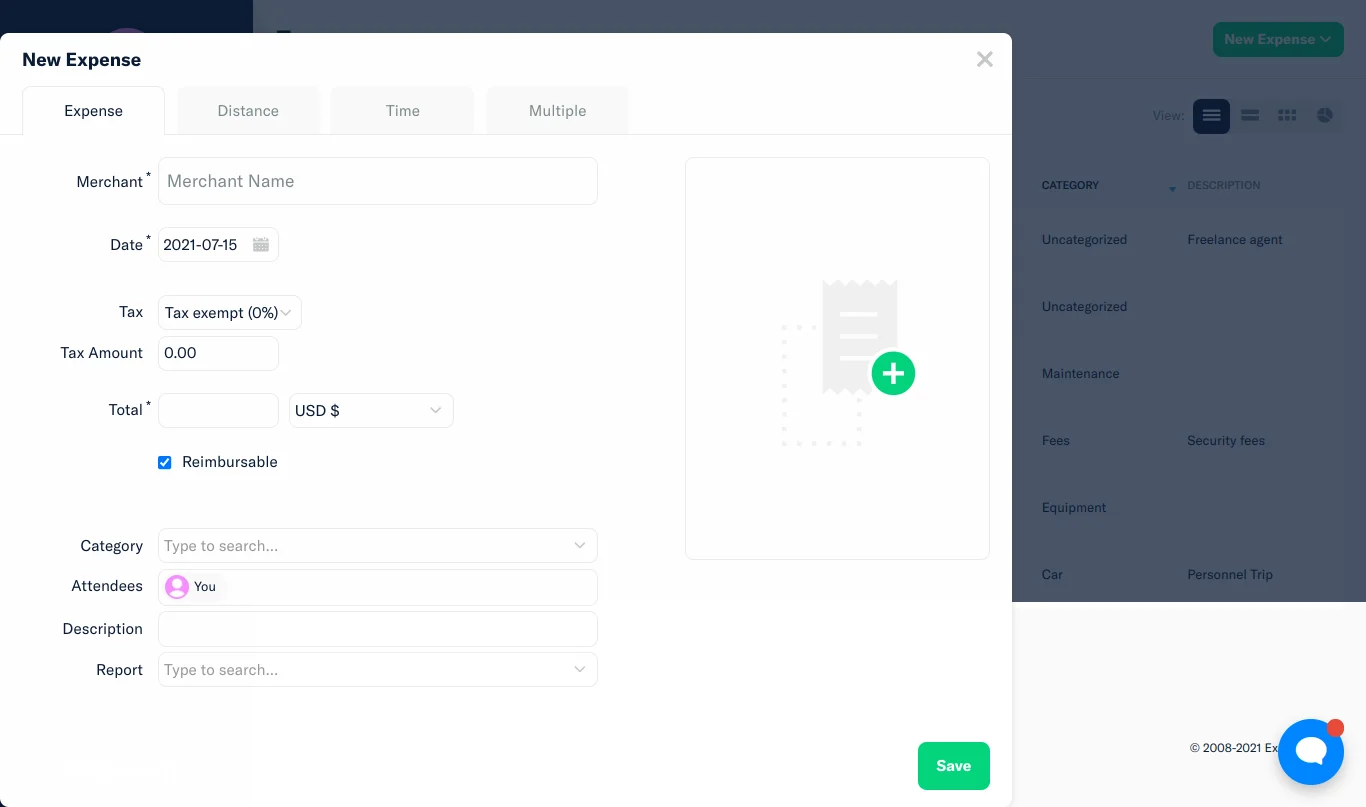
Once everything is laid out, you can add expenses to a new or existing employee’s expense report. Click the drop-down menu beside the Report tab, and it’ll show all your reports. In case there are no existing reports, Expensify can auto-generate a report for you. Once you click Save, the expense’s status will be Open.
Expensify can record mileage expenses in two ways: entering miles manually or via map. You can use your odometer to track your miles and input them into Expensify. The app will compute your mileage cost automatically based on the mileage policy and applicable taxes. Alternatively, creating mileage expenses via map allows you to enter your starting point and destination, and Expensify will compute the number of miles automatically.
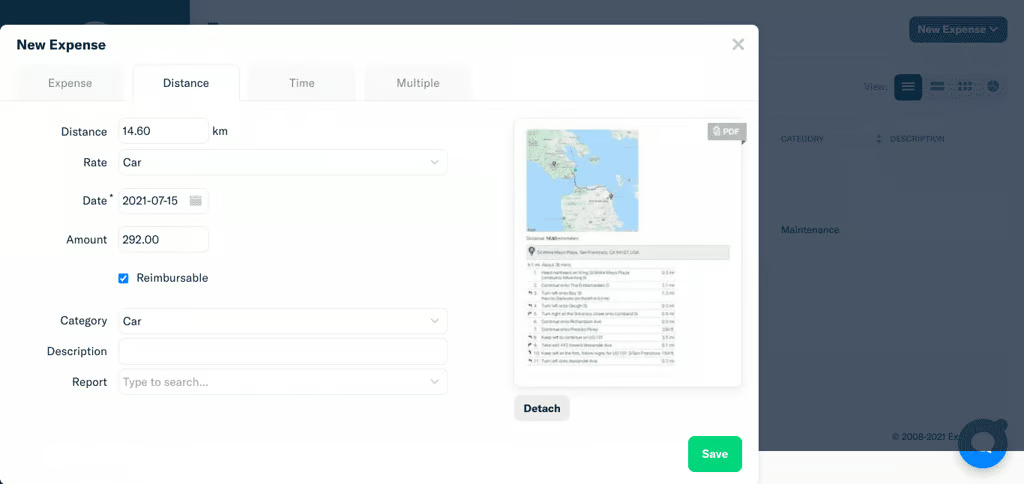
Entering Mileage Expenses 
Entering Mileage Expense Using the Map


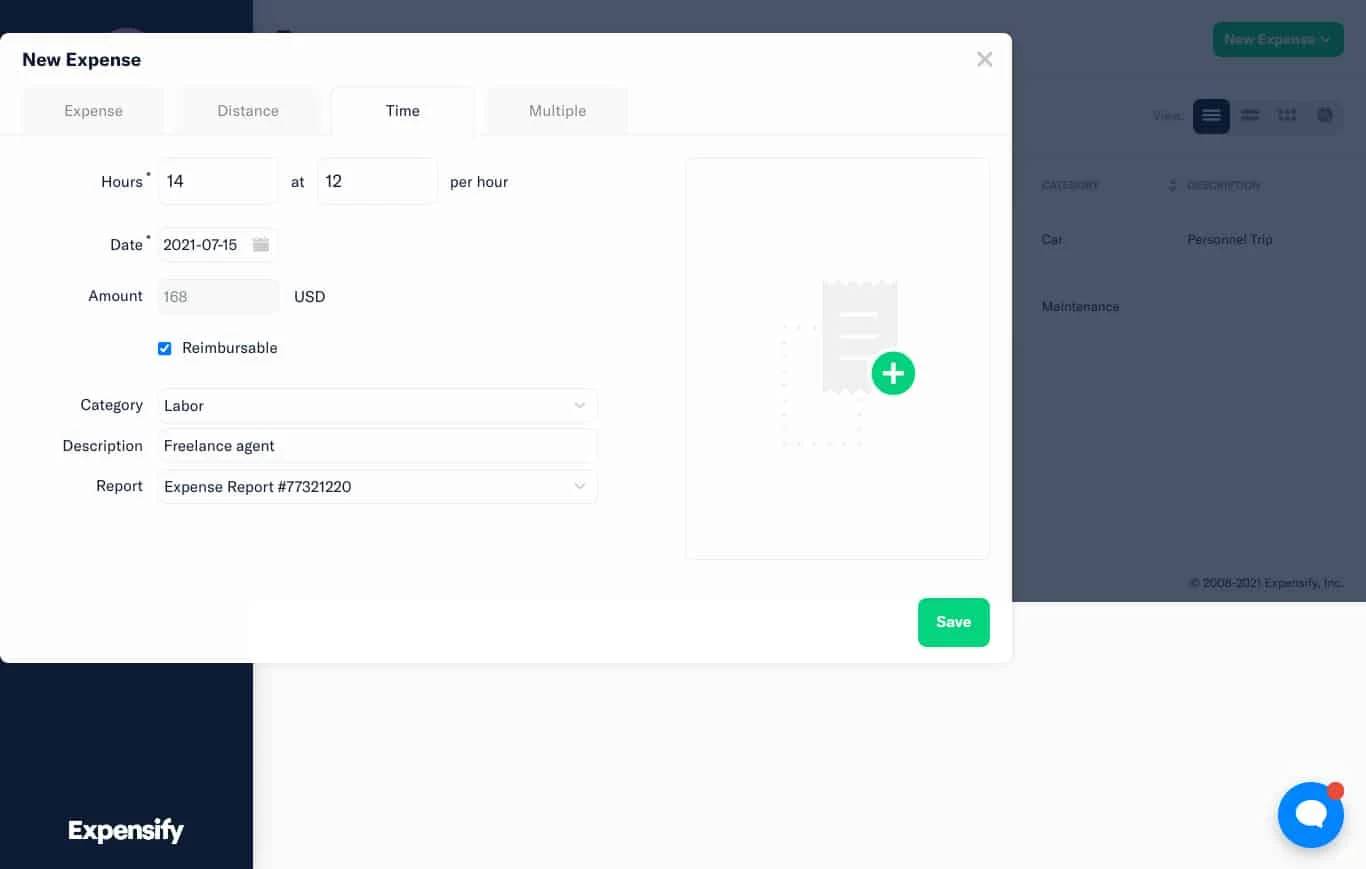
Expenses incurred based on billable hours are also accepted by the system. You can add the number of hours billed, and Expensify will do the rest.
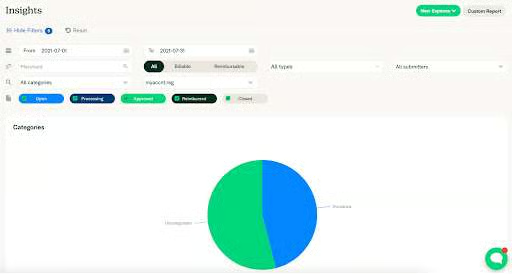
If you want to see a brief snapshot of your expenses, the Expense screen provides essential analytic tools like charts and graphs to visualize your transactions. You can also filter specific expenses based on status to assess your efficiency in approving expenses.
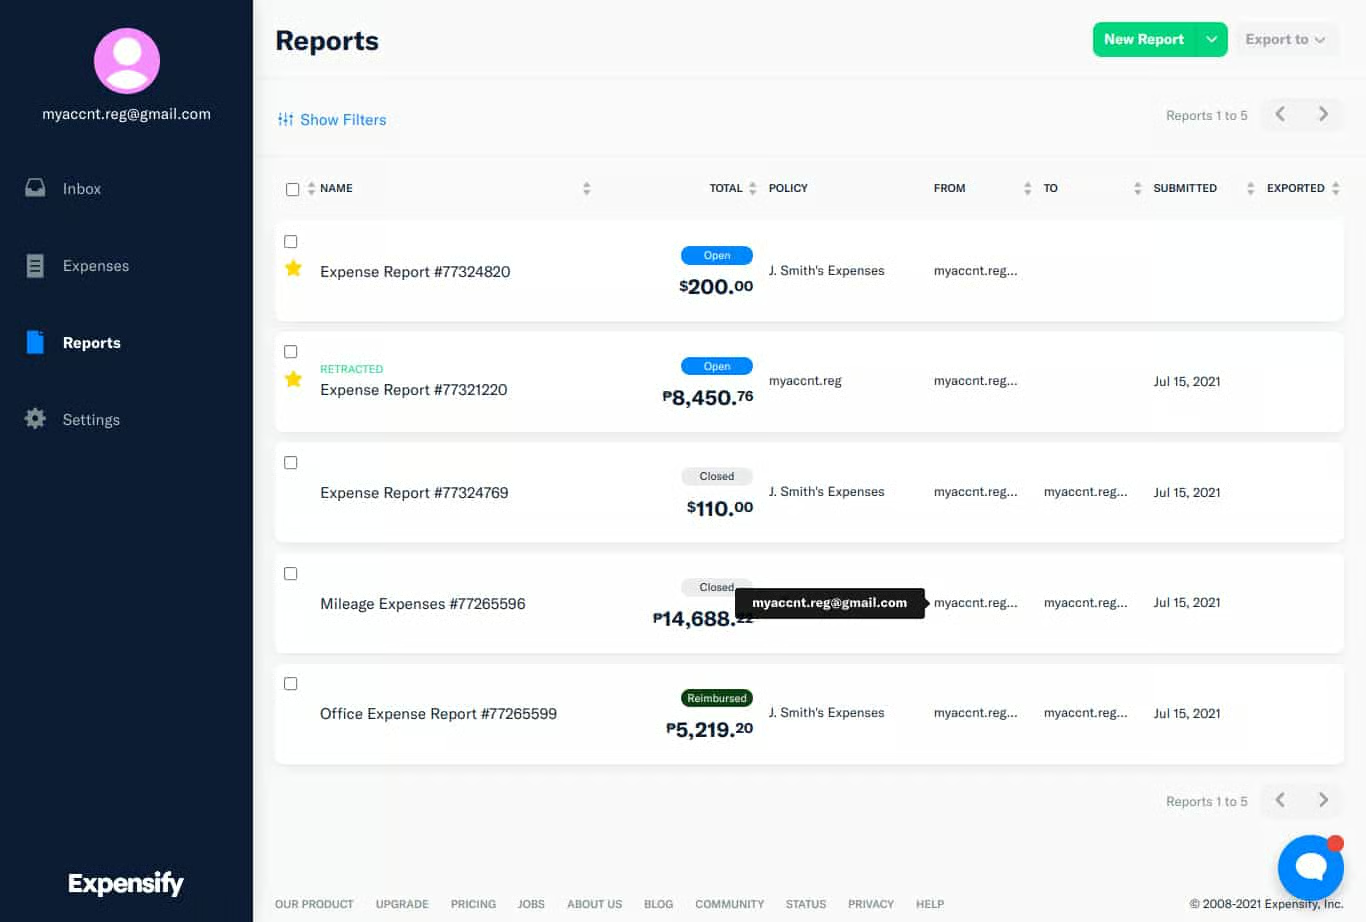
All expenses are pooled into a report that is then submitted to the approver. If you click Reports, it’ll show you all reports. The approver will review the report and approve or reject some of the items enumerated. Only approved items will move forward in the process.
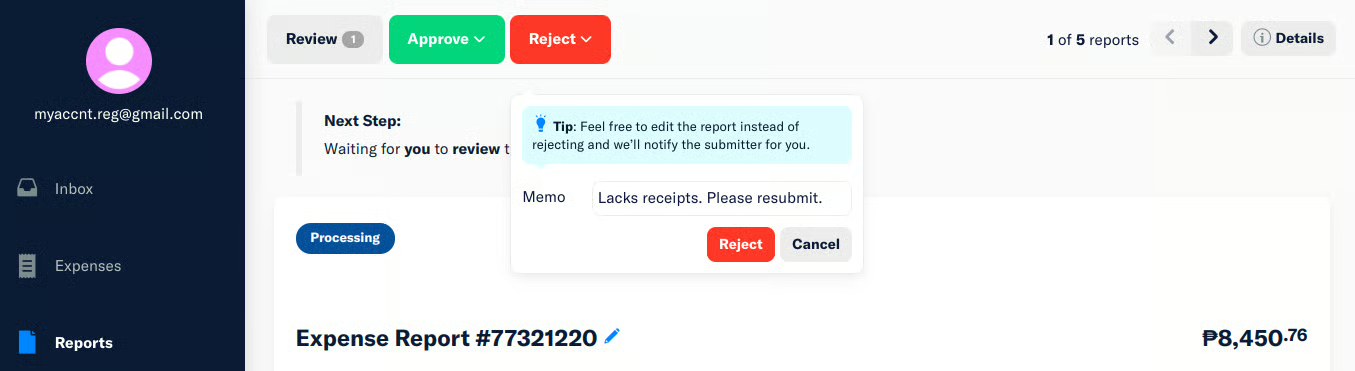
If the approver rejects a report, it goes back to the submitter and is marked as “Retracted.” All expenses in a rejected report will become Open again. However, after making the necessary changes, the submitter can resubmit it for approval.
After approval, expenses are now ready for reimbursement. The system lets you reimburse via direct deposit or manual reimbursement.
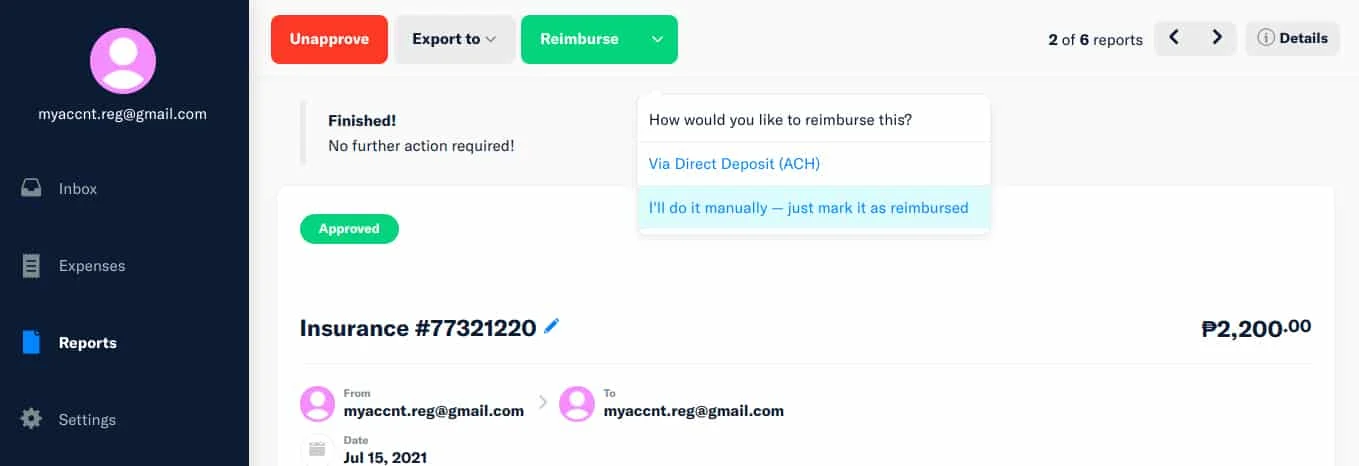
For direct deposit, you have to set up your bank account within Expensify, and it’ll be reimbursed via an automated clearing house (ACH). Manual reimbursements let you transfer cash physically while Expensify only marks the report as Reimbursed.
Corporate Card Programs
3.90 / 5
One good thing about Expensify is it can issue Expensify Cards and allows them to integrate third-party corporate cards. However, the catch is that you can get Expensify plans for free if 50% of company expenses are on Expensify Cards. If you don’t meet these requirements, you’ll have to pay for the regular price of your plan. Expensify’s score in our evaluation dropped because Expensify Cards are exclusively Visa cards, whereas its competitors offer both Visa and Mastercard.
Overall, Expensify’s corporate card system is flexible. You get to integrate and retain your third-party corporate card while also having the ability to issue Expensify cards. However, keep in mind you can get Expensify for free if you mostly use Expensify cards vs third-party cards.
Expensify Ease of Use
4.40 / 5
Expensify’s ease of use is outstanding since it has email, phone, and chat support. It has a knowledge base but it’s not comprehensive, which is one of the reasons why the score dipped slightly. However, Expensify’s chat support called Concierge is excellent. It provides quick instructions and information about the user’s queries and it even sends the answers to the user’s email. Overall, we find Expensify easy to use, given that it has multiple support channels.
How We Evaluated Expensify
Frequently Asked Questions (FAQs)
How much is Expensify?
Expensify is free for individuals. Business plans start at $10 per user, per month, if billed annually.
Is Expensify worth buying?
While Expensify can be expensive compared to competitors, users get free Expensify cards for the whole team. Expensify is worth it if your business wants to give all employees a company card.
Bottom line
Overall, Expensify is the ideal app for businesses needing to process and reimburse expense reports. Its features can help accountants and accounting clerks speed up bookkeeping procedures and correctly book expenses based on Expensify reports. In other words, expenses processed under Expensify will provide more accurate information for bookkeeping than those tracked manually in a spreadsheet. We highly recommend it as a supplementary app to your accounting software. However, it’s not a standalone bookkeeping program.
User review resources: