

Square Appointments is an appointment scheduling platform with integrated point-of-sale (POS), payment processing, and online shopping tools. With Square Appointments, you can manage your business calendar, track customer information, view sales reports, and create invoices from a single, customizable dashboard.
Square Appointments is part of the comprehensive Square small business software platform. With a free baseline subscription and no long-term contracts, Square Appointments is a low-risk way to start managing your appointment-based business. Whether you are a solopreneur or a busy brick-and-mortar, Square Appointments has options to support your business. Visit Square to get started for free.
Step 1: Set Up Your Square Account
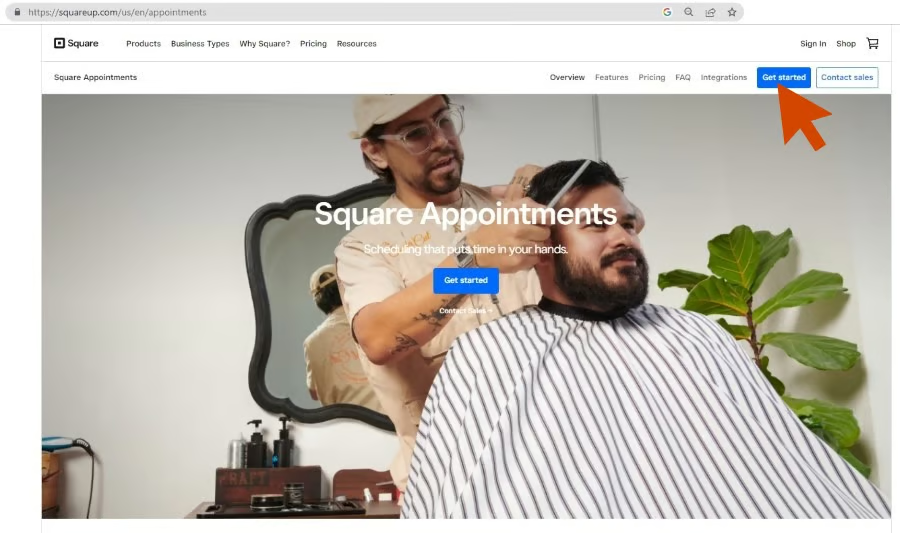
To start with Square Appointments, sign up for your free account. Navigate to the Square Appointments website, and click the “get started” button in the upper right corner.
Square will prompt you to enter your email and create a password. Then, a new screen will request your business name, phone number, local time zone, and business type. Square will also prompt you to confirm your number of locations and staff, though you won’t enter detailed addresses or employee types until later. The system then directs you to choose a Square Appointments plan.
You can choose from three different plans: Free, Plus ($29/month), and Premium ($69/month). Every plan has the base features needed to run a single location—booking tools, an online store, staff management, a corresponding scheduling app, and payment processing.
Both of Square Appointments’ advanced plans include multilocation tracking, advanced staff management tools through Square’s Team Plus, additional customer communication tools and resource management.
While you can’t go wrong with the free plan, you will want to upgrade to one of Square’s paid options if you operate a business with multiple locations, large staff, or appointments that include resources. If you’re unsure about which plan to choose, you can test-drive the Plus or Premium plans free for 30 days.
Once you’ve completed Square’s guided prompts, Square will direct you to your dashboard, your business control center for Square Appointments.
Your initial Square dashboard includes a checklist that prompts you through the rest of the setup process. Settings include:
- Adding hours of operation
- Creating services
- Creating a test appointment
- Creating your online booking site
- Adding booking settings/restraints
- Adding payment details
- Setting up booking reminders/customer communications
The checklist tracks your progress through the setup process. So, if you need to stop mid-setup, you can pick up where you left off when you next log in.
Step 2: Add Services
You can create your bookable services from your Appointments Dashboard by selecting the “Services” tab in your dashboard checklist or on the left-hand side of the dashboard screen and then clicking “Create Service.”
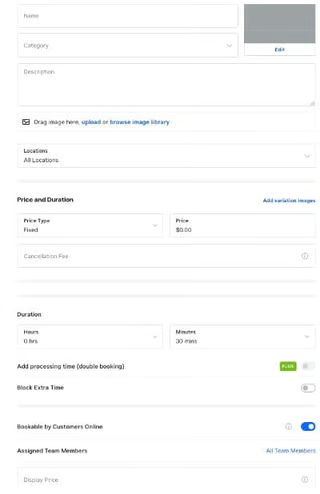
Add services to your Square Appointments account. 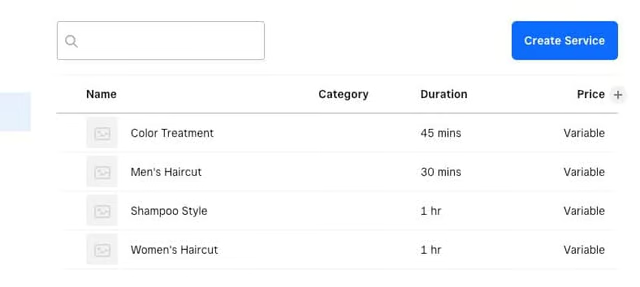
Once you hit Save, the new service will automatically be added to your service library.


Here, you can assign service information, like price, duration, eligible staff members, which locations offer the service, and online bookability. You can add deposit requirements or add a custom cancellation fee for each service. Once you have filled out the service form, simply click Save, and Square will add your new service to your library.
Step 3: Create a Test Appointment
Once you have added some services, Square will prompt you to create a test appointment.
As you fill in the client name field, you will either have to include an existing client from your address book or create a new one that includes contact information. Square requires this information so that it can send appointment reminders, track their activity, and log their information. Additionally, each new contact will automatically save to your account for future use.

Fill out your appointment information on this form.
Once you add your appointment and client information, select “Save” to add it to your calendar. This action will also prompt Square to give you a client notification option. Here, you can input notification preferences and add a custom message.
From there, your appointment will be on your calendar and your clients (in this case, you) will be notified accordingly.
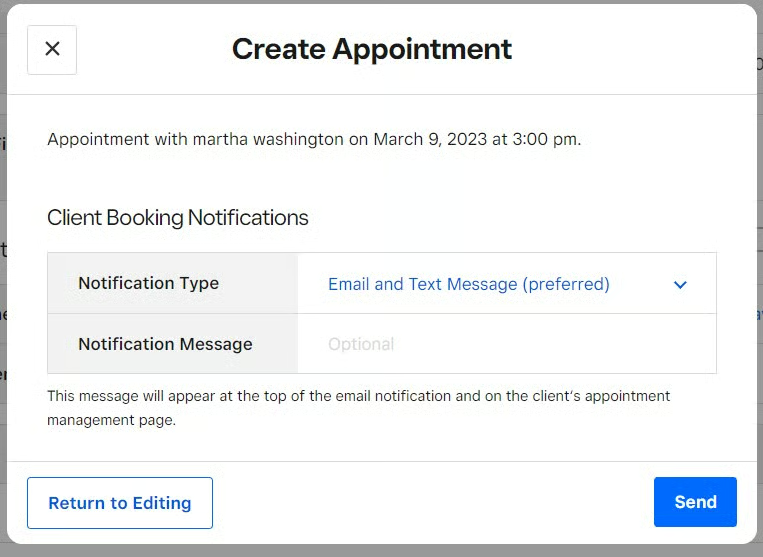
Decide how you want to notify clients.
Step 4: Customize Booking Settings
Before opening your calendar up for bookings, you will want to set your booking settings. Essentially, your calendar and booking settings restrict when customers can book an appointment, where appointments will take place, and how your calendar will appear online.
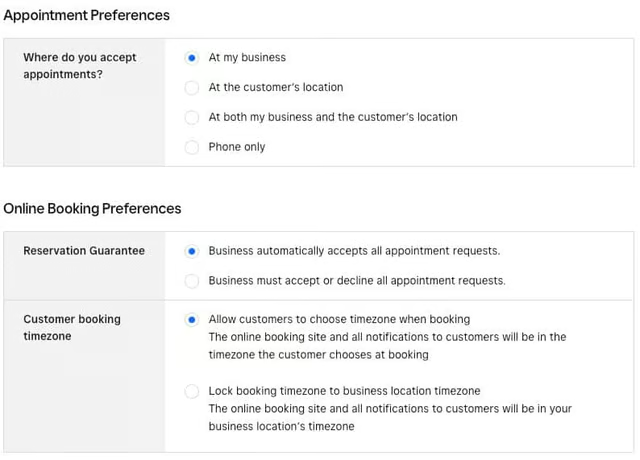
Add calendar and booking settings. 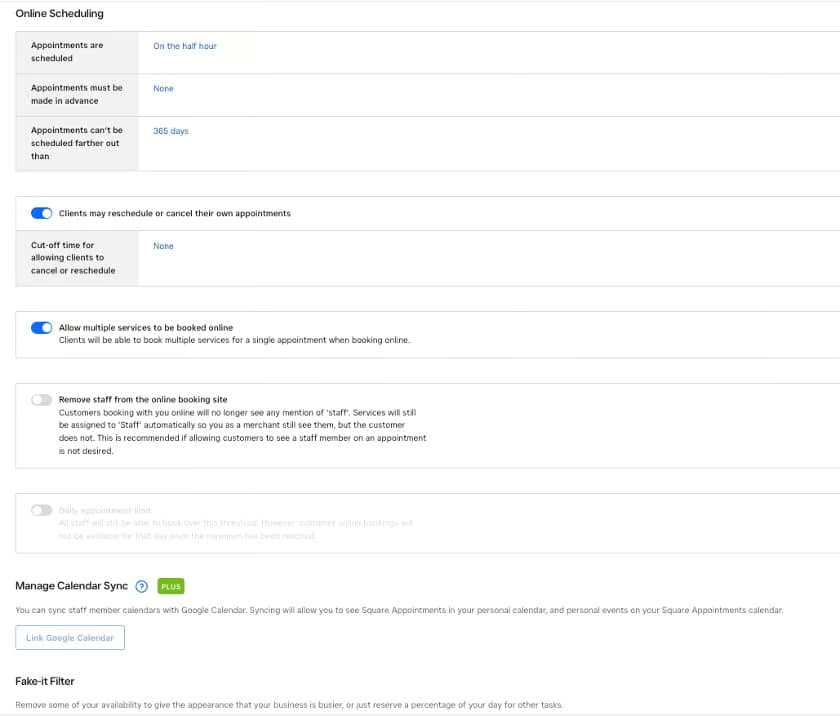
There are lots of different calendar and booking settings that you can customize.


To start, scroll over to the left-hand menu and select “Settings” and then “Calendar and Bookings.” This will take you to a page where you can add settings for your appointment preferences, online booking settings, calendar appearance, online scheduling restrictions, and Google Calendar sync. Once you have those settings to your liking, simply save them, and they will sync with your calendar at any time.
Step 5: Set Up Online Booking
Once you have your account settings ready to go, it’s time to make your appointment options available online so that customers can start booking. In addition to your Square Online site that is included in every Square Appointments account, you can also add booking options to several other channels, including Instagram, your Google listing, and any additional sites you may have. Bookings made on these channels are automatically synced, so your calendar is always up-to-date.
For online booking, you can utilize the following options:
- Square Online: Set up a custom online booking website with Square Online at no extra cost
- Existing website: Embed your appointment calendar to your existing website or add a Square booking widget or a booking button
- Instagram and Google: Add a Square booking button to your Instagram page and Google listing
To sync your online booking options from your Square Appointments dashboard, click the “Online Booking” tab on the left and then click “Channels.” On this page, toggle “Enable online booking,” where you’ll see your booking channel options. From there, simply follow the buttons to the right of the channel names and follow the setup prompts.
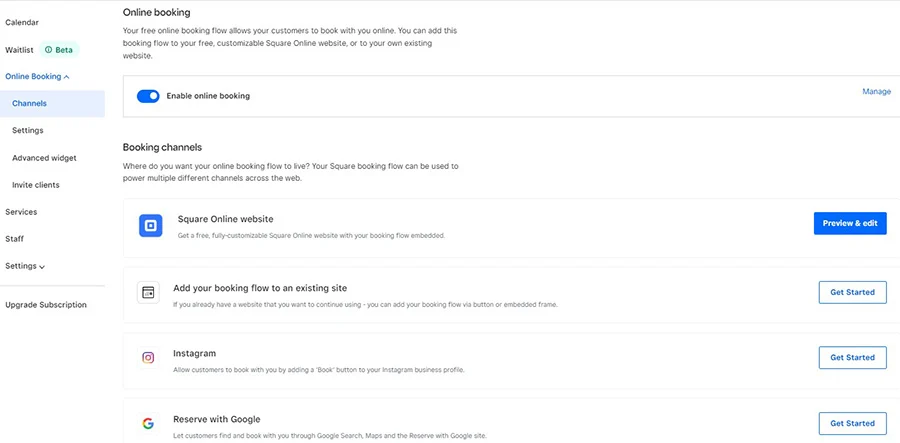
Toggle “Enable online bookings” to see and manage all of your channels.
If you want to use Square’s free website builder to create your booking site, you will want to choose the “Square Online website” option from the Channels menu. If you then select “Preview and edit,” this will lead you to Square Appointments’ free website designer. Here, you can choose from a host of website templates and then add your information and personalize your website. Once you’ve set up your new booking website, click “Publish” to make it public.
Square also includes a free subdomain with your site. However, if you want to connect your URL to an existing domain or create a custom one, you will need to sign up for a paid plan.
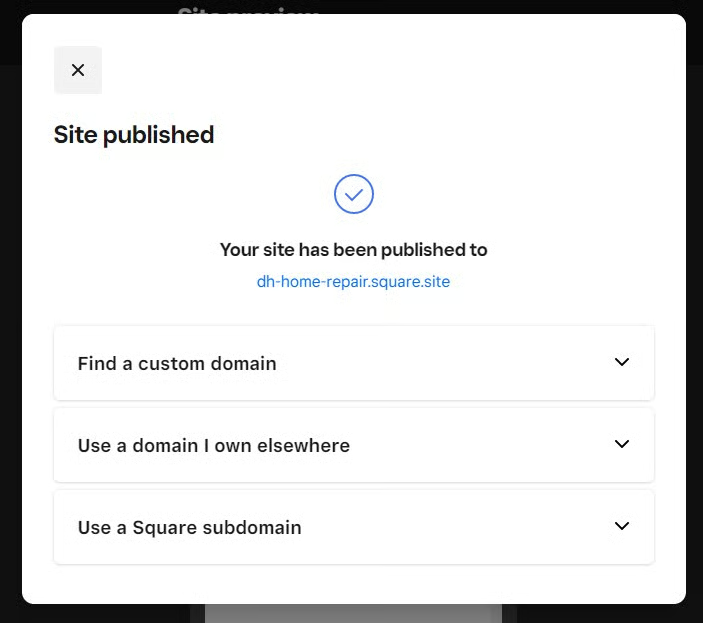
Use a free subdomain or create a custom one with Square’s paid plan options.
If you have an existing website and would prefer to add Square booking there, return to your Channels options page. Here, you’ll click “Get Started” in the “Add your booking flow to an existing site” row. This will take you to a screen where you can either get your Square booking flow to add to your website, add a booking button, or embed the booking flow directly into your site.
You can customize the color of your booking button so that it is in line with your current site’s appearance.
Add Square booking options to your website in a way that works for you.
From there, you simply follow the prompts. Square will take you step-by-step through the process of adding your booking flow or button to your website with ease. After that, customers will be able to book directly from your website, and all appointments will automatically sync to your Square Appointments calendar.
The final places you can add online booking options that will sync with your Square appointments account are your Instagram page and Google listing. For both options, you will return to your Channels page and select the “Get Started” button. From there, Square will show you all the steps for integrating a booking button into your Google listing and Instagram page.
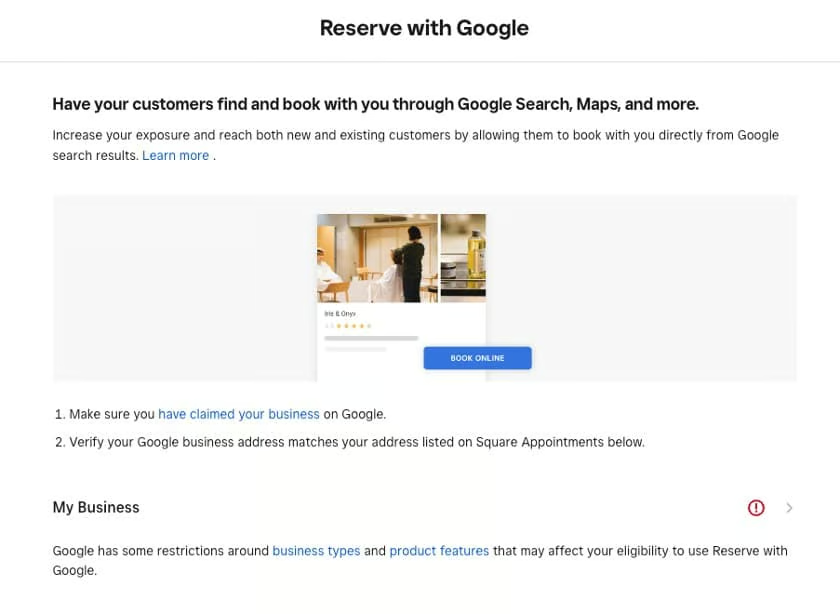
Setting up Google and Instagram booking options is easy and only a few steps away. 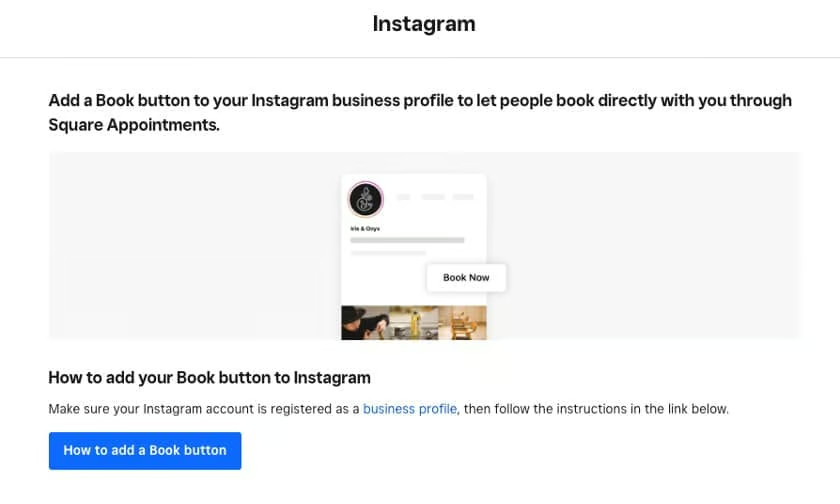
Setting up Google and Instagram booking options is easy and only a few steps away.


Unfortunately, adding buttons to Instagram and Google cannot be done directly through Square, and will require you to navigate through Instagram and Google. Once you have the buttons set up, however, they will automatically sync with your Square account.
Step 6: Set Up Payments
You don’t need to have payments configured to accept appointments through Square. The Square setup workflow actually prompts you to invite customers to book appointments before it prompts you to set up your payment information.
But, if you plan to require payments or cancellation fees for online bookings (as most service providers do), you should set up your payments before inviting customers to book. So, we recommend performing this step out of sync with the Square installer.
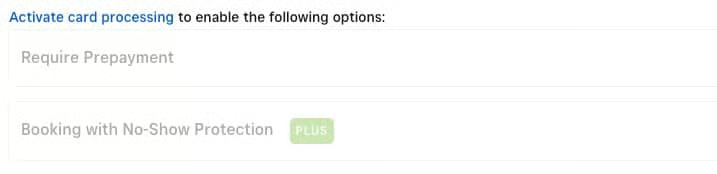
All Square accounts are automatically enrolled in Square Payments. All you need to do is click “Activate Card Processing” and follow the ensuing steps to connect your Square account to a bank account. With Payments enabled, you can accept payments in person or online, require payment upon booking, and add no-show protection, creating a charge for customers who do not make their appointments.
The payments screen also gives you the option to compose a custom cancellation policy. When you added services, you were able to add custom cancellation fees for each service. The cancellation policy is a little different—it is a written explainer that lets customers know what and when they will be charged for cancellations or no-shows.
Simply toggle the “Cancellation Policy” button in the payments settings screen, then a blank field will appear. You can fill out your custom cancellation policy. This policy will then appear on all booking pages so customers know exactly how you handle cancellations and no-shows.

Add a cancellation policy so customers know your terms and don’t feel blindsided.
Step 7: Invite Customers
Once you’ve got everything set, it’s time to let your customers know they can book with you—and tell them how. Square makes this easy with integrated, customizable marketing campaigns. To start your own roll-out campaign, start by selecting “Invite Clients” from the dropdown menu under “Online Booking.” Then, click the “Start a Campaign” button.
This will take you to a form where you can create a custom email to send to your clients announcing your launch and linking them to your booking page.
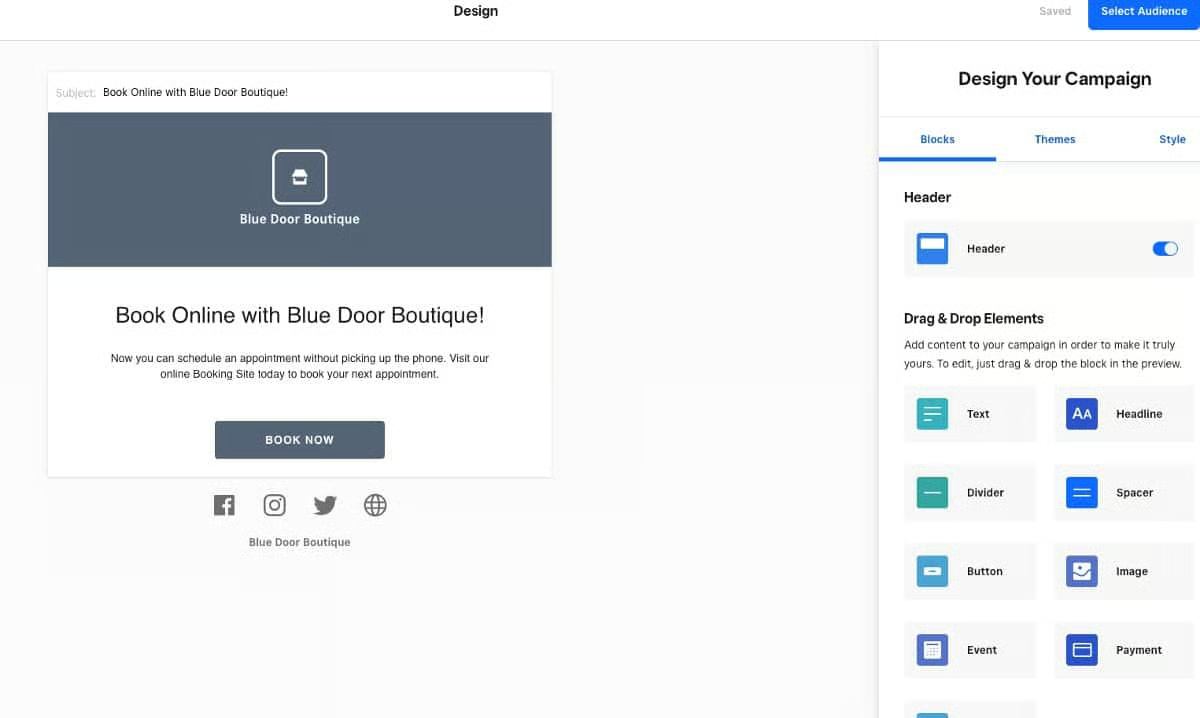
Square’s customizable template makes it easy to design a marketing campaign to send to your customers.
Once your email is designed and ready, click the “select audience” button in the upper right-hand corner. This will take you to a page where you can choose who you want to send your campaign to, as well as how it will appear on mobile devices.

Select who you want to send your marketing message to and even post it on Facebook.
From there, all that is left to do is hit send and watch the appointments roll in.
Optional Steps: Setting Up Hardware, Staff & Retail Items
If you need to operate your Square Appointments tools on dedicated hardware, sync multiple calendars, or sell retail items through your Appointments app, Square has you covered.
Set Up Hardware
You can operate Square Appointments from any desktop computer, tablet, internet-connected smartphone, or Square-designed registers and POS terminals.
To add Square Appointments to your mobile device, you need to download the free Square Appointments app from the Apple App Store (for iOS devices) or Google Play (for Android devices). Once you have downloaded the app, you simply sign into your Square account on the app, and you are ready to go.
To operate Square Appointments on a desktop computer, you navigate to Squareup.com in your internet browser and run the app from a browser. Square recommends using Google Chrome, Safari, Firefox, or Microsoft Edge.
Brick-and-mortar service businesses with multiple technicians may need more robust hardware. For these businesses, Square offers their in-house hardware, the Square Stand, Square Register, and Square Terminal. First, you must purchase your Square hardware from Square’s website. Then, log in to your Square Dashboard, and navigate the Settings dropdown on the lefthand menu. Click through the slides below to see each step in detail:
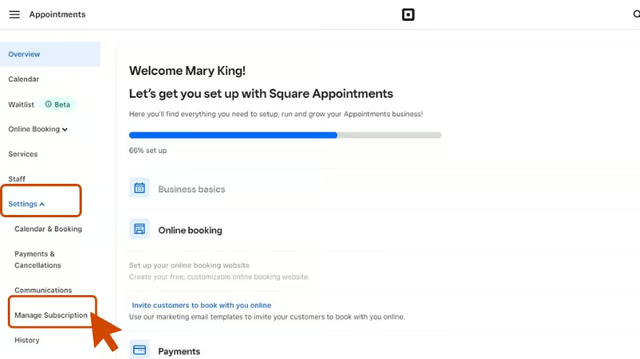
Click the “Manage Subscriptions” option. 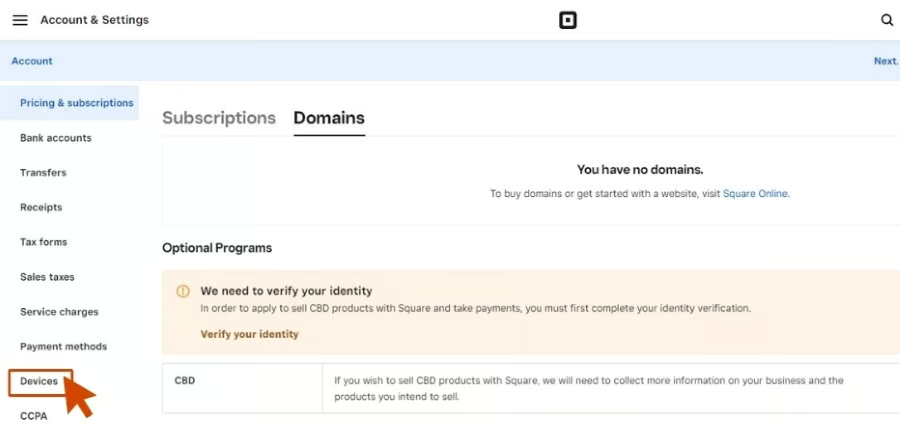
Click on the “Devices” option from the left-hand subscriptions menu. 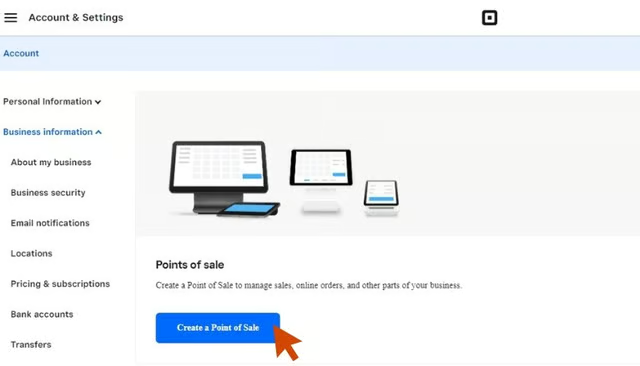
When you click on the large blue “Create a Point of Sale” button, Square will then prompt you to connect individual point-of-sale devices. 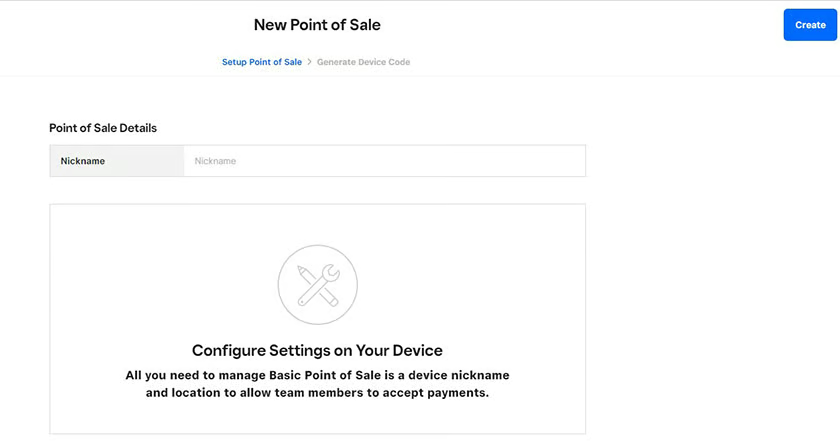
Square will prompt you to create a nickname for each device. This name might be “front desk computer” or “Square Terminal.” Choose a nickname that will help you identify the device later. Then, click the “Create” button in the upper right corner. 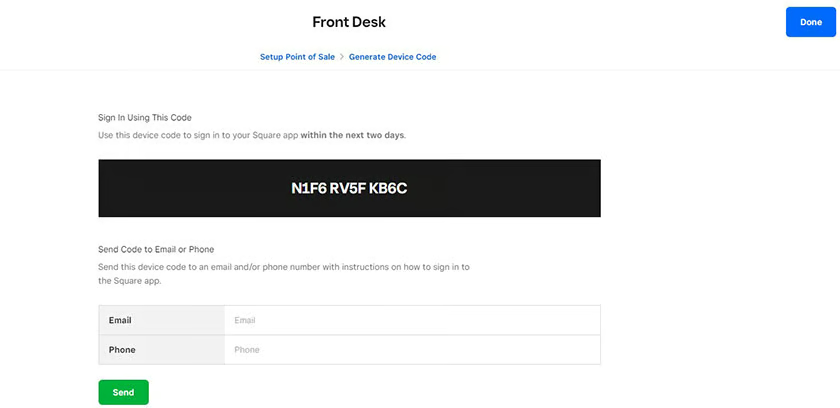
A screen will appear with a device code. You can write down the device code to reference later, or you can email or text the device code. You or your staff will use this code when you sign into the Square Appointments app on the designated device. Texting device codes is handy if you or your team spend most of your time in the field and use Square Appointments on mobile devices. 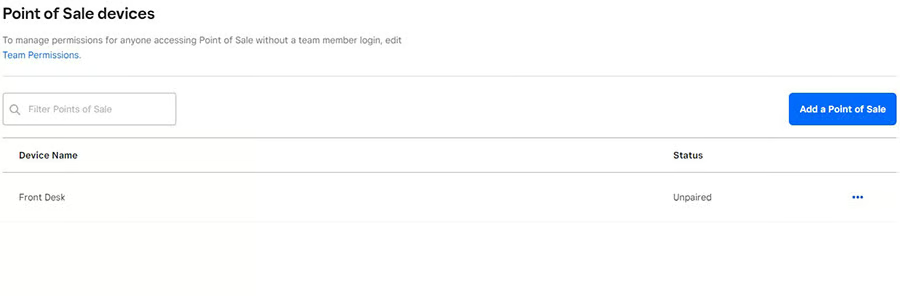
You only need to use the device code once on each device. Once connected, each device can be further configured and managed from your main Square dashboard. From this dashboard, you can control what information each connected device can access and add or delete affiliated devices as your staff changes.


Add Staff
If you have employees, you must create a unique staff profile for each. Their profile allows them to use Square’s appointment tools and allows you to restrict what operations they can access in the Square app.
To add a profile, simply click on the “Staff” option on the left-hand menu of your Appointments Dashboard, and then click “Add Employee” in the top right corner. Here, you can add contact information, set booking availability, assign offered services, manage employee notifications, and designate employee access permissions.
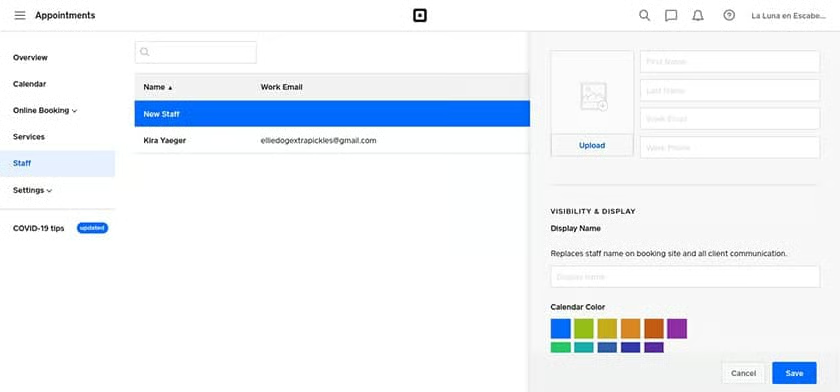
Under each staff profile, you can add customer-facing display names and photos to appear on your online booking site.
Add Retail Items
If you are a multichannel business offering both goods and services, you can add your retail items directly to Square Appointments. These items will be available for in-person or online purchases. Square Appointments tracks stock levels as items sell to prompt you to restock when supplies are low.
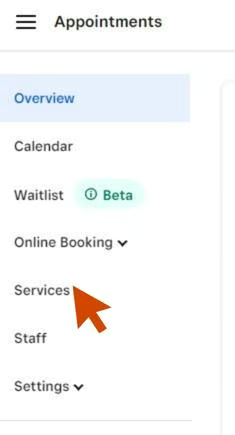
To add items, you’ll first need to select the “Services” option from the left-hand menu on the appointments dashboard. 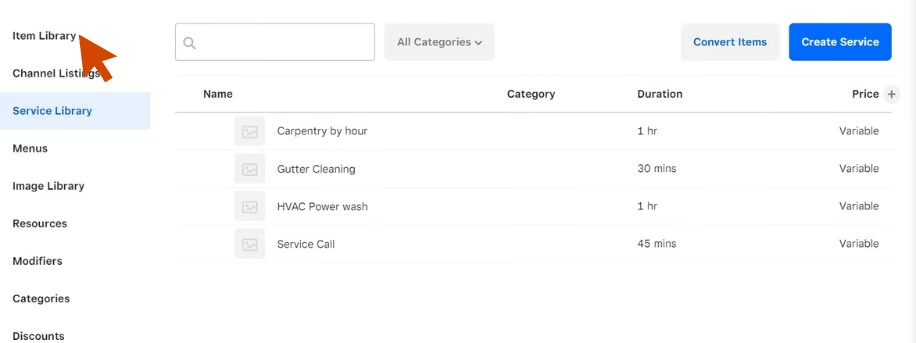
From there, select “Item Library” at the top of the left-screen menu. 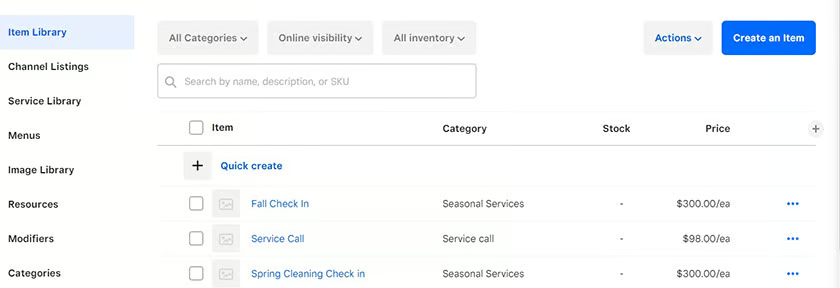
Then click the “Create an Item” bottom on the top right corner of the screen. 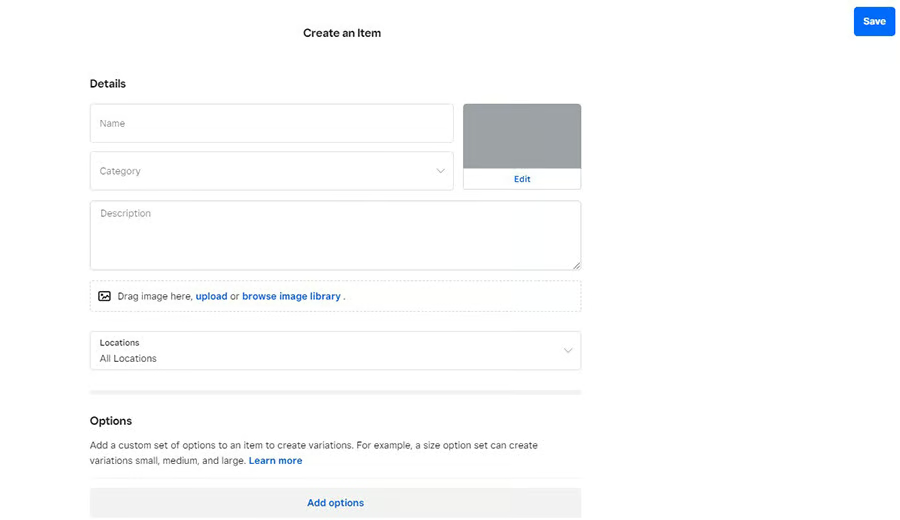
Complete the details in the item worksheet, adding price, images, available locations, and item variations as needed. 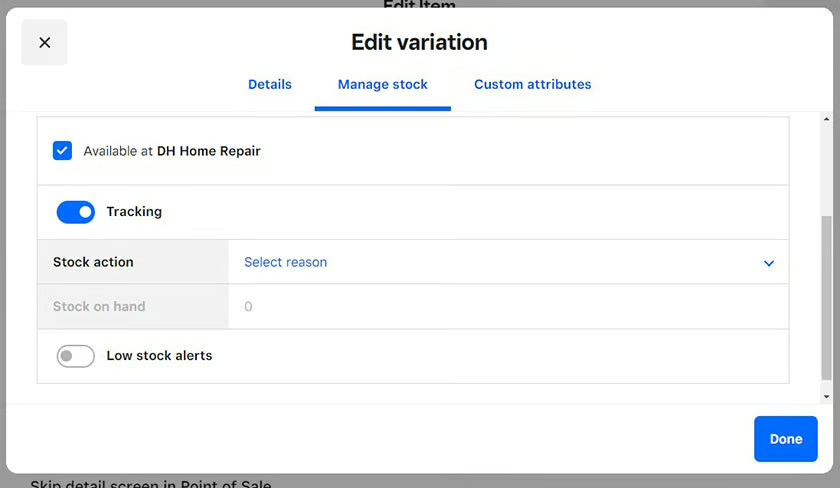
You can add on-hand quantities and enable stock tracking so your Square Appointments system will alert you when stock is low. 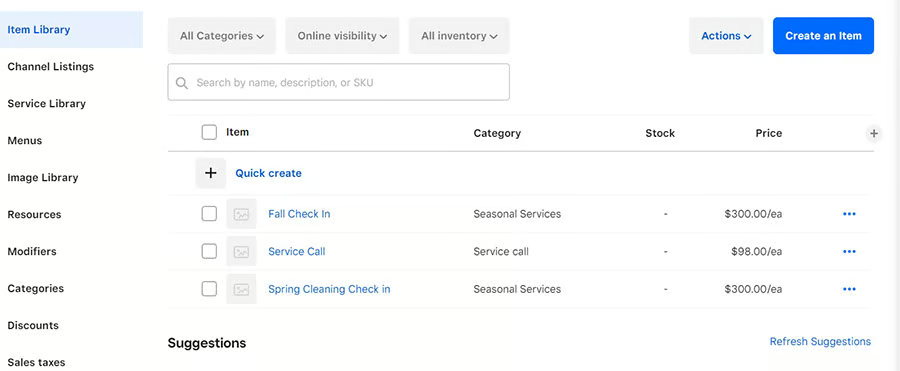
All of your items can be managed and adjusted via the Item Library.


Bottom Line
Square Appointments is one of the most versatile appointment-scheduling software products on the market—and this guide helps you get up and running in no time. The platform offers a wide range of customizable business management tools that you can access all in one place from your Appointments Dashboard.
Ready to try Square Appointments? It has a fast signup process, is free, and doesn’t require any commitment or credit card—you can cancel anytime.