

Square Online offers a free ecommerce website for small businesses of all kinds, including retailers, restaurants, cafes, ticketed event hosts, service providers, and more. Anyone can use a Square store to list products for sale, process payments, and deliver orders via traditional shipping methods, curbside pickup, and local delivery.
Setting up an online store with the platform is fairly easy to set up, and we’ll walk you through the process. If you want to follow along, sign up for a free plan now. It’s simple and completely risk-free; you can build your store as you read this Square Online store tutorial.
- Step 1: Create a Free Square Account
- Step 2: Configure Your Initial Store Settings
- Step 3: Add Your Products
- Step 4: Design Your Square Website
- Step 5: Set Up Your Domain
- Step 6: Add Order Fulfillment Methods & Settings
- Step 7: Set Up Taxes
- Step 8: Create Checkout Policies
- Step 9: Set Communication Preferences
- Step 10: Preview and Publish Your Site
- How to Set Up a Square Online Checkout Page
- BONUS: Set Up a Restaurant Website With Square Online
- Square Online Store Frequently Asked Questions (FAQs)
- Bottom Line
Step 1: Create a Free Square Account
The first step in setting up a Square Online store is to open a free Square account. The only information required to set up a Square account is your email address and password. Make sure you choose a secure password, as your identity and banking information will be connected to your profile. You can choose to enter optional information, like your business name and type, or do this later in your Square Dashboard settings.
Once you have an account, you can access all of Square’s free tools, including the online store builder, via your online dashboard.
Every free Square store ties into the rest of the Square ecosystem and can be managed through your Square Dashboard, where you can sync products, orders, and customers across your in-person and online sales channels. During setup, you will also have the option to choose from one of Square Online’s paid plans, which start at $29 per month.
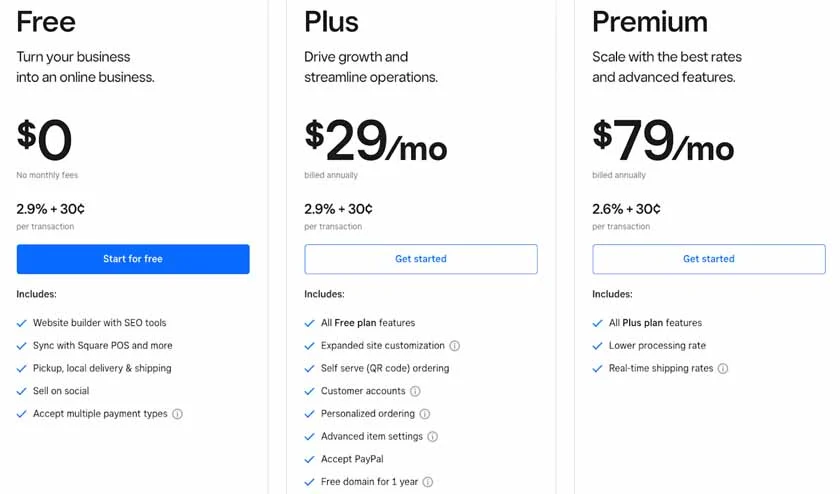
Set up your Square Online store for free or choose an upgraded plan. You can upgrade or downgrade any time.
Square’s paid plans allow you to connect a custom domain, remove Square branding, send abandoned cart emails, and more.
If you’re just setting up a simple site for occasional pickup orders or to sell on social media, you can likely stick to the free plan. However, if you want to scale an online business or sales channel, you’ll want to choose a paid plan. You can upgrade or downgrade at any time.
Step 2: Configure Your Initial Store Settings
Once you’ve signed up for your free account, you can start building your online store. Square guides users through the process with automated prompts; no technical skills are required. Additionally, all settings can be changed later—nothing you choose now is permanent.

First, you specify what kind of products you will be selling. With Square, you can sell different items, such as physical products, digital goods, memberships, or events. 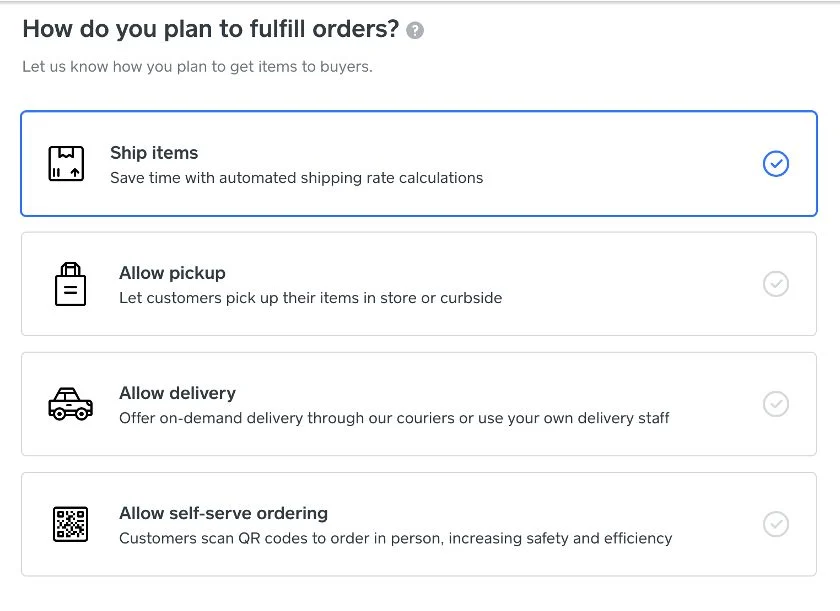
You also indicate how you intend to fulfill orders so that customers will be able to select from valid delivery options and Square can create the correct fulfillment operations in your account. You can change these settings in your dashboard at any time. For this demo, we selected “Ship Items” but will add more fulfillment options later. 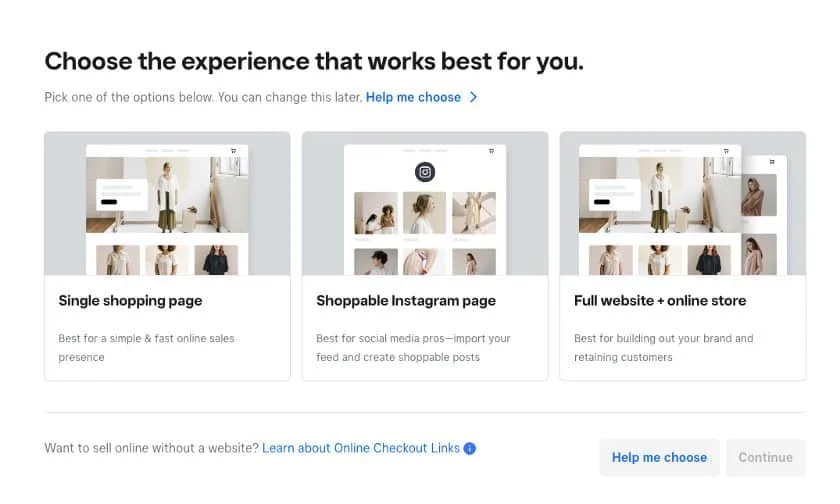
Finally, you select the kind of site you want to build. You can either opt for a single shopping page, which has a single rolling page with your home header on top and products underneath; a shoppable Instagram page; or a full website and online store, which includes different pages for shopping, store information, home page, etc. For this demo, we selected the full website and online store option.


After entering your basic information, you will be returned to the Square Online control panel in your Square dashboard, pictured below.

Upon signup you’ll be taken to the Square Online dashboard with has setup prompts and tutorials.
Step 3: Add Your Products
Now, Square suggests that the first thing you do is design your site. However, I recommend adding your products and product categories first, as you’ll want to showcase them on your site. Having these entered ahead of time will make the site creation and design process easier.
We have a dedicated guide to getting your products entered into Square, including a brief video from our retail expert Brigitte.
However, uploading products to sell online (vs selling in-store) looks a little different. There are extra fields, like photos, product descriptions, and online ordering settings you’ll need to fill out, which we detail below.
Create Site Categories
Creating your product categories first will allow you to assign items to categories as you enter them, instead of having to go back and categorize all of your products later. I personally find this order easier if you have existing inventory. However, you can choose to create either your categories or products first. There isn’t a wrong way to go.
When you select “Add Category” you’ll be prompted to add a category name, which is the only required field. Additional optional fields include:
- What items belong to the category
- A category photo
- SEO permalink, title, and description
- Whether or not this category should be hidden on your live site
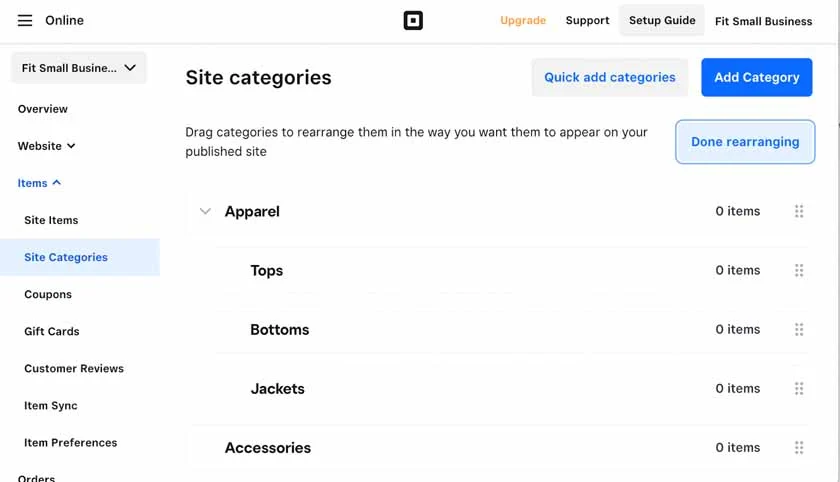
You can easily rearrange categories to control how they will appear on your site, and also nest subcategories under larger categories. For example, if you have an “Apparel” category, you can create additional categories for “Tops,” “Bottoms,” and “Jackets” and then nestle them underneath “Apparel” with the intuitive drag-and-drop editor.
When you click “Add Category,” once you have your first category set up, you’ll also have the option to create subcategories from that screen. Like with most of Square’s settings, there are multiple ways to get the same result—it’s just a matter of personal preference and what is easiest for you.
To re-arrange categories or turn a category into a subcategory by nestling it under another category, simply click “Rearrange categories.” Then you can drag and drop the categories into the positions you want.
Remember, categories can be added, removed, or adjusted at any time.
Add Individual Products
Next, add your individual products. Navigate to “Items” on the left-hand menu, then “Site Items.”
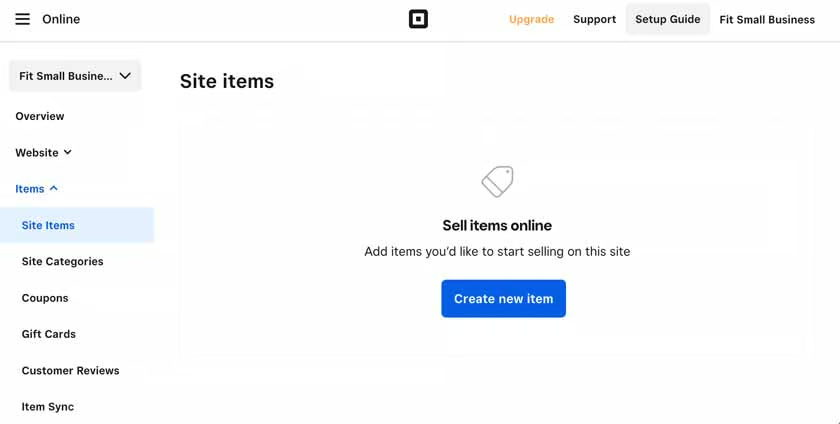
From the homepage of your Square Dashboard, click on “Items” on the left-hand navigation menu, then click on “Site Items.” 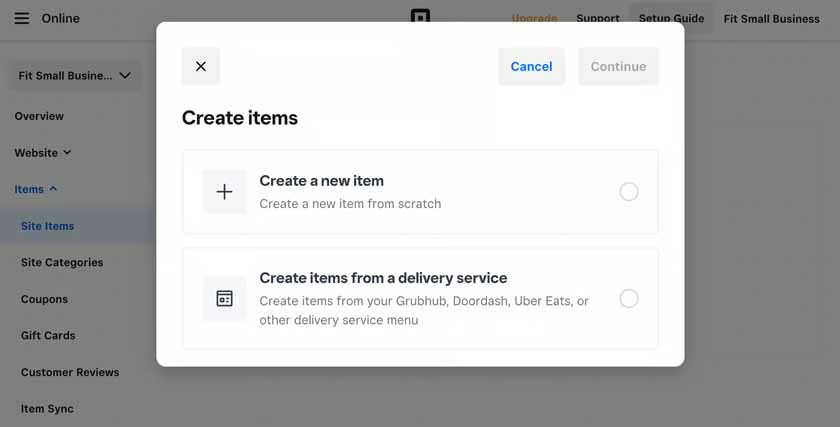
You can add products manually or import them from your third-party delivery listings. 
Choose the type of item you want to sell. This will automatically adjust some of the fields on the next page.


From there, you can click “Create new item” which will allow you to add:
- Physical goods
- Digital products
- Prepared food and beverage items
- Events and tickets
- Services
- Donations
- Memberships
If you already have items listed on a third-party delivery site like DoorDash or UberEats, you can import items from those listings.
If you’re adding a new item, you’ll then be prompted to add item information. The required fields are:
- Item Type
- Item Title (the customer-facing product name)
- Retail Price
If you are adding a physical product or a prepared food and beverage item, you’ll also need to add your Fulfillment Method. You can choose any combination of shipping, pickup, local delivery, and self-serve ordering.
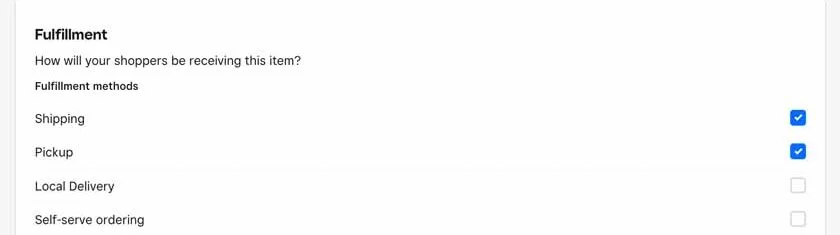
Choose any or all of the available fulfillment options.
Optional information you can enter for each item include:
- Sale price: A discount or clearance price you can choose to enable at certain times. In the Dashboard, you’ll also be able to bulk edit and apply dollar amount or percentage sales. You do not need to set this now unless you already run regular sales on certain items.
- Product description: This is the description customers see on your product page. This piece is important for driving conversion. See our guide to writing product descriptions for tips and a template.
- Visibility: You can choose to have items visible to everyone, visible to those just with a specific link, or unavailable (which is useful if you’re preparing to launch a new product or collection).
- Media: Upload product photos, GIFs, and/or 360 photos. If you don’t yet have product photos, Square has a free app called Square Photo Studio that guides you through taking product photos at home. Plus, you can sync the app with your Square Item Library for easy uploading.
- Sales tax exemption: You’ll configure specific sales tax settings under “Settings” in your main Dashboard, but can mark individual items as tax-exempt here.
- Stock levels: Add your current quantity on hand and select whether or not you want Square to automatically update your quantity as you sell items.
- Item ID or SKU number: Enter each item’s stock keeping unit (SKU) number if applicable. If you don’t have a SKU system set up, read our guide to SKU numbers to learn how to create one.
- Categories: If you already set up your categories and subcategories, go ahead and select which ones your item belongs to. Items can be assigned to multiple categories.
At the bottom of the screen, you’ll notice some SEO settings: title, permalink, and description. If you leave these blank, Square will just use the information you added above. Or, you can choose to override them and enter custom information.
SEO, or search engine optimization, plays a big role in getting your site in front of potential customers. It’s easiest to leave these fields blank for now, but before you launch your online store, spend some time learning about SEO for ecommerce.
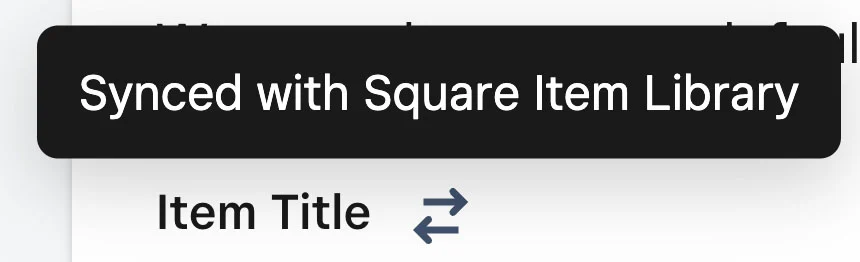
Fields with the double arrow icon are automatically synced in your central Square ITem Library.
Several fields are unique to different item types:
- Gift options: Enable shoppers to indicate whether an item is a gift, add a message, gift receipt, or request gift wrapping.
If you upgrade to a paid plan, you can also schedule item visibility and price updates in advance and set up pre-orders.
- Nutritional Information: If you choose the prepared food or beverage item type, you can enter calorie counts, dietary preferences, and allergy information.
- In-person or virtual event
- Event location
- Start and end date and time
- Event timezone
- Suggested donation amounts
- Whether or not custom amounts are permitted
Variations & Modifiers
Square also allows you to create variations, like different size or color options of the same items, or modifiers, which allow shoppers to customize their orders from a drop-down menu or by typing in a textbox.
The same modifier options can be applied to multiple products. Likewise, you can save variation sets called “Option sets,” like a size range for example, and apply it to multiple products. You can also create individual prices and SKUs for different variants under the same item.
Step 4: Design Your Square Website
Now that your products and categories are set up, it’s time to design your online store. Return to the homepage of your Square Online dashboard and click the “Design now” button.
The button will take you to the Square Online Website Builder, where your first selection will be to pick a style from Square’s pre-made templates. This will be the overall look of your website, but you will have the option to change font and color later.
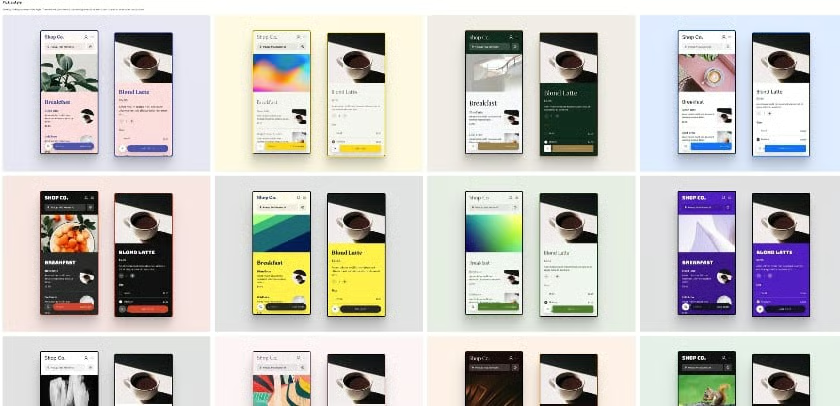
Over the last few years, Square has significantly increased the number of themes and templates you can choose from.
From there, you simply select a style that appeals to you and matches your brand. The template will expand so you can get a better view, and if you like it, select the “Customize” button to start adding the rest of your design.
Here, you will have a series of initial design options, including adding your logo, changing the color scheme and fonts, and choosing the shape of buttons, images, and form fields. If you opt for a paid plan, you can access additional customization options for buttons and your website width and spacing.
Next, you’ll customize the individual pages of your website:
Once you save your global design settings, next is setting up your home screen. First, you’ll want to customize your header and footer settings. Your header and footer settings are accessible through any of the individual page editors, though whichever header and footer settings you choose will be applied to your site globally.
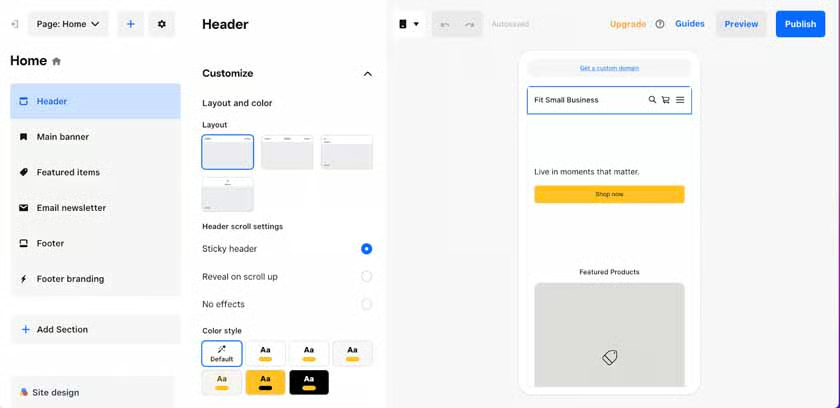
Square Online’s design editor is easy to use. 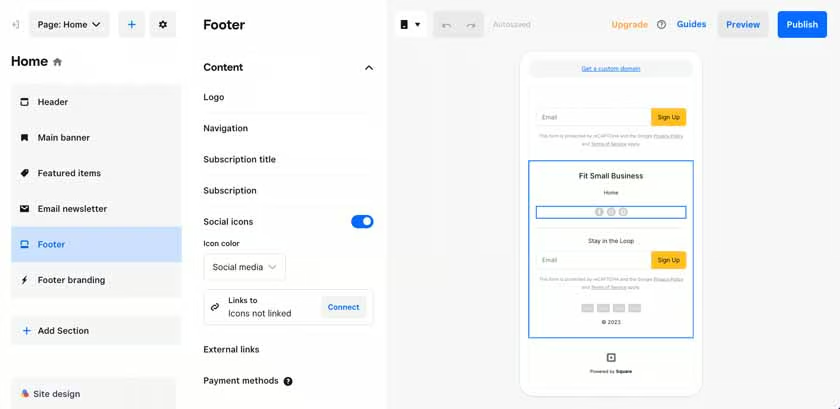
You can adjust your header and footer settings from any page, however, changes are applied globally. 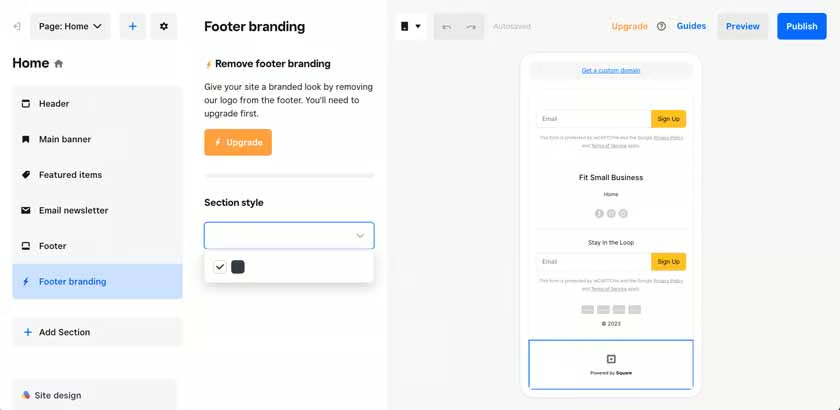
To remove Square’s branding from your site, you’ll need to upgrade to a paid plan.


After setting up your header and footer, design your main banner that shoppers will see when they first land on your site. Within the main banner, you can add an image, header, tagline, buttons, and customize the fonts, colors, and appearance of each of those elements.
Next, you’ll be prompted to add a few featured products to your homepage (this is where having your items already set up comes in handy). In fact, if you haven’t yet added your items, Square will prompt you to do so.
You can customize what information is shown about the products, including the images, title, description, price, and Buy Now buttons. You’ll also be able to adjust visual elements, like the shape of the images, how they are cropped, and what happens when shoppers hover over the image.
Then, you can enable or disable a newsletter sign-up. If you choose to have a sign-up, you can customize the layout and text of the signup box.
This completes the default homepage sections. However, you can also choose to add:
- Additional featured items
- Featured categories
- Donations
- Events
- Memberships
- Menu items
- Connect an Instagram feed
- Text and image fields
- Image galleries
- Buttons
- Videos
- PDFs
- Customer testimonials
- About sections
- Location and hours
- RSS feeds
- Embed custom code
If you already have an active Instagram account that showcases your products, I recommend adding your Instagram feed. This can help build trust with potential customers. Similarly, if you already have product reviews, showcase some positive reviews by adding a customer testimonial section.
Now that your homepage is set up, you can customize the Shop All page where all of your products will be displayed.
Here, you’ll want to pay the most attention to your Item list. First, choose how your products will be arranged when the page first opens. Though, note you can enable customers to sort for themselves.
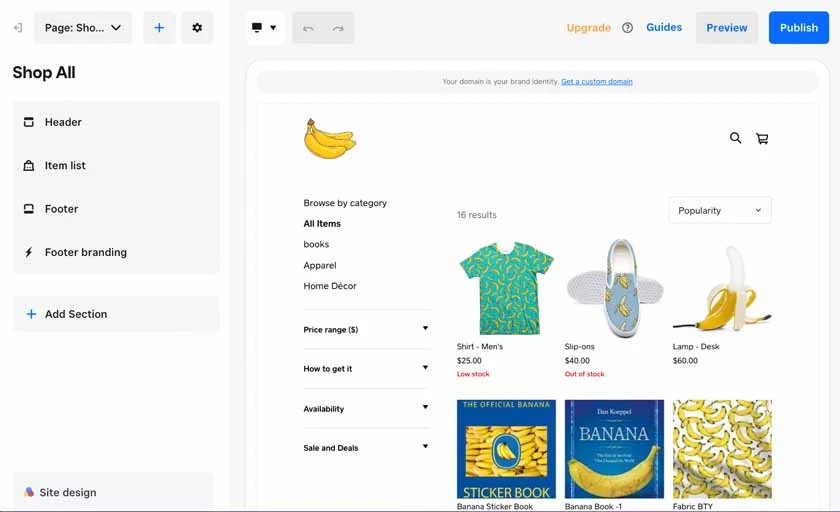
The Shop All page of our Banana Shenanigans test store features an assortment of apparel, books, and home goods.
If you set up categories for your products, you can have a specific page devoted to each category and subcategory of products.
Customers can find these pages by filtering the product view from the “Shop All” page. You can also choose to show categories in the main navigation.
The appearance and customization options for these pages are very similar to the Shop All page: arrange and add items to your category, then choose what product information to show and how customers can filter or sort items.

Setting categories for your products allows shoppers to easily sort and find what they are looking for.
- Instagram: Add a shoppable Instagram feed
- Contact Us: A customizable form fill that allows customers to send you an email
- Gallery: Choose from several different layouts to create an image gallery
- Gift Cards: You’ll need to set up and enable gift card sales from your Square Dashboard, but once they are set up you can create a dedicated page for them in addition to listing them as a product
- About: You can add a small “About Us” blurb on your homepage, or an entire page dedicated to introducing yourself and your business to customers. Include a title, tagline, text, and an image.
- Stories: These pages are essentially blog posts that you can group together under a Stories Overview page. Use stories to share product updates, trends, spotlight employees or customers, and more.
Step 5: Set Up Your Domain
During the design process, Square will likely prompt you to set up your domain or your website address. You can choose to do this now, or close out of the pop-up and add it later.
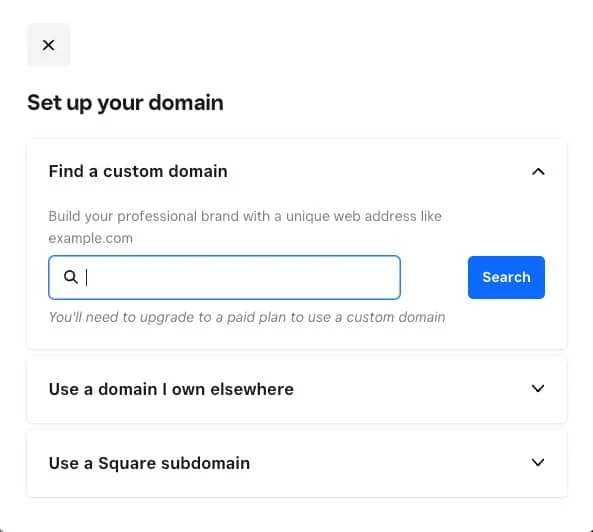
Fill in the blank field to set up your domain.
Either way, you have three options for your domain:
- Find a custom domain: This option allows you to create a custom domain for your site, and Square will check for its availability. This requires upgrading to a paid Square Online plan.
- Use a domain I own somewhere else: If you already own a domain from a third-party service like GoDaddy or Google, you can connect it to your Square Online store. This option also requires upgrading to a paid plan.
- Use a free Square subdomain: This option puts your website under Square’s subdomain. For example, if you have a pet store named after your dog Andy, you can set your domain as andythepitbull.square.site for free.
Step 6: Add Order Fulfillment Methods & Settings
Although you selected some fulfillment methods when first signing up for Square, now is when you’ll enter details and adjust your chosen methods as needed. Choose from in-store pickup, local delivery by your staff or a third-party, shipping, and self-serve ordering for restaurants and cafes.
Self-serve ordering is only available on Plus and Premium plans.
If you have a physical location, you’ll want to enable pickup and delivery orders. Simply head over to the menu on the left hand of your screen, select the “Fulfillment” tab, and then click “Pickup and Delivery.” This will take you to the page below, where you can start adding pickup options.
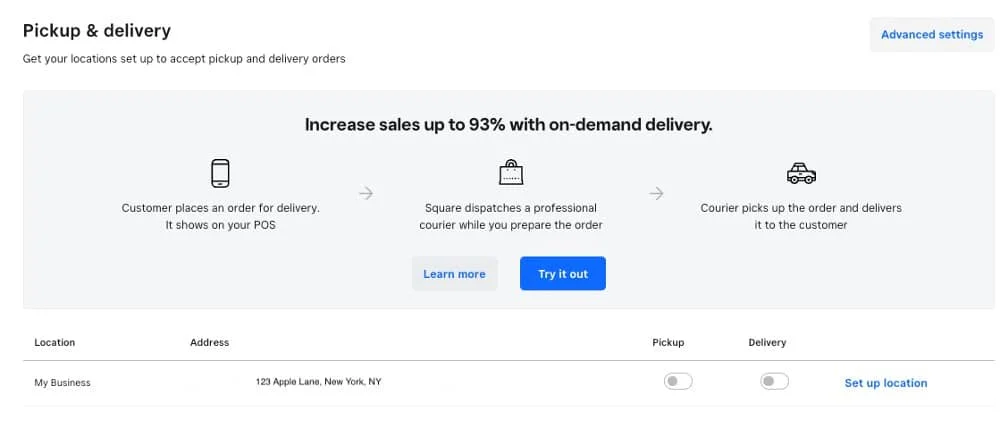
To begin adding pickup and delivery, simply click “Set up location.” Square will then prompt you through a series of forms (pictured below), where you can opt in to Pickup and Delivery methods for your store and configure settings like pickup times and order prep.
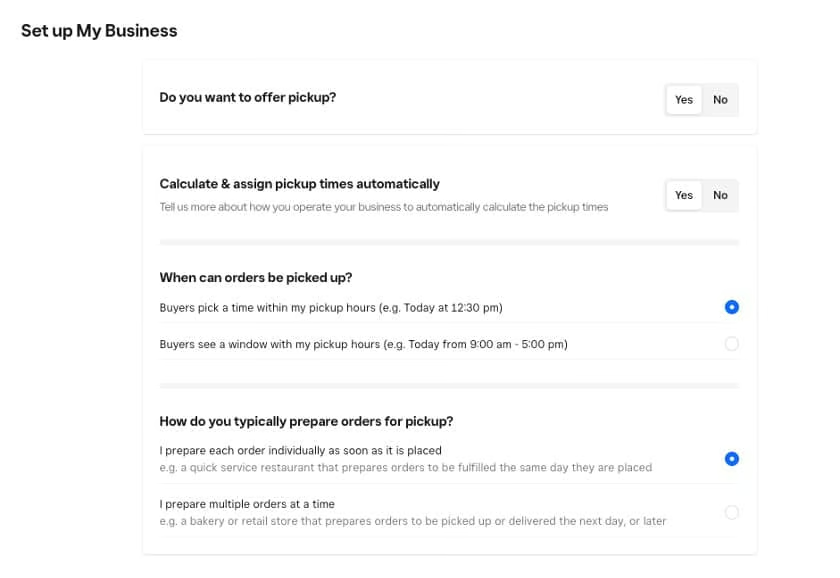
Add pickup to your store. 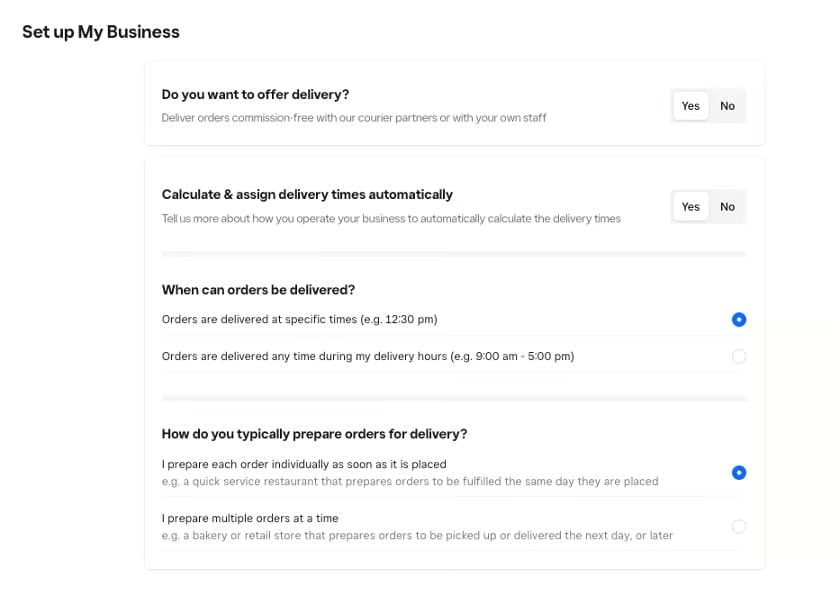
Add delivery to your store.


If you upgrade to any of Square’s paid plans, you’ll unlock the ability to send order updates and status alerts.
Once you click on “Shipping” under the Fulfillment tab on the left menu screen, you will come to the page below.
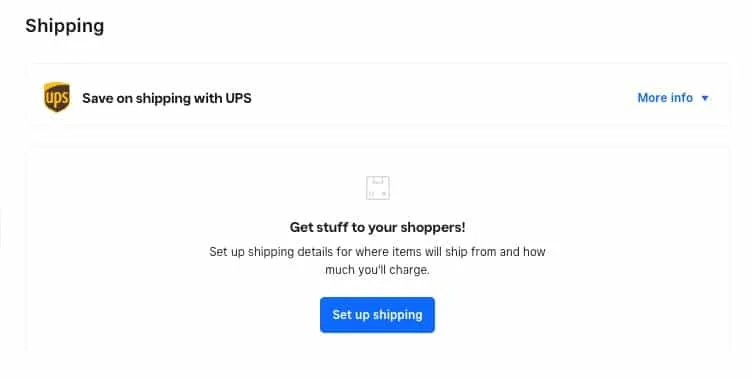
Start setting up your shipping rules and rates.
On the screen above, simply click “Set up shipping” and Square will ask you to add your “Shipping From” address. Square will automatically populate this field with your store’s address, but you can change it if needed (for example, if you’re shipping from a warehouse). Then, hit save, and your shipping page will populate with new options, as seen below.
One of those new options is “Shipping Carriers,” where you can link your FedEx, UPS, DHL, and USPS carrier accounts. Simply click “Manage” and then follow the prompts to link your accounts.
Then, you will input your shipping rates in the “Shipping Profiles” section. Just click “Set Up” and you will go to a form where you can set up shipping rates for each region you want to ship to, or for specific items.
Shipping discounts are included in all plans for all major carriers. However, real-time shipping rates are only available with the Premium plan.
If you upgrade to a Plus or Premium plan, you can enable QR code ordering so customers can order and pay right from their mobile device. With this fulfillment method, you can choose which items you want to make available and add custom instructions and messages for customers at checkout and after placing orders.
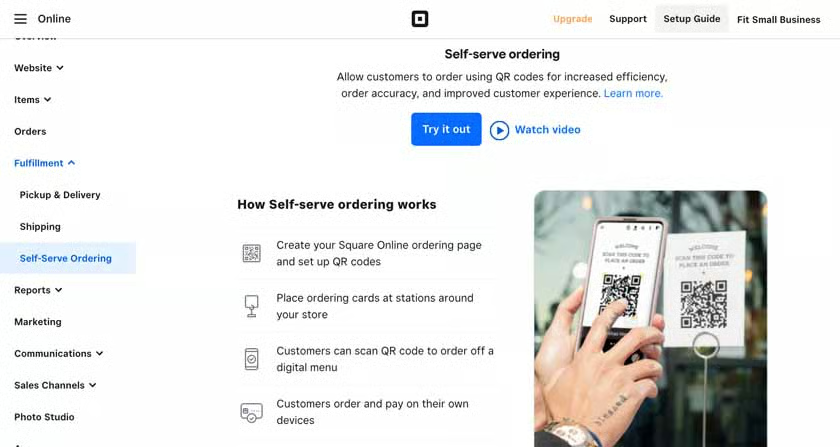
Upgrade your Square Online plan to enable self-serve ordering.
Additionally, you can manually disable QR code ordering at any time (like during a dinner rush or if you’re already swamped with online orders), and/or set certain hours you’d like to accept self-serve orders.
Step 7: Set Up Taxes
Next, adjust your settings to collect the proper taxes on your sales. Square prompts you to do this step from the homepage of your Dashboard; you simply need to select the “Set up taxes” button to get started.
Clicking this button will take you to your Sales Tax page, where you will select “Let’s get started” to begin your configuration.
Square will then walk you through a series of questions where you will have the option to delineate your fulfillment, apply different tax rates for different items, indicate your business as tax-exempt, and then add your location so that appropriate tax rates are applied.
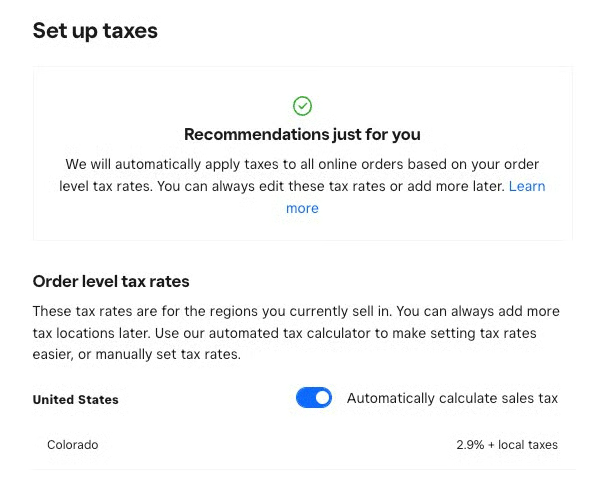
Square recommends a tax rate based on how you answer the tax configuration questions.
Based on the answers to your questions, Square will recommend a tax rate to apply to all purchases through your site. To activate, simply click save and your tax settings will be ready.
Step 8: Create Checkout Policies
With your taxes set, you are technically at the end of the Square-prompted setup process. However, we recommend also adding in your checkout policies before going live with your site (and additional fulfillment methods, which we will go over in the following step).
To begin setting up your checkout policies, head over to the “Settings” tab in the right-hand menu and select “Checkout.”
The first thing that you will see in the Checkout page is the Collect Payments section. All Square Online accounts are automatically configured to process online payments through Square Payments. Square Payments is set up to accept all kinds of payment methods, including credit cards, debit cards, Square gift cards, and mobile payment options like Apple Pay.
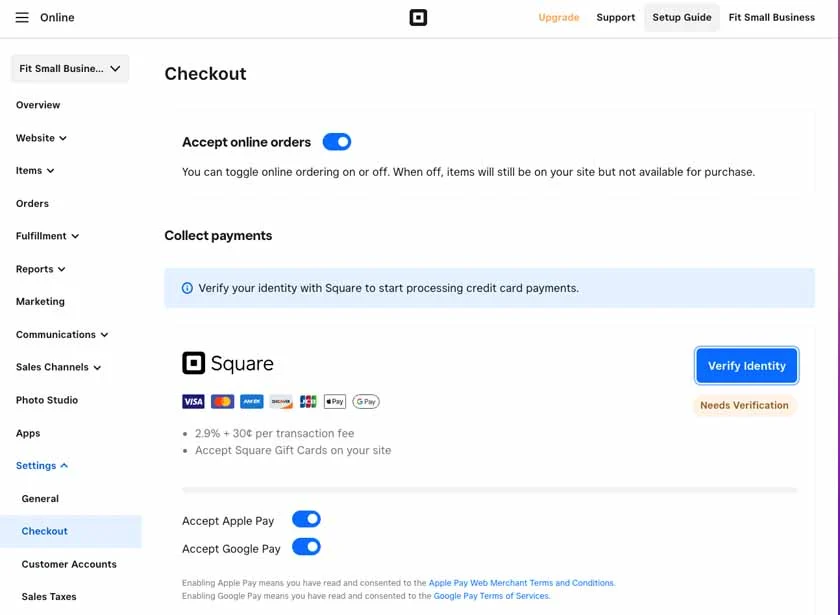
Verify your identity to enable Square Payments on your website.
Once your identity is verified and you’ve enabled Square Payments, the settings that you can adjust here include:
- Whether you will be accepting Apple Pay and Google Pay
- Whether you will be offering an Afterpay option
- Whether you will be accepting PayPal payments (paid plans only)
- Whether you will be accepting Cash App payments
All you need to do here is toggle your preferences on/off and then hit Save.
If you scroll down on the Checkout page, you will see that in addition to your payment settings, you can also adjust your checkout experience in a variety of ways. As you can see in the image below, Square gives you options to:
- Add a tipping option
- Ask for additional information like notes or addresses
- Ask customers to opt-in to email marketing
- Choose between allowing customers to add item to shopping carts or purchase directly from the product page
- Add shipping and return policies to the checkout page
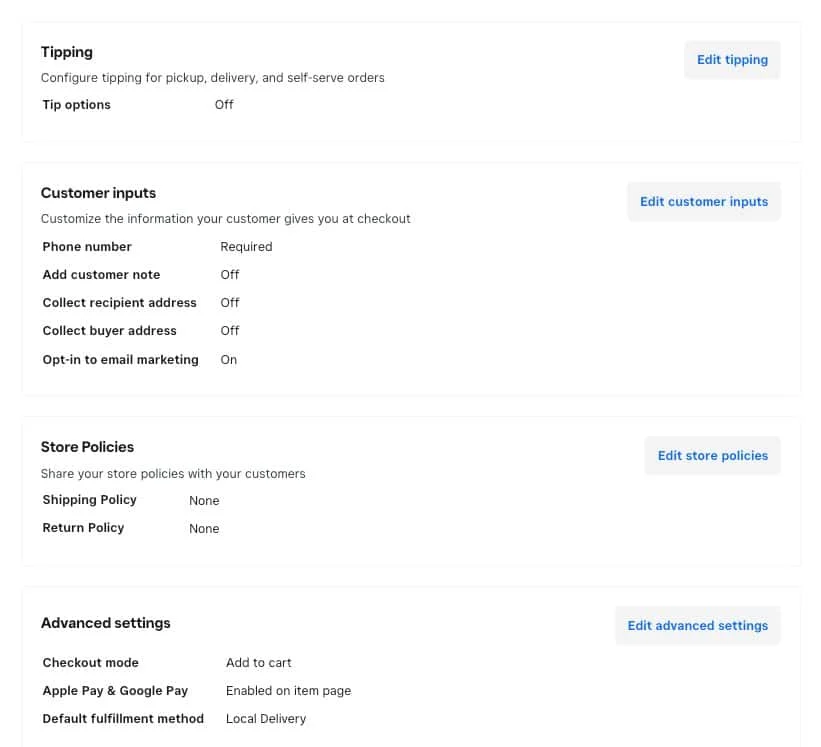
Configure your checkout so that it runs exactly how you want it to.
If you subscribe to a paid plan, you can also configure a progress bar that shows customers how close they are to receiving free shipping or delivery.
Step 9: Set Communication Preferences
Like the step above, setting your communication preferences isn’t part of Square’s prompted setup guide, but I find it helpful to navigate these settings before launching your store.
From the main navigation on the left-hand side, select “Communications.” From there, you can edit Email & Text Alerts, Pop-ups, Messenger, and Abandoned Carts.
First, create your sender profile and reply-to address with your business name, address, and contact information.
Then, choose between four theme options for your emails, which you can customize further with your logo, fonts, and colors.
Once your email theme is set up, you can edit and test the different emails you’ll send to customers, including:
- Order confirmations
- Order prepared
- Items shipped
- Items refunded
- Items canceled
If you upgrade to a paid plan, you can also send abandoned cart emails and solicit product reviews through emails.
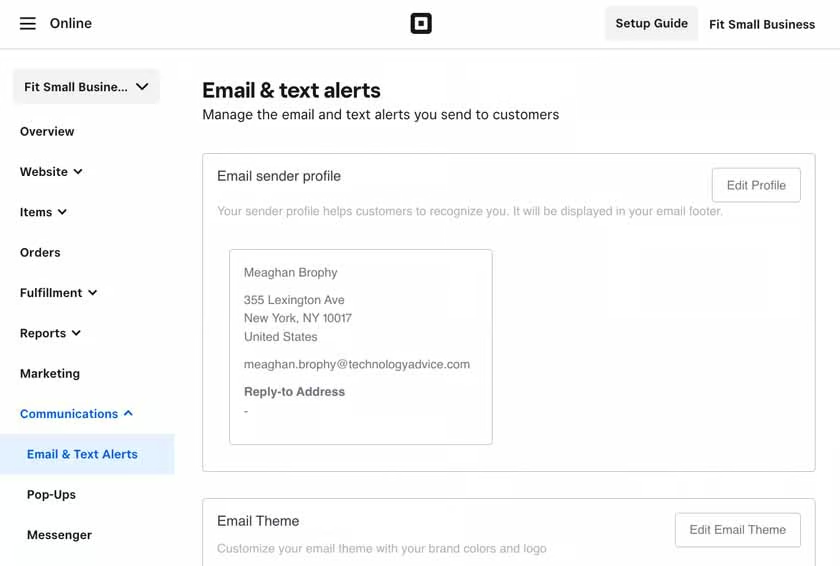
Set up automated emails for customers, starting with entering your contact information and choosing an email template or theme. 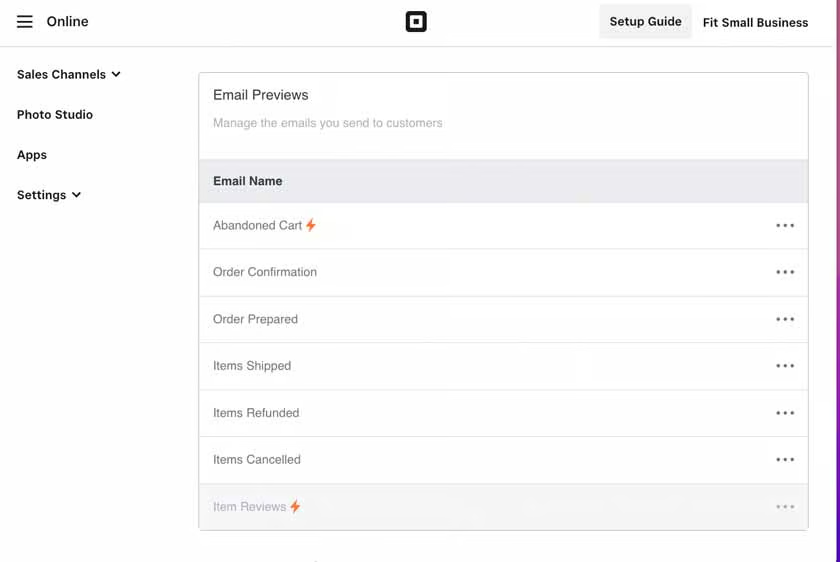
Customize each of the automated emails you can send to customers. 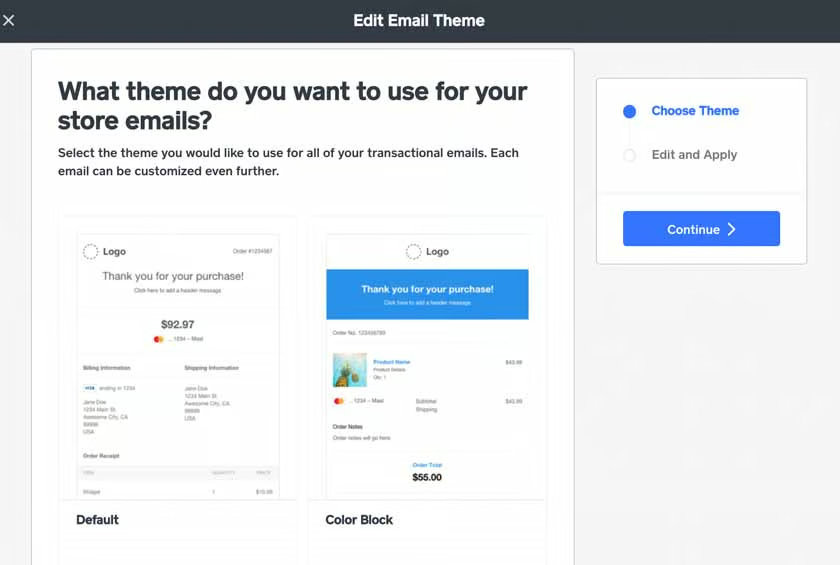
Choose between several theme options for your emails. 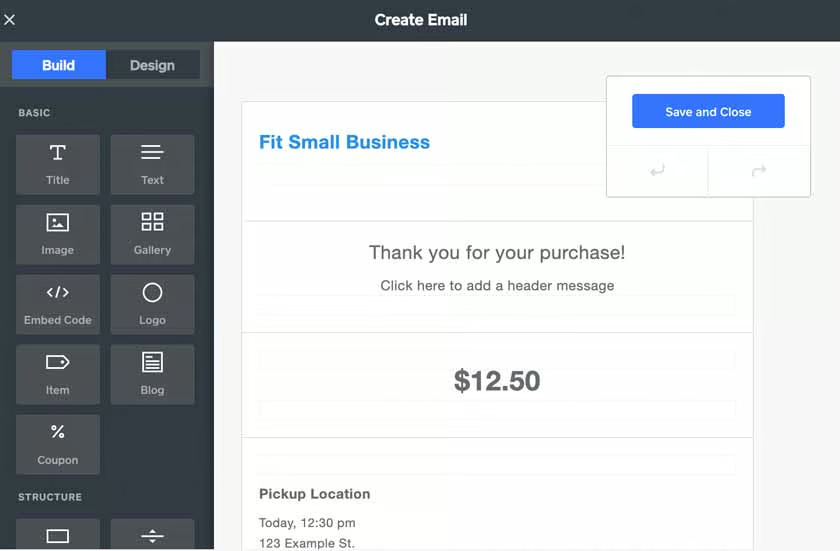
After choosing your theme, you can adjust the text, font, images, colors, and more within each individual email.


Once your email alerts are set up, choose whether you want to turn on text notifications for pickup and delivery orders.
With a paid upgrade, you can also enable text alerts when orders are received, ready for pickup, shipped, etc. Additionally, you can enable two-way communication and receive customers’ texts through Square Messenger.
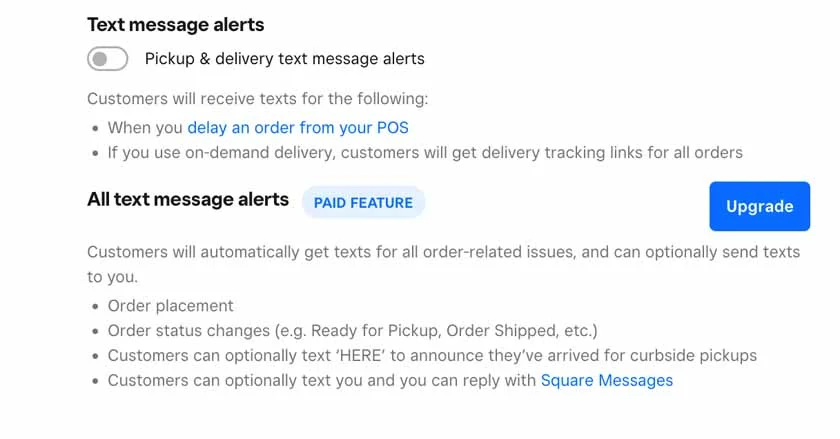
Toggle on text alerts if you have pickup or delivery orders.
Most businesses won’t need to configure pop-ups right away. However, if you sell age-restricted products you should add an age verification pop-up to your site before launching.
Otherwise, you can choose to enable an email capture pop-up to build up your mailing list.
Down the road, you can use these settings to announce new products, holiday shipping cutoffs, events, sales, and more.
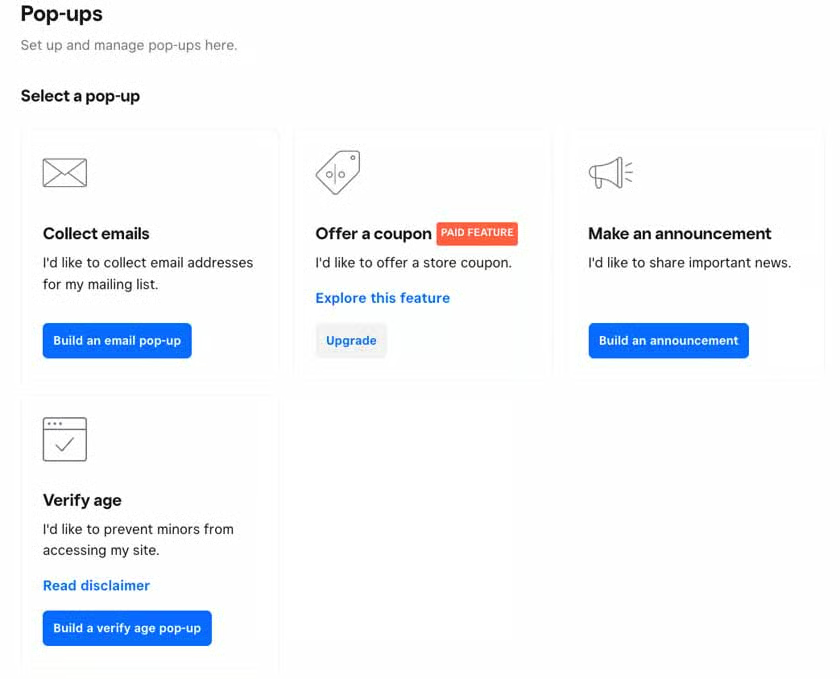
Add an age-verification pop-up if you sell age-restricted items.
If you have a Facebook Page for your business, you can allow customers to message you directly from your website. Messages will appear directly in your Facebook Inbox so you can reply from anywhere.
If you can commit to replying to messages quickly, adding a chat feature can build trust and credibility for your store, as potential customers know there is a real person on the other end.
However, if you know you don’t have time to respond to messages quickly, consider opting out of this feature as you don’t want customers to become frustrated waiting for a response.
Remember, if you have a team of employees, you can also add them to your Facebook Business Page to help answer messages during their shifts.
Learn more about creating a Facebook Business Page with our step-by-step guide.
As noted earlier, this feature is only available with paid plans. If you do upgrade, here is when you’ll set the timeline for abandoned cart emails (20 minutes, one hour, 24 hours, or two days) and track their performance.
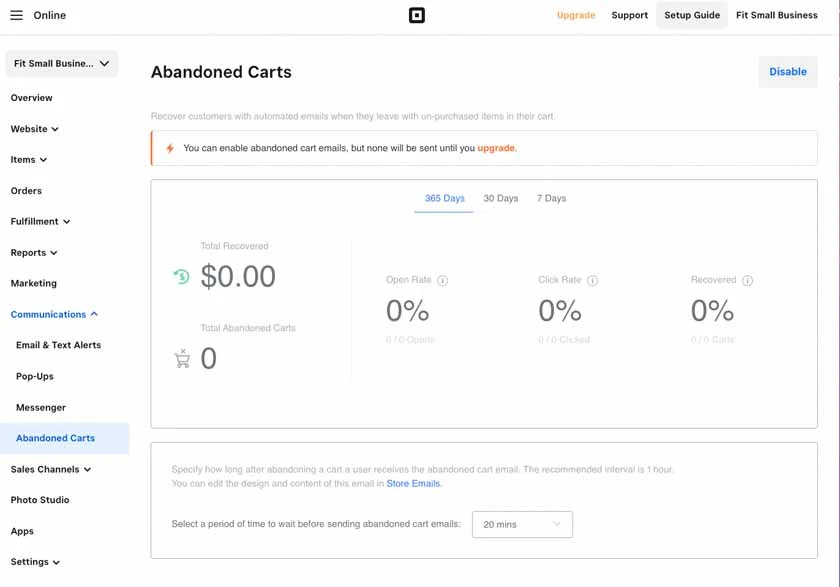
Unlock the ability to send abandoned cart emails by upgrading to a paid Square Online plan.
Step 10: Preview and Publish Your Site
Finally, your Square Online store is ready to launch. At this stage, you will want to give everything a final check from the customer’s point of view by previewing your site. Simply return to your website editor by selecting the “Website” tab from the left-hand menu, and click “Edit Site.”
Click the “Preview” button in the upper right corner. Make your final check, adjusting and editing your site as needed. You can even share the preview via a link if you want fresh eyes. Once you’re satisfied, click Publish in the top right corner to take your site live.
Even after your site is published, you can adjust any element (including design product pages, inventory, store policies, and shipping or delivery details). You can also add pages such as an About Us page, customer testimonials, or social media channels. Finally, you can include more features like collecting customer emails to grow a newsletter, selling tickets to events, and starting a membership program.
Ready to get started? Create a free Square account and start selling online on your Square Online shop today.
How to Set Up a Square Online Checkout Page
Square Online Checkout is an easy, single-page site any business or organization can use as a simplified ordering or payment option. A Square Checkout page features a single item (physical or digital product, food or beverage, donation request, or subscription service) and payment buttons.
Square Checkout pages are ideal for:
- Product launches or pre-orders
- Service payments
- Subscriptions
- Books and digital products
- Adding checkout functionality to existing websites
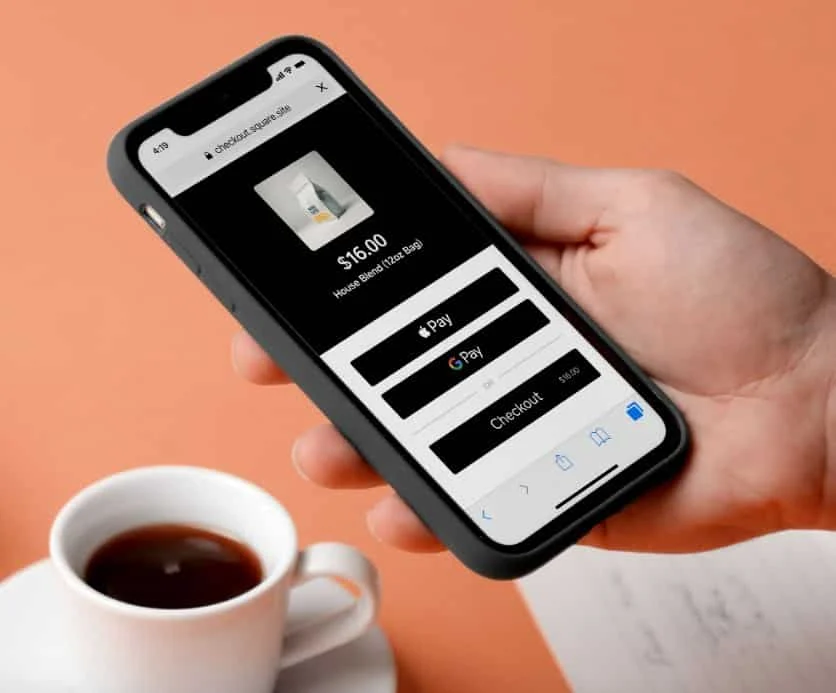
- Contactless shopping with QR code checkout
Like Square Online’s store, Square Checkout requires no coding and even less designing. Creating a page is more like filling out a form. You can then share it with customers via a link, buy button, or QR code.
Expand the tabs below to learn how create a Square Online Checkout page in three steps:
Same as if you were creating a full Square Online store, the first step is to set up a free Square account. To create an account, you’ll need an email address, password, name, last four digits of your Social Security or individual taxpayer identification number, and phone number. Square will use that information to confirm your identity if you want to receive payments (though there’s no application or approval process).
Once you have an account, it will take you to the Square Dashboard, which serves as the command center.
To set up a Square Online Checkout link or button, click on the three lines on the top rightmost of your Square Online account, which will show Square menu icons. Click on Online Checkout.
To set up a Square Online Checkout link or button, click on the three lines on the top rightmost of your Square Online account, which will show Square menu icons. Click on Online Checkout.
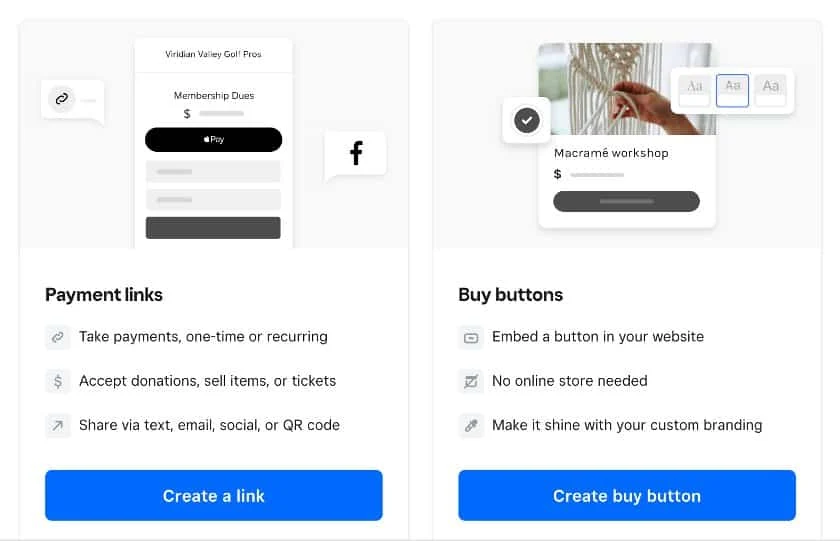
When you’re logged in to your Square account, you can create an Online Checkout page by creating a payment link or generating a buy now button for embedding on another website.
There are four primary types of checkout links: collecting payment, selling an item, accepting a donation, or selling classes or tickets.
In this example, we set up a payment link for our demo store, Everyday Knits.
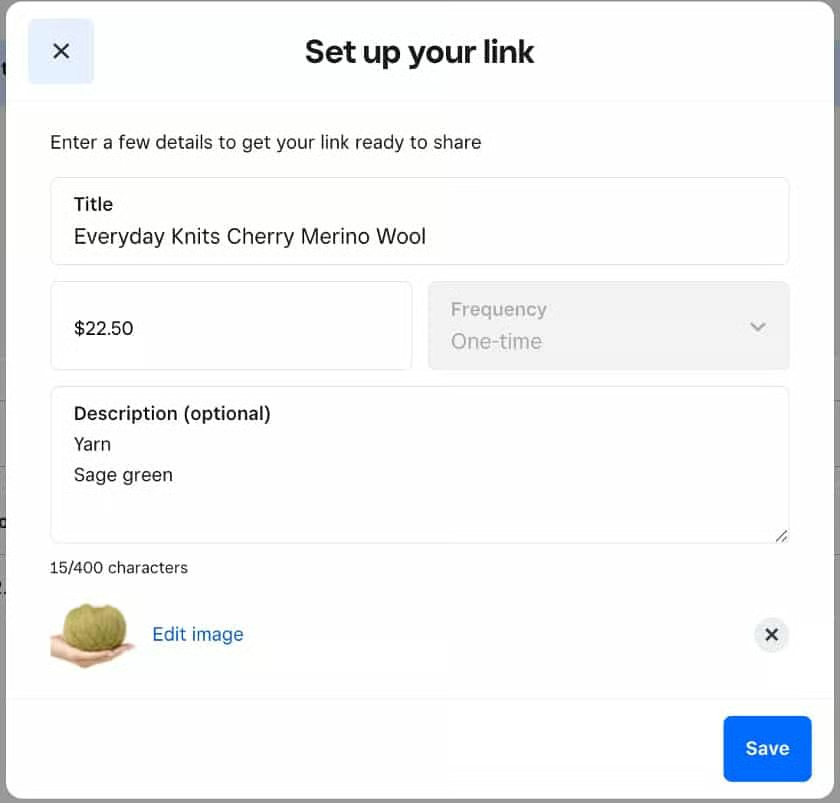
Enter a name for your link to be displayed to your customer, add pricing, and set up description and images if needed.
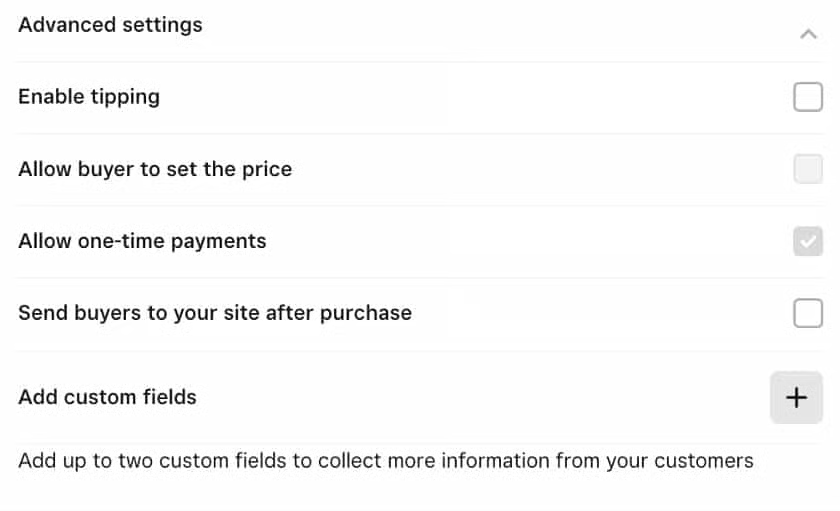
Add more settings such as tipping, custom fields, and order confirmation pages.
You can email or text the link to customers or as part of a campaign and add the link to social posts or advertisements to promote a specific product or service. If you already have a website, make it shoppable by adding buy buttons that link to your Square Checkout pages.
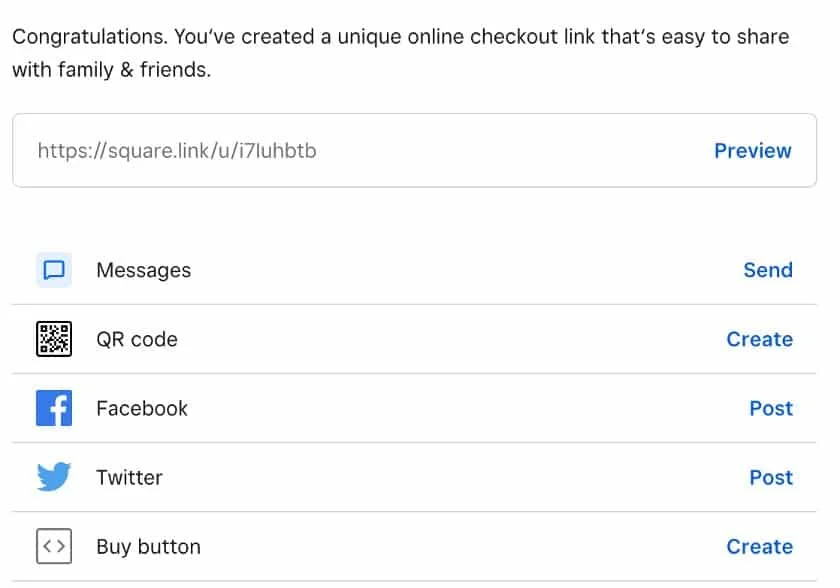
Share your checkout page by emailing or texting the link, having customers scan a QR code, adding a button on your website, or by adding it to a Facebook post.
Businesses can also use Square Checkout for contactless in-store shopping. Print the corresponding QR code and display it with the item in-store. Square has more tips in its Square Online Checkout guide.
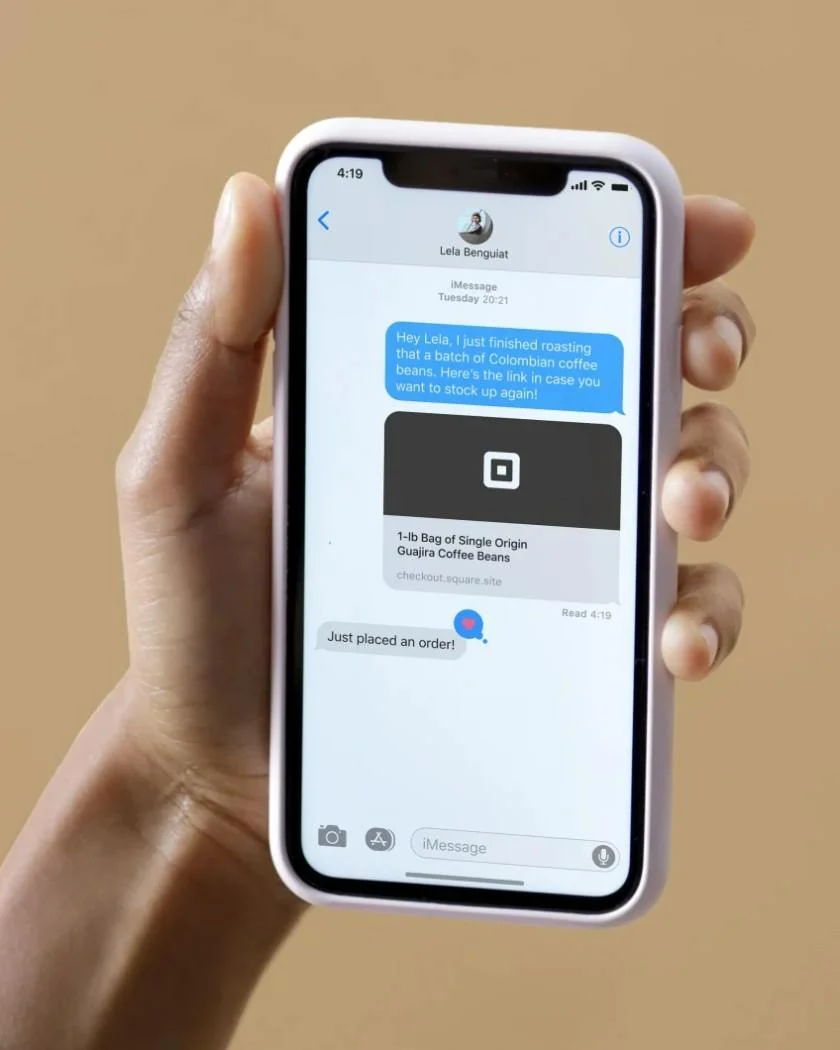
With Square Online Checkout, you can direct customers to a simple purchasing screen by sending them a link via text or email, adding the link to a social post, or by embedding a buy button onto an existing site. (Source: Square)
BONUS: Set Up a Restaurant Website With Square Online
Restaurants can use Square Online to set up an ordering page. This solution works for delivery orders and pickup and as a contactless menu option. Square Online syncs with other Square products, including Square for Restaurants and the kitchen display system, so all orders are in one place.
Read our guide to Square for Restaurants for more details.
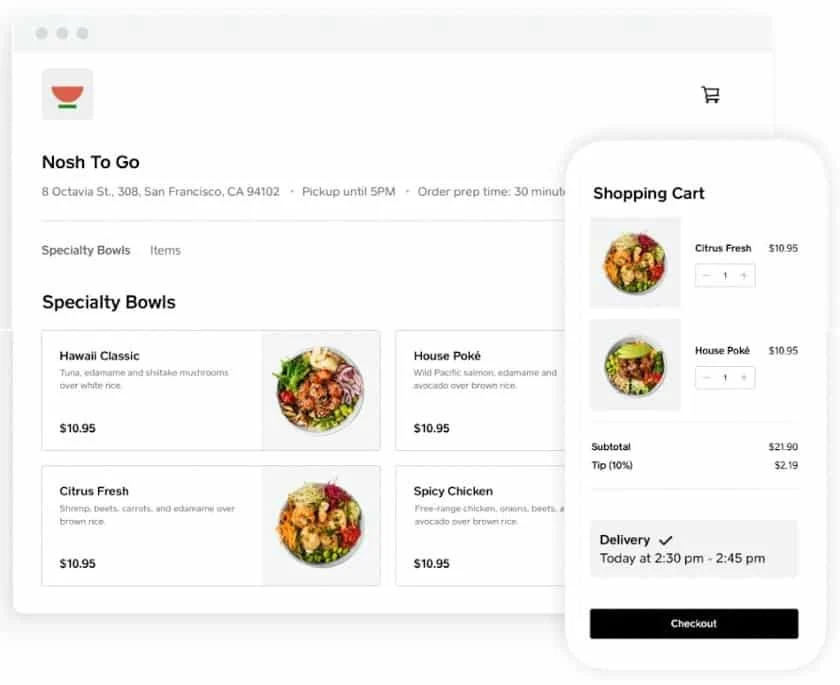
Restaurants can use Square Online to set up delivery. Use your own drivers or connect to Square’s on-demand delivery platform. (Source: Square)
Square Online Store Frequently Asked Questions (FAQs)
Yes, Square has an online store component called Square Online Store which has a forever-free plan. Every free Square store ties into the rest of the Square ecosystem and can be managed through your Square Dashboard, where you can sync products, orders, and customers across your in-person and online sales channels.
Yes, you can through your own Square Online shop. You can sell physical items for retail, event tickets, digital goods, donations, and prepared food and beverages for your restaurants.
Square Online is the ecommerce component of Square. With Square Online, you can have an online component for your brick-and-mortar store. Square Online is a popular choice for storefronts because it’s easy to use and free to get started—plus, it integrates seamlessly with Square POS.
Bottom Line
A free Square store is an excellent platform for small businesses wanting to take their operations online quickly. Setup is swift, and product entry is seamless—plus, it’s easy to track inventory and orders once your store takes off. On top of that, as your business grows, you can take advantage of Square’s free POS app for in-person sales, and add additional ecommerce and marketing tools to scale your business.
Set up an online store with Square—open your free Square account and launch your online store today.