Venmo is a popular peer-to-peer mobile payment platform that offers a Venmo Business profile, which allows businesses to accept Venmo payments.
Setting up Venmo for business is quick and easy, especially if you already have a Venmo Personal account. It involves submitting your business details and tax information and connecting a bank account or card.
To learn how to set up Venmo for business, see the steps I followed when creating my account below.
Want to learn more about Venmo Business account and its pricing and features? Read our Venmo Business ultimate guide.
Step 1: Download the Venmo App
The first step is to download the Venmo app. Venmo is only available for those in the US. It is free to download from the App Store or Google Play, and you will need a US number to use the app.
You can also sign up for a Venmo account via its website. However, since everything else is done through the app, I decided to download the app as my first step.
Step 2: Create a Venmo Account
To create a Venmo Business profile, you first need a Venmo account. If you already have a Venmo Personal account, skip this step and proceed to Step 3.
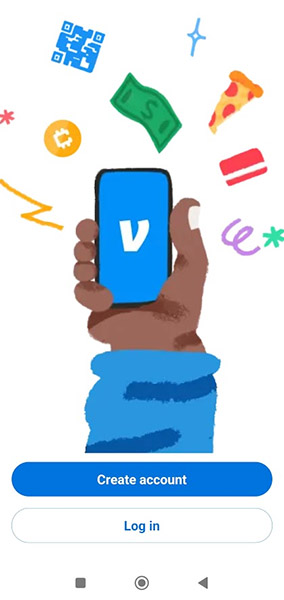
I opened the Venmo app and tapped “Create account.” From there, I was prompted to indicate how I plan to use Venmo and choose among three options: Personal, Teen, and Business. If you choose “Business,” Venmo will first create a Personal account for you before you can create a Business profile. The “Teen” profile is for parents who are creating an extended Venmo account for their teens.
Tip: Both your Personal and Business accounts will be easily accessible within the app. You can toggle back and forth between the two via a dropdown menu on your profile.
Once I tapped Business, I was prompted to enter my phone number and was sent a verification code. After entering it into the app, I was also asked to provide my legal name and set the email and password I wanted to use. From here, you will be asked to agree to Venmo’s User Agreement and Privacy Policy.
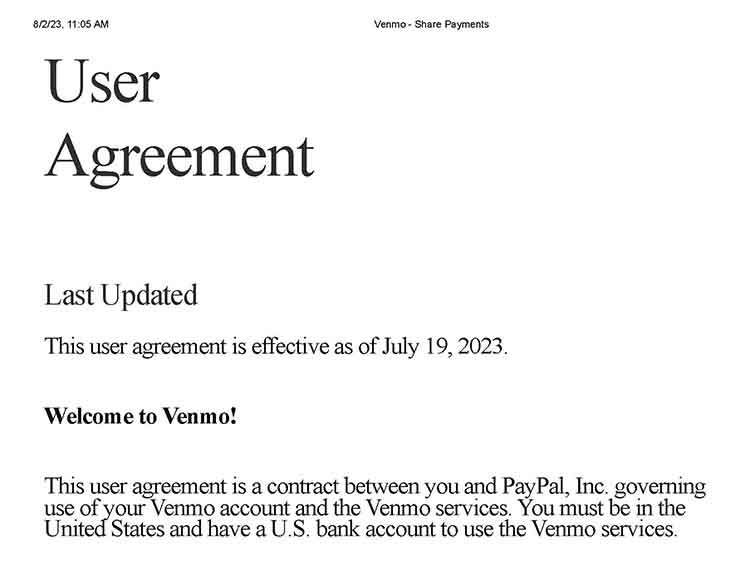
You may download the Venmo User Agreement here:
Step 3: Create Your Business Profile
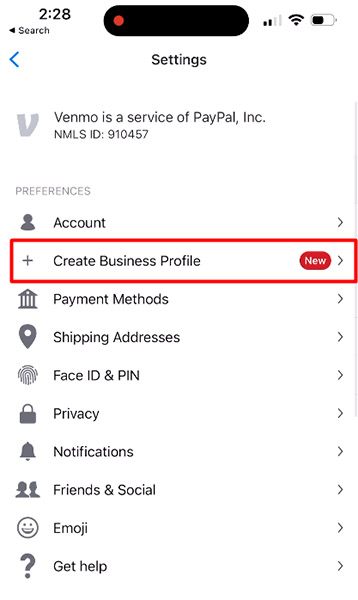
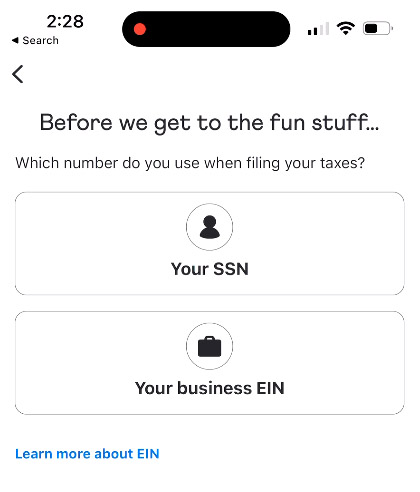
After creating my Venmo account, I proceeded to create my Business profile. If you already have a personal Venmo account, this is where you can start to create your Business profile as well.
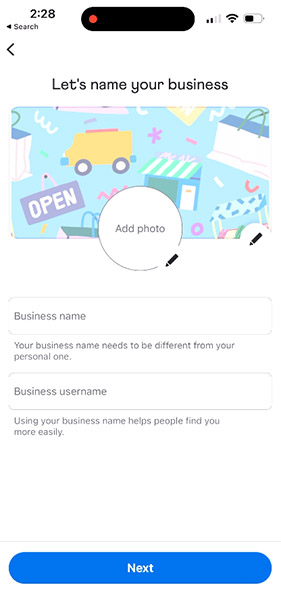
To recap, during the sign-up process, these were the business details I needed to provide:
- Business name
- Business username
- Business profile image
- Business description
- Business category
- Business address
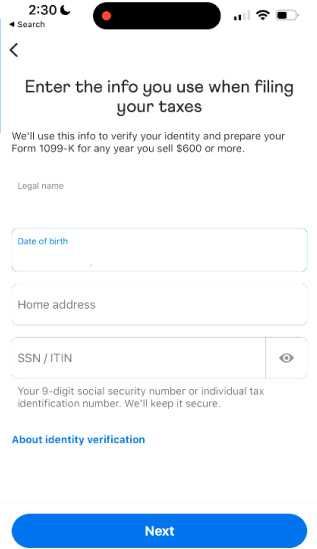
For identity verification, these were the required inputs:
- Legal name
- Birthdate
- Address
- SSN or individual tax identification number (ITIN)
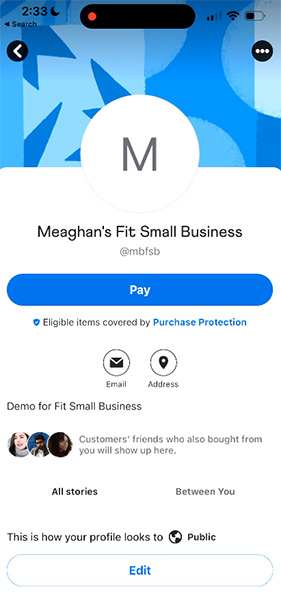
After creating my Business profile, there was an option to share my Business profile with others to promote my business.
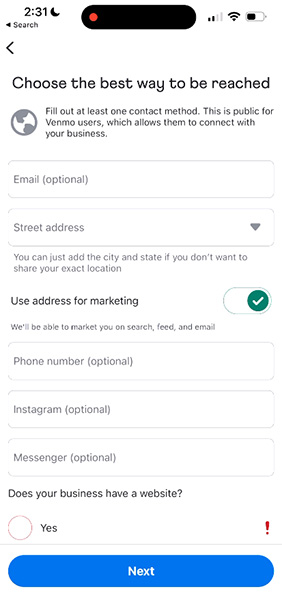
Tip: Add your business website and contact information to your Venmo profile so existing and prospective customers can easily ask questions and learn more about what your business has to offer.
Step 4: (Optional) Turn On Tipping
Newly created Business profiles will be given the option to turn on tipping right from the homepage. I tapped “Turn on tipping,” and the tipping settings showed more info on how Venmo tipping works.
When paying, a customer can choose from four tipping presets: 15%, 20%, 25%, and custom. The customer can also choose not to add any tip when paying. Keep in mind that any tips included in the payment are also charged with the seller transaction fee, which is 1.9% + 10 cents of the total transaction amount.
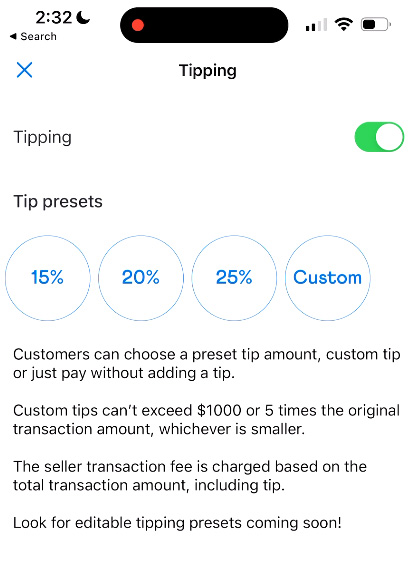
Venmo customers may choose from several tipping presets.
Step 5: (Optional) Order a QR Kit
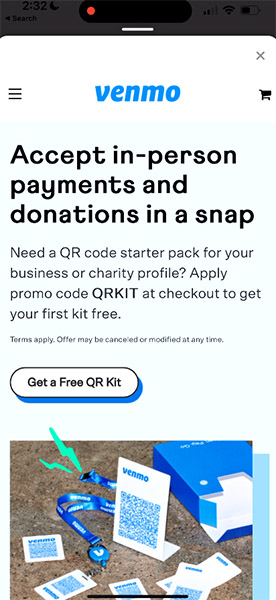
If you accept payments in person, Venmo’s QR kit is a helpful tool. It includes a tabletop display with a stand, five stickers, and a wallet card with a lanyard. The QR kit makes it easy to display your Venmo business profile QR code so your customers can quickly scan to pay.
Although ordering a QR kit is optional, Venmo usually offers the first kit for free. Extra QR kits are priced at $14.99 each. The QR kit can be ordered directly from the Venmo Business profile page.
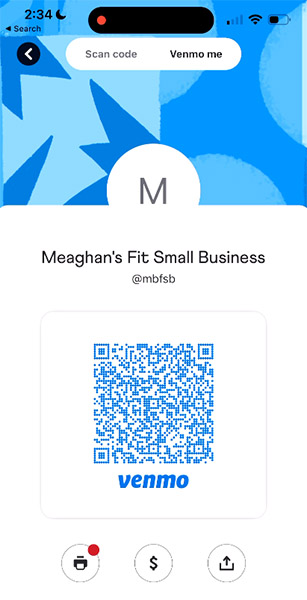
The Business profile page also has a QR code icon on the lower left corner if you want to see your Business profile QR code. Additionally, you can print the QR code to display it prominently in your business establishment.
Step 6: Add a Bank Account or Card
When you receive payments on your Venmo Business profile, you can use it to pay or send money to other Venmo accounts or withdraw it to a linked bank account or card.
If your Business profile is for a sole proprietorship and you submitted your SSN for identification, you may use any bank account or card linked to your Personal profile for transferring funds to and from your Venmo business account. However, if you created your business as a registered business, you will need to link a separate bank account or card for your Business profile.
To link a bank account or card, follow these steps:
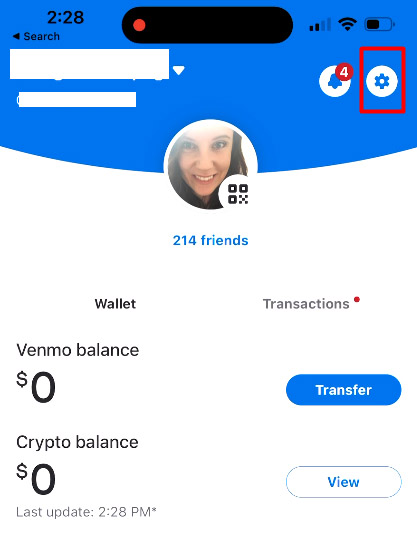
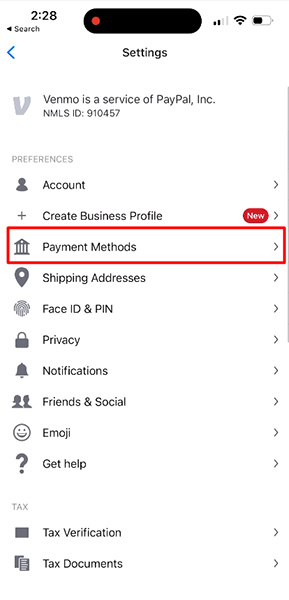
- Step 6.1: Tap the settings icon from your Business profile page and then “Payment Methods.”
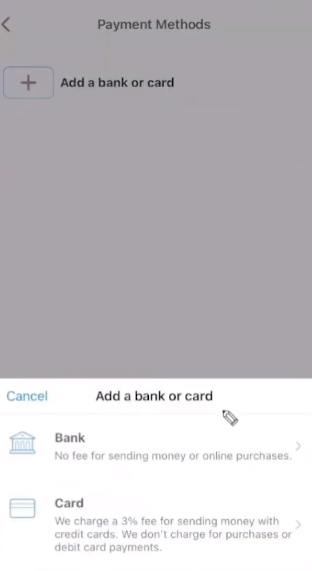
- Step 6.2: Select “Add a bank or card.”
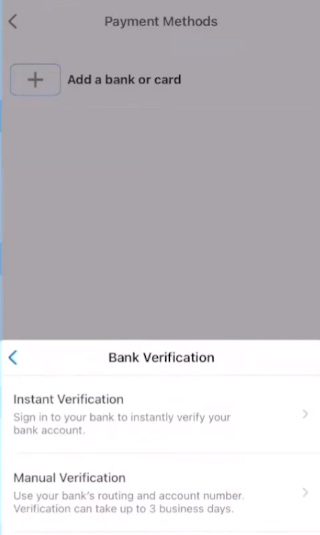
- Step 6.3: For bank verification, I was asked to choose between instant verification or manual verification. Venmo uses Plaid to instantly authenticate bank accounts. If you prefer to use manual verification, you will need to input your bank’s routing and account number. Make sure to have at least $2 in your bank account because Venmo will make micropayments to verify the account.
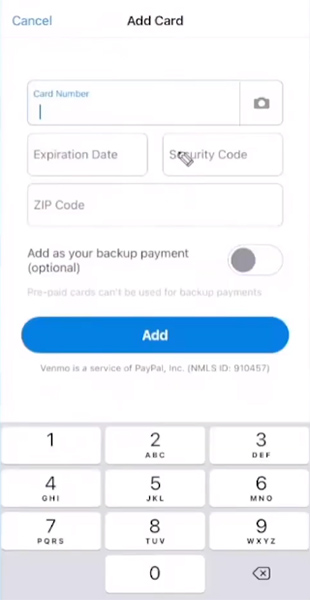
- Step 6.4: To add a card, the usual card details (card number, expiration date, security code, etc.) are required.
Venmo offers instant transfers of your Venmo balance to your bank account or credit card with a fee of 1.75% of the amount transferred. Instant transfers only take a few minutes for the amount to be reflected in your bank account or card. You may also choose Venmo’s standard transfer, which is free and takes one to three business days.
Don’t forget: Set your transactions to Public. One of the benefits of Venmo payments is the social feed on the home screen. Public transactions are like advertisements for your small business—your customers’ friends will see that they shopped your business. Read our Venmo Business ultimate guide to learn more.
How to Accept Payments Using A Venmo Business Account
Once you learn how to set up a Venmo account for a business, you can begin accepting payments from other Venmo users. Any funds that are paid to your Venmo profile go into your Venmo balance, which you can withdraw to your linked bank account or card.
Looking for ways to accept mobile card payments? Check out our list of the best mobile credit card processors.
Here are the different ways you can use your Venmo Business profile for accepting payments:
Through the Pay Button on Your Business Profile
To receive payments from customers with Venmo accounts, you only need to share your Venmo Business profile (or your customer can just search for your Business profile on the Venmo app). Customers can tap “Pay” and then input the transaction amount.
Through Your Business Website
If you have a business website and want to offer Venmo as a payment option, you will first need to add PayPal Checkout to your website. Read our guide on how to set up a PayPal Business account to learn how to enable PayPal Checkout to your website.
Those who already have PayPal Checkout integrated into their website should find an option to enable the Venmo button. If you don’t see this option, you will need to add the Pay with Venmo integration to get the Venmo button.
After adding the Venmo button to your website, your customers will be able to see both PayPal and Venmo buttons. If your customer is viewing your website on mobile, tapping the Venmo button will open the Venmo app so your customer can send the payment to your Venmo Business account. The customer will be sent back to the website after successful payment.
If your customer is using a desktop computer or a laptop to view your website, tapping the Venmo button will generate a QR code that your customer can scan using their Venmo app.
By Scanning Your Business Profile QR Code In Person
To accept payments in person, you can display QR codes in your business establishment. To pay, your customer can simply scan the displayed QR code using their Venmo app. If you don’t have your QR code displayed, you can also open your Venmo app, tap the QR code, and show it to your customer to scan.
Venmo will roll out Tap to Pay on Android for Business profiles soon. Once available, Venmo Business accounts will be able to accept any contactless payment using their Venmo app on a compatible Android device, even if the customer does not have a Venmo account.
Benefits of a Venmo Business Profile
I was able to create a Venmo Business profile at no cost and in just a few minutes, which means any small business can also set up a Venmo Business account quickly and easily. Whether you are an established business seeking additional payment options or a small occasional seller, having a Venmo Business profile will ensure that you can provide Venmo users with a convenient way to pay.
Here are the benefits of having a Venmo Business account:
- More Payment Options: Having a Venmo Business account allows you to offer your customers an additional payment option. Customers who are also Venmo users will find it convenient to pay using their Venmo balance.
- Capturing a Younger Demographic: With Venmo’s popularity among younger generations and its seamless integration with mobile devices, you can tap into a broader customer base and cater to those who prefer digital and mobile payment methods.
- Instant Fund Transfers: Venmo’s instant transfer option enables you to access funds from your Venmo Business account quickly. This can be particularly beneficial for small businesses that rely on timely cash flow for operations or inventory management.
- Social Sharing and Exposure: Venmo’s social aspect allows customers to interact and share their transactions with friends and followers. This means your business can potentially gain exposure as Venmo users share their purchases or experiences with your products or services on their social feeds.
- Simple In-person Transactions: The availability of a QR kit allows you to accept payments in person, making it convenient for customers who visit your physical store or attend events.
- Cost-effective Payment Processing: Compared to traditional payment methods, Venmo’s transaction fees are generally lower, making it a cost-effective solution for processing customer payments. Other popular merchant account providers charge transaction fees at around 2.6% + 10 cents, which is higher than Venmo’s 1.9% + 10 cents.
Bottom Line
I found the process of setting up a Venmo account for business to be easy and straightforward. Small businesses that want to easily accept payments from Venmo users should consider creating a Venmo Business profile to provide a convenient payment option. The steps involve downloading the Venmo app, creating a Venmo account, setting up your Business profile with relevant information, turning on tipping options, and ordering a QR kit for in-person payments.
With its user-friendly interface and widespread popularity, Venmo is an ideal payment option for small businesses to offer their customers.
