You can pay your credit card invoices in QuickBooks Desktop via two methods: pay when reconciling your credit card account and pay without reconciliation. This tutorial covers both.
To understand the instructions better, we recommend that you follow along in your QuickBooks Desktop account. If you don’t have an account, you can choose from QuickBooks Desktop Pro, Premier, Enterprise, or QuickBooks Desktop Accountant. Read our QuickBooks Desktop comparison to help you decide which desktop product is best for you.
QuickBooks Desktop Pro, one of our best small business accounting software, is available on an annual subscription basis with a 60-day money-back guarantee.
- How To Pay Your Credit Card Invoice When Reconciling Your Credit Card Account.
- How To Pay Your Credit Card Invoice When You’re Not Reconciling Your Account.
How To Pay Your Credit Card Invoice When Reconciling Your Credit Card Account
Tip:
Reconciling your credit card account before you pay your credit card invoice is a good practice because it allows you to catch potential errors made by vendors and helps reduce the possibility of fraud in your company.
First, you need to reconcile your credit card account. If you’re not familiar with the process, you can check our tutorial on how to reconcile a credit card balance in QuickBooks Desktop. When you have cleared your transactions successfully, click on the Reconcile Now button on the lower left side of the reconciliation screen as shown below:
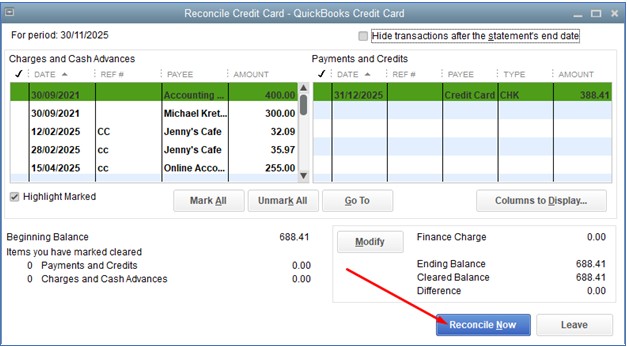
Reconcile Your Credit Card Account in QuickBooks Desktop
When you click Reconcile Now, a small pop-up screen will appear asking how you want to make your payment. You can write a check for payment now (A) or enter a bill for payment later (B). Click on your desired payment option and tap OK. This is where the payment process actually starts:
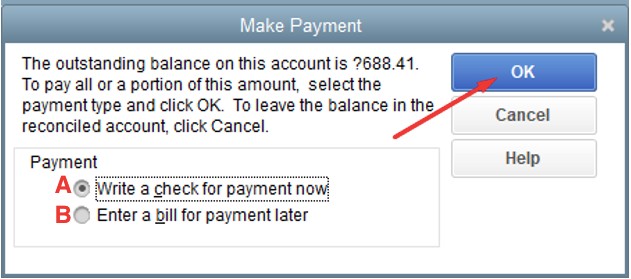
Write a Check for Payment Now or Enter a Bill for Payment Later
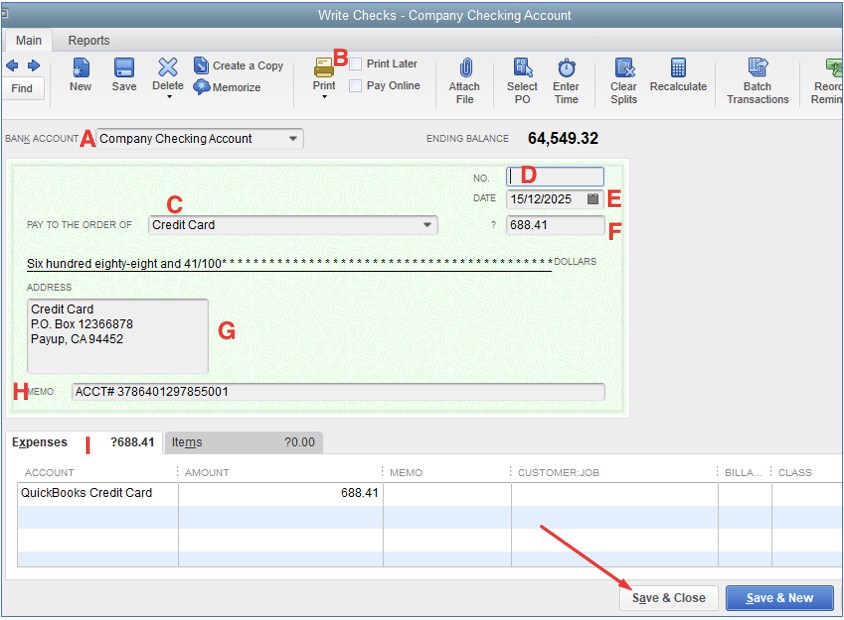
Write Check Screen in QuickBooks Desktop
The Write a Check for Payment Now button leads you to the Write Check screen, as shown below. From the Write Check screen, make sure to enter the required information, including the following:
- Bank Account: Select the bank account where you want to pay the amount.
- Print Later: Check this box if you want to create the check now but wish to print it later.
- Pay to the Order of: Enter the name of the vendor. This will be generated automatically by QuickBooks Desktop.
- No.: If you wish to print the check now, make sure to enter the correct number from the check you’ll place in the printer.
- Date: Enter the date when you’re issuing the check.
- Amount: Enter your desired amount. You can enter a portion or the total amount due.
- Address: This field is generated automatically based on the payee information you entered in QuickBooks Desktop.
- Memo (optional): Enter additional information like the purpose of the payment.
- Expenses or Items Tab: QuickBooks will record this payment in your credit card liability account automatically as shown in the Expenses tab.
After entering all information, click Save & Close, and your credit card invoice will be paid. You can check out our detailed tutorial on how to write and print a check in QuickBooks Desktop for more information on the Write Checks screen.
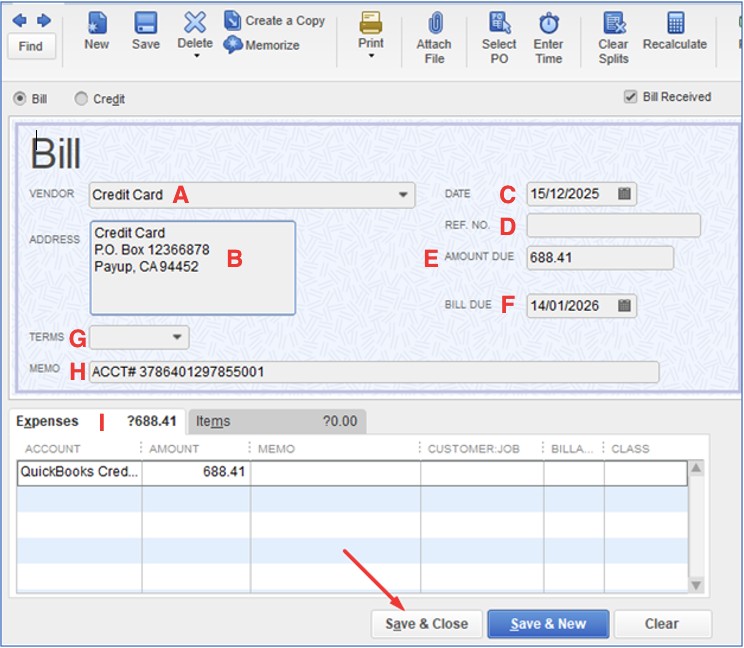
Enter a Bill to Pay Later
Now, let’s go to the other option which is to enter a bill for payment later. When you click on the Enter a Bill for Payment Later button, you should see the Enter a Bill screen. From here, you need to populate several fields, including the following:
- Vendor: Enter the vendor for whom you’re paying the bill.
- Address: This field is populated automatically based on the information you entered during vendor setup.
- Date: Enter the date of the credit card statement.
- Ref. No (optional): Assign a unique number to your bill.
- Amount Due: Enter the total amount of the credit card bill that you wish to pay this month.
- Bill Due: Enter the due date of the bill.
- Terms (optional): Generally, this isn’t applicable for a credit card bill.
- Memo (optional): Enter additional information, such as ”Bill for October Credit Card Payment.”
- Expenses and Items Tab: As with a check, QuickBooks will record the bill as a reduction in your credit card liability.
Review your entry and click Save & Close.
If after reconciling your credit card, you choose to create a bill to pay later, don’t forget to pay the bill. When you’re ready to pay the bill, click on the Pay Bills icon on your QuickBooks Desktop homepage:
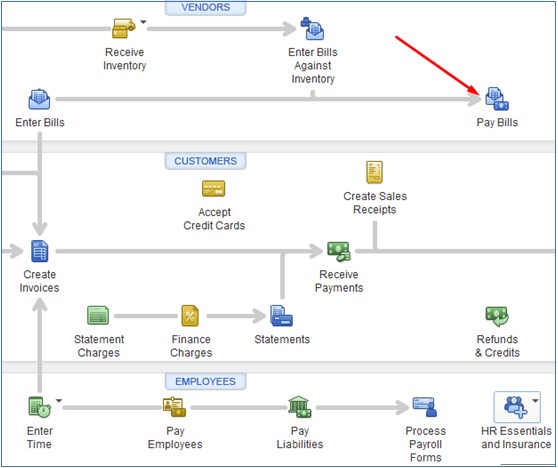
Pay Bills in QuickBooks Desktop
From here, you should see the bills that you entered previously:
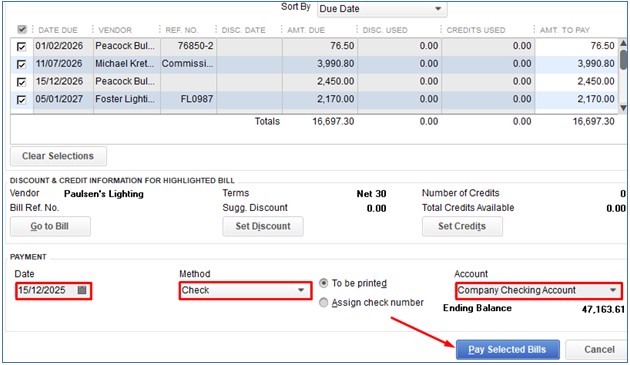
Outstanding Bills Entered in QuickBooks Desktop
Click on the checkbox next to the bill, enter the date when you’re paying the bill, choose the check method, and enter your company checking account. Tap Pay Selected Bills and your bills will be paid.
So, that’s how you pay a credit card invoice when you’re reconciling your credit card account.
How To Pay Your Credit Card Invoice When You’re Not Reconciling Your Account
Click on the Write Checks icon on your QuickBooks Desktop homepage:
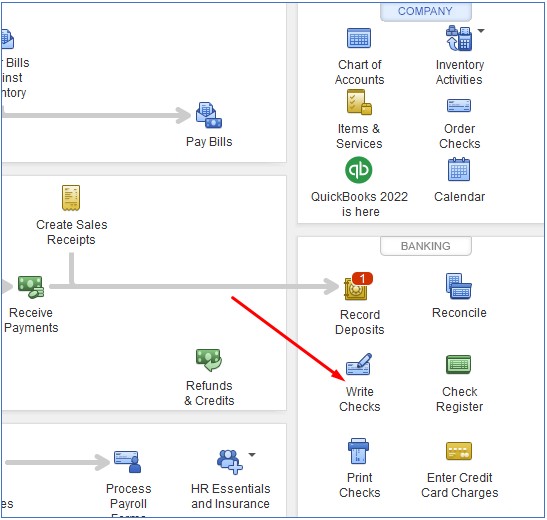
Launch the Write a Check Screen in QuickBooks Desktop
From the Write Checks screen, provide the required information, such as the bank account, pay to the order of (vendor), and amount. It’s important that you select the credit account to be paid in the “Expenses” tab rather than charging an expense account. Click Save & Close, and your credit card invoice is paid:
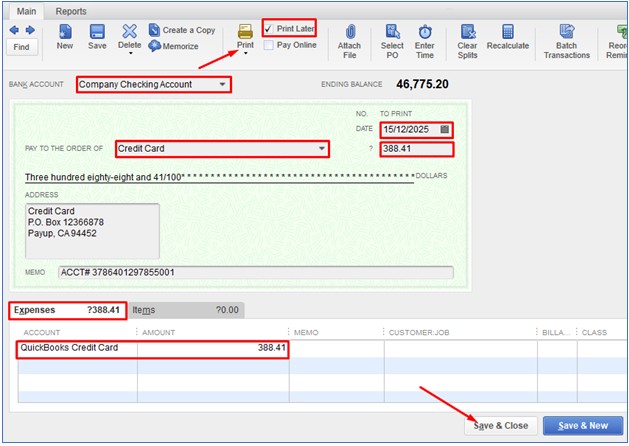
Write Check Screen in QuickBooks Desktop
You can choose to print the check now or print it later. Make sure to enter the number of the first check in the starting check number:
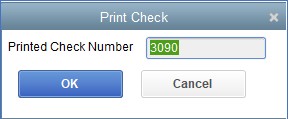
Print Check Number in QuickBooks Desktop
Frequently Asked Questions (FAQs)
Can I pay credit card invoices in QuickBooks Desktop without reconciling my credit card account?
Yes, just write a check as normal and select the credit card to be paid in the “Expense” tab of the write check screen. However, we strongly recommend that you reconcile your account before paying to ensure accurate bookkeeping.
Do I need to set up an integrated credit card processor to pay credit card invoices in QuickBooks Desktop?
No, as you can pay your credit card invoices directly from within QuickBooks Desktop.
Can I set up a recurring payment in QuickBooks Desktop?
Yes, and you can follow the steps in our guide to creating recurring vendor payments in QuickBooks Desktop.
Wrap Up
There you go—the process of paying a credit card in QuickBooks Desktop. Again, it’s a good practice to always reconcile your credit card account when paying a credit card invoice in QuickBooks Desktop. We hope you found this tutorial helpful.