


In this guide, you’ll learn how to write and print checks for bills that haven’t been entered. If you need to make payments for bills previously recorded in the platform, head over to our QuickBooks Online tutorial on how to pay bills that have already been entered.
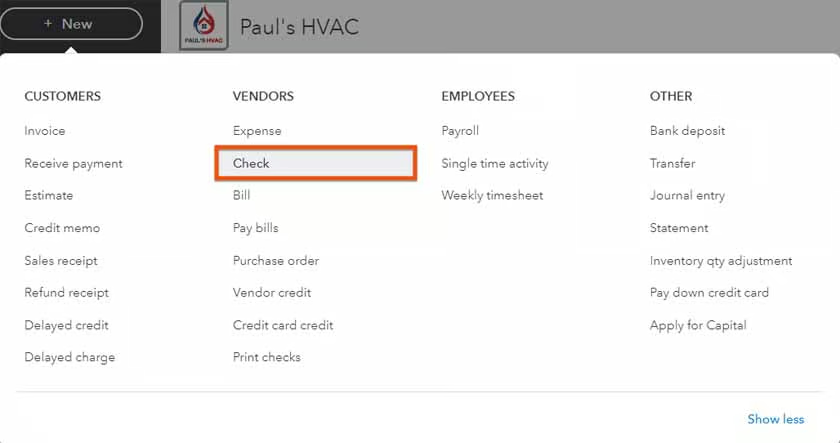
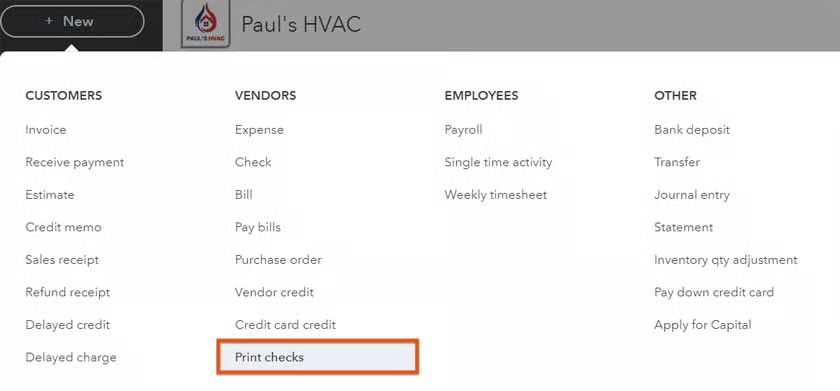
Click the + New button at the top of the left menu bar and then select Check under Vendors in the second column, as shown below.
QuickBooks Online displays an input screen to create a new check. The exact fields shown on the screen will vary based on how you customize your advanced options, as covered in our guide on how to set up advanced settings in QuickBooks Online.
To illustrate the process of completing the check input screen, we’ll use a sample scenario. Let’s say you receive a bill from your utility company, Vault Electricity, for $120. The bill has not yet been recorded, and you want to write and print a check to pay it.
The GIF below shows how the check input screen is completed using our sample scenario.
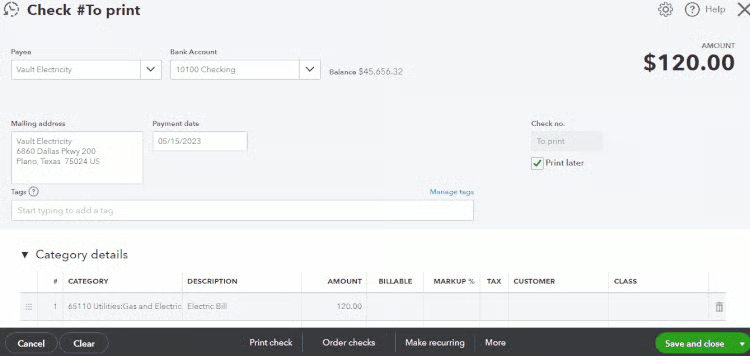
Some of the important fields you need to complete include:
- Payee: Select the vendor you’re paying from the drop-down box. If the check is to a new vendor, click Add new at the top of the drop-down list and set up the new vendor, as shown in our lesson on how to set up vendors in QuickBooks Online. After selecting a vendor, the billing address should populate automatically. In our example above, we selected Vault Electricity as the payee.
- Bank Account: Select the bank account from which you are writing a check.
- Payment date: Enter the date the check will be issued.
- Category: Payments must be assigned to either a Category or an Item. You should assign a check to a category when you want to track and classify the expense based on general expense categories. In our sample scenario, we assigned the expense to the “Utilities: Gas & Electric” category.
- Description: Provide a description of the payment.
- Amount: Enter the amount of the payment to assign to this category. By default, QuickBooks will enter the entire payment amount. However, the total check amount can be split between multiple categories and items if you wish.
- Billable: Place a checkmark if the amount charged to this category will be billed to a customer. However, the preferred method of recording expenses billable to customers is to use items instead of categories, as shown in our tutorial on how to set up the products and services list in QuickBooks Online.
- Tax: Place a checkmark if you’re required to charge the customer sales tax when billing them this expense.
- Customer/Project: Select the customer and project, if applicable, to which you want to bill this expense. If it is a new customer or project, click Add new at the top of the drop-down box and add the customer or project, as shown in our lesson on how to set up customers in QuickBooks Online.
- Product/Service (Item Details): This is where you can choose to assign the payment to a product or service item instead of a category. Once you select an item, the fields for Rate, Billable, Markup %, Tax, and Class will populate automatically.
- Qty: Enter the quantity of the item being purchased. This is especially important for inventory items. Once you enter the quantity, the amount will be calculated as rate times quantity.
- Customer/Project: Choose the customer and project to bill for this item. This field is required if there is a checkmark in Billable.
If you wish to save the check without printing it right away, you may simply click the green Save and close button on the lower right side of the screen (shown in the GIF above). You may also choose to print the check later by placing a checkmark in the Print later field located under the check number. Printing later is convenient if you are creating multiple checks.
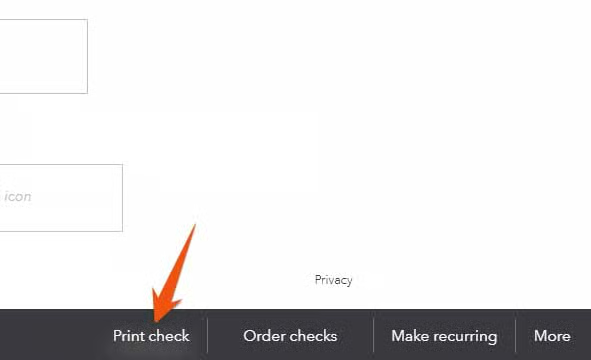
However, if you wish to print the check right away, click on the Print check button on the bottom menu bar.
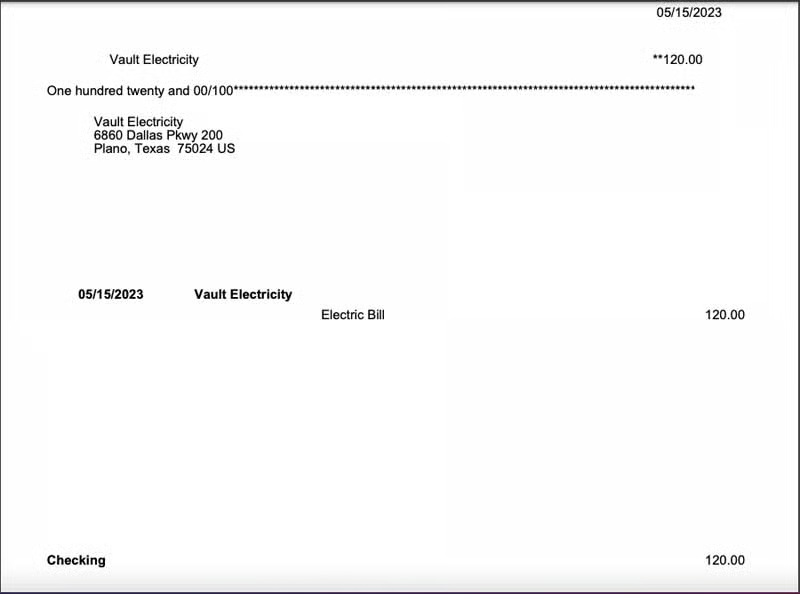
QuickBooks will bring up the print queue window that shows the current check plus any other checks you have selected previously to print later. Place a checkmark next to the check, or all the checks, you wish to print.
In the screenshot below, we highlighted the check that we just wrote for Vault Electricity.

The first time you print checks, the QuickBooks Online alignment wizard will guide you through setting up and aligning your printer for your particular style of checks. However, we recommend that you check your settings every time you print checks.
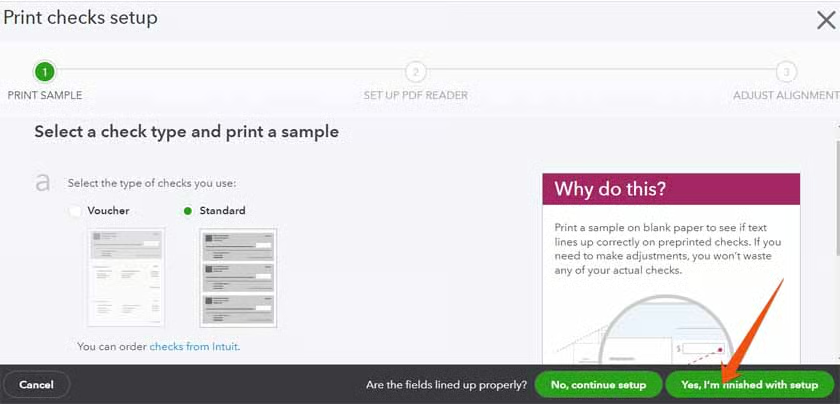
Click on the Print setup button on the bottom menu bar in the print queue window (shown in the screenshot above). The printer setup wizard will appear, asking you to choose the check type and print a sample on blank paper.
You can choose from two check types:
Voucher
A voucher check is a check that includes detachable stubs or vouchers. The stub includes the payment and vendor details. It may appear to have less information compared to the standard check to preserve space for the detachable stub or voucher.
Standard
A standard check is a check without detachable stubs or vouchers. It typically displays the payee’s name, payment amount, description, and bank account information.
After setting up the print settings, click on the Yes, I’m finished with setup button on the Print checks setup screen, as shown below.
In some cases after saving your printing settings, QuickBooks may take you back to your QuickBooks Online homepage. To find your checks to print, click on the + New button on your dashboard, and then click Print checks.
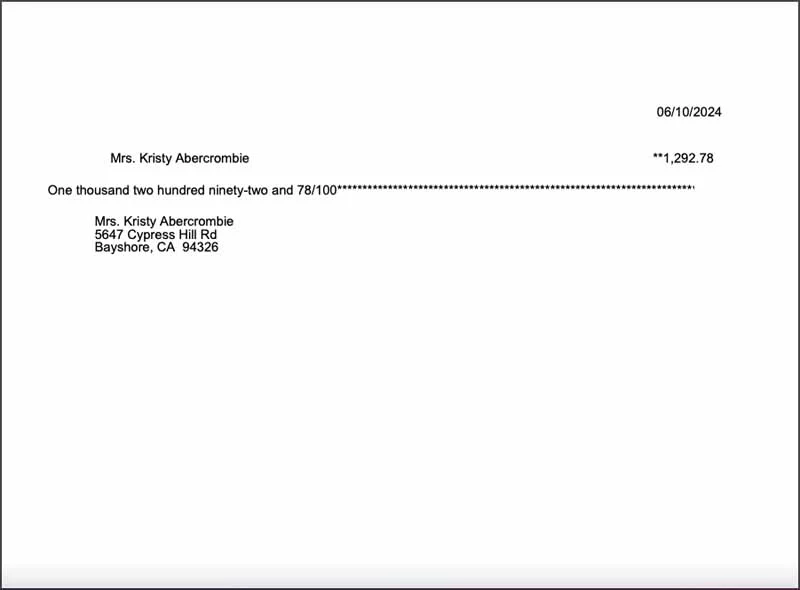
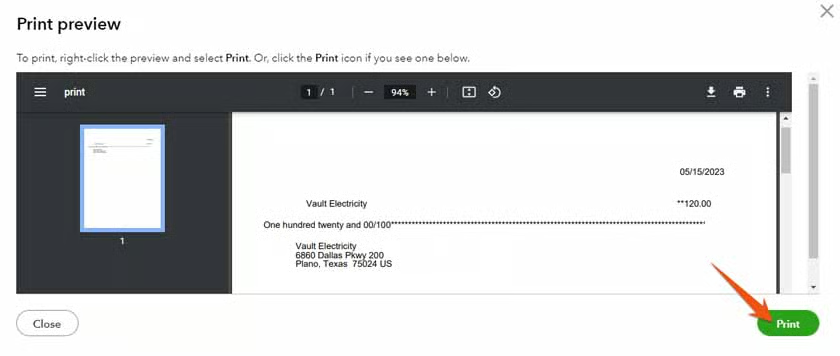
From the print queue window, place a checkmark next to the check you wish to print, click the Preview and print button, and then tap the Print button on the preview screen, as shown below.
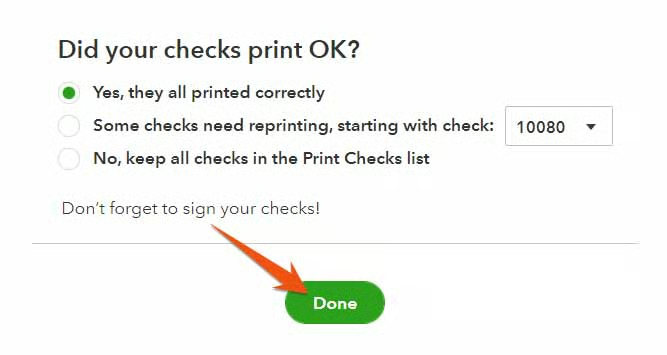
After you print the checks, you’ll be asked if your checks are printed correctly. If they are, select Yes, they all printed correctly, and then click Done.
Otherwise, select Some checks need reprinting, starting with check or No, keep all checks in the Print Checks list. QuickBooks will then return the checks that didn’t print correctly to your print queue. This saves you the time-consuming task of changing the check number manually and reprinting any checks.
If you choose to print later, you can print your checks from the Print Checks screen. QuickBooks will bring up the same print queue window shown above; and from here, you can continue as you did in the previous steps.
Why You Should Write and Print Checks in QuickBooks Online
QuickBooks Online, our best small business accounting software, has excellent check writing and printing features that help you avoid manual errors that may occur when writing checks by hand. Also, using printed checks in QuickBooks Online gives your business a more professional appearance compared to handwritten checks, which can enhance your company’s image and credibility with your vendors and suppliers.
Writing and printing checks in QuickBooks online also makes it easy to reconcile your bank transactions since it automatically records the transaction details, including the check number, payee, amount, and date.
Frequently Asked Questions (FAQs)
Can I print checks directly from QuickBooks Online?
Yes, QuickBooks Online allows you to print checks directly from the program. Once you have completed the check input screen, you can print it using a compatible printer.
What if I make a mistake on a check that I have already printed?
You will need to void the check in QuickBooks Online and create a new one with the correct information. Be sure to update your books accordingly. If needed, you can check out our tutorial on how to void a check in QuickBooks Desktop.
Wrap Up
You’ve just learned how to write and print checks for expenses that haven’t been recorded as bills in QuickBooks Online. The next tutorial in our training course is how to enter bills in QuickBooks Online, where you’ll also learn the benefits of entering bills as they’re received.