Increase your brand’s online visibility and drive sales with Google Local Services Ads. To get started, confirm your eligibility, create an account, and set your service area by ZIP code or city. Then select your services and add your hours of operation. Next, preview and submit your listing for review. Once approved, set your budget and start monitoring the performance of your ads.
Find freelance advertising experts on Fiverr for affordable help with Google Ads. From setup to optimization and campaign management, you can outsource the work for as little as $10.
Follow the seven easy steps below to set up and use local service ads on Google to generate leads and sales:
1. Verify Eligibility for Local Services Ads on Google
Before you begin creating an account, you must determine your business’ eligibility. Eligibility is based on your location and the kind of service your business provides.
Google makes this easy. Go to the Local Services Ads landing page and click “Get Started” to access the account registration page. Complete the form with the city and state where your business operates, and choose your industry. Once you’ve completed the form, click “Check Eligibility.”
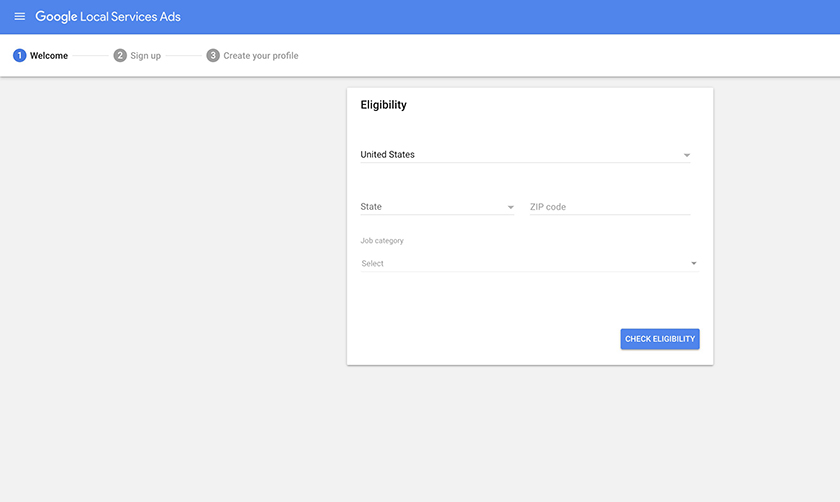
How to check your eligibility for Google Local Services Ads (Source: Google)
If your business operates in a region Local Services by Google supports, you’ll continue registering your business. But if Google does not serve your location yet, you’ll receive a message informing you to try again later.
Local ads can be used to build brand awareness and grow sales by most local service-based businesses. However, they are geared more toward consumer-facing services. Both brick-and-mortar and home-based businesses are welcome to use the ads (meaning you don’t have to serve customers at a physical location to be eligible).
Here is a list of the types of businesses that are eligible:
Acupuncturist Animal shelter Appliance repair Bankruptcy lawyer Beauty school Business lawyer Carpenter Carpet cleaning Child care Contract lawyer Countertop pro Criminal lawyer Dance instructor Disability lawyer Driving Instructor Dui lawyer Electrician Estate lawyer Family lawyer Fencing pro Financial planner First aid trainer Flooring pro Foundation pro Funeral home | Garage door pro General contractor Handyman Home inspector Home security Home theater House cleaner HVAC Immigration lawyer IP lawyer Junk removal Labor lawyer Landscaper Language instructor Lawn care Litigation lawyer Locksmith Malpractice lawyer Massage school Mover Personal injury lawyer Personal trainer Pest control Pet adoption Pet boarding | Pet grooming Pet trainer Plumber Pool cleaner Pool contractor Preschool Real estate agent Real estate lawyer Roofer Sewage pro Siding pro Snow removal Tax lawyer Tax specialist Traffic lawyer Tree service Tutor Veterinarian Water damage Weight loss service Window cleaner Window repair Yoga instructor |
2. Create Your Account
After you’ve confirmed your eligibility, you’ll be prompted to enter contact information and other details about your business to create an account. This information includes standard entries, such as the name of your business, your first and last name, and a business phone number.
That’s not all the information you can provide, however. You can make additional entries for a business website, a street address, the number of employees, and the year you started your business. While much of this information is optional, the more information you provide to Google, the stronger your listing will be.
More importantly, the more information you add here, the more likely Google will approve your listing—and sooner. Google utilizes this information to verify the legitimacy of your small business.
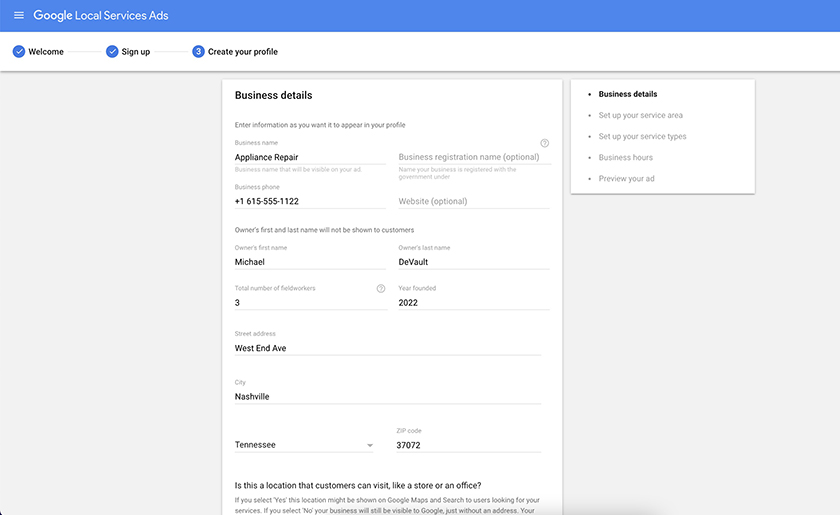
How to enter business details for your account registration (Source: Google)
3. Set Your Service Area
Your service area is the geographic region where your ads will be displayed, based on the location of the person searching online. There are two easy ways to designate your service area: by city or ZIP code.
Entering the ZIP codes of your service area will add those areas to your coverage map. If you don’t have a list of ZIP codes, you can enter city names. These two methods give you almost limitless control over your business’ market, which decreases the chance your ads will be shown to people outside of the area you serve.
As you add your service area, the map will highlight those areas in blue. This gives you an idea of the size and scope of your service area and shows you any holes that might exist in coverage.
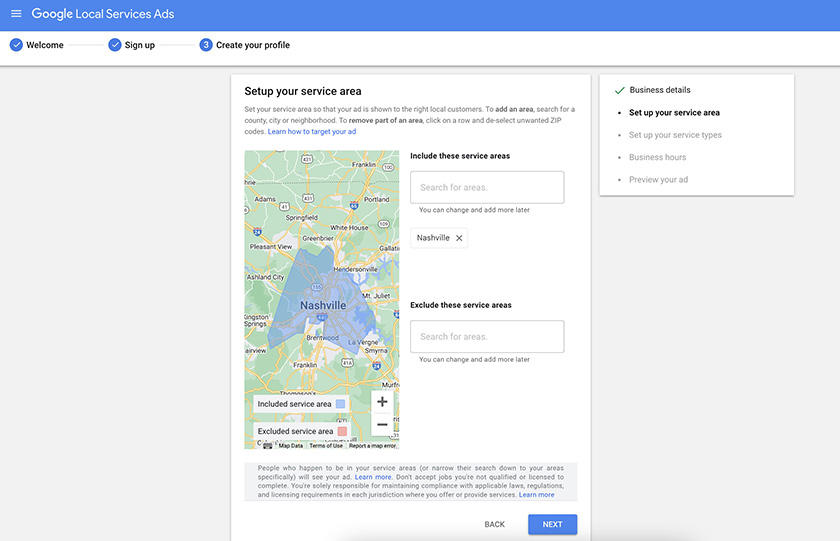
Entering ZIP codes or city names defines your service area (Source: Google)
Once your map matches your service area, indicate whether your business address is a location customers visit. For example, if your small business is a lawn care service operated out of your house, chances are customers don’t come to your location. However, if you’re operating a hair salon, clients need to know where to go. Select the appropriate option for your small business before moving forward.
4. List the Services Your Business Provides
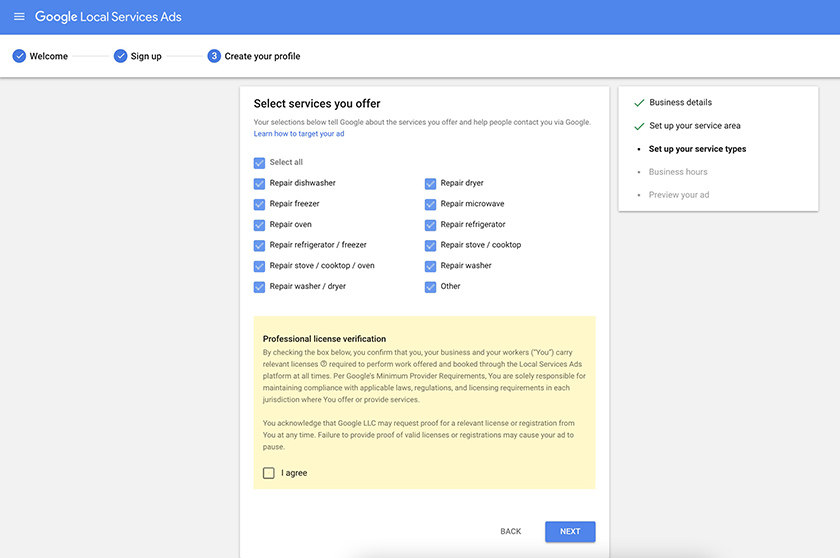
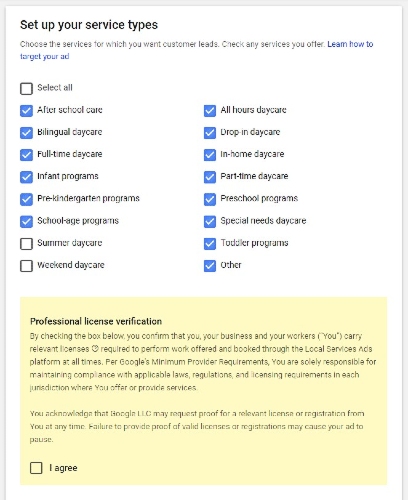
Next, Google will ask you to select your business’ services from a list of activities commonly found in your industry. Simply put a check in the box next to each service your business provides.
Be sure to be specific. The selections you make here will shape the kind and quality of leads you receive. If your business does not provide a service, don’t click the box. You’re paying for each lead you get from Google, so if you don’t offer the service, don’t list it.
Before you move forward, Google requires you to verify that you hold the appropriate licenses and certifications necessary to perform the work you’re advertising. Keep in mind that these questions are part of Google’s vetting process before they vouch for your small business.
Only list services you’re licensed and certified to provide because getting listed in local services by Google may require you to provide proof of licensure or certifications. For some businesses or industries, Google also may contact you to request a background check. These steps are all just part of the process you’ll have to go through to get Google guaranteed.
5. Add Your Business Days & Hours of Operation
Customers browsing Google small business ads need to know when you’re open and operating—and Google makes entering your operating hours simple. First, select the days your business is open by toggling the switch beside each day to “Open.”
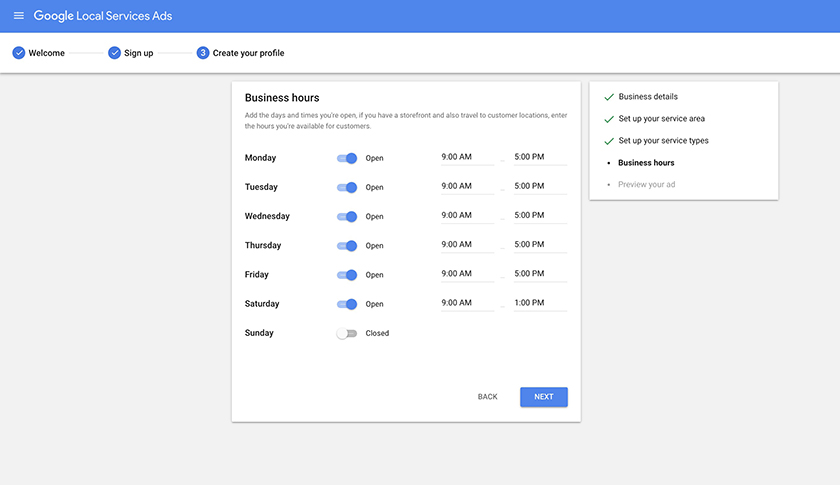
Setting your hours of operation (Source: Google)
Marking a day open reveals a pair of drop-down menus with times. Pull down the menus to select the open and closing times for each day marked open. Once you’ve entered your hours of operation, you’re almost through with the ad setup process.
6. Preview & Submit Your Ad
The final step of setting up your local service ad is to verify the appearance of your listing. Confirm that the information you’ve entered is displaying correctly. That includes double-checking the phone number, the name of your business, and any other information displayed. Once you’ve submitted your business listing, you cannot change it until after the verification process has been completed.
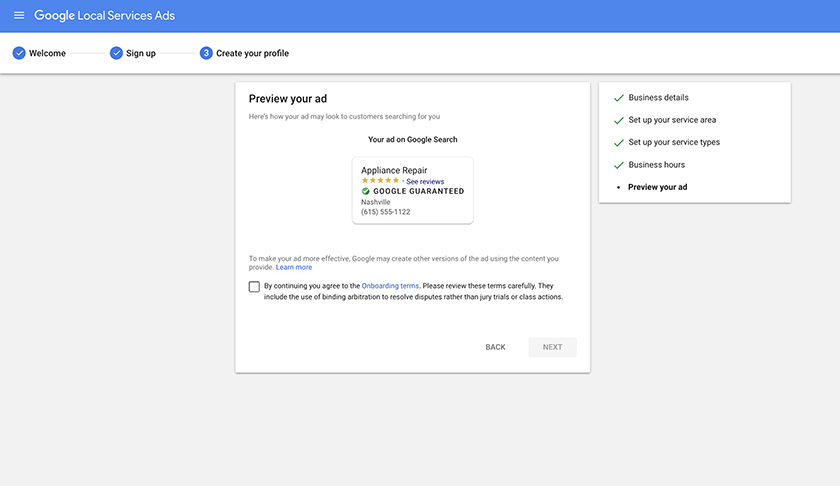
Previewing your ad before submitting it for verification (Source: Google)
Check the box to accept the onboarding agreement. Then, click next. You’ve successfully entered the verification process to become Google Guaranteed. But your work’s not done yet—there are still some things you’ll need to be prepared for after your business gets verified.
After you submit your account for verification, Google will research your business’ credentials and may reach out to request documentation from you. They may request proof of liability insurance, business licenses, professional certifications, and any other documentation required for you to provide the services your customers are seeking.
Once these have been submitted, you’ll receive word from Google that your business is approved for Local Services Ads. In addition to verifying your business is properly credentialed and insured, Google uses this to determine if your business can be a Google Screened or Google Guaranteed business. The “Google Screened” and “Google Guaranteed” labels only apply to specific industries.
For example, professional service providers like lawyers or accountants receive “Google Screened” labels, while certain providers, such as appliance repair or lawn contractors, receive the “Google Guaranteed” designation. Which designation your business receives is determined by Google’s category placement.
7. Set Your Budget, Monitor Performance & Tweak Your Ads
Once approved, you’ll need to set your budget—but you don’t have to go into the process blindfolded. Google provides an easy-to-use calculator to estimate how much your monthly advertising budget should be. To estimate how much you’ll need to spend each month to reach your sales goals, enter three pieces of information:
- Your ZIP code
- The number of leads you want to receive each month
- The types of products and/or services you provide
Once you submit this information, the ads calculator provides a spending range to deliver your desired number leads. This calculator will give you a cost estimate, but ultimately, you control how much you spend after your account is verified. Decrease or increase your budget at any time, and just because you set a budget does not mean you have to stick with that amount if you aren’t getting the results you’re looking for.
Once your budget is submitted and your local ads are up and running on Google, monitor the performance of your ads and make adjustments to increase your return on ad spend. You can tweak your advertising budget and local market area, then make other changes to improve performance. Also, learning more about local search engine optimization (SEO), in general, can help you improve your business’ online visibility—with or without ads.
Frequently Asked Questions (FAQs)
Are local service ads worth it?
For many businesses, Google’s Local Services Ads are worth the time and money. They are more targeted and competitive than typical pay-per-click (PPC) ads, which means you’re paying more per lead. However, Google does not charge per click—only per lead. You set your budget and manage the expense. You determine if you’re getting the return on investment (ROI) necessary to justify the expense.
Where do local service ads appear?
Local Services Ads appear at the top of Google search engine results pages (SERPs). They’re placed above regular Google ads, organic search results, and any Google Business Profile or mapped listings. This gives advertisers a huge advantage in terms of visibility and increases the likelihood these businesses will receive quality leads.
What’s the difference between Google search & local services ads?
Both Google search and Local Services Ads are search engine marketing (SEM) tactics for getting to the top of search pages. Brands using local service ads undergo verification, which isn’t required for search advertisers. Also, search ads are pay-per-click, whereas Local Ads are pay-by-lead, meaning someone took action to contact your business, like filling out a form on your website or clicking a hyperlinked phone number.
Bottom Line
While there are many local advertising ideas and digital marketing materials available to your business, Local Services Ads are a valuable tool to grow your small business. In addition to being hyper-targeted to your local market, you’re meeting potential customers in their moment of need. Each person searching for your service locally has decided to be someone’s customer. With Google Local Services Ads, you are taking one more step toward ensuring they’re your customer.
Learning how to use local service ads effectively takes time and involves a degree of trial and error. Avoid wasting time and valuable ad spend with the ad experts at Lyfe Marketing. Lyfe Marketing specializes in creating and managing highly effective pay-per-click (PPC) campaigns. Get started today with a free, no-risk consultation.
