Are you a wholesaler struggling to reach retailers? Start selling on Faire—one of the leading wholesale platforms for artisan and independent sellers.
How to Sell on Faire: A 6-step Guide
This article is part of a larger series on Retail Management.
Whether you are an established retail brand looking to start selling your products wholesale or you are exclusively looking to sell B2B, Faire is a leading marketplace where retailers and wholesalers alike can buy and sell their goods—and it’s free to open an account.
Faire supports smaller businesses that offer unique, high-quality goods, which typically fall into these categories:
- Not on Amazon
- Small-batch
- Handmade
- Organic
- Eco-friendly
- Woman-owned
- BIPOC-owned
In this guide, we will look at how to sell on Faire, from the initial sign-up down to the making of your first sale. Plus, we’ll look at some of Faire’s tools that will be at your disposal as a marketplace seller.
Step 1: Understand Faire’s Pricing & Selling Tools
On the platform, you can shop wholesale products, list products yourself, and even create your own storefront for regular consumers to shop. Before signing up, it’s important to learn about Faire’s pricing and the selling tools you can access with an account.
Not sure if Faire is the right fit? Check out our guides on how to sell on Amazon and how to start a dropshipping business, plus our roundup of the best wholesale supplier sites to explore your options.
Step 2: Apply for a Faire Brand Account
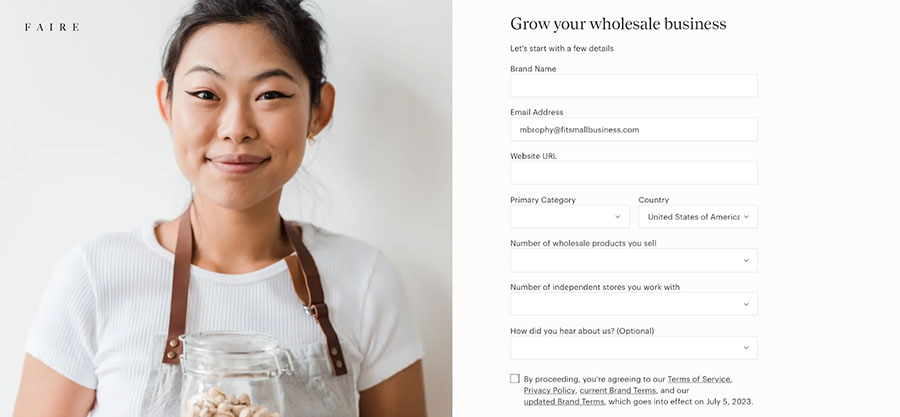
The process to apply for a Faire account is simple.
To become a Faire brand that can sell within the Faire marketplace, you have to start by applying. Simply go to the Faire site, select “Sell on Faire” from the homepage banner, and fill out the short form. When signing up to sell on Faire, you will provide the following information:
- Brand name
- Email address
- Website URL
- Retail category
- Country
- The number of wholesale products you sell
- How many retailers you currently sell to
It will then go to Faire’s brand verification team, which will determine the legitimacy of your brand and the accuracy of the information provided.
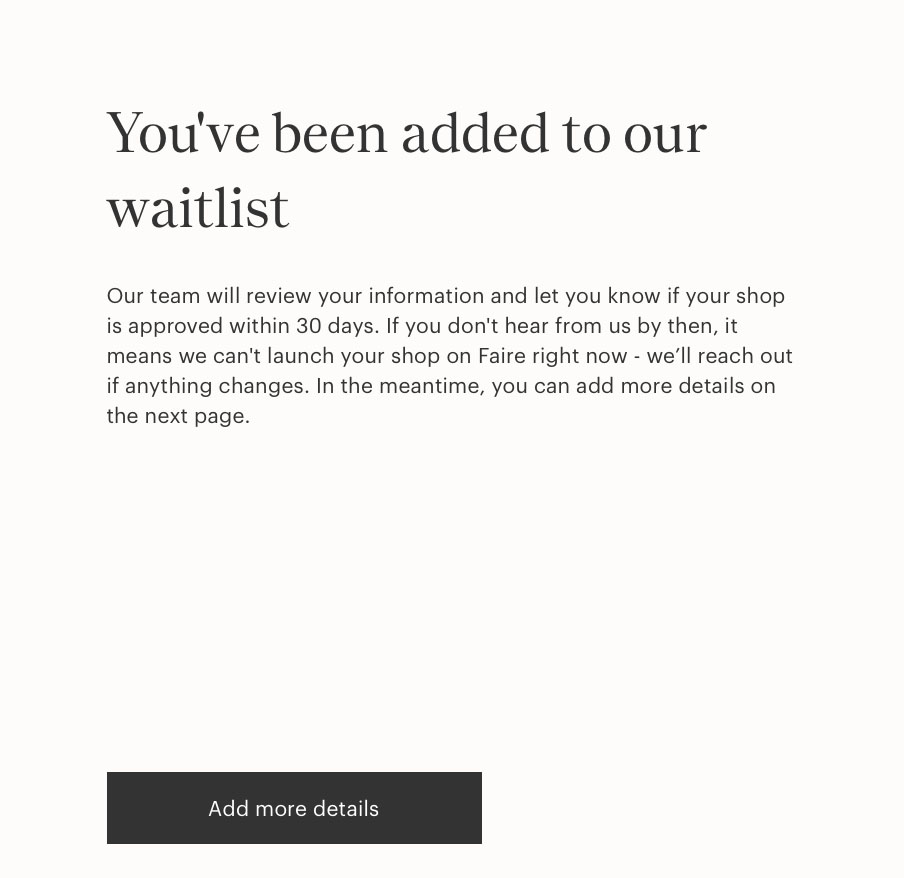
The verification process can take up to 30 days.
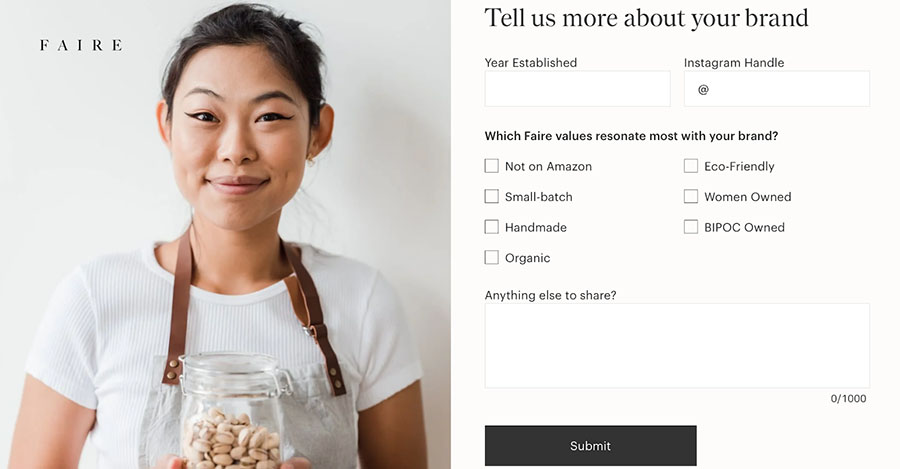
On the next page, you’ll have the option to provide:
- Your Instagram handle
- Year your brand was established
- Which of the core Faire values your brand aligns with
- Anything else you think will help your account in the approval process
Step 3: Input Your Account Settings
Once your application is approved, you will then need to officially create your account, setting your email, password, and phone number for two-factor authentication. Once you are in, then you need to set up your store with the following settings:
- Business details: Brand contact info, social media pages, name, product overview, shipping location details, and a list of the retail stores carrying your products.
- Contact information: Email address, phone number, and your billing and shipping addresses.
- Payment terms: Decide if you want to offer next-, 30-, or 60-day payout terms.
- Lead times: Add the amount of time you expect it will take you to ship orders. Brands with faster fulfillment times typically perform better with customers.
- Banking and tax information: Add your bank account information where Faire can deposit your payouts.
- Tax information: Input your tax classification and number to receive a 1099-K form come tax season.
- Order minimums: Set your order minimums to show customers the smallest quantities they are allowed to order from your store.
- Fulfillment times: Set your estimated shipping times once the order has left your warehouse.
- Fulfillment methods: You have two different fulfillment options with Faire, and you can choose the one that makes sense for your business. These are:
- Ship with Faire: With this method, you enter your order information and then you can find and print shipping labels straight from your Faire account. Faire offers low carrier rates and you’ll pay zero shipping fees upfront. Not only that, the order’s shipping cost and tracking number will be recorded straight to the order page on your Faire account so you can keep tabs on its progress and manage all your order details from your Faire account.
- Ship on your own: If you would rather ship with your own carrier or get shipping labels from another provider, you have the option to ship outside of Faire’s shipping tools. Faire will also reimburse the shipping cost up to a certain amount on your payout if you enter the shipping cost and tracking number on the order page once it’s available.
Step 4: Customize Your Faire Shop Page
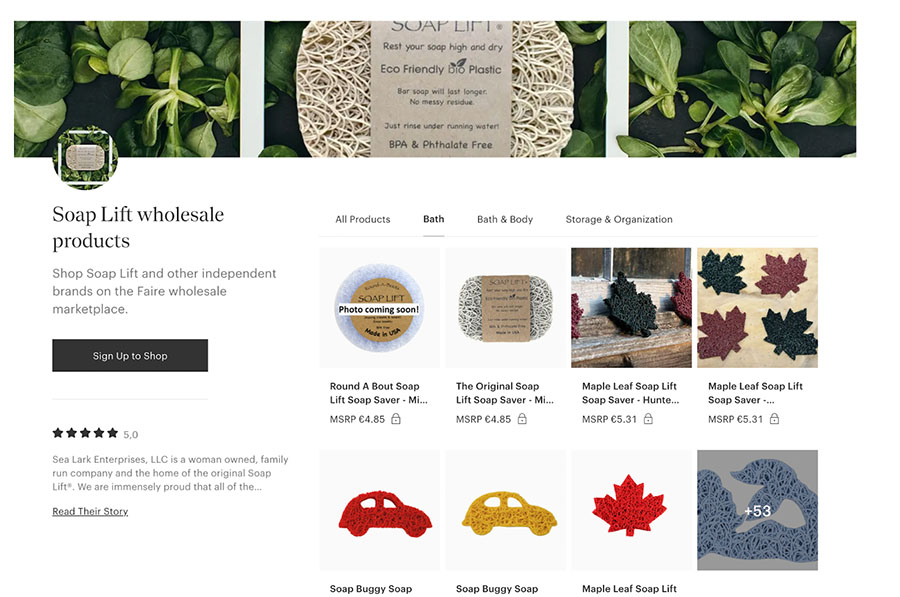
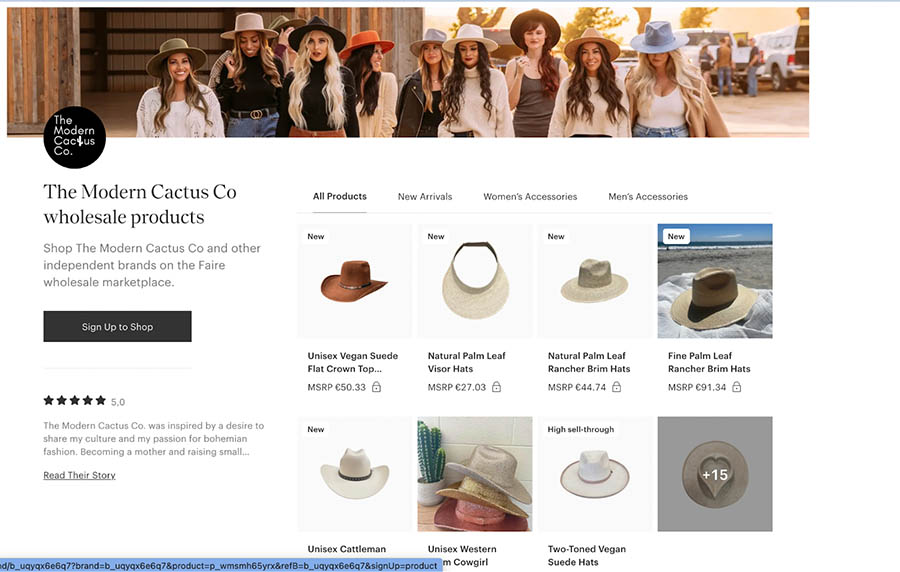
Faire gives you a few customization options for your store appearance, allowing you to showcase your brand and stand out from other stores on the site. Here are the areas that you can customize within your storefront as well as some sample store images to get you inspired:
- Shop images: You can upload custom images including a feature image that will be your store banner, marketplace cover image, and marketing email photo. The best size for your shop image is 1080 x 1080 pixels. Your shop image should also avoid logos or text, photo collages, inappropriate language, and nudity.
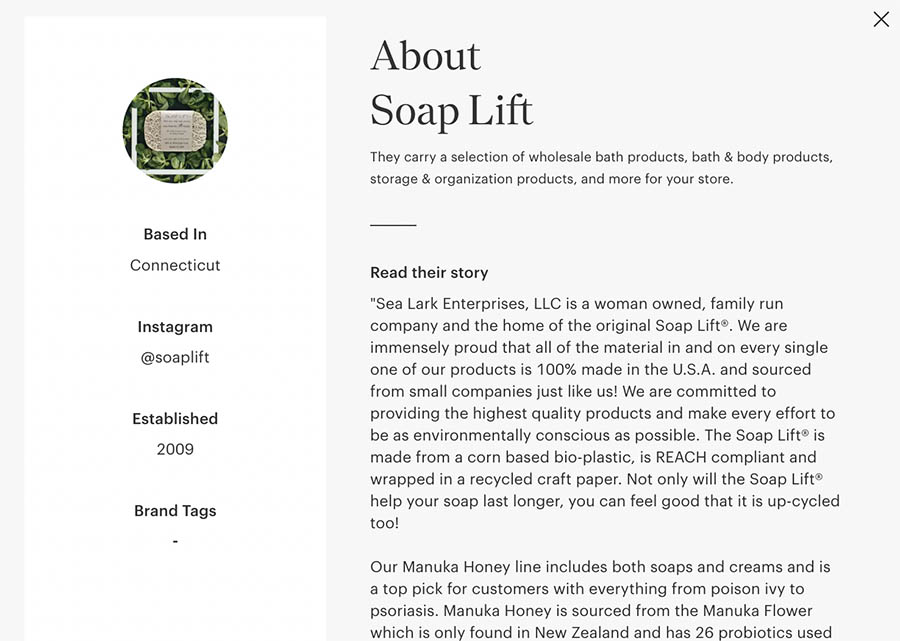
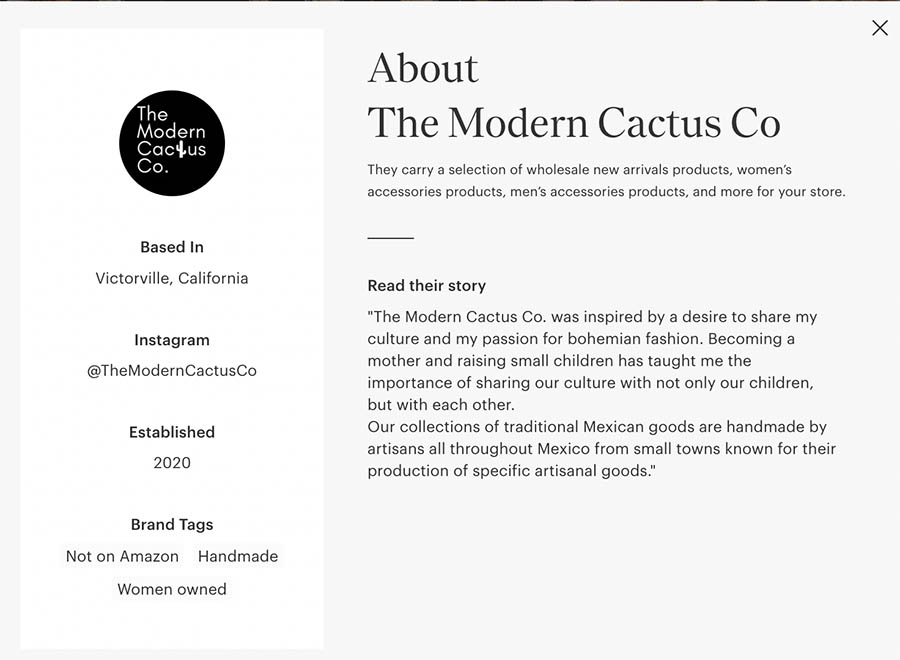
- Brand story: Add a short description or introduction to your brand to give customers a glimpse of who you are, what you stand for, and how you got started. Your brand story will appear on the “Read Their Story” page of your storefront. It will include your:
- Location
- The year you started
- Social media information
- Brand values
- A personal story of your brand
- The message you’d like to share with retailers
- Publications you’ve been featured in (optional)
- Some images that represent how your products are made (optional)
- An embedded YouTube or Vimeo video (optional)
The images below show shop images and story examples.
Soaplift
The Modern Cactus
Step 5: Add Your Team
Once you have your shop page up and running, you will then want to add your team to your Faire account. Your team can have their own login with set access roles and permissions, allowing you to collaborate more efficiently and streamline communication across your orders. Only the account owner can create new team members.
To begin adding new team members to your account:
- Head over to your Account Settings tab on the left-hand menu of your dashboard
- Select “My Team” from the Account Settings page
- Click the “Add Team Member” button to get a new team member form
- Fill out the team member’s form with their name and contact information
- Select “Next”
- Designate the member’s role: Admin or Contributor.
- Admin: This member can add, remove, and edit roles and permissions for all team members except for the account owner
- Contributor role: This member can’t manage roles or permissions
- Select “Invite Member”
- The team member will receive an email invitation immediately with a link to join the team
You will want to create accounts for each of your team members and also remove members as they leave your team. To deactivate Faire team member accounts:
- Navigate to Account Settings, then select “My Team”
- Select the team member you want to remove to view their profile
- Select “Deactivate Member” to end their account
Once removed, the user will lose access to their account and the account owner’s payment method will be charged for any outstanding invoices.
Step 6: Create Product Listings
With your account nearly set up, it’s time to add your product listings so that your shop has items for people to buy. For this process, you have two options. You can either upload in bulk via a CSV file or add products individually by filling out product forms for each item.
Add Products via CSV Bulk Download
To upload in bulk, you will either fill out Faire’s CSV file with all the relevant information or you can export and upload your product catalog directly from Shopify, Etsy, WooCommerce, Wix, or PrestaShop. To start:
- Select “Products” from the left-hand menu of your account dashboard
- Click “Add Products” on the top right
- Select the “Upload Spreadsheet or Export” option from the dropdown
- Upload
- For users that exported their product catalogs from Shopify, Etsy, WooCommerce, Wix, or PrestaShop, all you need to do is select “Upload a Catalog File” and then add the file for upload.
- For users that will use Faire’s CSV file to add products, you will need to download the file, fill it out, and then upload it.
To download and fill out Faire’s catalog template:
- There will be an option to “Download Template” under the “Upload a Catalog File” option. Select that.
- Fill out the file with at least the following information (there are additional fields if necessary):
- Product name
- Product description
- Wholesale price
- Retail price
- Case quantity and minimum order quantity
- Images (links or JPG or PNG files if you are planning to share an image folder)
- Product option details (if applicable)
- Then you can upload the file by returning to your products page and selecting “Add Products” > “Upload a Catalog File”
Add Products Individually
If you would rather upload items individually, you can fill out Faire’s product forms and add products this way.
- Select “Products” from the left-hand menu of your account dashboard
- Click “Add Products” on the top right
- Select “Add Single Product”
- Fill out the product form with the following details:
- Product name
- Product type
- Customer (customer group for whom the product is intended)
- Product description
- Image and videos
- Variants/Options
- Product tags
- Price
- Selling method and settings
- Weight and size
Faire integrates with Shopify, Square, and Clover POS systems. Once integrated, turn on “Automatically create new item listings,” so that products are automatically added to the POS system when you purchase through Faire. Don’t worry, they won’t be available for customers to shop until they are marked as delivered to you on Faire.
Step 7: Start Selling on Faire
With your account ready to go, it’s time to start selling on Faire. Each time an order is placed you will both receive an email and the order will be added to the “Orders” page on your account. Order notification emails will be written in the format: “New wholesale order for ‘Retailer’s Store Name’ (#order number).”
Once you have viewed the order, and have confirmed you have the products to fulfill it, you will select “Accept Order” on the order page. If you do not have enough inventory to fulfill the order, you will have the alternate option to “Edit Item Availability,” where you can mark discontinued or back-ordered items within the order and send them back to the retailer.
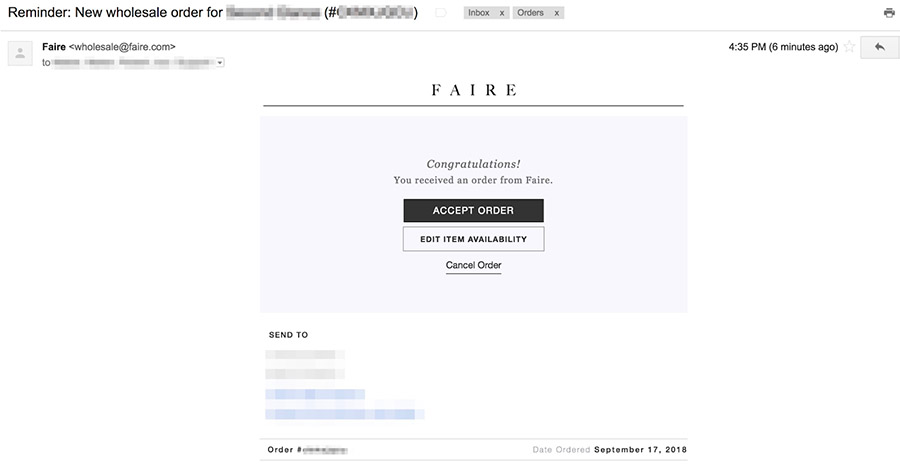
Accept or edit orders based on product availability.
Once you have accepted the order, you will then want to click “View Order” to see the order’s fulfillment page and then select your expected ship date for the package. This will automatically notify the retailer that their order is being processed.

Add a shipping estimate to alert customers their order is in progress.
From there, you simply acquire a shipping label and ship the order via your preferred fulfillment method. You will receive funds once the order is delivered to the customer.
How to Create a Shipping Label
When you input your shipping estimate, Faire will take you to the fulfillment page where you can create a shipping label. Here, you will:
- Confirm or enter your “Ship From Address”
- Choose Ship with Faire or Ship on your own
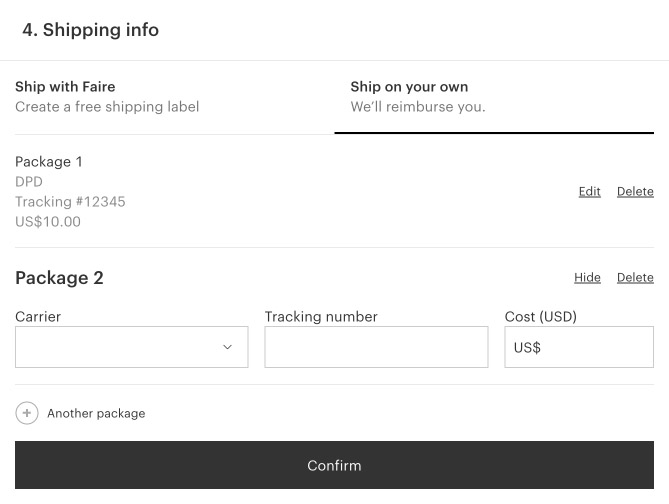
Select your preferred fulfillment method.
- Fill out the appropriate form
- Select “Confirm”
- Print out the shipping label and packing slip to include in the box
Bottom Line
Faire is a great place to reach retailers and sell wholesale, especially if you are a small business or artisan seller. The platform is free to use and comes with tons of great tools, plus the setup process is easy so you can learn how to sell on Faire in no time. Use the guide above to get started and visit Faire today to sign up for your free account.
