

Learning how to sell on Amazon can seem like an overwhelming and ambitious project. However, selling on the popular ecommerce platform requires only a few simple steps.
You’ll first have to plan which products to sell, and this involves understanding Amazon’s product restrictions and seller fees. Then, you’ll create a seller account and build your product listings. From there, you’ll need to manage your inventory and order fulfillment. Finally, because Amazon is such a competitive marketplace, you’ll need to manage your store’s performance.
- Step 1: Perform Product Research
- Step 2: Understand the Costs
- Step 3: Sign Up for an Amazon Seller Account
- Step 4: Create Your Product Listings
- Step 5: Manage Your Inventory on Amazon
- Step 6: Set Up Fulfillment & Shipping
- Step 7: Manage Store Performance
- Step 8: Earn Quality & Valid Customer Reviews
- Step 9: Learn How to Advertise
- Frequently Asked Questions (FAQs)
- Bottom Line
Step 1: Perform Product Research
Part of carving out your selling strategy is performing product research to identify the best items to sell on Amazon. For your Amazon products to be successful, they must be profitable, in demand, and not dominated by well-established brands.
The Amazon Best Sellers list is an excellent place to start your research and find promising item ideas. Browse by category to hone in on items in a specific niche or explore rising trends and new releases. As you dive in, look for generic items that don’t rely on the appeal of a brand name and those that would be easy to ship.
To gauge an item’s chance of success and profit:
- Consider qualities such as ship weight, sturdiness, category popularity, competition, wholesale price, and shipping costs.
- Use keyword research to measure consumer demand for the product and the level of competition surrounding it.
- Look at Amazon reviews. It is a helpful resource for gauging consumer interest and identifying gaps in the market.
Once you’ve discovered successful products to sell, you can use several tools to determine a potential item’s profitability. Some tools include:
- Salecalc: A free website that calculates your potential net profit, return, and margin based on granular item details
- Jungle Scout and Sellics: Paid tools that can give you additional features to help you manage your Amazon sales
Part of product research involves knowing Amazon’s product restrictions. Products sold on Amazon must comply with certain policies. Amazon has a full list of restricted products, but these are not all-inclusive. Consider consulting an attorney if you have questions about product regulations.
Additional regulations apply to the following:
- Certain product categories that require approval prior to listing (like jewelry, music, and watches)
- Some elements of the Fulfillment by Amazon (FBA) program; if you wish to use FBA, you should also review its product restrictions page
- Certain products in California
- Products that claim to be “FDA Cleared” or “FDA Approved” or include the FDA logo in associated images
Step 2: Understand the Costs
While Amazon is a low barrier to entry for starting to sell online, it’s not without its expenses. Even if you plan to start selling on Amazon without inventory of your own, there are associated costs to account for. The costs of selling on Amazon include Amazon Seller fees and indirect fees.
Amazon Seller Fees
Amazon seller fees include account and product fees. Account fees, or seller plans, come in two subscription levels: individual and professional.
Amazon Individual Seller
- $0.99 per sale, no monthly cost
- Best for low-volume merchants selling fewer than 40 items per month and developing stores still deciding what to sell
Amazon Professional Seller
- $39.99 per month, no sale cost
- Best for businesses selling more than 40 units per month and those that sell products in restricted categories
Go with a professional plan if you want to include advertising in your selling strategy and qualify for top placement on product detail pages. It has advanced selling tools—such as APIs and reports—that benefit high-volume sellers.
Both programs include additional selling fees beyond this per-product listing charge.
Here are highlights of each Amazon seller plan:
| Amazon Professional Seller | Amazon Individual Seller | |
|---|---|---|
| Monthly Fee | $39.99 | $0 |
| Product listing fee (charged when sold) | None | 99 cents |
| Number of product listings/sales | Unlimited | 40 per month |
| Amazon product-related fees | Same | Same |
| Access to Fulfillment by Amazon | ✓ | ✓ |
| Access to Amazon Seller App | ✓ | ✓ |
| Sell existing Amazon products | ✓ | ✓ |
| Add new products to the Amazon catalog | ✓ | ✓ |
| Listings eligible for the Buy Box* | ✓ | ✓ |
| Offer coupons, shipping specials, and gift wrap | ✓ | N/A |
| Can apply to sell in restricted categories | ✓ | N/A |
| Bulk upload products or feeds to Amazon | ✓ | N/A |
| Access to inventory reports | ✓ | N/A |
| Connect with third-party services and product feeds | ✓ | N/A |
Most sellers opt for Professional accounts because of its sales-driving features. But you can always start with an Individual account and upgrade in the future.
For example, if you’re just dipping your toes into Amazon using retail arbitrage (buying inventory from other sellers at a discount and reselling it for a profit), an Individual plan can get you started with minimal costs. But if you’re investing money in wholesale or private label products, the Professional plan is the best from day one.
Don’t forget to account for referral fees, too. Product or referral fees range from 5% to 45% of the product’s selling price, depending on the product type.
Indirect Fees
There are other costs associated with selling on Amazon. Product development isn’t free, especially if you’re creating a new item rather than sourcing existing products from suppliers.
You’ll also need to fulfill and ship your orders, the cost of which varies widely depending on your product and your fulfillment method. We’ll discuss this in more detail in Step 6.
You might also choose to pay for advertising, which we’ll cover in Step 9.
Step 3: Sign Up for an Amazon Seller Account
After deciding on a seller plan, you need to register for a seller account. Have the following ready to provide during the sign-up process:
- Bank account number and bank routing number
- Chargeable credit card
- Government-issued national ID
- Tax information
- Phone number
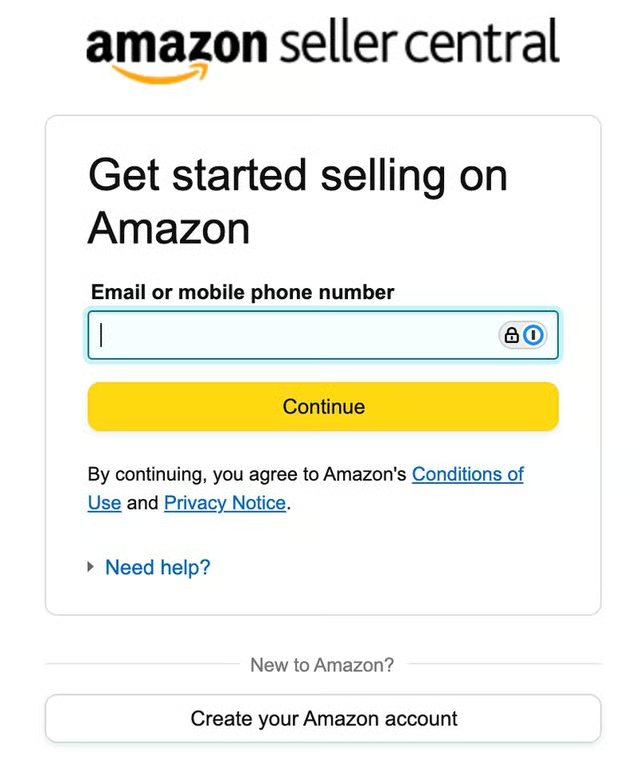
Note that you’ll need to have an Amazon account first before you can sign up for a new seller account. 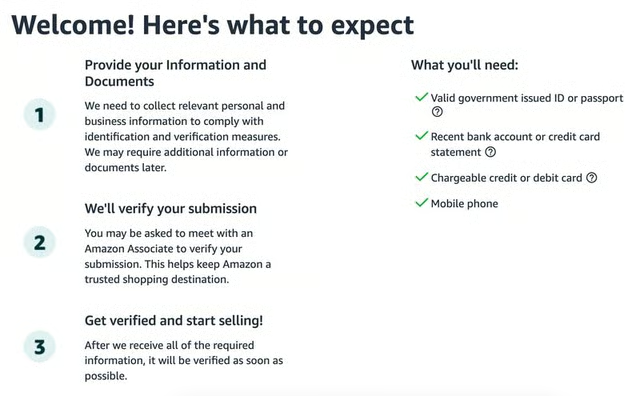
Then, follow the prompts for setting up a seller account. 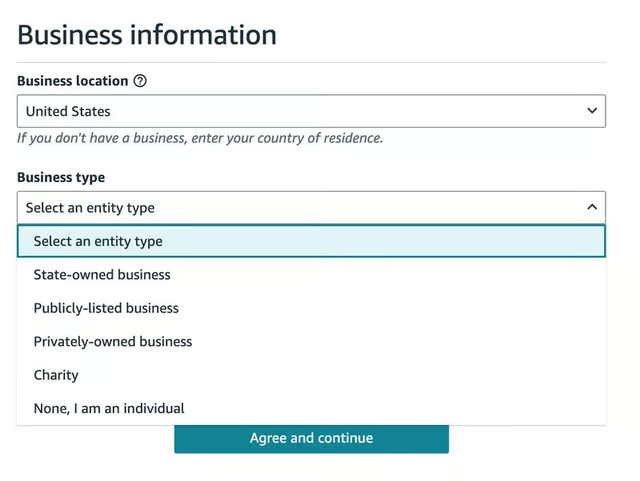
Your business type determines the requirements that will be asked of you when you sign up for a Seller account. 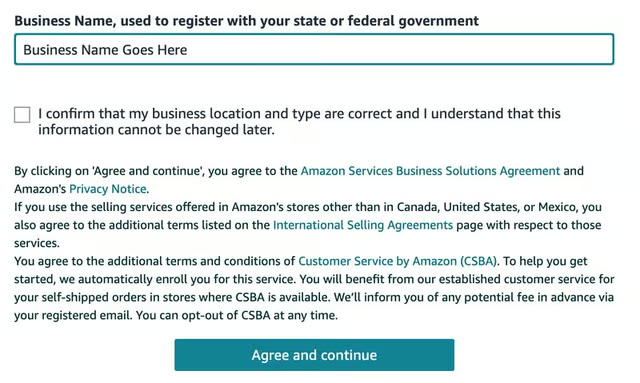
You’ll need to provide information about your registered business. 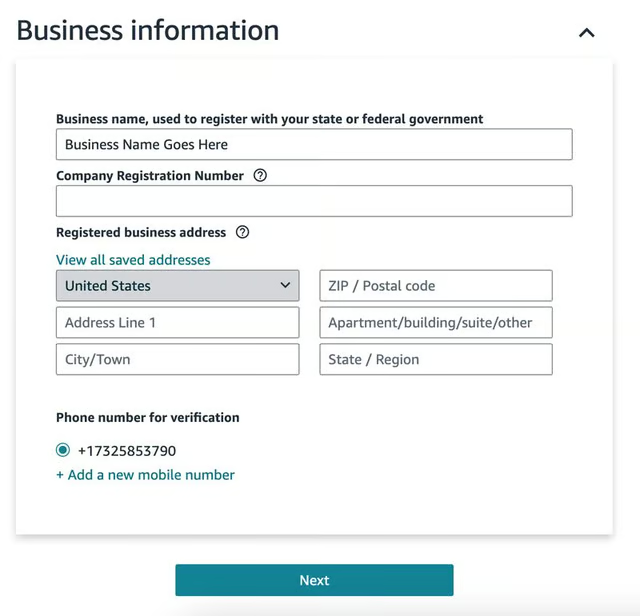
You’ll need to include information for the primary contact person. Other steps include providing Seller information, billing credentials, and your store info. Then, you’ll need to verify accuracy and submit for Amazon to review.


Once you complete these steps, you’ll have access to your Seller Central
Step 4: Create Your Product Listings
Amazon sellers can create product listings in two ways: by adding items to existing product listings or by creating new product listings.
Adding items to current listings is by far the easiest method, and it’s how most beginners get started on Amazon. So, we’ll begin there:
Manually Add Your Product to an Existing Listing
Many products for sale on Amazon have multiple sellers. The second and third sellers add their items to an existing product listing.
It might seem like a waste of time because of the existing competition—however, remember that the majority of sellers only keep a few items in stock. So, as others sell out, your listing will be the one available—and the one that shoppers buy.
To make your listing the top pick, you can also lower your price, offer free shipping, or use FBA (discussed below).
Manually adding your product to an existing listing is accessible from your Seller Central Dashboard. You can follow the steps below:
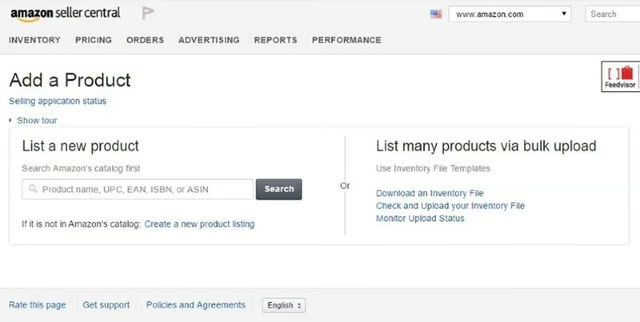
Simply search for the item using the product name, Amazon product ID, or item stock-keeping unit (SKU). If it’s already for sale on Amazon, you’ll see it on the next screen. 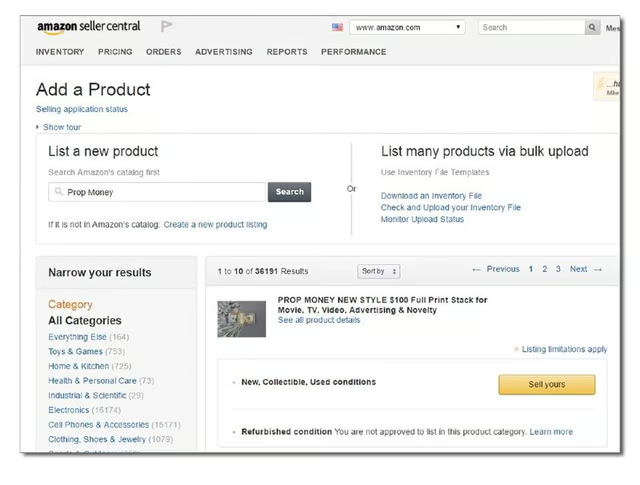
Click on “Sell yours.” 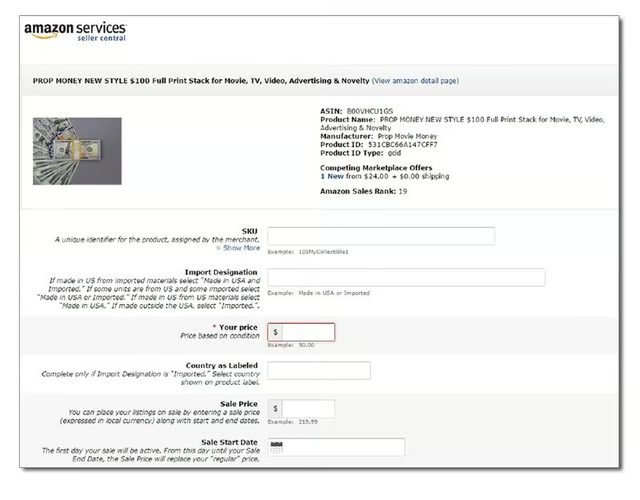
Add your item to Amazon by filling out a few fields on this screen. Required fields have an asterisk (*); others are optional. 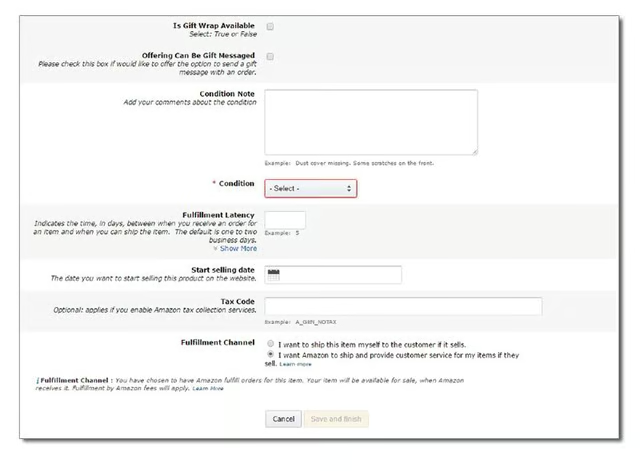
Hit “Save and finish.” Now you have a live listing on Amazon, ready to sell.


Manually Create a New Product Listing
Amazon Professional sellers can create entirely new product listings for items not already sold on the marketplace. Generating new listings takes more time than adding products to an existing listing. However, it allows you to create a high-quality listing that sells using keyword research, product images, and detailed item descriptions.
To create a new product listing, you need the following information:
- A product identifier: GTIN, UPC, ISBN, or EAN to specify the exact item you’re selling; find out more about which identifier is relevant to your product listing in Amazon’s listing requirements
- SKU number: A product ID you create to track your inventory
- Offer details: Price, product condition, available quantity, and shipping options
- Product details: Name, brand, category, description, and images
- Keywords and search terms: Applicable keywords to help buyers find your product
You also need to build out your product detail page. If you’ve ever shopped on Amazon.com, you’ve seen one. Product detail pages are where customers find vital information about an item.

- Title: 200 characters max, capitalize the first letter of every word
- Images: 500 x 500 or 1,000 x 1,000 pixels to increase listing quality
- Variations: Colors, scents, or sizes
- Product description bullet points: Short, descriptive sentences highlighting key features and benefits
- Featured offer (“Buy Box”): The featured offer on a detail page; customers can add to their cart or “Buy Now”
- Other offers: The same product sold by multiple sellers offers different prices, shipping options, etc.
- Product description: Keywords improve the chances that people will find your listing
Manage Your Product Listings: Use a Bulk Upload or Product Feed Tool
If you’re a Professional seller, you also have the option to add many product listings at once by uploading all of your product data using a spreadsheet.
If you also sell on your own website or plan to in the future, you can directly connect your products to Amazon. Here’s how both of these options work:
Using a Spreadsheet
You can add your product to existing listings and create new ones using a bulk CSV upload. To do this, you’ll build your Amazon product data file in a spreadsheet using Excel or similar software, save it as a CSV file, then upload it in your Amazon Seller Central dashboard.
Note: Amazon has several category-specific templates that you can use. There’s a learning curve if you go this route, but the time saved in the long run can be worth the effort.
Using Product Feeds
If you sell or plan to sell on your website, some ecommerce platforms support Amazon product feeds from your ecommerce store. This makes adding and maintaining product listings relatively easy, and it streamlines inventory and order management. If you only sell on Amazon but want to better manage your listings, there are systems for that, too.
Here are some top ecommerce platforms and listing management solutions to consider if you’re going this route:
| Platform | Best for | Price |
|---|---|---|
| Shopify | Sellers whose primary sales driver is online sales | From $39/month |
| Square Online | Sellers who have a brick-and-mortar shop and those who are on a budget | Free |
| Ecwid | Sellers who use Wix, Weebly, and Squarespace for their websites | From $25/month (Venture Plan) |
Step 5: Manage Your Inventory on Amazon
Accurately managing inventory is key to your success on Amazon since the platform will dock your seller rating for not promptly shipping items on that show as “in stock.”
Like the product listing methods described above, you have several choices regarding inventory management. Whichever method you choose, stay diligent about it to keep your Amazon seller rating high.
Amazon automatically reduces your inventory count as your Amazon items sell. If you sell only on Amazon, this should keep your counts correct. But if you sell the same stock on your website or in a retail store, you’ll probably need a different solution.
Manual Inventory
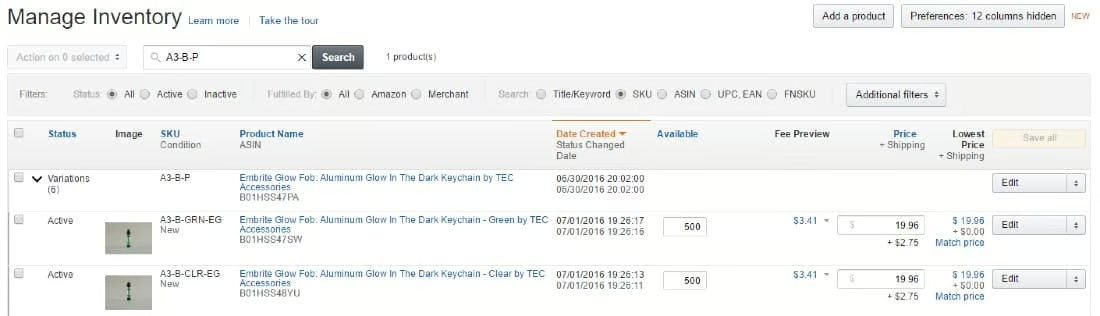
You can manually adjust inventory levels within your Seller Central dashboard inventory screen.
If you sell just a few items on Amazon, you can make manual adjustments by changing the Available units, as shown below. This task isn’t too time-consuming if you sell just a few products.
Via Bulk Upload or Inventory Feed
If you manage many products, frequently reorder products, or need to balance inventory between Amazon and another sales channel, you need a better solution than manual adjustments. Here are two of the most common methods:
- Via a Spreadsheet: You can make inventory adjustments to some or all of your Amazon products using a bulk upload. To do this, you’ll build or change your Amazon inventory file in a spreadsheet using Excel or similar software, save it as a CSV file, and then upload it to your Amazon Seller Central dashboard.
- Via Ecommerce Platforms or Inventory Software: The ecommerce platforms and listing management tools listed in the previous section also manage and update your Amazon inventory. So, if you’re already using a tool that uploads products to Amazon, you can manage inventory the same way. If not, there are plenty of other Amazon seller tools to help you manage inventory as you grow on Amazon.
Step 6: Set Up Fulfillment & Shipping
As an Amazon seller, you have three options for delivering your products. First, you can do it yourself—maintaining your inventory and shipping products to customers—which is called merchant fulfillment. You can also let Amazon package, label, and ship products through FBA, or you can use a third-party fulfillment provider.
Ship Amazon Orders Yourself (FBM)
Many beginners start out shipping Amazon orders themselves. Plus, many established ecommerce sellers ship all Amazon orders from their warehouse. Amazon calls this Fulfillment by Merchant, or FBM.
If you choose to go this route but are new to shipping, Amazon makes it pretty easy to handle on a small scale. You can print orders as well as US Postal and UPS shipping labels right from your Seller Central dashboard. You’ll need to have packing materials ready to go, including:
- Shipping boxes
- Packing tape
- Filler such as paper or bubble wrap
- A shipping scale
- Easy access to shippers for package drop-off or a secure place for pickup
Amazon’s Buy Shipping tool can help you get a great deal on shipping labels. You can choose from Amazon’s network of trusted shipping partners, ship and confirm your orders, and track your shipments.
Packing a few orders each week isn’t overwhelming for most. However, it is crucial to ship promptly. That’s why sellers of all sizes tend to use the next option.
Let Amazon Fulfill & Ship Your Orders (FBA)
With Fulfillment by Amazon (FBA), you ship your products to Amazon, and it stocks, packs, and ships your products for you. When products are ordered, Amazon collects payment from the customer and pays you available funds every two weeks. Read our in-depth review of FBA and how it works.

The six steps of Fulfillment by Amazon include:
- Inventory is sent to an Amazon warehouse
- FBA receives and stores the goods
- Customer orders come in
- FBA packs and ships the orders
- FBA performs customer service for the orders
- FBA handles customer returns
Of course, this comes with added FBA fees on top of your Amazon seller fees, but it also comes with many major sales-driving perks, including:
- Prime-eligible product listings: Most FBA items are listed as Prime products on Amazon
- Free shipping to Prime buyers: FBA makes your products eligible for Prime free 2-day shipping
- Higher rankings for product listings: Amazon gives FBA sellers preference in rankings
- More Buy Box listings: When prices are the same, FBA sellers win the tie for the coveted Buy Box
- Trust factor: Buyers trust packages will arrive as expected when items are fulfilled by Amazon
- Post-sale servicing: FBA handles every customer interaction for your orders, from inquiries to returns to refunds. Its customer service representatives are available by phone, email, or live chat 24/7.
Use a Third-party Fulfillment Partner
Another option that takes fulfillment tasks off your plate is using an outsourced fulfillment company. Like FBA, these businesses store, pack, and ship your orders for you. However, this method is considered a type of FBM since you use a company of your choosing. And, since it’s not FBA, you don’t get the sales-driving perks listed above.
Most fulfillment partners are geared toward mid-to-high-volume multichannel ecommerce companies that sell in many places—including websites and Amazon.
Our top pick for 3PL companies is ShipBob. It offers fast, two-day shipping and flexible resources to facilitate growth. Contact the provider for a free quote.
Step 7: Manage Store Performance
Once your store is up and running, it’s crucial to monitor, analyze, and promote your store’s performance for ongoing success.
Monitor Your Store’s Key Metrics
Amazon is a customer-centric marketplace and holds its sellers to a high standard. It expects you to provide a seamless and satisfactory customer experience every time.
Amazon requires these minimum key metrics that you should take note of:
- Order defect rate (a measure of a seller’s customer service standards): < 1%
- Pre-fulfillment cancel rate (initiated by the seller before shipment): < 2.5%
- Late shipment rate (orders that ship after the expected date): < 4%
Anything that falls outside these metrics might earn your store a negative performance review and affect how high or low your product listings rank on Amazon.
You can monitor your performance targets in Seller Central. Amazon also has a list of best practices for its sellers.
Offer Promotions & Coupons
Promotions are an incentive for customers to purchase now. You can offer three types of promotions in your Amazon store: money off, free shipping, and buy one get one free. You can also offer percentage or money-off discounts with digital coupons.
Step 8: Earn Quality & Valid Customer Reviews
One key component to Amazon selling is reviews. Customer product reviews play an essential part in the Amazon shopping experience. They benefit sellers and customers alike.
Familiarize yourself with the right and wrong methods to get more Amazon product reviews to avoid policy violations. You can learn more from Seller University.
Step 9: Learn How to Advertise
Amazon offers advertising solutions for sellers to reach and engage shoppers. Amazon claims that “small businesses using Amazon Ads attributed 30% of their sales to our solutions”—that’s one of many promising Amazon statistics.
You can use the following advertising methods through Seller Central:
- Sponsored Products are ads for individual product listings on Amazon that help drive product visibility and, ultimately, sales. You can find them on search results pages and product detail pages.
- Sponsored Brands are search-result ads that feature your brand logo, a custom headline, and up to three of your products. They help to showcase your brand and product portfolio.
- Sponsored Display ads use machine-learning and multi-format creative, helping businesses reach customers wherever they spend time—across the Amazon store and tons of third-party apps and websites. This advertising option is even available to non-Amazon merchants.
- Amazon Stores are custom, multi-page shopping landing pages that enable sellers to share their brand story and product offerings. You can manage a fully branded Amazon storefront to promote your brand story and facilitate product discoverability.
Frequently Asked Questions (FAQs)
These are some of the most common questions we get about selling on Amazon.
Is it free to sell stuff on Amazon?
No, it’s not free to sell stuff on Amazon. You’ll either need to pay $0.99 per sale on the Individual plan or $39.99 per month on the Professional plan. Additional referral, shipping, and product development expenses may also apply.
How much does it cost to start as an Amazon seller?
It costs either a monthly subscription fee of $39.99 for Amazon sellers on the Professional plan or $0.99 per sale for merchants on the Individual plan.
Is it good money to sell on Amazon?
It can be good money to sell on Amazon with the right product offering. However, success rates vary greatly. Many merchants make good money on Amazon, while others struggle to make a profit.
Is it realistic to sell on Amazon?
Yes, it’s realistic to sell on Amazon. With the right product offering, you have the opportunity to sell to millions of potential customers.
How can I sell on Amazon?
To begin selling on Amazon, choose a competitive product offering and understand the costs. Then, sign up for an Amazon Seller account. Create your product listings, manage your inventory, set up fulfillment and shipping. Once you start selling, manage store performance, earn quality and valid customer reviews, and learn how to advertise.
Bottom Line
Amazon is a highly accessible platform to start an ecommerce business. It welcomes all kinds of merchants—from individuals selling a few items per month to power sellers moving thousands of products each day. But while the barrier to entry is low, the competition is fierce and success is demanding.
If you want to learn how to sell products on Amazon, you need to approach every opportunity from a profit perspective. This considers the cost of the goods you sell and the time it takes to source products, create listings, manage inventory, and ship orders. Once you understand the basics of how to sell on Amazon, you can make decisions to help balance efficiencies, increase net profits, and find ways to grow.