


In this guide, we’ll go over how to create and manage customers in Xero by navigating to the Contact page and completing the contact creation form. Additionally, we’ll cover how to create an invoice in Xero—which involves navigating to the Invoice page and providing the information requested in the invoicing form. Furthermore, you’ll learn how to email an invoice to your customer, print it if needed, and track outstanding invoices.
How to Create and Manage Customers in Xero
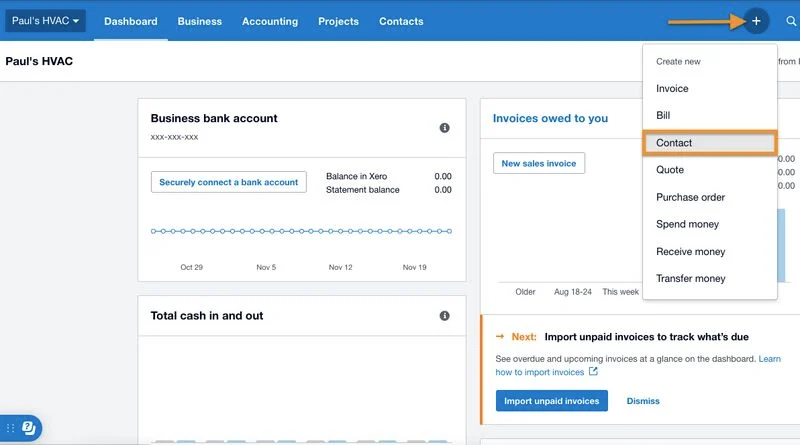
Step 1: Navigate to the Contact Form
Click on + in the upper right corner of your dashboard, and then select the Contact dropdown option, as shown below.
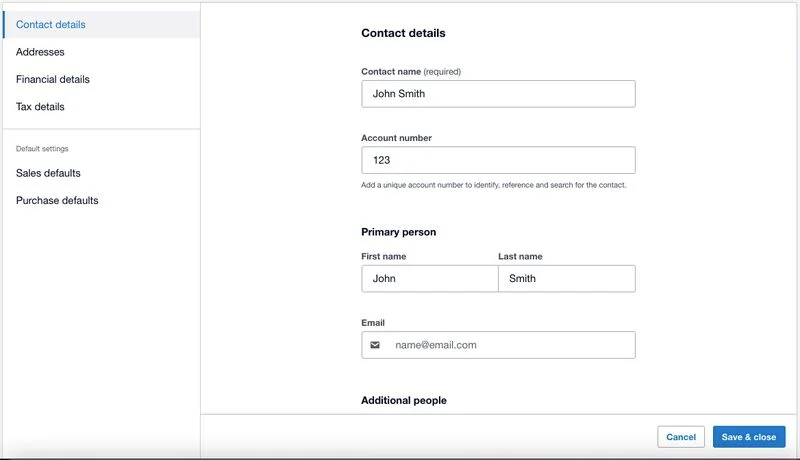
Step 2: Provide Contact Information
Complete the Add contact form by providing the necessary information. Essentially, you will need to provide at least the contact name to record a new customer, but we recommend providing as much information as possible. Xero automatically populates sales sales and purchase forms (e.g., invoices) based on the information you entered when creating the customer.
The Add contact form will ask for essential information, categorized into four tabs:
- Contact details: This is where’ll enter basic information, including the contact’s name, email address, and phone number. You may also add an account number so that you can easily locate and track that customer.
- Addresses: This tab lets you add billing and delivery addresses of the contact.
- Financial details: Here, you can provide specific banking information for your contact, including the bank account name, routing number, bank account number, reference, and currency.
- Tax details: This section allows you to input relevant tax information, like the legal name your contact has registered with the IRS and their tax number, which is required when filing 1099 reports.
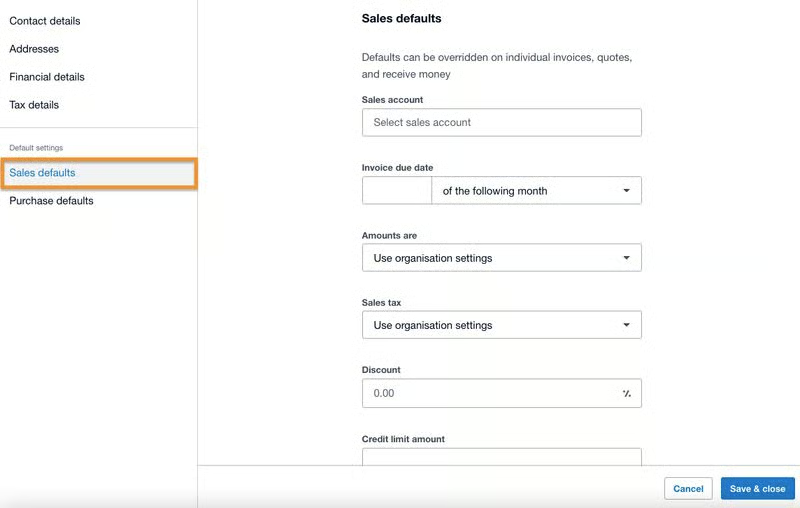
Step 3: Adjust Default Sales Settings
Once you provide all the essential information, proceed to the Default settings section to adjust the default sales settings for the customer. This tab is grouped into two sections: Sales defaults and Purchase defaults. Since you’re adding a customer, you’ll use the Sales default settings.
This is where you can specify the default sales account where revenue from this customer will be recorded, set up default payment terms, and apply any standard discounts for this customer.
Step 4: Save the New Contact
Once you provide all the essential information and adjust the sales default settings, click on the Save & close button in the lower right corner of the contact form.
Managing Customers in Xero
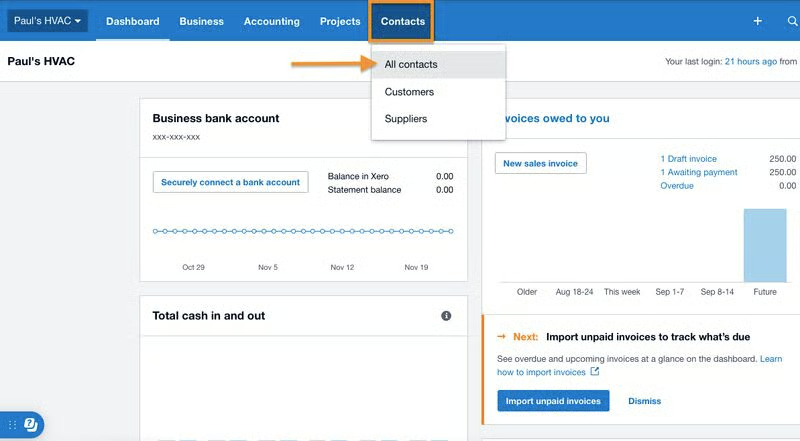
If you’ve just added a new customer and you haven’t made any sales transactions with them yet, then you’ll be able to view that customer on the All contacts page (shown in the next screenshot), which you can access under the Contacts menu. Later, when a transaction (e.g., invoice) is made, Xero will automatically record that contact under the Customers list, which you can also access from the Contacts menu.
To edit a contact information, simply click on the three dots (Kebab menu) on the far right side of the contact’s name, and then select Edit. The contact form opens up, and from here you can make the necessary edits. Once done, click the Save & close button to record the changes.
If you want to delete a contact, click on the Kebab menu and then select Archive.

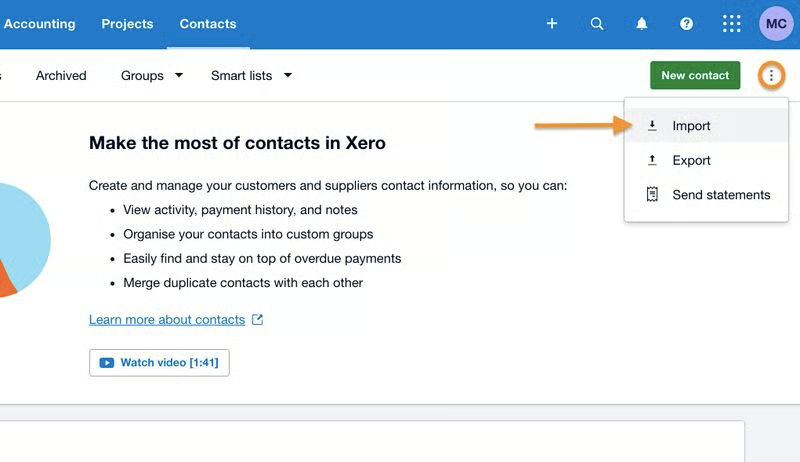
Importing Customers Into Xero
If you have many customers, you may save time by importing them into Xero as a CSV file. To do this, simply click on the three dots (Kebab menu) next to the New contact button on the All Contacts page, and then select Import. Locate the file to import and then follow the prompts to import your file into Xero.
How to Create and Send Invoices in Xero
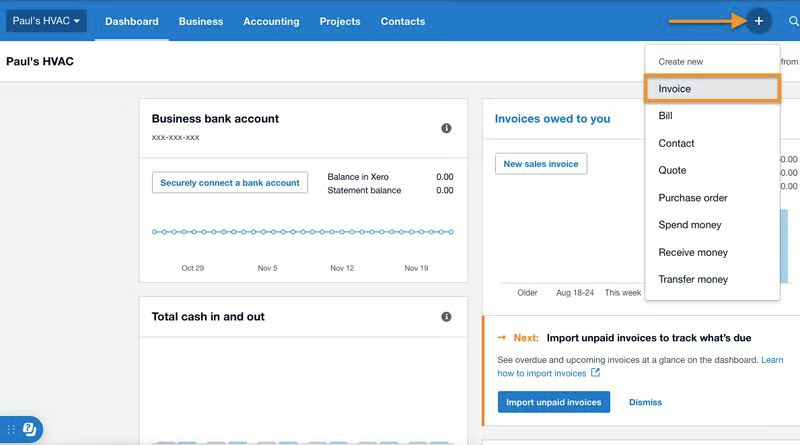
Step 1: Navigate to ‘Invoice’
Click on the + button and then select Invoice, as shown below.
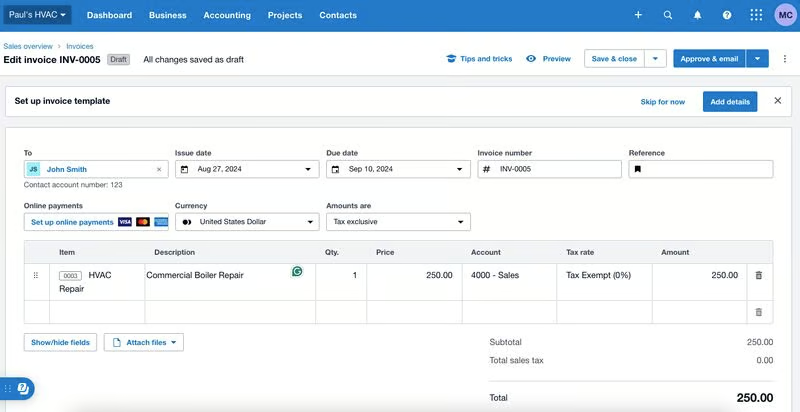
Step 2: Create the Invoice
To create the invoice, you must provide the necessary information, including:
- To (customer): Choose the customer you’re invoicing. Xero won’t display a customer dropdown list, so you need to type a letter or part of the customer’s name and then choose from the suggested customer list.
- Issue date: Enter the date the invoice is issued to the customer.
- Due date: Specify when the payment is expected. You can select from preset due dates like “Today,” “In 7 days,” or “In 14 days,”—or pick a date from the calendar.
- Invoice number: This is automatically generated, but you can enter it manually if needed.
- Reference (optional): You may add any information that is related to the invoice.
- Online payments: This lets you set up online payment options, such as credit and debit card payments.
- Item Details: Enter information about the specific products or services (called items) being invoiced, including the description, quantity, and price. If the item isn’t recorded in Xero yet, click on the Item field and then select + Create new item. Additionally, you must also specify the account where your sale is recorded and add a tax rate if needed.
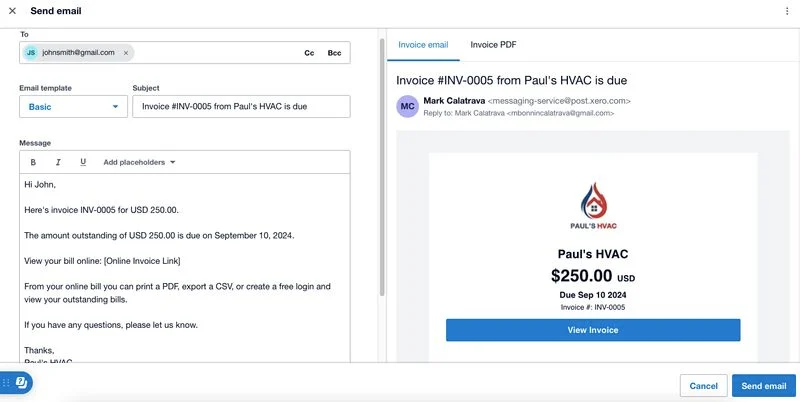
Step 3: Save the Invoice or Approve and Email
If you are a Xero Standard or Advisor user, then you can approve the invoice and email it right away by clicking on the Approve & email button in the upper right corner of the page. This will take you to the Send email preview page where you can see and adjust the content of the email before you send it to the customer.
If you’re not a Standard or Advisor user, you may not have the right to approve the invoice. If so, then click Save & close, and then the invoice will be recorded as a draft. An approver can then later approve it so that it can be issued to the customer.
Printing the Invoice
If you need to print the invoice, click on the Kebab menu in the upper right corner, and then select Print PDF. This will download a PDF version of the invoice, and from here, you can proceed to print the invoice. Note that you can’t print invoices directly from within Xero, so you have to print the invoice from the downloaded PDF file.

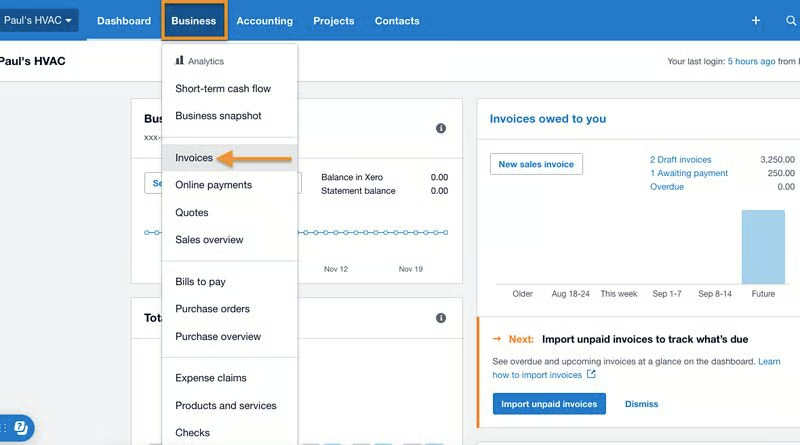
Viewing Outstanding Invoices
You can view outstanding invoices on the Invoices page under the Awaiting Payment tab or by running an Accounts Receivable Aging Report. To access the Invoices page, click the Business menu and then select Invoices.
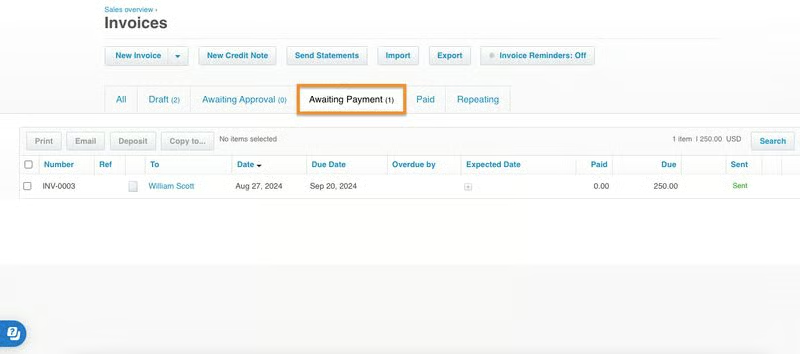
Next, click on the Awaiting Payment tab to view the outstanding invoices.
Running an Accounts Receivable Aging Report
Click on the Accounting menu and then select Reports. Locate the Accounts Receivable Aging Summary report from the list and then click on it. Xero will display a basic report that shows a list of unpaid invoices, whether they are overdue, and how long they have been overdue. If needed, you can customize the report by adjusting the settings on top of the report.

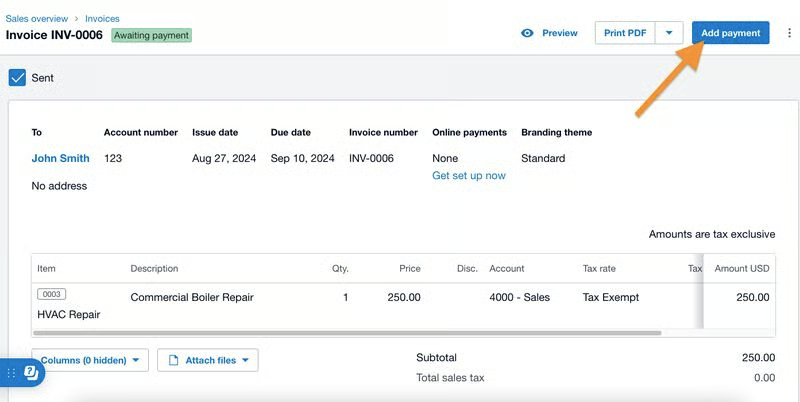
Receiving Payment on an Invoice
To receive a payment, click anywhere on the invoice entry line, and then select the Add payment button at the top of the invoice screen.
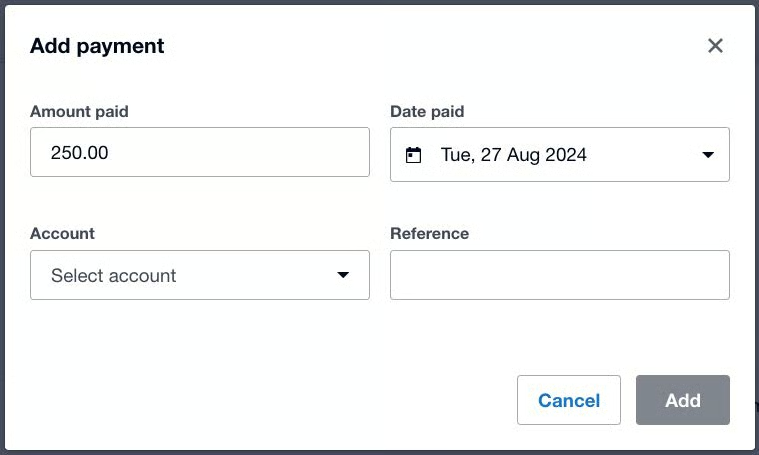
A pop-up window appears, where you can record the payment received. You need to indicate the amount received, the account the money will be deposited to, and the date the invoice was paid. You may also add a reference if needed. Once done, click the Add button, and the invoice will be marked as paid.
Frequently Asked Questions (FAQs)
Can I import contacts into Xero?
Yes, you can do so by using the Import tool on the All Contacts page.
Can I print invoices in Xero?
Yes, you can, but you have to do it from the downloaded invoice. Unlike other accounting software like QuickBooks Online, you can’t print invoices directly from Xero, so you have to export it as a PDF version first and then print it using the appropriate tools.
Bottom Line
You have now learned how to invoice in Xero and how to manage customers. The next tutorial in our Xero course series will cover how to enter and view unpaid bills, how to record the payment of a bill, and how to add and view vendors. You can learn about other Xero features in our Xero review.
← Previous Tutorial 5 Free Xero TutorialsNext Tutorial →