


This tutorial explains how to connect your bank account to Xero by going to the Bank Accounts section, locating your bank (or credit card account), and connecting the bank feeds. You’ll also learn how to reconcile in Xero—which involves navigating to the reconciliation screen and using options such as matching transactions and creating new ones. Finally, we’ll show you how to delete a bank account in Xero if needed.
How to Connect Bank Accounts to Xero
Step 1: Navigate to Bank Accounts
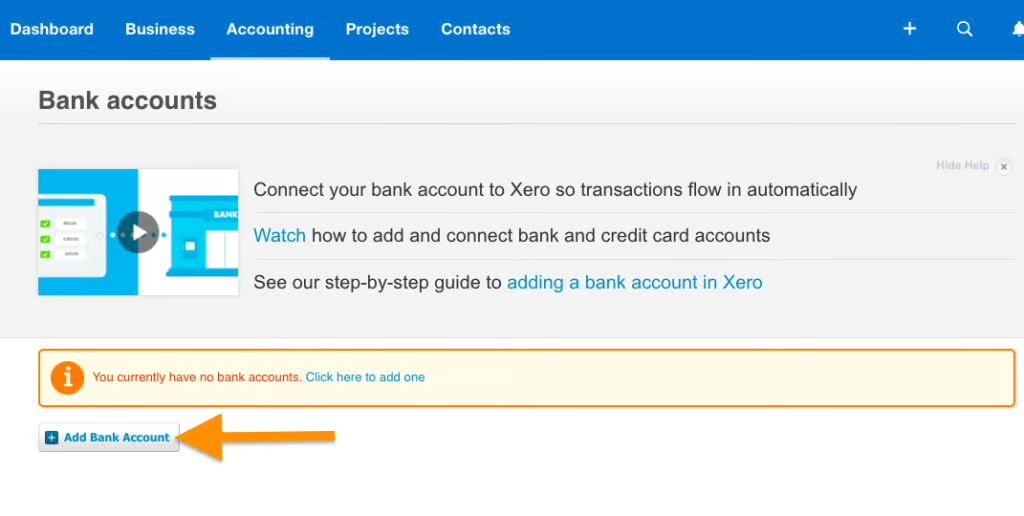
Click on the Accounting menu at the top of the page, and then select Bank accounts, as shown below.

Step 2: Select ‘Add Bank Account’
On the Bank accounts page, select the Add Bank Account button to continue. Note that you can add as many bank and credit card accounts as you need for your business.
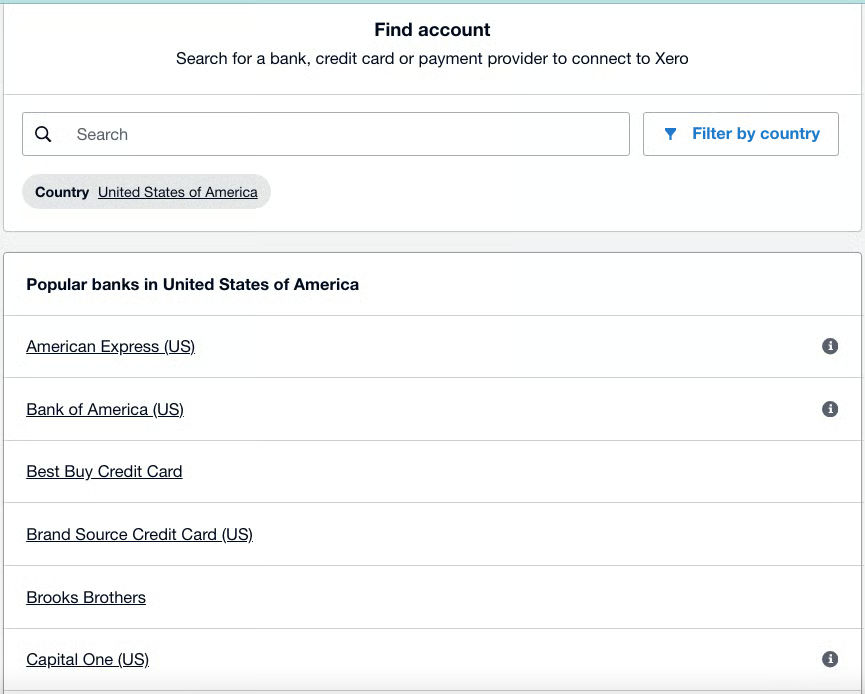
Step 3: Locate Your Bank Account
Next, Xero will display a list of bank and credit card accounts supported by Xero. Find your bank and then click on it. You may also use the search bar at the top if you don’t see your bank on the list.
Step 4: Connect Your Bank Account
After selecting your bank, click the Login & Connect Accounts button to continue. This will take you to a separate window where you can log in to your bank account and connect it to Xero. Enter your online banking credentials and any required multifactor authentication (MFA).
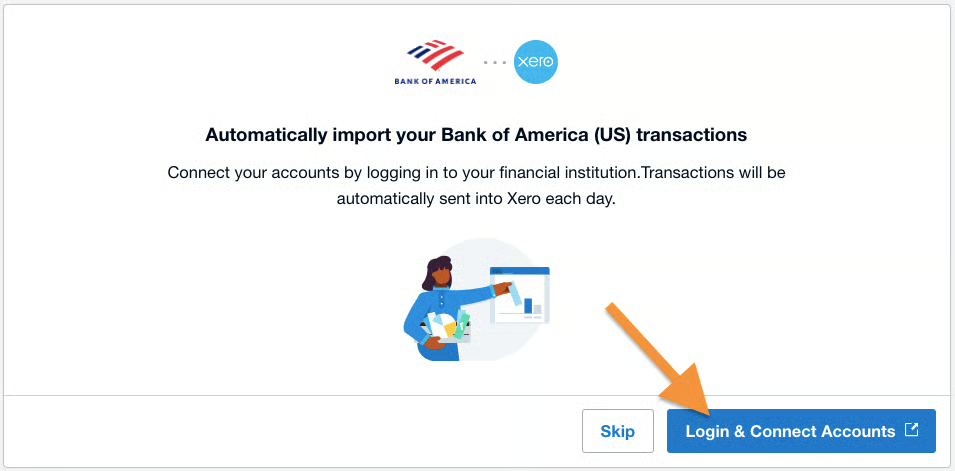
If you don’t see your bank account on Xero’s list or don’t want to connect it to the system, then you may manually set up the account. To do so, click on the Skip button (shown in the screenshot above), enter the details, such as the account name and account type, and then click the Save & Continue button in the lower right corner of the screen. However, note that Xero won’t automatically import transactions from your bank, so you have to upload them manually.
How to Reconcile Bank Accounts in Xero
Step 1: Navigate to the Reconciliation Screen
Navigate to the Bank accounts page and then select the bank you wish to reconcile. Click on the Manage account button in the upper right corner of the bank panel, then select Reconcile account, as demonstrated in the GIF below.
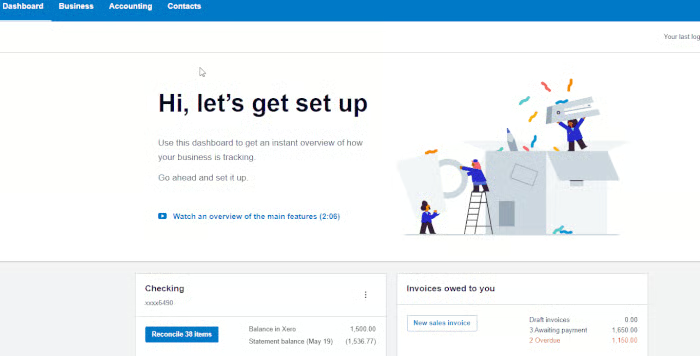
Alternatively, you can click on the blue Reconcile [X] items button in the lower left corner of the bank panel. When a bank statement is imported, the bank account panel shows the number of bank statement lines that are ready to be reconciled. If you don’t see the Reconcile [X] items button, there aren’t any statement lines to reconcile.
Step 2: Perform the Reconciliation
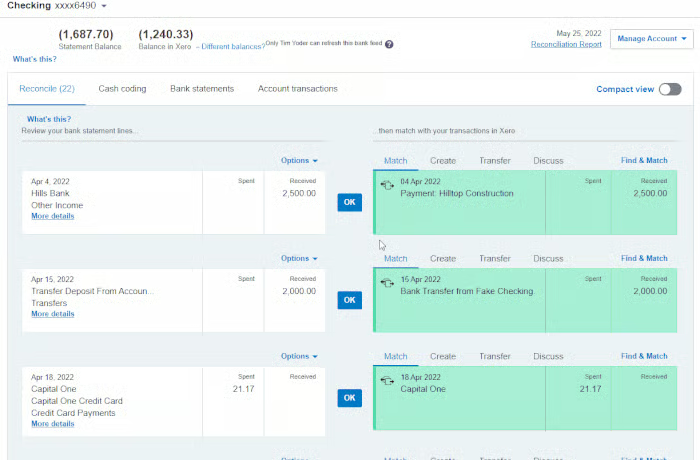
After clicking the Reconcile account button, Xero will take you to the reconciliation screen with a side-by-side layout. On the left side of the screen, you’ll see a list of all the transactions that have been imported into Xero. On the right, you’ll see possible matches and options to reconcile the transactions on the left.
On the upper left corner of the reconciliation screen, you’ll see the Statement Balance and the Balance in Xero. As you reconcile each transaction, the differences between the two balances should get closer, and your goal is to bring the difference down to zero.
To reconcile the transactions, you are provided with four options: Match, Create, Transfer, and Discuss.
1. Match
Xero will automatically try to match the transaction on the left with a corresponding transaction in your Xero records on the right. If it finds a possible match, it will display it on the right, highlighted in light green. Confirm that the transactions match; if they do, click the OK button to reconcile the transaction.
If Xero doesn’t find a match, you’ll use the Find & Match button to manually search for the correct transaction in your Xero records. Select the transaction, and then click the OK button to reconcile it.
Note that there are some instances where you may select multiple transactions to match the single transaction on the left. For instance, this could happen if you have a single payment or deposit that corresponds to multiple smaller transactions in Xero, which is similar to the case illustrated in the GIF below.
2. Create
If the transaction on the left has no corresponding match in your Xero record, then click on the Create button. From here, Xero will ask for the essential information, including:
- Who: Select the contact associated with the transaction. This could be a vendor or customer depending on the transaction.
- What: This field lets you specify the account code to record the transaction.
- Why: Enter the purpose or reason for the transaction.
Once the transaction is created, click OK to reconcile it.
3. Transfer
Use the Transfer option when you need to move funds between bank accounts in Xero. For instance, when you pay a credit card balance using money from your bank account, use the Transfer option to match the payment to the credit card account. You only need to create a transfer transaction in one bank account—Xero will create the transaction in the corresponding account.
4. Discuss
You can use the Discuss option if you’re unsure about a transaction. You can leave a note (e.g., discuss with my accountant), and then click Save to record it. You can then come back to the transaction later to finalize it.
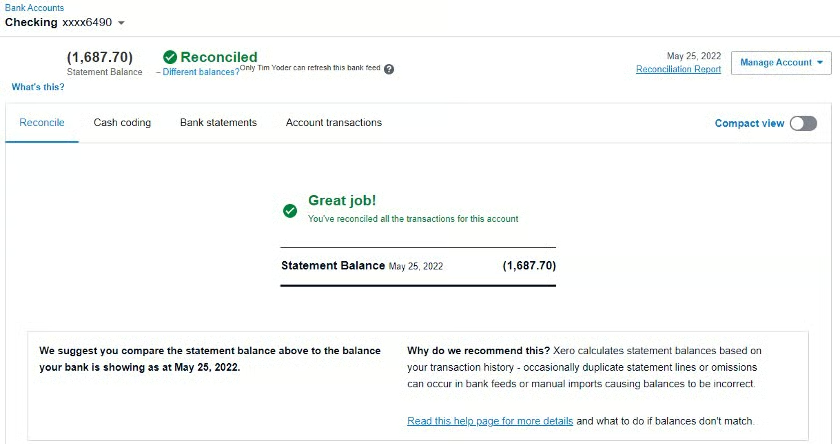
Step 3: Finalize the Reconciliation
Once all transactions have been successfully reconciled and your bank balance and Xero balance match, the bank reconciliation is complete.
Step 4: View Bank Reconciliation Summary Report
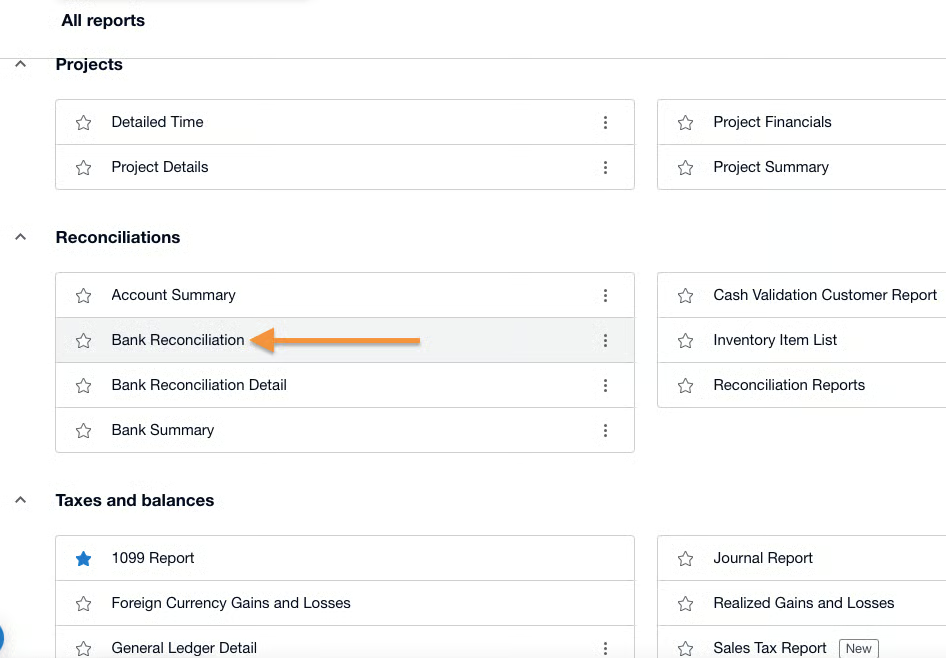
To further confirm that your actual bank balance and the bank account balance in Xero match, you can run a Bank Reconciliation Summary report. This is useful if your balances don’t match because it allows you to check for missing, duplicated, or deleted transactions.
To do this, navigate to Reports under the Accounting menu and then locate and open the Bank Reconciliation Summary report.
Select the bank account and the date to customize the report, and then click on the Update button to generate the report.
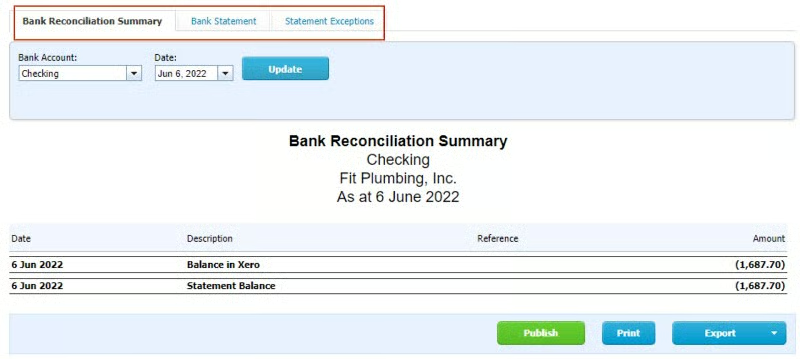
The report consists of three tabs:
- Bank Reconciliation Summary: The summary breaks up into sections to show your actual bank balance based on the data you entered into Xero on any given date. It isn’t taken from your online bank balance but rather calculated using the data in Xero.
- Bank Statement: This shows you a list of all statement lines downloaded for the current month by default, the date the item was imported from the statement into Xero, whether the item was reconciled, and where each statement line came from.
- Statement Exceptions: This shows any items that are exceptions to the regular reconciliation process in Xero. It displays items that are in Xero and are manually reconciled, imported statement items that are deleted in Xero, and duplicates. This is a good place to check if your online bank account balance doesn’t match the balance shown in Xero.
How to Delete a Bank Account in Xero
If you wish to delete a bank account in Xero, navigate to Chart of Accounts under the Accounting menu. Then, select the checkbox next to the account that you want to delete, select Delete, and then click OK.
Frequently Asked Questions (FAQs)
Can I connect multiple bank and credit card accounts to Xero?
Yes, you can connect as many accounts as needed.
How often are bank transactions imported to Xero?
With a bank connection, transactions are imported into Xero every 24 hours.
Bottom Line
You have now learned how to manage and reconcile bank accounts in Xero. The next and final tutorial in our series of Xero courses is how to create and print custom reports, which will cover how to navigate to reports, what reports are available, and how to set basic options.