

In this fifth and last Xero tutorial, we’ll show you how to print reports in Xero by navigating to the Reports page, selecting the desired report, and then exporting it for printing. We’ll also cover how to create custom reports in Xero, adjust basic reporting options, and save customized reports. Additionally, for Adviser users, we’ll discuss how to save a report as a draft or publish it to create an uneditable, permanent record in Xero.
Step 1: Navigate to the Reports Page
Click on Accounting on the top menu bar and then select Reports from the drop-down list, as shown below.
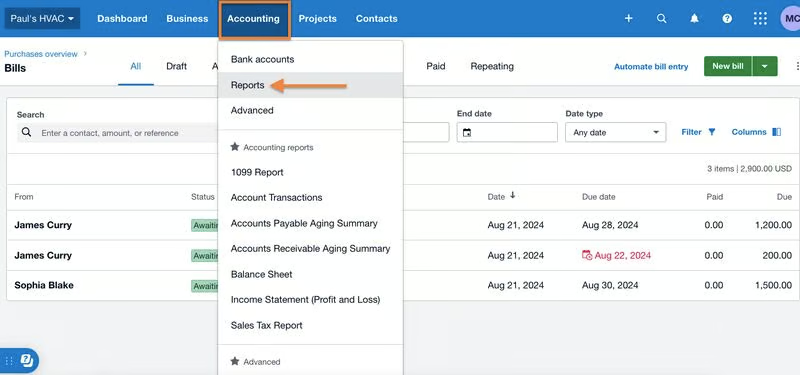
Navigate to “Reports” in Xero
Step 2: Select the Desired Report
From the Reports page, select the report you wish to create. You’ll see a large selection of reports categorized into various sections, like financial statements and payables and receivables.
Some of the most popular reports include balance sheets, profit and loss (P&L), accounts payable aging summary, and accounts receivable aging summary reports. You can also use the report filter located in the upper right corner of the page if needed.
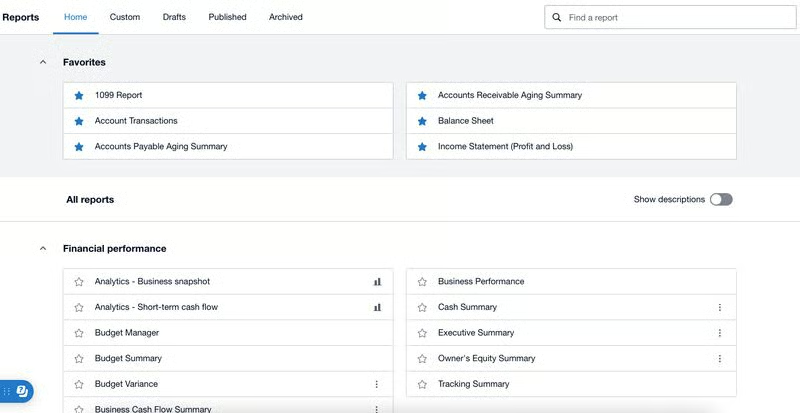
Reports page in Xero
On the Reports page in Xero, you’ll see five tabs to manage and organize your reports.
- Home: This is where you can view all of the available reports and create new ones.
- Custom: This shows all the reports that have been created and saved for your company.
- Draft: This is where you’ll see all reports saved as drafts. These reports are read-only and require an Adviser role to create.
- Published: From here, you’ll see all published reports, or those that have already been finalized and locked to prevent changes. Same as drafts, it requires an Adviser role to publish reports in Xero.
- Archived: This is where you can find published reports that have been archived by you or someone in your company; these archived reports can be restored if necessary.
Step 3: Customize the Report
After clicking your desired report from the Reports page, Xero will automatically generate a basic version of that report. At the top of the report, you’ll find several options to customize it. These options can vary depending on the type of report you’re working with, but some of the most common settings include the following:
- Date: This allows you to select the reporting period for your report. You can select specific date ranges, such as end of this month or end of last quarter, or set custom dates.
- Columns: You can select what specific columns to include or exclude in your report.
- Grouping/summarizing: This option lets you group data by various attributes, such as contact group and document type.
- Filter: You can narrow down the data by including or excluding specific data, such as contact name, contact account number, contact group, and document type.
- More: Click More for additional filtering options. For instance, when creating an Accounts Payable Aging Summary report, you can select whether the report should include decimals and exchange rate notes.
In the example below, we’re running an Accounts Payable Aging Summary report, and you’ll notice specific customization options available for this report—including aging periods and aging by.
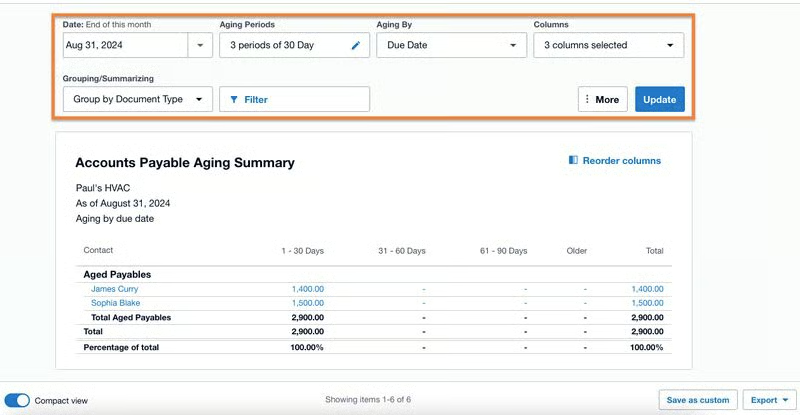
Customization options for creating Xero reports
Next, click on the blue Update button (shown in the screenshot above), and Xero will refresh the report with your customized settings.
Save and Manage a Custom Report
Xero allows you to save a customized report so that you can easily access it later. To save a custom report, simply click the Save as custom button on the lower left side of the report page (shown in the screenshot above).
You can later access the report from the Custom tab under the Reports page. From there, you can click the three dots next to the report and perform various actions, such as renaming the report, marking it as a favorite, and exporting it in a PDF, Google Sheets, or Excel format.
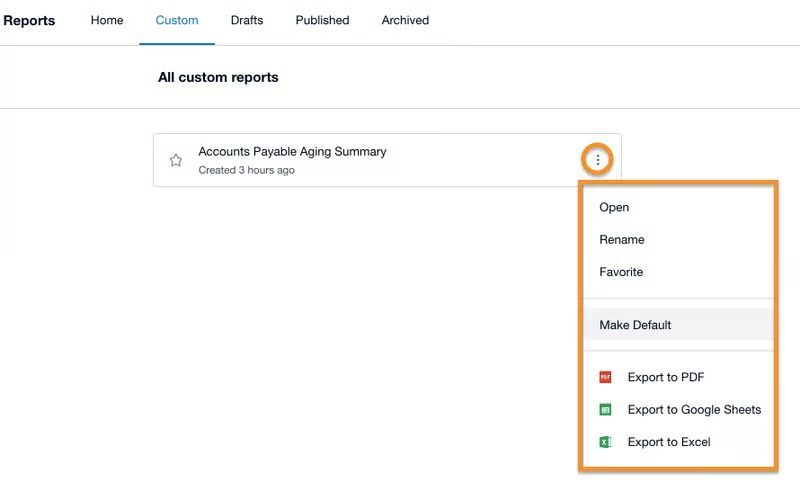
Managing a custom report in Xero
Step 4: Save the Report or Publish It (for Adviser Users)
As mentioned earlier, only users with Adviser user roles can save a report as a draft or publish it in Xero. If you don’t have this access, you can
to export the report for printing.
After customizing the report, you can save it as a draft or publish it so that it is permanently recorded in Xero.
- To save the report as a draft, click the arrow next to Save as on the bottom right of the report and then select Draft. Your report will then be recorded in the Draft tab of the Reports page.
- To publish a report, select Save as and then click Publish. Also, if you save a report as a draft for now, you can later check it in the Drafts tab and then publish it by clicking the three dots next to the report and then selecting Publish.
The purpose of publishing a report in Xero is to finalize it and create a permanent record within the system. When you publish a report, it locks the data for that period, preventing any further changes—which is crucial for audits and future reference.
Step 5: Export the Report for Printing
Click Export in the lower right corner of the Reports page, and then select whether you want to export the report in a PDF, Excel, or Google Sheets format. Locate the downloaded file, and proceed to print the report.
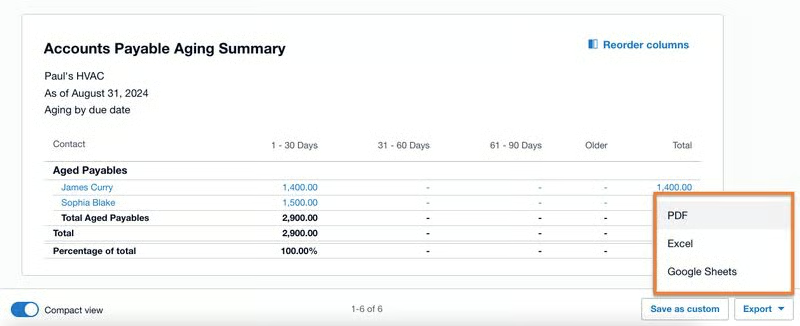
Exporting a report in Xero
Frequently Asked Questions (FAQs)
Some of the most widely used reports in Xero include balance sheet, P&L, accounts payable aging summary, accounts receivable aging summary, project reports, and reconciliation reports.
When you publish a report in Xero, you create a permanent, uneditable record. Most importantly, a published report locks the accounting period so that no further entries or adjustments can be made.
Yes, and you can do so by clicking on the Export button in the lower-left corner of the report and then selecting the format.
Bottom Line
You have now learned how to print reports in Xero, including how to generate reports and customize them. This concludes our series of free Xero tutorials. We hope that you have found this information helpful and encourage you to revisit these guides as questions while using Xero arise. You may also enjoy our Xero review, where we provide an in-depth analysis of Xero’s features, pricing, and user reviews.