


Selling on Instagram is easier than ever with Instagram Shopping, a set of features that lets people buy products on your Instagram posts and videos. It includes shopping tags, in-app checkout (US only), and a storefront to showcase your product collections.
To get started, create an Instagram business profile and upload a product catalog or connect your existing online store. Activate Instagram Shopping in the app, and finally, since Instagram is a visual platform, have a solid marketing strategy with great photos and videos.
Learn how to sell on Instagram by following the steps I outline below, which include actionable tips to make your Instagram profile stand out so you can reach more customers and sell more products.
- Step 1: Check Your Eligibility for a Shoppable Instagram Account
- Step 2: Switch Your Instagram Profile to a Business Account
- Step 3: Connect Your Instagram Account to a Catalog
- Step 4: Turn on Instagram Shopping in the Instagram App
- Instagram Shopping: Ways to Sell on Instagram
- Tips for Selling on Instagram
- How to Sell on Instagram Frequently Asked Questions (FAQs)
- Bottom Line
Step 1: Check Your Eligibility for a Shoppable Instagram Account
Instagram limits those who can sell products using shoppable posts. Before you can set up Instagram Shopping, make sure that:
- Your business is located in one of the countries where Instagram Shopping is available
- You sell physical goods that comply with Instagram’s commerce requirements
- Your business has a website
- You have a business profile on Instagram that is connected to a Facebook page (we cover both processes in the sections below)
Also, note some of Instagram’s restrictions:
- If you travel to a market outside the list of allowable countries, even temporarily, you may lose the ability to tag products. It can take up to two weeks for you to regain access to tagging capabilities.
- You cannot sell digital goods and services through a shoppable post. You will have to direct users to the link in your bio to make purchases.
Step 2: Switch Your Instagram Profile to a Business Account
If your business uses a personal Instagram account, you will have to convert it to a business account to create shoppable posts.
To convert a personal Instagram account to a business account:
- Step 1: From your profile, tap the three horizontal bars in the top right corner of the screen.
- Step 2: At the bottom of this screen, tap Settings.
- Step 3: Tap Account.
- Step 4: Click on Switch to a Professional Account.
- Step 5: Select Business, and tap Done.
For a detailed step-by-step, you can read Instagram’s business account setup guide.
Step 3: Connect Your Instagram Account to a Catalog
After setting up a business account for Instagram, the next step is to connect a catalog or upload your products.
You can actually onboard onto Instagram Shopping in three ways: by setting up your shop in Commerce Manager, connecting a supported platform through its dashboard, or onboarding directly within the Instagram app.
Using the Commerce Manager
In Commerce Manager, you can set up and customize your Facebook Shop (since Facebook and Instagram are connected platforms under Meta), enable Instagram Shopping, manage your product catalog, create product collections, and track shop metrics.
Keep in mind:
- You can only use Commerce Manager on a computer.
- You must connect your commerce account, Instagram account, and Facebook Page to the same Business Manager (this is where you oversee your Facebook Pages and Ads).
Follow the steps below to complete your shop details in Commerce Manager
- Step 1: Choose how you want your customers to complete their purchase by selecting a checkout method.
- Step 2: Next, choose your sales channels by selecting whether to have your shop on Instagram, Facebook, or both.
- Step 3: You’ll also need to choose a product catalog you want to connect to your commerce account (more on this in the following step).
After you’ve set up shop, you can manage your business assets in your Commerce Manager settings.
Click through the slides below to set up a shop in Commerce Manager.
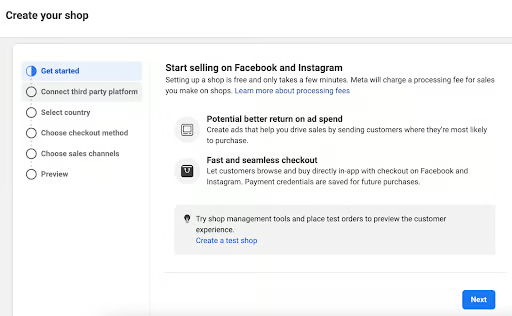
The first thing you will see when onboarding from the Commerce Manager is a prompt to start selling on Facebook and Instagram. 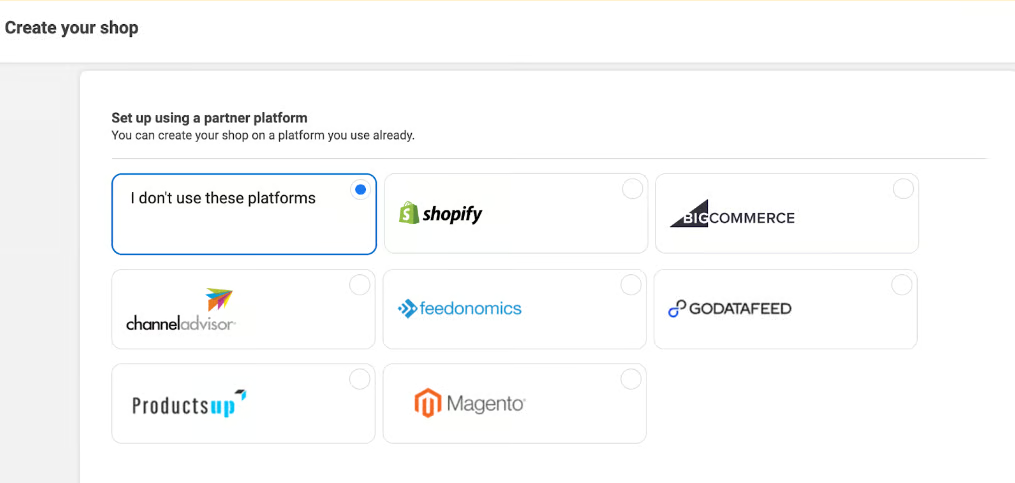
Next, you can connect your existing online store to Instagram. 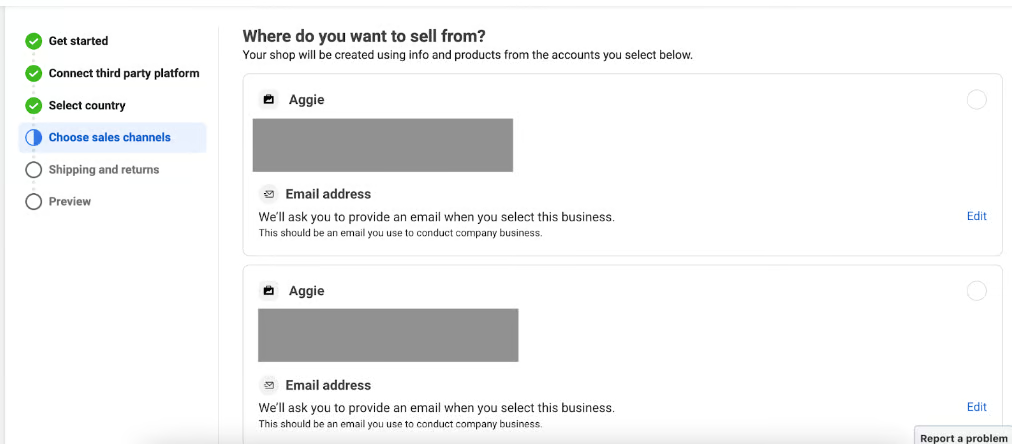
When choosing sales channels, connect the Instagram account you want to sell from (in case you have multiple Instagram accounts).


There are a few ways to connect a catalog to your Instagram account. You can use the manual method through Facebook Catalog Manager, or you can go through an approved Facebook partner like BigCommerce or Shopify.
Using Facebook Catalog Manager (Manual)
If you already have a Facebook Shops catalog, connect it to your Instagram account. Once connected, it will automatically create your Instagram shopping catalog. You can’t change it later, so make sure you want to have the same catalog for both platforms. Most stores use the same catalog anyway to be able to monitor inventory.
To view and manage your connected Instagram account and catalog in Commerce Manager:
- Step 1: Go to Settings.
- Step 2: Select Catalog to view the catalog connected to your commerce account.
- Step 3: Select Business Assets. Under Ad and Sales Channels, select Instagram; you can view your connected Instagram account here. When your Instagram business account is connected, it appears as a sales channel in the Shops tab.
To add products manually, use Catalog Manager to upload product details, such as photos and information. You can do this individually, upload products in bulk with a spreadsheet, or use a Facebook pixel to import products from your website. (We use the same steps when we upload products to a Facebook Shop.)
Connecting a Facebook Partner
You can use one of Facebook’s certified third-party ecommerce platforms like Shopify and BigCommerce. Since Facebook and Instagram manage their shops in the Commerce Manager, they have the same steps for each provider. Follow your partner’s website steps to connect your account with Instagram. Instagram will then direct you to complete the setup based on your platform.
Step 4: Turn on Instagram Shopping in the Instagram App
You’ll receive a notification about your approval from Instagram, and once you receive it, you can set up product tagging. To do so, you need to turn on Instagram Shopping in the app. Make sure you have the latest version of the Instagram app.
To enable product tagging, follow these steps:
- Step 1: Go to your profile and tap Menu.
- Step 2: Tap Settings.
- Step 3: Select Business.
- Step 4: Click Shopping. Note: You will only see this option once approved for Shopping.
- Step 5: Tap Continue.
- Step 6: Select a product catalog to connect to your professional account.
- Step 7: Click Done.
And that’s it! You can now start selling your products.
Instagram Shopping: Ways to Sell on Instagram
There are several ways to sell your products on Instagram: tagging products in posts, adding product stickers in Stories, through the Shop experience in your profile, activating Instagram checkout, and scheduling a Live Shopping broadcast.
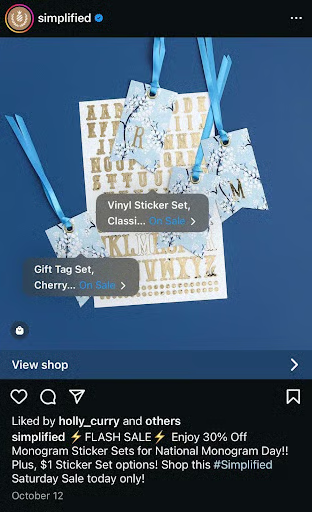
Upload Shoppable Posts
To make your Instagram posts shoppable:
- Step 1: Tap the plus icon to create a New Post.
- Step 2: Select a photo or video and add a caption, effects, and filters. Tap Next.
- Step 3: Tap Tag Products. Click the products in the photo or video that you want to tag. Note: You can select up to five products per single-image and video post or 20 products per multi-image post.
- Step 4: Search for the products you want to tag in your catalog, then select.
- Step 5: Tap Done and tap Share.
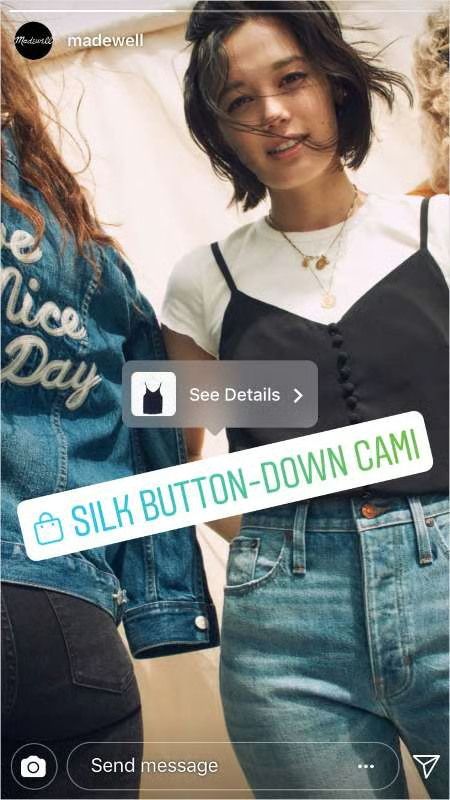
Add Product Stickers to Instagram Stories
To make your temporary and highlighted Instagram Stories shoppable:
- Step 1: Click on your profile picture to add a story.
- Step 2: Select a photo or video to upload to your story.
- Step 3: Select the product sticker from the sticker tray.
- Step 4: Choose the product from your catalog that you want to feature.
- Step 5: Tap Done.
- Step 6: Move the product sticker to where you want it to appear on your story. Note: You can change the style of the product sticker by tapping the sticker.
- Step 7: Tap Send To and select your audience; then Share.
Activate Instagram Checkout
Activating Instagram checkout allows your customers to place their orders without needing to check out on a specific product page on your website. When the feature is activated, you will see a “Checkout on Instagram” button on a product page instead of “View on Website.”
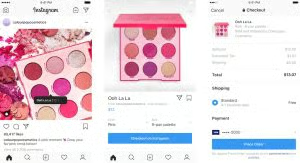
Once a customer clicks on the button, they will only need to enter their name, email, billing information, and shipping address the first time they check out. When the initial order is complete, Instagram will securely save their information for convenience the next time they shop.
Customers will also receive notifications about shipment and delivery right inside Instagram to keep track of their purchases.
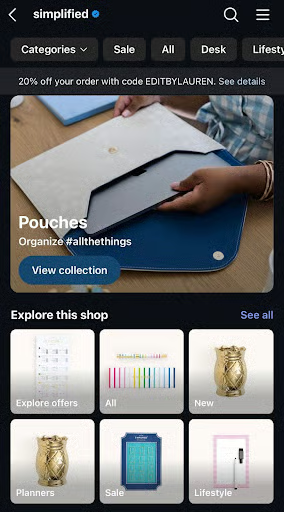
Set Up Your Instagram Storefront
When you connect your product catalog to Instagram, it enables you to have a storefront so you can share your brand story and create product pages and collections.
Tips for Selling on Instagram
As a platform that relies heavily on visual aesthetics and hashtags for increased visibility, here are some tips for marketing on Instagram.
Get on the Explore Page
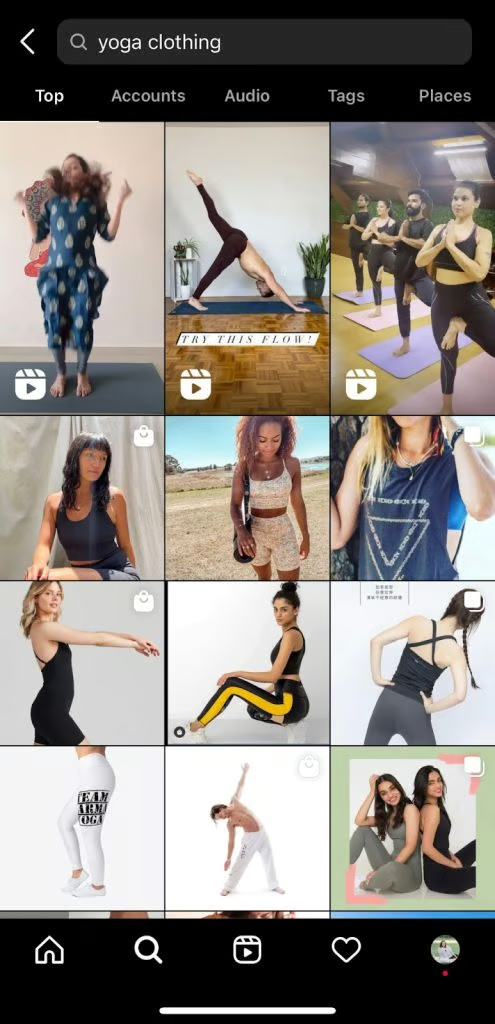
Instagram’s Explore page is a collection of public photos, videos, Reels, and Stories customized to help an Instagram user discover posts, accounts, hashtags, or products they might like. For example, if one searches for yoga clothes on Instagram’s search bar, they will see a curation of videos, reels, and posts relevant to their query. In the image below, notice how there are shoppable posts included in the search results (the icon with a shopping bag).
You can liken Instagram’s Explore Page to a Google Search engine. It delivers targeted content to users based on their interests, search history, and user behavior data. Fifty percent of Instagram users use the Explore page each month. Getting on the Explore page will boost a post’s engagement and drive discoverability for your brand, which signals the algorithm that your content is relevant and drives more traffic to your feed.
To get on the Explore page, consider doing the following:
- Know your audience and what content type they prefer.
- Share valuable content. Learn how to take great photos.
- Mix up your posts—do Stories, Instagram videos, Reels, and posts.
- Build an active community of followers.
- Use relevant tags.
We tackle more of the tips to get on the Explore page below, which also serves to help you increase sales when selling on Instagram.
Embrace Video (Publish More Reels)
Videos are no longer just a trend; video marketing is here to stay. The sooner your business adapts its marketing strategies to include videos, the better.
Instagram video posts have a 1.45% engagement rate (which experts equate to a highly converting post already), with 9 out of 10 Instagram users watching videos weekly. In fact, Instagram says Reels are the platform’s future, as it already takes up 20% of the time spent on the platform.
Some Story, Reel, and IGTV (video) content ideas include:
- Showcase your products in action.
- Promote special offers and new products.
- Do a behind-the-scenes to show production, packing, shipping, and more.
Partner With Influencers
People are 1.5x more likely to want to see branded creator content on Instagram than on other platforms, so partnering with influencers (or collaborating with creators, as it’s referred to in the industry) can be an effective marketing tool. You get to tap the influencer’s community and engage with them, too.
When working with influencers, keep in mind the following:
- Take time to find the right match for your brand.
- Check every detail of your brand requirements and the required deliverables.
- Discuss how the final deliverables will be used and when and where they will be posted.
- Share feedback during the creation process to make sure you are aligned with your goals.
- Move forward with the collaboration once you have a contract in place.
- Use Insights to measure the success of your collaboration.
Don’t discount micro-influencers, too (those with less than 20,000 followers). They are proven to have a very niche but highly engaged community of followers—and they might deliver more value for your brand.
Related Read: Ultimate Guide to Influencer Marketing: What It Is & How It Works
Leverage User-Generated Content (UGC)
Seven out of 10 shoppers are influenced by friends’ social media posts and reviews. UGC has been proven to be more effective in brand advertising, and you need to take advantage of it as a small business.
Encourage your customers to post social proof and even use your branded hashtag. Customers showcasing your products help build trust and prove authenticity. Plus, it provides your followers with a community they can be part of.
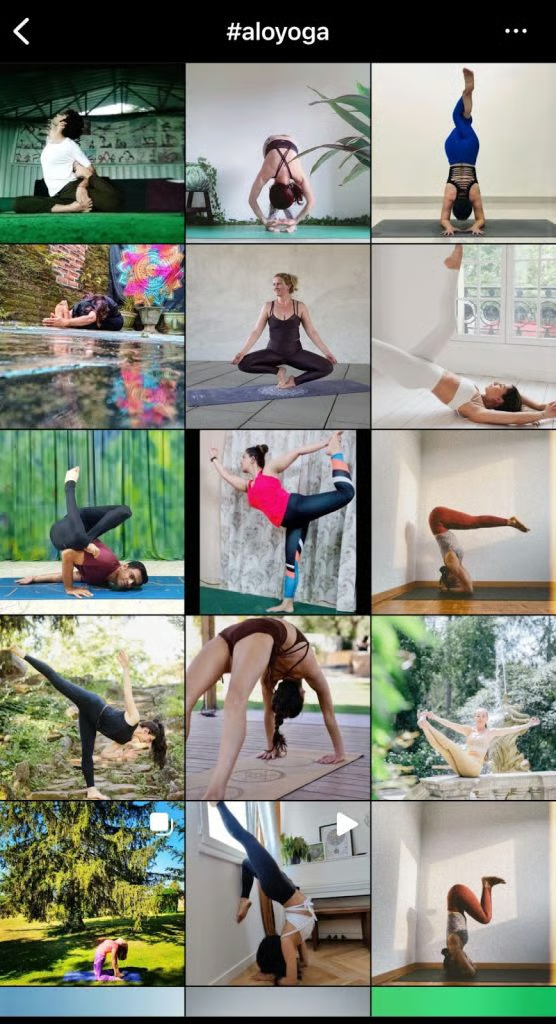
Take, for example, Alo Yoga’s #aloyoga hashtag. The clothing and lifestyle brand encourages shoppers to post their outfits while doing yoga poses using the branded hashtag. As a result, its feed is mostly curated from its 2.1 million followers, all sporting Alo pieces.
Use Relevant Hashtags
Instagram hashtags work like keywords in a search engine. When a potential customer wants to find something easily on Instagram, they can quickly type in a hashtag related to their query, and the corresponding results are what they will be searching for.
Hashtags also work to build brand awareness and connect your post to a specific topic. When used correctly, hashtags help make your shoppable posts more discoverable on the feed. Use those relevant to your product to make it easier for customers to find your business.
Create your own branded hashtag if you can. It helps develop your brand’s voice, zero in on specific events and promos, if there are any, and helps you track engagement. A great example is #ShareACoke by Coca-Cola.
Use the Link in Your Bio
You can only add one external link to your Instagram account—the URL section in your Instagram profile bio. It’s a prime spot, so take advantage of it. Whenever someone finds you on Instagram, they are more likely to check your bio page and click your link if interested. Having a link in your bio will encourage traffic to your online store.
To maximize the link in your bio:
- If your link is too long, you can shorten it with a Bitly or Google URL shortener.
- Refer your followers to the link often. Phrases such as “link in bio” in post captions are there for a reason. This can encourage people to take action and visit your page.
- Change your link depending on your business promotion. Whenever you have something new to promote, ensure the link in bio corresponds to it. Your followers won’t always search for the right link, so make it easy for them to find whatever you promote.
How to Sell on Instagram Frequently Asked Questions (FAQs)
Click through the tabs below to get answers to the most often asked questions about selling on Instagram.
How much does it cost to sell on Instagram?
There is no cost to enable shoppable posts and Instagram Shopping on Instagram. However, you might encounter costs associated with linking it to an ecommerce platform if you plan to set up your online store. You will also have expenses when you decide to run Instagram Ads.
How do you sell on Instagram?
It’s easy to sell on Instagram. Start by creating a business profile on Instagram. Connect your Facebook page. Then, make your product catalog or connect it with your existing online store. Once approved, you can now start selling your products.
Can you sell directly on Instagram?
Technically, yes. However, checkout on Instagram is currently only available to all eligible business and creator accounts in the US.
Can I sell things on Instagram without a website?
No, you can’t. A business website is required to be eligible for a Shoppable Instagram account.
Bottom Line
Having your products shoppable on Instagram is a great way to get in front of an enormous audience that is already likely to buy. Learning how to sell on Instagram is easy—the real work begins when you market your shoppable Instagram posts.