

In this fifth and last FreshBooks tutorial, we’ll teach you how to print reports in FreshBooks—which includes accessing the Report section, locating the report you need, and printing it in a PDF format. We’ll also show you how to customize the report before printing it, as well as how to export it as a CSV file if needed.
Step 1: Access the Reports Section
To navigate to the Reports section, click on Reports in the left menu bar, as shown below.
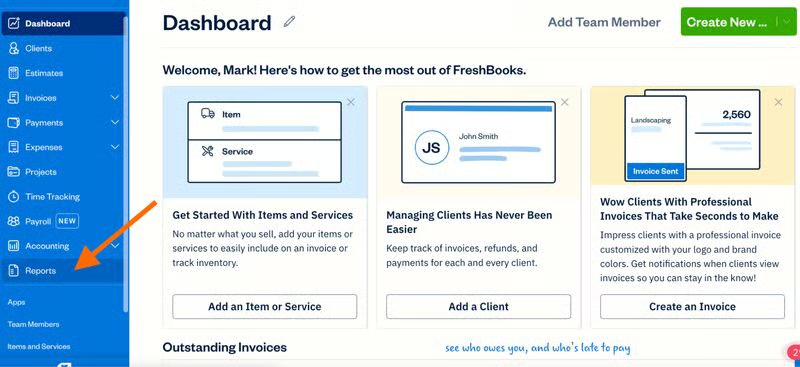
Navigating to Reports in FreshBooks
Step 2: Locate the Report
From the Reports page, you’ll find a list of all the reports available in FreshBooks, including profit and loss (P&L), balance sheet, accounts aging, accounts payable (A/P) aging, and revenue by client reports. Simply click on the report you need, and FreshBooks will automatically generate it for you.
Here’s a summary of a few of the most popular reports:
- Accounts Aging: The Accounts Aging report shows you which clients are taking a long time to pay their invoices by displaying all outstanding and overdue invoices in one place for your review.
- Accounts Payable (A/P) Aging: The A/P Aging report shows you which vendors have outstanding bills that need to be paid. Like the Accounts Aging report, bills are grouped by outstanding (past the bill issue date) and overdue (past the due date) in 30-day intervals.
- Profit & Loss (P&L): Also referred to as an Income Statement, this report shows your net profit by subtracting your total expenses from your total income over a specific period of time. The P&L report helps determine what you owe in taxes and if you’re making more money than you’re spending.
- Balance Sheet: The Balance Sheet is a snapshot of your company’s financial position on a given day, usually calculated at the end of the quarter or year. It’s useful in summarizing your company’s assets, liabilities, and owner’s equity.
- Revenue by Client: This report gives you a breakdown of revenue, including sales taxes, earned for each client that you have invoiced.
- Sales Tax Summary: The Sales Tax Summary report helps determine how much you owe the government by breaking down the value of the sales tax you have collected, along with how much you have paid on expenses.
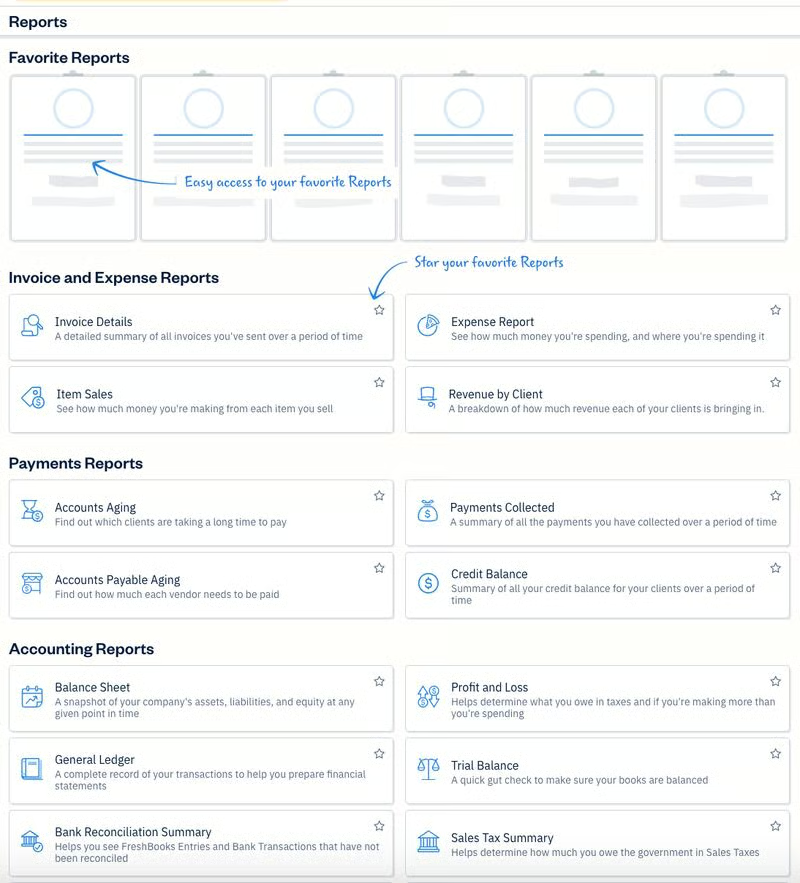
Available Reports in FreshBooks
Step 3: Customize the Report
You can customize your report by clicking on the Filters section in the upper right corner of the report. This allows you to select the date range covered by the report, whether you want it presented by month or quarter, and the accounting method used (e.g., accrual or cash-based). Click on the Apply button to update the report with this data.
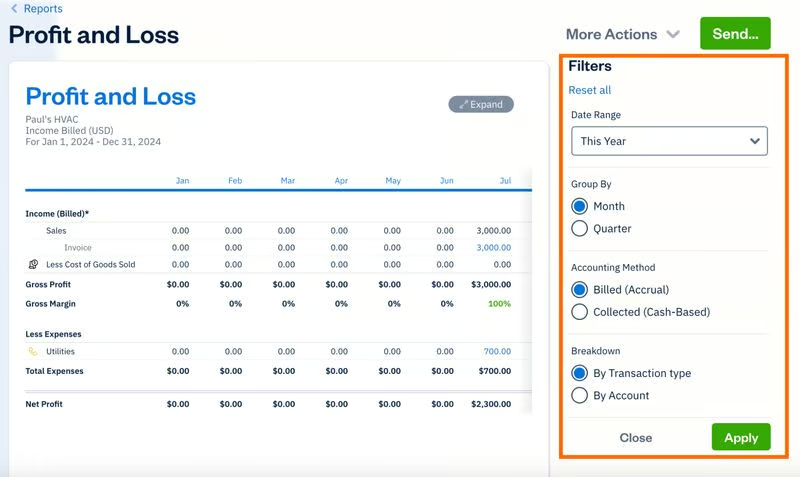
FreshBooks report filters
Step 4: Print the Report
To print the report, click the arrow next to More Actions in the upper right corner of the report and select the Print button, as shown below.
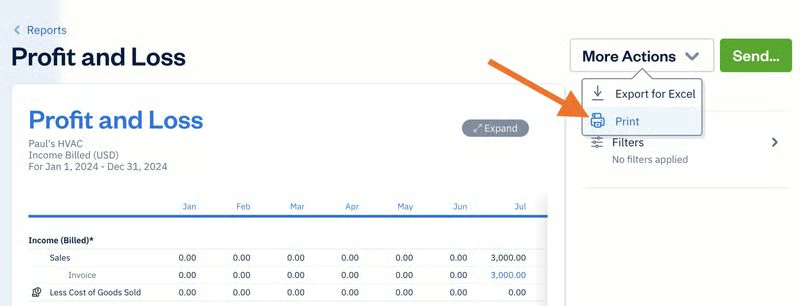
Printing a report in FreshBooks
From the printer dialog box, verify your print settings, such as printer selection and page layout. Click the Print button to start printing.
Frequently Asked Questions (FAQs)
The process for printing reports in FreshBooks involves navigating to the Reports page, locating the report you need, customizing the report using filters, and printing the report.
Yes, and you can do so by using the date selector in the Filters section under Settings on the upper right side of the report.
Bottom Line
You have now learned how to print reports in FreshBooks. This concludes our series of FreshBooks tutorials. We hope that you have found this information helpful and encourage you to revisit these tutorials as questions arise while using FreshBooks.