

Welcome to the Fit Small Business free FreshBooks tutorials. Whether you’re new to FreshBooks or could benefit from a more in-depth understanding of the software, we have provided five tutorials that will help you. Each FreshBooks tutorial includes an in-depth lesson, complete with text and images as well as a comprehensive video demonstration.
You’ll find these tutorials much more useful if you have a copy of FreshBooks so that you can follow along with your own data. If you haven’t already subscribed to FreshBooks, you’re eligible for a free 30-day trial subscription or 60% off for four months.
We have the following tutorials:
TUTORIAL
01 How to Set Up Your Company in FreshBooks
TUTORIAL
02 How to Manage Customers and Send Invoices in FreshBooks
TUTORIAL
03 How to Enter, Track, and Pay Bills and Pay Expenses in FreshBooks
TUTORIAL
04 How to Classify Transactions and Reconcile Bank Accounts Transactions in FreshBooks
TUTORIAL
05 How to Print Reports in FreshBooks
- Tutorial1: How to Set Up Your Company in FreshBooks
- Step 1: Adjust Your Settings
- Step 2: Invite Team Members
- Step 3: View Your Chart of Accounts
- Step 4: Connect Your Bank Account
- Step 5: Set Up Clients (Add Manually or Import)
- Step 6: Set Up Vendors (Add Manually or Import)
- Frequently Asked Questions
- Bottom Line
Tutorial1: How to Set Up Your Company in FreshBooks
Our first FreshBooks tutorial covers how to set up your company file. This includes adjusting your settings, inviting team members, viewing the chart of accounts, connecting bank accounts, and adding clients and vendors.
Step 1: Adjust Your Settings
Step 1.1: Navigate to Settings
From your dashboard, click on Settings in the left menu bar, as shown below.
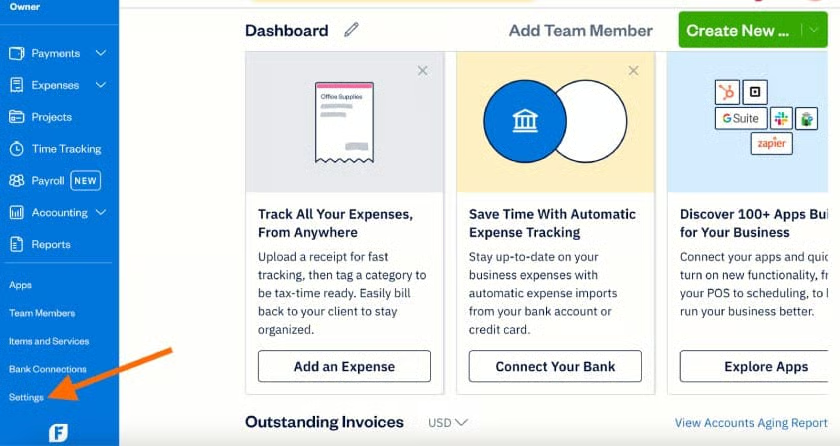
Navigate to Settings in FreshBooks
Step 1.2: Customize Your settings
Under the Settings tab, you’ll see three sections: Business Profile, Connections and Integrations, and Advanced Preferences. Click on each section to make the necessary changes, and make sure to always click the Save Changes button to apply the settings. Below we explain the three sections in detail:
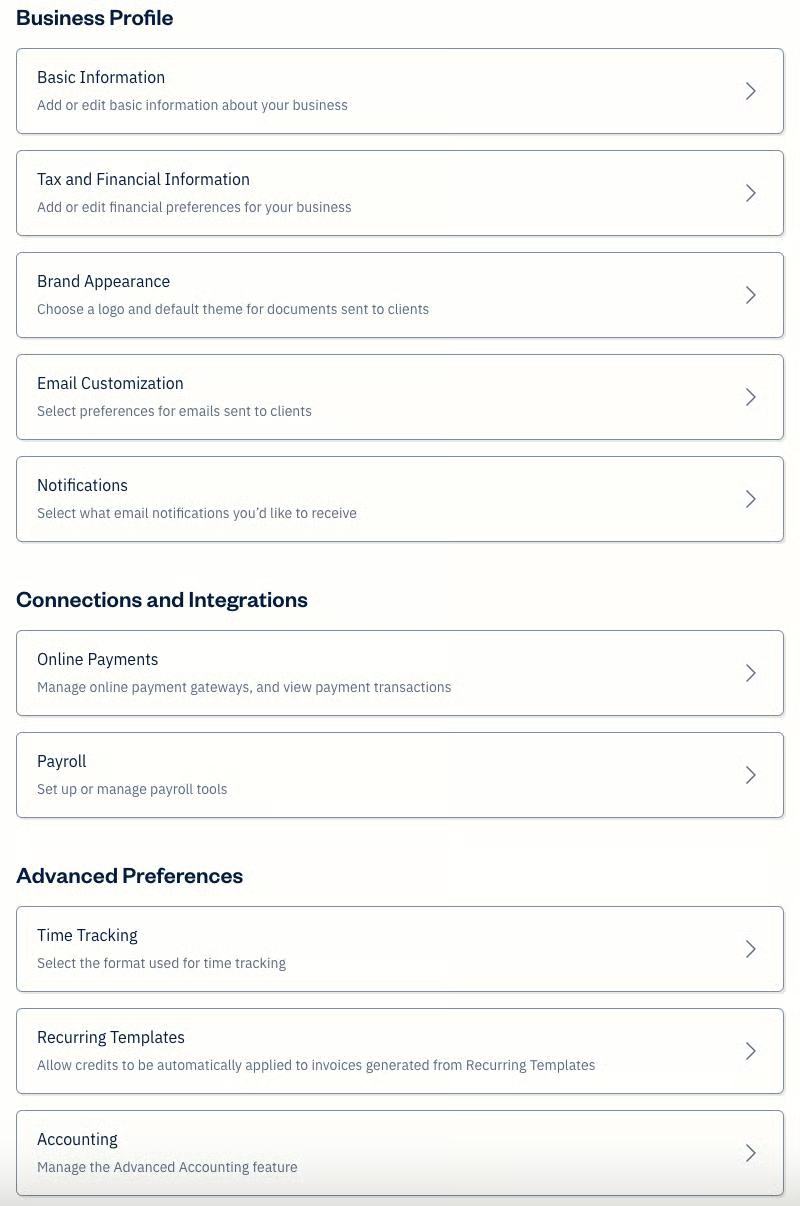
Company settings in FreshBooks
This is where you can set up, configure, and manage the key details and preferences for your company, including:
- Basic Information: This section allows you to add or edit basic company details, such as company name, contact details, address, and business time zone. Also, you can specify which day your business week starts as well as the industry in which you operate.
- Tax and Financial Information: This is where you can specify or edit your base currency and select what month and day your fiscal year ends. Also, you’ll use this section to set a default hourly rate for your services rendered.
- Brand Appearance: You can adjust the appearance of your sales forms (e.g., invoices, estimates, and proposals) by changing the template design, theme color, and font style. You can also upload your company logo to make your sales forms more professional.
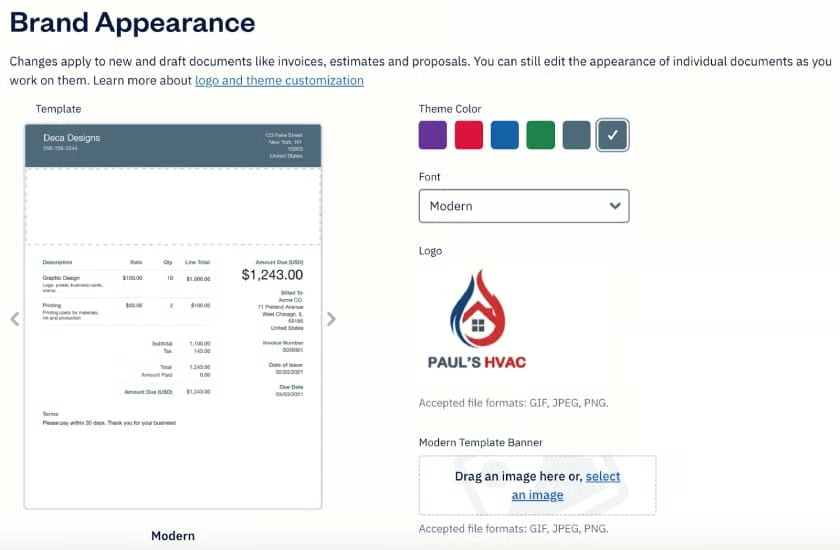
Adjusting brand appearance in FreshBooks
- Email Customization: This allows you to customize your email templates, including the content and appearance of the email. If you use Premium or Select, you’ll be able to customize your email signature.
- Notifications: Decide which items you would like FreshBooks to send you an email notification for. These notifications apply to invoices, payments, projects, estimates, and proposals. Some of these notifications include when an online payment is received, or a recurring invoice is sent. You can also opt to turn on or off all FreshBooks notifications.
This section enables you to connect FreshBooks to other apps and services to automate your business processes.
- Online Payments: This is where you can manage online payment gateways and set up integration with Stripe or PayPal. Also, you can view here your online payment transactions.
- Payroll: Set up and manage your FreshBooks Payroll by Gusto. Read our Gusto review to learn more about this payroll solution.
- Time Tracking: This section lets you select how you want to track time entries. You can either manually enter the total hours worked or log specific start and end times.
- Recurring Templates: When turned on, FreshBooks will automatically apply any credits on a client’s account as a payment on any invoices generated from recurring templates.
- Accounting: When enabled, you’ll have the same abilities as an accountant. This means you’ll be able to manage the chart of accounts, including editing, archiving, and creating new accounts. Also, you can create and manage journal entries.
Step 2: Invite Team Members
With FreshBooks, you pay by the user, and each additional user that you invite is $11 per month. The exception is Accountant users, which are free.
Step 2.1: Navigate to Team Members
From your FreshBooks dashboard, select the Add Team Member button in the upper right corner. Alternatively, you may click on Team Members in the left menu bar and then select the Add Team Member button.
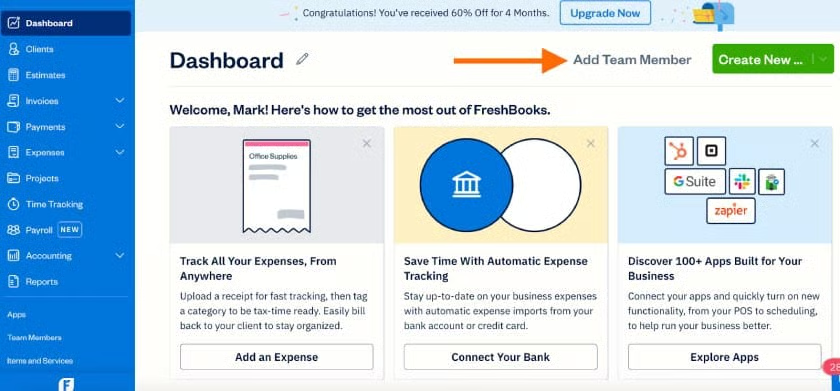
Click Add Team Member from the FreshBooks dashboard
Step 2.2: Enter Basic Information
Next, enter basic details, including the team member’s name and email address. Click Add to continue.

Adding a new team member in FreshBooks
Once the new team member is added to FreshBooks, a few additional settings, including role and permissions, appear under their profile.
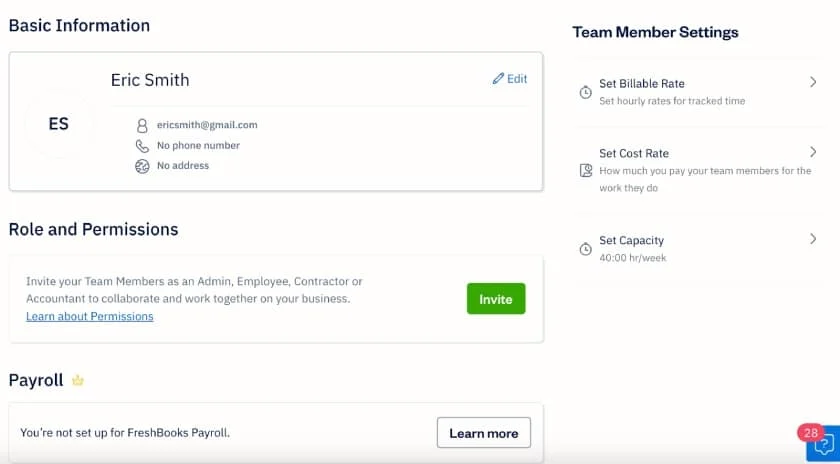
Team member profile in FreshBooks
Step 2.3: Select Roles and Permissions
Click Invite under the Roles and Permissions section to assign the new team member the appropriate role and permissions. You can select from five different roles:
- Admin: Full access to your FreshBooks account, including clients, invoices, and reports
- Manager: Full access to your FreshBooks account, but can’t view financial reports, expenses, or the dashboard
- Employee: Able to track time and expenses for assigned projects, but can only view their own information
- Contractor: Able to track time and expenses for assigned projects, and can send you invoices
- Accountant: Able to access reports, categorize expenses, and create journal entries, but can’t manage clients, track time, view projects, or send invoices or estimates
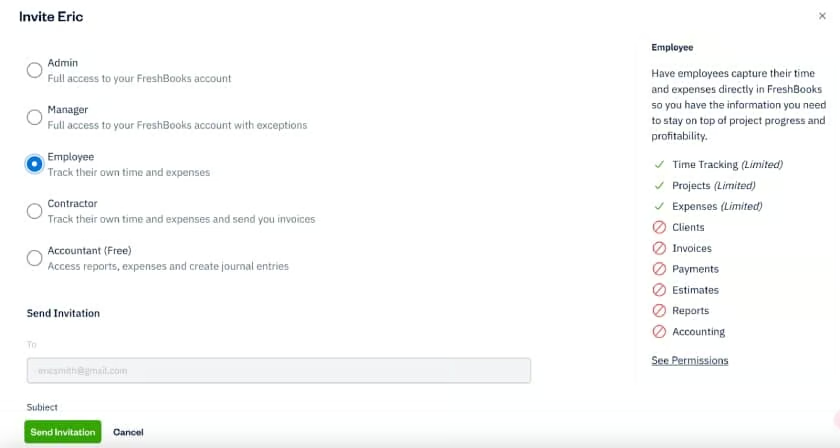
Assigning role and permissions to a new team member in FreshBooks
If you click on the See Permissions link at the bottom of the Invite drop-down menu, you’ll be able to explore the permissions for each team member role in more detail.
Once you send the invitation and the team member accepts it, they’ll be able to access your FreshBooks account with the permissions that you have established.
Step 3: View Your Chart of Accounts
Step 3.1: Navigate to Chart of Accounts
To view your chart of accounts, click on Accounting in the left menu bar, and then click on Chart of Accounts.
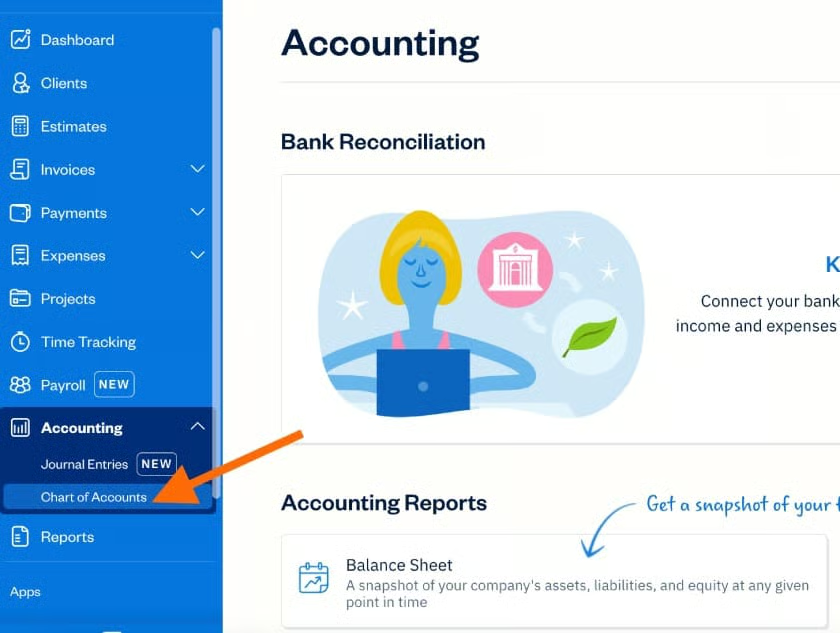
Navigating to Chart of Accounts in FreshBooks
Step 3.2: View the Chart of Accounts
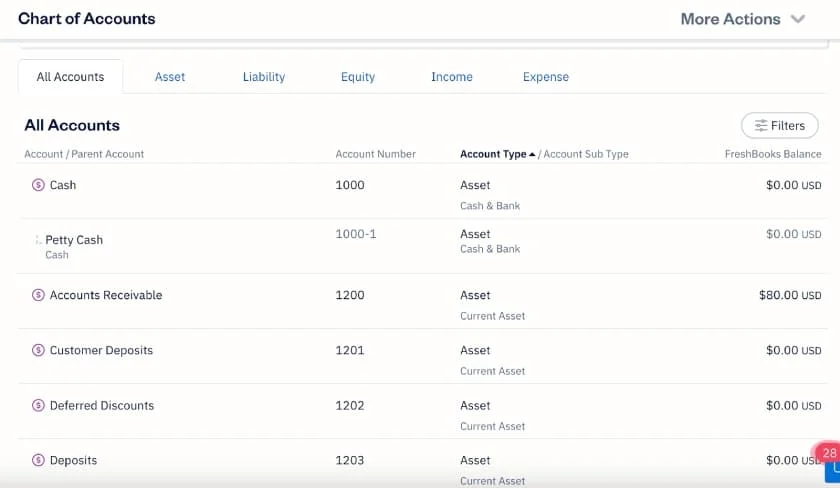
FreshBooks Chart of Accounts
In order to make modifications to your chart of accounts, you need to toggle on the Accounting option in our advanced preferences, as discussed above in step 1.2. Otherwise, only Accountant users in step 2.3 will be able to make modifications.
Within FreshBooks, expenses are treated a little differently than other accounts—they’re called “categories.” As you record expenses, you can create new expense categories. This is the one exception to adjusting your chart of accounts without toggling on the Accounting option.
Step 4: Connect Your Bank Account
Step 4.1: Navigate to Bank Connections
From your dashboard, click the Connect Your Bank button. You may also click on Bank Connections in the left menu bar.
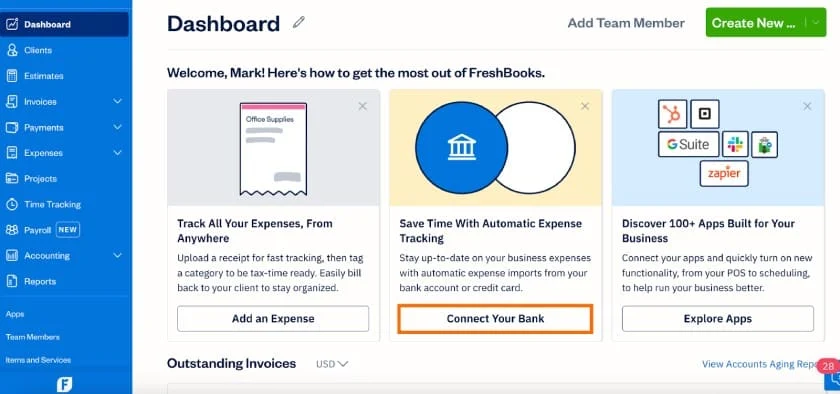
Navigating to Bank Connections in FreshBooks
Step 4.2: Connect Your Bank Account
FreshBooks will display a list of bank accounts; and from here, select the bank you wish to connect. If your bank isn’t on the list, click on the Find your bank link to locate your bank.
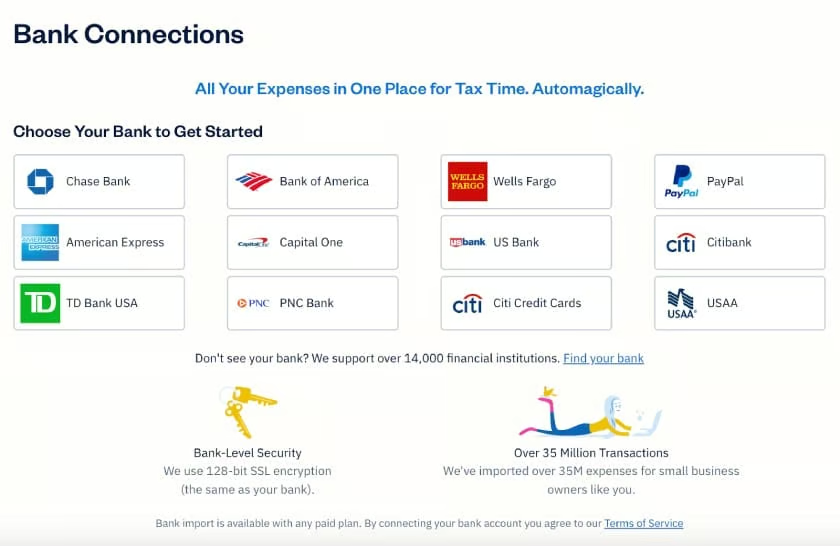
Bank Connections in FreshBooks
Before initiating the setup, you need to make sure that you have internet access to the account and can log in from its website. To do this, you’ll need your user ID and password. Those credentials are what you’ll use to connect the account to FreshBooks. Once it connects, your account’s transactions will flow over to FreshBooks and you’ll be able to categorize the expenses.
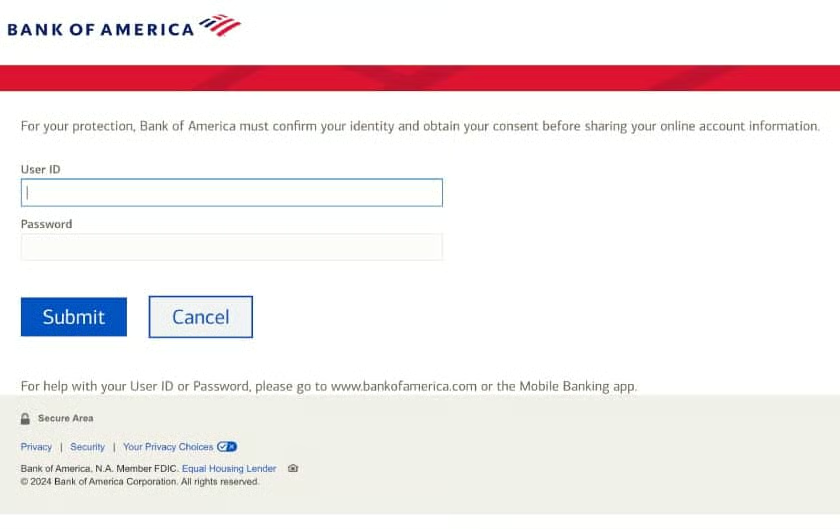
Setting up a bank connection in FreshBooks
Step 5: Set Up Clients (Add Manually or Import)
Add Manually
From the Clients page, click the green New Client button in the upper right corner. You can then enter the client’s contact info on the next screen, as well as adjust their settings. These settings include currency and language options and whether you want to send reminders at customizable intervals, charge late fees, or attach invoices. Once done, click the green Save button to record the new client.
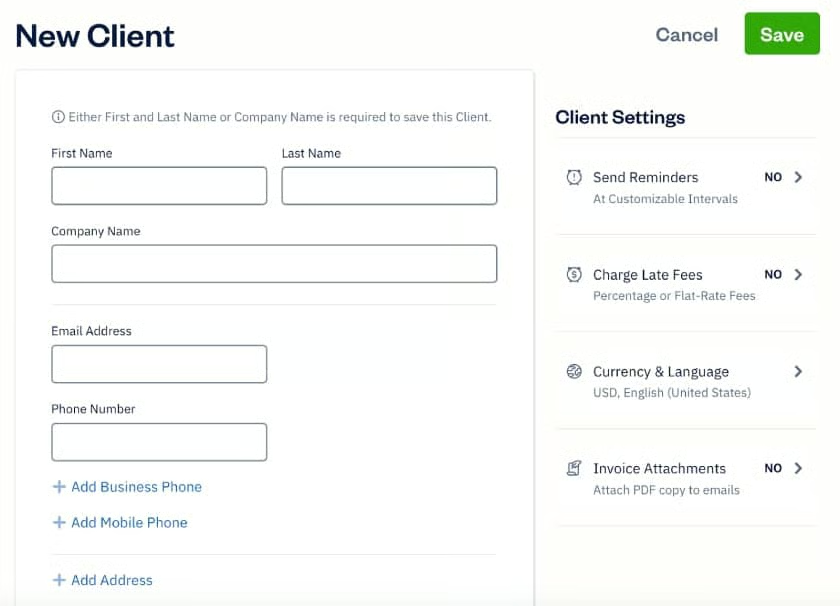
Adding a new client in FreshBooks
Import Clients
If you have prior accounting software or even a spreadsheet with a list of your client names, you can import that into FreshBooks.
For example, in QuickBooks, you export a list of your clients by going to the Reports tab and locating the Customer Contact report. Generate the report and export it to Excel. Once you open it in Excel, remove any rows leading up to the data, and then save it as a CSV file. CSV files are the only files that can be imported to FreshBooks.
Once you have a CSV file of all of your customers, you can import them into FreshBooks by navigating to the Clients page and selecting Import Clients under More Actions, as shown below.
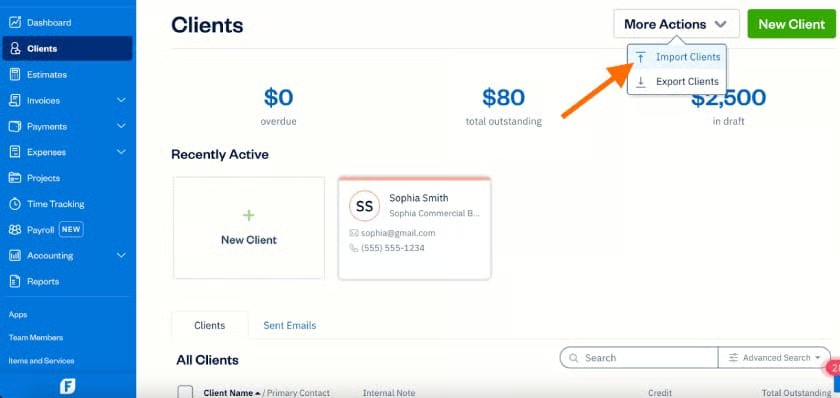
Clients page in FreshBooks
Next, FreshBooks will display a popup window where you can upload the file from your computer.
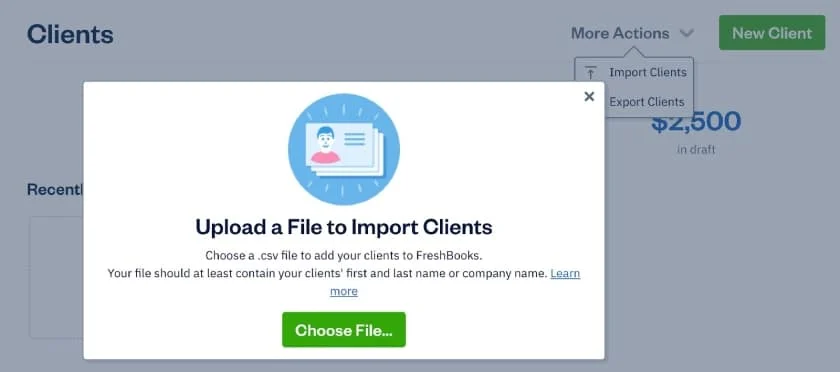
Uploading a CSV file to add clients to FreshBooks
Before importing, FreshBooks is going to ask you to map the columns in the spreadsheet to the FreshBooks fields. To begin mapping, click the first drop-down menu next to First Name, and select the column name in your file that matches this field. Continue mapping each field—Last Name, Company, Email Address, and Phone Number.
If your spreadsheet doesn’t already have this information separated out this way, then you’ll need to go in and do a little manipulation of your CSV file to ensure that you have all of the appropriate fields available.
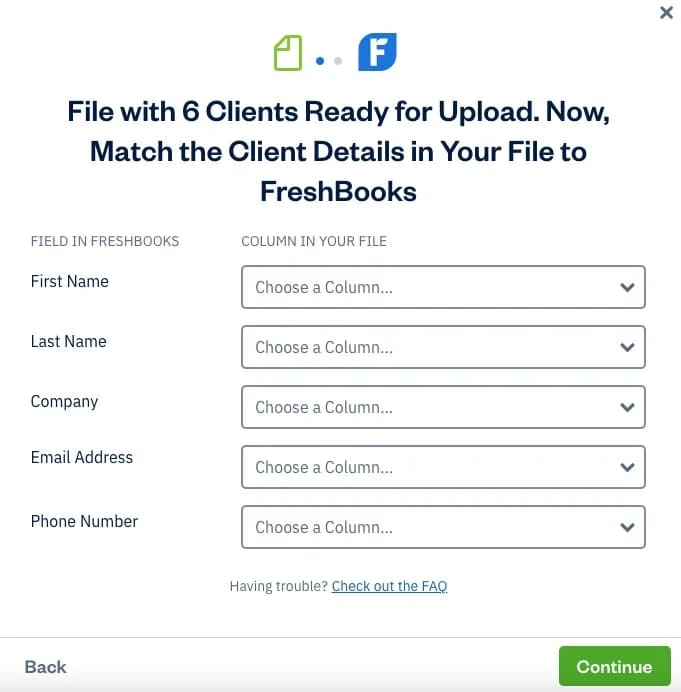
Mapping Client files in FreshBooks
Step 6: Set Up Vendors (Add Manually or Import)
The last step in this FreshBooks tutorial is to set up vendors. Similar to clients, you can set up vendors either by manually entering the details or using the FreshBooks import feature.
To create a new vendor manually, navigate to the Vendors page under Expenses, click New Vendor, enter the vendor details, and then click Save.
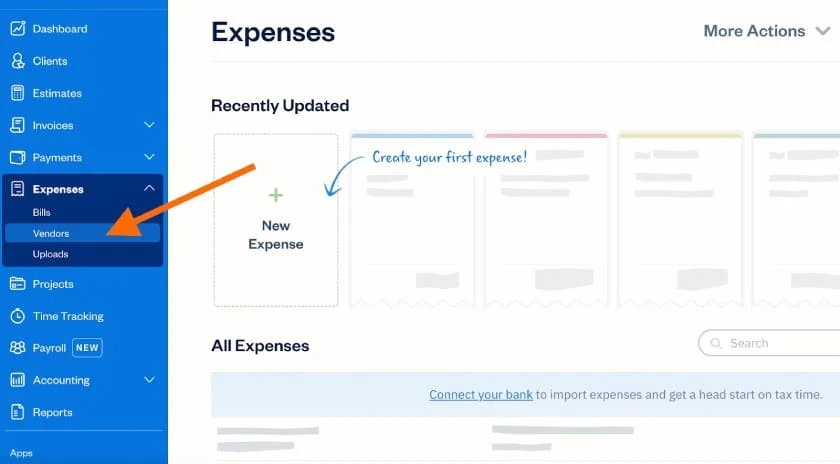
Navigate to the Vendors page in FreshBooks
Additionally, the process of importing vendors is very similar to that of importing customers, as discussed in the prior step. From the Vendor page, click on More Actions in the upper right corner, and then Import Vendors.
Like your customers, you’re going to need to set this up in a CSV file. If you’re migrating from another accounting program, you’ll need to figure out how to export the vendors to a CSV file. It should have all of the same columns as FreshBooks fields, and all of the descriptions of each of those columns should be in the very first line of the spreadsheet.
Once you have done that, click the green Choose File button, and then select the vendor list that you want to import.
Then, map the columns in the spreadsheet to the fields in FreshBooks just like in step 5. Note that you can leave any fields blank that you don’t intend to use in FreshBooks. Once all of the fields are mapped, click on Import Vendors. You’ll see them listed in the Vendor Center.
Frequently Asked Questions
Yes, Freshbooks is fairly intuitive for business owners to learn. Invoicing and bill tracking is pretty straightforward, but learning to manage the bank feeds and reconciling accounts can be a bit confusing.
It depends upon the number of users. FreshBooks is less expensive than QuickBooks for one user, but more expensive for five users when comparing similar plans. Read our complete comparison of FreshBooks vs QuickBooks.
FreshBooks is a cloud-based program, so all you need to do to get started is to purchase a subscription. First, you’ll want to enter your company information and adjust your settings. Next, connect all your bank and credit card accounts before trying to enter any expenses.
Bottom Line
You’ve just learned how to use FreshBooks, including how to set up basic and advanced settings. Be sure to check out our other four free FreshBooks tutorials. Our next tutorial is how to manage customers and send invoices, which covers how to adjust settings for your customers and preferences for sending invoices.