







Once project tracking is turned on in QuickBooks Online, you can create a new project and track it until it’s completed. You can then assign costs, such as expenses incurred and hourly costs worked by employees, and link invoices to the project. This allows you to monitor how much you spend and earn on that project. Finally, once the project is successfully delivered, you can mark it as complete.
Below, I will walk you through how to create a project in QuickBooks Online, including how to generate a Project Profitability Summary report.
Step 1: Turn on Project Tracking
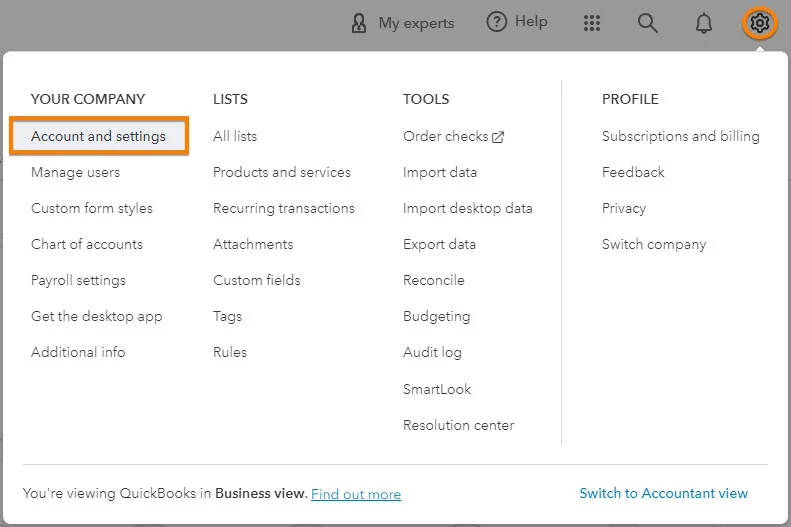
Click on the cog wheel (⚙︎) icon in the upper-right corner of your QuickBooks dashboard and then select Account and settings, as shown below.
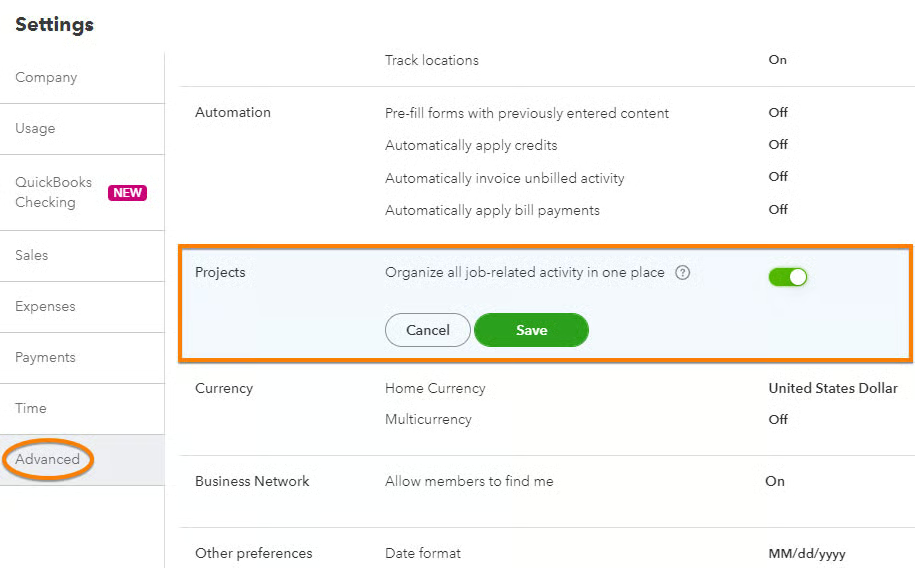
On the Settings page, select Advanced, and then choose the Projects category. Next, switch on the toggle button and click Save to turn on project tracking.
Step 2: Create a New Project
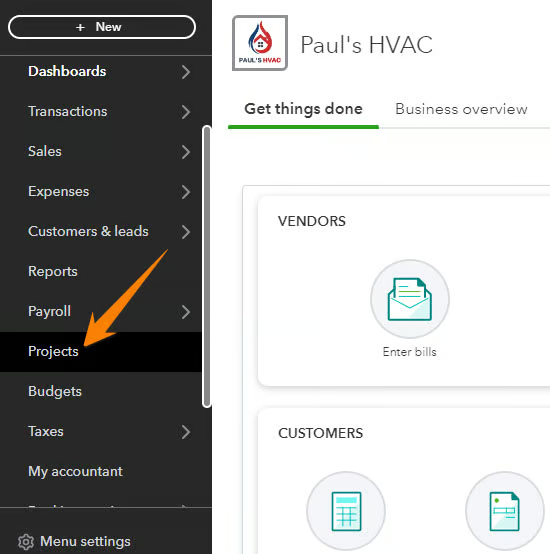
Once project tracking is turned on, you can proceed with creating a project in QuickBooks. To do this, select Projects in the left-side menu and then click the New project button (not shown in the image below) on the Projects screen.
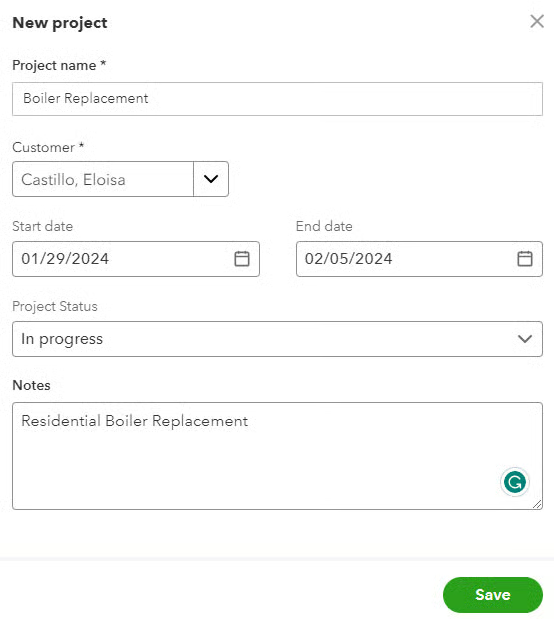
To create a new project, complete the information requested in the New project form, including the project name, the customer for whom the project is being undertaken, and the start and end dates.
By default, QuickBooks Online will set the project status to “In progress”—but you can change or update it as needed. Additionally, you can also include notes to add additional information about the project. Once done, click the green Save button.
In the screenshot below, we are setting up a new project titled “Boiler Replacement” for a customer named Eloisa Castillo.
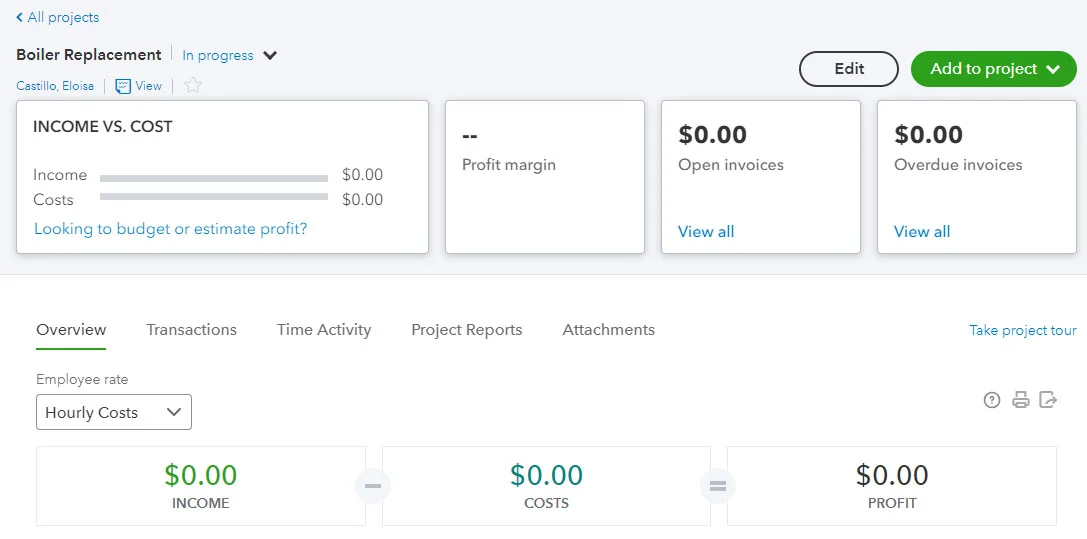
The new project will now appear in the project dashboard. When a new project is created, the dashboard will show no information, especially if no transactions have been recorded for the project yet. However, that will change as you add transactions to the project, such as expenses, invoices, and time activities.
Step 3: Record Transactions Associated With the Project
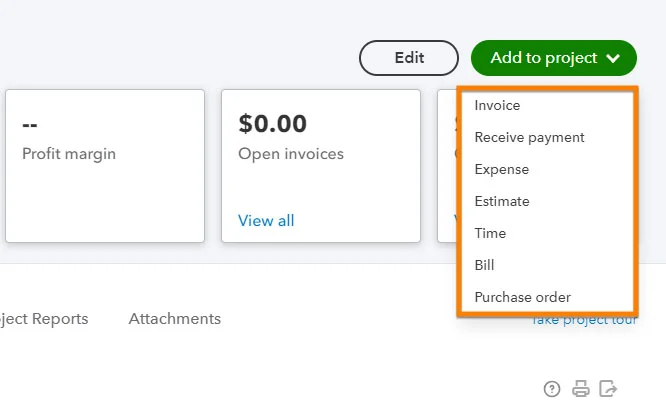
You can add transactions directly to the project by clicking the small drop-down arrow next to Add to project. You can then select the type of transaction you want to add to the project, such as estimate, invoice, bill, expense, and time entries.
Adding an Estimate to a Project
Select Estimate from the drop-down list under the Add to project button, and then proceed to create the estimate. The customer field will populate with the project automatically. Complete the estimate as you normally would, and once done, click Save or Review and send.
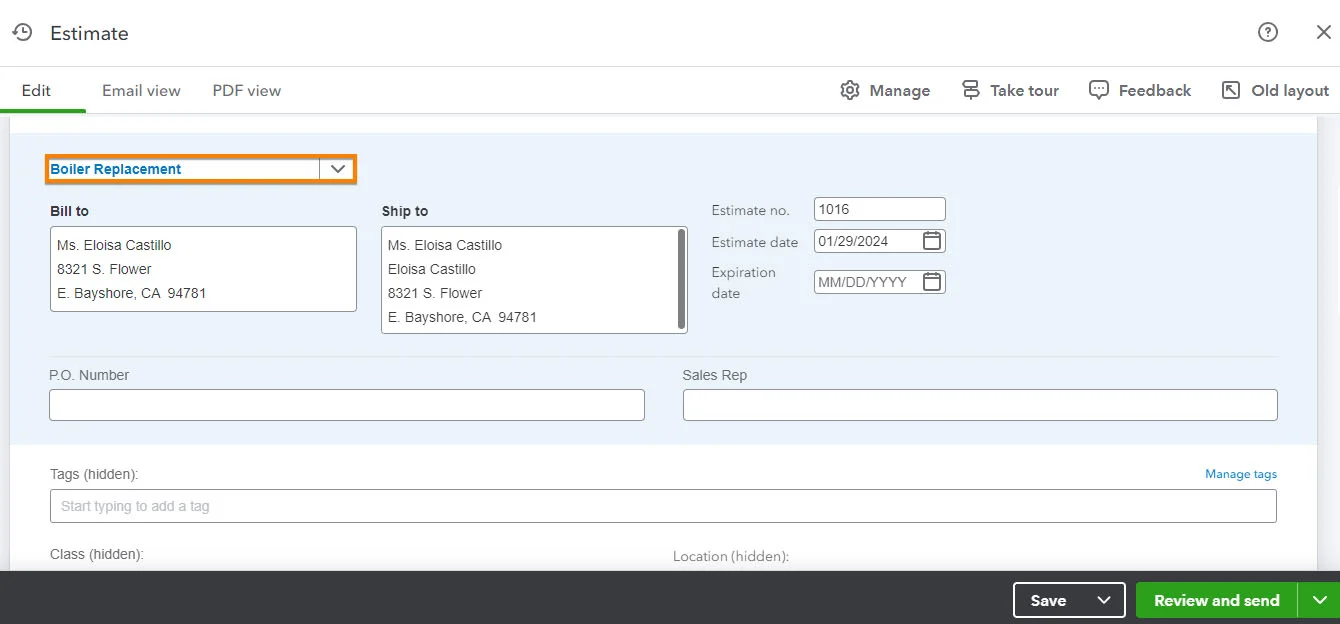
The estimate will then be linked to the project we created, and you’ll soon see it under the Transactions tab in the project dashboard along with the other transactions we’ll add.
If you need help generating an estimate, quote, or bid in QuickBooks, check out our tutorial on how to create estimates in QuickBooks Online.
Assigning an Expense to a Project
Click the Bill or Expense drop-down under the Add to project button, and then record the expense as you normally would. Again, QuickBooks will populate the Customer/project field with our project automatically.
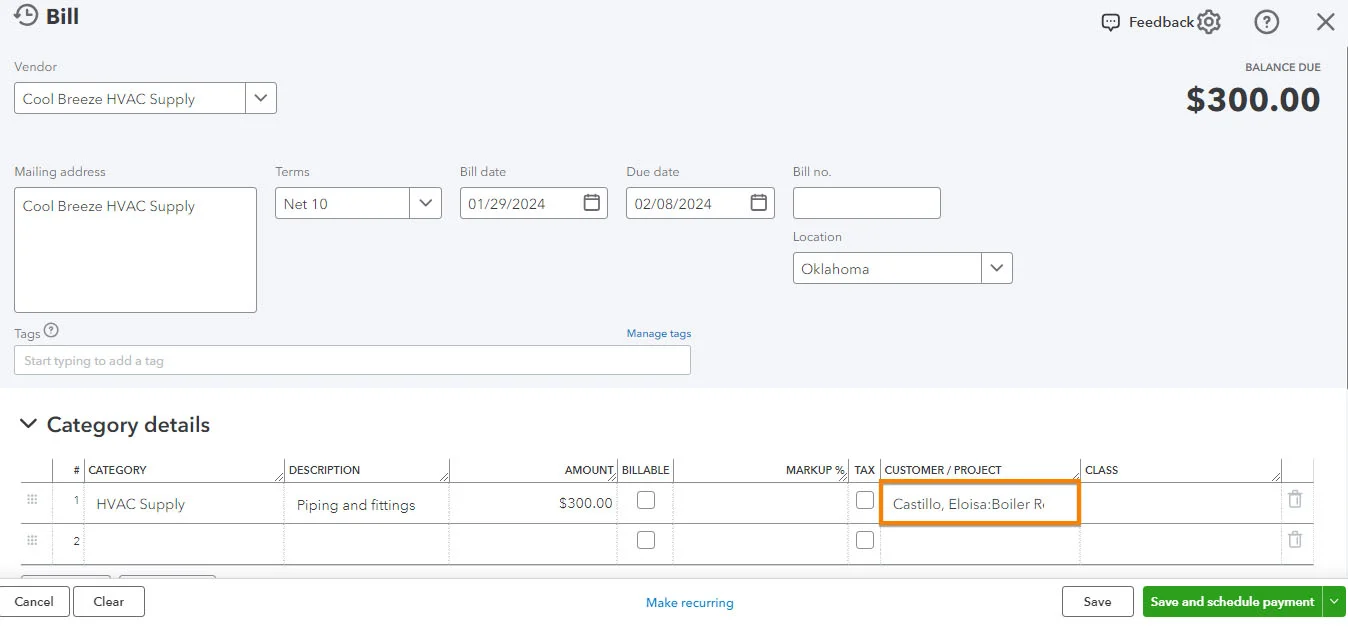
Once done, click Save or Save and schedule payment.
For detailed instructions on how to record a QuickBooks bill, see our guide on how to enter bills in QuickBooks Online.
Recording Hourly Costs
To track hourly costs worked by your team members, select Time from the drop-down list and then proceed to record the number of hours worked. You can use the built-in timer or manually enter the number of hours. In the screenshot below, we’ve entered 24 hours for an employee named Dan Miller.
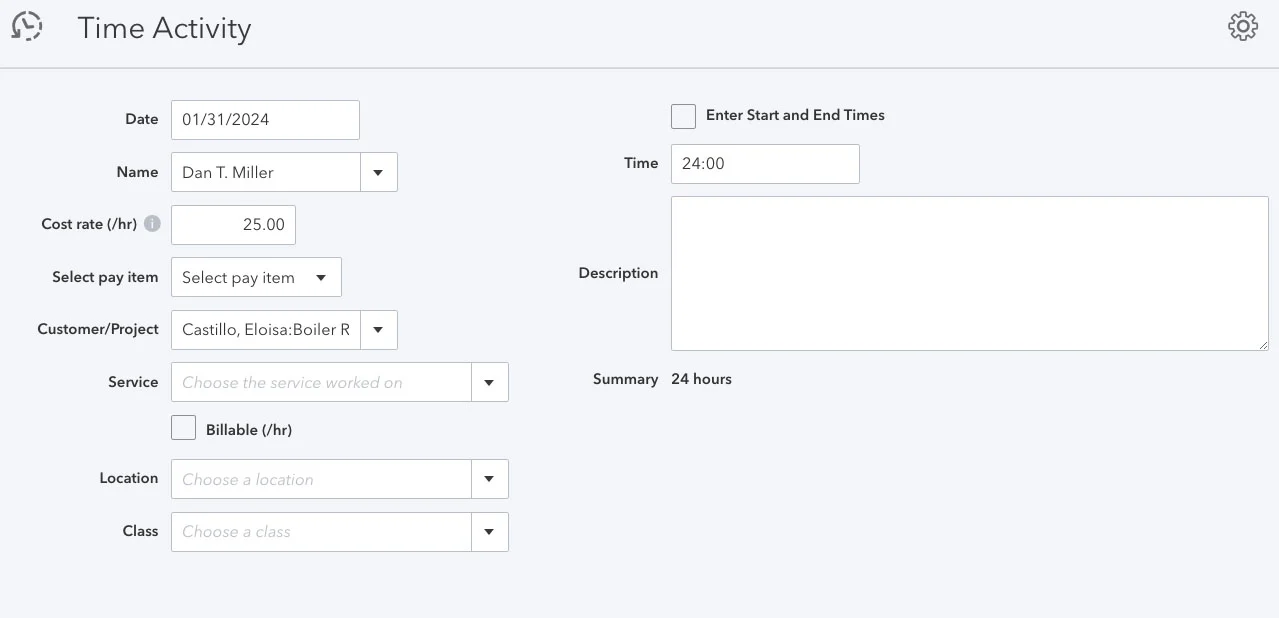
Ensure the customer/project field is pre-populated with your project, and once done, click Save or Save and new. QuickBooks will calculate the total hourly costs automatically based on the cost/rate you specified for that employee and the total number of hours worked.
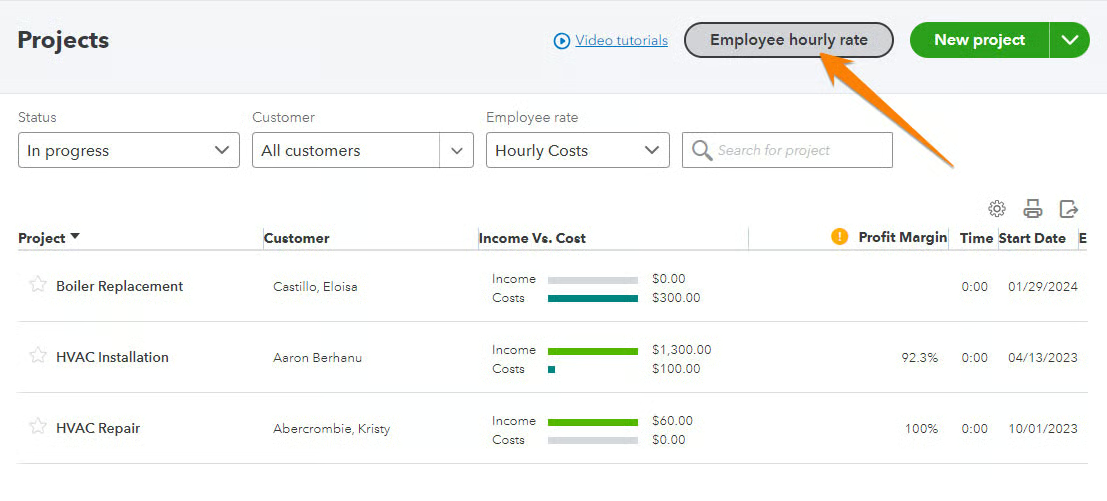
If you haven’t set up the employee’s hourly cost yet, click on the Employee hourly rate button on the Projects screen. From here, you can specify the hourly rate for a specific team member or even add a new employee if needed.
Linking an Invoice to a Project
Once you’re ready to bill the customer, click on Invoice next to the Add to project button and then complete the invoicing form.
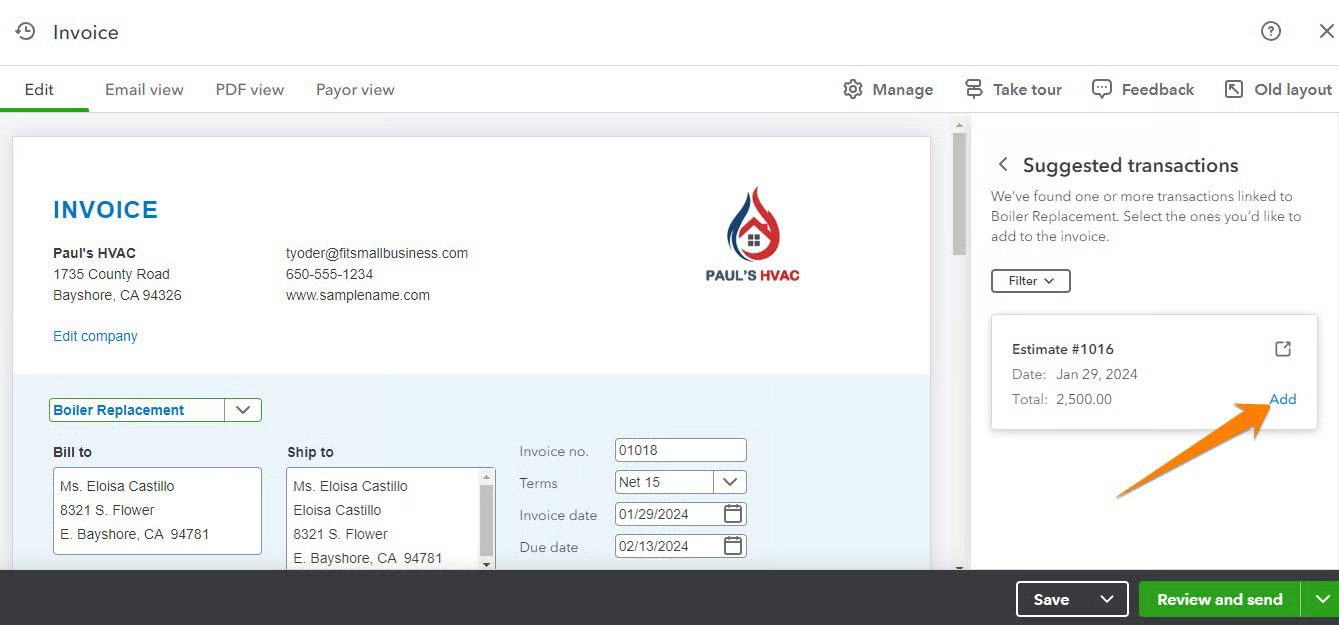
When creating the invoice, you can add the estimate we created for the project. The estimate will appear on the right-hand side of the invoice—simply click the Add button to include the estimate in the invoice. Once done, click Save or Review and send.
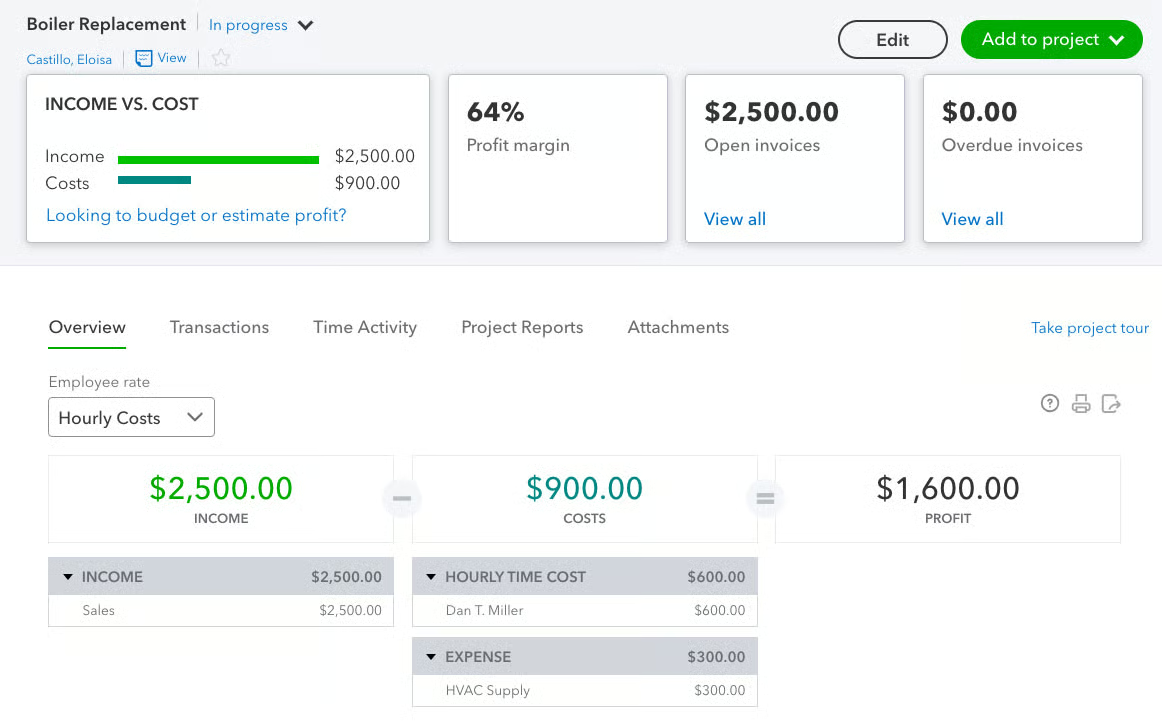
Now, when you go back to the project dashboard, you’ll see a list or summary of transactions recorded, including the estimate, expense, time entry, and invoice we added. You’ll also see profitability insights, including your total income, expenses incurred, and the profit gained from the project.
Tracking Estimates vs Actuals
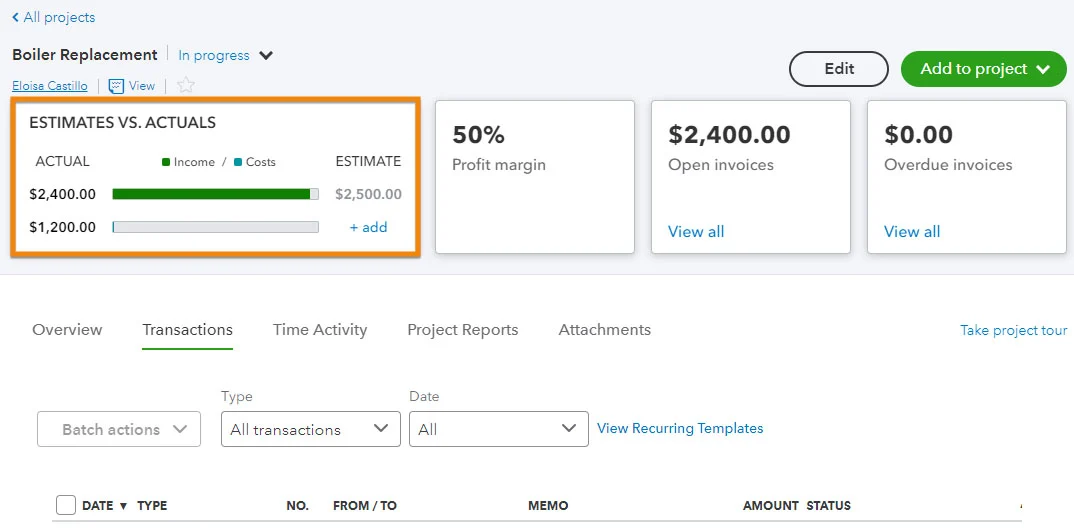
If you need to track project cost estimates vs actuals, then you must subscribe to QuickBooks Online Advanced. When you create a project in Advanced and you’ve entered estimate and invoice details, you’ll see your total estimated expenses and income vs actuals, as shown below.
Step 4: Update the Status of the Project
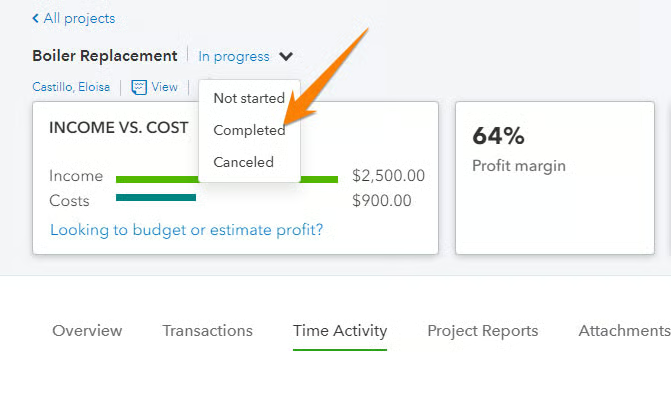
As you work on the project, you can update the status accordingly by clicking on the status arrow next to the project and then selecting the appropriate status. For instance, if the project is successfully delivered, you can mark it as “Completed.”
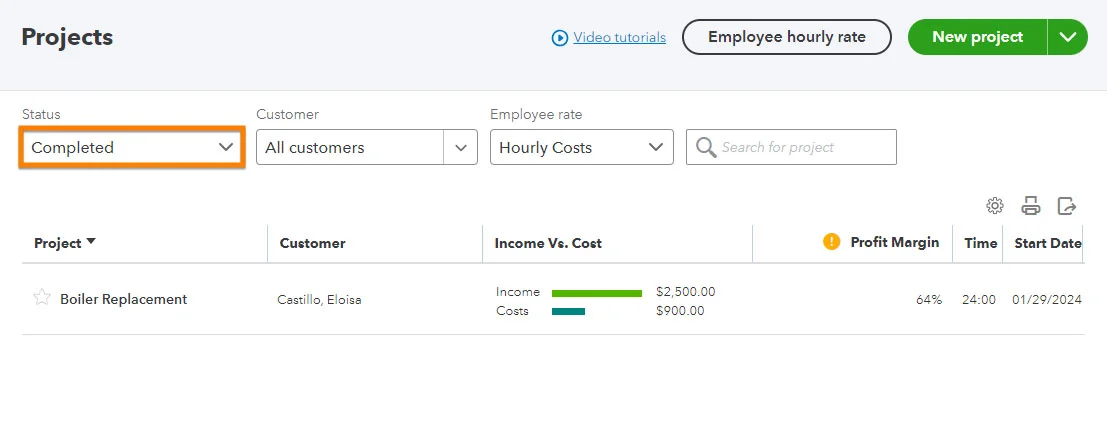
If you need to see or review the project again, you can find it in your list of completed projects. Use the “Completed” status filter to display the list of all your completed projects.
Step 5: Run Project Profitability Reports
If you wish to see a detailed report of the project you just created, click on the Project reports tab in the project dashboard and then select Project profitability.
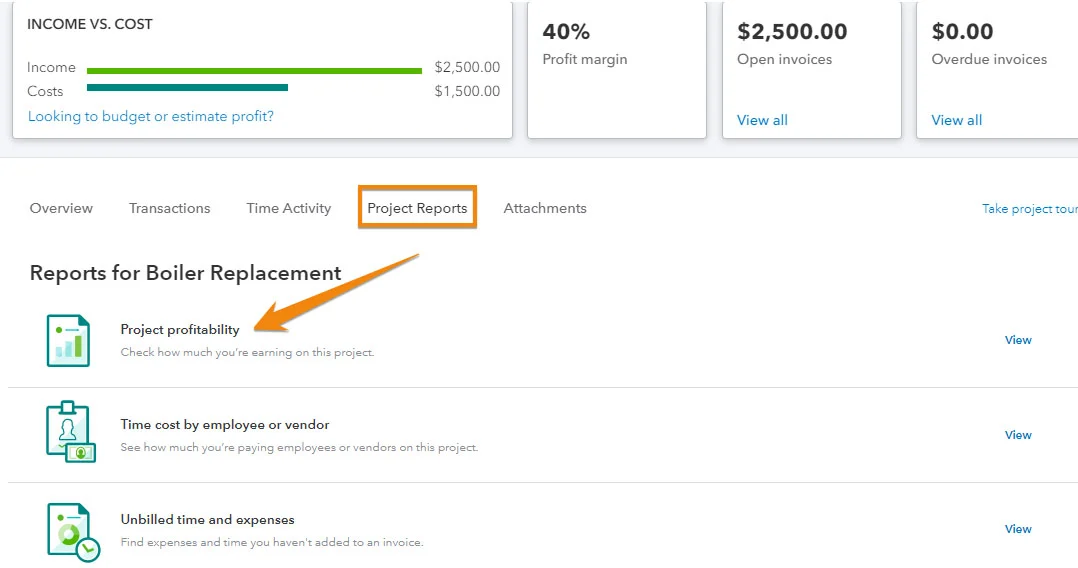
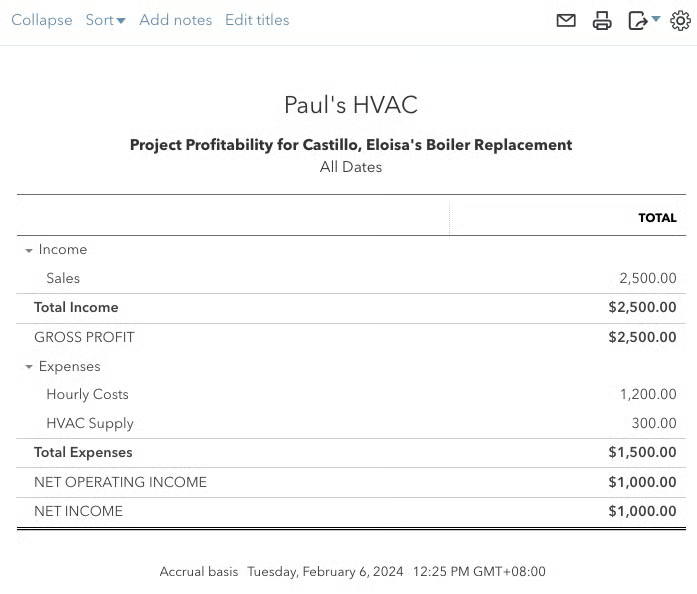
QuickBooks will display a detailed report of your project including your total income and expenses and net income.
From the Project reports tab, you can also run:
- Time cost by employees or vendor: This shows the breakdown of costs incurred due to the time spent by your employees or vendors on the project.
- Unbilled time and expenses: This includes the work hours and expenses that have been recorded but have not yet been invoiced to the client.
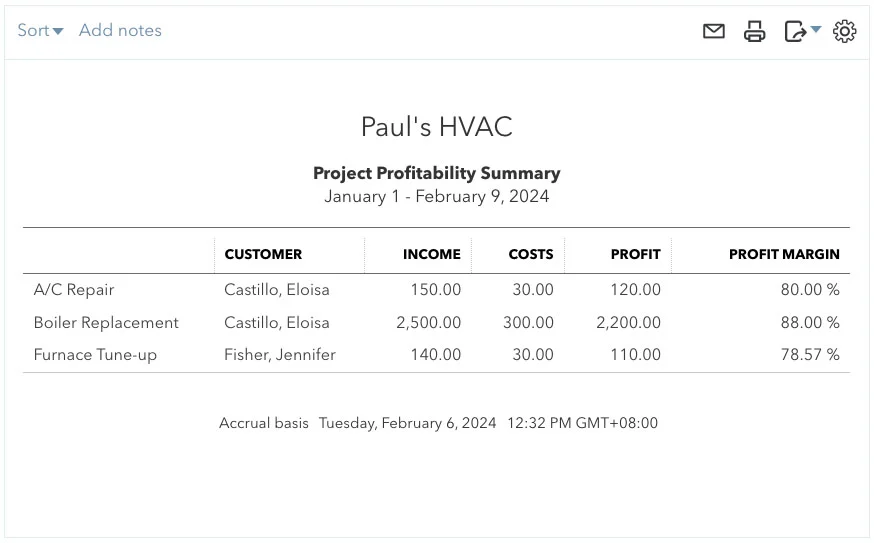
If you wish to generate a summary report showing a list of all projects undertaken in a selected period, click Reports in the left menu bar and then select Project Profitability Summary report. This report shows the total expenses incurred and income earned from different projects.
Frequently Asked Questions (FAQs)
How do I enable the project tracking feature in QuickBooks Online?
Click on the gear icon, select Account and Settings, navigate to the Advanced tab, and then toggle on the Projects feature, and then click Save.
Can I assign expenses to a specific project in QuickBooks Online?
Yes, you can. You can add an expense directly to the project—and the expense form will automatically populate the customer/project field with the selected project.
How do I view the profitability of a project in QuickBooks Online?
You can visit the project dashboard or run a Project Profitability Summary report if you need to track how much you spend and earn on a project for a specific customer.
What types of transactions can be associated with a project in QuickBooks?
You can add transactions, such as expenses, bills, invoices, payments, time entries, and purchase orders.
Wrap Up
You’ve just learned how to create and manage projects in QuickBooks Online. If you want to learn how to use the other features of QuickBooks, check out our other free QuickBooks Online tutorials.
