


Employers are required to complete an I-9 form, which confirms eligibility to work in the US, within three days after a new employee starts. The employee fills out the top section of the first page, and employers must verify and fill out the rest. Follow the instructions below for how to fill out an I-9 form correctly.
Begin by downloading the current I-9 form, which is free and available in English and Spanish. You can choose to use the fillable PDF or print and give paper copies to your new hires.
Section 1: Employee Information and Attestation
Section 1 of the I-9 form should be completed in full by the employee. If any of the fields are not relevant (such as your employee has no email address), they can write “N/A” in the field.
Employee Information
The first part of Section 1 is to provide the employee’s information. Have the employee input their
- Name
- Address
- Date of birth
- Social Security number
- Telephone number
- Email address (if applicable)

Some employees have non-standard names, such as hyphenated last names or no middle initial. Other employees may not have received their Social Security number yet. There are instructions provided in the Handbook for Employers for these unique situations.
Attestation
The second part of Section 1 attests (under penalty of perjury) that the employee is eligible to work in the United States. The employee should check the appropriate box:
- A citizen of the United States
- A noncitizen national of the United States
- A lawful permanent resident
- An noncitizen authorized to work
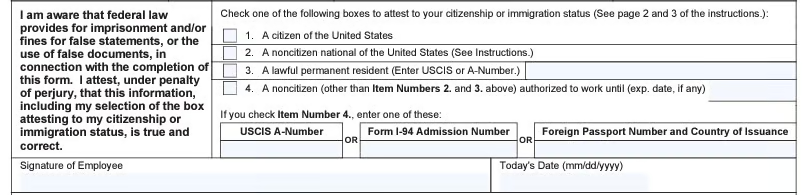
The employee should then sign and date the form, where indicated.
Section 2: Employer Review and Verification
Section 2 is now also on Page 1 where the employer should examine documents and complete all fields to verify the employee’s documents.

To complete this portion of the employment eligibility verification form, have the employee bring in two forms of identification (must be examined in person). Examples of acceptable documents can be found in our I-9 form article.
Using the document(s) provided by the employee, the employer representative will complete the Identity and Employment Authorization sections (List A or Lists B and C). Fill in the following fields:
- Document Title (i.e., US Passport)
- Issuing Authority
- Document Number
- Expiration Date (if applicable)
The form allows for Additional Information. You can use this space to document any irregular activity when filling out the form. For example, if you followed protocol and examined the I-9 documents remotely due to COVID-19, you can make that note.
When an employee presents identification as defined by List A, the form can be completed with only that one document, which serves both to identify the employee and validate that they’re authorized to work in the United States. Examples include:
- Valid US passport
- Permanent resident card
- Employment authorization document
- Foreign passport
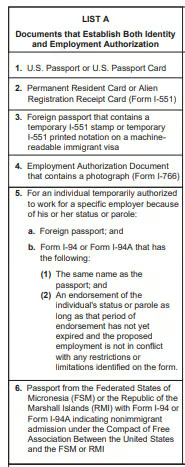
Full list of acceptable documents on List A
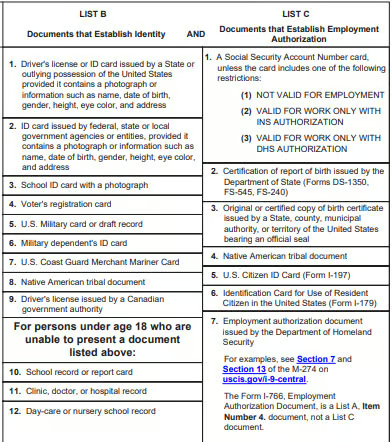
If the employee does not provide documentation from List A, then they must provide two forms of identification as required in List B (identity) and List C (employment authorization). The most common type of identification that US employees present is a driver’s license (as identification) and a Social Security card (as work authorization).
As an employer, you must accept any of the documents listed on the I-9 instructions that can be used to establish the person’s identity or employment authorization. These include the following:
| List B - Identity | List C - Employment Authorization |
|---|---|
| Driver’s License | Social Security Card |
| School ID | Birth Certificate (original or certified copy) |
| Military ID | ID Card |
| Voter Registration Card | Employment Authorization Document |
Certification
After you have completed List A or Lists B and C, you will enter the employee’s start date. This is the date the new hire began work with your company. The employer or authorized representative will then sign the document. Include the following:
- Title of employer or authorized representative
- Last name of employer or authorized representative
- First name of employer or authorized representative
- Date of signature
- Business or organization name
- Business or organization address

Once you’ve seen the original documents yourself (or had your representative verify them), and you’ve noted the document title, issuing authority, document number, and expiration date on the I-9 form, hand the documents back to the employee. There’s no need for you to keep photocopies.
If the employee is unable to present the required documents from list A, or from lists B and C combined, you have one of two options.
- If the employee doesn’t yet have their documentation, a receipt showing that they’ve applied for these documents will suffice. You will be required to come back and complete Supplement B – Reverification and Rehire (formerly Section 3) once the documents arrive.
- You can rescind the employment offer and terminate their employment. Make this expectation clear from day one by showing them the text at the top of Section 2, which states: “Employers must sign and complete Section 2 within three business days of the employee’s first day of employment.”
Supplement A: Preparer and/or Translator Certification
If the employee used a preparer/translator to complete their I-9 form, then they must complete Page 3 of the I-9 form, now titled Supplement A – Preparer and/or Translator Certification. The employee no longer needs to check a box stating they used a preparer or translator. Instead have the preparer or translator complete Page 3 and sign.
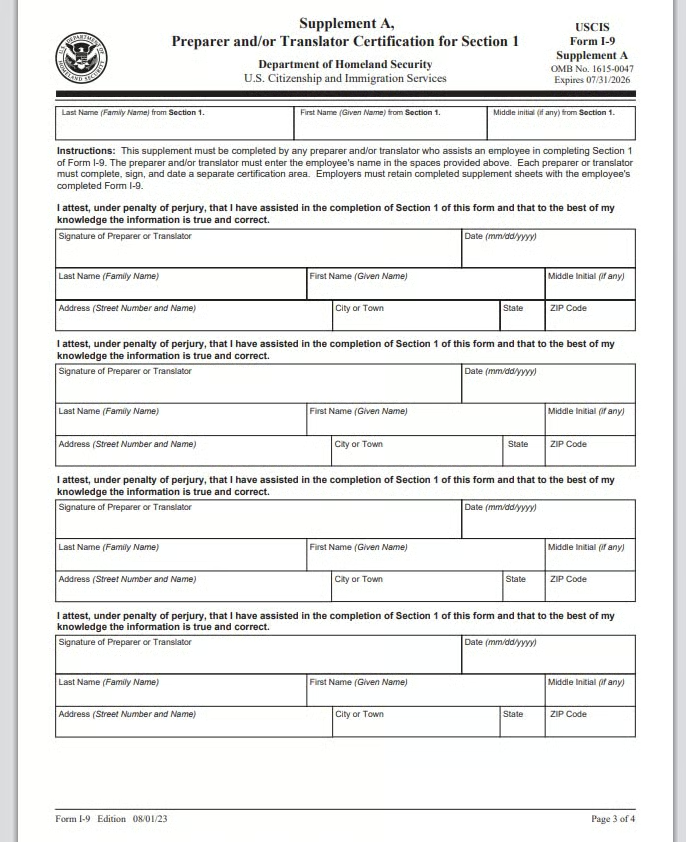
If more than one preparer or translator was used to help the employee complete the I-9 form, then each person is responsible for filling out one of the indicated boxes with their signature, date, full name, and address.
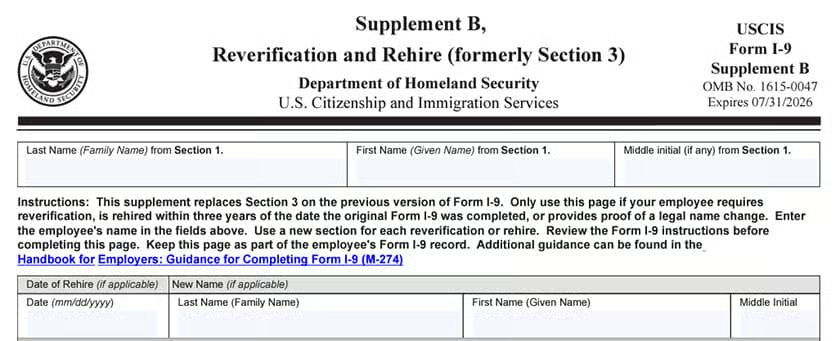
Supplement B: Reverification and Rehires
Page 4 of the updated I-9 form is Supplement B – Reverification and Rehires (formerly Section 3). It is used only to review documentation that was applied for but not yet received at the time of hire or reverify documents when an employee is rehired. Similar to Section 2, you (or your representative) will sign that you have reviewed/reverified the document once the employee brings it in. You do not need to fill out a new form—simply add to the existing I-9.
If an employee has been away from employment with your company for three years or less, you will need to complete the rehire portion of Supplement B upon their return. Simply input the rehire date and any name change information. Then sign and date the bottom portion of the form.

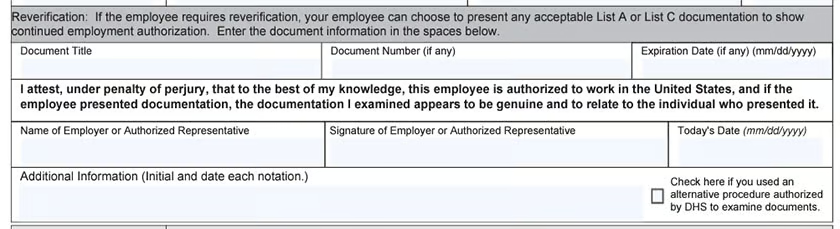
For any employee that requires reverification, have them present in person any acceptable List A or List C documentation to show continued employment authorization. Enter the document information in the spaces provided. Then sign and date at the bottom of the page.
Verify & File the I-9 Form
To verify that the I-9 form is completed, make sure all required fields are filled out (or marked “unknown” or “N/A,” as required), signature fields are completed, and dates are input in the correct format of mm/dd/yyyy (example: 07/03/2023).
Another option to verify employment eligibility is to use the E-Verify system. E-Verify is a government internet website that allows you to verify that the information the employee listed on the I-9 form is valid. Whereas completing an I-9 form is required, using E-Verify is not required for most employers. However, it can give you peace of mind if you want to ensure your employees are legally eligible to work in the US.
Remote Verification
When verifying an I-9 form for a remote employee, the rules are a bit different. You still need to verify in person the documents the remote employee is presenting. If you are unable to verify documents in person, you will need an authorized representative to verify the documents for you. This can be a friend or family member of the employee, or any person who can physically view the documents provided.
The best way to accomplish this is to have the employee and their authorized representative join a video call where you can see the employee and representative and the documents. Have the employee download a fillable .pdf of the I-9 document and fill out the top portion. Then have the authorized representative view the documents and fill in the employer section and sign the document. From there, have the employee send you the completed I-9 form and upload their documents to you so that you can verify what is entered on the form.
Where to File I-9 Forms
Once documents are signed and verified, create an electronic or paper file folder called I-9s and store them by year. As a best practice, do not store signed employment eligibility verification forms in employees’ personnel folders due to the confidential information they contain. Use a new hire checklist in each employee’s personnel file to indicate that you have completed the I-9 form and have it on file. Of note, the I-9 does not need to be sent to an authorizing authority but simply kept on file within your business.
When to Delete I-9 Forms
Completed and signed I-9 forms need only be kept for three years after the time of hire. A best practice is to destroy (shred) I-9 documentation after three years. If an employee is terminated, their I-9 form can be destroyed after one year. An audit of your records can result in fines (up to $10,000), but records aren’t usually levied against a business unless a pattern of violations is seen.
Frequently Asked Questions (FAQs) About I-9 Forms
Can I fill out an I-9 for myself?
No. Employees cannot act as their own authorized representative. Each employee must fill out the employee section of the I-9 form and the employer should complete and sign the employer section.
In the case of an employee, such as HR, acting as the authorized representative for employees when signing I-9 forms, this person should have someone else in the company review, verify, complete and sign their individual I-9 form.
What happens if I don’t fill out an I-9?
If an employee does not complete their I-9 form within three days of hire, you have the right to refuse work and/or terminate their employment. However, you cannot withhold payment for work completed even for an employee who has not filled out the I-9 form and is facing termination.
Although the I-9 form does not have to be returned to the IRS, it is a requirement to keep one on file for each employee. Not having I-9 forms filled out could result in a penalty if your business is audited.
Does the address on your I-9 matter?
Your employees should enter their current physical address (that matches their identification) on the I-9 form when they first fill it out. After that, there is no requirement to keep I-9 forms updated when employees change their names or addresses. The primary purpose of the I-9 is to verify eligibility for employment in the United States. Once that has been verified, there is no need to update the form unless the eligibility status changes.
Bottom Line
I-9 verification is an employer requirement that must be completed within three days of your new hire’s start date. We recommend making this part of your initial onboarding with your new employee. You must complete Page 1 and verify documentation in person for each new hire. While the I-9 does not need to be sent to anyone, you should keep the document in a separate file from the new hire’s personnel folder.