

To create an Outlook business email, you’ll need a custom email domain, aka what comes after the “@” symbol in your email (like “@fitsmallbusiness.com” instead of “@outlook.com”). You can get that by upgrading to a Microsoft 365 Business plan, which also comes with Microsoft’s productivity tools, including Microsoft Word and Excel and its cohorts.
After signing up for a Business plan, sign in or create an Outlook account, and then create your email address to complete your subscription. Read on for step-by-step instructions on how to create a business email with Microsoft.
- Step 1: Choose your Microsoft 365 plan
- Step 2: Create an Outlook account & finalize your subscription
- Step 3: Create your email address
- Step 4: Complete your purchase & sign in to your new account
- Step 5: Finish setting up your account
- Best alternatives to Microsoft 365
- Frequently asked questions (FAQs)
- Bottom line
Step 1: Choose your Microsoft 365 plan
The first step in creating an Outlook business email is to choose your Microsoft 365 plan. Visit the Outlook website, scroll down, and you’ll find Microsoft 365’s Business plans, which range from $6 to $22 a month annually. Choose a plan, then select the “Buy Now” button.
| Microsoft Outlook for Business (Microsoft 365) plans | ||
|---|---|---|
| Microsoft 365 Business Basic | Microsoft 365 Business Standard | |
| Monthly cost | $6 | $12.50 |
| Users | 300 | 300 |
| Mail storage | 50GB | 50GB |
| Cloud storage | 1TB | 1TB |
| Custom email domain | ✓ | ✓ |
| Microsoft Word, Excel, and PowerPoint | ✓ | ✓ |
| Shared calendars and video meetings | ✓ | ✓ |
| Microsoft Loop (collaborative workspace) | X | ✓ |
| ClipChamp (video editor) | X | ✓ |
| Host webinars | X | ✓ |
Step 2: Create an Outlook account & finalize your subscription
After choosing your plan, finalize your subscription and enter the Outlook email account you want to upgrade into a business Outlook email plan. Follow the prompts to fill in your name and company details. You’ll also need to verify your phone number.
[gallery: images unavailable]
Step 3: Create your email address
After signing up for your account, the next step is to create your new business email address. This address will consist of your username (the part before the “@” symbol) and your email domain (the part after the “@” symbol)—for example, audrey@fitsmallbusiness.com.
Your domain will have the subdomain “.onmicrosoft. “com ” by default, but you can change that later. For now, finish setting up your email address by choosing a password.
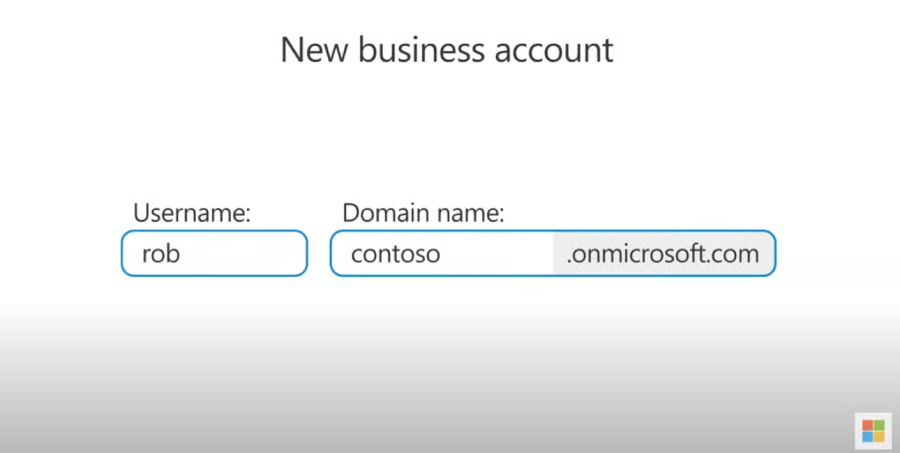
Choose your email username and domain. (Source: Microsoft)
Step 4: Complete your purchase & sign in to your new account
Next, finalize your purchase by entering your payment details. Adding payment information is required even if you choose a free trial. After setting up payment details, you’re all done purchasing your Microsoft 365 subscription. The next step is to sign in to your brand-new account to set up other details like your domain, add team members, and connect your new account to your computer’s email app.
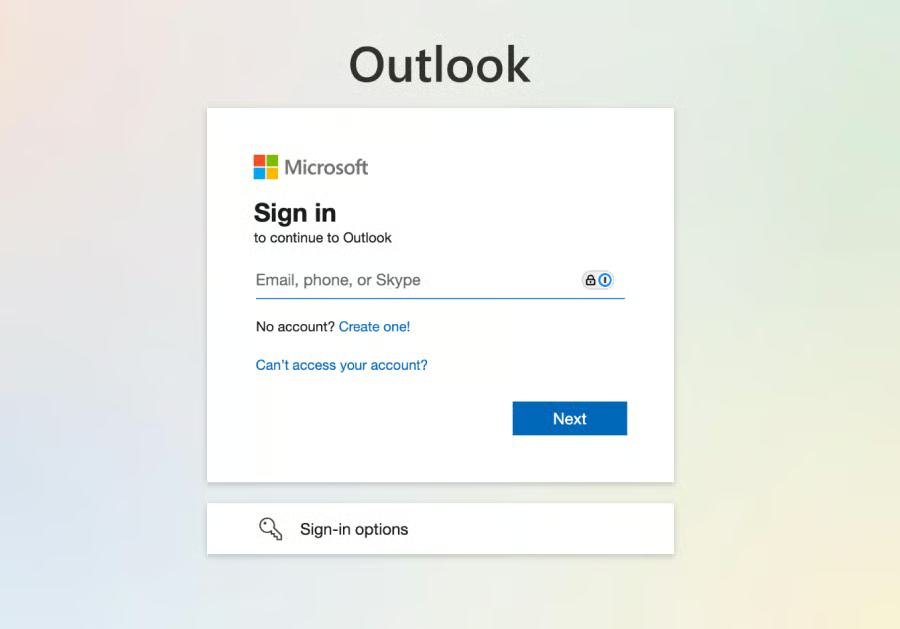
Sign into your brand-new email account. (Source: Microsoft)
Step 5: Finish setting up your account
Once you sign into your new Outlook business email account, you’ll next enter your Microsoft admin dashboard. From the dashboard, you can manage your email account, set up a domain, and add team members to your business email.
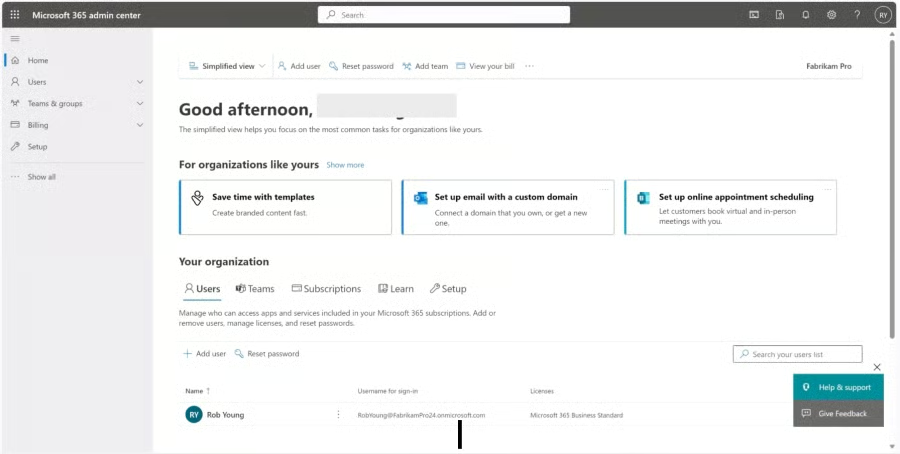
Your admin dashboard is where you’ll manage everything about your Microsoft business email account. (Source: Microsoft)
To set up a custom domain for your email, head over to the Setup tab and select “Setup email with custom domain.” Then, follow the prompts to add your domain.
[gallery: images unavailable]
If you already own a domain from a different provider, select “Use a domain name you already own,” then enter your domain name. You may need to sign in to your previous domain registrar to confirm your domain transfer to Microsoft and verify that you own your domain.
If you don’t own a domain yet, choose “get a new domain, free for one year,” and then buy your new domain from Microsoft. It’ll be free for the first year, but you’ll need to pay to maintain it.
Choose a domain name that reflects your business. It can be as simple as your business name (for example, audrey@fitsmallbusiness.com) or something that incorporates a keyword or lets people know what you do. For example, the domain for Frontier Airlines is flyfrontier.com.
After adding your domain, update your email address, select “Update and sign out,” and sign in again with your new email address.
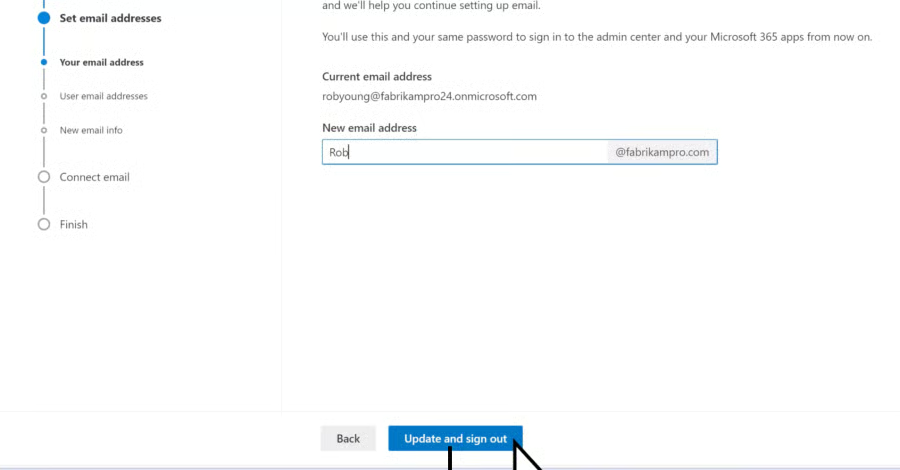
Update your email address with your new domain, then sign out and sign in again. (Source: Microsoft)
To add team members, select “Add users to your organization” under the Setup tab. Then, fill in their first and last name and email username, which will automatically connect to your domain. Microsoft will also email the user with their sign-in information. When you’re done, select “Add User.” You can also add more users on the next screen.
[gallery: images unavailable]
Once you create your Outlook business email account, installing the Outlook email app into your computer makes it much easier to access and manage. Under your dashboard’s Setup tab, select “Install Microsoft 365 on your PC or Mac,” and Outlook automatically downloads to your computer, along with the Microsoft Office Suite. Once your apps download, simply sign into your account and select “Connect.”
[gallery: images unavailable]
That sums up the process of how to create a business email with Outlook. Once you’ve signed into your account, you can send and receive emails using your new email address.
Best alternatives to Microsoft 365
Microsoft 365 is one of the most popular business email providers, but it may not always be the best choice for your team or small business. For instance, if you want a more beginner-friendly platform, Google Workspace is always a good choice. Meanwhile, IONOS has a lower starting cost. Below are some of the best Microsoft 365 alternatives. Learn more about these and other options in our guide to the best business email providers.
 |  | |
|---|---|---|
| Best for a beginner-friendly interface with similar productivity tools as Microsoft | Best for small teams that only need an email platform with no extra productivity tools | Best for a business email account with a website builder |
| From $7/month | From $1/month | From $2.49/month |
| Visit Google Workspace | Visit IONOS | Visit Hostinger |
Frequently asked questions (FAQs)
Is Outlook email free for business?
Microsoft Outlook offers a free plan, but it doesn’t come with a custom domain (only an @outlook.com one), which may not be suitable for business use. It also only accommodates one user. Microsoft 365’s business plans start at $6 a month and let you use a custom email domain (e.g., yourname@businessname.com) and add multiple users to your organization. It also comes with the Microsoft Office productivity suite, including Word, Excel, and PowerPoint.
How do I create a professional email in Outlook?
To create a professional email in Outlook, you’ll first need to subscribe to a Microsoft 365 Business plan, which lets you add a custom domain to your email account to get a branded email address and not a generic “@outlook.com” one. After subscribing to a Microsoft 365 plan, create your new email address and finish setting up your account by adding a custom domain, inviting your team members, and installing the Microsoft 365 platform on your computer.
Should I use Outlook or Gmail for business email?
Use Outlook for your business email if you need a lot of email and cloud storage. Microsoft provides up to 50GB of mail storage and 1TB of cloud storage on all its Business plans. It’s also a good option for more productivity tools like a collaborative workspace or online video editor. Choose Gmail if you want an easier setup process and beginner-friendly interface or are more familiar with the Google Workspace productivity suite.
Bottom line
Creating a business email with Outlook gets your team all the Microsoft Office tools you know and love, plus lots of cloud storage for your files and emails. Start by choosing a Mircosoft 365 plan, sign up for an account, and create your email address. Then, finish setting up your account by adding a custom domain, inviting your team members, and installing Microsoft’s apps to your computer.