Learn the basics of HR and payroll with Rippling’s all-in-one HR platform. We’ll cover the dashboard and hiring and offboarding flows before giving step-by-step instructions for running payroll.
How to Use HR Features & Run Payroll With Rippling
This article is part of a larger series on Payroll Services.
Rippling is an all-in-one HR and payroll platform that streamlines and automates employee management processes. Its robust features allow you to hire, manage, pay, and train employees. In addition to HR tools, Rippling offers IT solutions for setting up and monitoring computer devices and app access.
In this article, we go over some basic HR features and then cover the steps to process payroll using Rippling. If you want to learn more about what this provider has to offer, check out our in-depth Rippling Review for everything you need to know.
If you’d prefer to watch our video, rather than follow along with screenshots, check out our video below.
Getting Familiar With Rippling’s HR Dashboard
The first thing you’ll see when you log in to Rippling is your to-do list, populated with any time-sensitive action items that are being flagged for your immediate attention. This list will help you ensure that you’re not falling behind and that everything for your employees is in order.
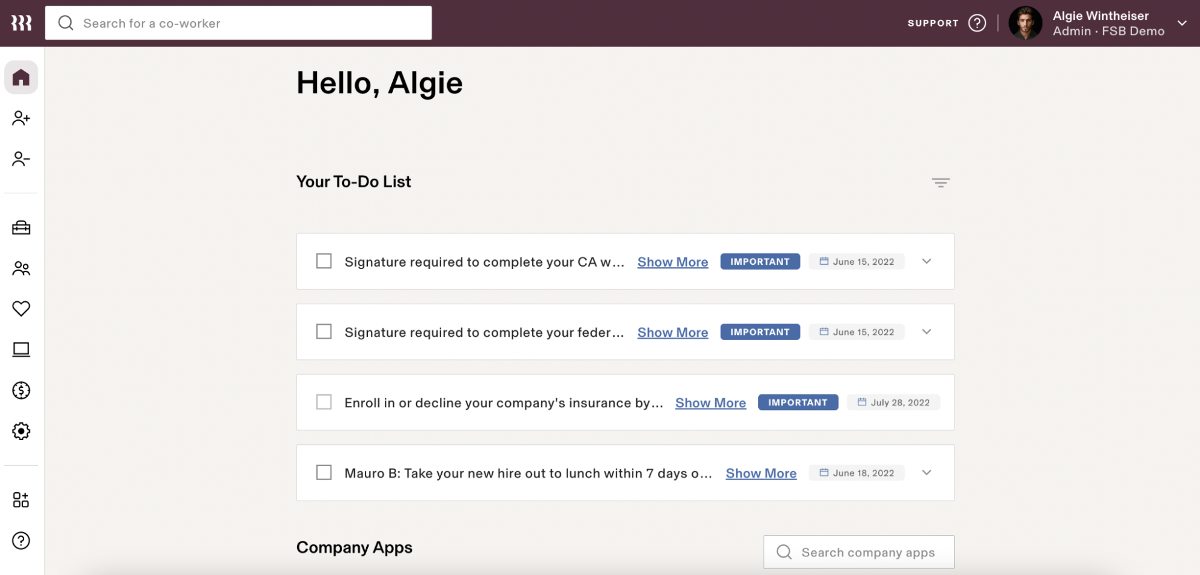
Once you scroll below your to-do list, you’ll see a list of all of your company apps. These include both internal and external add-ons that your company utilizes, from payroll, time off, and insurance to Google Workspace and LinkedIn. Rippling has the ability to integrate with over 500 third-party software apps that makes running your business from one dashboard quick and simple.
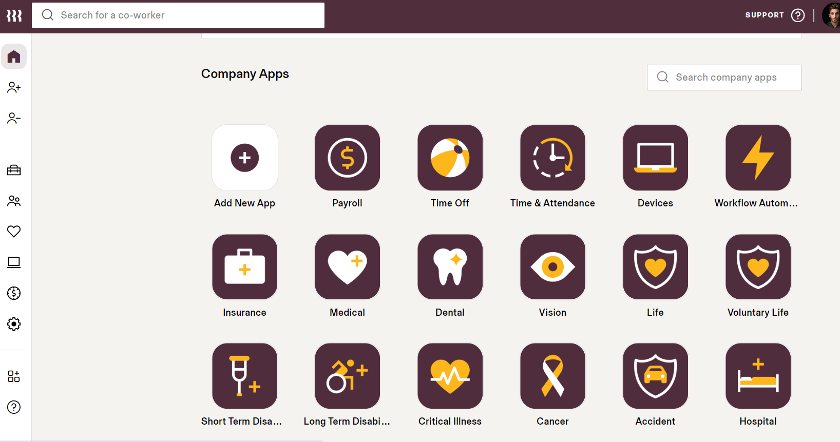
There is also an expandable toolbar on the left side of the screen with tons of Payroll and HR tools to choose from including Rippling’s Hiring and Offboarding Flows, HR Management, Insurance & Benefits, and Payroll & Time.
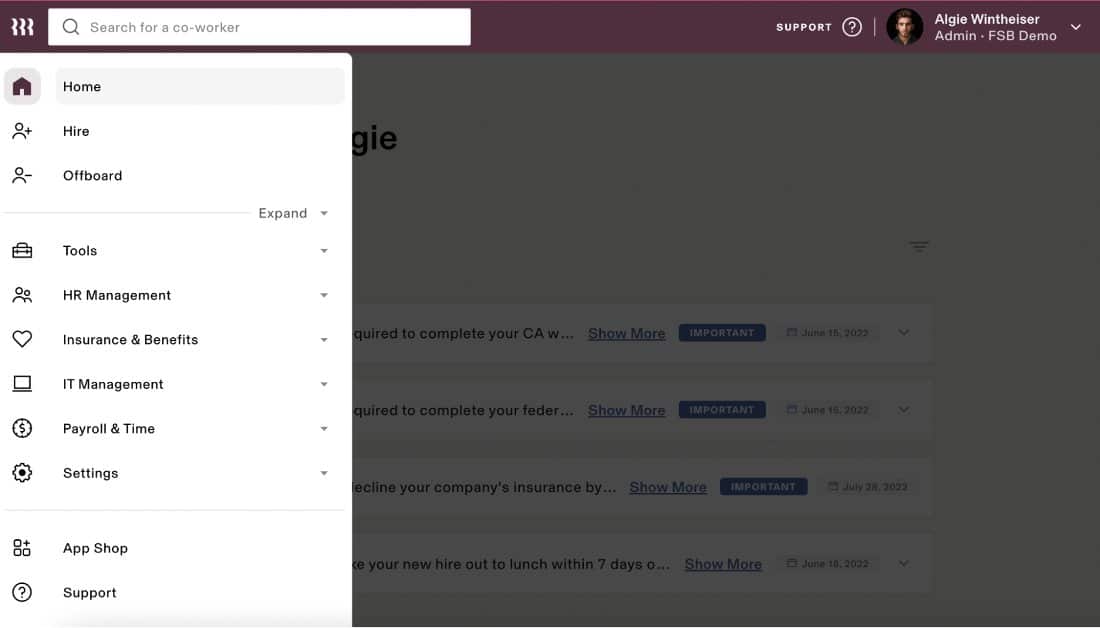
Using the Hiring & Offboarding Flows
When you are ready to hire or offboard an employee, Rippling makes it easy with a step-by-step guide to input the required information.
Hiring Flow
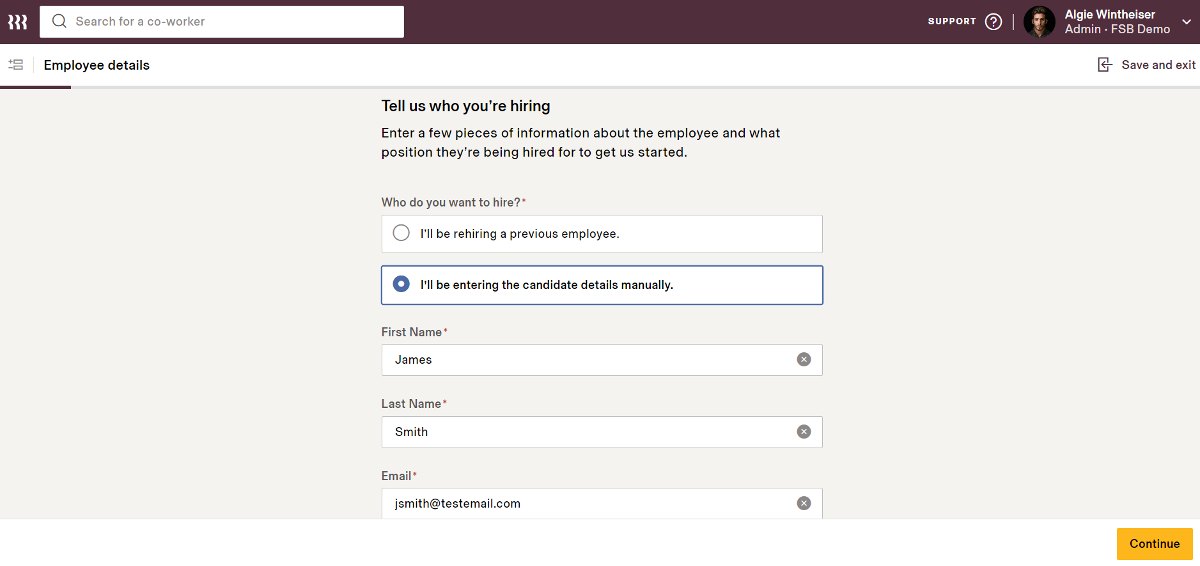
From the expandable toolbar, simply click Hire to get started. The system will then ask you whether you are hiring a previous employee or entering new candidate details manually.
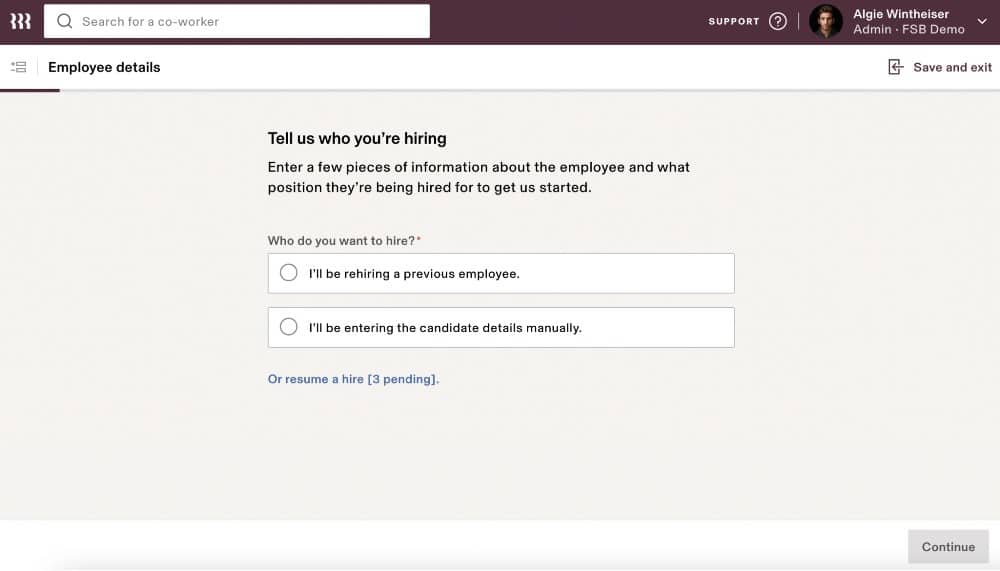
Rehiring a Previous Employee
If you choose to rehire a previous employee, you will be able to select that employee from a drop-down list of all former employees currently in the system. You will then be able to choose if that employee will be working in the same role or a new role, confirm their first and last name, and add their email address.
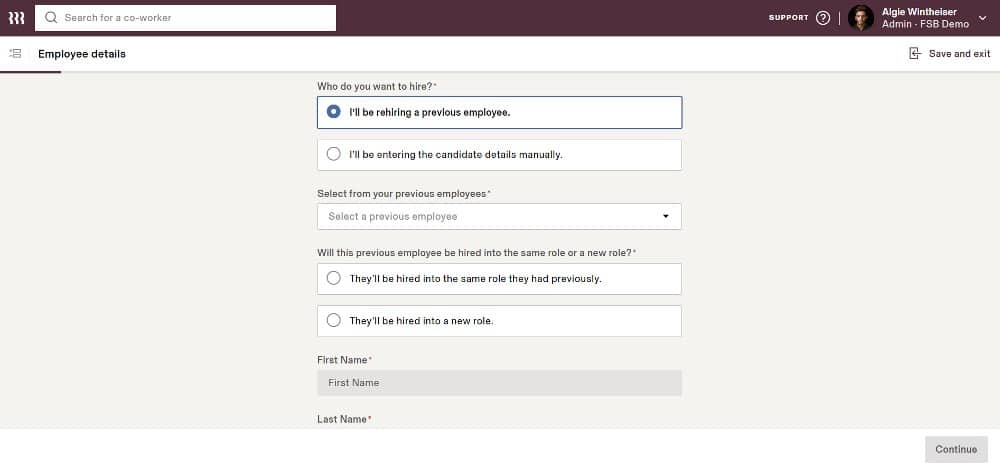
Once you’ve added the preliminary information, select Continue in the lower right corner to walk through the flow, confirm the employee’s information, and add any new details.
Hiring a New Employee
The second option for hiring is to enter a new candidate’s details manually. The process is very similar to that of rehiring a former employee with a flow that walks you through each step in the process.
First, enter the new employee’s first and last name and email address, and then click Continue. You will then be taken to a screen where you will be able to enter the new employee’s details.
Follow the hiring flow’s instructions to complete the setup for the new employee. This will include filling out the following:
- Work location
- Manager information
- Job title
- Start date
- Offer expiration date
- Direct reports
- Department
- Compensation
- Job duty details
- Work device information
- Third-party apps
- Work email
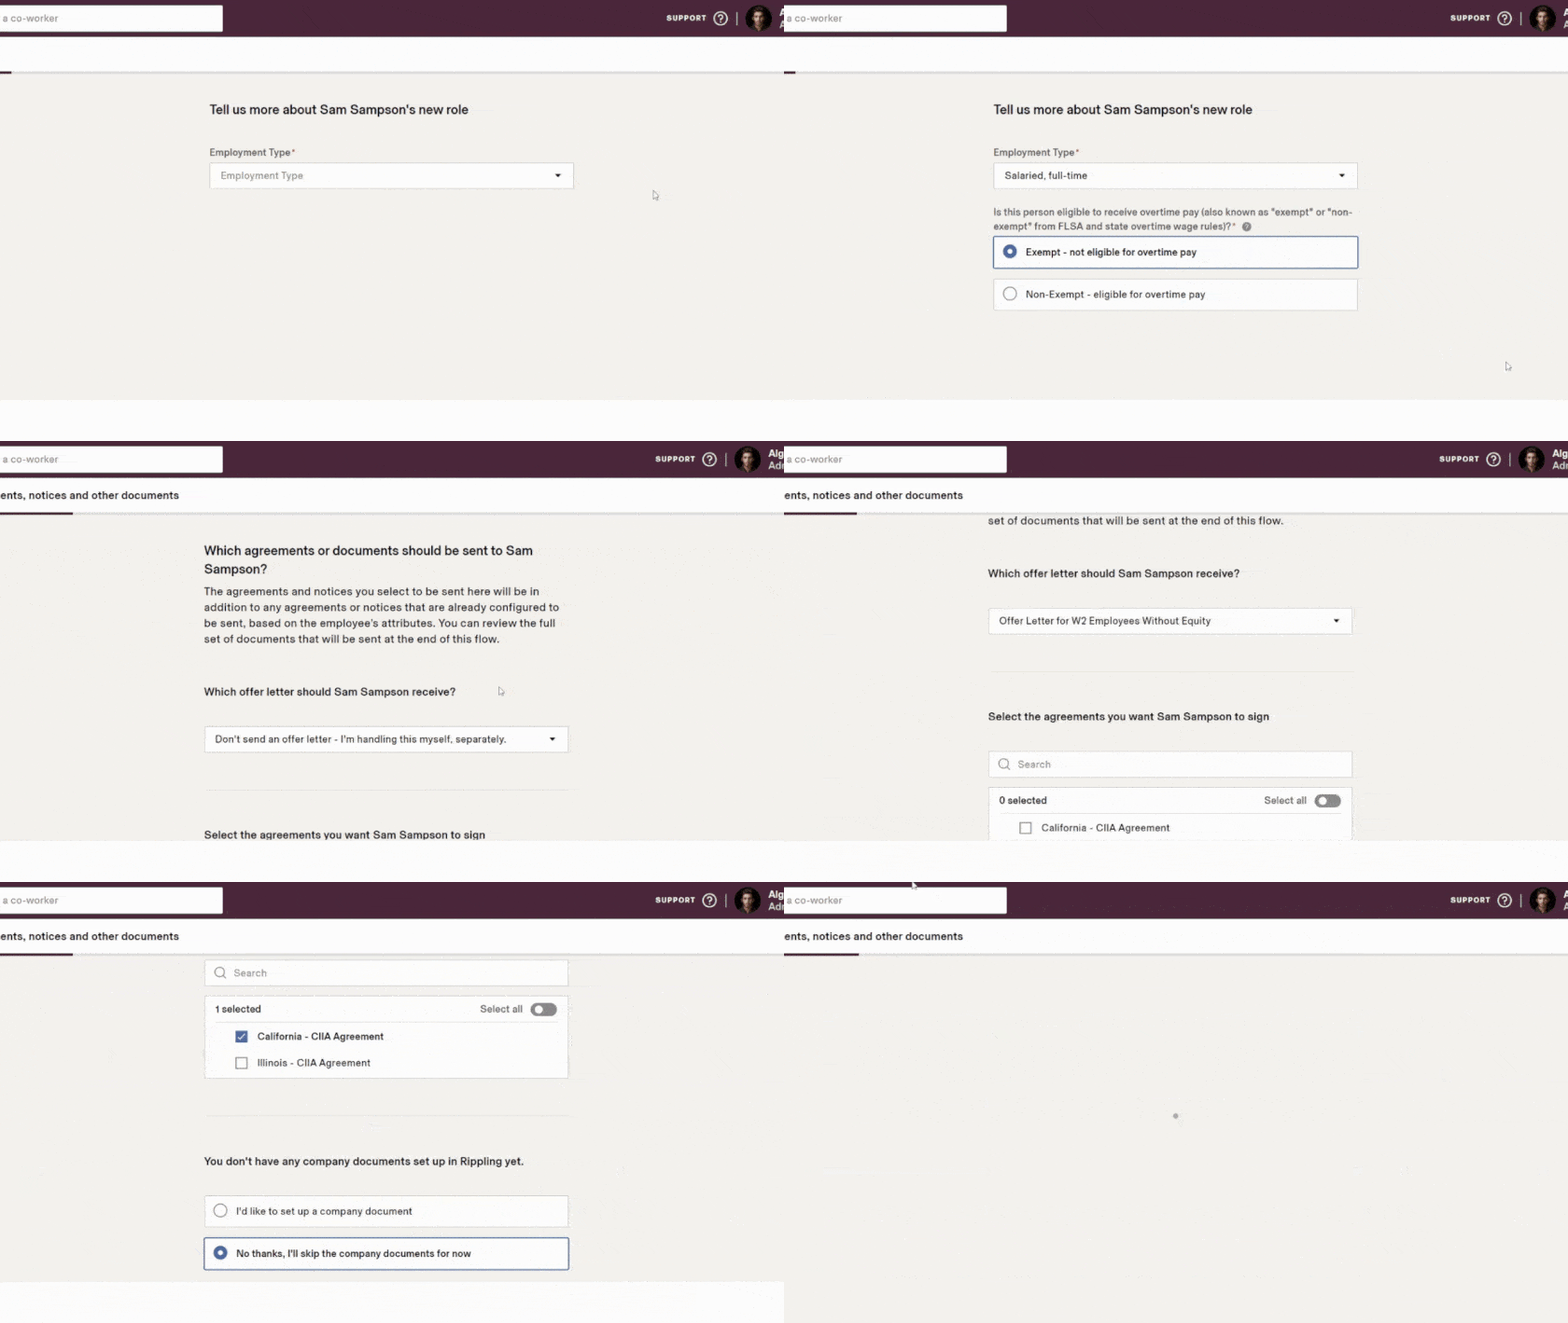
You will enter the employee’s employment type (e.g., full time, part time, contractor, etc.) and select which agreements or documents should be sent to the employee (e.g., offer letter).
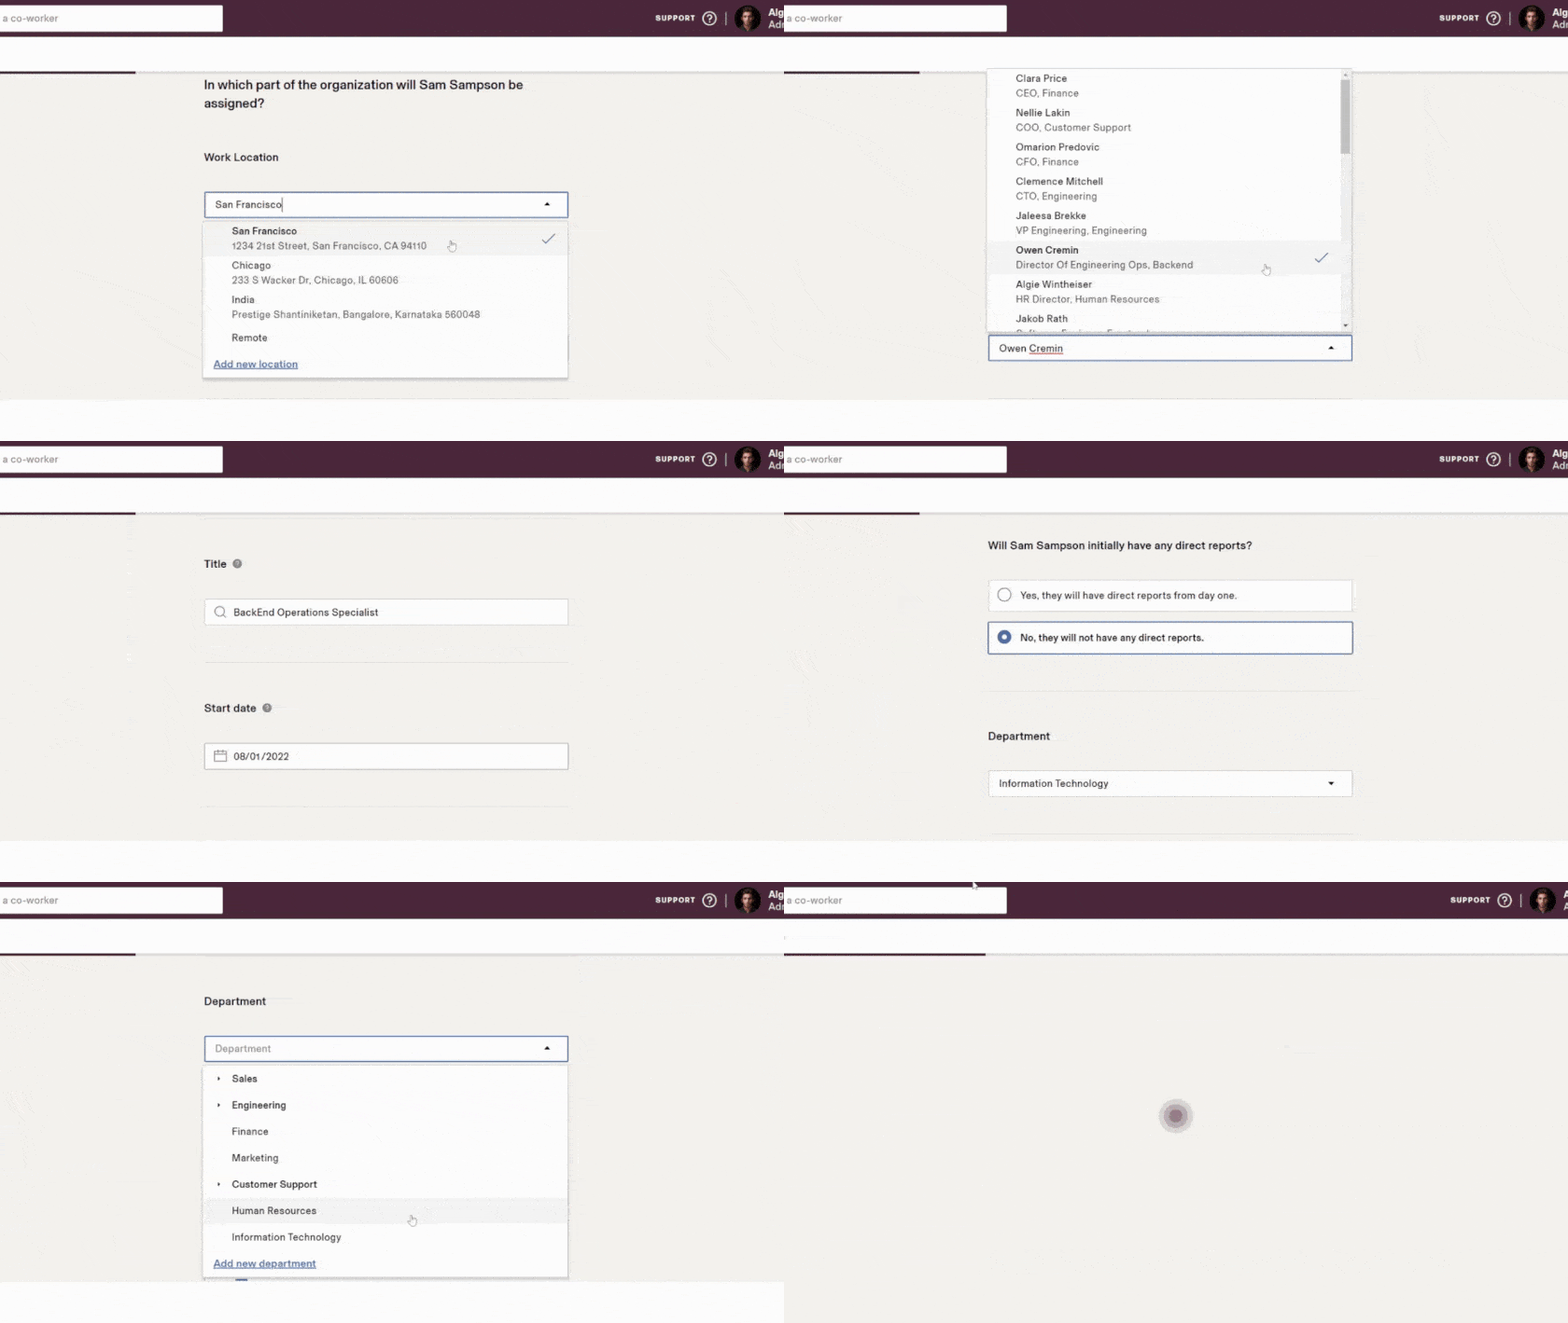
From here, select the employee’s work location, job title, and department. You will also input manager information as well as start date.
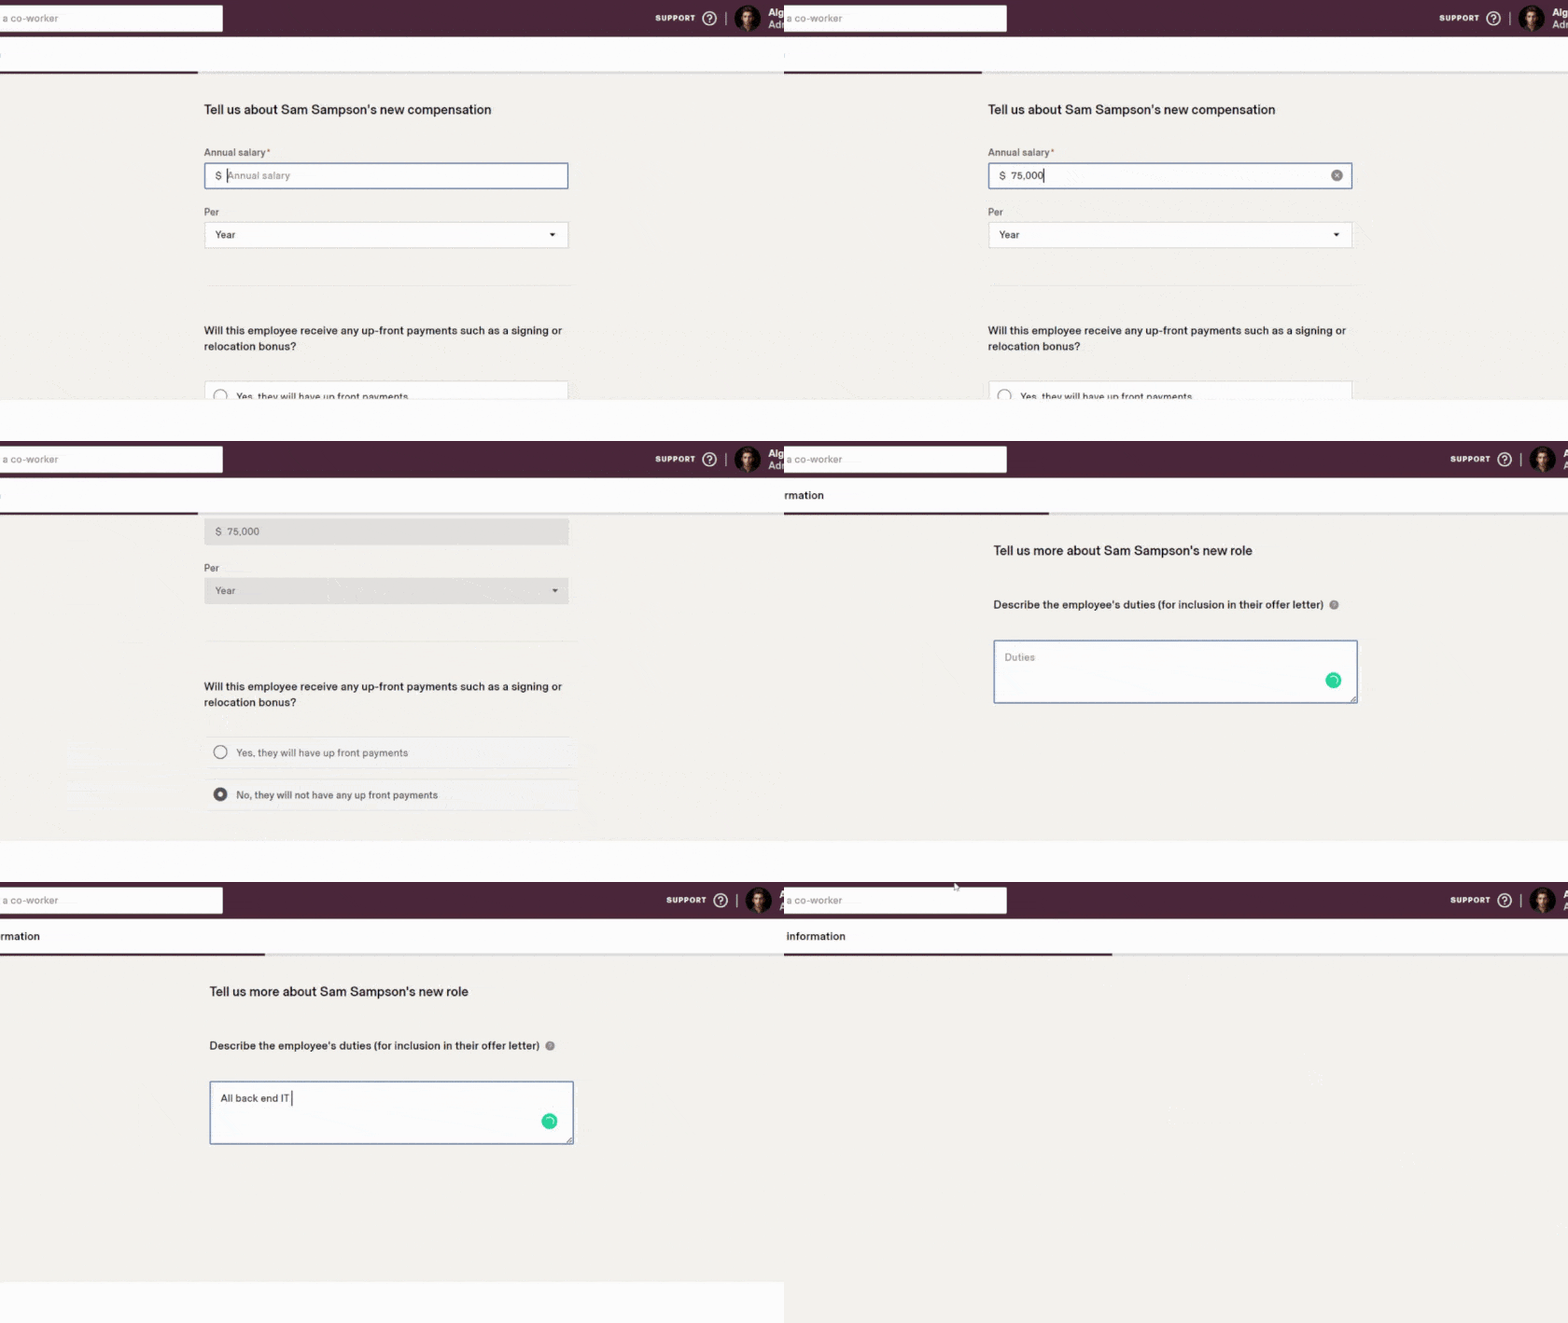
Input the new hire’s salary information and describe the job duties in detail.
Your next step is to review the job offer letter for accuracy and click Continue to complete the new employee set up.
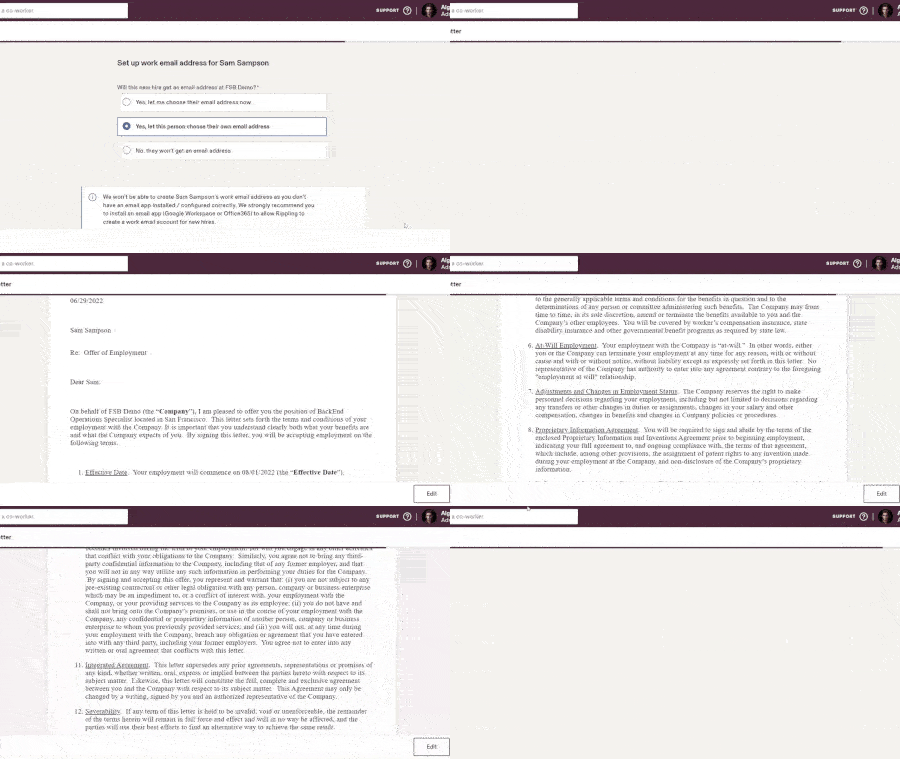
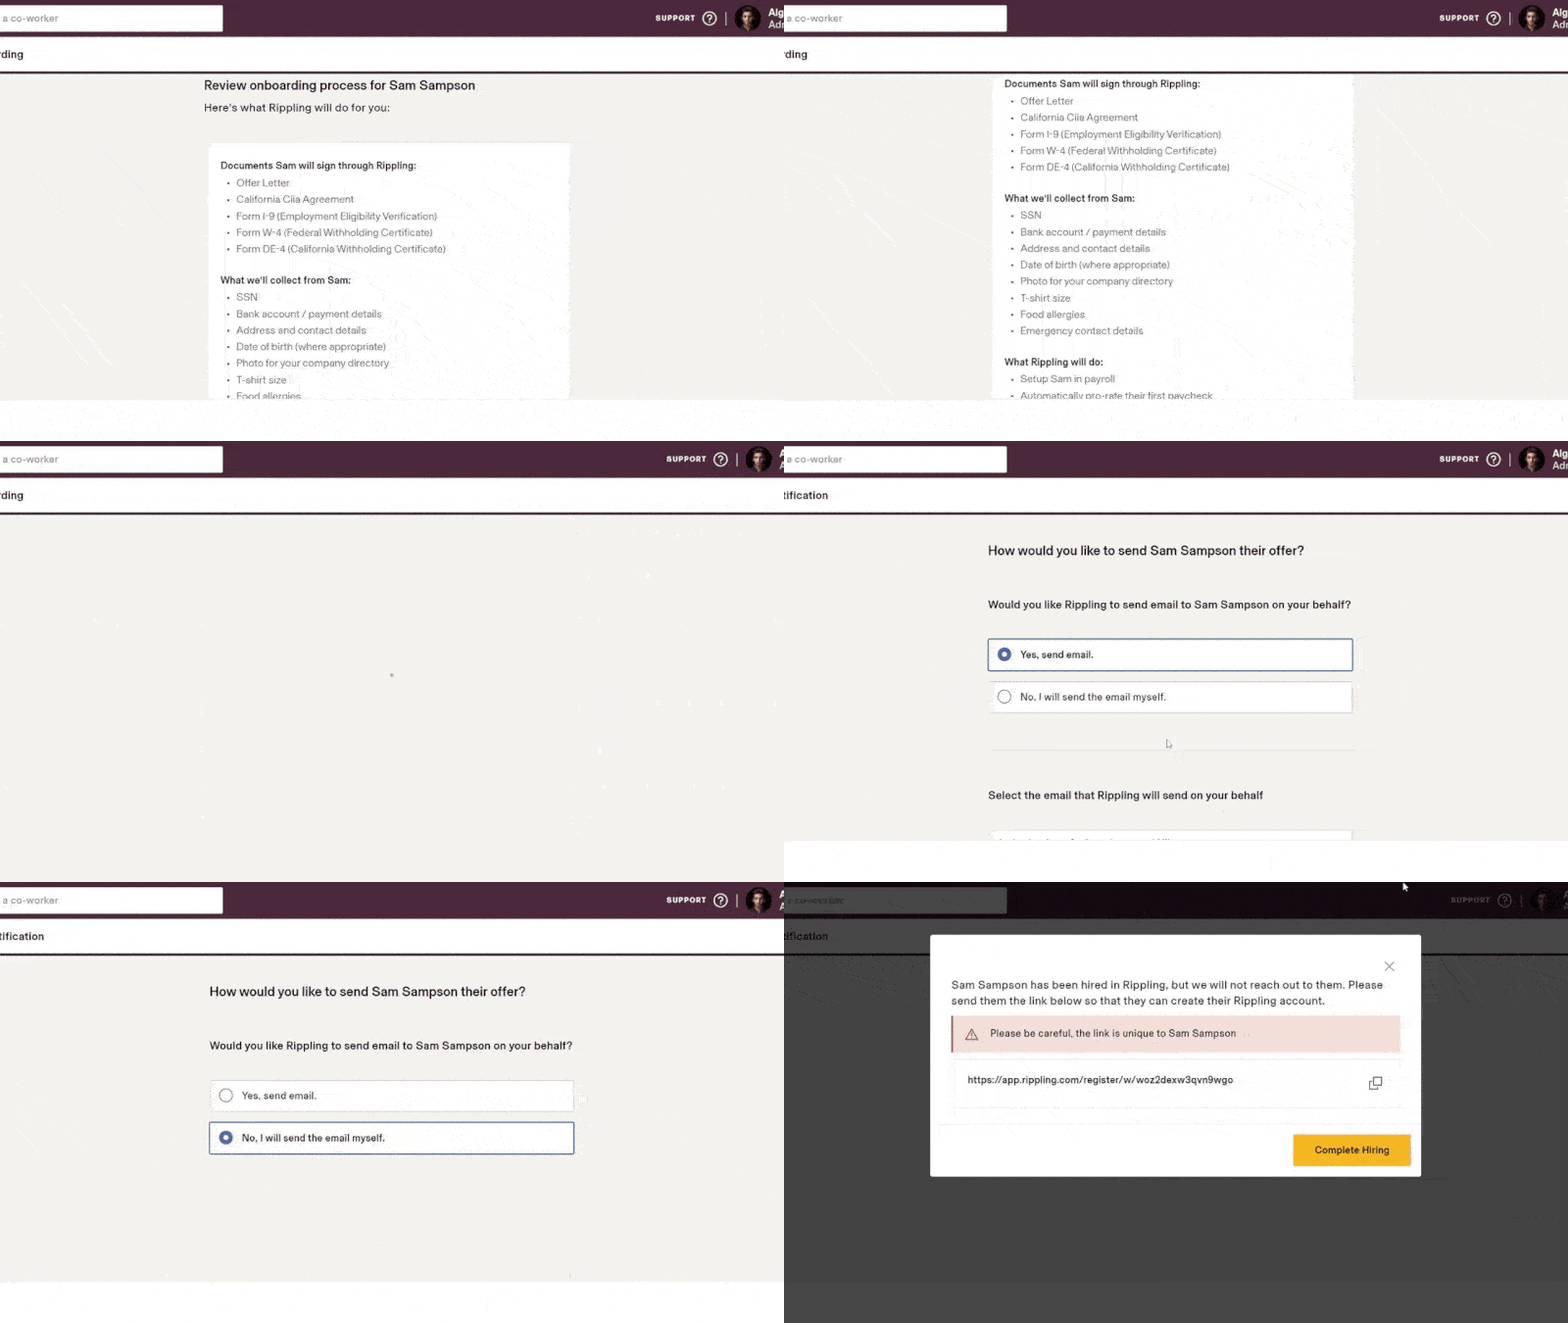
Finally, you will review the details you’ve added for the new employee and the onboarding process. This includes the documents the employee will sign through Rippling and the items Rippling will collect from the new employee (e.g., Social Security number, bank information, address details, and more). Choose whether to have the onboarding email sent directly from Rippling or your business email address and select Finish Hiring.
Offboarding Flow
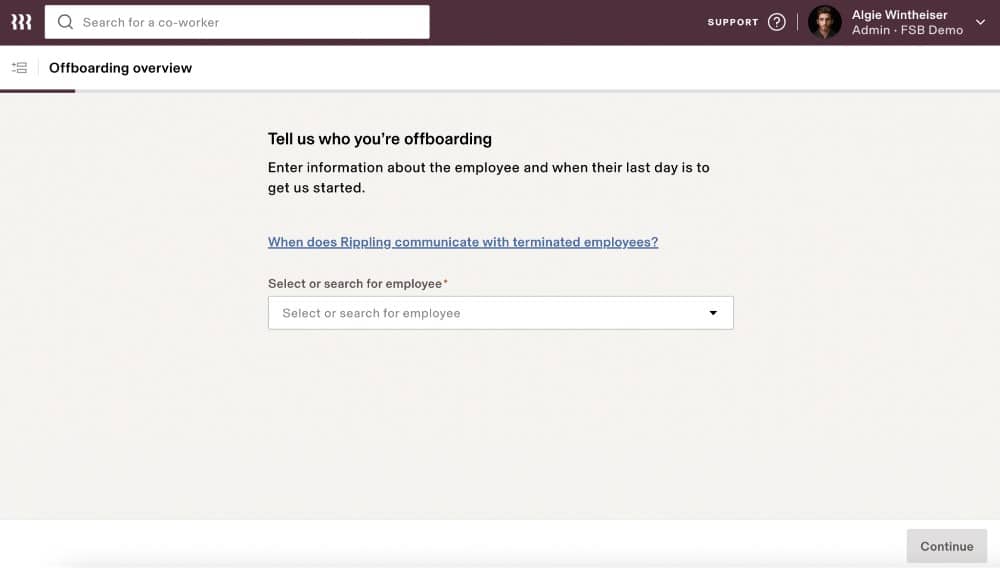
There will inevitably come a time when you will either need to terminate an employee or offboard an employee who has quit their job. Rippling makes this process easy with its offboarding flow. Simply select Offboard from the left navigation menu and select the employee you wish to terminate from the drop-down list.
Once you select the employee, you will be prompted to enter their last day of employment. Select if you want Rippling to suspend their system access and input the date their access should be suspended.
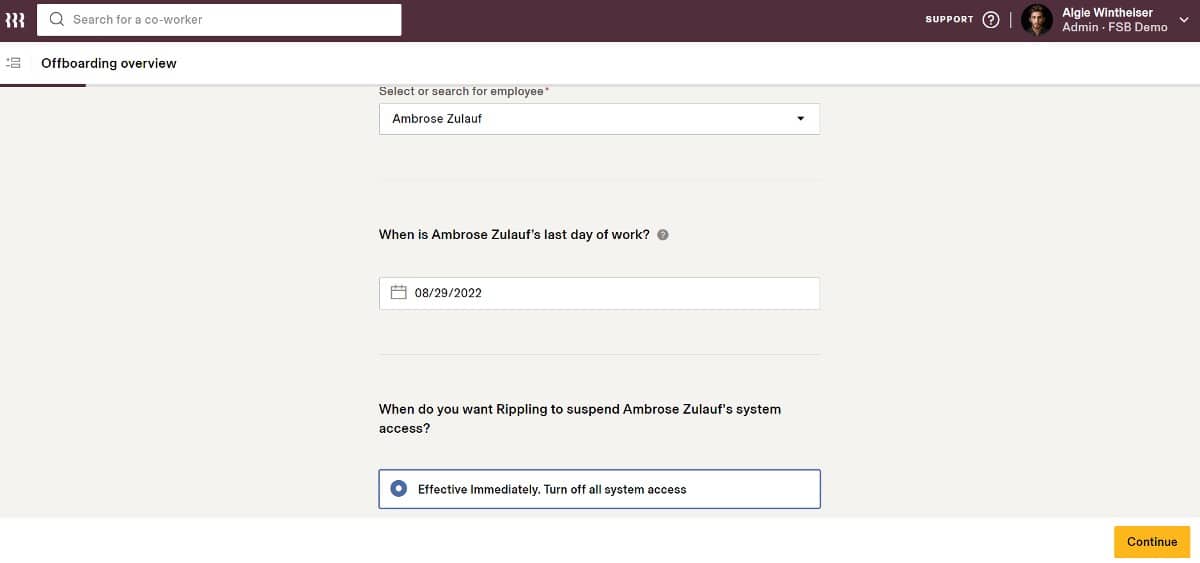
From there, you will click Continue, and the Offboarding Flow will walk you through the process to successfully offboard your employee from the system. These steps include the following:
- Voluntary or involuntary termination
- Would you rehire?
- Reason for termination
- Additional comments
- Responsibility transfer
- Severance information
- Third-party app removal
- COBRA decision
- Final paycheck
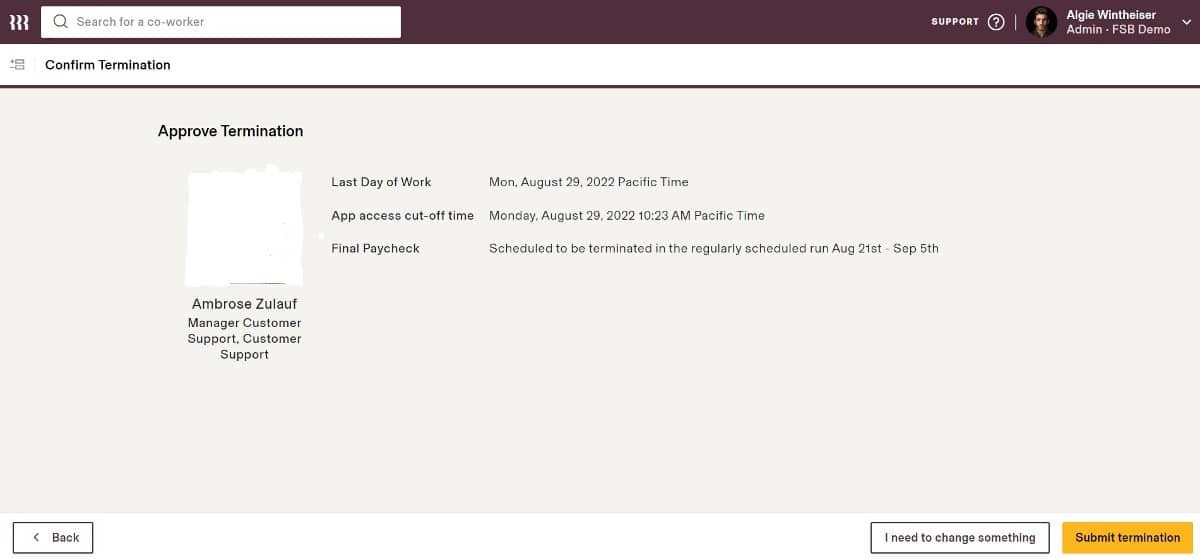
Finally, you will have the option to review your decision, make any changes necessary, and then click Submit Termination in the lower right corner to remove the employee from the Rippling system.
See how Rippling compares to similar payroll providers:
Rippling vs Gusto
Rippling vs Paychex
Rippling vs TriNet
Doing Payroll With Rippling
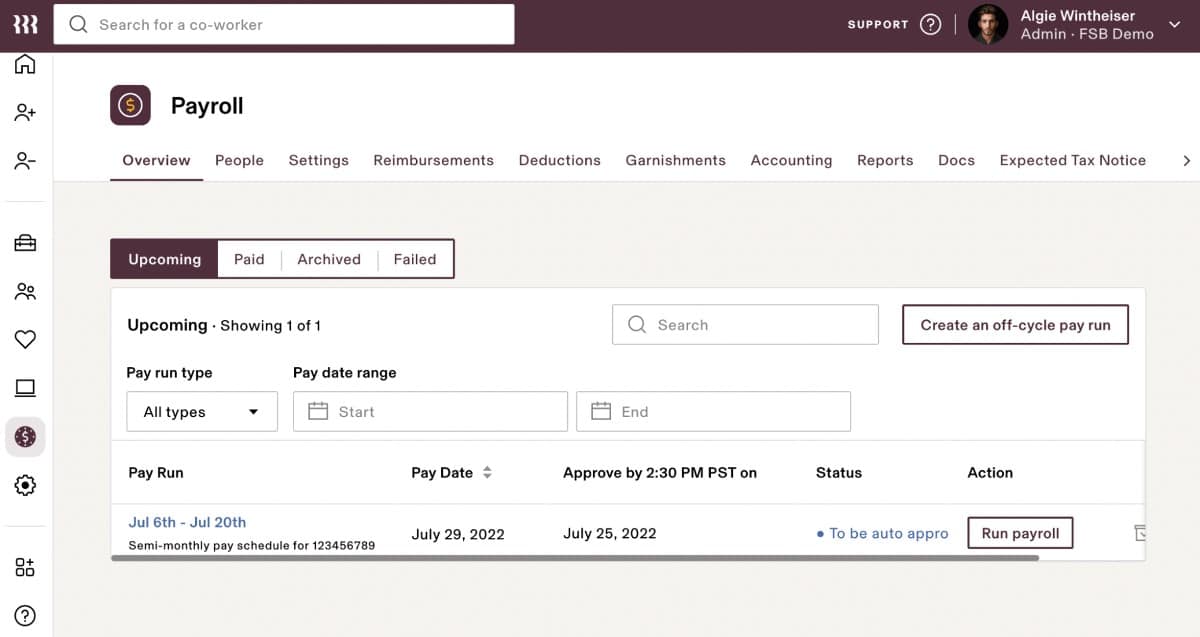
Now that we’ve reviewed the hiring and offboarding flows, we’ll discuss the payroll screen so that we can walk you through processing payroll using Rippling.
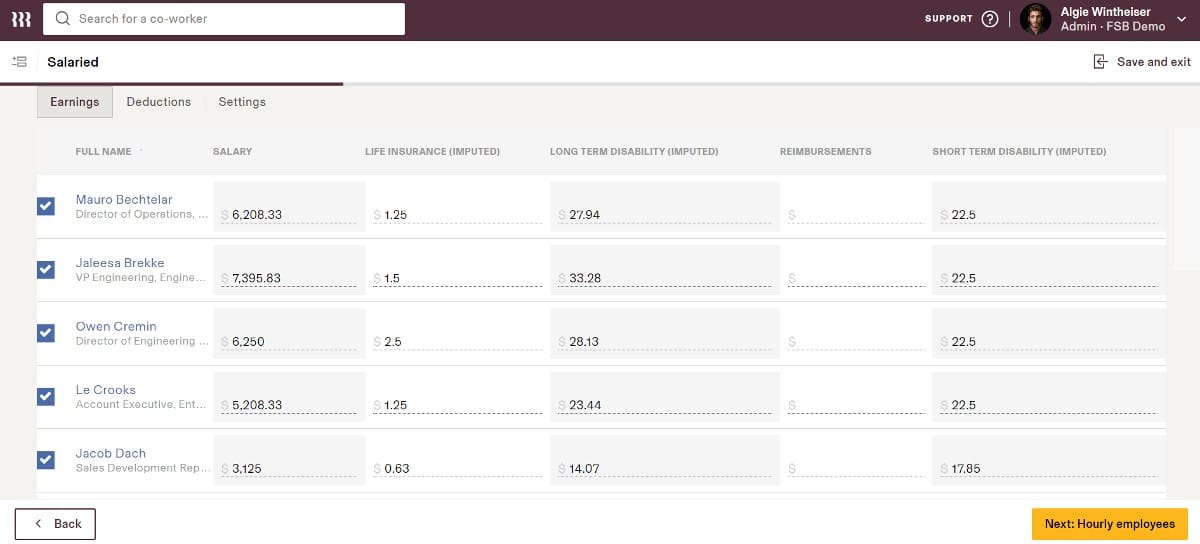
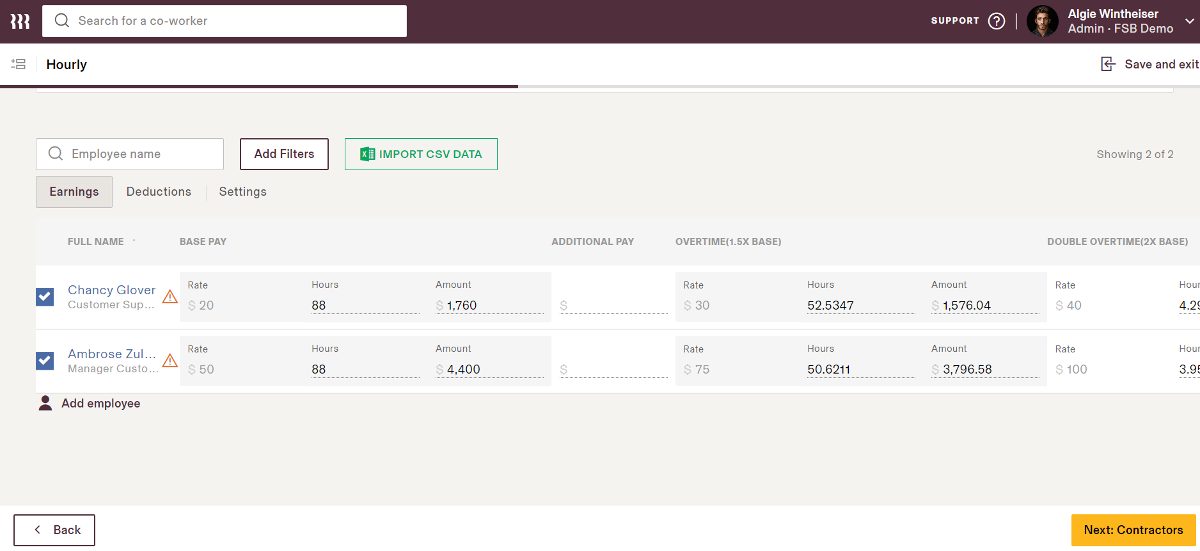
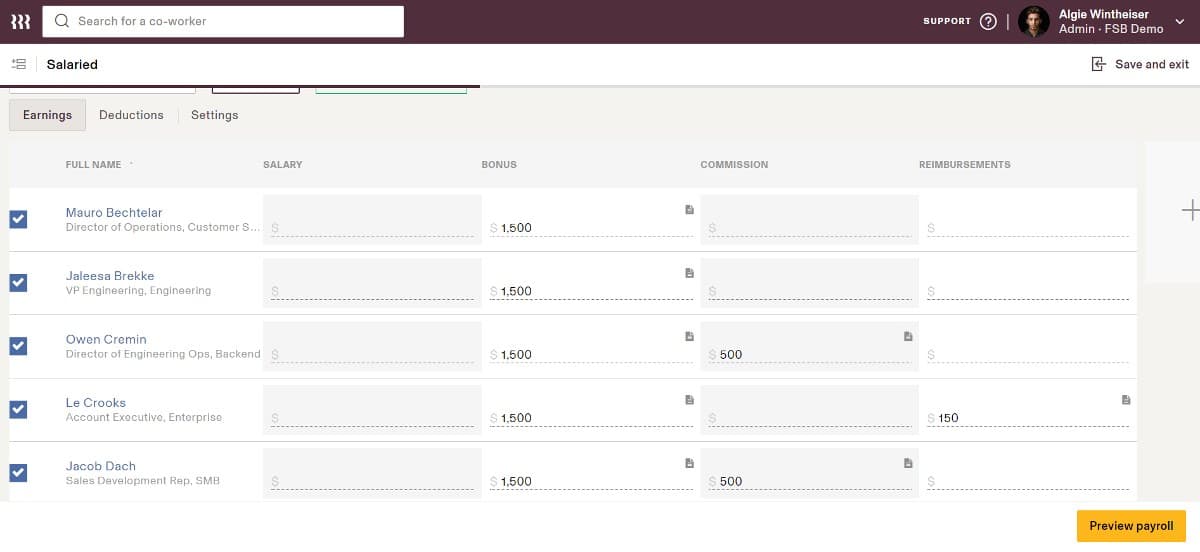
After you review your salaried employees, click the Next: Hourly Employees button at the bottom right. For your hourly employees, their time will already be populated from the time and attendance tool within Rippling. You can adjust their hours or add hours where there are none, before submitting payroll.
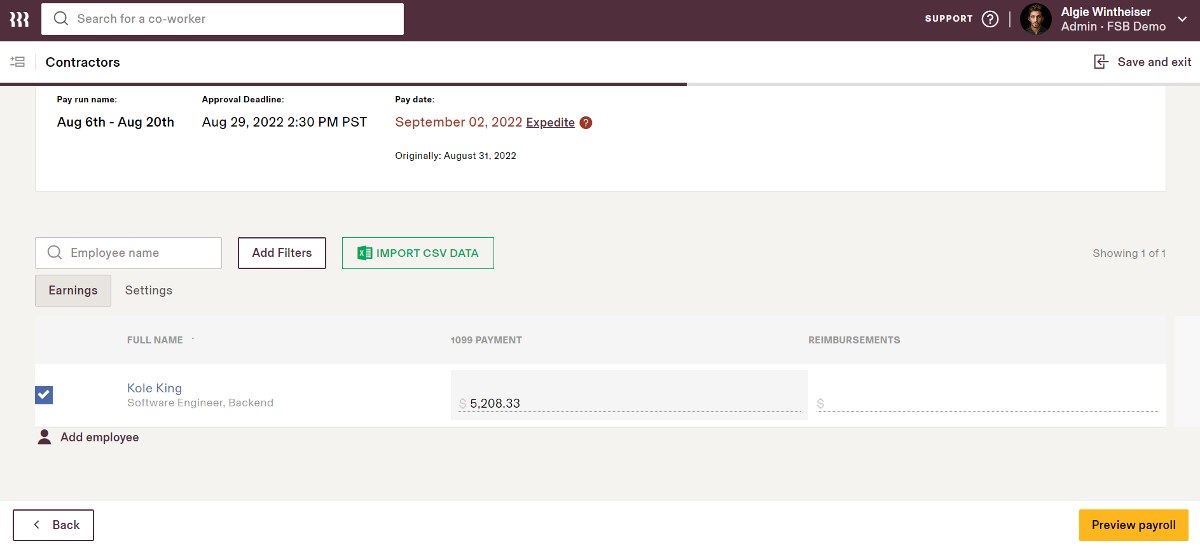
Once you are satisfied with your hourly employees’ information, click Next: Contractors to move to the contractor portion of your payroll. Here you can add total pay information for your contractors. If your contractors receive a recurring payment, it will be automatically populated in the system.
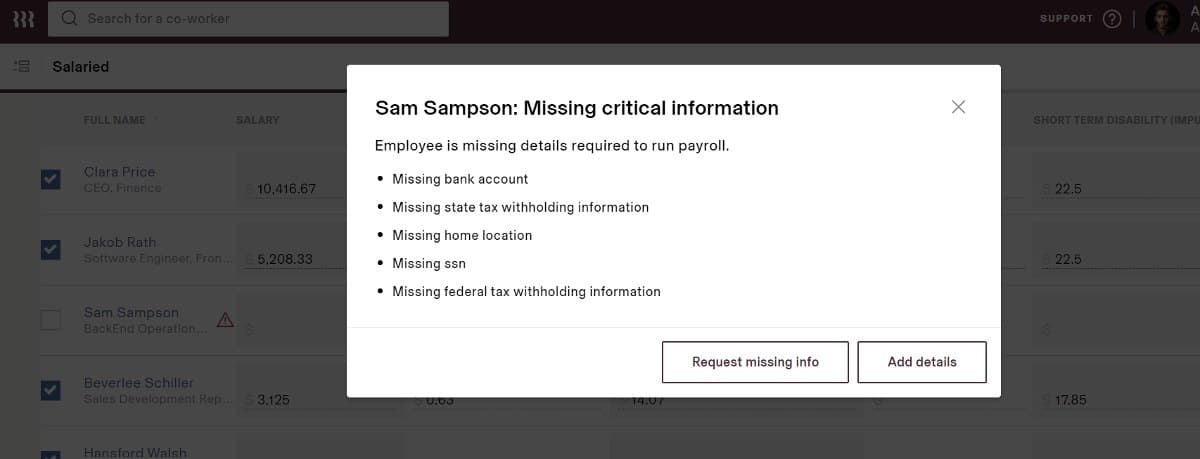
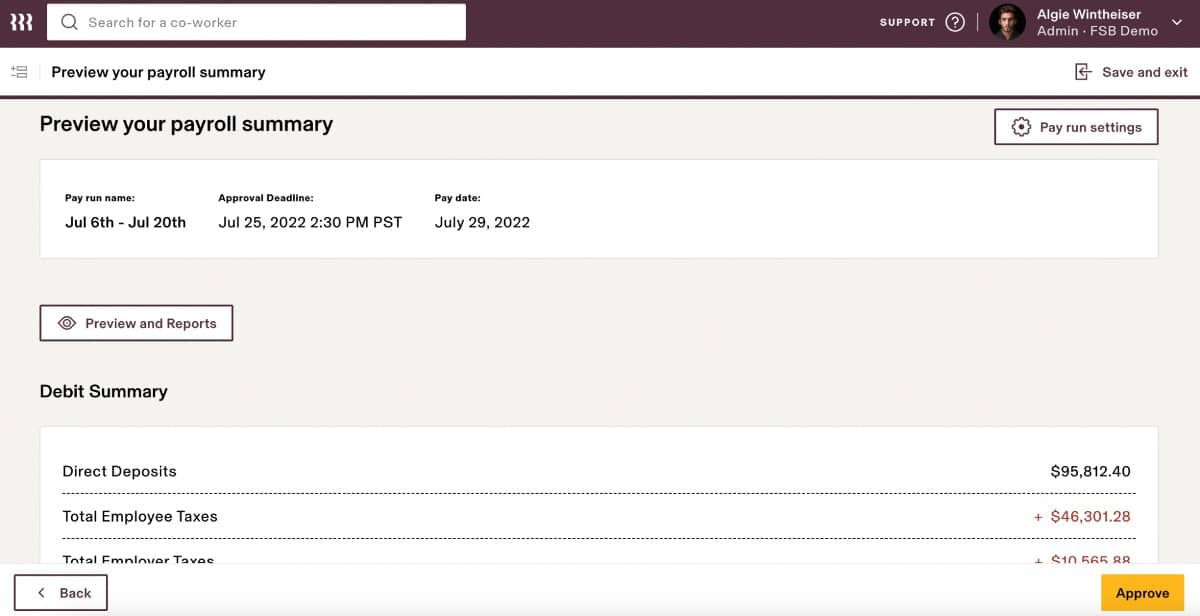
Once you are satisfied with all payroll entries, simply click Preview Payroll to review your overall payroll for that pay period. In the preview screen, you will be informed of the total payroll and taxes for that pay period. You will also be alerted to any missing information and be able to see each person being paid, along with a comparison from the previous payroll. From here, if there are no changes required, simply click Approve in the bottom right corner to approve your payroll.
Sometimes, you will have the need to run a payroll that is not your scheduled weekly/semimonthly payroll. These generally occur when you need to pay a new hire that was not included in your regular payroll or when you are paying bonuses or commissions to employees. Rippling makes it easy to run off-cycle payrolls directly in the system.
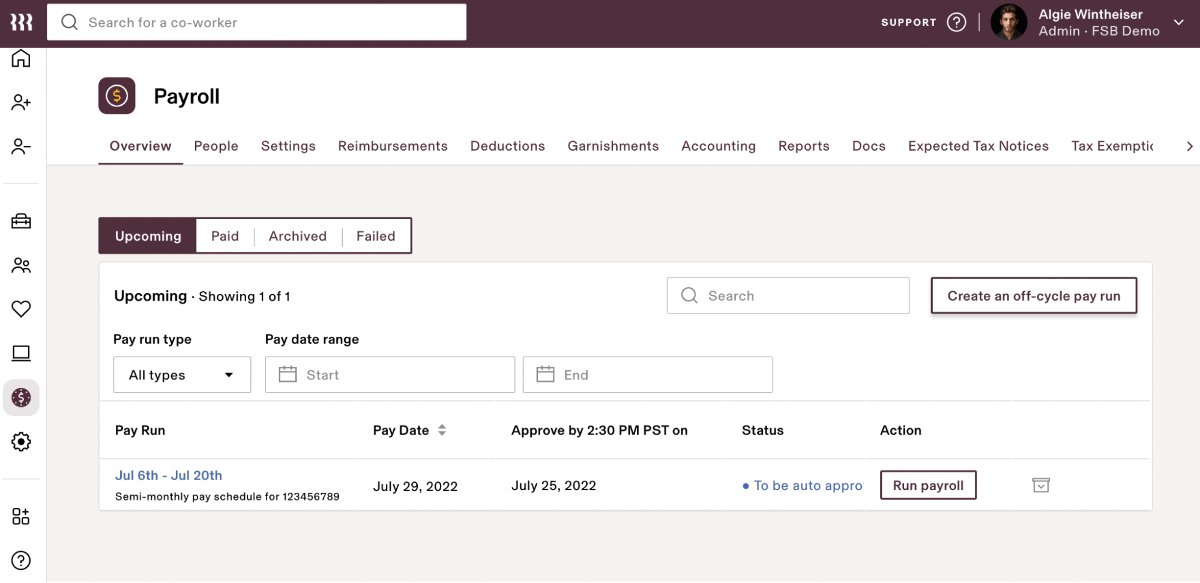
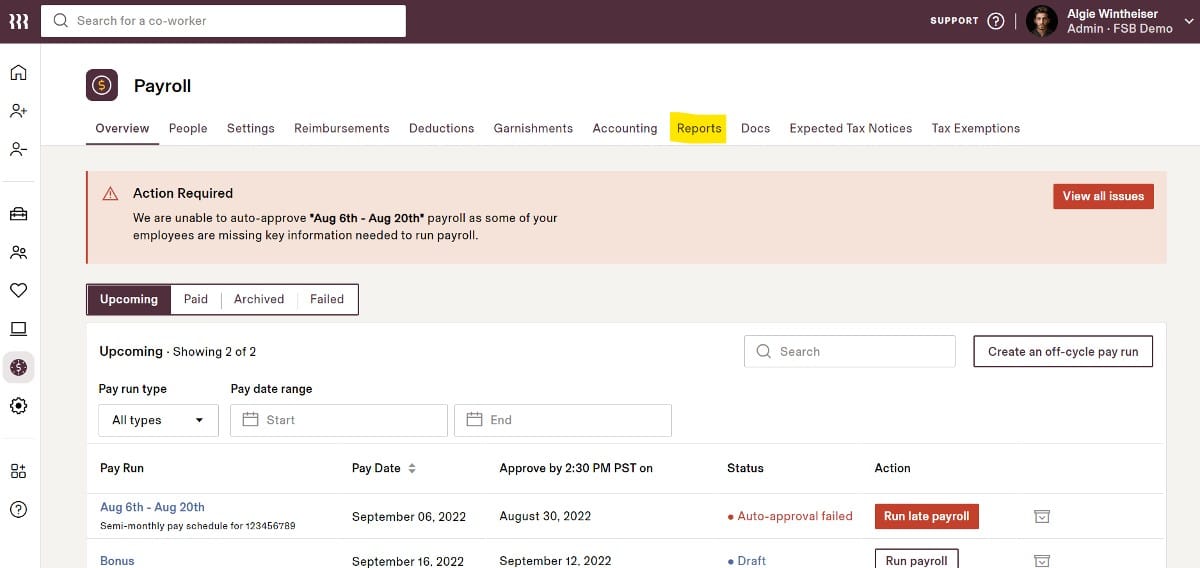
To run an off-cycle payroll, simply navigate to your payroll screen and click Create an Off-cycle Pay Run. You will then be walked through the entire process to completion of your off-cycle payroll.
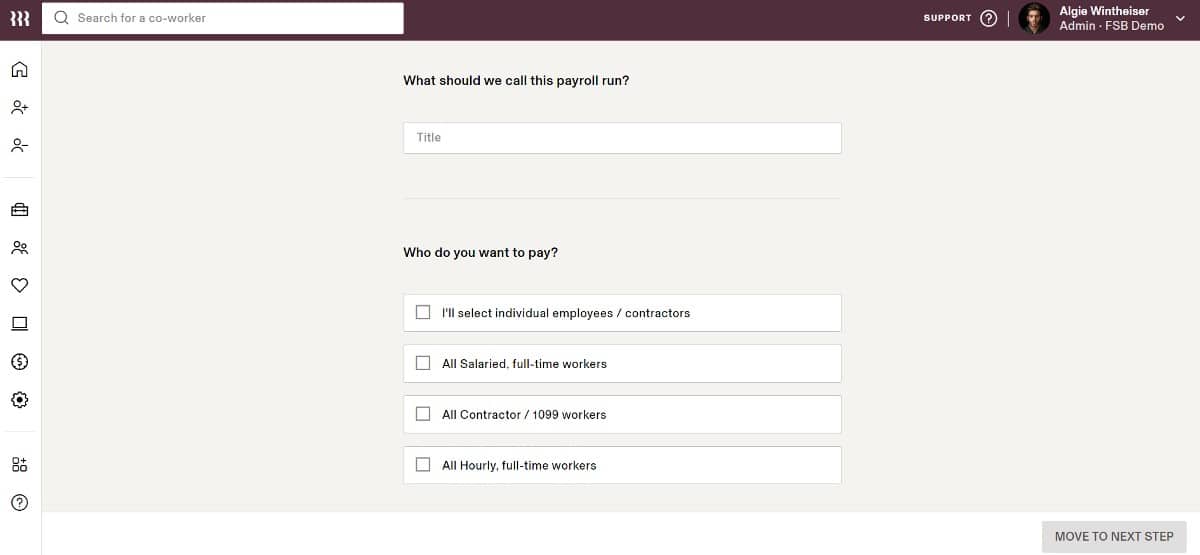
For easy tracking, you can give this off-cycle pay run a title (e.g., bonus), which will make it easy for you to find whenever you need to review the pay run. You can also decide who you want to pay. You can select from individual employees or pay all salaried, hourly, or contract employees at one time.
You will then have the option to use gross pay (where Rippling will calculate the gross pay) or net pay (where Rippling will calculate taxes) to process the off-cycle payroll. From there, you select whether to pay these employees by direct deposit or paper check and select the pay date. Follow through the rest of the flow to answer specific questions regarding the pay run and click Move to Next Step. Here, you will be able to input your specific pay information (e.g., salary, bonus, commission, and/or reimbursements).
Once completed, simply click Preview Payroll to verify all amounts are correct and then click Approve.
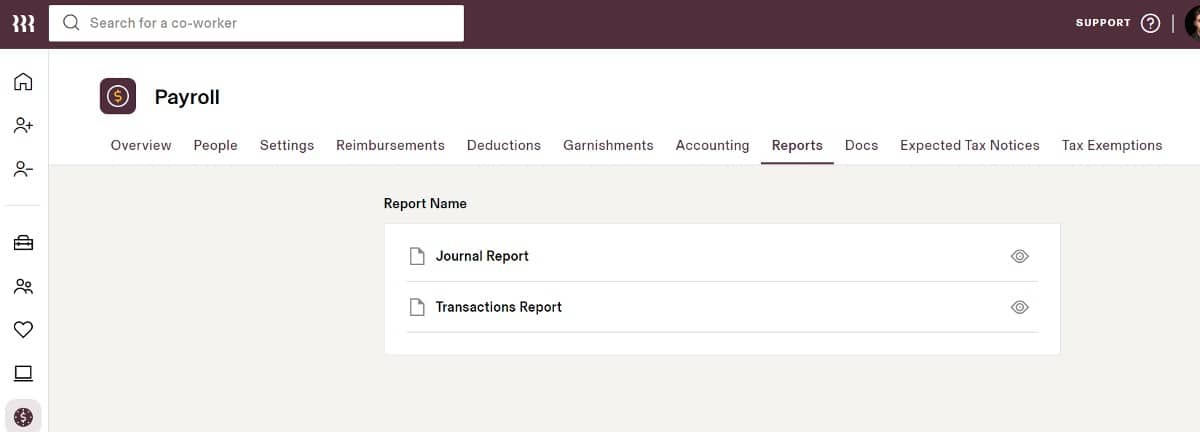
Once you’ve processed all of your regular payrolls and any off-cycle payments that need to be made, it’s important that you know how to run reports using Rippling’s payroll software. To run payroll reports, navigate to your payroll screen. Across the top, you will see the option for reports. Click there to get started.
There are two standard reports available—journal report and transactions report. The journal report will give you an overview of an entire pay cycle (you choose the type—yearly, monthly, quarterly, or custom—and select the dates you wish to view). The transactions report is available for you to see individual transactions throughout the pay year.
For typical reporting, most small businesses will use the journal report. Once configured to the specific type of report you need, the system will generate an overview report that shows all details from pay runs during that period. You will have the option to view data from a full company standpoint, by department, or by individual employee. You will also have the option to download your reports to either PDF or CSV format.
Still looking for payroll software? Check out our step-by-step guide on how to choose the best payroll software.
Bottom Line
Knowing how to set up your employees for payroll runs is an essential part of any business. With Rippling, you can have your employees set up and ready for their first payroll in a matter of minutes, plus running payroll is a breeze with Rippling’s automated flows.
The end-to-end HR and payroll platform allows you to manage your employees from onboarding to offboarding and everything in between. Its intuitive interfaces make it easy to navigate through its many features. Sign up for a free demo today! PLUS, new users who subscribe to Rippling’s solutions and services get the first month FREE!
You May Also Like…
- For additional payroll provider options, check out our best payroll services
- See our top tips on how to get the best payroll training
