


Craft shows are a prime opportunity for small businesses, startups, and solopreneurs to connect with customers, attract wholesale buyers, and network with fellow makers. Products often range from handmade goods under $20 to premium items worth hundreds, but inventory is limited, and so is the cash most attendees carry.
Accepting credit card payments at craft shows can instantly increase your sales potential. The good news: you don’t need complex equipment or a merchant account to get started. With the right mobile payment processor, setup takes minutes and can even be free.
For most craft vendors, Square offers a free app, flat, predictable fees, and several hardware options to fit your booth setup. Create a free Square account and start taking payments today.
Keep reading for our step-by-step guide, processor comparisons, and tips for selling more at your next craft fair.
What you need
- A business bank account where proceeds of your sale will be deposited
- A payment processor to connect your business with banks and credit card networks (Visa, Mastercard, American Express, Discover)
- A wireless credit card reader or payment terminal, which lets you process credit card payments
5-step guide to setting up credit card payments for craft shows
Follow these simple steps to start taking card payments at your craft fair or market booth. This process works for chip, swipe, and contactless payments, and can be completed in minutes.
Step 1: Open a business bank account
Regardless of business size, merchants need a business bank account if they want to work with a payment processor to accept credit card payments. Applying for one should only take a few minutes and getting approved is easy if you have all the required documents. If you need one, visit our complete guide to opening a business bank account.
Step 2: Choose a payment processor
Pick a processor designed for small vendors, such as Square, PayPal Point of Sale (formerly PayPal Zettle), or Stripe Terminal. Compare transaction fees, hardware costs, payout speed, and offline mode availability before making your choice. Payment processors will also help you apply and get approved for a merchant account.
Some payment processors include tools to ring in sales — point-of-sale (POS) software — and manage your inventory. Others may even have the functionality to help you track cash sales. Payment processors will also provide you with a credit card reader to use at your craft shows. Integration tools are also included, so your sales during these events are automatically synced to your main sales and inventory records.
Learn more:
Choosing a payment processor for craft shows
The best payment processors for merchants at craft shows are those that are affordable, easy to set up, and do not lock you into a long-term contract. It should also be versatile, offering a number of ways to accept credit card payments such as swipe, via EMV (dip and contactless), and via digital wallets.
Learn more:
The following payment processors are perfect for microbusinesses and are thus great options for credit card processing for craft vendors. They offer pay-as-you-go terms and zero monthly fees, so all you need to pay for are the costs per transaction. There are also options for those who are still looking for a business bank account.
| Best For | Merchant Account Approval | In-person Transaction Fee | Learn More | |
|---|---|---|---|---|
 | Managing inventory | Instant | 2.6% plus 15 cents | Square Payments review |
| Visit Square | ||||
 | Occasional sellers | Instant | 2.29% plus 9 cents | PayPal Business review |
| Visit PayPal | ||||
 | Merchants needing a business bank account | Few Days | 2.6% plus 10 cents | Chase Payment Services review |
| Visit Chase Payment Services | ||||
Step 3: Choose your card terminal
Merchants need a certain level of mobility to process payments efficiently at craft shows, so the ideal options are those that are wireless — battery-powered credit card terminals with WiFi, Bluetooth connection, and offline payment features.
The ability to accept mobile payments is also becoming a major consideration for customers. For example, digital wallets provide customers the convenience to make purchases without presenting their physical credit card. In addition, the transactions are protected by security features from the payment processor and the smartphone, making customers less hesitant to buy.
Based on these requirements, the best way to accept credit cards at a craft fair is with a mobile card terminal.
The top payment processors offer a number of options:
- Standalone credit card machine
- Tablet-based POS with card reader
- Mobile credit card reader (paired with a smartphone)
- Standalone POS smart terminal with card reader
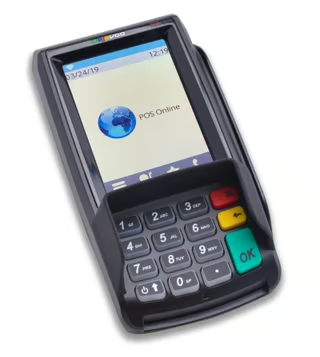
Dejavoo Z6 PIN Pad: Touch screen stand alone credit card machine with PIN pad supported by a number of popular payment processors including Stax. Cost: From $129 (Source: Dejavoo Systems) 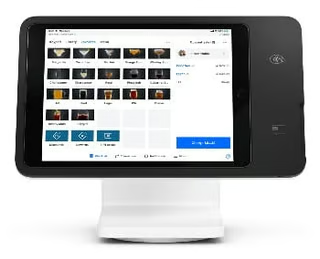
Square Stand: iPad-based credit card reader from Square. Cost: $149 or $14 per month for 12 months 
SumUp Plus: Most affordable 3-in-1 (Swipe, Tap, and Dip) card reader with PIN pad for debit card payments. Cost: $39, or $49 (with charging dock) 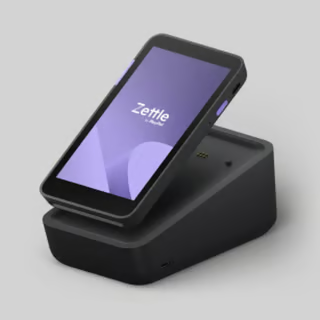
PayPal Zettle Terminal: Standalone smart POS and card reader with receipt printer from PayPal. Cost: From $199


Related reading:
Step 4: Create your account and download the app
Sign up online, then install the processor’s mobile app on your smartphone or tablet. Once you’re logged in, begin setting up your account:
- Connect your bank account for payouts
- Design your digital receipt
- Add your tax (and tip) settings.
- Upload your inventory list.
Set up craft show payment options
Lastly, set up your payment options. In the app, enable card types (Visa, Mastercard, American Express) and digital wallets (Apple Pay, Google Pay). If your processor supports QR codes, activate them for faster contactless transactions.
Step 5: Set up your credit card terminal
Credit card terminals are provided by your payment processor, and some may even offer you an option to reprogram your own hardware if you already have one. Most card readers are already pre-programmed and are ready to use out of the box, while others may require a bit of setup, such as downloading payment software, setting up taxes, and pairing it with your card reader.
Standalone credit card machines are pre-programmed by your payment processor so there’s no need for any additional configuration. To prepare your credit card terminal for the craft show you will need to:
- Turn on the card terminal and check for battery life
- Connect and test the WiFi network provided by the craft show event manager (consider bringing your own mobile WiFi in case the event WiFi crashes or slows down)
- Load the thermal paper roll and perform a test print
- Perform a test transaction at the venue to ensure that the card terminal is in good working order.
Note, however, that a standalone card terminal is not integrated into any POS software so there is no way to automatically track your inventory or have immediate access to your sales records.
Your mobile credit card reader’s performance will partly depend on the smart mobile device that it is paired with. This means you should have received the card reader days ahead and performed the setup and checks needed for both hardware.
Once you have received the mobile credit card reader:
- Download the POS app on your compatible mobile device.
- Create an account and log in to the app.
- Design your digital receipt.
- Add your tax (and tip) settings.
- Upload your inventory list.
- Turn on your mobile credit card reader.
- Navigate to the hardware settings and choose “add a card reader.”
- Use the Bluetooth feature to pair your mobile device and card reader (depending on the card reader, you may need to press a separate button to initiate the pairing process).
- If successful, you should see your card reader listed under paired hardware on your POS app.
- Perform a test payment (if possible) to make sure everything is in order including the receipt.
At the event:
- Turn on and pair your mobile device and mobile credit card reader.
- Connect and test the WiFi network provided by the craft show event manager (consider bringing your own mobile WiFi in case the event WiFi crashes or slows down).
- Perform another test payment before the event starts—mobile credit card readers may suffer from disconnections or failed payments due to a number of reasons.
A countertop POS with built-in credit card readers can be more reliable, but lacks the mobility that mobile credit card readers provide. It’s somewhat faster to set up since you are only looking after a single device.
Once you receive your countertop POS hardware:
- Carefully unbox your hardware and remove the protective wrap.
- Plug in and turn on the device, then log into your account.
- Connect the device to your network.
- Follow the prompts to begin the basic settings for location, language, timezone, and connection type.
- Create your account and log in to the system.
- Update the software if prompted.
- Navigate to the settings menu and begin completing the setup for features such as taxes, tipping, and reporting tools.
- Design and format your customer receipts, make sure to toggle the digital receipt option if needed.
- Load your thermal paper if your POS comes with a receipt printer.
- Perform test prints for both digital and printed receipts.
- Upload your inventory list.
- Perform test transactions if possible.
At the event:
- Assign a designated checkout area at your craft show booth that has ample access to a power source.
- Plug in/turn on your POS system.
- Connect and test the WiFi network provided by the craft show event manager (consider bringing your own mobile WiFi in case the event WiFi crashes or slows down).
- Log in to your account and review your settings.
- Perform a test transaction and print (or send for digital) a test receipt to identify any issues before the event starts.
Handheld POS terminals have the luxury of both the mobility of a mobile credit card reader and built-in POS software. The small size provides convenience while keeping your inventory and sales records up to date in real time.
If you have signed up with a payment processor, you most likely already have a desktop version of your POS software that’s accessible from a computer or a main POS hardware, and have already configured most features such as taxes, tipping, payments, fund transfers, inventory, receipts, etc.
The handheld POS terminal is synced to your main POS system, so you do not have to go through the initial setup process.
Once you have received your handheld POS terminal:
- Remove the device and accessories from the box.
- Turn on the terminal and configure basic settings like location and time zone.
- Connect the terminal to the charger to make sure it works.
- Connect your handheld POS terminal to your network (WiFi or Ethernet).
- Update the POS software if prompted.
- Sign up and log in to the POS software.
- Review the settings to make sure it matches your main POS software.
- Load the thermal paper in the built-in printer.
- Perform a test transaction to make sure the device is functioning properly.
At the event:
- Turn on your handheld POS terminal and log in to your POS software.
- Plug in your charger to make sure that the power outlet is in good working order.
- Connect and test the WiFi network provided by the craft show event manager (consider bringing your own mobile WiFi in case the event WiFi crashes or slows down).
- Perform a test transaction to check for any issues that need to be addressed before the event starts.
Best practices when accepting credit card payments at craft shows
Here are some things to remember when planning to accept credit cards at craft shows.
Sign up with a payment processor ahead of time
While most free merchant account approvals are instant, additional information may be requested by the payment processor, which may cost another day or so to verify. Requesting a credit card reader will also take some time to ship (roughly 3–5 business days), so make sure to have enough time available before the craft show to receive and set up your hardware.
Ask your payment processor how to do test transactions for payments and refunds (if possible). This will help you become familiar with the system, identify any payment processing issues (failed transactions, disconnection), and understand how to record and keep track of your sales.
Test your card reader before the event starts
Make it a point to arrive at the craft show venue early, not just to set up your booth, but also to test your card reader. Check to make sure that you have a strong wireless internet connection (you can get the WiFi from the craft show event manager ahead of time), Bluetooth signal (if you pair your card reader with a mobile POS device), and that your card reader is fully charged with the charging dock working properly.
If possible, have a backup mobile card reader in case your main card terminal causes you problems.
Display signage of your payment methods
Some customers at craft shows who are out of cash might hesitate to approach vendors (instead of asking) if they are not aware that credit card payments are an option. Make sure to display signage of your available non-cash payment methods to remove this deterrent to potential sales.
In addition, remember to offer card payment alternatives (such as tap to pay) as soon as customers come up for checkout.
Don’t forget the receipt
Along with offering customers alternative payment methods at checkout, also make it a habit to ask them if they would like a printed or digital receipt if this feature is available from your payment processor. Regardless of form, receipts are proof of transactions and can be used to protect merchants from possible chargeback claims. Digital receipts carry the added benefit of having your customer’s email address for future marketing and advertising opportunities.
Continue to accept cash
Knowing how to accept credit card payments at craft shows doesn’t mean you should do away with cash transactions. Consumers still carry cash and expect craft show attendees to bring at least a hundred dollars to spend. Be prepared with around $200 in small bills and change for your cash customers.
Make sure to have a process in place to record cash transactions. Some payment processors with a POS system do come with cash tracking tools.
Learn more: Cash vs Card spending.
Frequently asked questions (FAQs)
These are some questions we commonly encounter about accepting credit card payments at craft shows.
How do I accept credit card payments at craft shows?
Sign up with a mobile payment processor like Square or PayPal Point of Sale, install its app on your phone or tablet, and connect a card reader. You can accept chip, swipe, and tap payments in minutes.
Can I take card payments without Wi-Fi at a craft fair?
Yes. Many processors offer offline mode or allow payments over cellular data. Test your setup before the event and keep a portable charger handy.
What’s the cheapest way to accept credit cards at craft shows?
Choose a processor with flat, transparent fees and a free or low-cost reader. Compare transaction rates, hardware costs, and payout times to match your sales volume.
Do I need a card reader, or can I use tap to pay on my phone?
Many processors now support tap to pay on compatible iPhones and Android devices, so you can accept contactless cards and digital wallets without extra hardware.
Is it legal to add a credit card surcharge at craft shows?
It depends on your state’s laws and card network rules. If surcharges are allowed, you must clearly disclose them and follow your processor’s policies.