In this article, you’ll learn how to manage inventory using the Lightspeed POS system. Lightspeed is our top-recommended point-of-sale (POS) inventory system, best for midsize businesses with multiple locations. It has age verification tools, payment processing, and analytics reporting. This system is browser-based, so you can start a 14-day free trial and start using the platform right away.
For this guide, we’ll cover how to add products, submit purchase orders (POs), receive and tag inventory, conduct inventory counts, and reconcile differences.
Though the Lightspeed interface has changed slightly since our video was recorded, the basic steps are still the same. Continue reading below for in-depth details and insights into the latest interface.
Step 1: Log in to Your Lightspeed Account
Once you have an account set up, go to the Lightspeed website and enter your login credentials to get to your dashboard. From there, you’ll see a vertical navigation bar on the left. Select “Inventory.”

Step 2: Add Your Products
Before you can manage inventory with Lightspeed POS, you need to input your product information. This information includes everything from the product name, wholesale and retail price, and product description to vendor and manufacturer information, stock-keeping unit (SKU) numbers, and Universal Product Code (UPC).
There are two ways to add your products to Lightspeed: import items from a database or add products manually. We’ll go over each one below.
If you already have a spreadsheet with existing product information, Lightspeed can import everything for you. Start by clicking on “Catalog,” then “Products,” and “Import.”
The system will check that the columns in your spreadsheet match. If not, the system will inform you, and you can fix the issue by choosing the appropriate column from a drop-down menu.
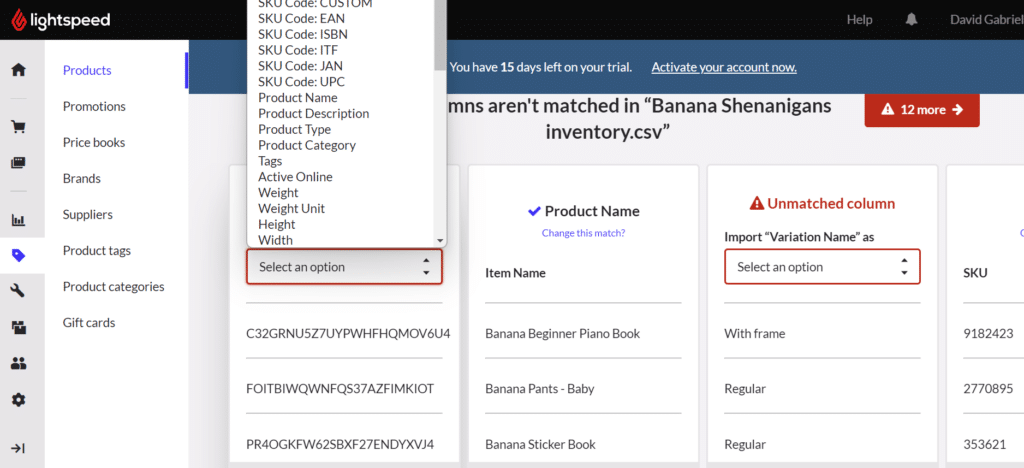
You’ll have the option to import unmatched columns as SKU codes, product dimensions, tags, and more. You can also choose not to import the affected items or to continue with the import despite the unmatched columns.
To avoid formatting problems, Lightspeed recommends organizing your product list as an XLSX or CSV file before importing into the POS.
Once all columns match (or if you decide to proceed with the import regardless), you’ll be taken to a confirmation screen. Select “Continue with Import” to import the inventory items into your store.
Lightspeed can import all your vendor and customer information. In the end, this means a quick move to a more effective POS system without losing important data. This is one of the reasons Lightspeed is one of the best POS inventory systems for small business retailers.
Don’t expect the product upload to be an instantaneous process. It will take Lightspeed some time to check your import file. We waited about 20 minutes for our file of 100 products to be ready to upload. Keep in mind it may take you much longer depending on how much formatting and adjustments need to be made to the spreadsheet before starting the upload process.
Also note that we did not upload any images or product photos, which would likely make the process longer.
Lightspeed also allows you to input products and product information manually. When you begin with Lightspeed, this would be a time-consuming process unless you have a limited inventory list. However, adding products manually makes more sense post-setup, when you only need to add one or a few items.
To do this, click on “Catalog” and then “Add Product.”
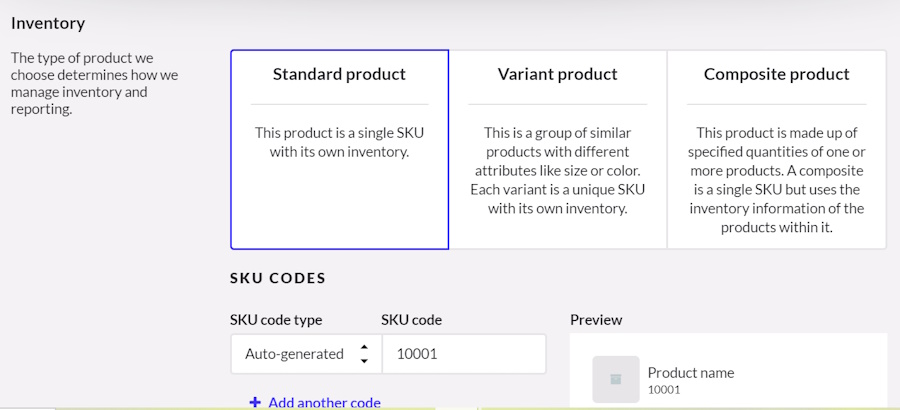
On the next screen, you’ll see a form with fields for various product information—pricing, SKU, vendor, product type, etc.
Download our Lightspeed mock inventory list to test the system for yourself. It’s formulated using Lightspeed’s product import file.
Step 3: Create & Submit Purchase Orders
Much of the difficulty and time in preparing a purchase order (PO) comes from figuring out how many of each product you need. With the right settings, Lightspeed can configure POs for you. By noting your inventory on hand and reducing your inventory count after each sale, you can set up specific rules in Lightspeed that will generate POs automatically.
Lightspeed POS will also combine POs for the same vendor so that everything is in one place and easy to track. All you have to do is review the PO and submit it to your vendor.
You can also select different rules for different stores. Let’s say you have two physical locations (Stadium Store and City Store) and an online store (nmbr1fan.com), and each store carries and orders their own inventory.
Team Pompoms might sell more quickly at one location than another. If that’s the case, you can set up a rule for each store. Stadium Store can automatically reorder 100 Team Pompoms when it reaches an on-hand inventory level of 25, but City Store can automatically generate a PO for 15 Team Pompoms when it reaches an on-hand inventory level of 5.
To set this up, go to Inventory, then Stock Control, and Order Stock.

From here, select a supplier, store branch to receive the delivery, delivery date, and details of the product you wish to order. You can search for individual products or import a list via CSV file.
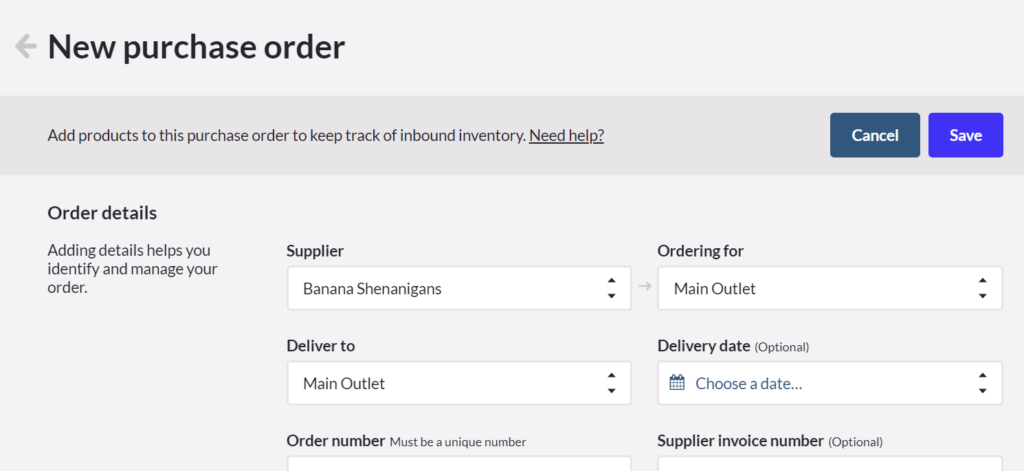
When you are done filling in the details, save your changes. The purchase order will then be recorded into the POS system.
To set the quantity level at which the system recommends you send out a purchase order for more stock, select a product and, go to the Edit Product screen, then click the arrow beside Variants to find the appropriate field to fill in. Then, specify the quantity level at which a re-order will be suggested.
Step 4: Receive Inventory With Lightspeed POS
Inventory shrink happens for many reasons, including administrative errors, vendor error, and fraud. Assuming you’re submitting accurate POs, delivery of the inventory is the first point at which you can identify those costly errors.
It’s important to make sure you receive the correct products, quantity, price, and quality from your vendors. You can perform these checks with your Lightspeed POS.
Tips for Receiving Inventory
- Review each invoice. Confirm purchase order, invoice, and shipment match.
- Immediately note any and all inconsistencies between PO, invoice, and shipment.
- Resolve any discrepancies with your suppliers before paying the invoice.
- Report discrepancies to your vendor within 24 hours to explain and correct the invoice.
- Update inventory counts before storing or stocking the inventory.
When you follow these tips, you’ll know exactly how much inventory is coming into your store and prevent paying for extra items or items you didn’t receive. For more tips like this, read our guide to inventory shrinkage.
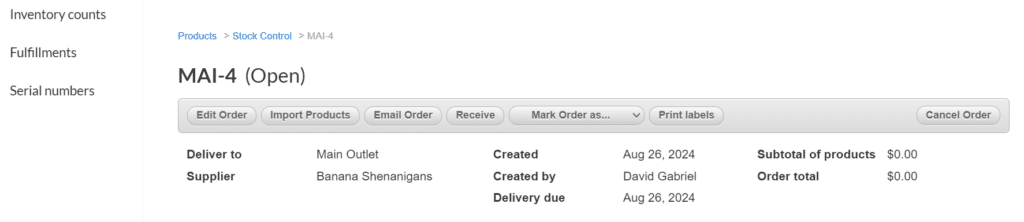
When you receive a delivery, you can check your items by going to “Inventory,” then selecting “Stock Control.” Click on the relevant order number, and then “Receive” at the top.
At this point, you’ll be prompted to confirm the supplier’s details and enter the amount of inventory that you are receiving. This allows you to have a record of whether you received the entire shipment of stock from the supplier. You can also edit the price of the items if you wish.
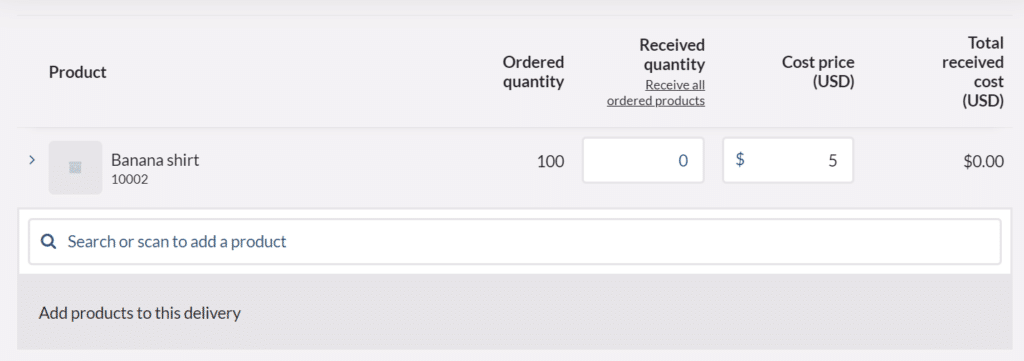
When receiving stock, you can confirm how many items you received from a supplier as well as the cost price.
Once you have confirmed all the details and quantities, click “Receive” to log the inventory in your POS. Be sure that you really want to log this inventory as received, because you cannot undo this action. You can then check your inventory levels to see the added stock.
Step 5: Tag Inventory: Label Inventory & Stock the Shelves (Optional)
Your inventory may come with its own barcodes. If that’s the case, you might just need to add a price tag with your logo on it, and the product is ready to sell.
However, if you’re selling your own or others’ craft products, your inventory likely won’t come with barcodes. You can create and print your own unique barcode stickers. A Zebra Label Printer will work well, but others are compatible as well. We’ve put together a guide to the best barcode printers for your small retail business.
Tagging your inventory now will save you tons of time in the future. During customer checkouts, your associates just need to scan to get pricing info and automatically adjust inventory counts accordingly. You’ll also save time during physical inventory counts when all you have to do is scan an item with a Bluetooth barcode scanner.
Step 6: Conduct Physical Inventory Counts
One of the greatest advantages a modern POS system provides you is a current, accurate inventory count based on sales. Naturally, you have the same advantage with Lightspeed.
To conduct an inventory count, go to “Inventory,” and then “Inventory counts.” If you are starting a new inventory count, select “Add inventory count.”
You can choose to start a count immediately or set a schedule for a future count. You’ll also be able to choose which store outlet the count applies to, select a name for the count, and determine whether it will be a partial or full inventory count. These details will make it easier to keep track of when and where specific counts were completed.
To learn how to conduct cycle and annual inventory counts, read our guide to retail inventory management.
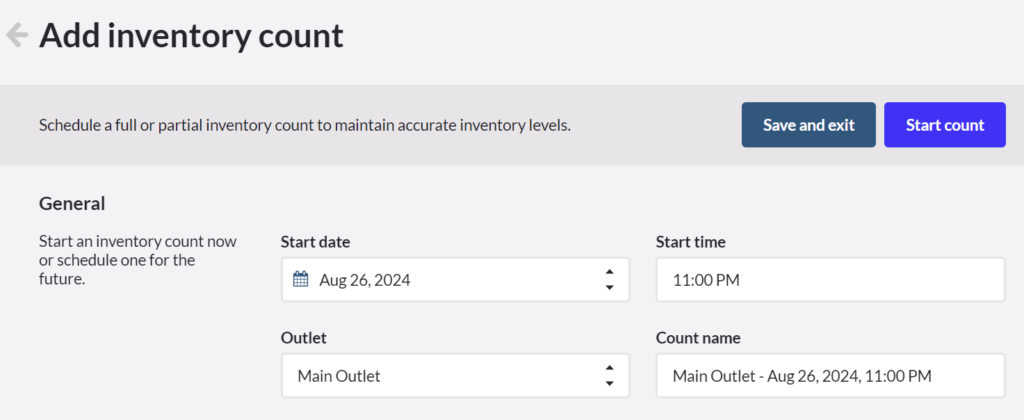
When starting a new inventory count, you can select the date, time, and outlet for which the count applies.
You can use Lightspeed’s Quick Scan mode to quickly add items to your inventory count by scanning their barcodes. Using a barcode scanner is a lot faster than manually searching for products, so this is a great option for getting the count done quickly. Alternatively, you can use the barcode to look up an item’s SKU and then enter and submit the count number manually.
Finally, you can review an inventory count after it has been completed, letting you see any inventory discrepancies quickly. You can also generate a PDF or CSV report of the inventory count.
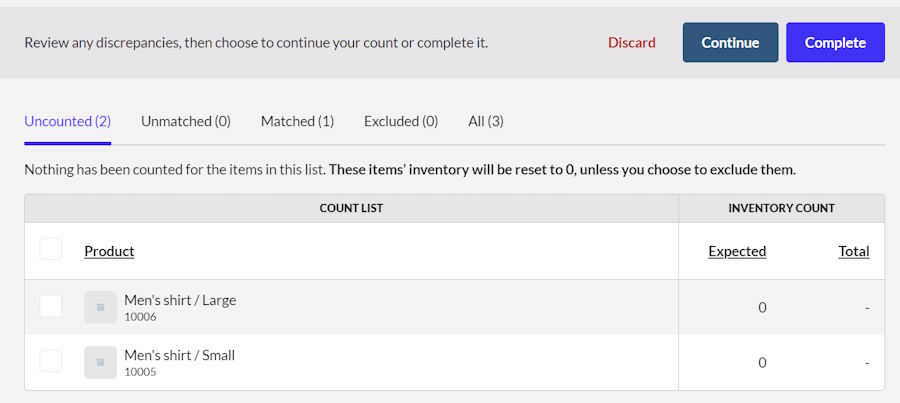
You can view uncounted products (such as those not in stock), and note any discrepancies.
Step 7: Reconcile Differences
Once you’ve completed your physical inventory count, you’re ready to reconcile. In a perfect world, there would be no differences between what you physically counted and what your POS had listed as stock on hand. If there are, now’s the time to account for that.
After exploring the Lightspeed POS dashboard, I was unable to find a way to reconcile inventory discrepancies automatically or from inventory count reports. However, you can reconcile these differences via manual stock adjustments.
Go to “Inventory” and then “Stock Control.” Click on “Receive Stock.”
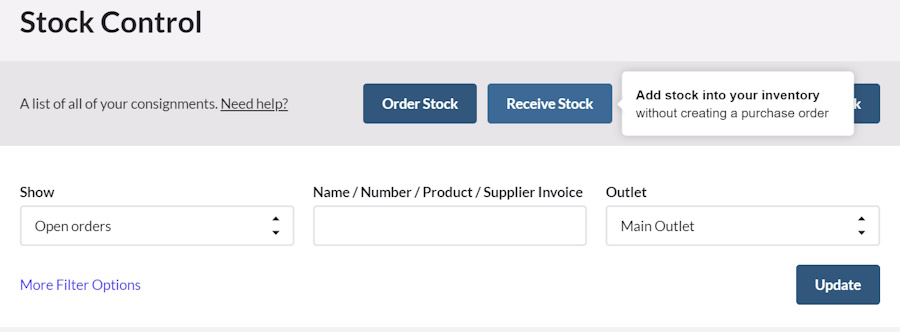
Lightspeed gives you the option of adding stock into your inventory without a corresponding purchase order. You can use this option to reconcile inventory count discrepancies.
Similar to ordering stock from a supplier with a PO, you’ll be able to choose a supplier, delivery date, and the specific items and quantities you wish to add to your inventory. Once you confirm the inventory receipt, the items will be added to your stock and you’ll get a summary report.
You can also manually reduce stock levels to account for damage, shrinkage, or expiration. From the Products option under Catalog, click on “Adjust inventory” for a particular product. Select a variant if necessary, and then specify a new quantity as well as the reason for the reduction.
Frequently Asked Questions (FAQ)
Click through the sections below to learn more about POS inventory management.
A very brief summary of the steps is as follows: Add your products manually or via import, create and submit purchase orders as needed, receive and label inventory, conduct regular counts, and know how to reconcile count differences.
Lightspeed software is a complete point-of-sale system that lets you process transactions; manage employees, inventory and vendors; count and order stock; and generate reports.
Lightspeed’s interface is not the simplest or most intuitive around and can take some time to get used to. There is also no free subscription available, and the pricing can become expensive for small businesses, especially for the higher plans.
Bottom Line
Lightspeed POS and other modern POS systems can revolutionize the way your small business manages inventory. For many small businesses, inventory management is the one area where people are still using the same technology and methods used generations ago.
Upgrading to a new POS system with Lightspeed is quick and easy since the platform is intuitive and powerful. If your small business is moving any kind of product in volume, this is an easy way to save yourself time and money. It will pay you dividends day after day, quarter after quarter, year after year. Sign up for its free 14-day trial.