Visual merchandising is the practice of displaying your product and organizing your store to drive sales, enhance your brand, and provide a stimulating and enjoyable shopping experience for customers. This article outlines a dozen game-changing visual merchandising techniques and how to implement them in your business.
Key Takeaways
- Use visual queues: Color, lighting, signage, and blank space all help set the tone for your store and draw attention to your products.
- It all starts with your layout: Your floor plan controls traffic flow and sets the stage for the shopper experience.
- Make it easy to buy: Signage, point-of-purchase displays, seasonal product placement, and a clean, well-organized store with clear aisles allow shoppers to focus on buying.
1. Direct customer traffic with your store layout
Your store layout — the strategic arrangement of shelves, fixtures, and furniture — guides how customers move through your retail space. An effective layout naturally directs shoppers toward featured products, keeps them engaged, and makes their experience enjoyable. Ultimately, it can influence the story your store is telling and the sales you can generate.
To display your product more effectively, here are five actionable and strategic store layout tips:
- Create clear pathways: Ensure aisles are wide enough for comfortable browsing and lead customers toward key displays or featured items.
- Use focal points strategically: Place best-sellers, new arrivals, or seasonal items in highly visible areas like entrances and checkout zones.
- Observe customer movement: Watch how shoppers move through your store to identify popular areas and opportunities to better direct traffic flow.
For more detailed information and guidance on how to plan your store layout, check out our article on planning your store layout.
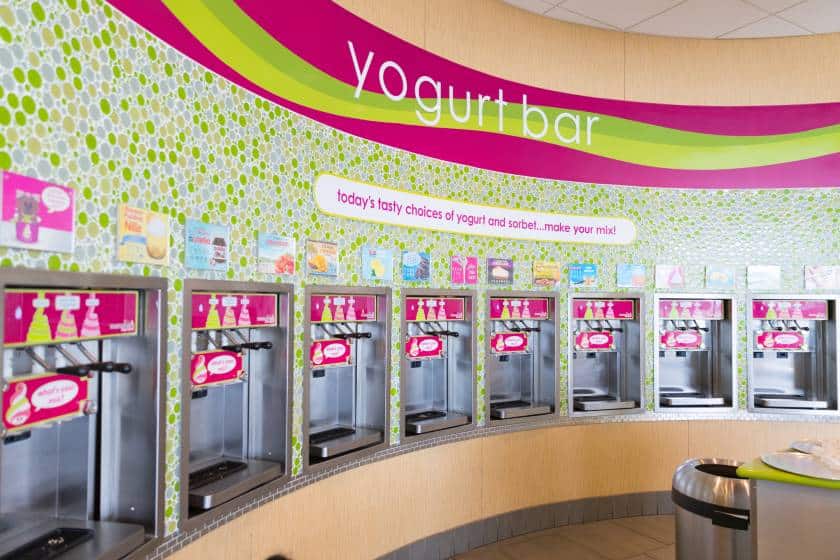
2. Use color to create a cohesive visual experience
Colors play a huge role in retail visual merchandising because color psychology shows customers respond differently to specific color palettes.
Here’s how to use color in your visual merchandising displays:
- Use colors to direct shoppers’ attention to where you want them to take notice. For example, bright, light colors draw the eye more than darker ones. So use eye-catching bright colors to highlight specific products and darker shades to keep the eye moving.
- Limit the number of colors you work with to create a harmonious visual experience. Most brands work with three to four hues at a time, with variation within each color.
- Choose a palette that matches your business and sales objectives. For example, let’s say you are a pet supply store, and you want your brand to be family-friendly and evoke images of animals and nature. You might want to stick with earth tones and greens, as these hues elicit associations with nature and comfort.
Scroll through the slides to see visual merchandising examples showing this technique:

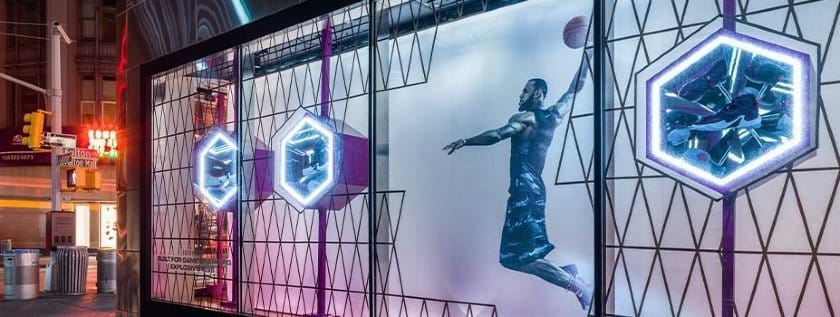
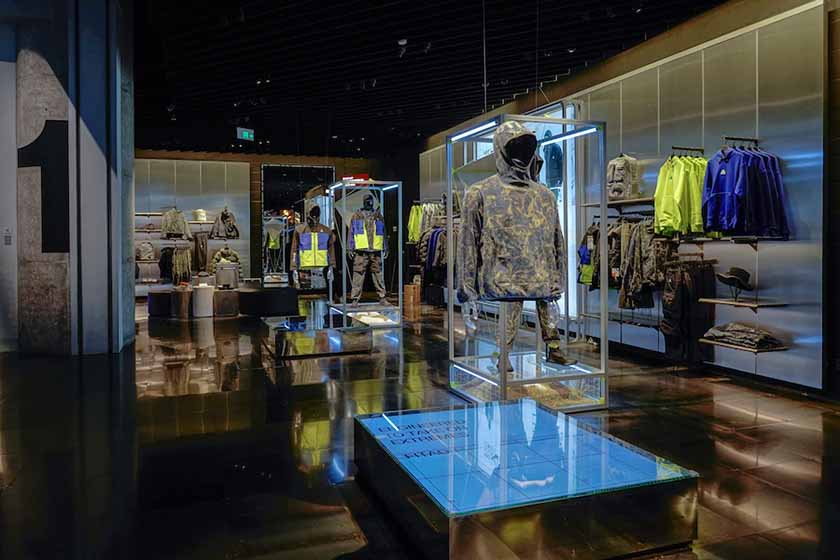
3. Adopt lighting techniques to feature merchandise and set store ambiance
Like color palettes, proper lighting techniques help draw shoppers’ attention to specific parts of your store or display. Lighting can also influence the mood and behavior of your store visitors. When done right, lighting can significantly improve your in-store experience and drive sales.
There are four primary types of store lighting that you need to include in your store: ambient, accent, task, and decorative lighting.
- Ambient lighting: This is your main lighting source, providing consistent illumination throughout the store. Good ambient lighting makes your space inviting and comfortable, encouraging customers to spend more time shopping.
- Accent lighting: Use accent lights to spotlight featured products, special displays, or key areas in your store. This directs customers’ attention precisely where you want it.
- Task lighting: These lights support specific activities, like checkouts, fitting rooms, or workspaces. Proper task lighting ensures these areas are functional and comfortable for both customers and staff.
- Decorative lighting: Decorative lighting serves aesthetic purposes, adding style or personality to your store. For instance, trendy neon LED signs featuring your brand’s name or slogan can boost visual interest and reinforce branding.
Here are a few quick visual merchandising tips to effectively layer lighting in your store:
- Highlight key products: Place your featured or best-selling items under brighter accent lights to instantly draw attention.
- Use lighting to create mood: Bright lighting conveys energy and urgency, ideal for promotions or new arrivals, while softer lighting creates a relaxed atmosphere that encourages leisurely browsing.
- Be intentional with color temperature: Warm lights evoke a cozy, welcoming environment, whereas cool lights suggest modernity and spaciousness.
- Regularly adjust lighting setups: Experiment with intensity and angles, periodically updating lighting to match seasonal changes or new product displays.
- Observe customer reactions: Pay attention to how shoppers respond to your lighting arrangements and adjust based on their behaviors to boost engagement and sales.
Here are examples of visual merchandising displays that use retail lighting to their advantage:

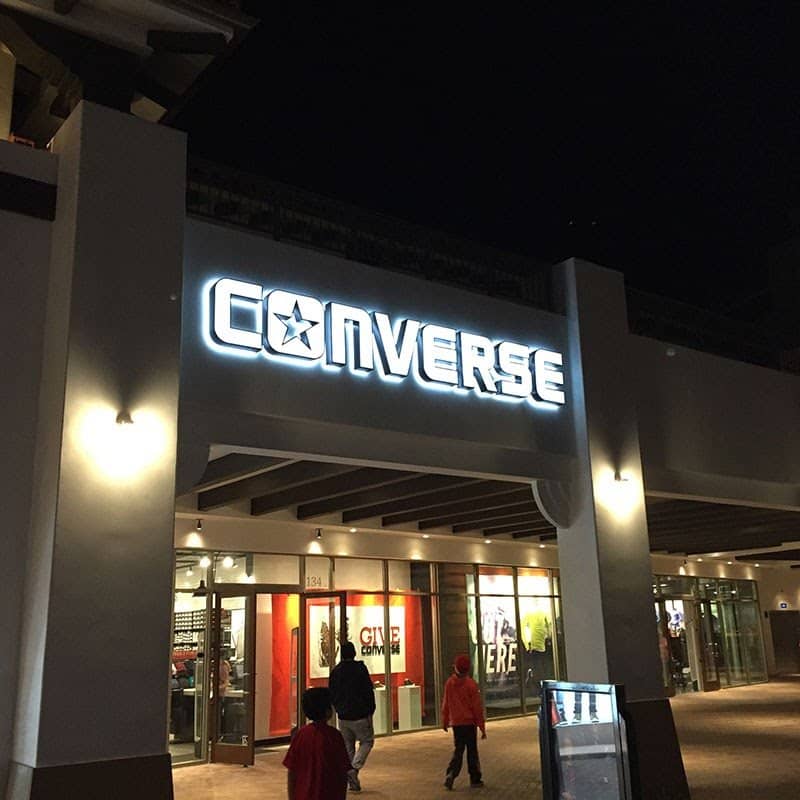
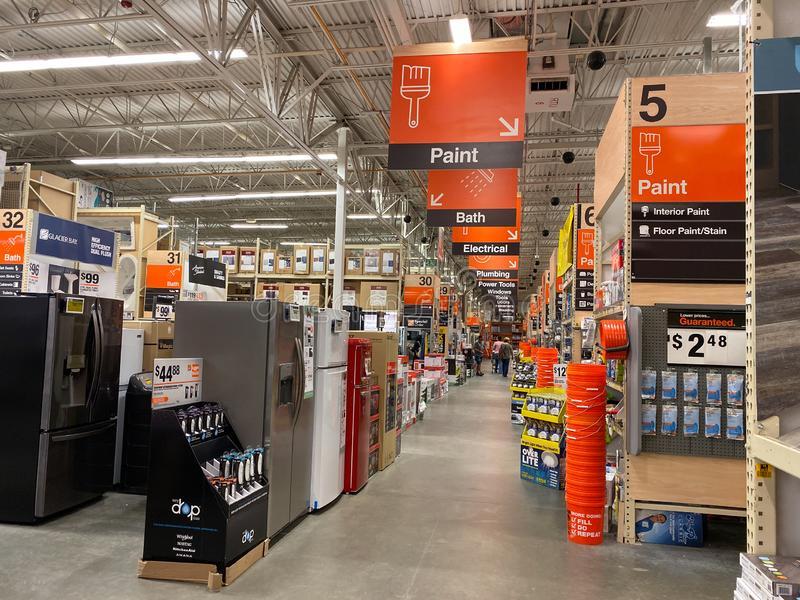
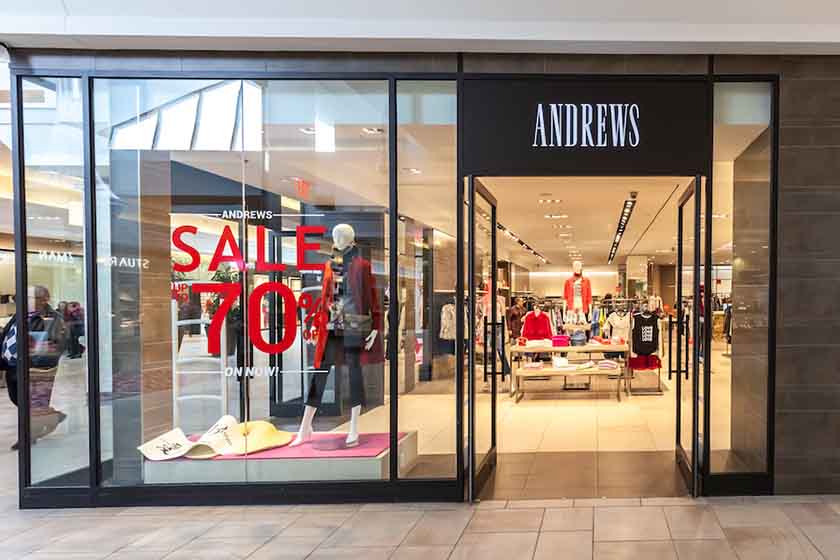
4. Use signage to guide and inform customers
Effective signage can enhance your brand image, highlight products or features, guide your customers to specific items, and share information with your shoppers. Just like price tags, clear and well-placed signage is crucial for boosting sales in your store. Types of signage include promotional signs, window displays, wayfinding signs, and safety notices.
There are a few major dos and don’ts when designing and placing your signs.
Follow these tips to maximize your signage’s impact:
Dos:
- Keep signage concise: Clearly and briefly communicate the intended message.
- Include a clear call to action: Encourage shoppers to buy, explore, or learn more.
- Make it visually appealing: Capture attention using attractive colors, fonts, or graphics.
- Use signage purposefully: Every sign should inform, persuade, or promote specific items or actions.
- Place signage strategically: Put signs at eye level and on your store exterior to attract attention.
Don’ts:
- Avoid clutter: Don’t overwhelm customers with too much information on one sign.
- Don’t leave questions unanswered: Ensure signs provide clear and accurate details.
- Avoid poor placement: Never position signs too low, hidden, or in hard-to-see spots.
- Don’t use signs as space fillers: Every sign should have a clear purpose and function.
Here are great examples of how signages contribute to visual merchandising:
Exterior displays are all about capturing people’s attention and intrigue; they will often be the boldest visual display in your entire storefront. Think of your exterior signage as the greeting your business gives out into the world. Is it inviting enough to beckon the passerby inside?
Want to learn more about exterior displays? Read our guide to designing storefront signs.
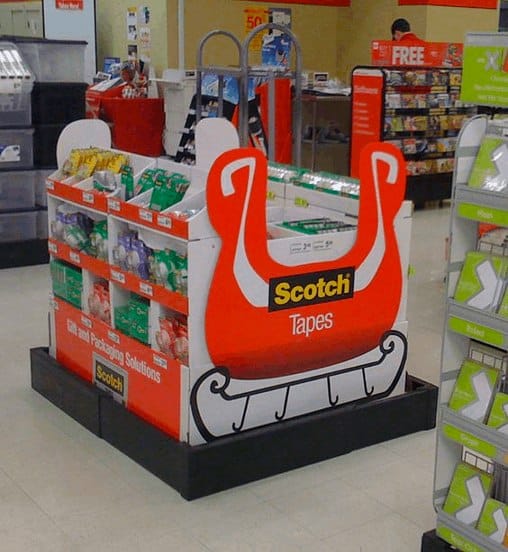
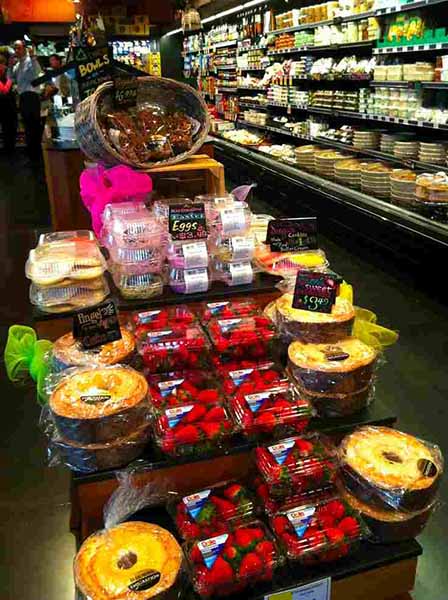
5. Highlight products with point-of-purchase (POP) displays
POP displays are temporary digital or physical displays located around products you want to draw attention to or advertise. Since an average person retains 65% of visual information after three days — far more than auditory information — placing POP displays can significantly increase message retention.They are a great way to create a visual stimulus around a product and make customers engage and remember your store.
POP displays can promote product features, showcase deals, break up clutter, or draw attention to an exciting item. They are also great for breaking up clutter in high-volume product areas, filling open spaces, and guiding customers through your store.
Here are some visual merchandising guidelines when working on your POP displays:
- Choose products strategically: Highlight best-sellers, new arrivals, or slower-moving items you want to promote. POP displays can help boost their visibility and sales.
- Make designs attention-grabbing: Use bold colors, appealing imagery, and clear messaging aligned with your store’s brand identity.
- Place displays thoughtfully: Position POP displays in high-traffic areas, near checkouts, or in spots with monotonous shelving to break up visual repetition and maintain shopper interest.
- Keep messaging simple and clear: Customers should quickly understand the benefit or promotion being offered without needing to ask questions.
- Regularly refresh displays: Update POP displays frequently to keep customers intrigued and encourage repeat visits.
Take a look below at some great examples of POP displays:
For more information on how POP displays can work for you and other pop-up display options, check out our article on different display options.
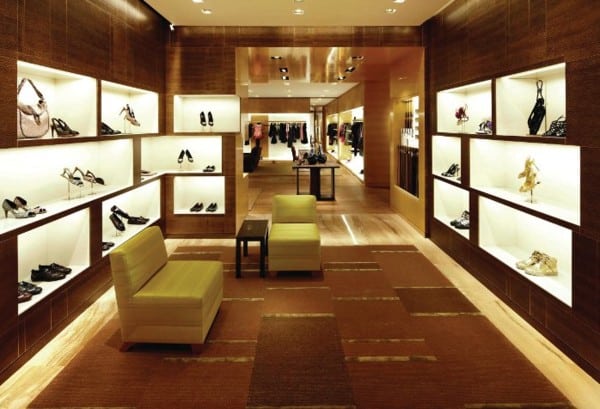
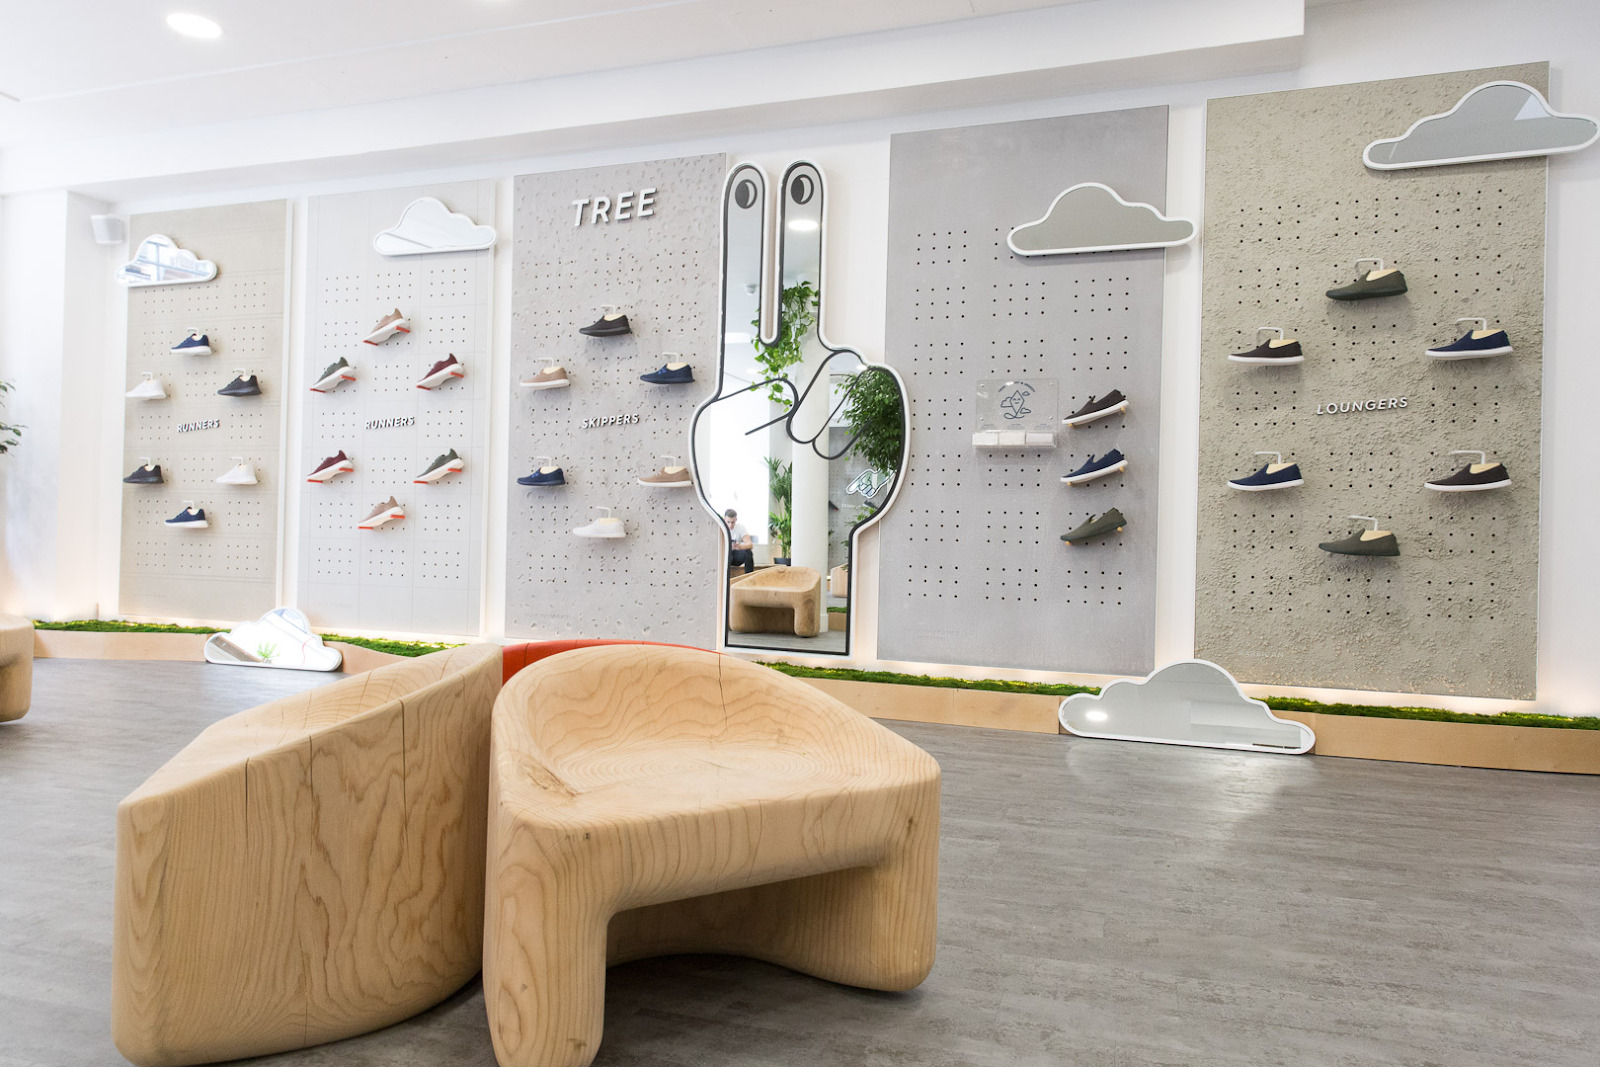
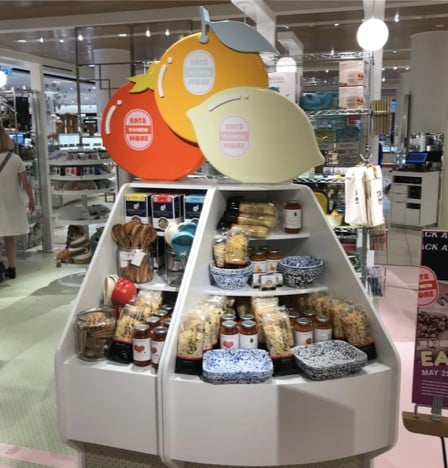
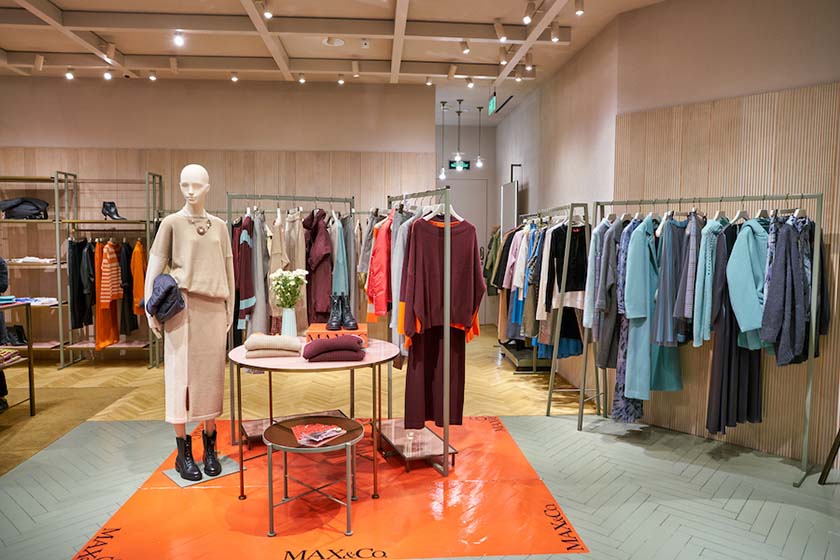
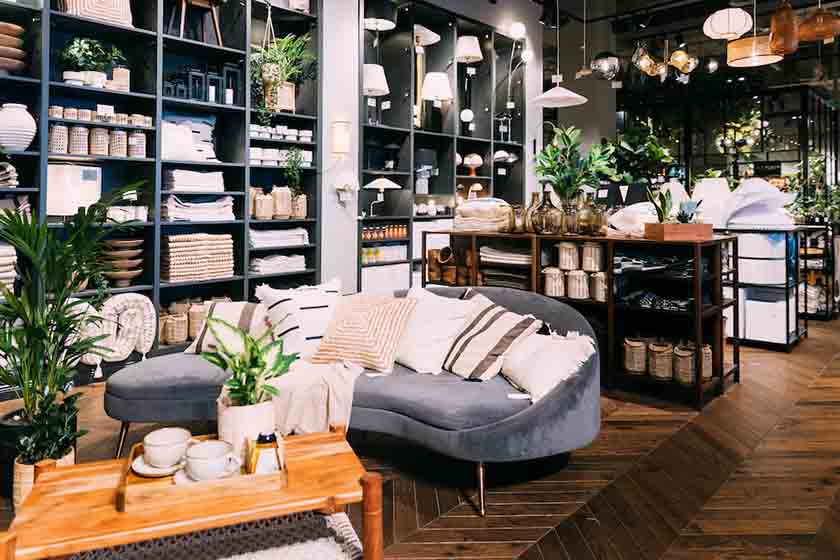
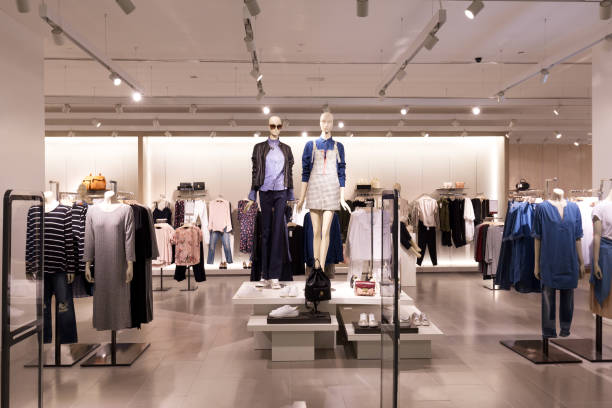
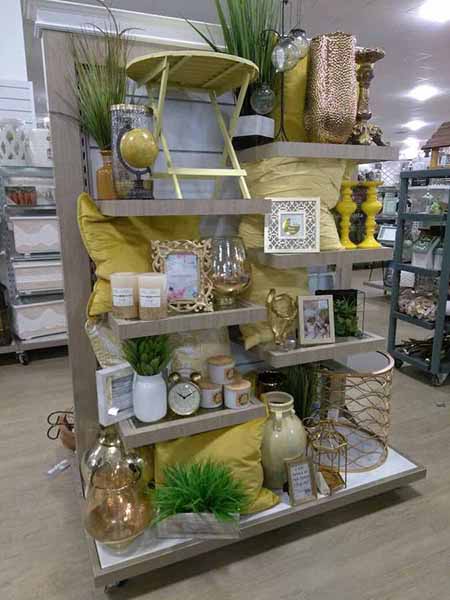
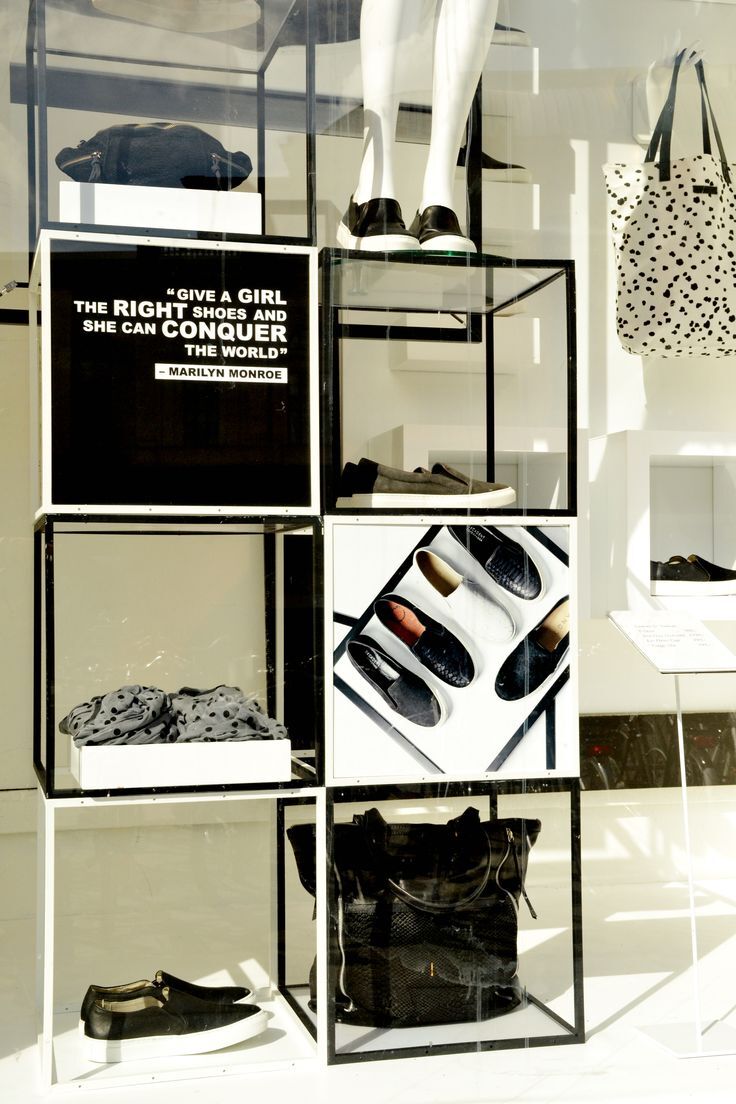
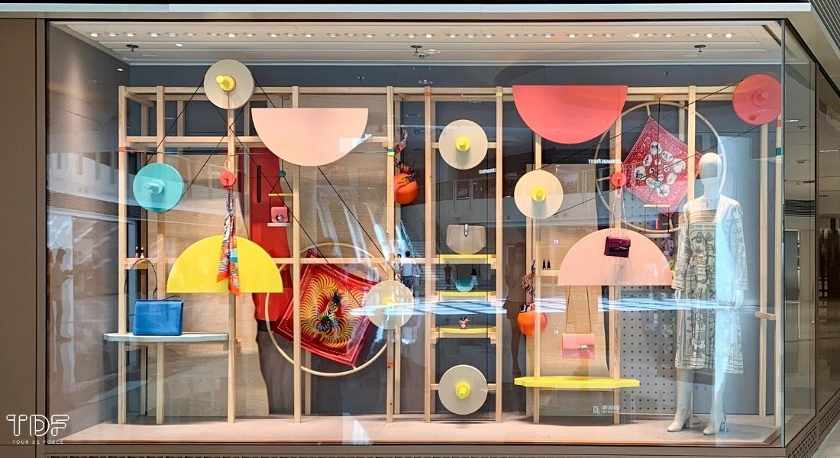
6. Guide customers with focal points.
Retail focal points are deliberate visual arrangements to create a sensory impact, with the ultimate goal of influencing purchasing behavior. Focal points do not necessarily have to be overt ads like POP displays. They can also be design features that create a narrative for your customer, like a group of mannequins, a piece of wall art, or a table display. These focal points create visual interest and promote customer involvement without creating a shoppable space.
When figuring out how you want to place your focal points — and what you want them to be — you will need to consider three main things:
- Traffic flow: Focal points will draw customers in and make them engage with the store area in which they are located. Consider what areas of your store you want customers to engage with. Avoid spaces that can’t accommodate high traffic or direct customers out of your store.
- Functionality: Figure out the kind of focal point you want. Will they be ads or exclusively aesthetic? Will they be shoppable displays or simply visual? This will largely come down to how much space you have for unshoppable or aesthetic areas and whether you want to create a more overt ad or a display geared toward just visual appeal.
- Design: Consider how your focal points fit into the rest of your store and your brand. Does this display improve the shopping experience or impede on your space? All in all, you want to determine your display’s utility and how it works with the rest of your merchandising and branding.
Take a look at how these retailers created focal points in their stores:

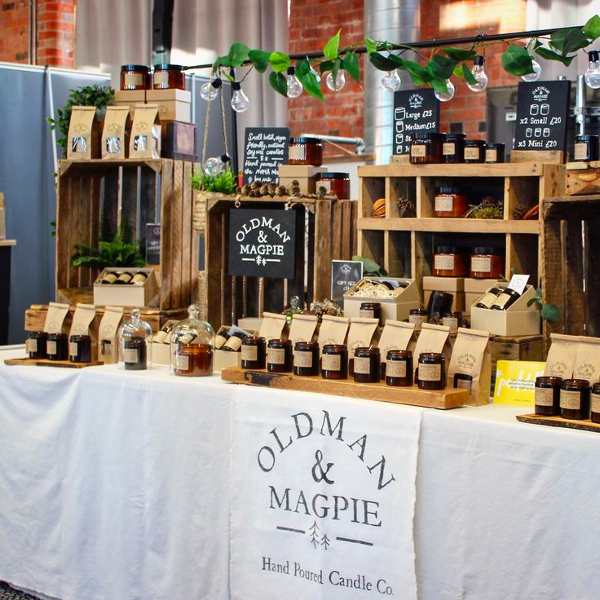
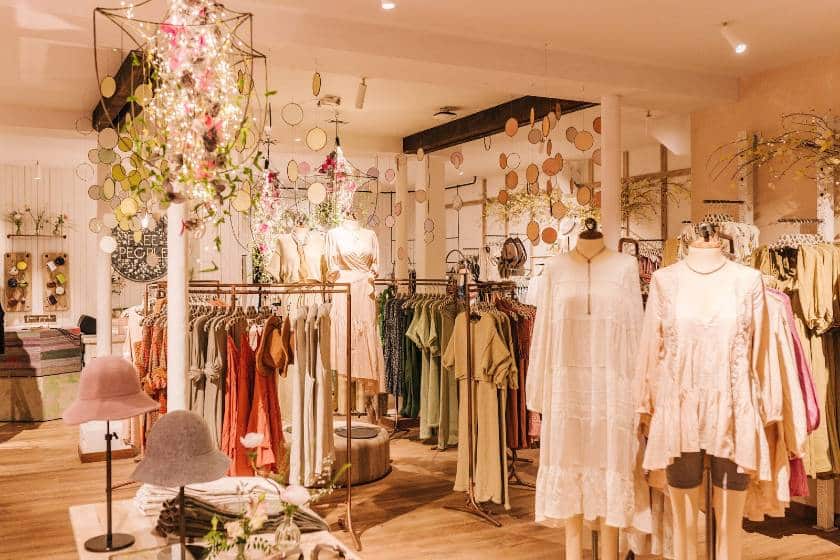
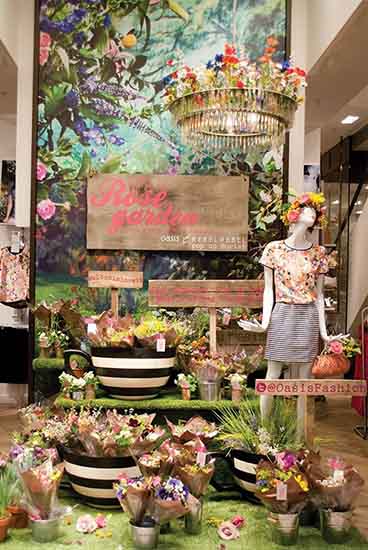
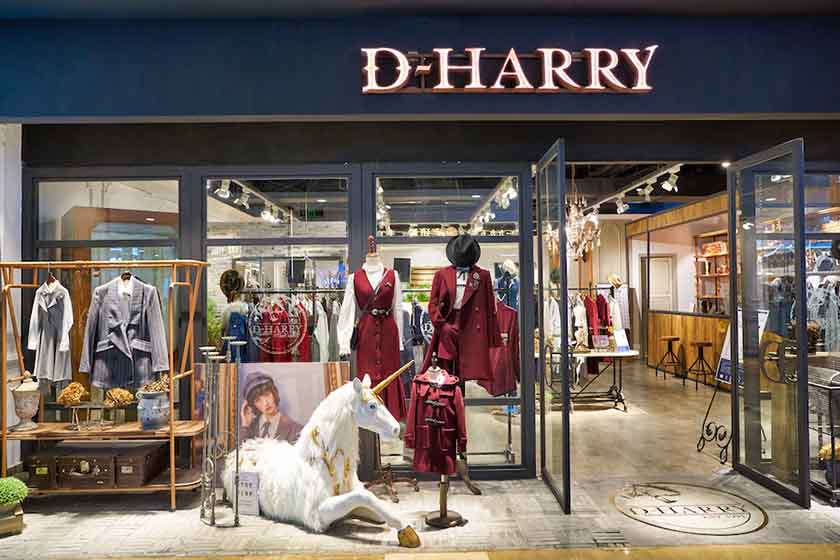
7. Tell a cohesive brand story
At the end of the day, you want your business to tell a story about who you are, what you stand for, and what people can expect from you. Customers crave this narrative — they want to understand and assign meaning to the places they shop. This is where storytelling comes in.
Think of your business’s story as the way you want your customers to describe your store when they talk about it to a friend. To best tell your story, ensure that each merchandising element makes sense as part of a complete visual narrative. Cohesion plays a major role in creating a discernible story.
For example, if you were starting a gardening store, you might want customers to walk away feeling like they just left a quaint English country garden or maybe a luxurious chateau estate. Both of these stories require different merchandising strategies to make them clear, but if merchandised effectively, they would leave customers with a clear picture of who you are and the story you are telling.
A great example of effective storytelling via merchandising is the brand Free People. When customers walk away from a Free People storefront, they are left feeling like they just experienced a girly, bohemian escape. Pale colors, soft lighting, whimsical decor—everything fits into Free People’s girly-boho narrative.
Not only that, but Free People’s visual merchandising story is perfect for the brand. Its customer demographic is primarily young girls and its clothing leans toward bohemian style. Thus, Free People’s story is in line with both its customer base and product.
Take a look at how Free People told their brand story through visual merchandising:
Here’s how to effectively build your brand story through visual merchandising:
- Define your narrative clearly: Decide exactly how you want your customers to feel when they enter and leave your store, and create a merchandising strategy that evokes that experience.
- Stay consistent: Every element, from lighting to signage, should align visually and thematically to avoid confusion and reinforce your story.
- Know your audience: Your merchandising strategy should resonate with your target customers’ style, interests, and lifestyle.
- Create immersive experiences: Make it easy for customers to imagine themselves within your brand’s narrative through thoughtful, consistent visual design.
- Regularly review your store: Step back occasionally and ensure each merchandising element supports your intended story and customer experience.
8. Leverage product placement to drive sales
Thoughtful product placement guides customers toward specific items, encourages impulse buys, and ultimately increases your store’s sales. Whether it’s an elaborate focal-point display or simply placing popular items at eye level, strategic product placement helps shoppers easily discover products you most want them to buy.
Here are some key product placement strategies to consider:
- Cross-merchandise complementary items: Putting commonly used items in the same area increases the likelihood that shoppers will purchase multiple products, like pairing coffee mugs with gourmet coffee beans.
- Place premium items at eye level: Boost sales of higher-priced merchandise by placing it where customers naturally look first. Less expensive options can be displayed above or below eye level.
- Use checkout areas for impulse buys: Stock your cash wrap with small, inexpensive products customers are likely to grab quickly, driving up your average transaction value. We have a comprehensive guide on setting up your cash wrap to drive more sales.
- Pair slow sellers with best sellers: Attract attention to less popular items by placing them close to your most successful products to increase their visibility.
- Position key items at store entrances and rear: Place your top-selling or most appealing products near the front to draw shoppers in, and strategically position others toward the back to encourage customers to explore your entire store.
Take a look at how these retail businesses leveraged product placements in their stores:
Here are some bundling product display examples:
Related:
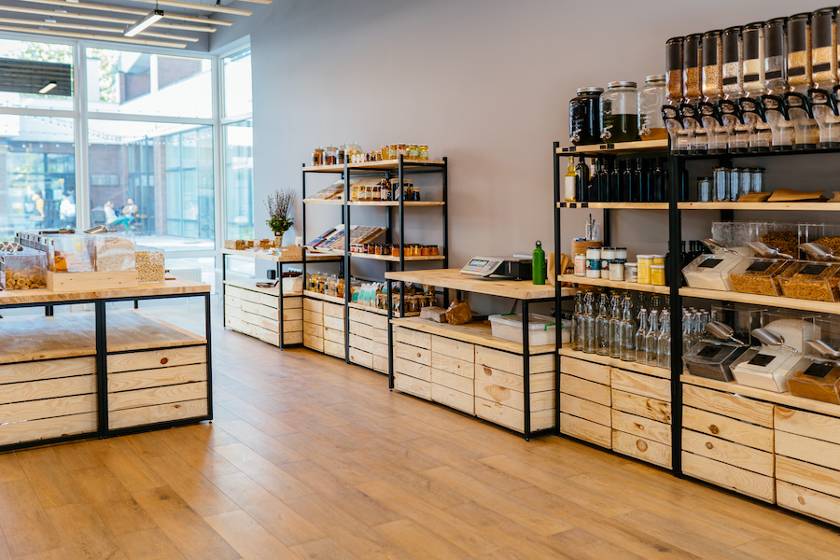
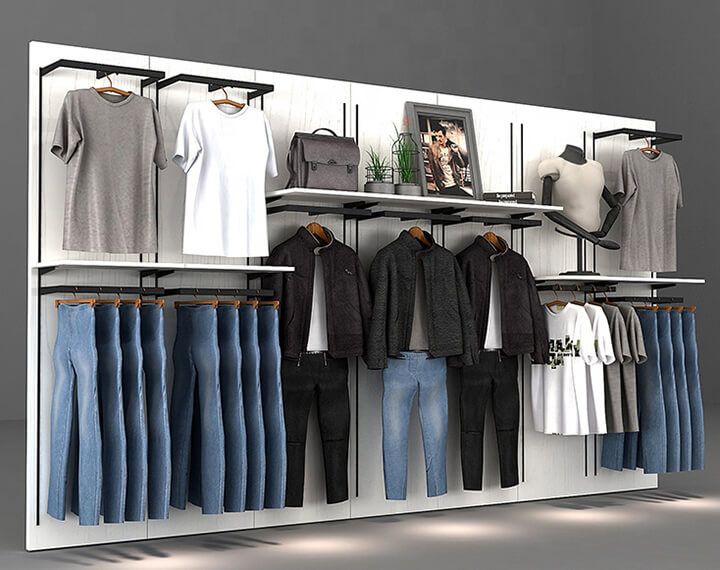
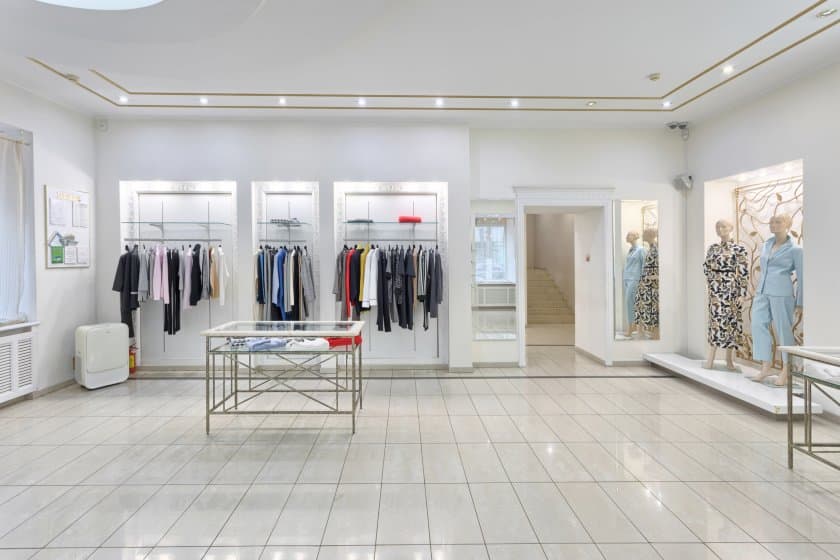
9. Use white space to increase product exposure
In retail, customers often relate space with luxury — the amount of space in a store and in between products conveys volumes. Just notice how luxury brands put a lot of space between displayed merchandise and how discount retailers tend to overfill their shelves with items.
Known as white space, these intentional gaps reduce clutter, highlight key items, and create a sense of exclusivity or importance. Apply white space strategically: use it generously around featured or limited items, keep some corners intentionally empty, and ensure all displays, windows, and checkout areas maintain clarity. During sales, you can increase product density slightly, but always prioritize neatness to avoid overwhelming shoppers or causing them to miss important products.
What if your store is limited to a small space? Don’t fret, here are some best practices for visual merchandising in small spaces:
- Prioritize vertical space: Use vertical shelving, wall-mounted fixtures, and hanging displays to maximize your limited square footage.
- Be strategic with product selection: Curate merchandise carefully, highlighting best-sellers, exclusive items, or seasonal products to avoid overcrowding.
- Create clear sightlines: Arrange fixtures and displays to keep the store visually open and inviting, preventing clutter and improving customer navigation.
- Utilize multifunctional furniture: Invest in fixtures that serve dual purposes, such as storage benches or movable display units, to optimize functionality and flexibility.
- Keep it neat and organized: Regularly declutter and tidy up your space, as cleanliness and simplicity enhance perceived space and elevate customer experience.
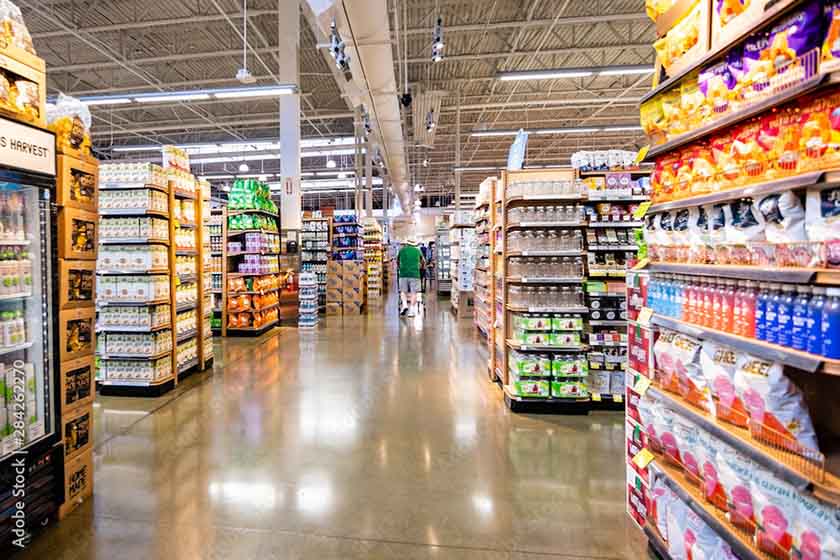
10. Organize your space to make shopping easy
An organized retail environment is foundational to effective visual merchandising. It enables customers to quickly and easily find what they’re looking for, reduces frustration, and significantly improves their shopping experience. Thoughtful organization also benefits your staff, streamlining store management and product restocking.
Organizing your storefront starts with creating a system for categorizing and displaying your products. This will largely depend on the type and volume of your products and the space you have to display them. For example, where a grocery store with lots of space and merchandise might want to use a categorical organization system, a clothing boutique with fewer items and less space might want to use color categories.
Be deliberate yet flexible — don’t hesitate to experiment with multiple approaches. The ideal organizational system will emerge through observation and adjustment, reflecting your customers’ shopping habits and your store’s unique requirements.


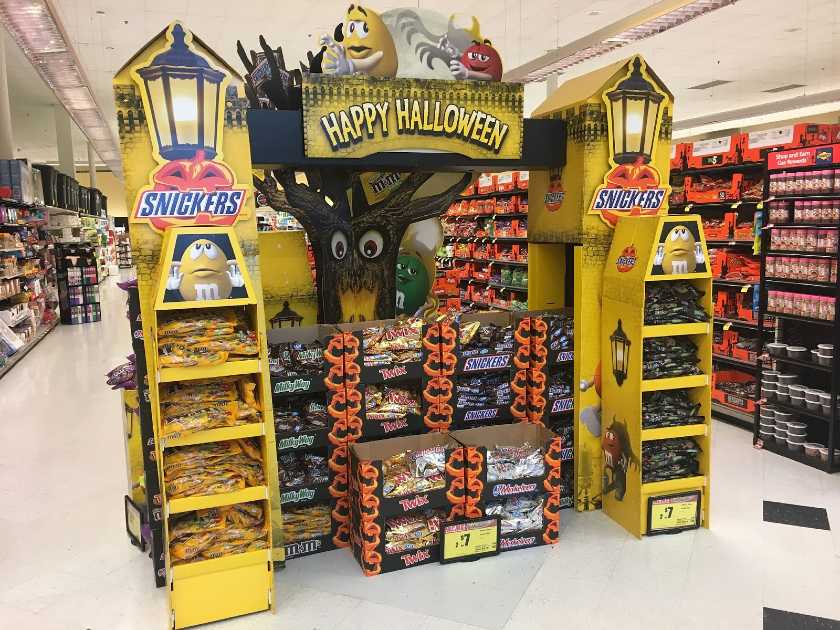
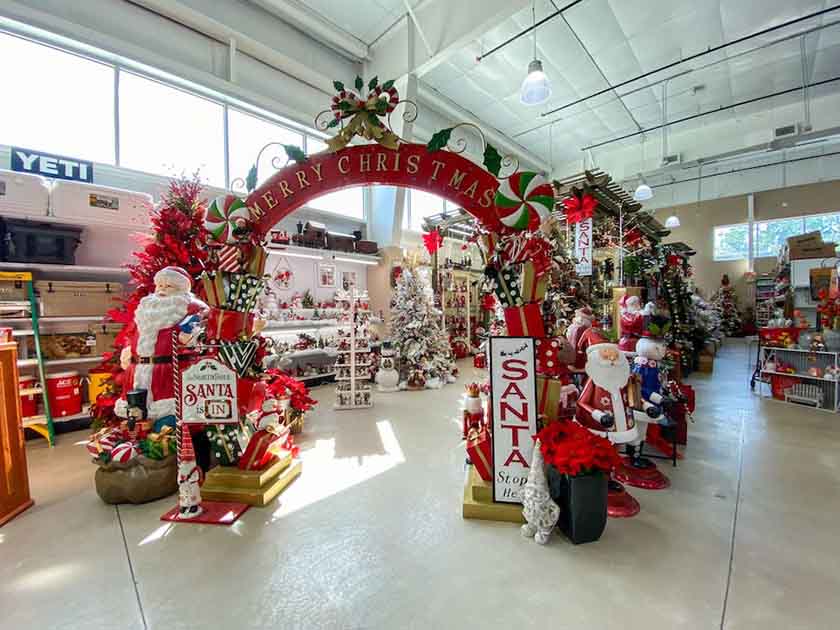
11. Connect with customers through strategic seasonal displays
Seasonal displays keep your store relevant and appealing by aligning your merchandise with your customers’ current interests, sentiments, and purchasing behaviors. From holidays to seasonal shifts, thoughtfully designed displays — whether they’re focal points, window decorations, or carefully chosen music — create meaningful connections that inspire purchases.
It doesn’t have to be complicated. Most retailers just let one seasonal display replace another during its window of relevance rather than redoing an entire section of their store.
There are a few things, however, to consider when using seasonal displays:
- Timing: While you want to maximize the time that seasonal displays are effective, you do not want to put them out too early. Get a feel for when the community and other businesses bring out their seasonal displays so you don’t pull yours out too far in advance.
- Consistency: Don’t let your seasonal display exist in a vacuum. Adding more than one display or small decor pieces throughout your store will make the seasonal displays feel less gimmicky and more celebratory.
- Relevancy: Your brand or market specifically might benefit from highlighting a time of year. For example, for a health and wellness business, advertising cold and flu season or New Year’s resolutions through seasonal merchandising might help make its products more relevant to customers and help people understand the importance of its business at that moment.
Take a look at some virtual merchandising examples using seasonal displays:
12. Entice shoppers inside with engaging window displays
Your window display is a powerful visual merchandising tool, serving as the first point of contact between your store and passing shoppers. Done well, it captures attention, piques curiosity, and compels customers to step inside.
Whether you’re showcasing your best products, highlighting special promotions, or creating an artistic installation, your window display should provide a clear and appealing glimpse of what customers can expect inside your store, without misleading them.
Here are some ways to be strategic with your window displays:
- Remember that your window is one part of your overall store design. Make sure it matches your store’s overall decor, style, and branding once a customer is inside.
- Redesign your window displays often. Keep up with trendy themes, but still keep the previous point in mind.
- Show off bestsellers and exclusive products to entice customers into making a purchase.
- Have fun with it! Window displays are one of the few places in visual merchandising where your display doesn’t have to be shoppable (though, it certainly can be!) and can entirely focus on visual appeal.
If you want to learn more about creating window displays that will make customers have to stop and shop, read our full guide to creating stunning window displays.
Here are some window display examples of great visual merchandising:
BONUS: Leverage digital integration in visual merchandising
Leveraging technology amps up your visual merchandising strategy as it can further engage customers with interactive experiences, personalized content, and dynamic presentations. Integrating digital elements into your displays not only captivates shoppers but also provides valuable insights to help you optimize your merchandising approach.
Here are some digital visual merchandising display techniques you can use for your store:
- Interactive displays: Use touchscreen kiosks or tablets to let customers explore product details, view options, or access promotions.
- Digital signage: Incorporate screens showcasing dynamic content like videos, special offers, or brand messaging, enhancing engagement.
- Augmented reality (AR): Allow customers to virtually try products, like clothing or home decor, using AR apps, creating immersive shopping experiences.
- QR codes: Include QR codes near products or displays to quickly direct customers to your website, product reviews, or exclusive offers.
Frequently asked questions (FAQs)
Click through the tabs to learn more about the most asked questions about visual merchandising techniques.
Visual merchandising is displaying products in a retail or digital space to highlight their features and benefits with the purpose of attracting, engaging, and motivating customers to purchase.
Branding, engaging the senses, and displaying products effectively are the basic elements of visual merchandising.
Retail product merchandising is displaying 1) the right merchandise, 2) in the right quantities, 3) at the right time, 4) at the right price, 5) in the right place.
The four elements of visual merchandising in a retail store are its 1) exterior (marquees, window displays, and entrance), 2) layout (selling space, personnel space, and display space), 3) interior (the store design like floor and wall coverings, fixtures, and lighting), and 4) display (the way of presenting merchandise).
Visual merchandising strategies involve thoughtfully arranging your store layout, product placement, lighting, signage, displays, and branding to enhance customer experience and drive sales. Effective techniques include using focal points, window displays, strategic product placement, and seasonal or themed presentations.
For online retail, visual merchandising includes clear, high-quality product images, compelling product descriptions, user-friendly website navigation, and personalized product recommendations. Engaging content, organized categories, and consistent branding throughout your site will also improve the customer experience and boost online sales.
Technology enhances visual merchandising through interactive displays, digital signage, augmented reality (AR) experiences, and smart analytics. These tools help retailers better engage customers, personalize shopping experiences, and gain deeper insights into shopper behavior.
Bottom Line
Visual merchandising affects every customer-facing aspect of your business. From your brand voice to customer experience to sales, visual merchandising is much more than just arranging products in an aesthetically appealing way.
Keeping all the techniques and tricks that this article reviewed in mind will allow you to create a storefront that is not only beautiful but also in line with what your business stands for and the experience you want to create for your customers.