





.jpg?w=288)


Weebly is an ecommerce website builder owned by payment processor Square. It is a leading website builder thanks to integrated ecommerce and affordable pricing. Customer reviews underscore its ease of use, the value vs pricing (starting from free), and extras, like its robust app marketplace. Weebly is the best website builder for small or startup ecommerce, as well as restaurants, and a top free website building option for hobbyists.
- True web design beginners
- Ecommerce startups and solopreneurs
- Restaurants
- Small businesses on a tight budget
- Digital portfolios
- Event-based businesses
- Bloggers
 |  |  |  |
|---|---|---|---|
| Best for site design, niche ecommerce, and SEO | Best for membership or subscription-based ecommerce | Best for large ecommerce or dropshipping | Best for online appointment booking |
| Free plan Paid plan from $16 | Free plan Paid plan from $4 | Paid plans from $39 | Free plan Paid plans from $11.99 |
| Visit Wix | Visit Dorik | Visit Shopify | Visit GoDaddy |
Get more options from our list of the best website builders for small businesses. Or, if you need a totally free site builder like Weebly, see which platforms offer the best ways to build a free website.
When to Use Weebly
- You’re a beginning web designer: With Weebly’s drag-and-drop builder or the Square editor (for ecommerce sites), you’ll get an intuitive, easy-to-use interface. See how to use the Weebly website builder and set up your website in five steps.
- You operate a restaurant: Weebly tops our list of the best restaurant website builders thanks to the ability for customers to place online orders for pickup and the Weebly Restaurant app (GloriaFood) for online reservations and unlimited online orders—all starting for free.
- You’re budget-conscious: Starting at $12 for ad-free plans, Weebly offers an affordable cost of entry. Plus, your plan includes your domain for the first year to save you more money.
- You’re building an ecommerce business: Weebly’s ecommerce capabilities are among the best and most affordable. It only takes eight steps to build a Weebly store—you can even do so on a free plan.
- You’re planning an event: Weebly has templates specifically for event-based operations, complete with calendars, RSVP and forms, registry pages, and maps.
- You’re an artist: Weebly templates and e-commerce simplicity make it ideal for building artists’ portfolios and stores–which is why it ranks first on our list of website builders for artists.
When to Use an Alternative
- You’re making a blog: Weebly isn’t the greatest for blogging as it limits the number of pages you can have. Instead, consider IONOS, Dorik, or Hostinger, all of which are on our list of the best blogging platforms.
- Booking appointments online: GoDaddy has a built-in appointment scheduler. With Weebly, you’ll need a third-party integration.
- Selling online memberships: Dorik has memberships built in at every level of service, including up to 3,000 members in its $48 per year plan. Weebly’s highest tier accommodates memberships, but only up to 100.
- You need a larger ecommerce solution: Shopify includes more shipping functionality than Weebly (and better dropshipping features), which is why it’s our best ecommerce platform.
Still not sure? Check out our list of the best Weebly alternatives to find the one best suited for your business.
Weebly Pricing & Plans
Click the tabs below to see what’s included with each of the Weebly plans:
Cost: $0/month
- Storage: 500MB
- Unlimited bandwidth
- SSL certificate
- Ecommerce
- Online ordering (in-person pickup)
- Automatic sales tax
- Coupons and gift cards
- Transaction fee: 3%
- Basic page and site-level SEO
- Instagram feed
- Lead capture forms
Cost: $10/month/annually or $13 month to month
Get everything in the Free version plus:
- Connect a custom domain (your site will still display Weebly/Square branding)
- Sell digital goods
- Shipping calculator and labels
- Pop-up notifications
Cost: $12/month/annually or $16 month to month
Get everything in the Free and Personal plans, plus:
- Remove Weebly ads
- Domain free for one year
- Unlimited storage
- Advanced analytics
- Password-protected pages (e.g., member or customer-only pages)
- Phone support
Cost: $26/month/annually or $29 month to month
Get everything in Professional, Personal, and Free plans plus:
- Item reviews
- Cart abandonment
- Advanced ecommerce analytics
- Memberships (up to 100)
- PayPal payment option
- Priority technical support
Weebly Features & Capabilities
Weebly includes robust ecommerce tools and features for online stores that want to build a strong brand presence. Powered by its parent company, Square, even the free version includes an exceptional ecommerce suite for building a store online. You can build your store on the free version and then upgrade to the ad-free version when you’re ready to launch, saving you some money during the setup process.
Click the drop-downs below to learn more about the features that place Weebly at the forefront of website builders:
Templates & Design
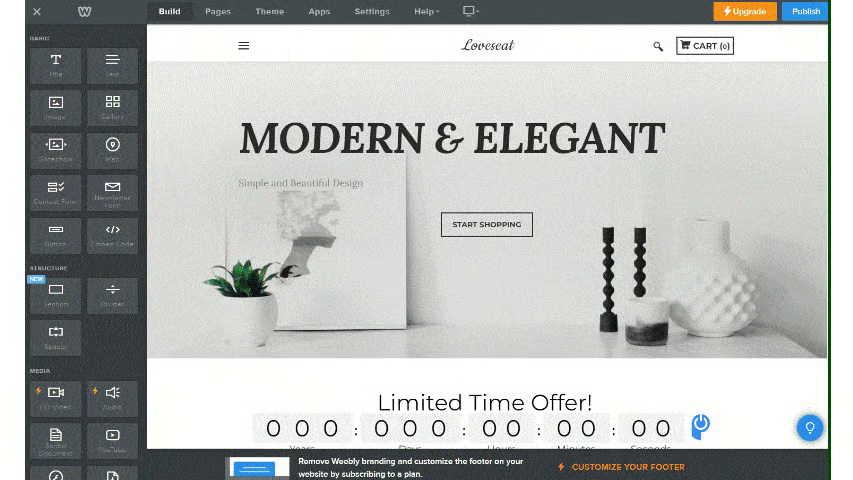
Weebly offers two editors: Weebly editor for a personal website and Square editor for a business website. Unfortunately, neither provides a significant level of design functionality.
Plus, it can be confusing to determine which to choose. The Weebly editor is “for personal sites” but includes the same robust ecommerce as the Square editor “for business sites.” The main difference is that with the Weebly editor, you get to choose a template and have access to the third-party app marketplace. Square users have far fewer app integrations, and their template is generated by artificial intelligence (AI).
Despite being a combination of point-and-click with some drag-and-drop functionality, neither editor compares to Wix’s extreme amount of design freedom. However, that lack of freedom can be a plus, especially if you’re a novice designer and hope to avoid mistakes.
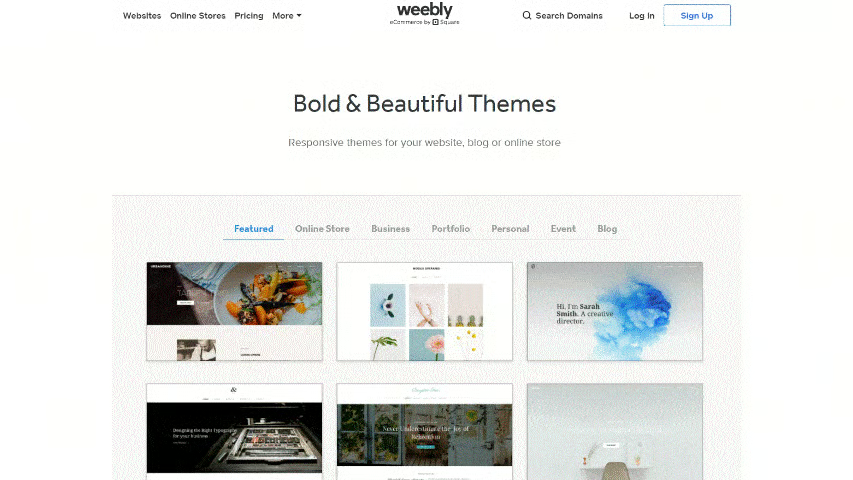
The Weebly editor also lacks a significant number of template choices. There are only about 50 templates, many of which are repeated among the seven categories of Weebly themes. In comparison, Squarespace provides more than 100, and Wix has 900-plus templates to choose from.
At the same time, Weebly’s templates are outdated. While the Square editor’s AI-created templates are sleeker and more modern, you can’t choose which one to start with. Your template is assigned to you. If design freedom and template choice are important to you, consider Wix instead.
Ecommerce
Weebly is best known for its ample ecommerce offerings, including online selling in its free plan. Even the free plan includes ecommerce for unlimited products. While Mozello and Strikingly also offer ecommerce in free plans, each only offers support for a single product. In addition to unlimited products, Weebly’s free plan includes other valuable features, such as a shopping cart and inventory management.

Regardless of the robustness of the free plan, those serious about selling online will want to upgrade to Weebly’s highest-tier plan at $26 per month. That’s still very affordable in the ecommerce web hosting market, and at this price, you get no ads, additional payment gateways, advanced ecommerce tracking and metrics, and perhaps most importantly: no transaction fees.
Online Marketing Tools
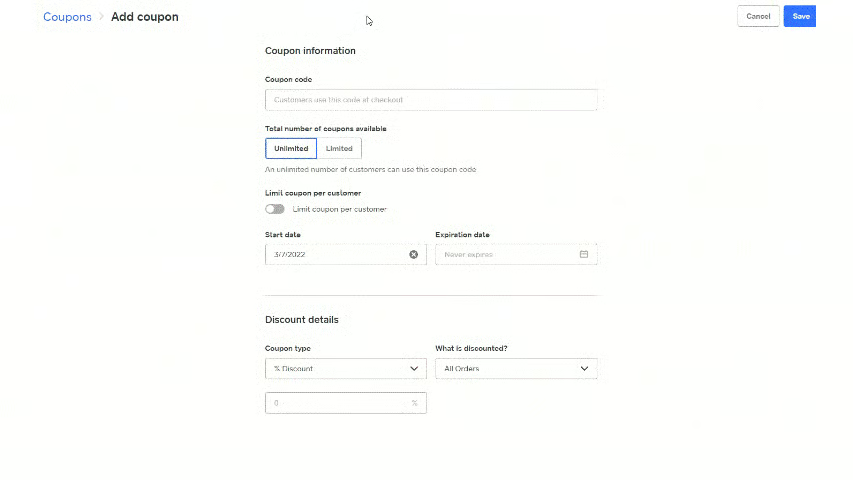
Weebly offers users a host of online marketing tools and techniques. Starting with the free plan, you can create time-limited or quantity-limited coupons and special offers. With paid plans, you can create pop-ups to get the attention of site visitors.
In addition (and another rarity in site builders), you can sell Square gift cards beginning with the Free version of Weebly. Choose one of the preset gift card amounts ($10, $25, or $50) or set up gift cards in your own chosen amounts.
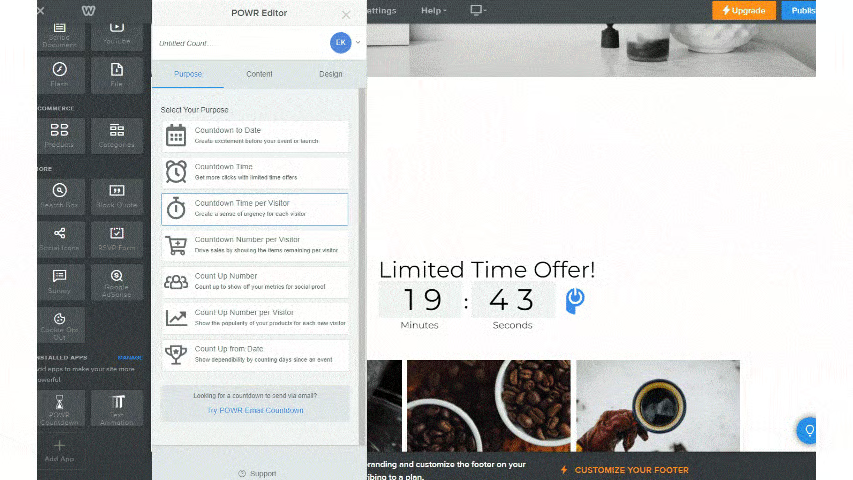
Weebly also supports limited-time offers with countdown widgets to create a sense of urgency. Add a countdown widget to your site giving shoppers a window of time to act, such as by a specific date or even a set number of minutes for a flash deal.
SEO
Search engine optimization (SEO) settings include page-level titles and descriptions as well as the ability to add alt-tags to images, helping to ensure your site can get found online. You can also add custom header and footer codes for third-party services like Google Analytics.
For SEO newbies, Weebly has published a full guide to SEO. It includes information and suggested resources for everything from developing a strategy to researching keywords and competitors, as well as measuring and tracking results.
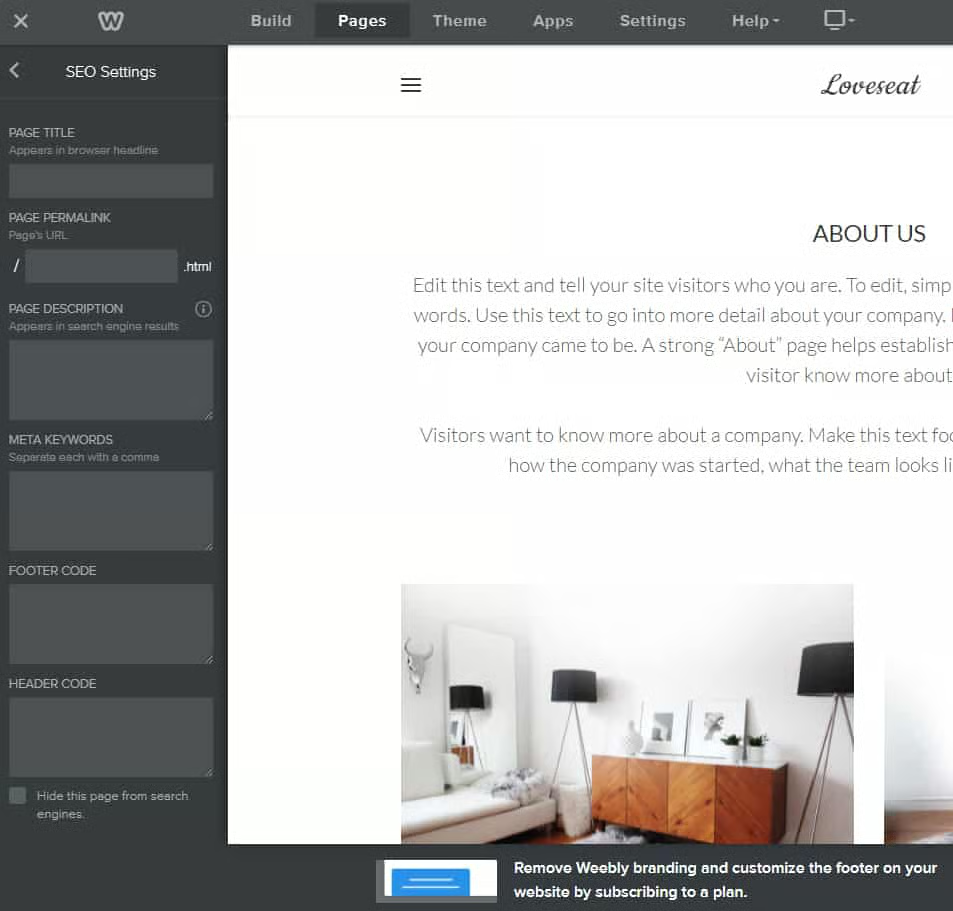
Even so, Weebly’s SEO is pretty basic. For example, while it’s an ecommerce site builder, it doesn’t offer advanced product SEO. If you want a site builder that offers more advanced SEO, look to Wix, IONOS, or another on our list of the best SEO website builders.
Add-ons & Integrations
With nearly 400 premium and free third-party apps, Weebly provides a tremendous amount of functionality. Keep in mind, though, that Free plan users can’t integrate third-party apps.
There are apps to drive traffic and sales, increase site visitor engagement, and add niche functionality to your website, such as appointment booking. For example, you can integrate apps to create more visual interest through animations, manage Google ads, and market your business on social media.
One popular add-on is the Site Booster app. Connecting Site Booster to your site ensures it is listed and added to search engines, review sites, maps, and mobile app directories. You can add it to any plan, even in the Free version. Use it free or subscribe to its low-priced $4.99 per month plan to get all the features included.
Email Marketing
For an additional fee, Weebly offers a suite of email marketing tools. To access them, you must add the Weebly Promote plan, starting at $8 per month. Weebly Promote makes it easier to promote your online store to new and repeat customers. To help gauge how well your campaigns are working, the plan includes email marketing analytics.
With a Weebly Promote subscription, you can segment lists and automate email marketing. Reach out with a welcome email to new customers or subscribers, or send an upselling or cross-selling email after a sale. You can start with attractive, premade templates or create an email from scratch using a point-and-click editor similar to Weebly’s site-building tool.
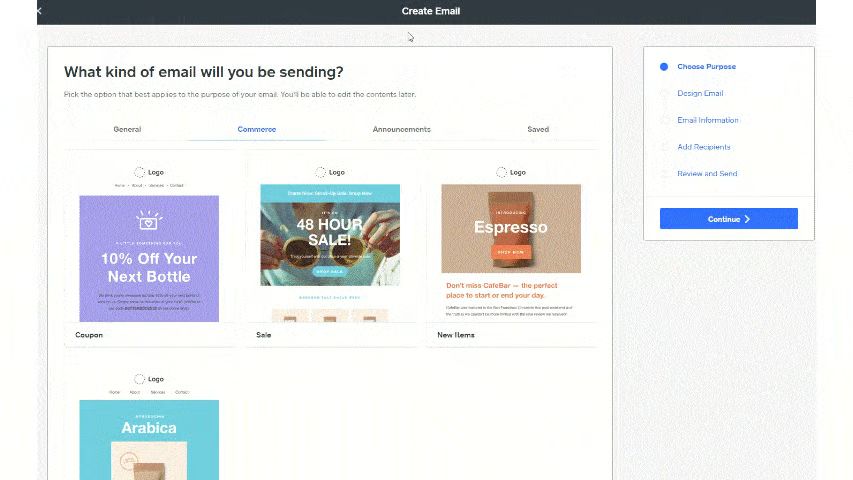
Weebly Promote subscriptions start at 2,500 emails per month. To send more than that, you will need to upgrade to either the Grow plan, with 50,000 emails for $25 a month, or to the Accelerate plan, where you’ll be able to send 250,000 emails for $75 a month.
Customer Support
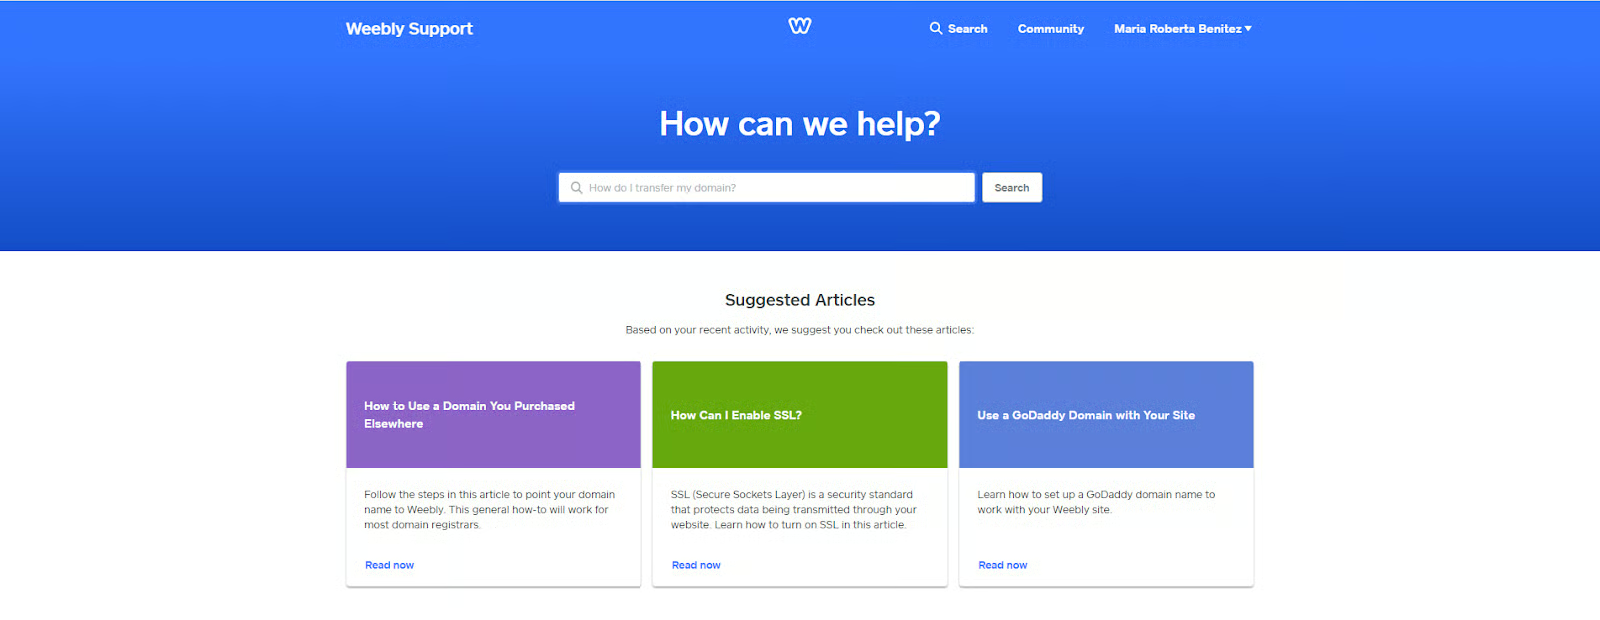
If Weebly falls short, it’s on customer support. All plans have access to the knowledge base and live support via chat or email. However, phone support is reserved for the Professional plan or higher. The most expensive, Performance tier promises priority support, which can cut down on response times significantly.
That being said, customers don’t have many good things to say about customer support in Weebly reviews. Its live chat feature is slow to respond, and this, plus phone support, is only available to US-based users. Surprisingly, the email support works well, but since it’s via email, don’t expect instantaneous answers.
Ease of Use
Weebly is marketed as a beginner-friendly website builder, and our Weebly review found this to be mostly true. Its interface is easy to navigate—both on the classic drag-and-drop editor and Square’s point-and-click editor for business websites. Building a website with Weebly is simple and straightforward.
The first thing you’ll do while setting up your Weebly account is deciding which editor you’re going to use. During onboarding, Weebly asks you if you need a business or personal site. Picking a Personal site will lead you to a template selection process and Weebly’s Classic editor. Selecting a business website by clicking on “Try Square Online” is followed by a series of questions about your business.
The Square Online editor will use your answers to choose a theme and build the first pages of your site. This brings you to Square’s editor with a populated site you can begin to customize. Unfortunately, the Square editor does not allow you to choose your own template. This can prove frustrating, especially if you dislike the appearance of your Square site. If design choice is something you value, consider Wix or Squarespace instead.
Expert Score
When we reviewed the best website builders available, Weebly scored a 4.6 out of 5, placing it well ahead of much of the competition. This was based on included features for making a small business website, the availability of a free-forever version, usability, and more.
We also used the Weebly editor to determine user-friendliness and ensure the features lived up to what was promised. For the most part, Weebly performed as advertised. It is a sleek, nimble editor with ample functionality and plenty of apps to help you customize your website.
It isn’t perfect, though. The design limitations of the Square editor proved very restrictive. While it’s possible to use the editor to completely change the look and feel of the template, Square chooses for you. That’s a lot of extra work that could be avoided simply by providing even a scant few template choices. If there is a major drawback to Weebly, it’s the lack of design choice.
Still, if you want an ecommerce site that’s attractive, works well, and has the tools to support an online store, Weebly may be the right choice for you.
What Users Say in Weebly Reviews
For many reasons, Weebly is one of the best website builders for small businesses, and we recommend it for small ecommerce sites as well as web design beginners. It has enough features to entice even intermediate-level site builders and, notably, includes ecommerce from the start.
Average ratings based on Weebly reviews show that users from around the web agree:
- G2: 4 out of 5 stars based on 448 Weebly reviews
- Capterra: 4.3 out of 5 stars based on 1,746 Weebly reviews
- TrustRadius: 4 out of 5 stars based on 124 Weebly reviews
With the exception of Weebly’s customer support and its limited design customization, Weebly reviews show that users are generally happy with how easy it is to use and how much it offers for the price. Its ecommerce capabilities are some of the best and the most affordable we’ve tried for an all-in-one site builder that isn’t dedicated to ecommerce (like Shopify).
Frequently Asked Questions (FAQs)
What are the disadvantages of Weebly?
The main downsides of Weebly are its site design and customization capabilities, lackluster templates, the absence of advanced SEO, and a confusing sign-up process. For example, there are two different editors available, but not much guidance to know which to start with, and you can’t switch editors without creating a new account.
Is Weebly a trusted site?
Weebly is a trusted name in website building, with thousands of happy customers who have built websites and online stores at an affordable cost. Furthermore, payments through Weebly are reliable and trustworthy, since it’s owned by online payment processing company Square.
Which is best: Wix or Weebly?
Weebly is arguably better than Wix for basic ecommerce, but drawbacks like poor templates and design tools take away from the case. Wix has a better free plan, as it includes access to third-party apps and has far superior design tools and templates. Likewise, while Wix plans cost a bit more, they are far more full-featured, including for ecommerce, and Wix has better SEO.
Do you own your own domain with Weebly?
Weebly’s Professional and above plans include a free domain for one year. However, that is registered through Weebly and connected to your account, so while you technically own it, if you cancel your Weebly account, you may lose the ability to use the same domain name. To avoid this, register a business domain through a third party like Domains.com or IONOS and then configure it for use with your Weebly website.
Bottom Line
Weebly is one of the easiest and most affordable website builders for small businesses. Its ecommerce capabilities exceed what we expect from an all-in-one site builder, especially for U.S. users. The free plan allows you to test Weebly to see if it’s the right site builder for your business’ website. While templates and design freedom are limited, it’s still a site builder we’d recommend for any small business looking to get online quickly and affordably.
