Weebly is one of the most trusted website builders for small businesses thanks to its array of valuable tools. Whether you’re setting up an online store, building a blog to grow your business, or creating a portfolio to showcase your work, all it takes is a few steps, from signing up for an account to publishing your site live. Keep reading to learn how to use Weebly to create a small business website in eight steps.
Video Tutorial: How to Use Weebly to Create a Website
For a step-by-step video tutorial on how to make a Weebly website, watch the video below, which follows the steps in this article.
1. Create a Weebly Account & Choose Personal Website
The first step in learning how to make a Weebly website is to sign up for a free account. Then, answer a few prompts about your website. You can upgrade your plan later on if you need more features before publishing your site—we’ll cover more of that in the final step.
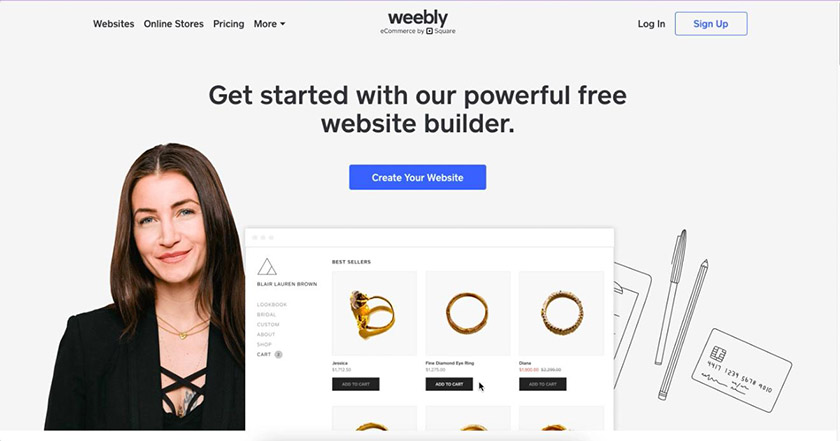
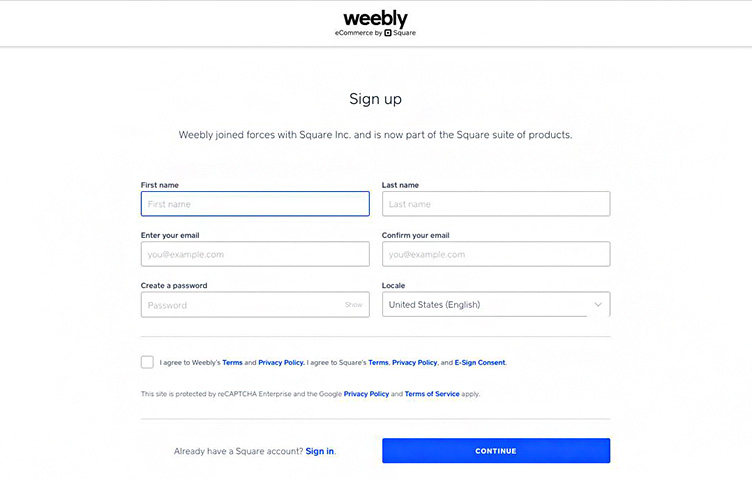
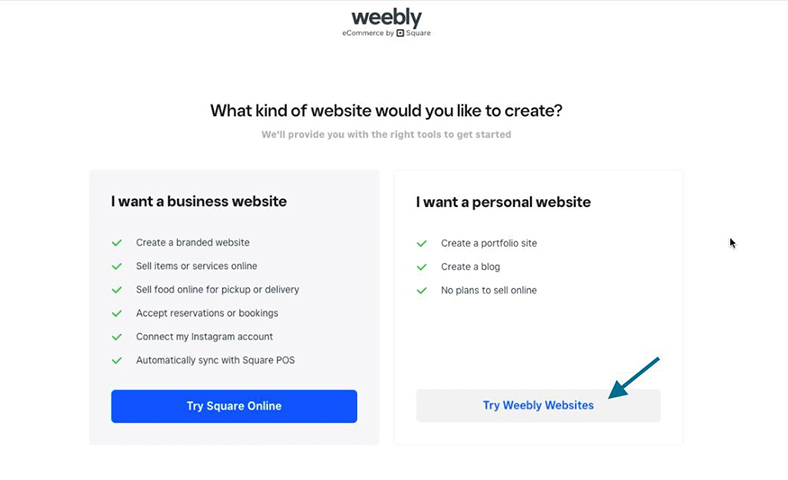
On the Weebly home page, click the “Create your Website” button, then on the next screen, fill out the form to create an account. Once you’ve signed up for an account, choose to build a personal website in the following prompt. This is the better option for building a regular website, blog, or portfolio.
Note: Even though it doesn’t explain this clearly, you get robust ecommerce features whether you choose to make a personal or business website on Weebly. However, with the editor for personal sites, you get your choice of template, blogging capabilities, and access to Weebly’s 300-plus app marketplace (which you don’t have with the business editor). Read our expert Weebly review for more clarification.
Pro tip: Want to build a business website with full ecommerce features instead? Use Weebly’s business Square editor—check out our guide for how to set up a Weebly ecommerce store to learn how.
2. Select a Theme for Your Website
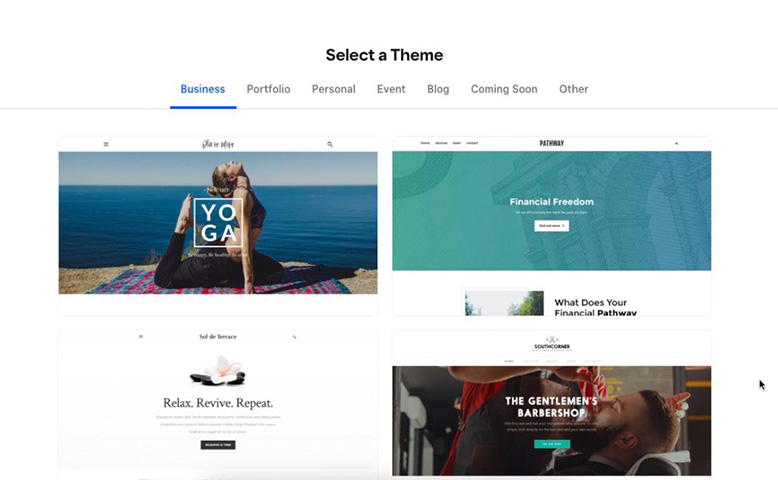
Once you’ve signed up for an account and answered Weebly’s prompts, you’ll then need to choose a theme for your website. On the next screen, Weebly has over 50 professional themes to choose from depending on your needs, from portfolios to blogs, events, and more.
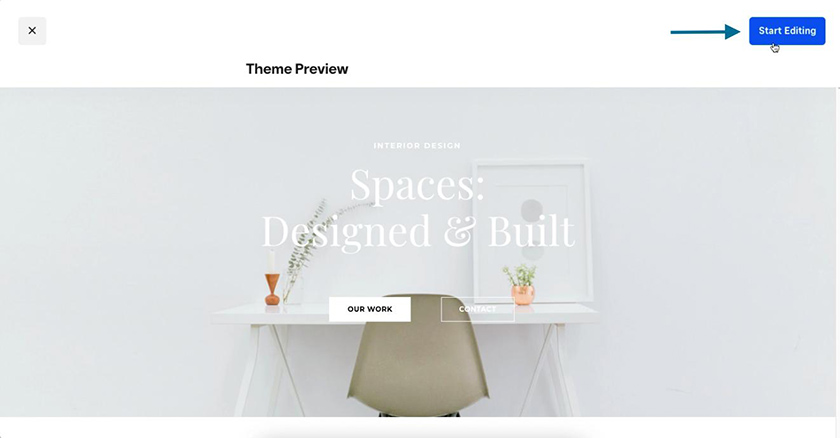
Once you’ve chosen a theme for your website, click on it to preview how it looks, then click on the “Start Editing” button in the upper-right corner to start customizing it inside the drag-and-drop Weebly editor.
3. Customize Your Website & Add Content
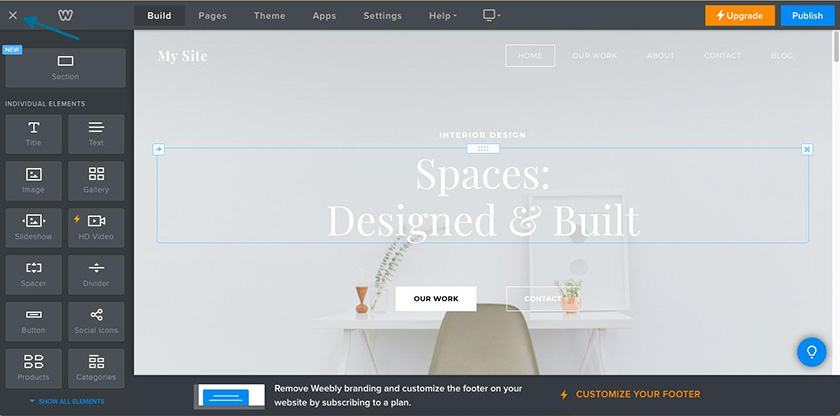
Part of learning how to make a Weebly website involves customizing it with your content and branding, which you’ll do inside the drag-and-drop editor. After choosing a theme for your website, you’ll automatically enter Weebly’s drag-and-drop editor, where you can manage all the details of your site, from its structure and pages to its design and domain.
Follow the steps below to learn the particulars of how to create a Weebly website, including how to use Weebly’s editor to add and edit pages, sections, and elements, add your logo, and customize your fonts.
Pro tip: Not sure what to include in your website? Read our checklist of website basics, from an SSL certificate to your brand assets.
Add & Manage Pages
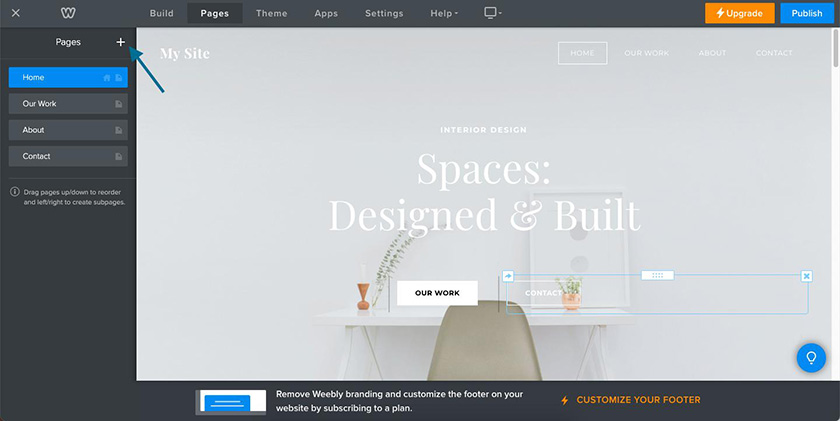
Once you enter the drag-and-drop editor, Weebly automatically generates a few web pages to help you get started. But, you’ll likely need to manage and customize them further. To start editing your site’s pages, first navigate to the “Pages” tab on the upper menu of your screen.
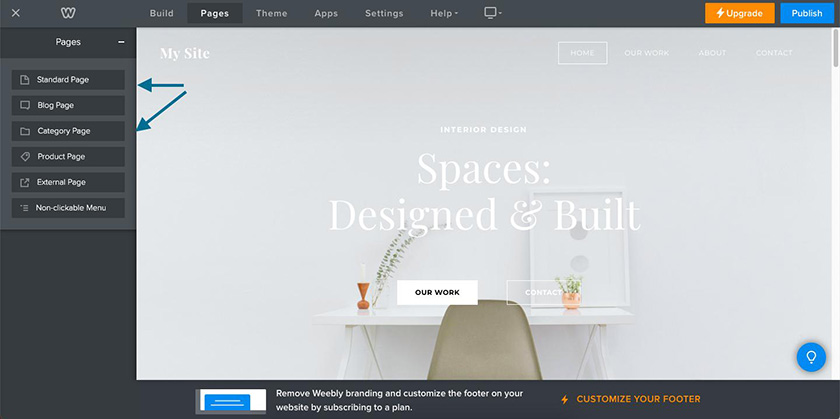
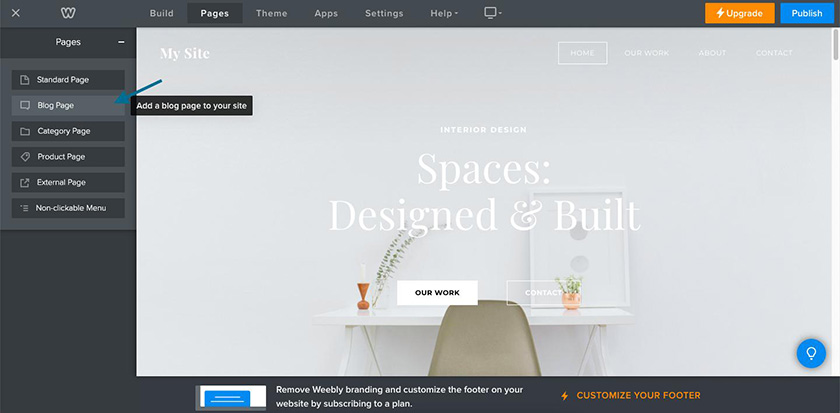
- To add a page: Inside the Pages menu, click on the “+” icon, then choose the kind of page you want to add in the following menu. Then, type in your page’s name and click “Done.” Your new page will automatically be added to the Pages menu.
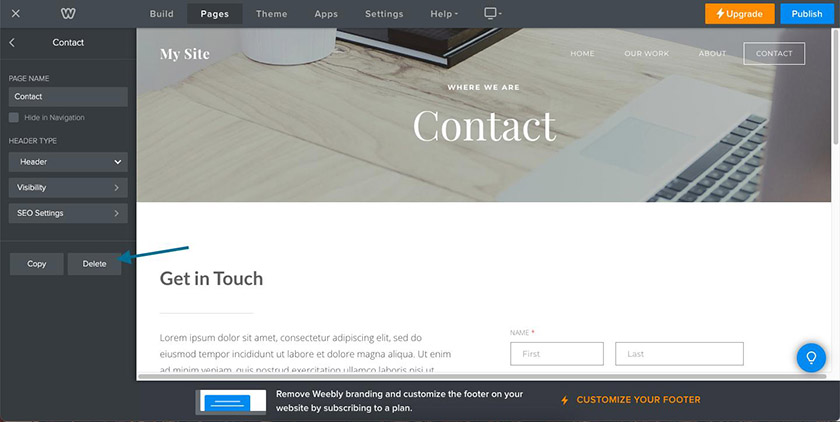
- To delete a page: Click on the page you want to delete, then click “Delete” in the following menu.
Add & Edit Sections
Besides managing your site’s pages, you can also add and edit the individual sections that make up each page, as well as the elements inside them, such as images and text. From the Pages tab, navigate back to the Build tab on the upper menu.
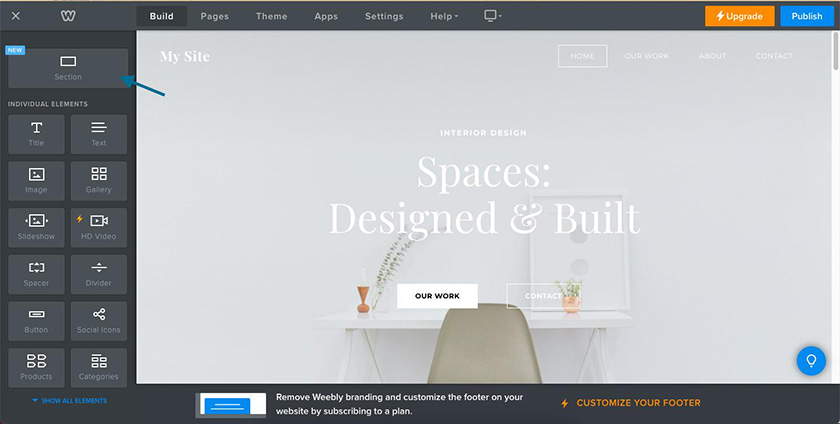
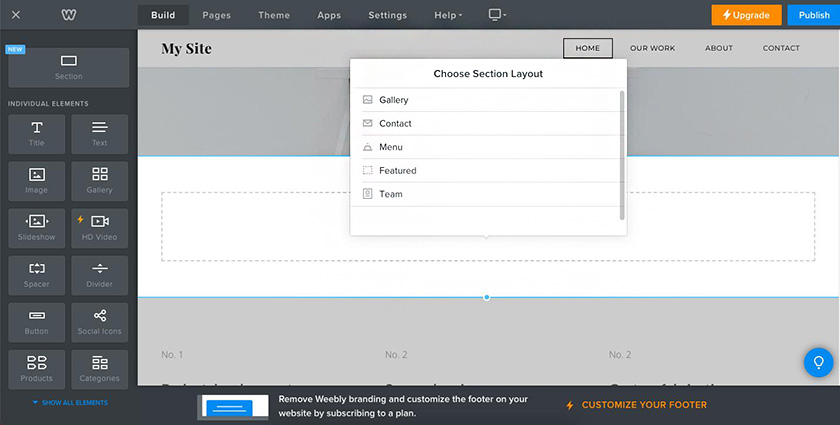
- To add a section: Inside the Build tab, click and drag the section element over where you want your new section to appear on your screen. Then, in the pop-up menu, choose the type of section you want to add (an image gallery, a contact form, and so on) and its layout, and click “Save.”
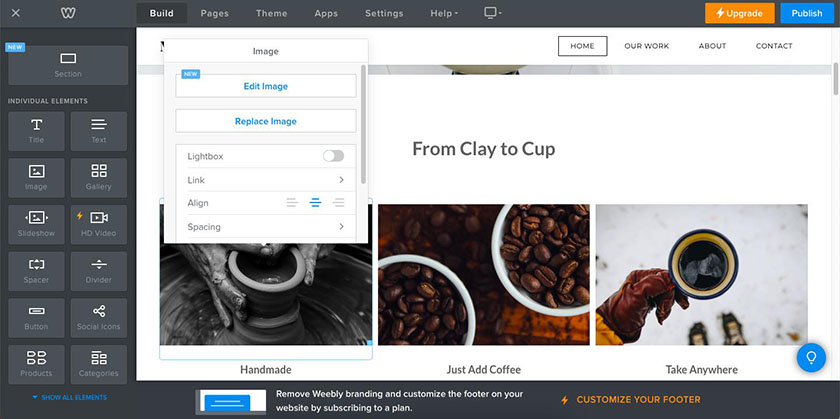
- To edit images: Click on the image element, then click “Replace image” in the following menu. In the pop-up box, upload your image. It’ll automatically appear on the screen.
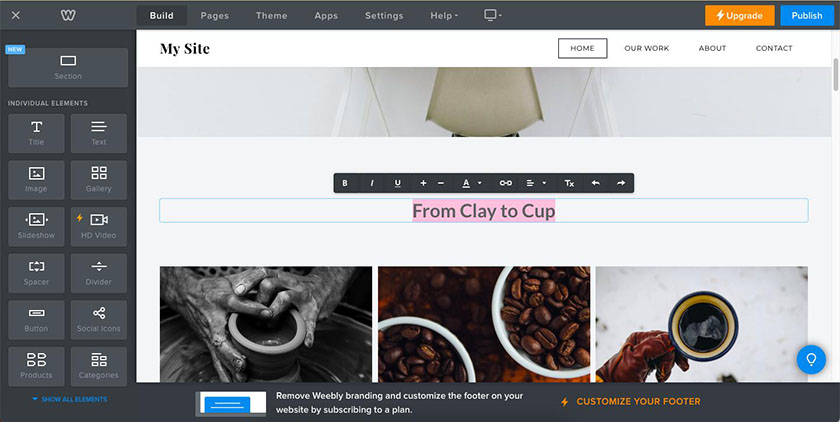
- To edit text: Click on the text element, then type in your preferred text. You can also edit its font size and color.
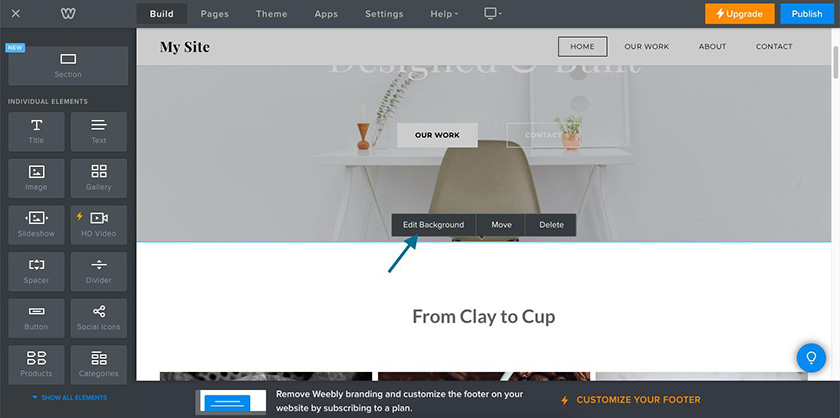
- To change your section’s background: Click on the section, then click on Edit Background > Change Color, then choose your section’s background color.
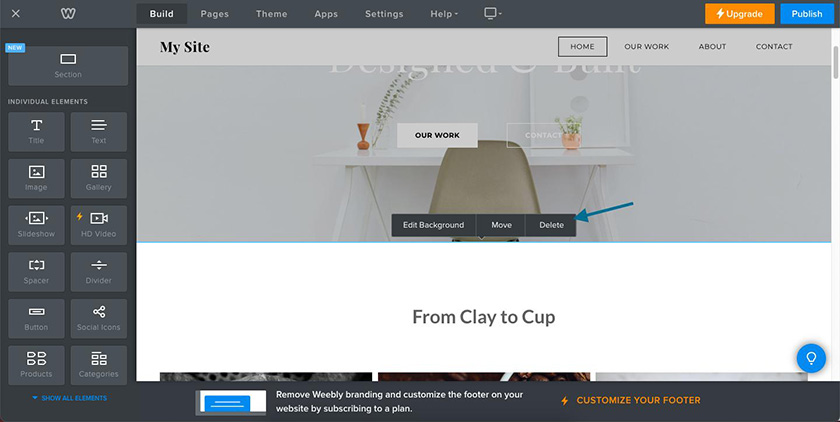
- To delete a section: Click on the section, then click “Delete.”
Add & Delete Elements
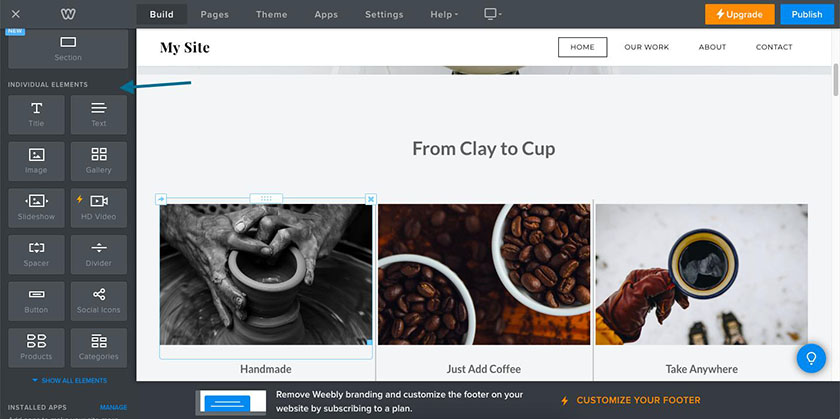
Beyond adding sections, you can also add individual elements to your site. Under the same “Build” tab, Weebly has a menu of elements you can add to your website, from titles and text to image galleries and newsletter sign-up forms.
- To add an element: Click on the element you want to add, drag it over to your screen, then customize it directly.
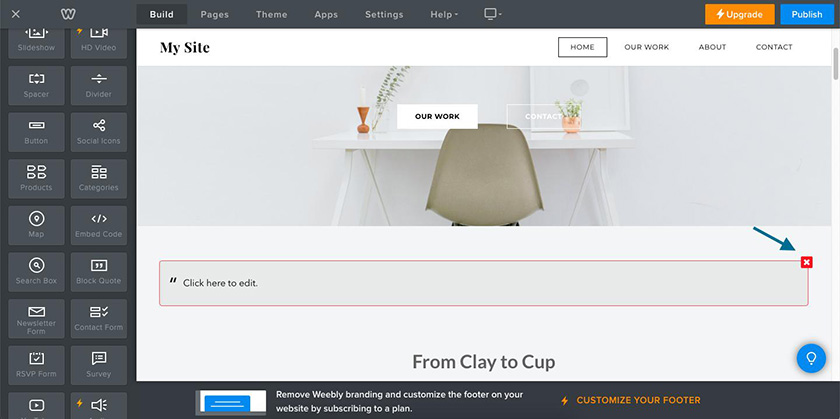
- To delete an element: Click on the element, then click on the “X” button in its upper-right corner.
Add Your Logo
Next, you’ll also need to add your logo to your site. On the header portion of your site, click on your site’s title, then click on “Logo” and upload your brand logo in the pop-up menu.
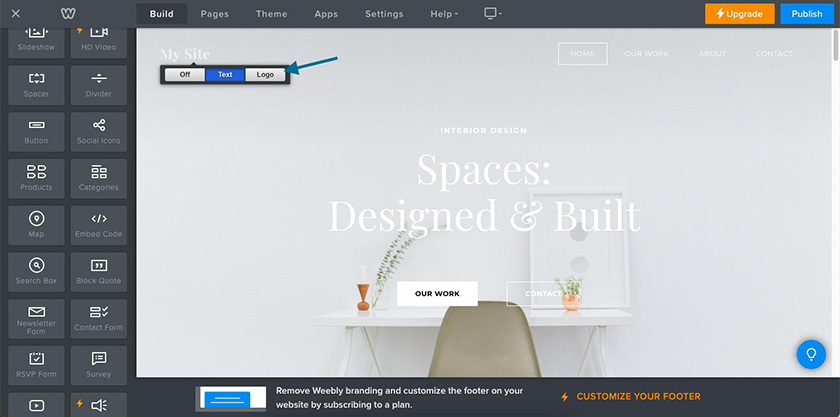
Click your site’s title, then choose “logo” to add your logo to your site.
Customize Fonts
Finally, the last step to customizing your site’s design is to customize your fonts. To choose fonts for your site, navigate to the Theme tab, then choose “Change fonts” from the menu. In the following menu, you can choose fonts for your titles, headlines, and paragraphs.
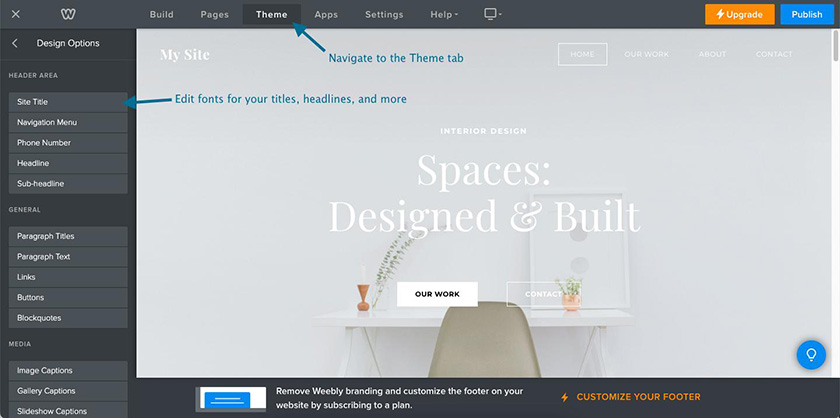
Navigate to the Theme tab, then edit the fonts for your titles, paragraphs, and more in the menu.
4. Add a Blog & Online Store
Next, after building and customizing your site, Weebly also has options to add an online store and blog if you need them. While these are optional, adding a blog and a store can maximize your site’s functionality and build your brand presence, and you can add both even on a free plan. Keep reading below to learn how to use Weebly’s site editor to add a blog and online store to your site.
Add a Blog
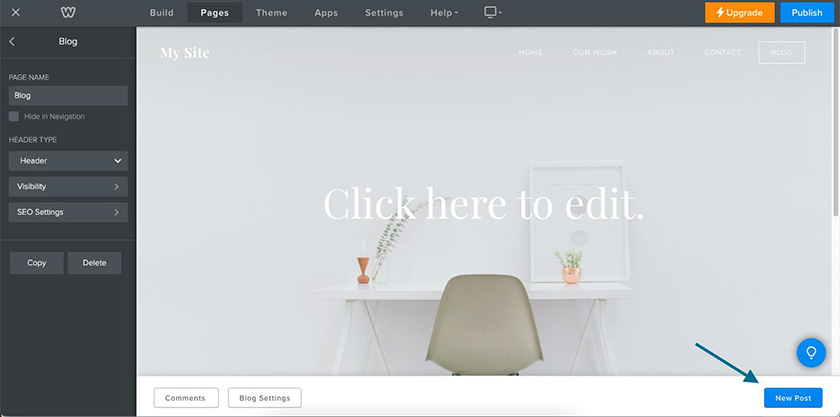
To add a blog to a Weebly site, navigate to the Pages tab, then click on the “+” icon to add a new page and choose a blog page. Once your new page is created, click on the “New Post” button in the lower right corner.
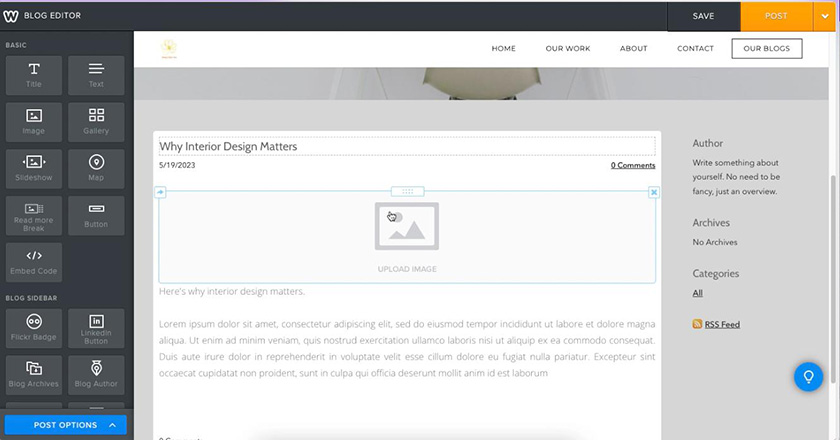
In the next screen, click and drag elements to add to your blog post, such as images, titles, and paragraphs, then click “Save” once you’ve added your blog’s content. Your blog will automatically go live as soon as you publish your website.
Add an Online Store
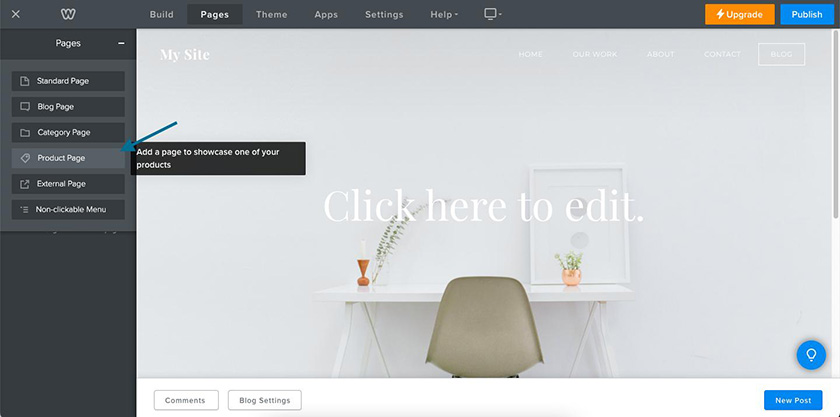
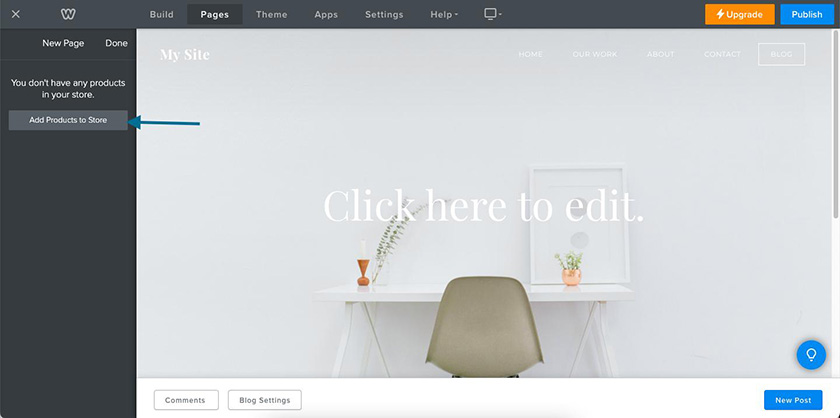
You can also add an online store to your website, even on the free Personal plan. To add an online store, you’ll need to add a new page to your site under the Pages tab, then choose “Product Page” from the menu and click “Add products to store.” Weebly will then automatically direct you to its online store editor, where you can add and manage your store’s inventory.
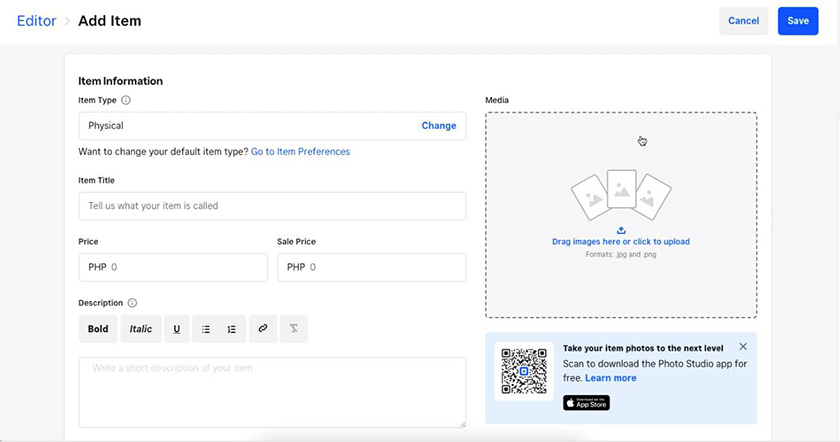
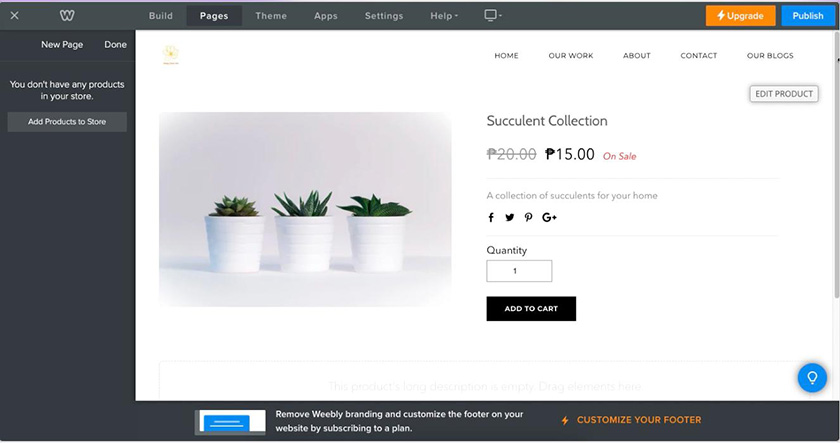
Inside the store editor, add your product’s name, price, image, and other info, and you can even add details like shipping and pickup info, product options, and your product’s SEO. Then, click “Save” once you’re done. Inside your editor, it’ll automatically appear on your website.
5. Set Up Your SEO
After setting up its main structure and design, the next step in how to make a Weebly website that stands out is to set up your search engine optimization (SEO). Setting up your SEO is essential when making a small business website to maximize its chances of ranking online and reaching your target audience.
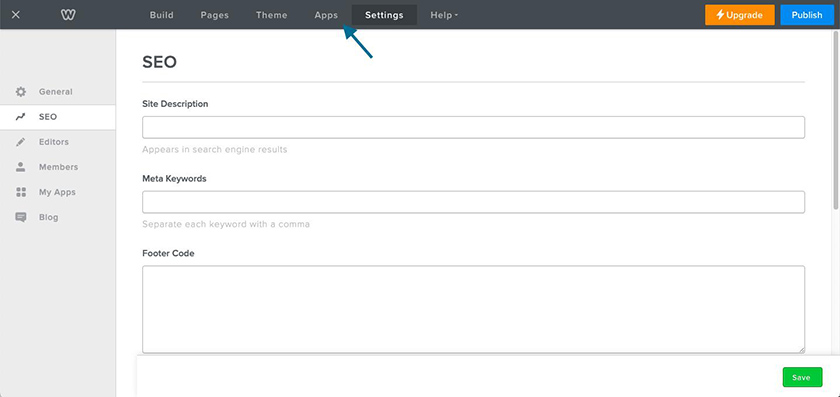
Inside the editor, navigate to the “Settings” tab on the upper menu, then click on the SEO tab in the following screen. In the SEO form, add your site’s description on search engines and meta keywords for your site. You can also add header and footer codes and edit your page’s URLs. Once you’re done, click “Save.”
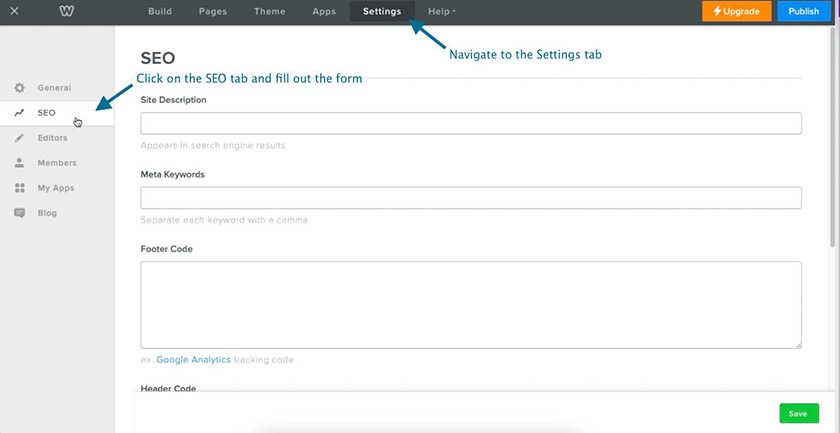
Set up your site’s SEO under the Settings tab.
6. Add Apps to Your Website
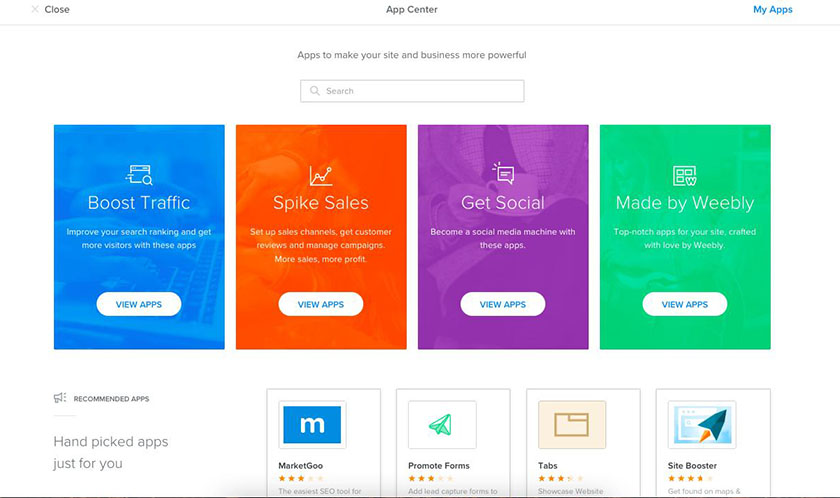
Part of how to set up a Weebly website is to add third-party app integrations. One of Weebly’s best features is its menu of over 300 apps for everything from boosting your site’s traffic to increasing your sales.
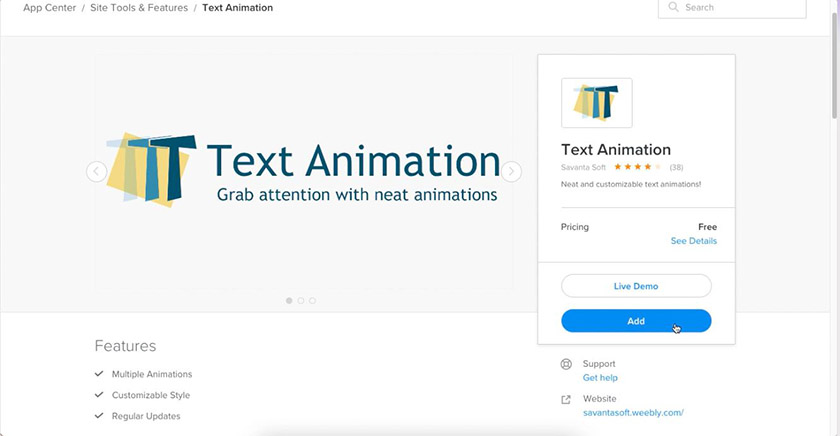
Inside your editor, click on the “Apps” tab to enter Weebly’s app marketplace. Once you’ve chosen an app, click on it, then click the “add” button to connect it to your site. Once you’ve connected it to your site, it’ll automatically show up under “Installed Apps” on your menu.
7. Set Up Your Domain
When using Weebly to create a website, you’ll first need to connect with a domain before officially publishing it live. Your domain is the official address of your website that appears in your URL and is another essential part of building your online brand presence and credibility.
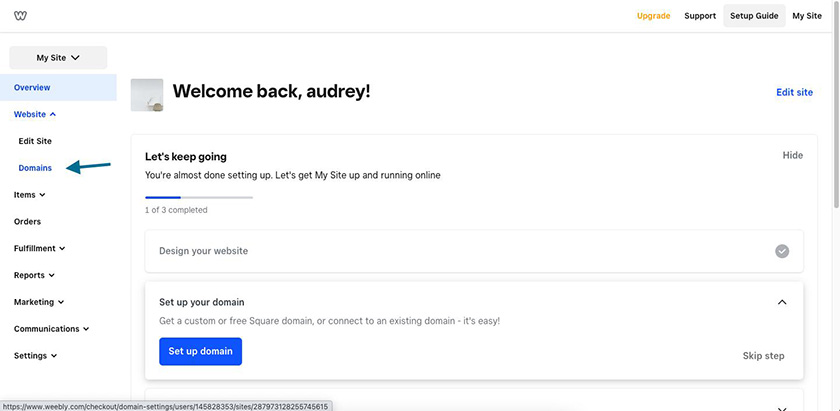
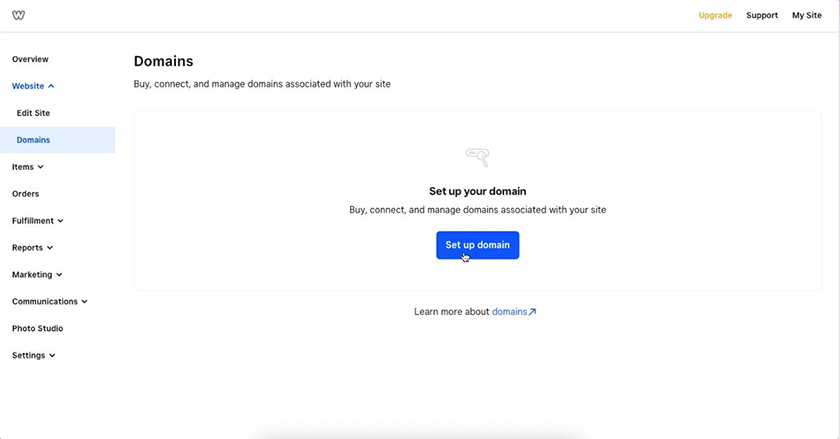
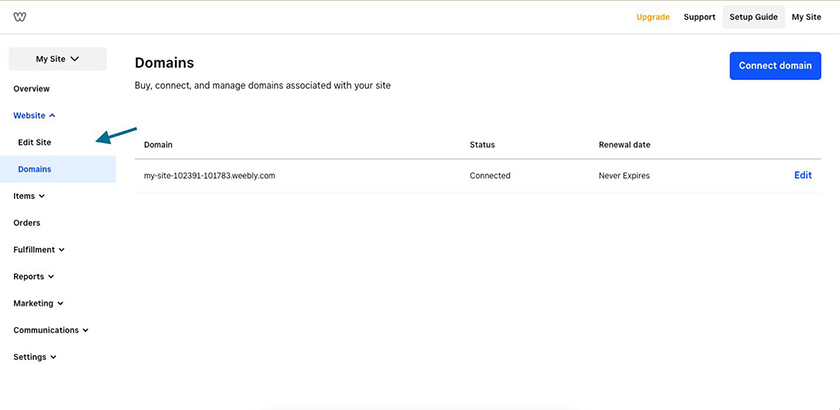
First, you’ll need to exit the editor in the upper-left corner and enter your dashboard. Then, inside your dashboard, click on the Website tab, then choose “Domains” in the drop-down, then “Set up domain” on the next screen.
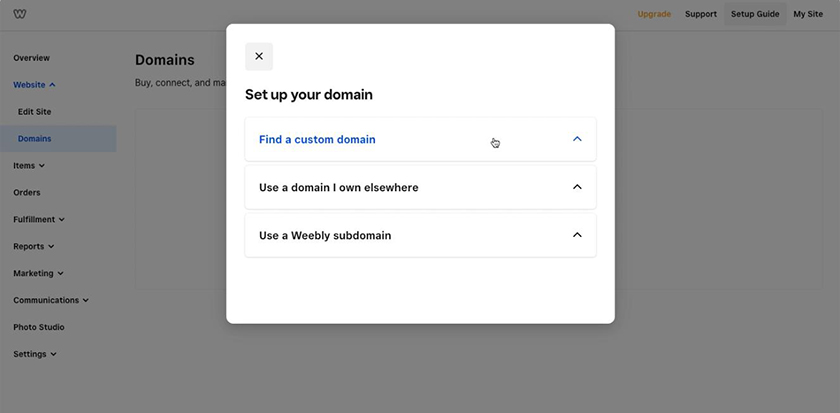
In the pop-up box, you’ll have the option to search for a brand-new custom domain, to connect with one you already own elsewhere, or to use a Weebly domain if you’re on a free plan.
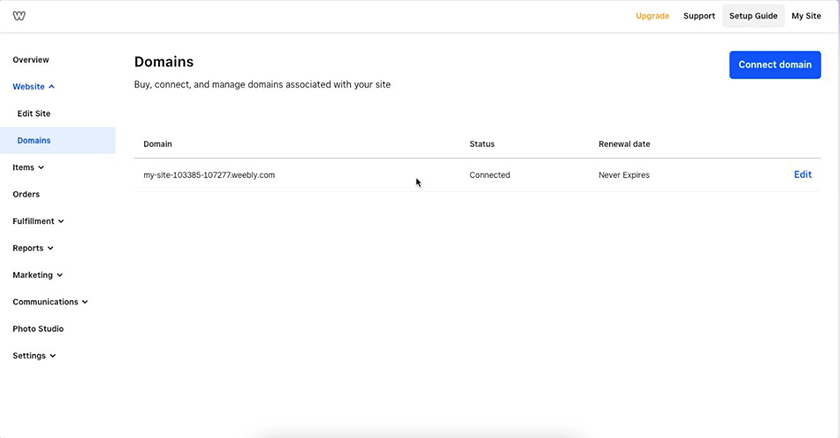
While choosing a custom domain is the best option to build your site’s credibility, you’ll need to upgrade to a paid subscription first to use one. Otherwise, if you’re on the free plan, you can only use a standard Weebly domain. Once you’ve connected with a domain, it’ll automatically show up inside your Domains tab.
8. Choose a Plan & Publish
Once you’ve set up your website’s domain, the final step for how to make a new website on Weebly is to choose a plan for your website.
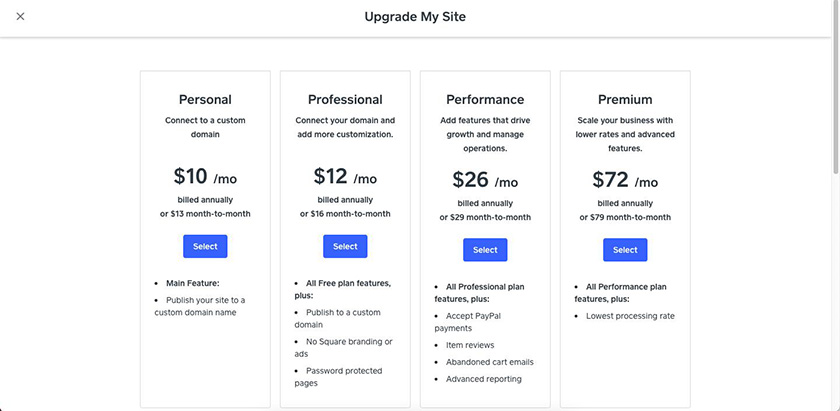
When you first create your website, you’ll automatically be subscribed to the free plan, which has all the basic website features, an online store, and SEO. However, upgrading to a paid plan gets you many additional capabilities, including a custom domain, advanced payment options, insights, and more. Learn more about Weebly’s pricing below.
Weebly Pricing & Plans
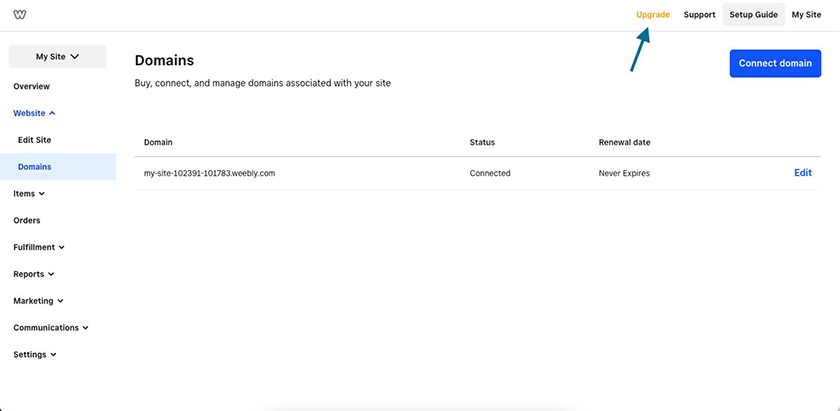
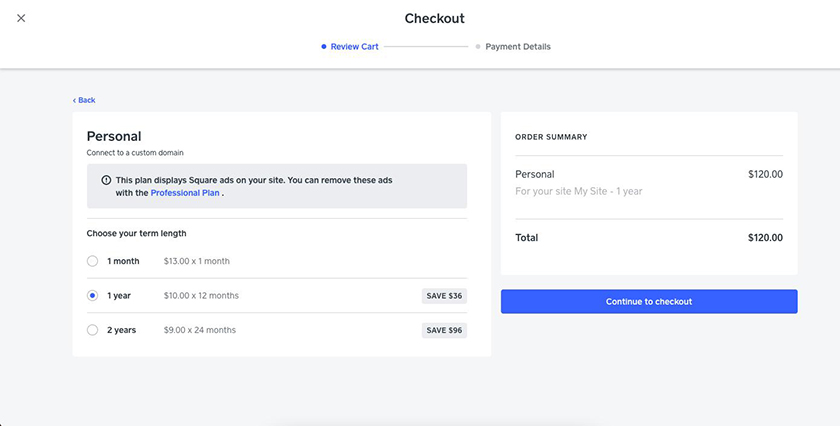
To choose a plan for your site, click on the “Upgrade” button on the upper-right corner of your dashboard. Then, in the next screen, choose a plan that best suits your website’s needs, add your billing details, and complete your checkout. Your plan will automatically apply to your website.
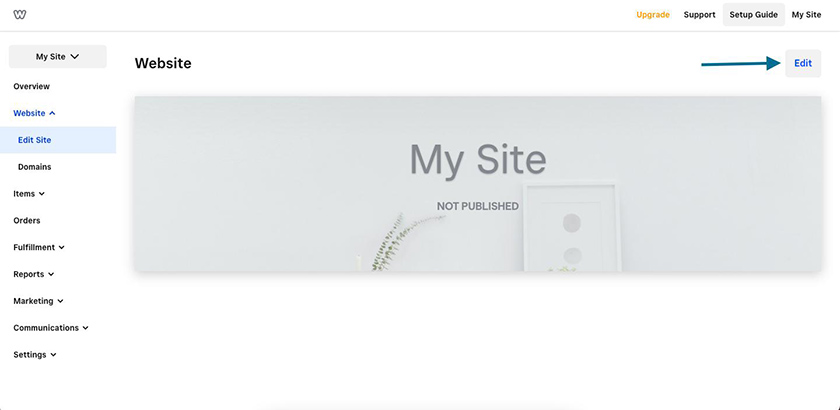
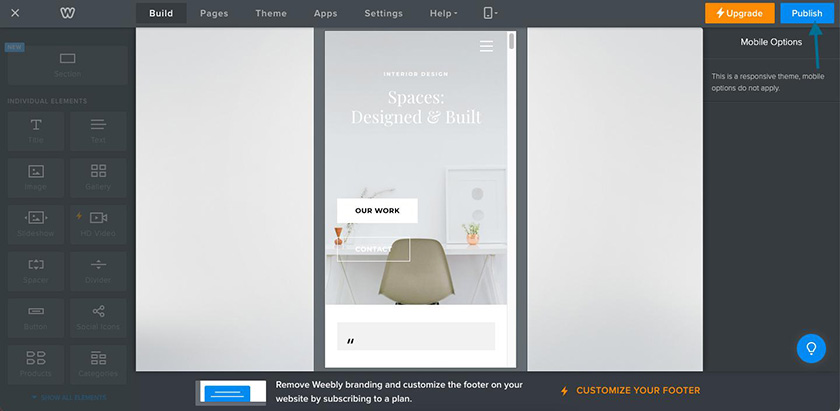
Once you’ve chosen a plan for your site, it’s officially ready to go live. To publish your site, first navigate back to the site editor by clicking “Edit Site” on your dashboard, then click “Edit” on the following screen. Inside the editor, do one final check of your entire website to ensure that everything is working smoothly and in the proper order. You can also check how your site looks on mobile screens by clicking on the mobile icon on the upper menu.
Finally, once you’ve given your site a final run-through and ensured that all your pages and elements are working and in the proper order, click on the “Publish” button in the upper-right corner to officially let your site go live.
Once your site is live, be sure to check, maintain, and optimize it regularly. For example, if you have a blog, publish fresh content frequently, or if you have an online store, keep track of your sales and performance in your dashboard. Do regular site health checkups, monitor your site’s SEO, then update and optimize areas as necessary.
That sums up how to use Weebly to create a website. Weebly is one of the most trusted site builders for nearly any small business, thanks to its easy-to-use site editor and extensive features, even on a free plan. However, it isn’t the only site builder around—keep reading below for some of the best alternatives to Weebly.
Best Weebly Alternatives
Weebly offers great ecommerce plans for building online stores and is our top pick for the best website builder for restaurants—but it isn’t the most ideal for every business. For example, it has limited design capabilities and SEO features compared to alternatives like Wix or Squarespace.
If you’re unsure whether Weebly is the best website builder for your business, check out some of the best Weebly alternatives below.
Top Weebly Alternatives | ||||
|---|---|---|---|---|
Advantages Over Weebly |
|
|
|
|
Free Plan | ✓ | ✕ | ✓ | ✓ |
Starting Price per Month* | $16 | $16 | $18 | $11.99 |
Ecommerce Plans From* | $27 | $23 | $18 | $24.99 |
Learn More |
*Monthly cost with annual billing; month-to-month billing is available at higher cost.
Need more choices? Read our full list of the best website builders for small businesses.
Frequently Asked Questions (FAQs)
Weebly has free plans to make a website, but they are not always adequate for businesses looking to establish a credible brand presence online, as they offer limited marketing features and don’t include a custom domain. For a more professional website to grow your business, opt for a paid Weebly plan instead. These offer custom domains and advanced ecommerce, marketing, and security features. Learn how to make a free Weebly website in the steps above.
Anyone can host their own website on Weebly with a custom or non-custom domain. Custom domains are better for building your business’ brand presence, but cost at least $10 on Weebly. However, these paid plans also come with helpful marketing, ecommerce, and security features for your website. You can also host your website on Weebly free of charge on an unbranded Square domain.
To publish a website for free on Weebly, you’ll need to use a standard unbranded Weebly domain. First, visit Weebly, then sign up for an account and create and design your website. Once you’ve created your website, navigate to your Weebly dashboard, then under the “Domains” tab, click on “Connect Domain,” then choose to use a Weebly subdomain.
Bottom Line
Weebly has built its reputation as one of the most comprehensive website builders around for small businesses. Plus, one of the best parts about it is that the process of learning how to make a Weebly website is simple enough for complete beginners and affordable enough for small business owners on a budget. Follow the Weebly tutorial above to learn how to use Weebly to create a professional website, and get started building yours today for free.
