


With sleek template designs, built-in business tools, and beginner-friendly setup and editing, Squarespace has established itself as one of the best website builders for small businesses. Below, we walk you through the steps of how to use Squarespace to build a website, including a Squarespace video tutorial walk-through guide you can use as a reference.
- Squarespace Video Tutorial
- 1. Choose a Template or Start From Scratch
- 2. Create an Account (or Login)
- 3. Create & Edit Elements, Settings & Pages
- 4. Customize Your Squarespace Website’s Design
- 5. Review Your Website
- 6. Choose a Plan & Publish Your Website
- Squarespace Pricing
- Additional Resources for Building a Site on Squarespace
- Frequently Asked Questions (FAQs)
- Bottom Line
Squarespace Video Tutorial
For a step-by-step guide on how to use Squarespace to build a website, check out the video tutorial below.
Making a website on Squarespace to build brand presence online involves six main steps—from choosing or building a template, setting up an account, editing the pages, customizing the design, and finally, reviewing and publishing your website. Follow along step by step below to learn how to use Squarespace to create a professional website.
1. Choose a Template or Start From Scratch
To use Squarespace to build a website, visit Squarespace and click on the “Get Started” button to begin the setup process. This takes you to the template landing page. Next, either choose a template to start with or scroll down to select the option to build your site from scratch.
How to Get Started Using a Squarespace Template
To build your website using a template, choose the template that best suits your needs, then customize it to your business. There are dozens of professionally designed templates available on Squarespace for various industries and business types, from online stores to blogs, portfolios, and more.
Squarespace’s sleek templates are well-tailored to artists and musicians because they’re visually stunning but also easy to customize. The Squarespace editor is simple enough for independent creators to build and manage their own sites. This is just one reason why Squarespace consistently grabs a spot on our best website builders for artists guide.
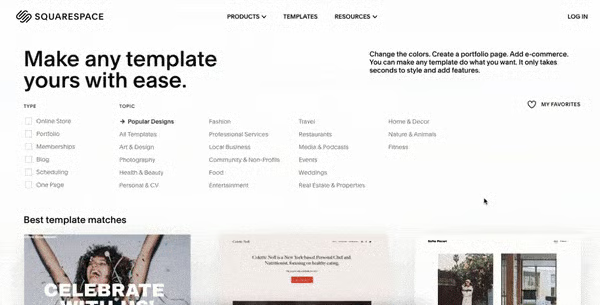
To save time, check out our roundup of the best free Squarespace templates for small business websites. You can also filter templates using Squarespace’s handy filtering section on top of the page. Just click on the specific website type and topic you need, then choose from the selections generated by Squarespace. You can also preview and demo a template first before using it.
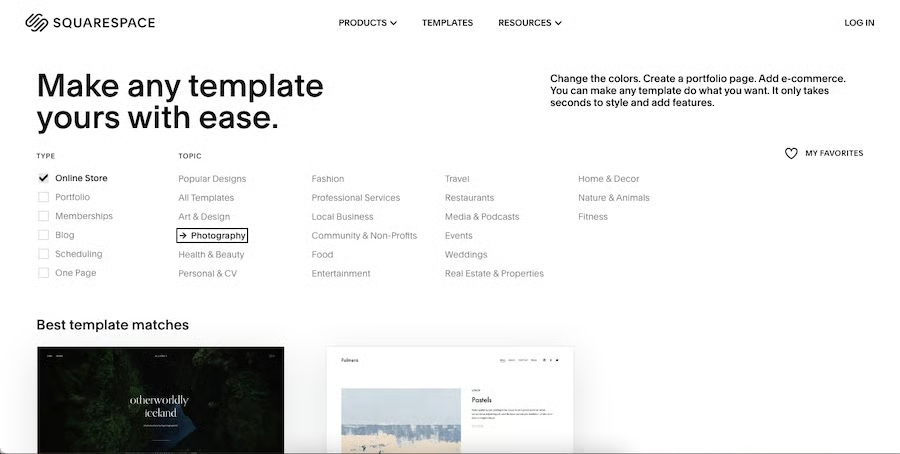
Sift through templates using the filter section 
Choose from over 100 templates. 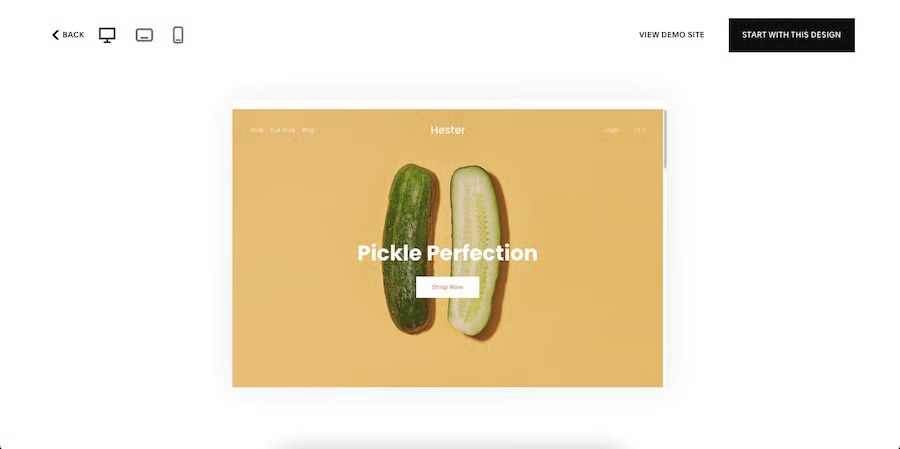
Preview and choose the template best suited to your needs


How to Build a Squarespace Website From Scratch
If you prefer to design your website from scratch, scroll down to the “Build your own template” section on the template landing page and click the “Get Started” button. In the following screen, click on the “Let’s Go” button to continue the site setup process.
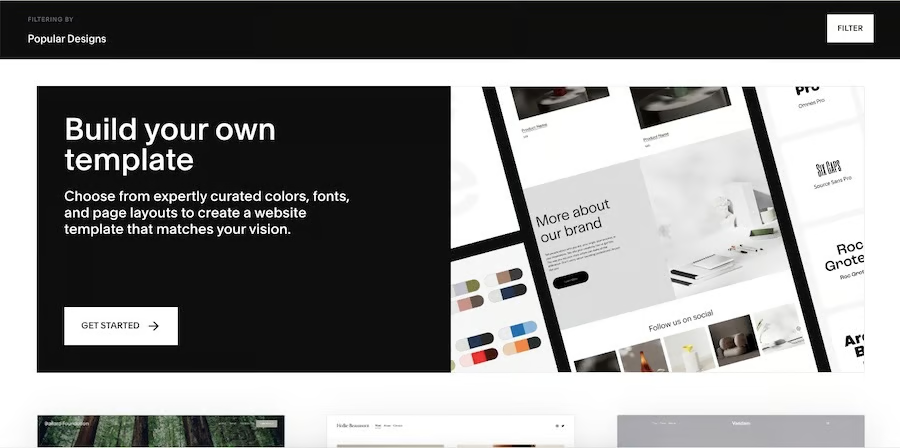
Create your own site by choosing the “Build your own template” section 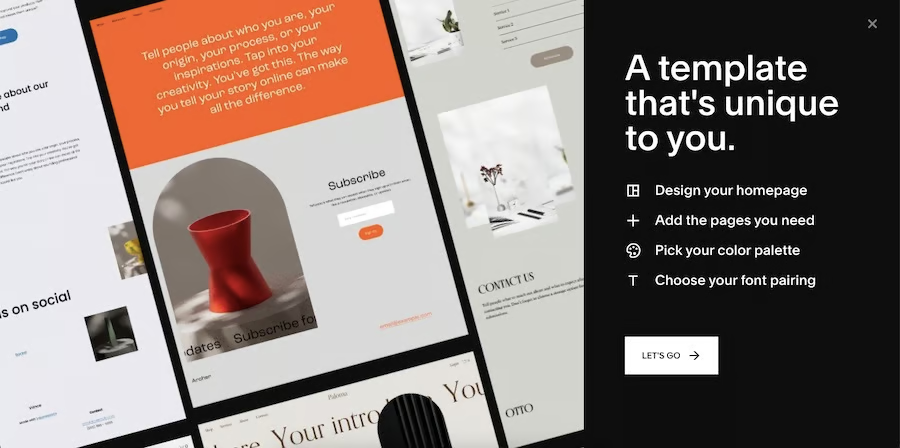
Follow Squarespace’s prompts to start the setup process


2. Create an Account (or Login)
To continue the process of how to build a website on Squarespace, you’ll next have to create or log in to your Squarespace account. You can create an account by connecting with Google, Apple, or Facebook, or manually by typing in an email address. If you already have a Squarespace account, choose the login option in the upper-right corner of the screen.

3. Create & Edit Elements, Settings & Pages
After logging in or creating your Squarespace account, the next step is to set up some basic website elements and then build out your site. This includes setting up pages, themes, and colors, among others. The Squarespace website setup process differs between using a template and building your site from scratch—keep reading below for instructions for each option.
Set Up When Starting With a Template
After creating an account, Squarespace will prompt you to add a website title. Type in the name of your website (usually your business name), then click the “Continue” button. The following screens show a short tutorial of how to use Squarespace’s editor—simply click through them to enter the editing platform.

Enter your website’s name 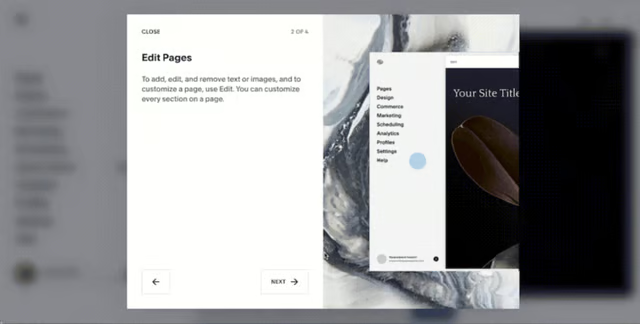
You’ll be shown a short tutorial on how to edit a Squarespace website using the editing tool


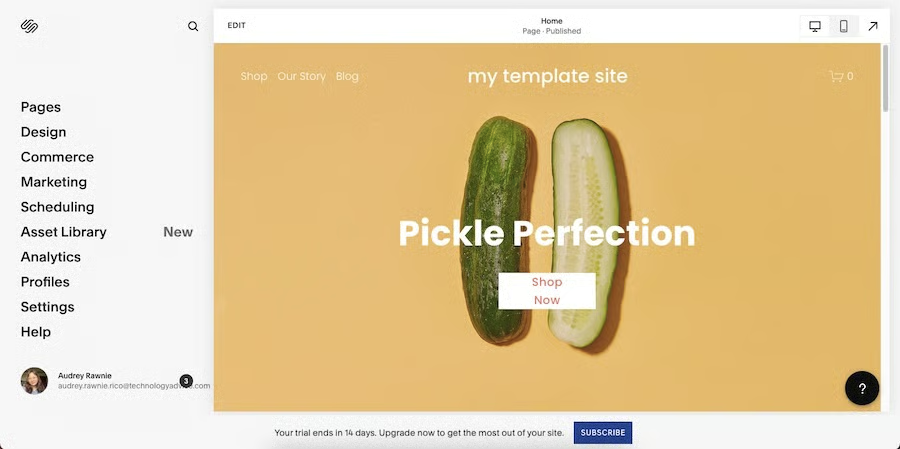
After clicking through the tutorial, you’ll be directed to Squarespace’s drag-and-drop editor. This is where you’ll manage and edit all the elements of your website, including the template you chose in the previous step. On the left-hand side of the screen, you’ll find a menu bar with all the elements of your website you’ll need to set up, from your web pages to your design and settings.
Set Up When Building a Site From Scratch
If you decide to create a site from scratch, Squarespace shows prompts to walk you through the process of adding some details about your website. Input your website’s name, then choose from a selection of website page design layouts. You’ll also be able to add pages, such as an “About” or “Contact” page. Finally, choose the colors and fonts of your website, then click the “Finish” button in the lower right corner.
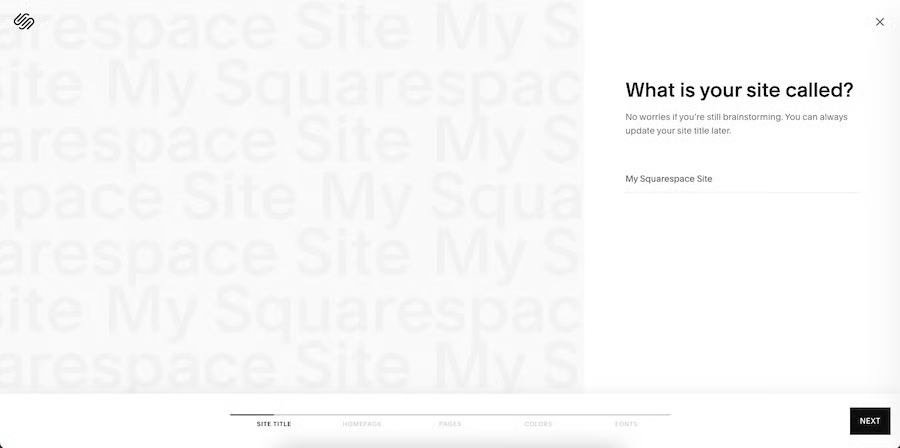
Type in your website’s name 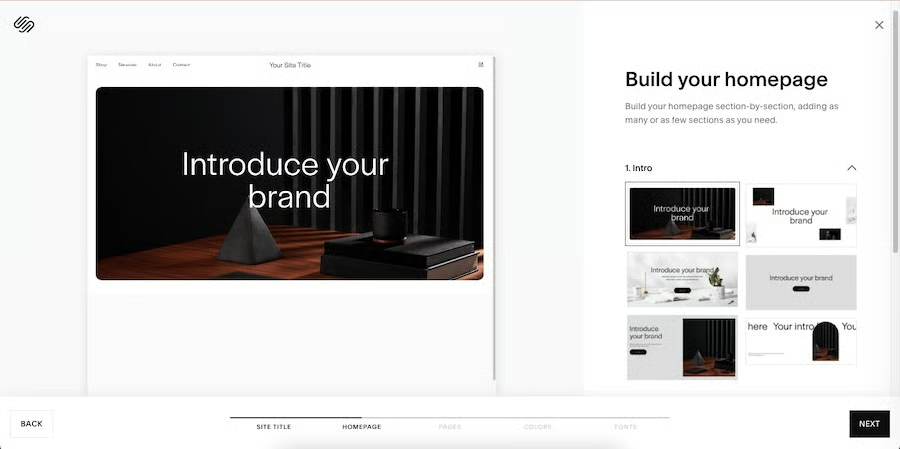
Choose a homepage layout 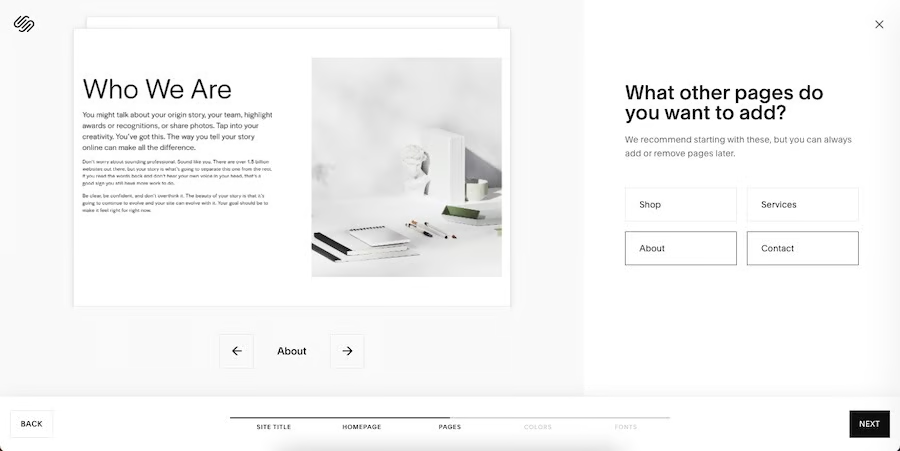
Add other supporting pages 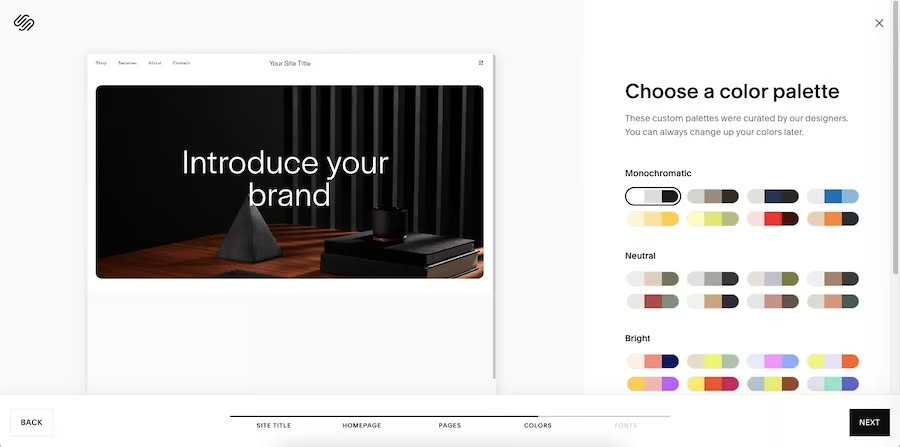
Choose a color palette 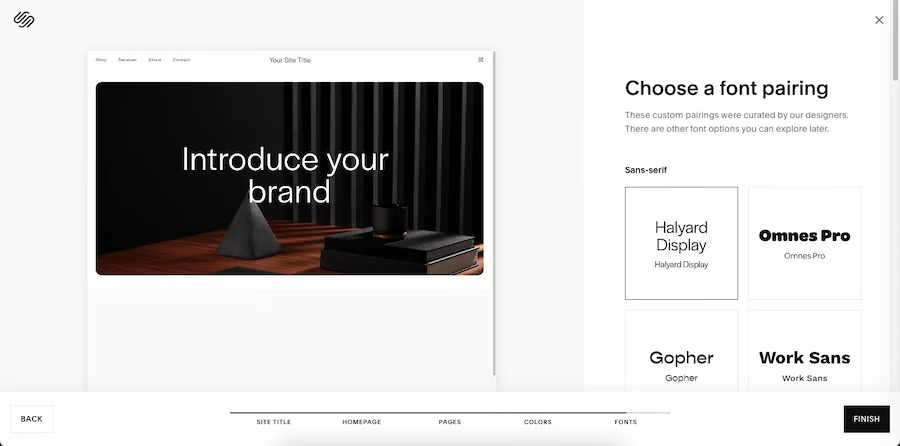
Choose font pairings


After clicking on “Finish,” you’ll automatically enter Squarespace’s drag-and-drop editor. From here, you can further customize the details of your website.
The following steps for how to use Squarespace to build a website pertain to all users, whether you use a template or build your site from scratch. Next, you’ll set up the most important parts of your website: web pages, an online store, and marketing tools.
Open the drop-down boxes below to learn the setup process for each.
To set up and manage the pages of your website, click the “Pages” tab on the left-hand menu bar. This will open up a tab with all the pages of your website—both those that appear on your site’s main navigation menu (such as your “Shop” and “Blog” pages) and those that aren’t linked from anywhere (your “Home” page or a “404 error” page, for example).
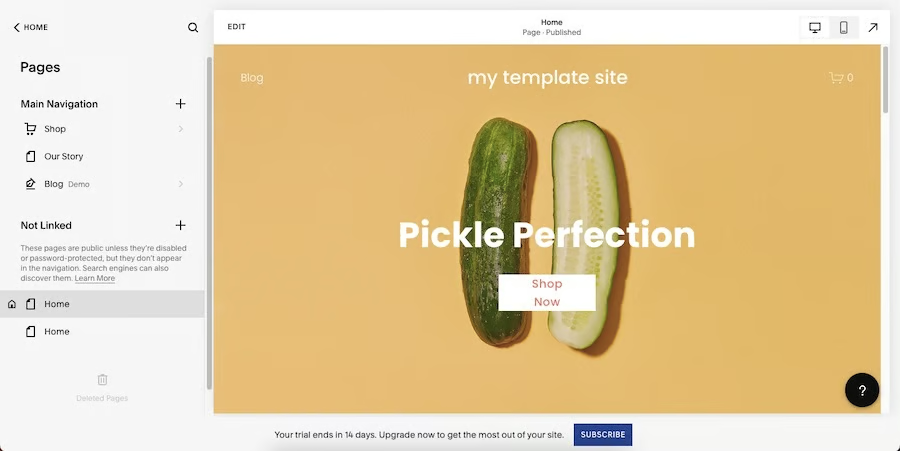
Set up and manage your site pages in your “Pages” tab 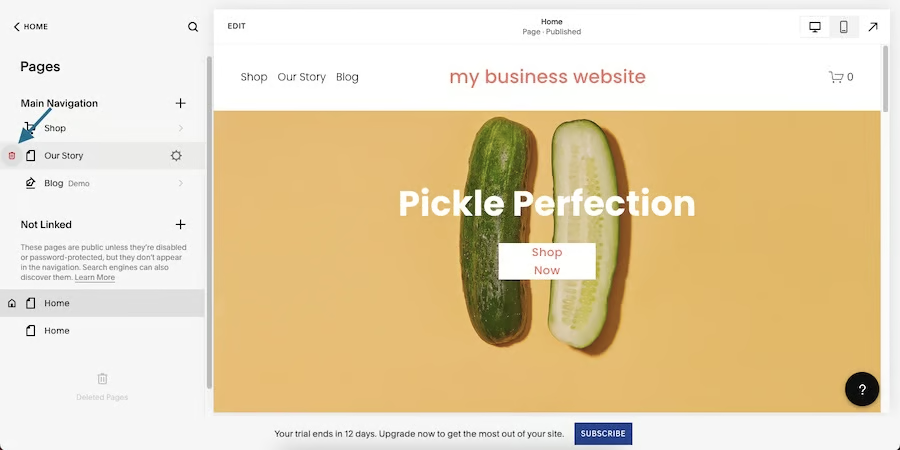
Click the trash icon to delete pages 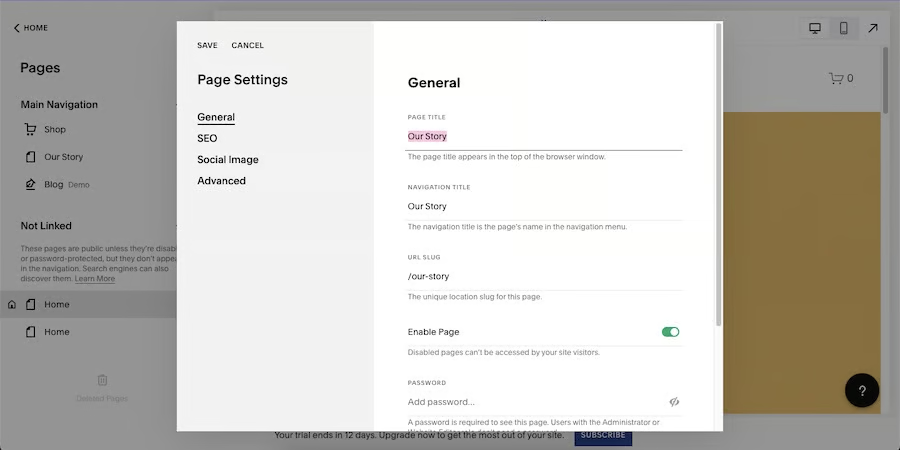
To rename pages, click the gear icon, then type in the new name 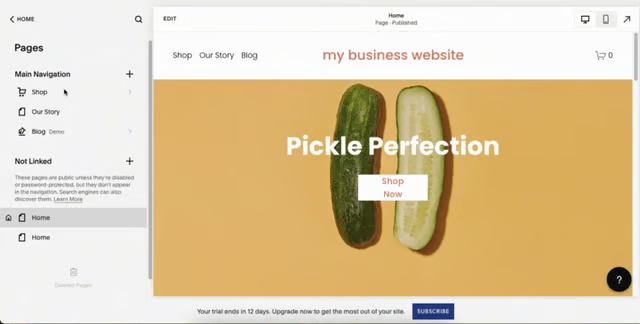
Click and drag pages to reorder them


- How to add pages: Click the + button beside the “Main Navigation” tab, then choose the kind of page you want to add (blog, store, portfolio, etc.) or start with a blank page. If you choose a ready-made page, Squarespace will present you with a few layout options—select and click on the one you prefer most.
- How to delete pages: Click on the trash icon next to the page you want to delete, then click “Confirm.”
- How to rename pages: Hover over the tab of the page you want to rename, then click on the gear icon to open up its settings. Type in your preferred page title, navigation title, slug, or password, if necessary.
- How to reorder pages: Simply click and drag the pages around. This will also shift their order on your site’s main navigation bar.
In addition to learning how to use Squarespace to create a website, you may also want to add ecommerce. To add an online store to your Squarespace website, choose the “Commerce” tab on the left-hand menu bar. Inside this section, you’ll be able to manage all the elements of your store, including your orders, inventory, customers, and discounts.
Squarespace also has a handy checklist prepared to make the setup process easier. It involves three steps: setting up products, adding payment options, and choosing a Squarespace subscription plan. The latter is required before your store can go live, but you can also set it up after you’ve finished building your site.
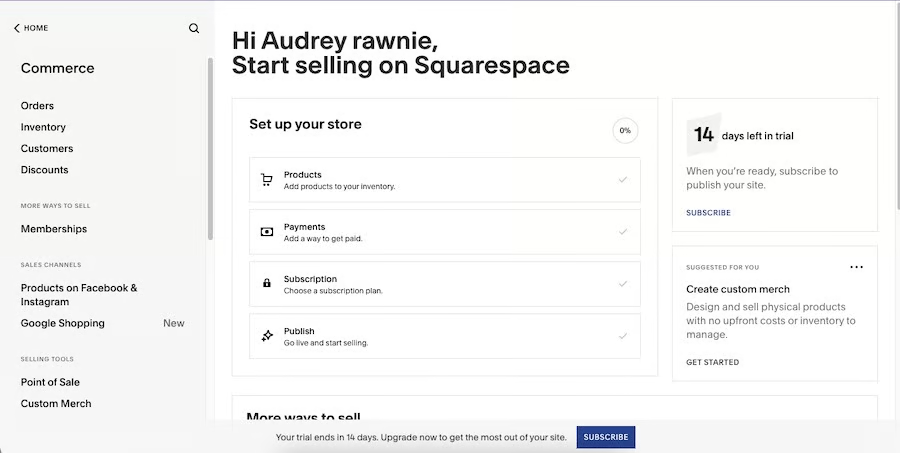
Manage your online store under the “Commerce” tab 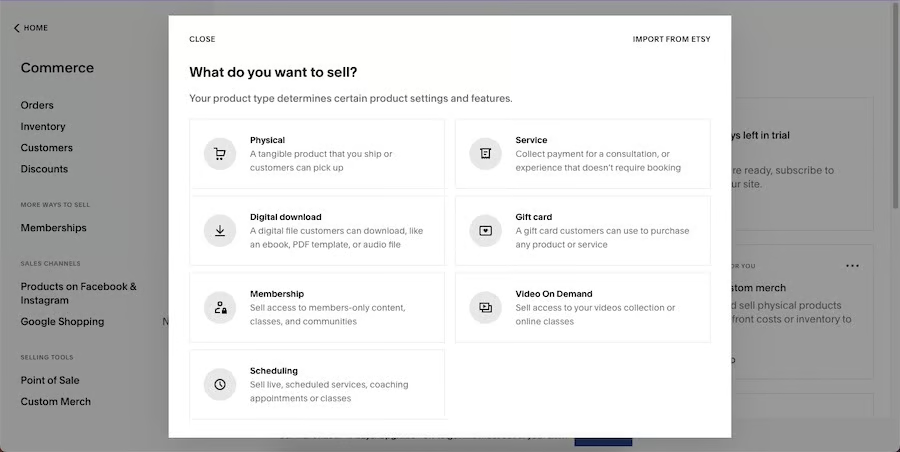
Under the “Products” tab, choose the kind of products you’re selling 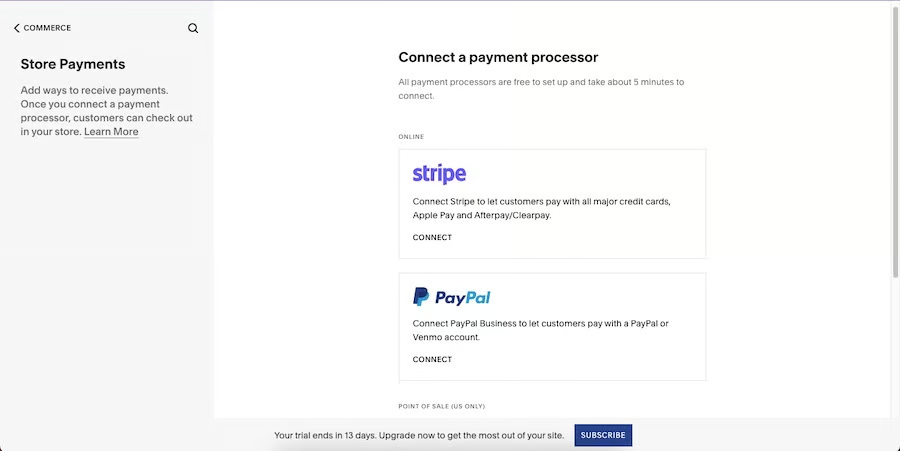
Under the “Payments” tab, choose a payment processor 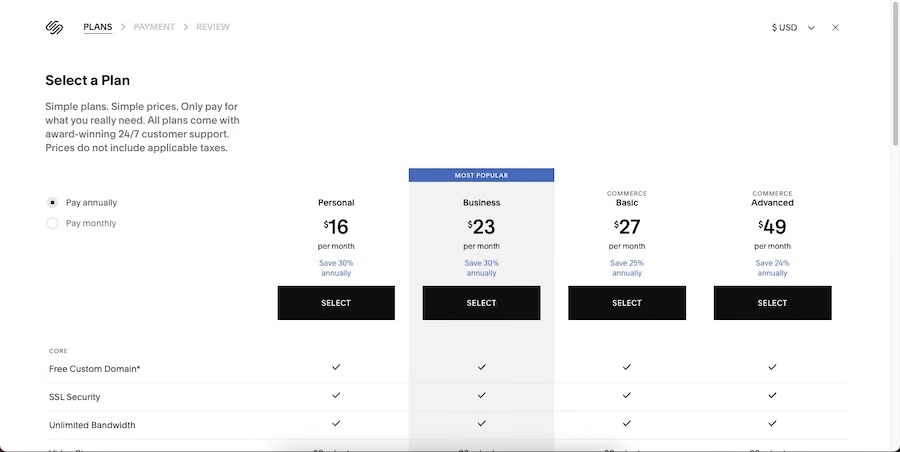
Under the “Subscriptions” tab, choose a Squarespace plan 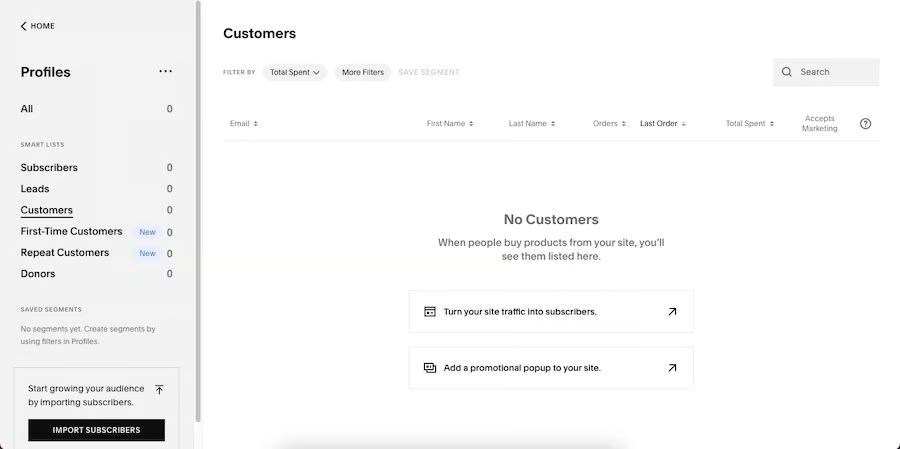
Access Squarespace’s CRM tool under the “Customers” tab 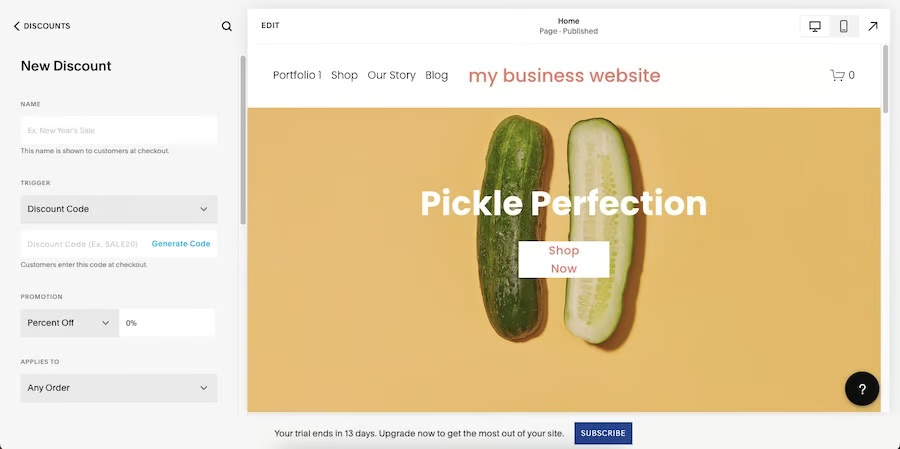
Add and manage store discounts under the “Discounts” tab


- How to add products: Click on the “Products” tab, choose the type of products you’ll be selling (physical products, services, digital downloads, etc.), then fill in the following fields.
- How to add payment methods: Click on the “Payments” tab, choose a payment vendor (Stripe, PayPal, or Square), and a payment currency.
- Choose a subscription plan: Click on the “Subscription” tab, then choose your Squarespace plan (you can also set this up later on before publishing your website).
- How to manage your customers: Click on the “Customers” tab to enter Squarespace’s version of a customer relationship management (CRM) tool. This is where you can add your customers’ information, like their email address, name, total spend, and more.
- How to add discounts: Click on the “Discount” tab, then click on the + button and fill in the fields to add a new discount.
You’ll need to set up your marketing tools to fully optimize your site and promote it using Squarespace’s built-in features for website marketing. In this section, you can set up email marketing, search engine optimization (SEO), your Google Business Profile location, and more.
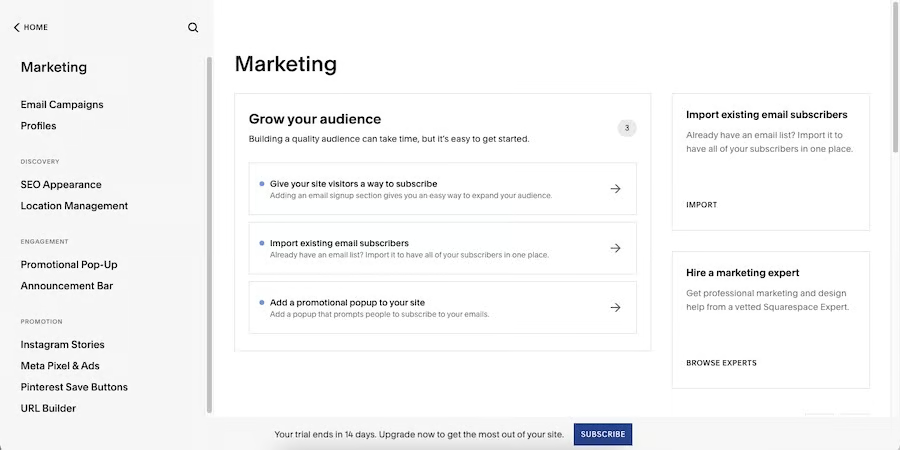
Set up your site’s marketing tools under the Marketing tab 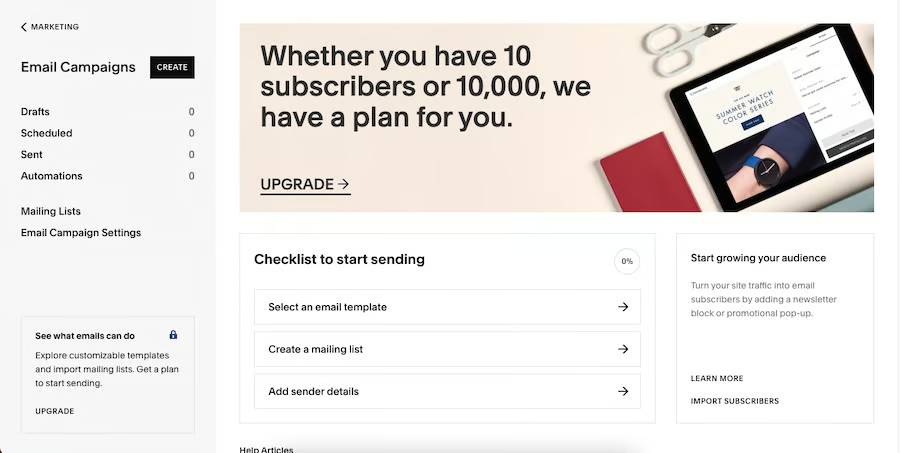
Set up email marketing under the “Email Campaigns” tab 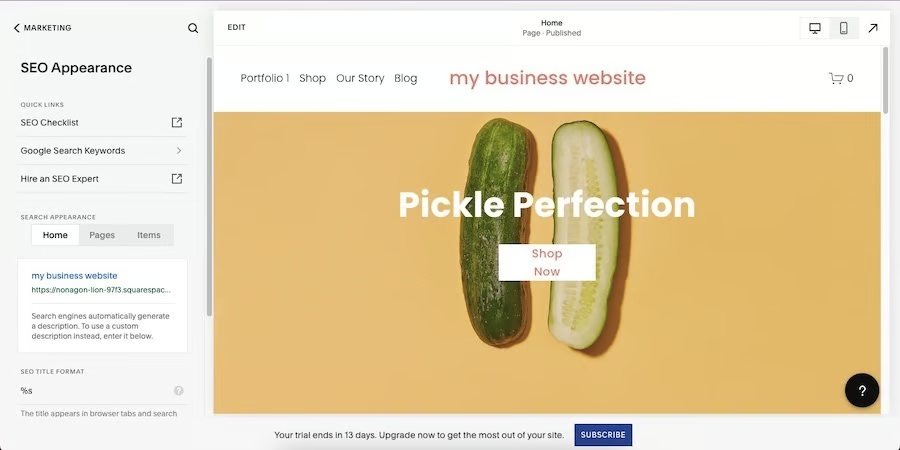
Set up your SEO under the “SEO Appearance” tab 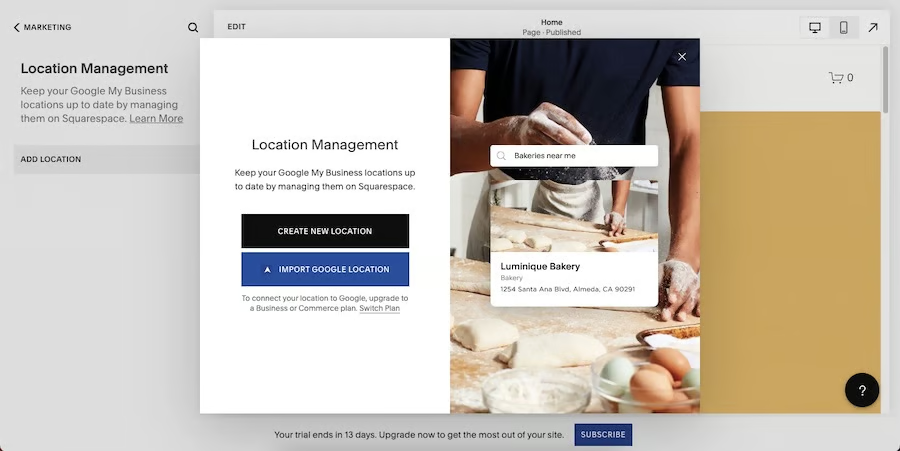
Under the “Location Management” tab, add your location or connect with your Google Business Profile


- Set up email marketing: Click on the “Email Campaigns” tab, then choose an email template under “Select an email template.” You can also create your email list and set up your sender details.
- Set up Squarespace SEO: Click on the “SEO Appearance” tab, then type in search-optimized titles and descriptions for your website. You’ll also be able to add titles and descriptions to every page of your site. In addition, Squarespace offers SEO guidance and the ability to connect Google Analytics to view your site’s traffic from the dashboard.
- Set your location: Click on the “Location Management” tab, then the “Add location” button to add a new location or connect with your Google Business location.
4. Customize Your Squarespace Website’s Design
In terms of how to use Squarespace to build a website, the next step is to customize your template’s design and general appearance. To do this, simply click and customize the elements inside Squarespace’s intuitive drag-and-drop editor.
Open the drop-down list below to learn how to use Squarespace’s customization tools.
To add more elements to your site, double-click anywhere on your website until it enters full-screen mode to access your site’s editing tools. Then, hover over the web page and click the “Add Block” button. This opens a menu of elements, including text boxes, images and videos, forms, newsletters, and more—click on the element you need, and it automatically appears on your page.
You can also move elements around by clicking and dragging them where you want them to appear. To delete elements, select the trash icon above the element.
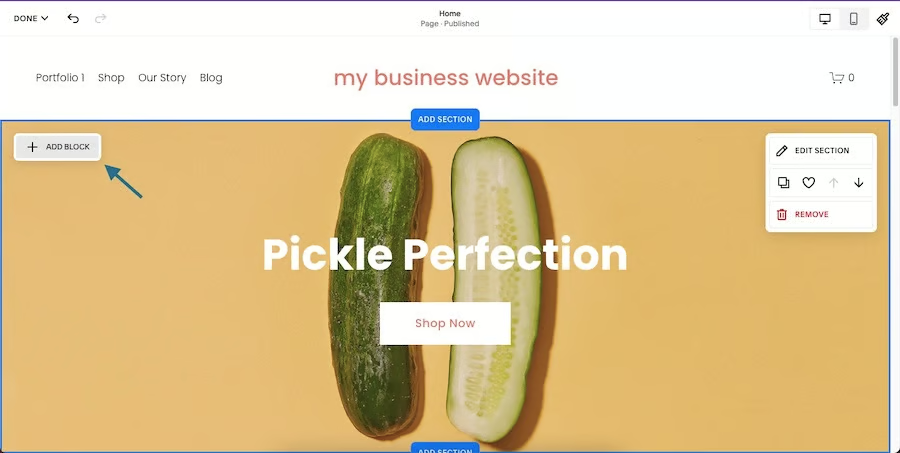
Click on the “Add block” button to add an element 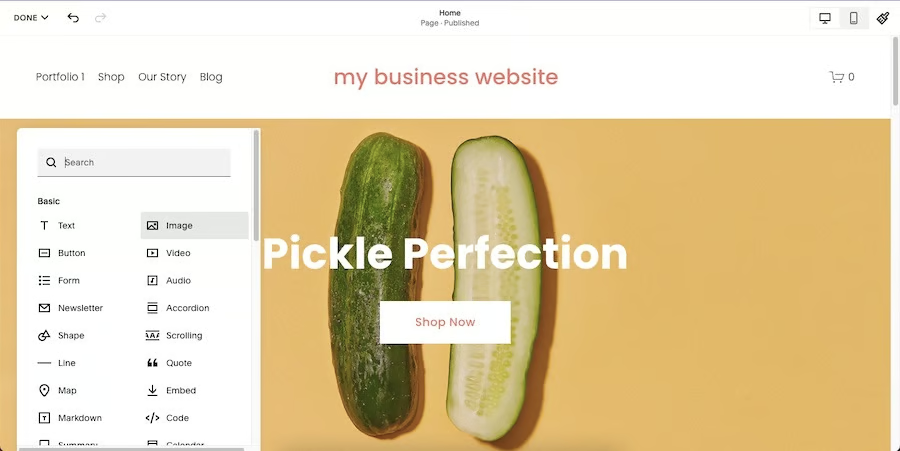
Choose the element you need from the menu 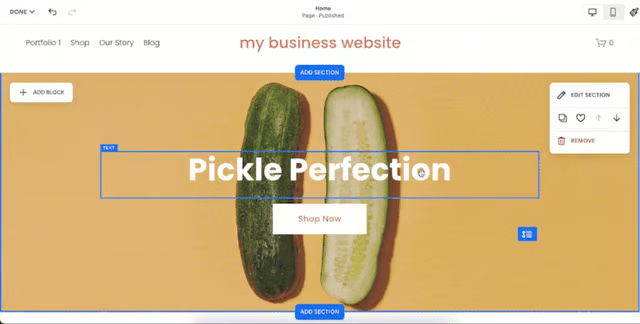
Move elements by clicking and dragging them around


To add a new section to your website, select the “Add Section” tab either above or below the pre-existing section where you want to add a new one. Then, choose the type of section you want to add (a “Contact” section, “About” section, and so on), and choose a layout. You can also choose to add a blank section.

Click on the “Add section” button to add a new section 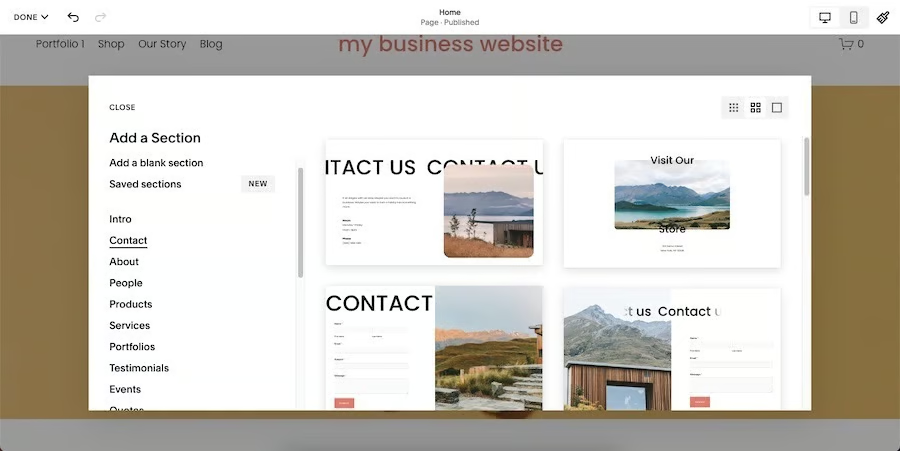
Choose a section type and layout or start with a blank one


To edit a pre-existing section, hover over the section you want to edit, then select the “Edit section” button. In the following menu, you can edit your sections’ format, divider style, background image, and colors.
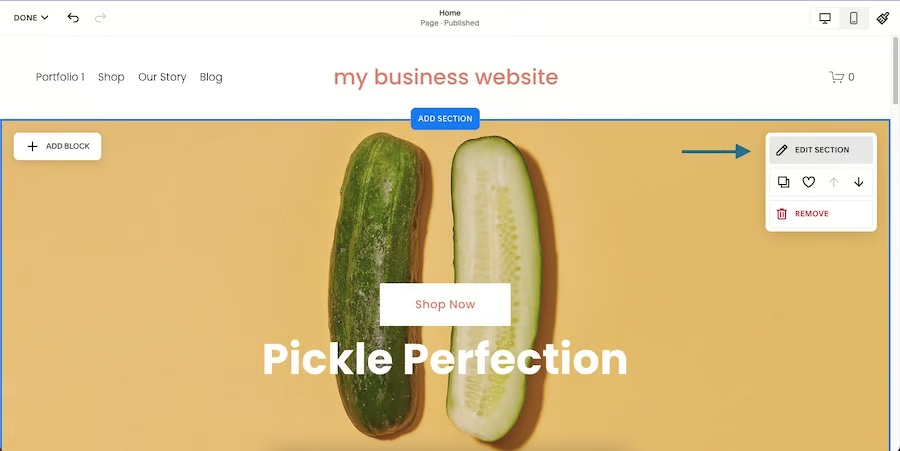
Click “Edit section” to customize your section (Source: Squarespace) 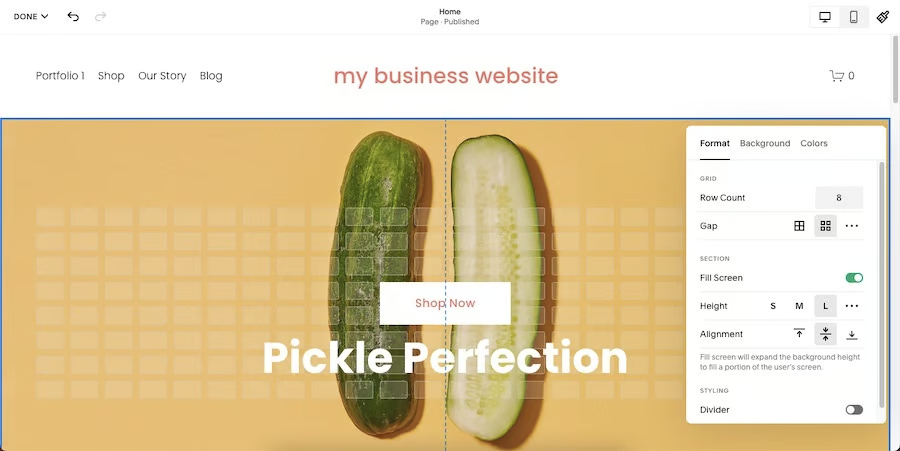
Customize your section’s design


You’ll also need to add a logo to your website. To do this, navigate to the header section where your site’s title is located, then click on it to open its Settings box. Under the “Site title & logo” tab, click the “Add logo” button to upload your logo from your computer.
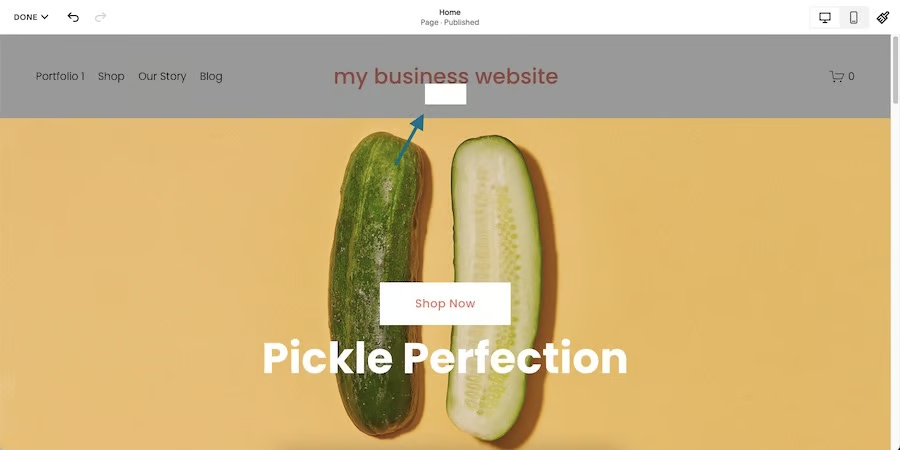
Click on the header section to add your business logo 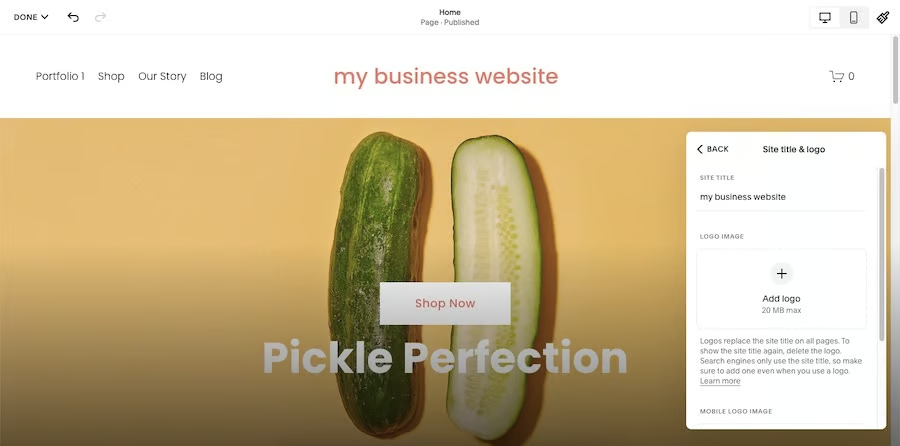
Upload your logo under the “Add logo” box


Finally, to customize your website’s details such as fonts, colors, buttons, and more, click on the paintbrush icon in the upper-right corner of the screen. This will open up Squarespace’s Site Styles menu.
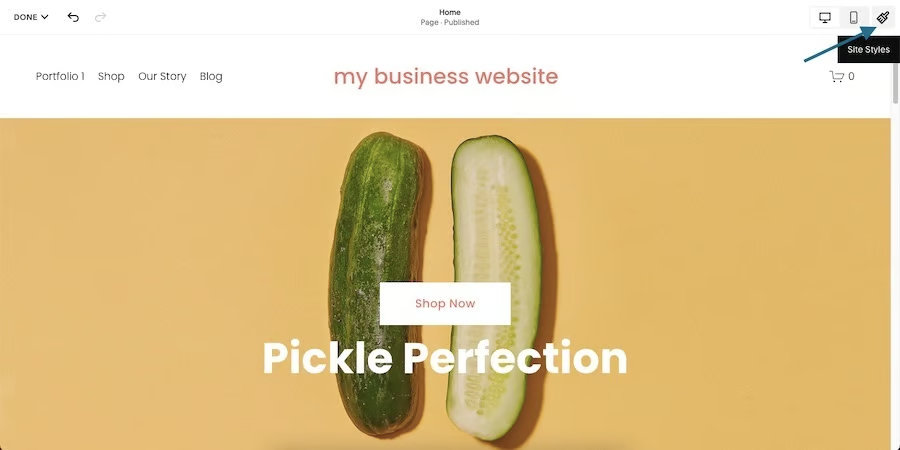
Navigate to the “Site Styles” button on the upper-right corner 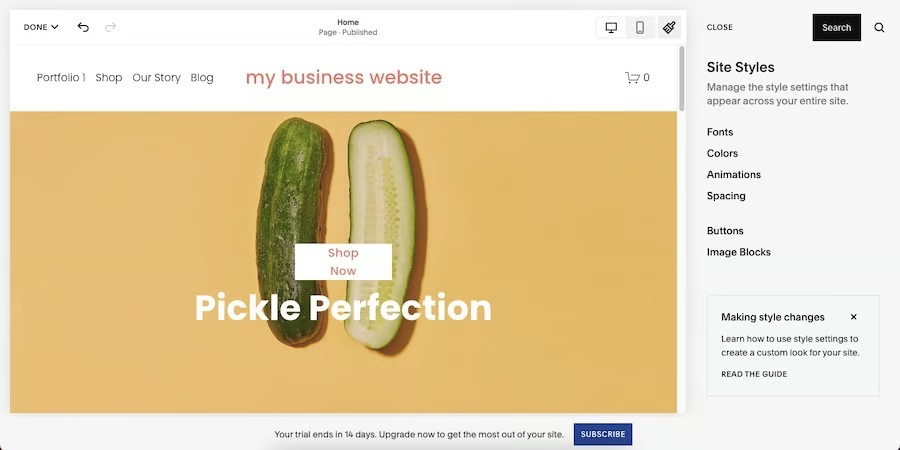
Customize your fonts, colors, buttons, and animations 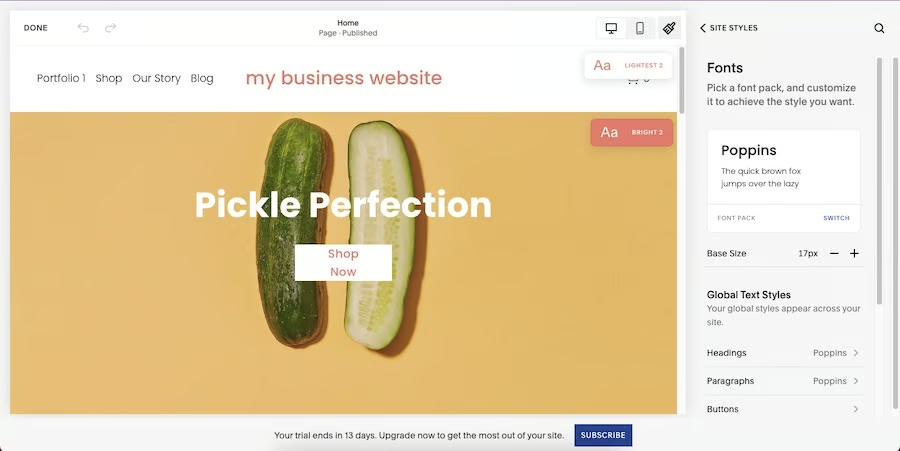
Choose your website’s fonts under the “Fonts” tab 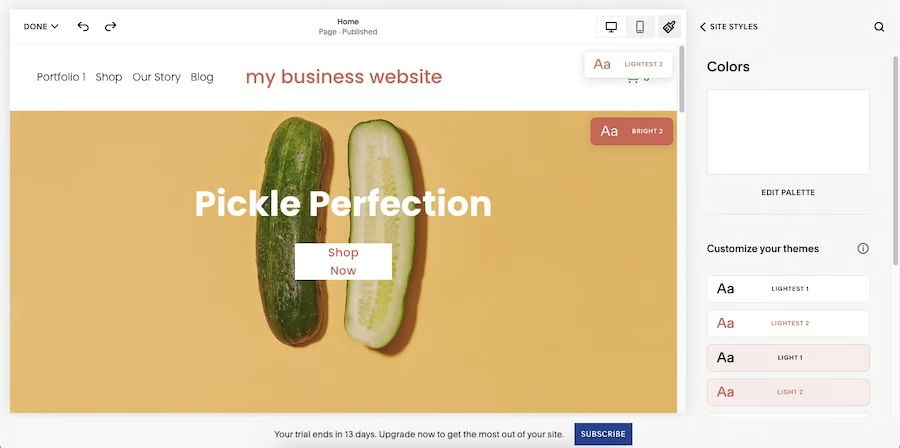
Under the “Colors” tab, select and customize your color palette 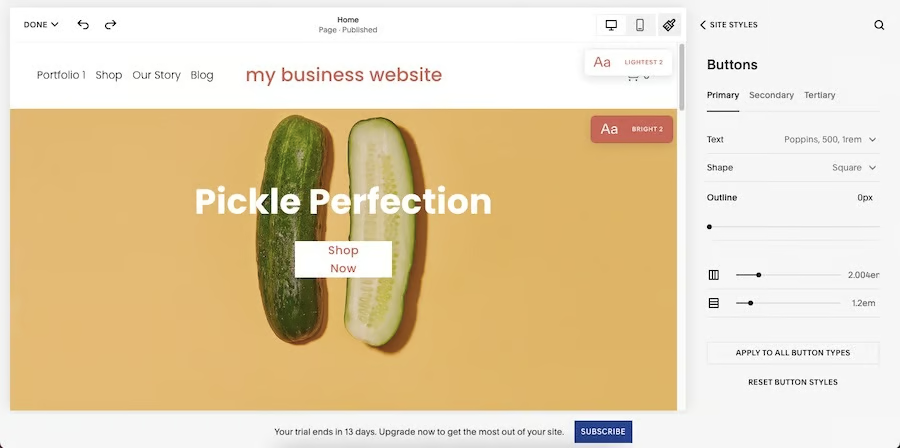
Customize your buttons’ shape, size, and outline under the “Buttons” tab 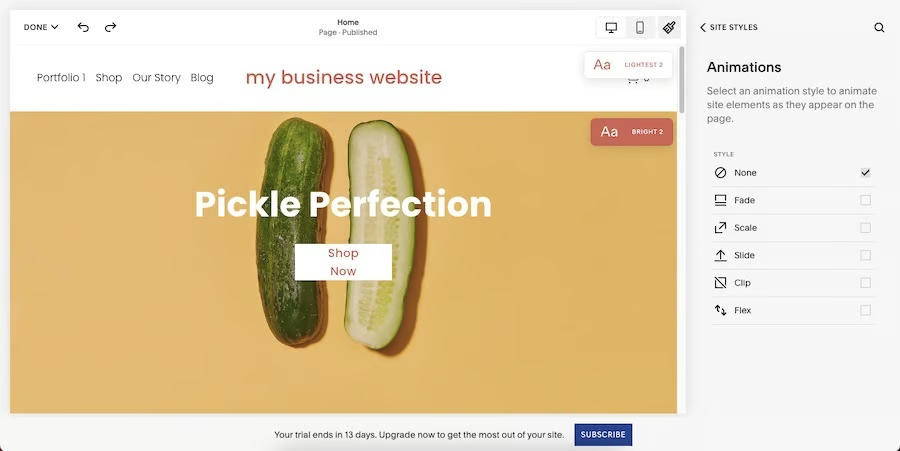
Add preset animations under the “Animations” tab


- Edit your website’s fonts: Click on the “Fonts” tab, then choose your preferred font for your headings, paragraphs, buttons, and other miscellaneous copies like your tags and product names.
- Edit your site’s colors: Click on the “Colors” tab, then “Edit Palette” to access the color picker and color presets. After choosing a color palette, you can also edit the colors of specific sections, such as your header, your background, and more. Learn how to pick a website color palette in a few simple steps.
- Edit buttons: Click on the “Buttons” tab, then select your preferred button font, shape, and outline from the drop-down lists.
- Add animations: Animations can create a more engaging user experience on your website. Click on the “Animations” tab, then choose a type of animation. You can choose between a fade, scale, slide, clip, or flex animation.
Another aspect of customizing your site is writing search-friendly copy for each page. If writing doesn’t come naturally to you, don’t worry–help is now available. You can use free AI content writers like Jasper and WriteSonic to come up with attention getting headlines and well-written copy for your site.
5. Review Your Website
Before publishing your website, review everything, and think about the site visitor’s experience. Is your site easy to navigate? If a customer wants to reach you, is it obvious and easy for them to do so? Can they find your hours of operation and location?
Here are some specific things to review:
- Page navigation: Make sure that all your essential pages are present and linked correctly from your navigation bar, and that each page has all the necessary information structured in an easily digestible way.
- Mobile site experience: Mobile websites now account for nearly 60% of all online activity—this means it’s essential that your website is fully functional on mobile screens. To check how your site looks and works on mobile devices, click on the mobile phone icon in the upper-right corner of the screen (beside the paintbrush icon). Edit elements and sections as needed to provide the best possible experience.
- Header and footer: Double-check that your header has your logo, your main navigation menu with links, and a call to action or search bar if necessary. Your footer should also offer basic contact information and social media links. You can also add an email sign-up form, another navigation menu, or your business address.
- Google map: If your business has a physical location, Squarespace makes it easy to add a Google map to any page of your website. This improves the experience for site visitors, especially on mobile, since they can easily navigate to your location.
- Privacy page: Every website should have a privacy page (and Squarespace requires you to have one). This notifies site visitors about things like how their data is stored and used, whether your site uses cookies, and who to contact if they want their information deleted. You can add these as an unlinked page under the “Pages” tab.
- Custom 404 page: Another unlinked page you can add is a custom 404 page, which is a landing page displayed to users in case of a navigational error. You can customize your 404 page’s design and add helpful content for users, like links that redirect to other pages, to create an overall better user experience.
- Cookie notification banner: You can also add a cookie notification popup or banner. While this isn’t a requirement for U.S.-based businesses, it’s increasingly becoming a standard for all websites. You can set these up under Settings > Cookies & Visitor Data.
- Website favicon: Favicons are tiny icons that visually represent your website on the internet. They appear as tiny images on browser tabs, bookmarks, search results, and more, and are essential to help build your branding. Set up your website’s favicon under Design > Browser Icon. Learn more about what a favicon is and how to make one.
- Branding: Double-check that your website and all your site elements also follow your business’ overall branding. Your website essentially represents your business in the digital world—it should align with your overall branding for better brand recognition and recall.
- SEO: Search engine optimization (SEO) is essential to any website’s success in the modern world, and Squarespace is one of the best SEO website builders around. Do keyword research to find out what keywords can best get your site to rank high on search engines, and be sure to include them under the SEO section in your site’s Marketing tab.
6. Choose a Plan & Publish Your Website
The final step in terms of how to build a website with Squarespace is to choose a plan so you can finally publish it live. Squarespace doesn’t currently offer any free plans—to make your website public, you’ll need a paid subscription.
On the upper-left corner, click “Done” to return to your home screen. Then, navigate to the Settings tab and click on “Site Availability,” then click the “Upgrade to publish” button, which takes you to Squarespace’s plans. Choose the one that best suits your needs, fill in your billing information, then click “Save & Continue.”
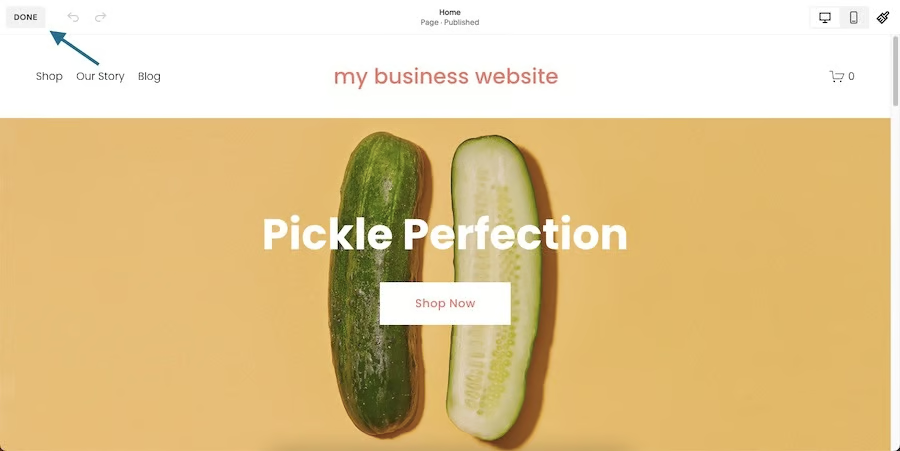
Click “Done” to return to the main menu 
Navigate to the Settings tab to start finalizing your website 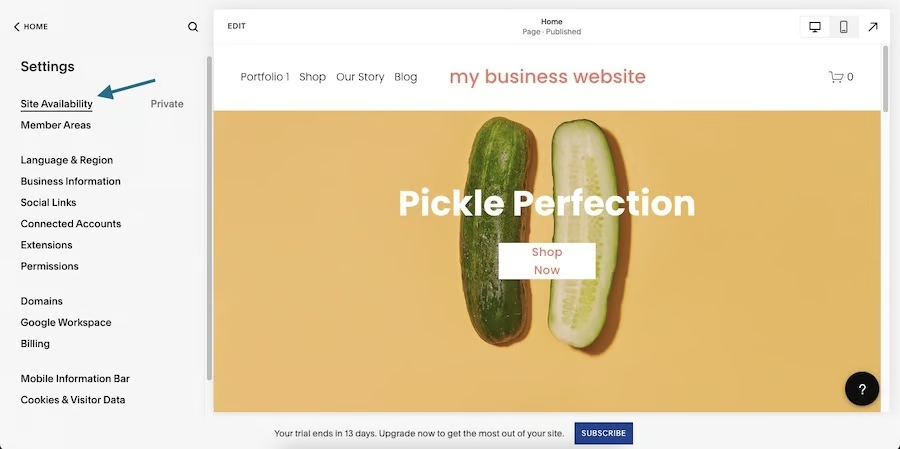
Under the Settings tab, click “Site Availability” 
Click the “Upgrade to Publish” button to choose a plan -
Choose the plan that best suits your needs, then fill in your billing information to finish publishing your site


After purchasing a plan, your Squarespace website will automatically go live.
Squarespace Pricing
Click through the tabs below for a rundown of Squarespace’s pricing plans and what they offer. Keep in mind that the prices displayed below are based on a yearly billing cycle, which is overall cheaper than paying month by month:
Monthly cost: $16 with annual billing or $25 month-to-month
What’s included:
- Free custom domain for one year
- SSL Certificate
- Unlimited image storage and bandwidth
- Website templates, SEO features, and mobile optimization
- Basic website metrics
- Squarespace extensions (plugin integrations)
- Up to two contributors
Monthly cost: $23 with annual billing or $36 month-to-month
Get everything in the Personal plan, plus:
- Integrated ecommerce, unlimited products, 3% transaction fees
- Website popups and banners
- Advanced analytics
- Third-party integrations and CSS and JavaScript via code embed
- Unlimited contributors
- Additional video storage
- One year free Google Workspace and Gmail account
Monthly cost: $99 with annual billing or $139 month-to-month
Get everything in Basic and Core, plus:
- Advanced ecommerce and merchandising features
- Shopping cart abandonment
- Sell subscriptions
- 0% transaction fees for ecommerce
- Additional video storage
- Social media selling
Additional Resources for Building a Site on Squarespace
In addition to the essentials of how to build a Squarespace website, below are additional resources. Learn more about Squarespace, including who it’s best for, what extensions to use, get design tips, and find out how to get the most from your site.
- Get a comprehensive overview of Squarespace, what makes it great, and its limitations in our expert Squarespace review.
- Customize your website on a budget using images from the best places to get free images for website design.
- See why Squarespace is one of the best blogging platforms for creatives.
- Plugins are great for getting more functionality—learn all about Squarespace’s plugins and extensions.
- As much as 75% of your brand’s credibility can be impacted by your site’s design. Read our list of 30-plus web design statistics for more key insights you need to know to build your brand’s presence online.
- Several elements make up a good website, from great UX to having the proper brand persona. Learn more from our list of what makes a good website.
- Download our free checklist to make sure your new site has all of the vital website basics covered.
- Learn the website marketing strategies you need to gain web traffic and build your brand presence online.
Frequently Asked Questions (FAQs)
Is Squarespace good for beginners?
Squarespace is easy to use, even for web design beginners. There are dozens of professionally designed templates, built-in capabilities for marketing and ecommerce, and plug-and-play extensions. You can easily customize any template to fit your branding or build your own template in just a few clicks. Plans are also affordable and bring a lot of value when building a small business website.
What is Squarespace & how does it work?
Squarespace is an all-in-one website builder that combines web hosting, domain registration, and security for an easy website solution. Users can simply choose and customize a premade template or build one from scratch with drag-and-drop editing. To get started, create an account, choose a template, build and edit pages, then publish your site.
Can I use Squarespace for free?
Unfortunately, Squarespace doesn’t offer any free plans, although it does have a 14-day free trial. You can build your website on Squarespace and access its features for free for 14 days, but to make your website visible to the public, you’ll need a paid plan. If you need a truly free option, check out our list of the best free website builders.
Bottom Line
Squarespace is one of the most reputable website builders in the industry, and never fails to make our list of best website builders for small businesses. It’s easy to use, and has visually impactful templates and drag-and-drop editing to speed up site building. Take advantage of the platform’s 14-day free trial to see if it’s the right solution for you.