


GoDaddy is one of the most well-known names in web hosting and domains. It offers reliable website hosting, including all-in-one site builder plans that make it easy for anyone to build a website. We’ll walk you through the entire process of how to create a website on GoDaddy in six steps, including a GoDaddy website builder tutorial video that showcases just how easy it is.
- GoDaddy Website Builder Tutorial Video
- 1. Create an Account & Answer GoDaddy’s Prompts
- 2. Set Up Your Ecommerce Features
- 3. Design Your Website
- 4. Set Up Marketing Tools & SEO
- 5. Review Your Website
- 6. Choose a Subscription Plan
- Best Alternatives to Building a Website With GoDaddy
- Frequently Asked Questions (FAQs)
- Bottom Line
GoDaddy Website Builder Tutorial Video
For a more detailed step-by-step walk-through on how to create a website on GoDaddy, watch the tutorial video below, which follows all the steps outlined in this article.
Follow along with the GoDaddy website builder video tutorial that shows step-by-step how to build a website on GoDaddy:
1. Create an Account & Answer GoDaddy’s Prompts
The first step to building your small business website on GoDaddy is to set up an account on the platform. Visit the GoDaddy website and click on the “Get Started” button on the home page. This leads you to a screen to create a GoDaddy account. Create one by connecting with Facebook or Google, or by manually typing in your email address.
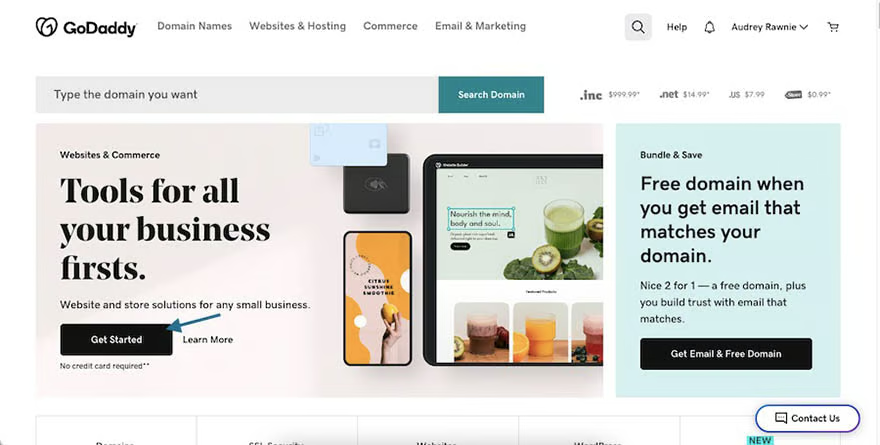
Click the “Get started” button to start the process. 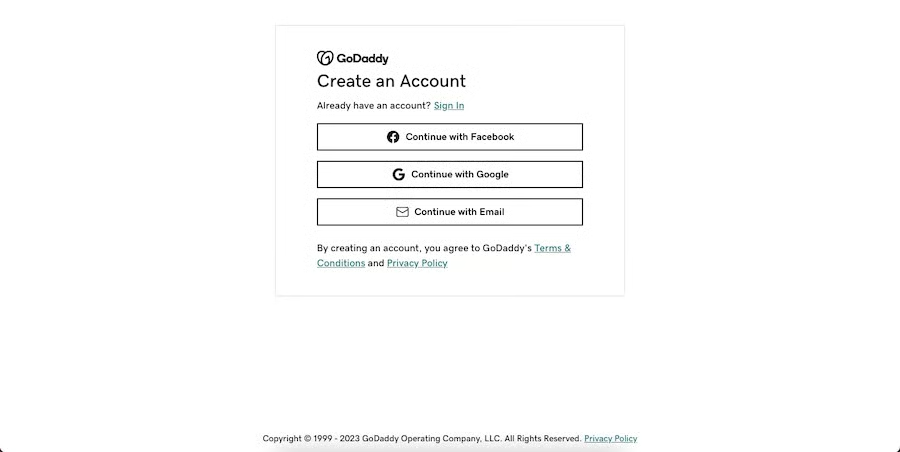
Create your account with Google, Facebook, or by typing in your email address.


Once you’ve created your GoDaddy account, you’ll be greeted with a series of prompts about the details of your website. These include things like your primary objectives for building a website, the ecommerce features you need, your business name and industry, and so on.
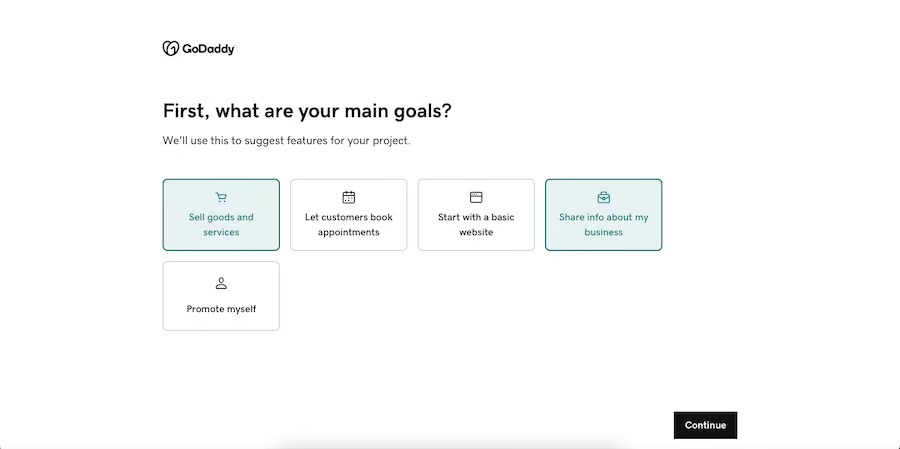
After setting up your account, answer GoDaddy’s prompts about your business website. 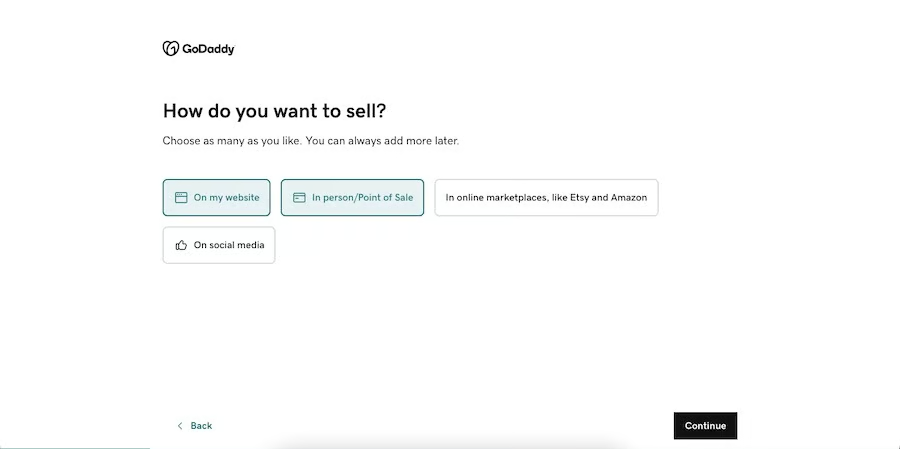
Prompts can include your selling options and type of business, among others. 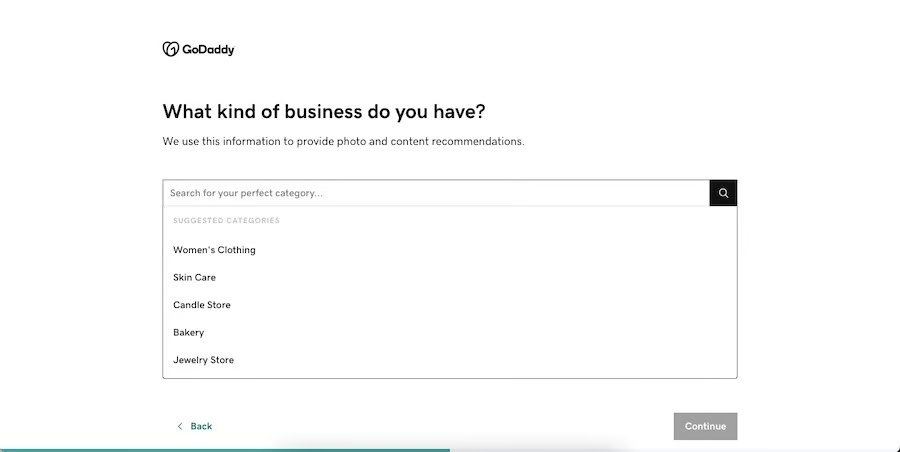
GoDaddy will use your answers to generate a theme that best suits your needs. 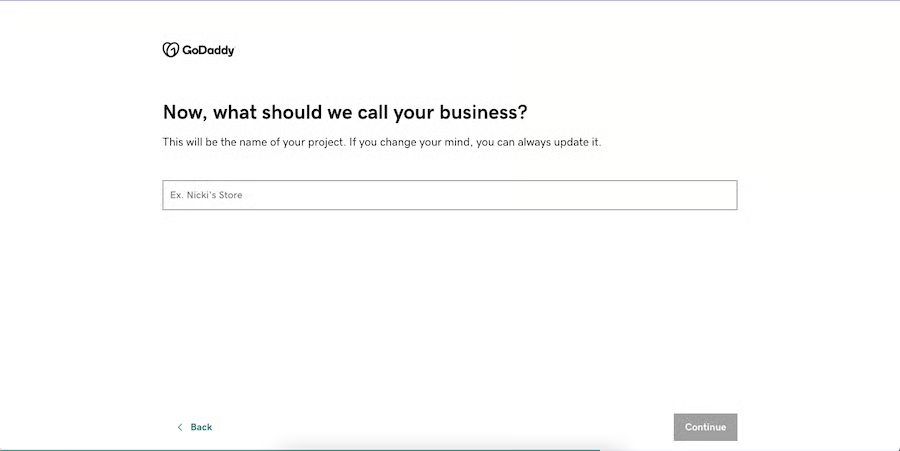
Input your business name.


Simply answer the prompts, and GoDaddy will automatically direct you to your website’s dashboard. Here you can set up all the essential elements of your website, from your online store and your website design to your marketing capabilities.

2. Set Up Your Ecommerce Features
Inside your dashboard, you’ll find helpful guidelines from GoDaddy on setting up the individual elements of your website, from your online store and your website design to your marketing capabilities. If you plan to sell services or products online, we recommend setting up your ecommerce features first.
To start setting up your website’s ecommerce, click on the “Design and publish your online store” subtab under the main “Commerce” tab on your dashboard. This takes you to GoDaddy’s intuitive site editor. This is where you’ll customize all the components of your website, from your home page to each individual button, and get an overall look and feel of how it works.
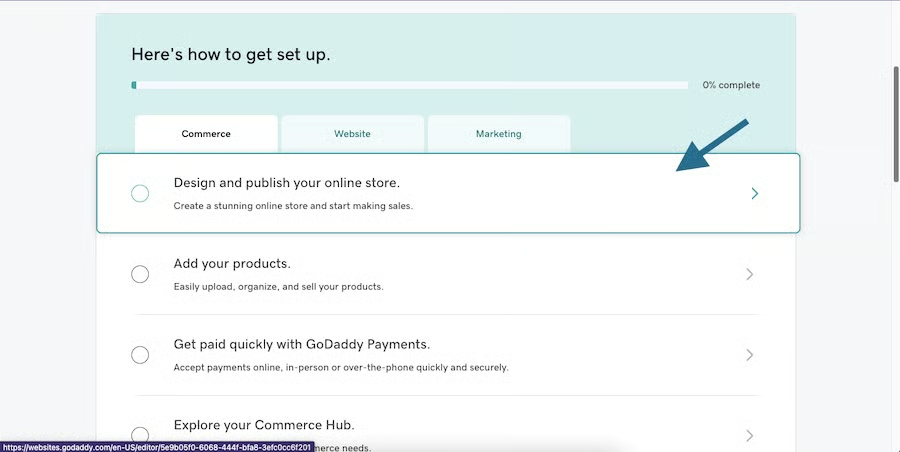
Click on the “Design and publish your online store” to set up your ecommerce site. 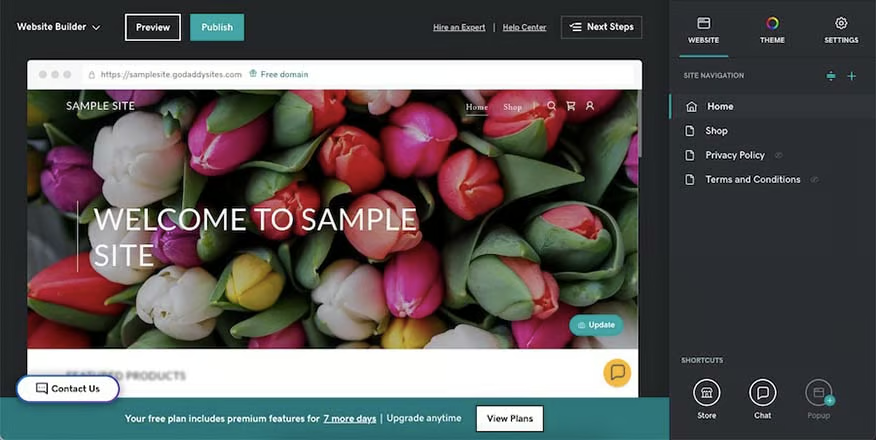
The GoDaddy site editor, where you’ll customize each individual website element.


Scroll down the website editor, and you’ll find a prompt to set up your online store. Click on the “Add products” button to start adding to your store inventory. Inside the pop-up box, you can add details about your store’s products, including your product name, description, category, price, and others. If you offer non-physical products (e.g., digital downloads and e-books), you can choose the “Video/Digital” tab.
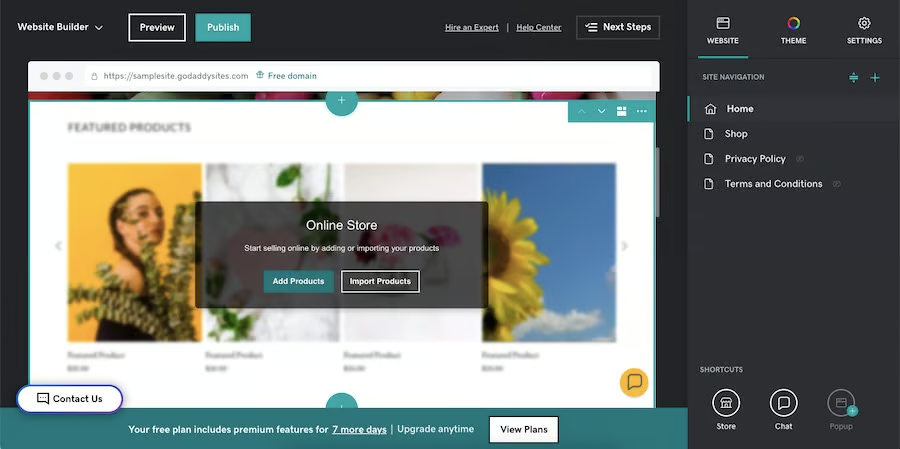
Click the “Add Products” button to add your inventory. 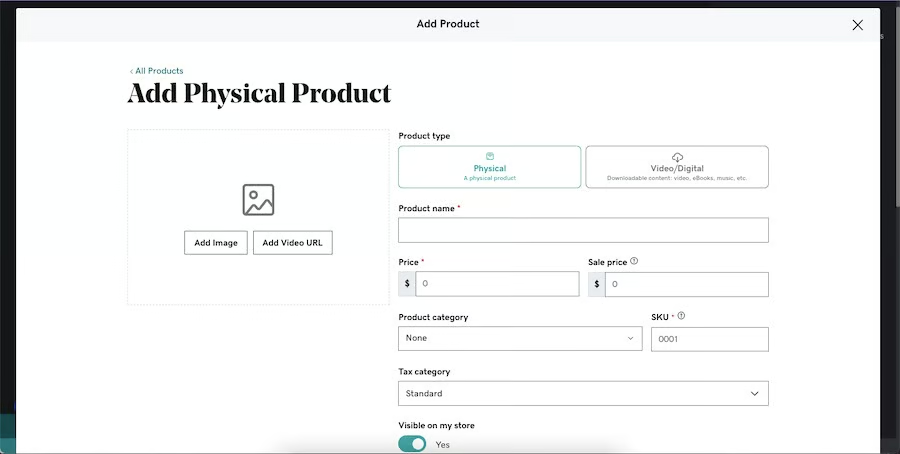
In the pop-up box, add the details of your products. 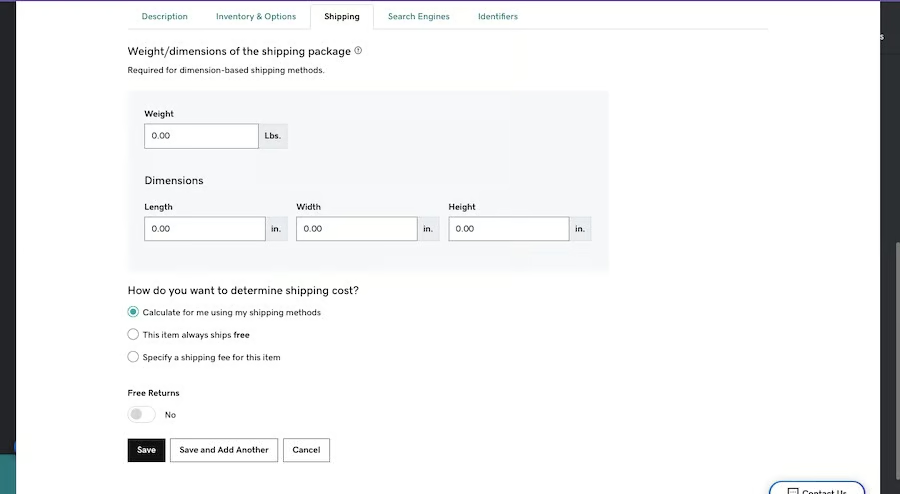
Scroll down to add information about shipping. 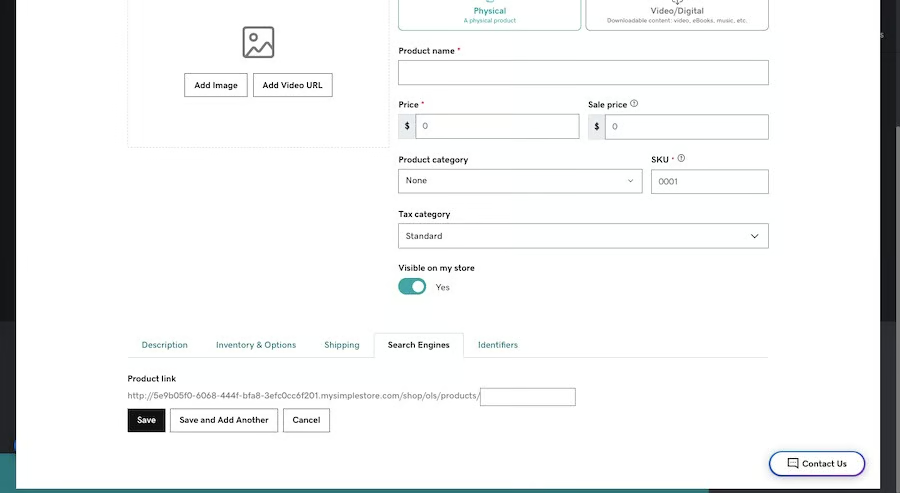
Plus, add a custom URL slug, product identifiers, and more.


On the bottom of the pop-up screen, you can also add information on shipping (for physical products), a custom URL slug to help boost your search engine ranking, and other helpful details about your product. After setting up your product details, click “Save” in the lower left corner.
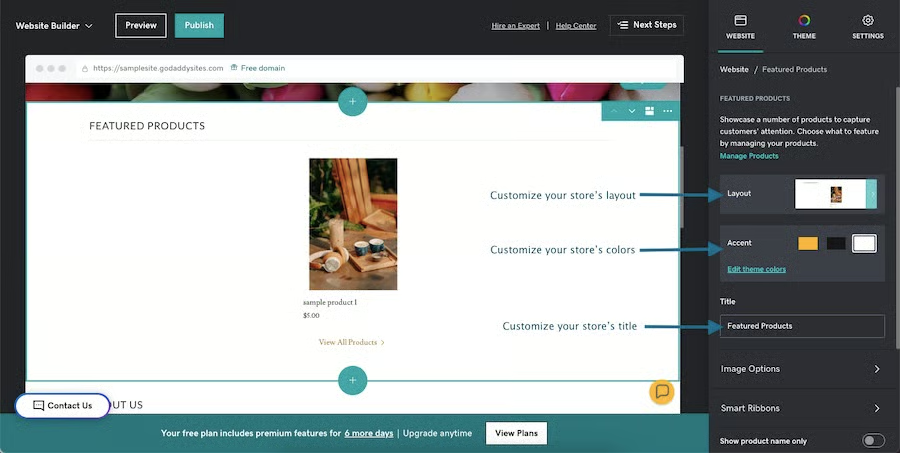
After you’ve added a product, it will automatically appear on your website. You can customize how it looks on the right-hand menu of the site editor. Click the “Layout” section and choose your preferred layout, and you can also customize your store’s accent color, title, image shape, and more.
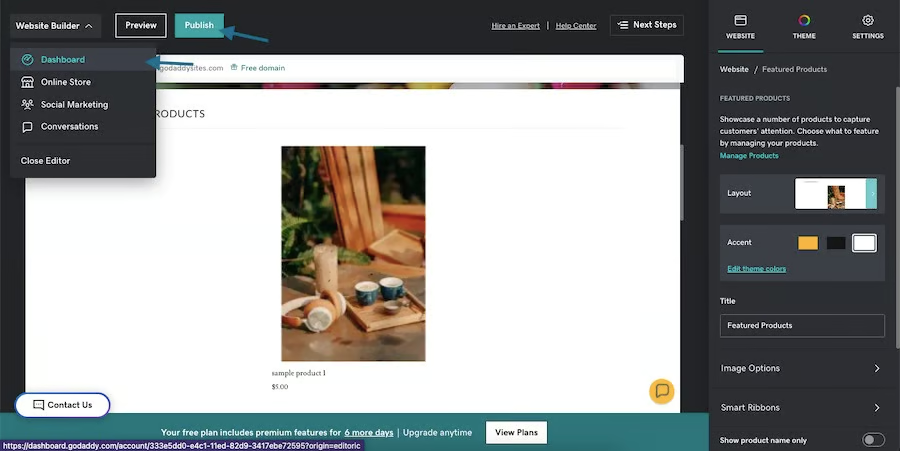
Once you’ve finished adding all your products and customizing your store’s layout, click the “Publish” button on the upper menu to save your edits and publish your store live. Then, navigate back to your dashboard to set up your other elements by clicking “Website Builder” in the upper-left corner and “Dashboard” in the drop-down menu.
After you’ve set up your online store, you can start exploring your site’s ecommerce hub. This is where you can manage all the ecommerce functions of your website, including setting up your payment methods, reviewing your business results and analytics, and editing your product inventory. On your dashboard, click on the “Explore your Commerce Hub” tab, and this will lead you directly to your Commerce Hub page.
- To edit your online store’s products: Click the “Products” button to access and edit your online store’s inventory.
- To set up in-person selling: If you also wish to sell products in person, GoDaddy has alternate payment methods, including point-of-sale (POS) hardware you can purchase, iPhone payments, a virtual terminal, and an online payment link. Under the “Where I Sell” section on the Commerce hub, click the “In Person” button to explore your options.

Click on “Explore your Commerce Hub” to manage your ecommerce features. 
Under your Commerce Hub, edit your inventory, review your business analytics, and set up your payment methods. 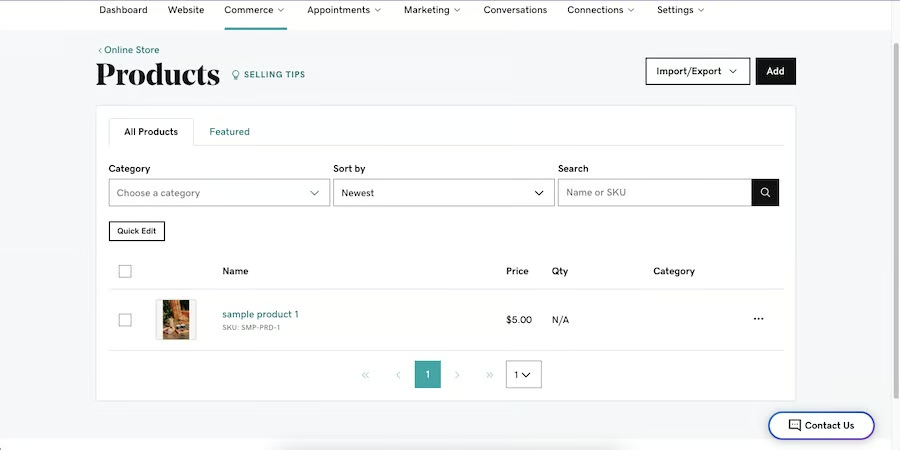
Manage your store inventory under the “Products” tab. 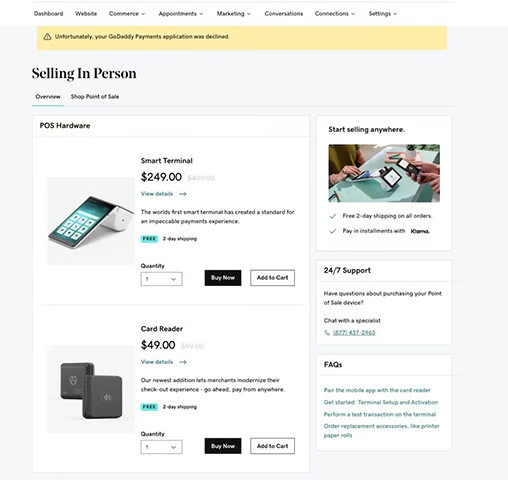
Set up in-person payment methods under the “Selling In Person” tab.


3. Design Your Website
After you’ve set up your website’s ecommerce features, you’re ready to start customizing its design and content. Click on “Dashboard” in the upper-left corner of your screen to return to your main dashboard, then click on the “Edit Website” button to access the website builder platform. As mentioned above, this website builder platform is where you’ll manage and customize each element of your website.
As you may have noticed, after answering GoDaddy’s prompts in the first step, it automatically generates a website template that best matches your answers. However, it will also likely need further edits to best fit your business’ needs. Keep reading below to learn how to manage your website’s pages, sections, and customize its overall appearance.
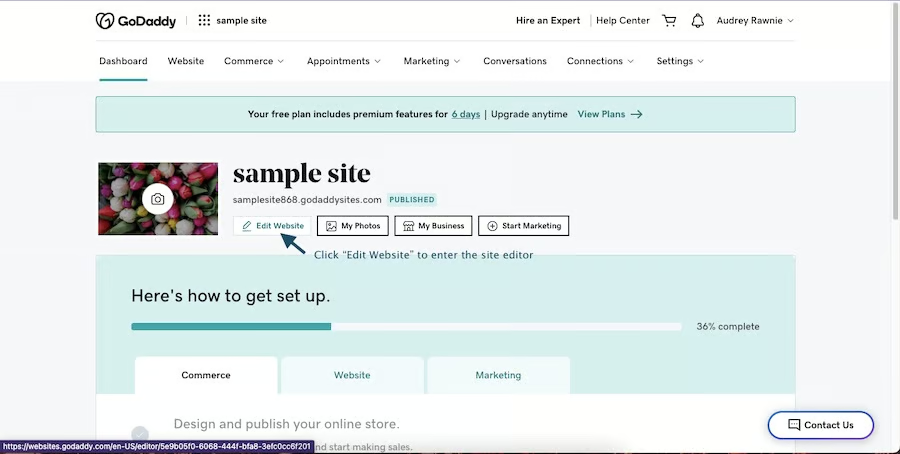
Click the “Edit Website” button on your dashboard to enter the site builder platform and customize your design. 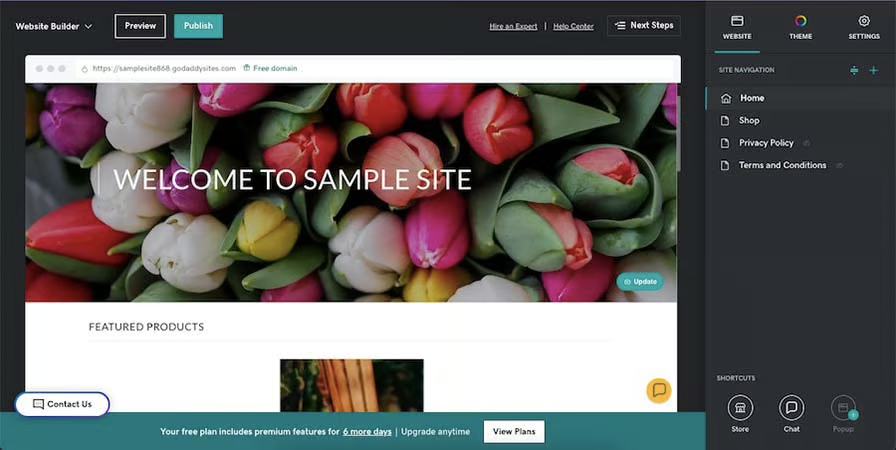
Customize the automatically generated template to best suit your needs.


Inside the site builder platform, you’ll find the Site Navigation menu on the right side of the screen, which is where you’ll manage all your site’s pages. GoDaddy also automatically generates a few pages for you.
- To add a new page: Click the “+” icon on the upper right corner of the menu, then click “New Page” in the following tab. Choose the kind of page you want to add, then click “Create Page.” You can also choose whether or not to have it appear on your navigation bar.
- To reorder pages: Click on the “Reorder Pages” icon beside the + button on the site navigation menu, click and drag pages in the order you prefer, then click “Done.“ They’ll also be rearranged on the navigation bar.
- To rename a page: Hover over the page you want to rename, then click on the gear icon and choose “Rename.” Type in the new name you want to call your page in the following menu.
- To delete a page: Hover over the page you want to delete, then click the same gear icon, and choose “Delete.”

Click the “+” button, then “New page” to add a new page. 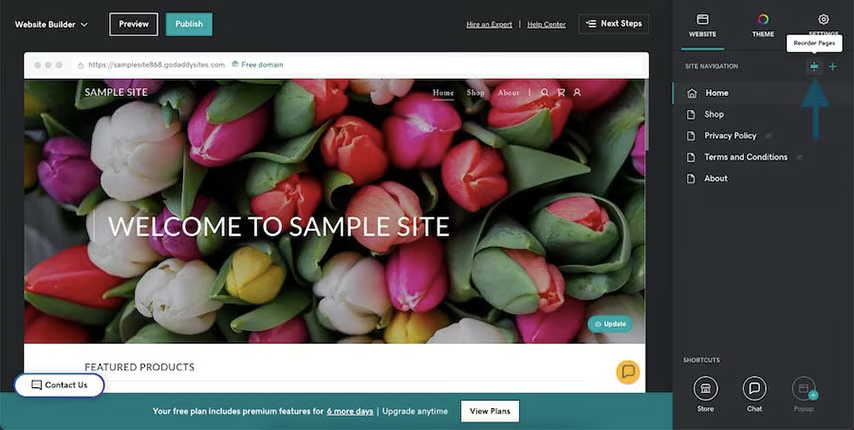
Click the “Reorder pages” icon beside the “+” button to reorder your site pages. 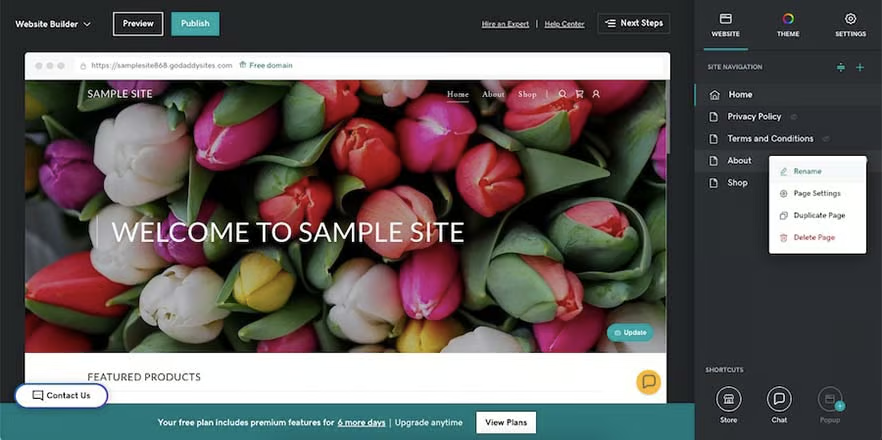
To rename a page, click the gear icon beside the page’s name, then choose “Rename.” 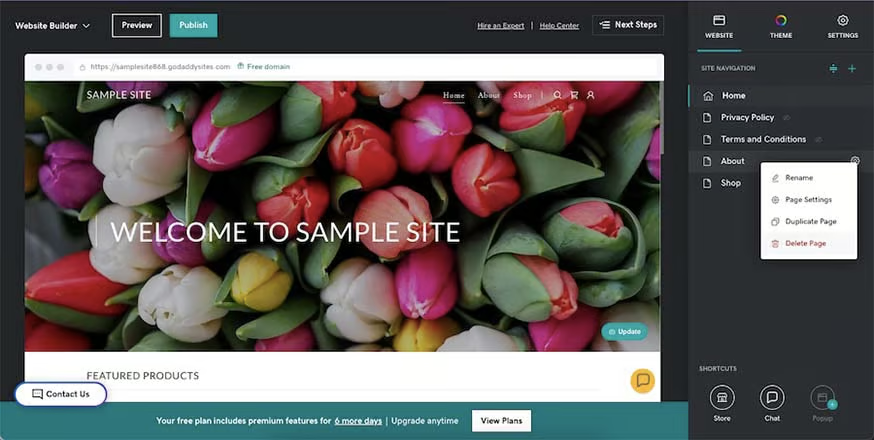
To delete a page, click the same gear icon, then choose “Delete.”


You’ll also need to edit the sections that make up each website page. You can add, delete, and reorder sections, and customize the layout and content of the elements within them. However, note that, unlike Wix and Squarespace, the GoDaddy site builder isn’t a drag-and-drop editor, which means all of its sections come with prebuilt elements and layouts to make the process of how to make a website on GoDaddy simpler.
- To add a new section: Click on the “Add Section” button above or below the section to which you want to add a new one, then choose the kind of section you want and its layout. You can choose from audio and video sections and image galleries to scheduling and ecommerce sections, and many more.
- To reorder sections: Click the up and down arrows on the upper right corner of each section.
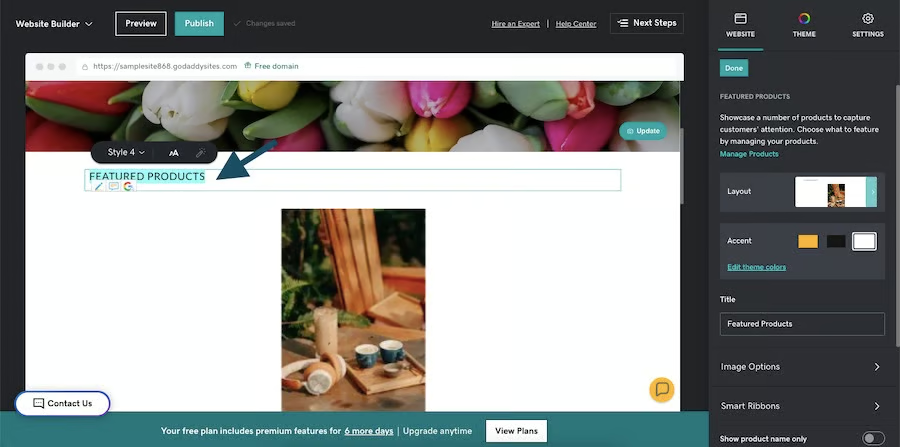
- To edit your section’s layout: Click the layout icon on the upper right corner of each section (next to the up and down arrows), then choose a layout from the right-hand menu.
- To delete a section: Click on the button with three dots (ellipsis button) in the section’s upper-right corner, then choose “Delete.”
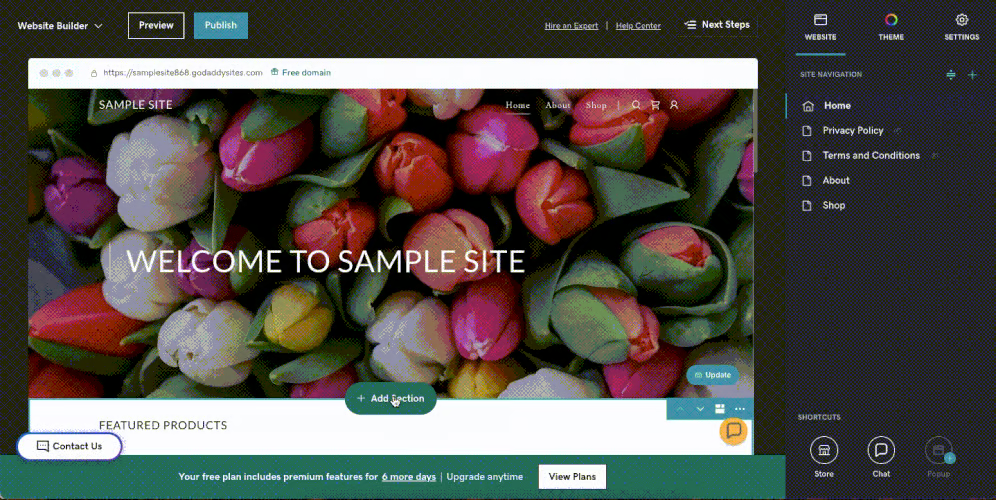
Click “Add section” and choose a layout to add a new section to your site. 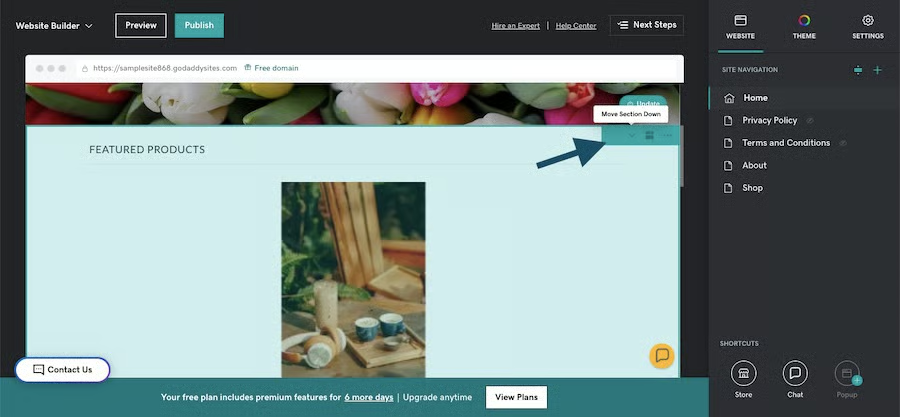
Click the up and down arrows to reorder sections. 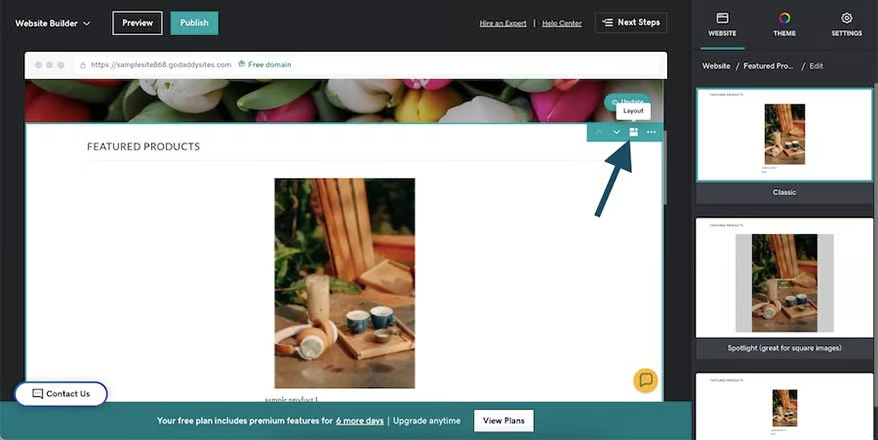
Click the layout icon to change your section’s layout. 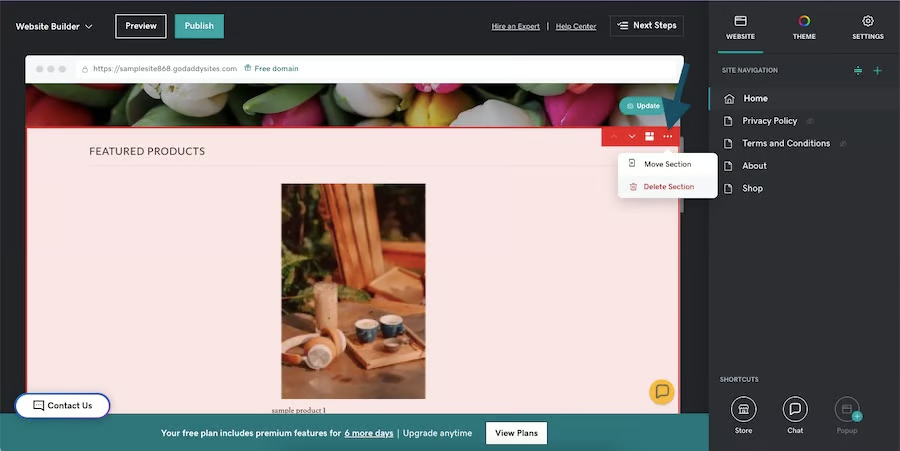
Delete a section by clicking the ellipsis button and choosing “Delete.”


Beyond customizing the sections of your page, you can also edit the individual elements within them. While GoDaddy isn’t a drag-and-drop editor, you can still customize the content and appearance of each element. Follow along to learn how to edit your site’s text, images, and logo.
- To edit text: Click and highlight the text element you want to edit, then type in your preferred text.
- To edit images: Click on the image element, choose “Change Image,” then upload your image. You can also choose a frame shape and add an image link and description.
- To add a logo: Click on the header section of your website, then click on your site’s title to open its menu and choose “Upload or create a logo.” In the following pop-up box, you can upload your own logo or create a new one using GoDaddy’s free logo maker.
Edit text by clicking and highlighting the text element, then typing in your text. 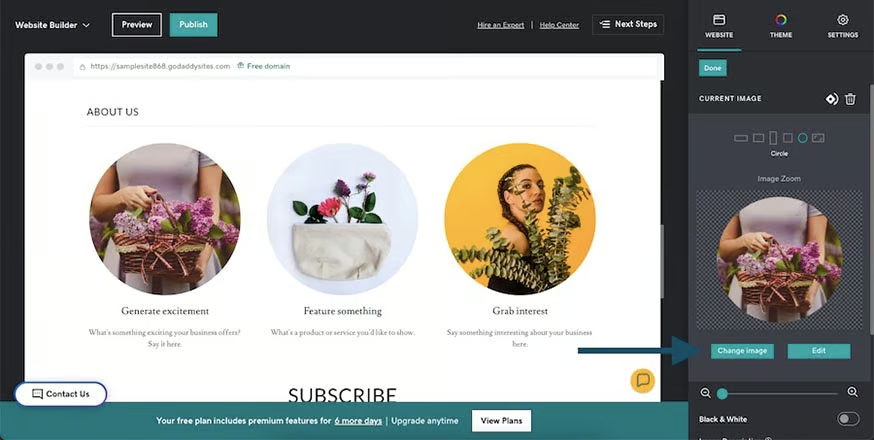
Edit images by clicking on the image element and uploading your own images under the “Change Image” button. 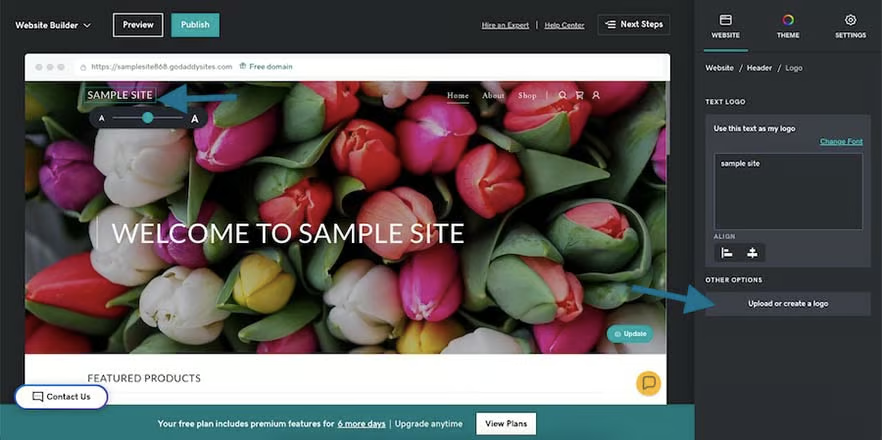
Add your business logo in the header section.


Once you’ve added and customized all the necessary sections and elements of your site, you can start customizing its appearance, from its overall theme and color palette to your fonts and buttons.
- To edit your theme: Under the “Theme” tab on the right-hand menu, click on the “Try a new look” button to open GoDaddy’s themes menu. Choose and click on the theme you prefer, and it’ll automatically apply to your site.
- To edit your site’s color: Under the same “Themes” tab, click the “Color” subtab and choose your site’s color palette.
- To edit your fonts: Click on “Fonts,” then choose your primary and secondary fonts, or choose one of the premade font combinations.
- To edit your buttons: Click on the “Buttons” tab, then choose your primary and secondary buttons’ layout.
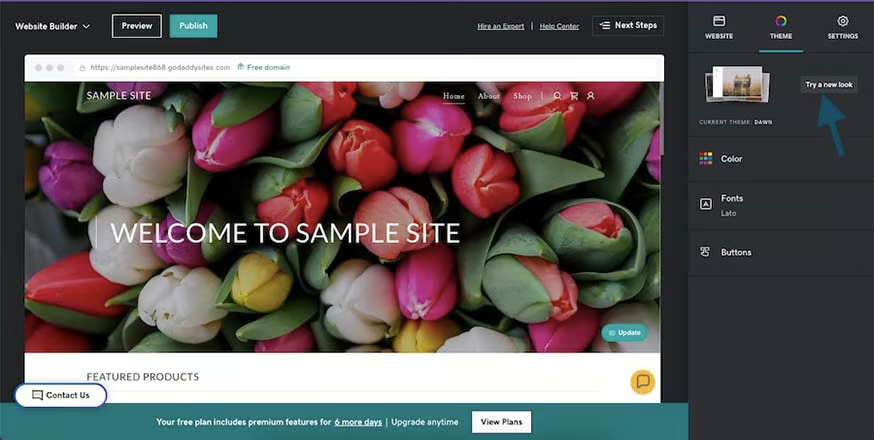
Choose a new theme under the “Theme” tab and the “Try a new look” button. 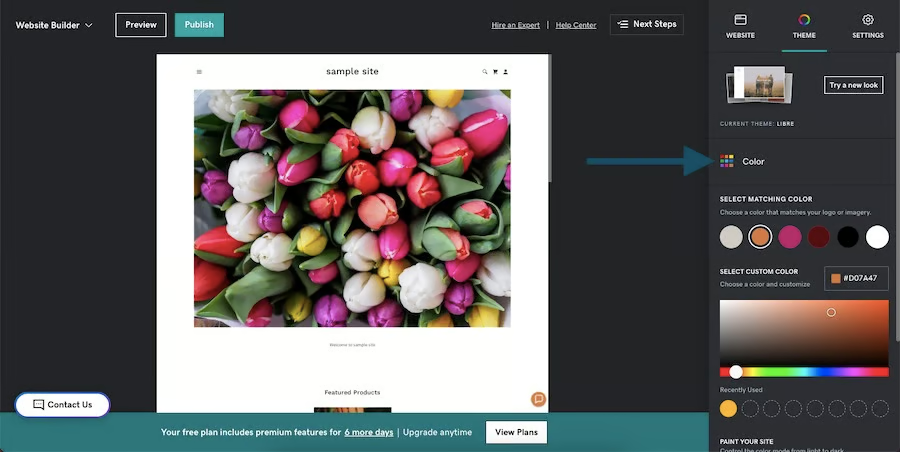
Customize your site’s color palette under the “Color” tab. 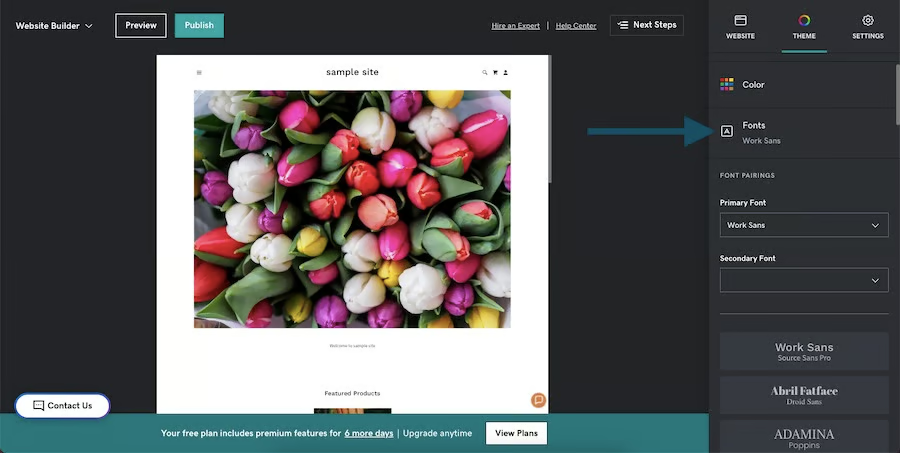
Customize your site’s fonts under the “Fonts” tab. 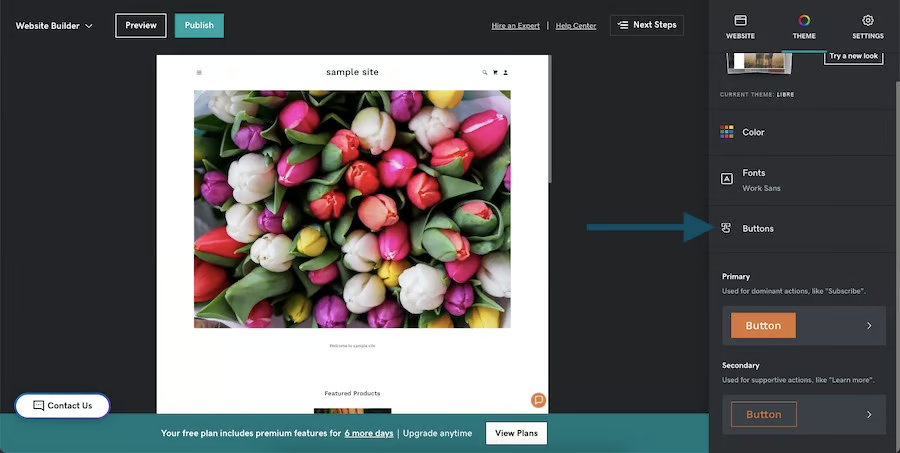
Customize your site’s buttons under the “Buttons” tab.


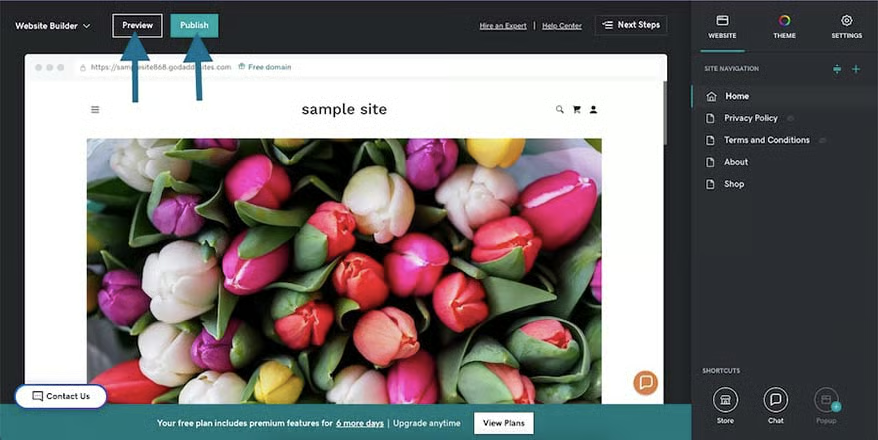
After you’ve customized your site’s elements, you can preview how your overall website looks by clicking the preview button in the upper left corner. Be sure to preview it on both desktop and mobile and ensure that everything is organized and functioning smoothly. Once you’re happy with your site’s design, click the “Publish” button in the same section to publish your changes so they go live.
4. Set Up Marketing Tools & SEO
After setting up and publishing your website’s design, the next step in creating a GoDaddy site is optimizing its marketing features to help you better connect with your target audience. While your site is technically already published live, it won’t get any traffic without optimizing its marketing features, like its search engine optimization (SEO), or connecting with your profiles on Yelp or Facebook.
To optimize your site’s marketing, navigate back to your site’s dashboard and click on the “Start Marketing” button. This will open up your Marketing Hub, where you can manage everything from your SEO keywords to your digital ads and email marketing.
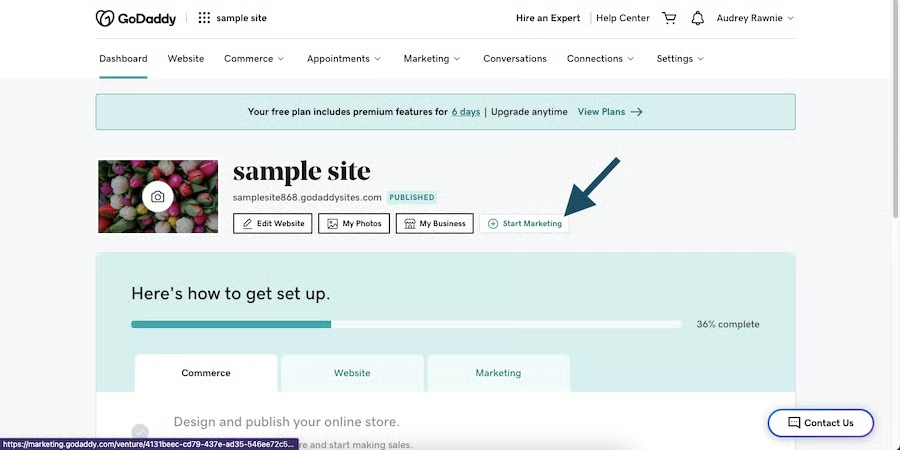
Click “Start Marketing” on your dashboard to access your Marketing Hub. 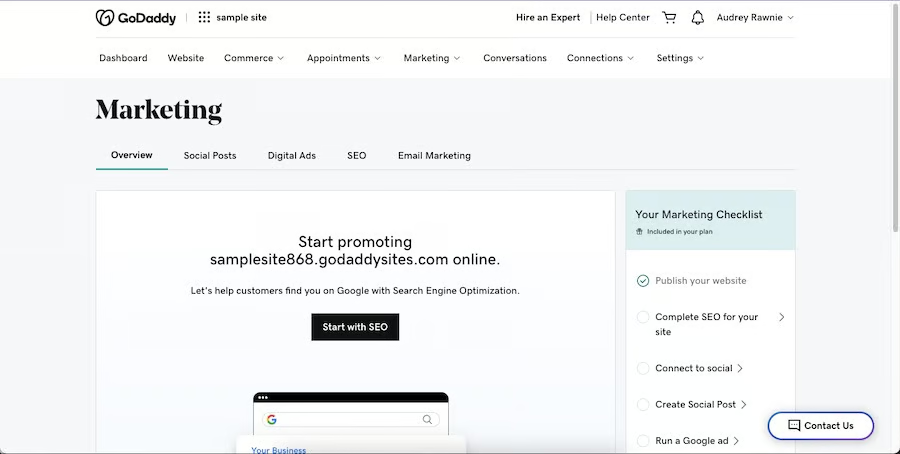
Your Marketing Hub is where you’ll manage everything from SEO to email marketing.


To set up your website’s SEO, click on the “Start” button under the SEO tab, then answer GoDaddy’s prompts to define your website’s SEO keywords. You’ll need to input and refine key phrases, choose your website’s search-optimized title and description, and edit your on-page text.
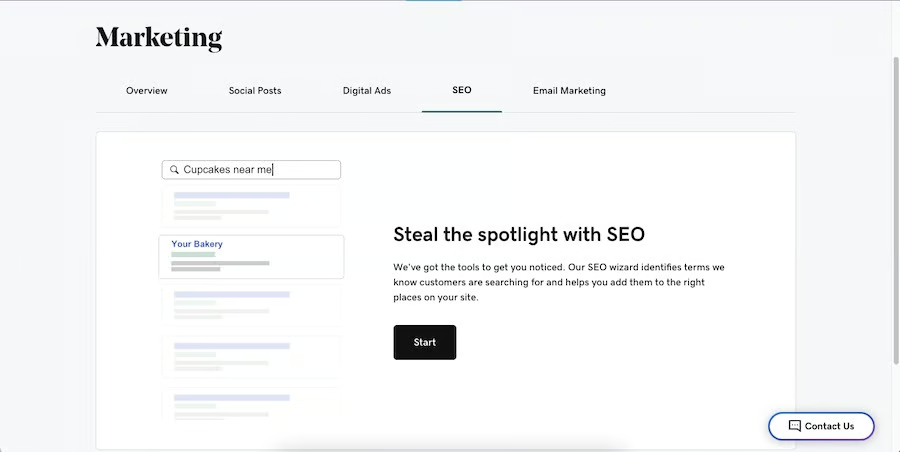
Start setting up your SEO by clicking the “Start” button. 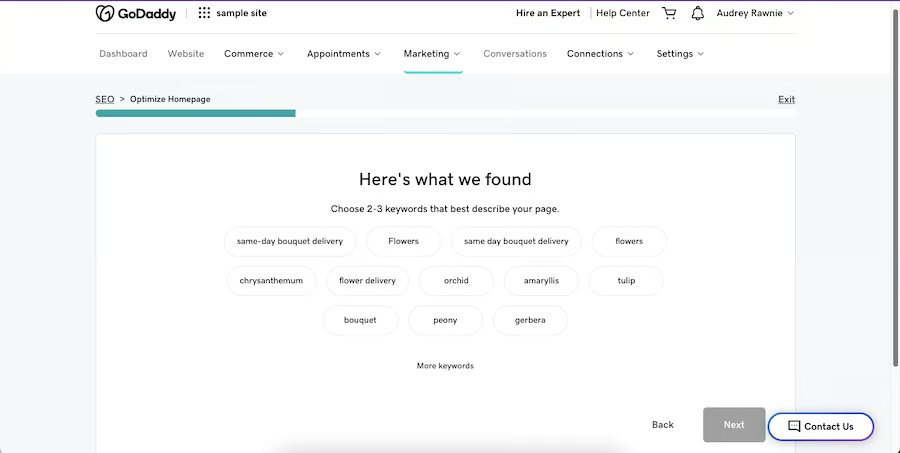
Choose your SEO keywords. 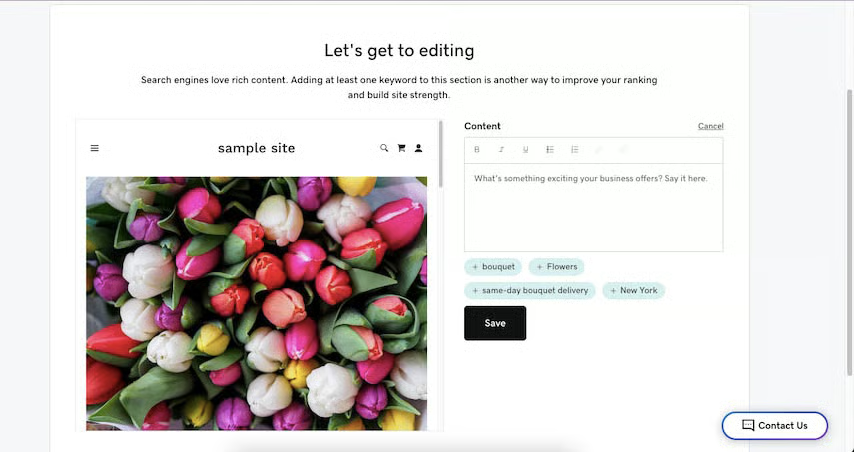
Refine your on-page text and more.


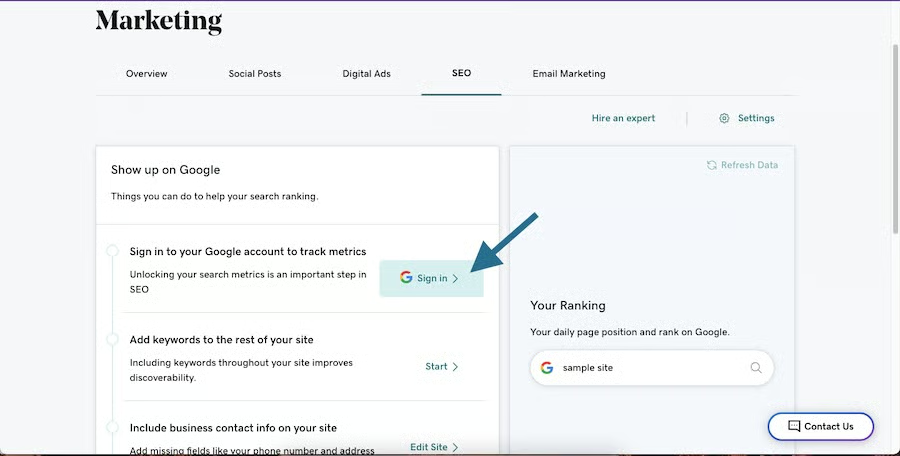
An important way to track your site’s SEO success is to connect it with your Google account. This will help you monitor your ranking on Google, what keywords you’re ranking for, and essential metrics like your impressions, clicks, and average position—-all within the GoDaddy platform.
To connect with your Google account, click on the “Google Sign In” button under the same SEO tab, then follow the prompt to allow Google access to your GoDaddy website.
Email marketing is another way to get more visitors and leads to your site, and GoDaddy has a built-in email marketing tool to create and send out marketing emails to your visitors. Plus, you also get 25,000 email credits per month. To access your email marketing tools, click on the Email Marketing tab in the Marketing Hub.
Inside the Email Marketing tab, you can start creating an email by choosing one of the prebuilt templates or creating one from scratch via the “Create a New Email” button. Further down the page, you’ll also find a list of all your email campaigns, including your scheduled, sent, and draft emails.
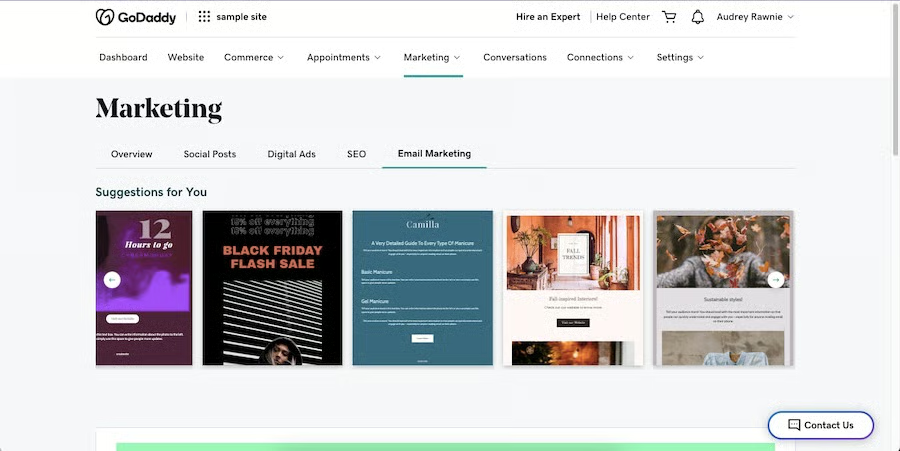
Start your email campaign with a prebuilt template. 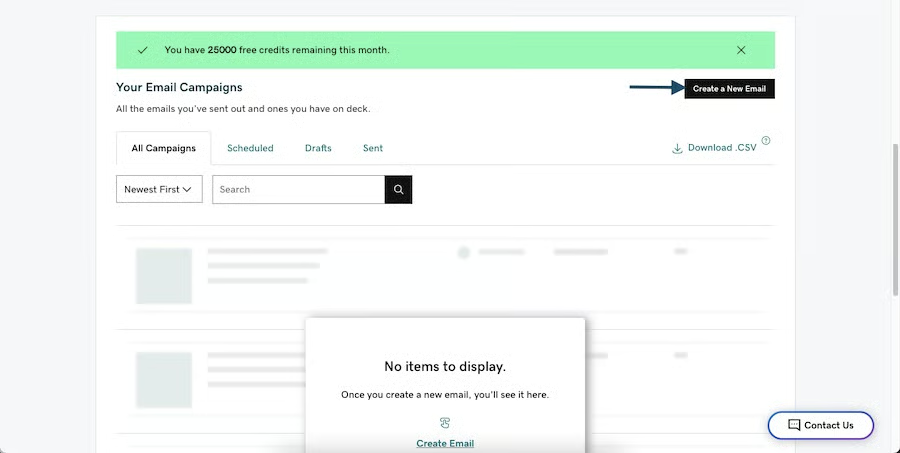
Or, create one from scratch via the “Create a new Email button,” and access all your campaigns in the same platform.


Your social media content is just as essential a strategy to drive traffic to your website, which is another area GoDaddy can help out on. As part of your plan, you’ll also get a social media content creator and scheduler to publish your social media posts from your GoDaddy dashboard.
To access your social media content tools, navigate to the Social Posts tab in the Marketing Hub. Like in the email marketing tab, you can create social posts from the premade templates available (GoDaddy automatically presents templates for upcoming holidays). Or, you can create your posts from scratch via the “Create Social Post” button, where you can create images and captions and publish them on your Facebook, Instagram, and Twitter accounts.
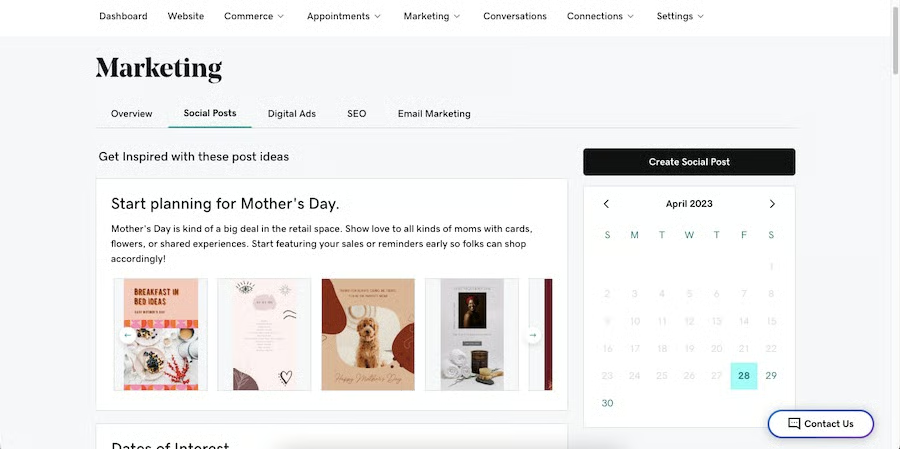
GoDaddy prepares premade templates for upcoming events that you can edit. 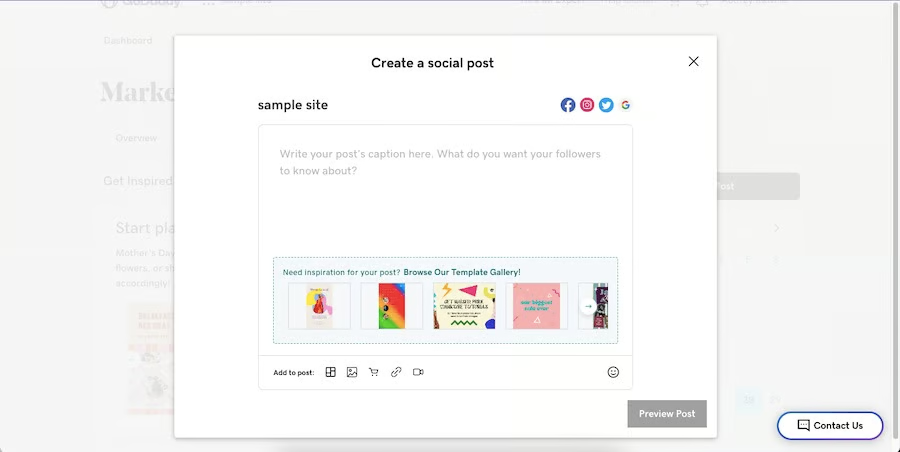
You can also create your posts from scratch by clicking on the “Create Social Post” button.


To round out your website’s marketing strategy, you’ll also need to set up your digital ads. In the Marketing Hub, navigate to the Digital Ads tab, then click on “Create my Ad” to start the ad setup process. You can create a Google, Facebook, or Instagram ad—simply choose one option, then follow the prompts to set up your ad.
For Google ads, these prompts will include choosing your ad objective and keywords, while for Facebook and Instagram, you’ll need to choose what you’re promoting with your ad, and where you want your ad to appear on the platform.
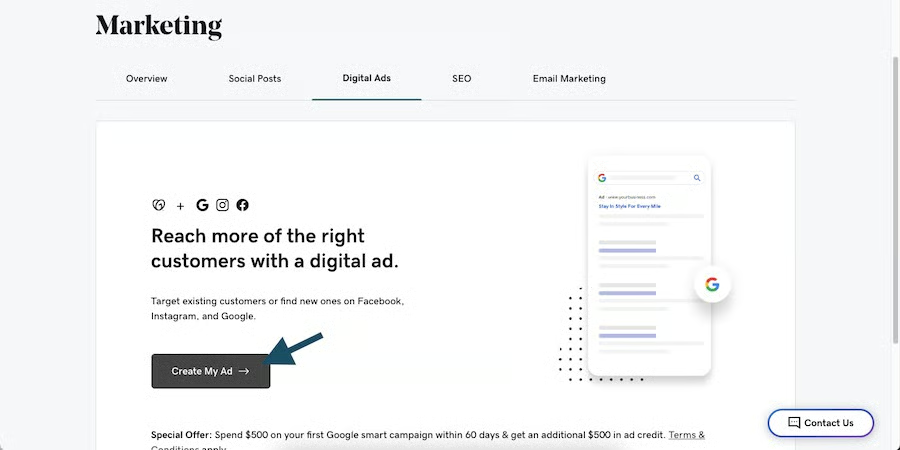
Click “Create My Ad” to start the ad setup process. 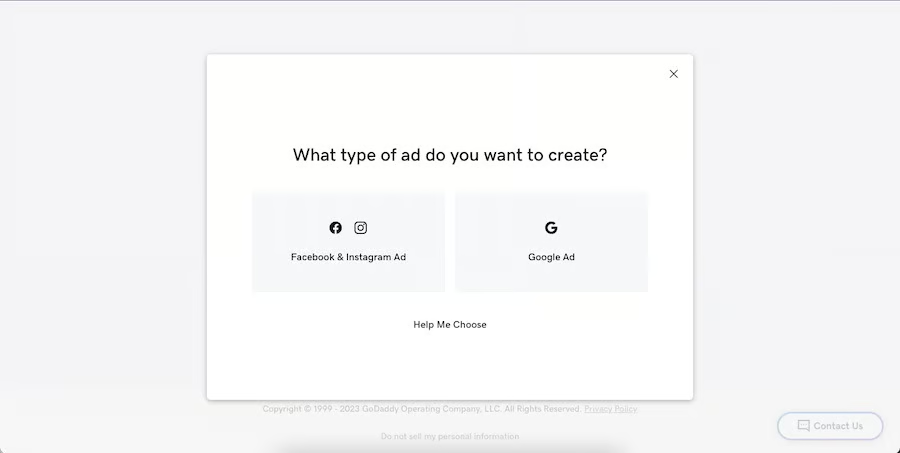
Then, choose between a Google or Facebook and Instagram ad and follow the prompts.


Finally, while these steps aren’t mandatory, it’s good practice to optimize your website to cover as much ground as possible, such as by connecting with your Google Business Profile or Yelp listing. To set these up, first navigate back to the Overview tab of your Marketing Hub. On the bottom of the Marketing checklist on the right side of the screen, you’ll find tabs to create a Google and Yelp listing.
- To connect your Google Business Profile: Click on the “Create a Google Listing” tab, then “Connect a Listing” if you already have a Google Business Profile, or choose “Create Listing” to make a new one.
- To connect your Yelp Listing: Similarly, connect your Yelp listing by clicking on the “Create a Yelp Listing” tab, then connect a pre-existing account or create a new one.
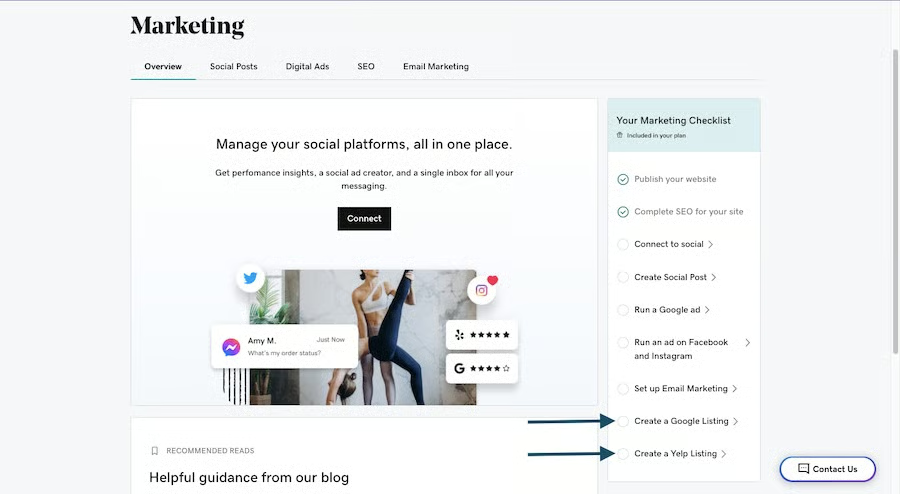
Connect your site with your Google or Yelp profiles. 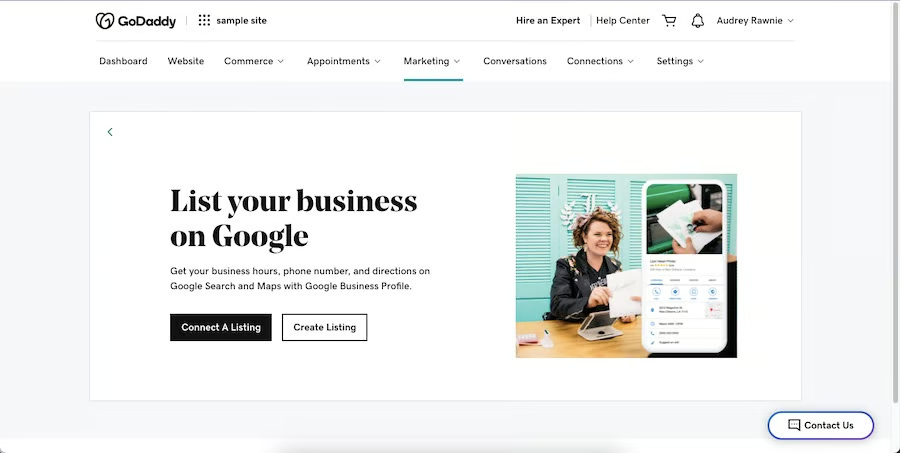
Connect with your Google Business Profile or create a new one. 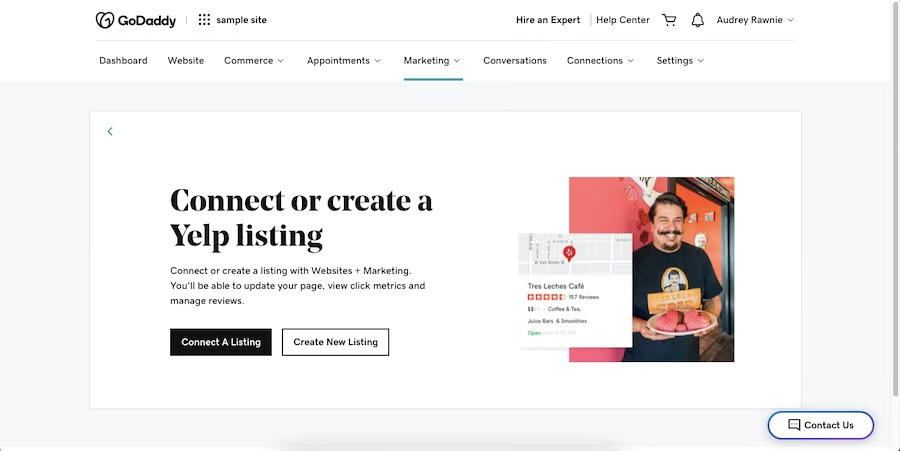
Connect with your Yelp profile or create a new one.


One of GoDaddy’s most helpful features is its appointment booking tool, which allows site visitors to schedule appointments with your business directly on your website. This feature is especially helpful for service-based businesses such as salons, fitness classes, and the like. Follow along to learn how to build a website on GoDaddy with scheduling and features to best serve your customers’ needs.
On the header section of your screen, click on the “Appointments” tab, then choose “Overview” in the following window. This is where you’ll find an overview of your site’s appointments once you have them.
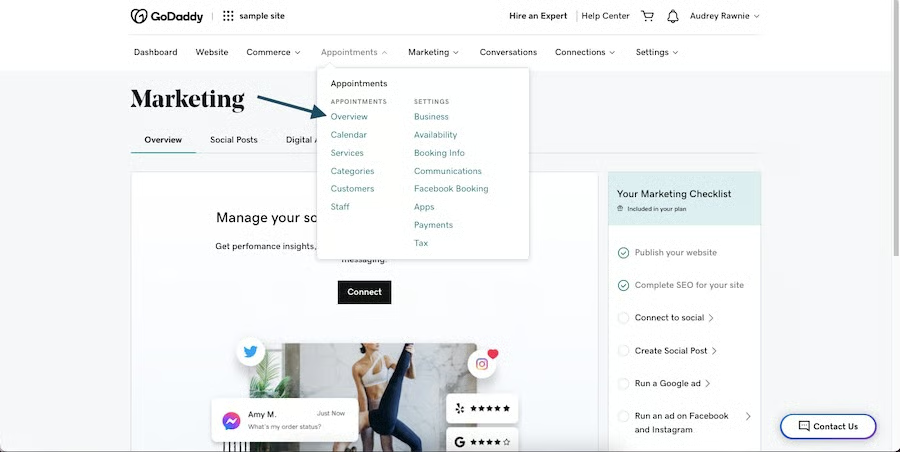
To add the appointment booking feature, click on the “Add Service” button. In the next screen, you can choose between an Appointment feature, a One-time Event, or Repeating Events. Select the type of appointment you need, then fill in the form with its details and click “Save” at the bottom of the screen once you’re done.
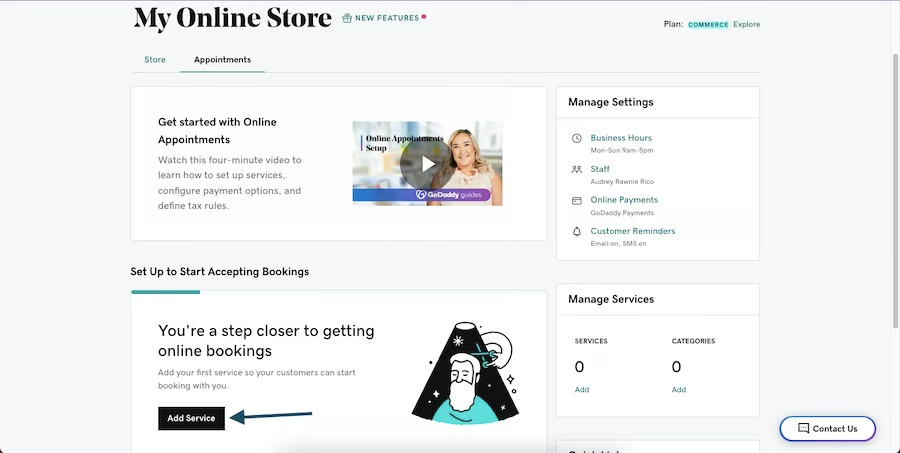
Choose “Add Service” in the following screen. 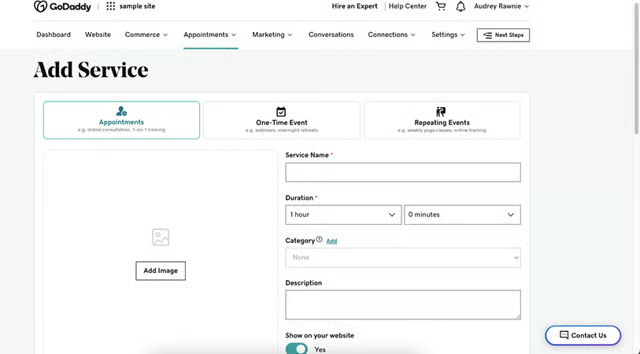
Finally, choose your type of appointment and complete the form.


5. Review Your Website
Once you’ve finished setting up your site’s marketing features, it’s ready to accept site visitors and customers. However, there are a few things you can take note of to optimize your site better and stand out from competitors, such as using a custom domain and adding helpful pop-up banners, among others. Below are a few things to review to help your site create the best user experience possible.
- Website navigation: One of the foremost components of a good user experience is effective site navigation. Double-check that all your necessary web pages are present and linked in the proper order to create a meaningful user journey. Follow our instructions for what makes a good website to get the most out of your site on GoDaddy.
- Your branding: Your website is one of the most prominent places to reinforce your business’ brand presence and boost brand recall among your visitors. When designing your website, ensure that you keep it in line with your business’ overall branding; e.g., using the same colors, fonts, and tone of voice, among others.
- Cookie banners: While they aren’t compulsory for U.S.-based businesses, adding a cookie notification banner can help visitors have a more fulfilling and trust-building experience on your website. You can add a cookie notification banner within the editing platform. Click Settings > Cookie Banner, turn on the ”Show cookie notification” option, then customize your banner’s messaging.
- Domain: Your domain is your website’s official name that people type into their browser to reach your website (e.g., fitsmallbusiness.com). Adding a custom one to your site can significantly boost your credibility and branding, and the good news about building a website with GoDaddy is that all plans automatically come with a customizable domain. Learn more about how to choose a domain name for your business.
- Favicon: Favicons are tiny icons that visually identify your website on internet browsers, such as on search engine results, bookmark bars, and more—find out more about them in our guide to favicons. You can upload your favicon in the editing platform under the Settings tab, then choose “Favicon” to upload your own image.
- Social media links: Connecting with your social media accounts creates a more coherent experience for site visitors and can even introduce new audiences to your business. Connect your business’ social media profiles via the Settings tab > Social Media Links.
- Facebook and Pinterest meta tags: In addition to linking your social media profiles to your site, GoDaddy also allows you to claim your website on Facebook and Pinterest. This lets you track how visitors discover and interact with your content on those platforms. You’ll simply need to copy your meta tags from Facebook and Pinterest and then paste them under Analytics & Tracking in your Settings tab.
6. Choose a Subscription Plan
Finally, to set up your website for long-term success, the final step for how to create a website on GoDaddy is to choose a subscription plan. After reviewing that all the elements of your site are functioning correctly, navigate back to your dashboard, then click on your name in the upper-right corner.
In the following window, choose “My Products,” which will display a list of all your GoDaddy products, including your website’s free trial. Under the “Websites + Marketing” tab, click on the “View Plans” button, then choose a plan that best suits your needs.
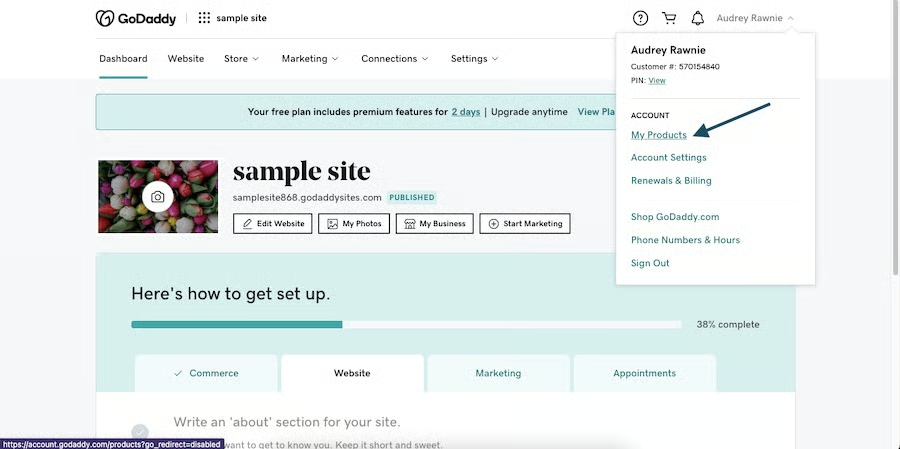
Choose “My Products” to start choosing a plan for your site. 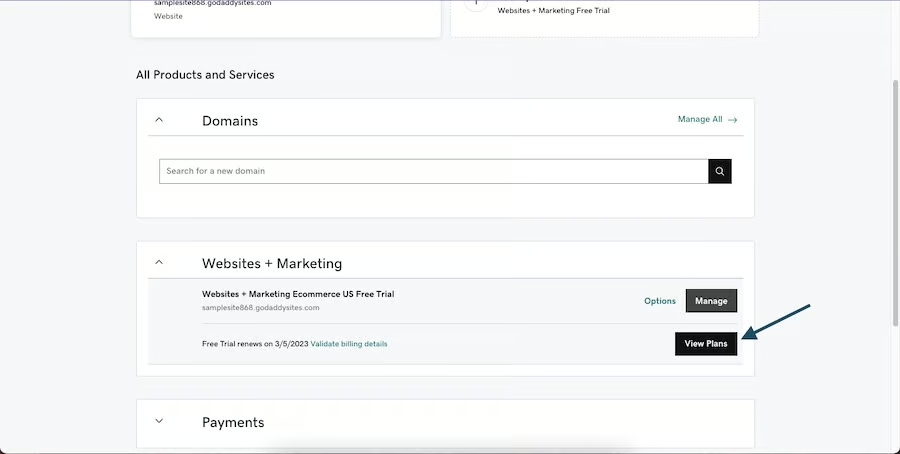
Under “Websites + Marketing,” click “View Plans.”


GoDaddy currently offers three website plans, each with its own benefits. Click on the tabs below to learn more about each plan.
GoDaddy Website Builder Pricing & Plans
You can get started with GoDaddy for free, but we recommend you use the free version to build your site and then upgrade to a paid plan. The free version is hosted on a GoDaddy subdomain with ads, which isn’t credible for building a strong brand presence. Learn more about what’s included in the tabs below.
Cost: $0
What’s included:
- Free website on a GoDaddy subdomain, with GoDaddy ads
- Free SSL
- Guides for building your site
- One-time appointment booking
- Hello and Order website chatbots
- Approximately 20 template variations with limited customization
- Basic analytics
- GoDaddy Studio (limited access) to create branded images for your site or social media
Cost: $11.99/month with an annual contract or pay $16.99 month to month
What’s included:
- Remove GoDaddy ads and host your site on a domain you own (purchased separately)
- Free SSL
- One-time appointment booking and payments via PayPal paylinks
- Connect Google Analytics
- Editing via desktop, tablet, or mobile
- Connect Google Business Page, Yelp, and one social profile
- Five social posts per month (upgrade to schedule posts in advance)
- 100 email marketing sends per month
- Automated welcome and appointment confirmation emails
- Full access to GoDaddy Studio
Cost: $24.99/month with an annual contract or pay $29.99 month to month
Get everything in lower-plan tiers, plus:
- Ecommerce on your site
- Recurring appointments with payments and deposits
- SEO site optimizer
- Unlimited social accounts and posting, including scheduling
- 25,000 email marketing sends per month
- Automated order emails
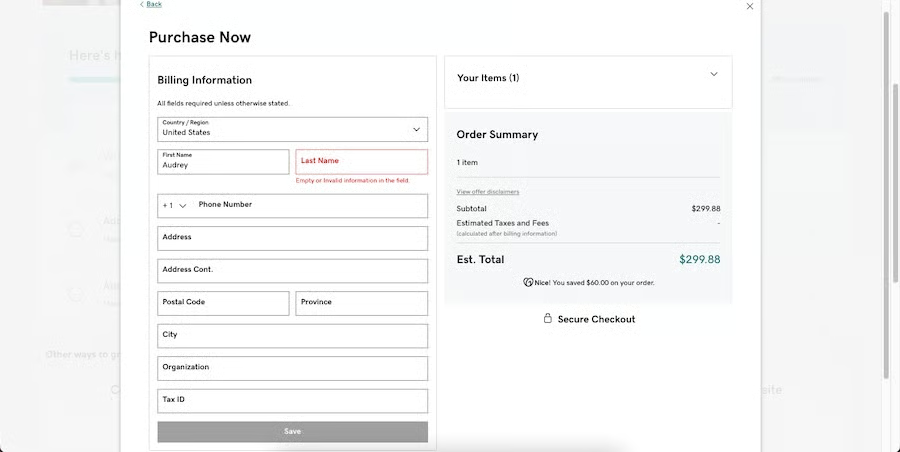
Once you’ve chosen a plan for your site, click on the “Add to Cart” button, then fill in your billing information in the following window and click “Save.”
After selecting your site’s subscription plan, it’s officially set up for success. Don’t forget to regularly monitor its analytics and run site tests to check on its health, then optimize areas as needed. You can also upgrade your subscription plan anytime if your site’s needs change in the future.
Best Alternatives to Building a Website With GoDaddy
While GoDaddy is a great choice for any small business, it’s just one of the dozens of intuitive, full-featured site builders around. GoDaddy stands out for all-in-one paid plans and helpful features—however, you might prefer a site builder with a simpler setup process and more template choices, for example. Here are a few of the best alternatives to GoDaddy to build your small business website.
| Best GoDaddy Alternative | |||
|---|---|---|---|
| Key Features Compared to GoDaddy |
|
|
|
| Free Plan | ✕ | ✓ | ✓ |
| Starting Cost of Paid Plans* (Monthly) | $16 | $16 | $12 |
| Starting Cost of Ecommerce Plans | $23 | $27 | Free |
| Read our Squarespace review | Read our Wix review | Read our Weebly review |
*Ad-free paid plans with annual billing; monthly billing is also available at a higher cost.
Frequently Asked Questions (FAQs)
How much does it cost to build a website on GoDaddy?
It costs nothing to start building a website on GoDaddy. Once you create a GoDaddy account, you’ll get a seven-day free trial to explore all its features, and GoDaddy also offers a free-forever plan with basic website features. Paid plans start at $11.99 per month for a basic site or $24.99 a month for ecommerce. For other free alternatives, check out our list of the best free website builders for small businesses.
Is building a website on GoDaddy free?
You can build a website on GoDaddy that is 100% free, and it’s a great way to test out the website builder’s features, tools, and capabilities before committing to a paid plan. Keep in mind that if you publish your site without upgrading, it will be hosted on a GoDaddy subdomain and display GoDaddy branding. So while it’s fine to build your site in the free version, you will want to purchase a paid plan to publish your site on your business domain name.
Can you build a website on GoDaddy?
Yes—GoDaddy has features that allow anyone to build a website for free, then upgrade to a paid plan later on for more advanced features. To learn how to build a website on GoDaddy, follow the GoDaddy website builder tutorial above. Besides professional websites, GoDaddy offers web hosting, SSL security, email marketing, and domain names. Get a full view of what you can do with GoDaddy in our expert GoDaddy review.
Bottom Line
GoDaddy offers some of the most helpful tools for any small business owner looking to build and expand their online presence. From setting up your online store to optimizing your digital marketing, the process of how to create a website on GoDaddy is automatically set up for your business’ success—and you can get started for free. Follow the GoDaddy website builder tutorial above and start building your business’ professional website today.