

Zoho CRM is popular customer relationship management (CRM) software used for managing sales, marketing campaigns, and customer support in a collaborative environment. To get the most out of Zoho, set up and customize the system to your organization’s preferences, then incorporate the data and workflows you’ll need. Here’s how to use Zoho CRM in seven easy steps:

1. Create Your Zoho CRM Account
To learn Zoho CRM features, start by creating a Zoho CRM account. From the Zoho CRM sign-up or “Get Started” page, input credential information such as your name, email address, and password. You can also create an account through Google or LinkedIn accounts.
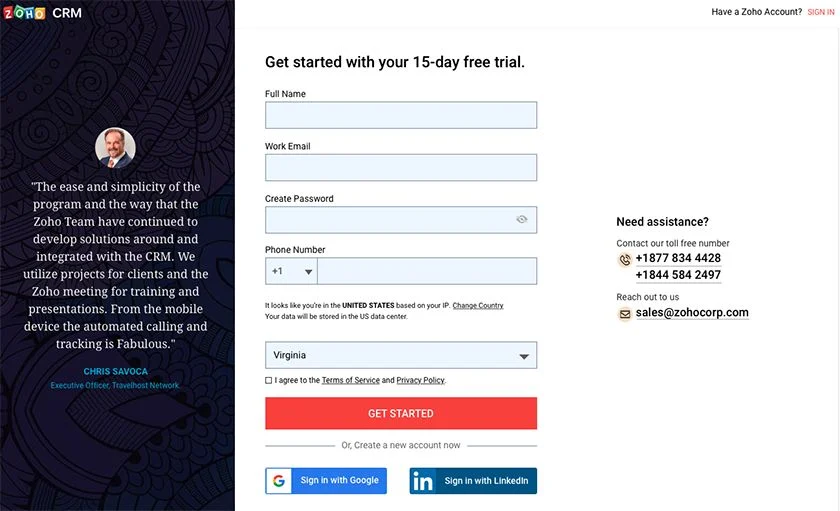
Zoho CRM Get Started page (Source: Zoho)
After your account is created and verified through a confirmation email, you’ll be guided to the welcome screen. You can start with a free trial that lasts 15 days for the Enterprise plan or immediately select a plan. When upgrading to a regular plan, you’ll select the number of users, check out, and make the payment (if necessary for your chosen plan).
Zoho CRM offers five subscription plans that vary in features, data storage, customization options, and the number of users. The price for each Zoho CRM plan is as follows:
- Free: Up to three users
- Standard: $14 per user, per month, billed annually or $20 per user, per month for monthly billing
- Professional: $23 per user, per month, billed annually or $35 per user, per month for monthly billing
- Enterprise: $40 per user, per month, billed annually or $50 per user, per month for monthly billing
- Ultimate: $52 per user, per month, billed annually or $65 per user, per month for monthly billing
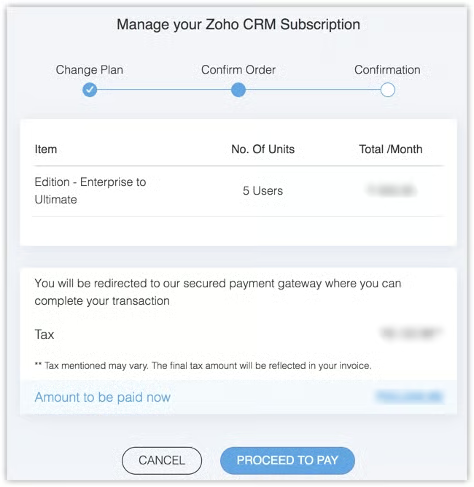
Zoho CRM subscription upgrade (Source: Zoho)
As the initial creator and user of the CRM, you are considered the system Administrator, or Admin. This role makes you the settings master and manager of all other users, allowing you to add and remove them and set their permission status. As the Admin, you are responsible for designing settings that suit your needs.
From the Zoho CRM Setup Menu:
- Select General
- Click Personal Settings
- Choose the right language and time zone for your team
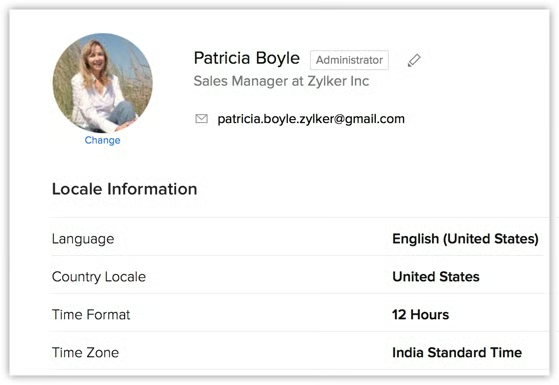
Zoho CRM Admin information (Source: Zoho)
The next step in this Zoho CRM walk-through is creating your company profile. Go to the Settings menu and look for the Company Details under the General column. From there, start inputting information about your organization, fiscal year, business hours, and standard currency.
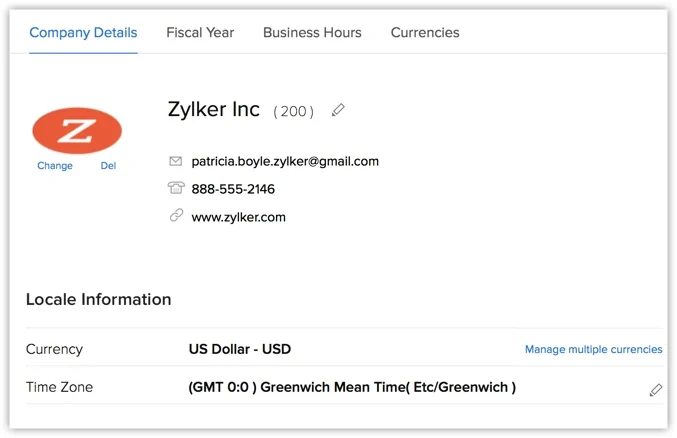
Zoho CRM company details (Source: Zoho)
2. Customize the CRM System
Customizing the CRM system refers to creating all of the modules, fields, templates, pipelines, and views you’ll use in Zoho. This is arguably the most important step in learning how to use Zoho CRM. As the Admin, create those Zoho CRM modules and customize their components based on your unique business operations and preferences. Here are the main customization categories you’ll need to work with when selecting Setup → Customization.
As you can see in the Zoho CRM tutorial, the platform’s features and associated data are sorted into “modules.” Modules are where users can collaborate and keep each other updated on activities and statuses made on sales opportunities, marketing campaigns, or customer support initiatives.
By default, Zoho offers premade modules you can edit, such as Leads, Accounts, and Contacts. You can also create new ones from scratch. You can start the module customization by selecting the module you want to edit or selecting the “+ New Module” button on the Modules and Fields customization page.
This process includes adding data fields for information you want to collect, such as email addresses, phone numbers, currencies, and dates. It also includes editing the data field properties in terms of how the information is collected, such as using single-line formats, check boxes, or options for multi-select data fields. Furthermore, you can edit permissions within each module to which users can access the data.
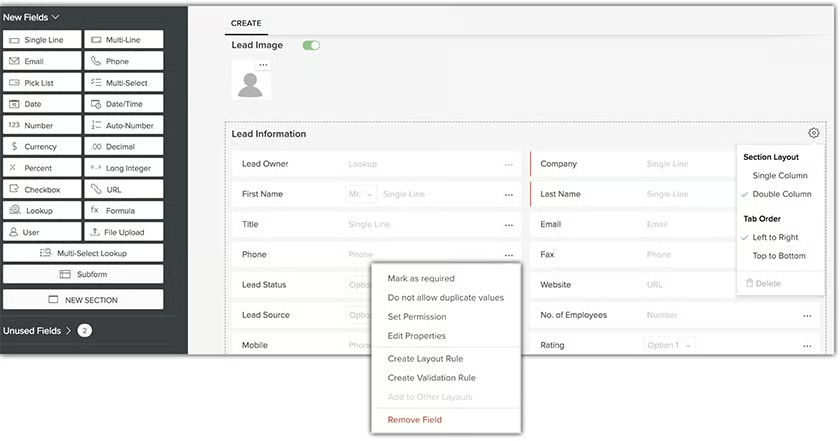
Zoho CRM customizing module (Source: Zoho)
After finalizing your modules, organize them by which ones are visible and the order they will be shown on the top horizontal menu tab. Additionally, from the module and fields customization page, you can tailor other elements of the module, such as:
- Record details page: Related information within records of a module, such as Quotes, Attachments, or Projects associated with Deals, Accounts, or Leads.
- Module views: The way records in modules are laid out and organized, such as List View, Kanban View, or Canvas View.
- Page layout: How an individual record page is displayed along with conditional settings for showing certain data fields based on information entered into the system.
- Validation rules: Setting rules for the approval of information added into a data field before the record can be saved, e.g., you might require a minimum deal size ($) in a record for the Deals module before the record is captured.
- Buttons and links: Connecting your CRM fields to external web links or third-party applications, e.g., a lead record may have a person’s LinkedIn profile linked to it.
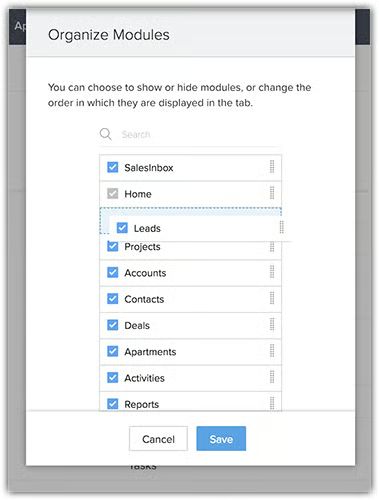
Zoho CRM module organization
(Source: Zoho)
An essential part of using any CRM system is managing your sales or operational pipelines. These are the steps needed to complete a workflow or close a deal and will be used for status tracking and reporting in relation to your deals module.
From the Setup → Customization → Pipelines page, click “New Pipeline.”
From there, add the name of the pipeline, the layout you want, and the stages of your sales process. You can adjust the order of the steps once they’re established and can even set probabilities of stage conversions for when you run sales forecasts later on. Once everything is set, select Done, and that pipeline will be accessible to anyone with permission to use your deal module.
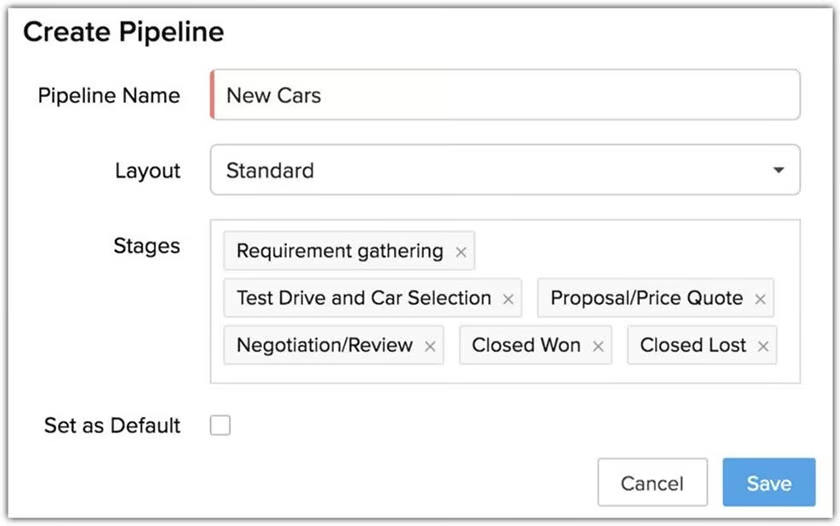
Creating a pipeline on Zoho CRM (Source: Zoho) 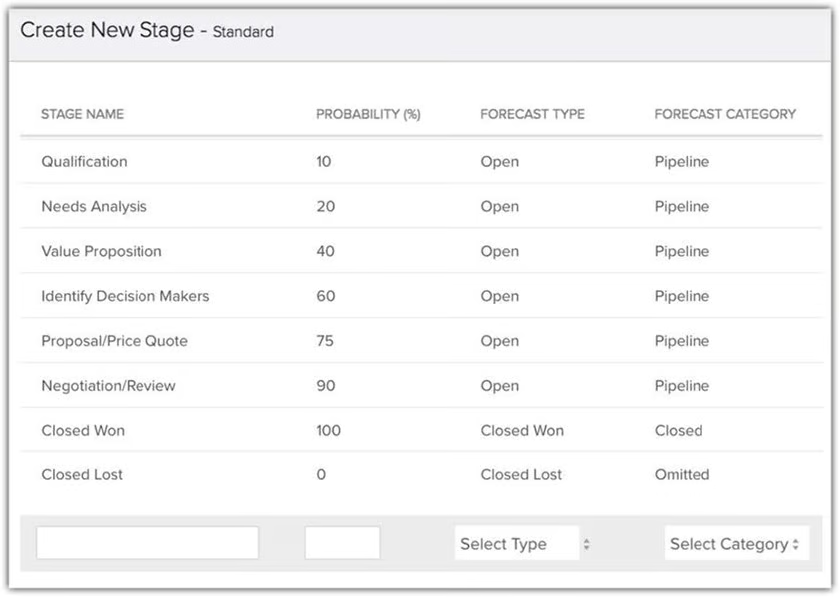
Zoho CRM pipeline probabilities (Source: Zoho)


Zoho CRM allows you to create and save templates for emails, purchase orders, invoices, quotes, and mail merges. These templates keep you from undergoing the tedious process of recreating a document or message each time an opportunity presents itself. Instead, you can plug in information relevant to that opportunity on something reusable and still keep a personal touch.
You can customize all types of templates from the Setup → Customization → Templates page, where you select Email, Inventory, or Mail Merge. Each type allows you to create one from scratch or use a predesigned template from the Zoho gallery.
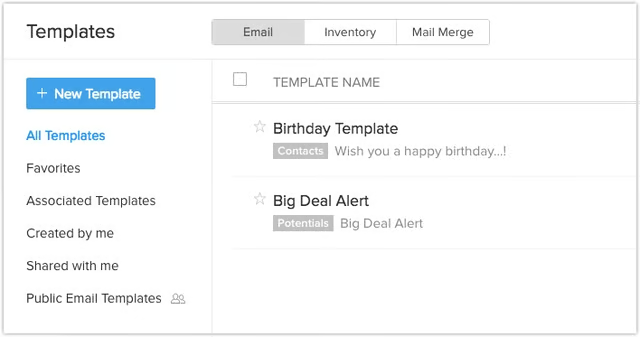
Zoho CRM new templates page (Source: Zoho) 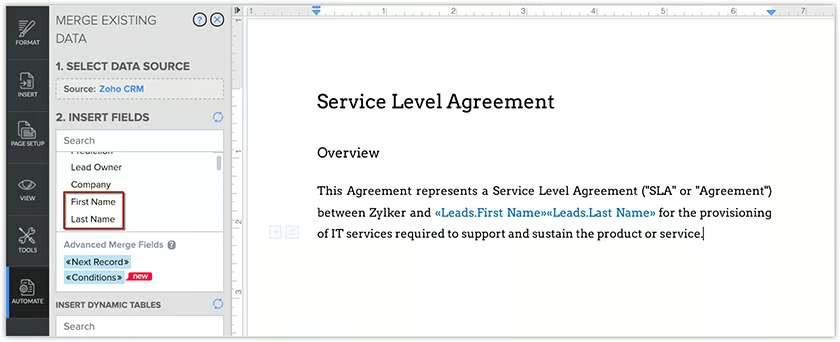
Zoho CRM mail merge template from gallery (Source: Zoho)


Your home page will be the first thing you see when you access your Zoho CRM account, and it serves as a “quick glance” into the CRM and sales activities. Like other aspects of this small business CRM, it can be designed from Setup → Customization → Customize Home Page. You can have multiple home pages to switch through, which can be one of three types: Classic View, User Home Page, and Manager View, depending on the specific user.
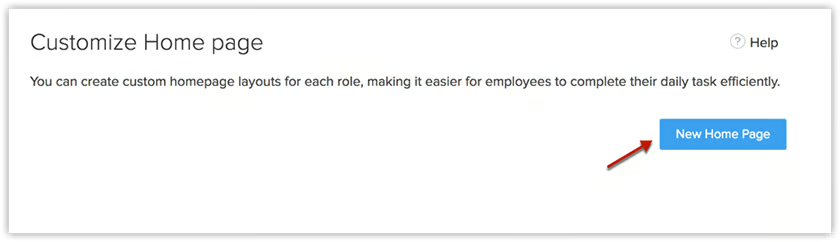
There’s also the option to create a customized home page if you have certain preferences. From the “Customize Home Page” screen:
- Select “New Home Page”
- Add the components (dashboard, tasks, and so on) and the modules (deals, activities, leads, etc.) you want to view
- Size it to your liking on the page
- Save and name the home page
Zoho CRM new home page (Source: Zoho) 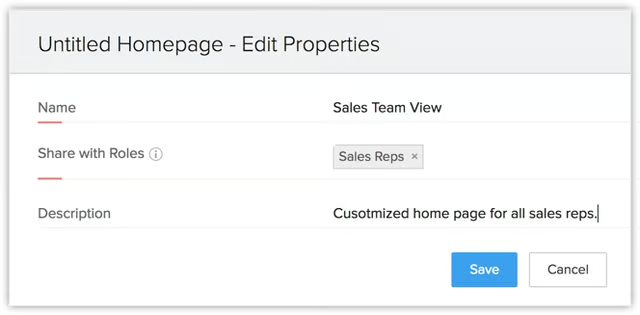
Zoho CRM home page properties (Source: Zoho)


3. Integrate External Applications
In addition to the built-in features and custom modules available for Zoho, users have the option to integrate Zoho CRM with their favorite third-party applications as well as other native software. Doing so gives you additional functionality for your CRM and allows you to sync data between applications, so you don’t have to enter the same Zoho CRM information twice.
Integrating Zoho Applications
Regardless of which Zoho-created applications you want to be added to the CRM, you can do so from Setup → Marketplace → Zoho. From there, select the specific software you want to add, click Get Started, and follow the instructions as they’re prompted on the screen. Zoho has endless applications available for its CRM customers. Some of the most popular ones include:
- Zoho Projects
- Zoho Desk
- Zoho Campaigns
- Zoho Survey
- Zoho Mail
- Zoho Finance Suite
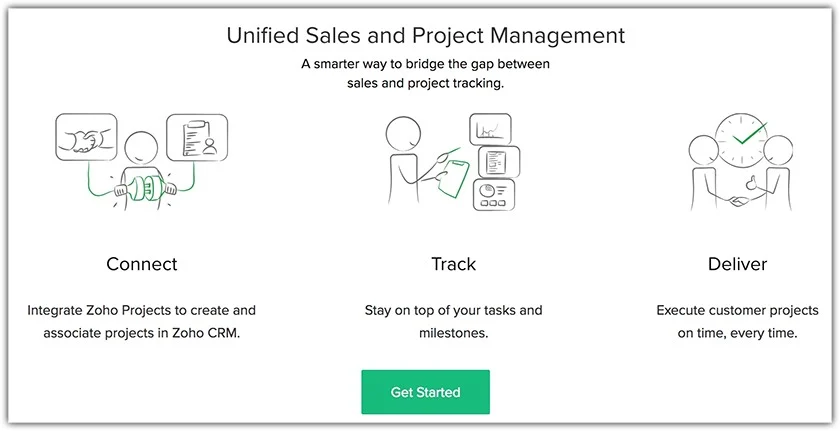
Zoho Projects Get Started page (Source: Zoho)
Integrating Third-party Applications
Integrating your CRM with third-party software gives you the functionality and data synchronization with applications not created by Zoho. Zoho allows users to integrate with Google and Microsoft productivity products as well as websites, social media platforms, and even other CRMs like HubSpot and Salesforce. Each application varies in terms of the integration process.
Many external integrations, such as the Microsoft Outlook plugin, can be done through the Setup → Marketplace page. Browse through the Zoho apps you want, then follow their unique step-by-step procedure.
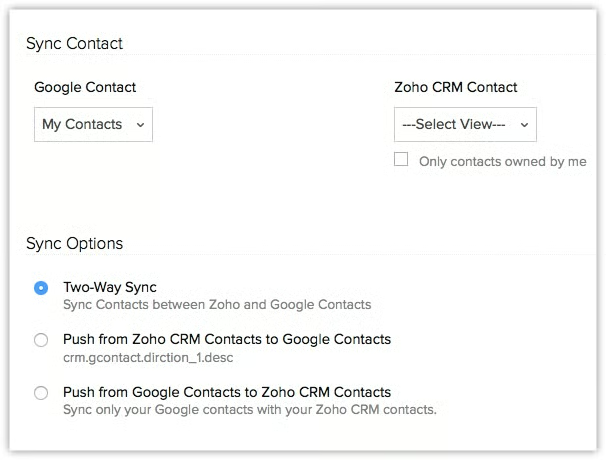
Zoho CRM two-way sync with Google Contacts (Source: Zoho)
4. Import & Add Data
Once the CRM system is designed well and you’re fully integrated with all the add-ons, extensions, and applications you’d like to add, start making your CRM functional. This requires you to import or add data you’ve already collected and possibly stored in a separate data system.
For data migration from a spreadsheet file or separate CRM system such as Salesforce, HubSpot, or Insightly, go to Setup → Data Administration → Import. From there, select the file or other CRM you wish to migrate from and follow the process given on the screen. Once completed, all your leads, contacts, deals, and activities from other systems will be added to Zoho.
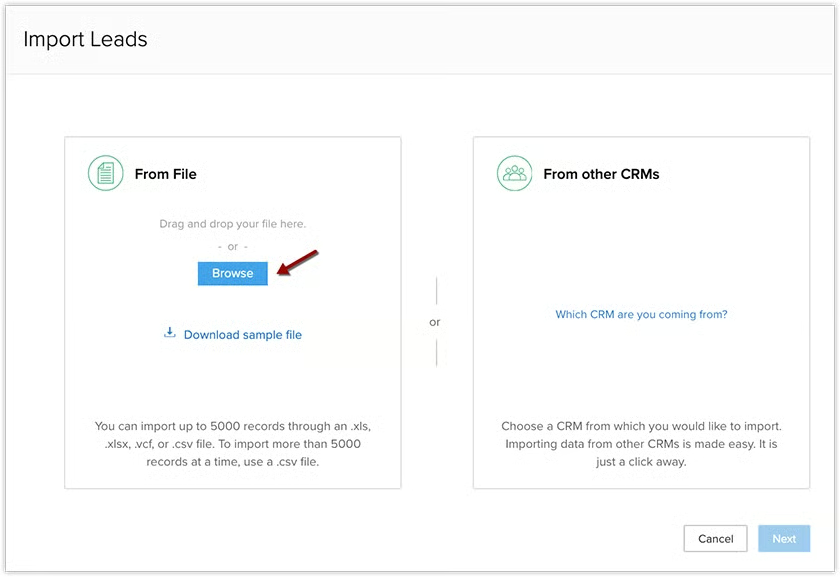
Zoho CRM import data (Source: Zoho)
It is possible that Zoho CRM could be your first CRM, and you’ll be adding information manually. Whether it’s a lead, contact, deal, or another module, start by clicking the tab on the home page that navigates you to the module. For example, if it’s a new contact, click the New Contact button in the Contacts module, enter the data, and save.
Once the record is created, you can start more advanced functions, like associating it with other records such as cases, products, orders, or deals. You will continuously create new records as leads or customers are generated and partnerships are created.

Zoho CRM contact details page (Source: Zoho)
5. Configure Automated Workflows
Workflow automation lets you receive notifications, create tasks, and update data fields hands-free as events occur. For example, if a new lead expresses interest in receiving a quote, an automation rule can be set that creates a new task for a user. It could also be set to “create and send invoice” if that lead moves to a certain stage in the deal pipeline.
With Zoho CRM’s workflow configuration, all workflow rules can be configured from Setup → Automation → Workflow Rules when “Create Rule” is selected. From there, select the module from the drop-down that the workflow will apply to and enter a name and description.

Zoho CRM creates automation rules (Source: Zoho)
Next, set your automation triggers. The screen will prompt you to configure various steps until you’re done and can save the workflow. Zoho CRM allows for three types of rule triggers that will cause the automation action to take place. They are as follows:
- Record Action: When a record is added, edited, deleted, or a certain data field was updated
- Date Field Value: When a date takes place per the data field of a record
- Score Value: When the score of a record is increased, decreased, or updated—commonly used for lead scoring to qualify leads
Zoho CRM rule triggers (Source: Zoho)
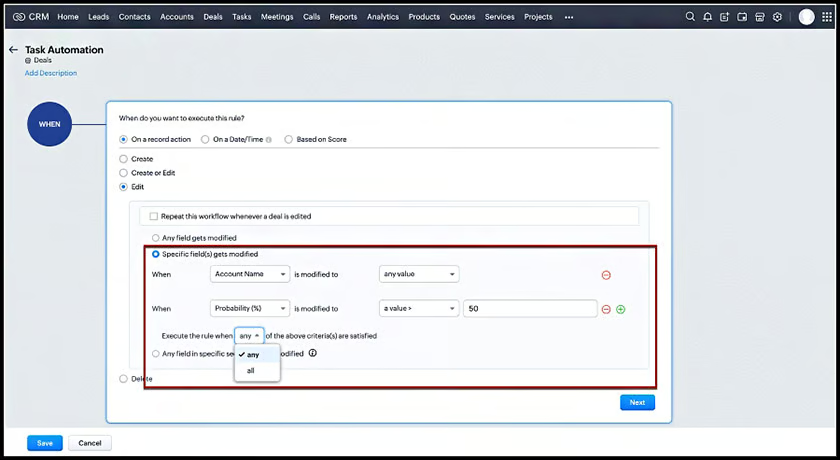
Within automation, you can set workflow conditions to address scenarios where you would or would not activate the automation. For example, you might set a rule where a task is created for a sales manager to review a business proposal before it’s sent out when that deal record moves to a certain pipeline stage.
However, to avoid wasting the manager’s time on small deals, you could set a condition that only triggers the CRM automation if the deal is for $100,000 or above. After completing the trigger rules, the system will allow you to add one or multiple conditions to each rule.
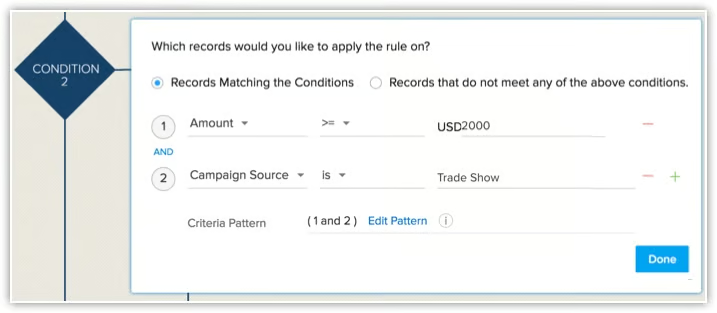
Zoho CRM automation conditions (Source: Zoho)
While setting up Zoho CRM rules and conditions, decide whether you want an instant or scheduled action. “Instant” simply means the automation action will occur immediately upon the trigger, while “Scheduled” gives a certain amount of time before the action occurs.
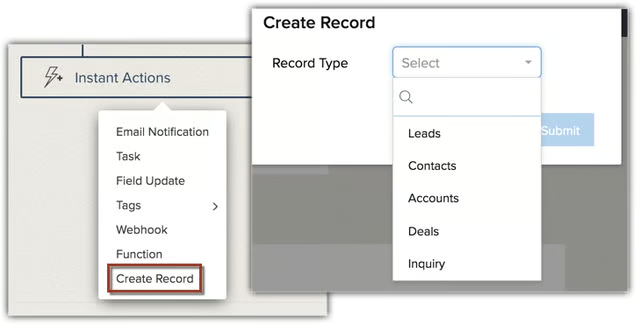
Zoho CRM instant automation actions (Source: Zoho) 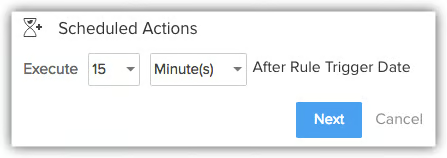
Zoho CRM scheduled automation actions (Source: Zoho)


6. Invite Your Users
Once you have designed, integrated, and configured your CRM platform based on your needs, start inviting your users. Go to Setup → Users & Control → Users page. Enter the identifiable information as prompted, such as their name and email address. Then, select their role at your organization and the profile they will have.
The profile determines their access rights. They can either have Administrator or Standard-level profiles. Administrator rights give users access to all data and modules, while Standard is limited and based on role and security parameters set by the Admins.
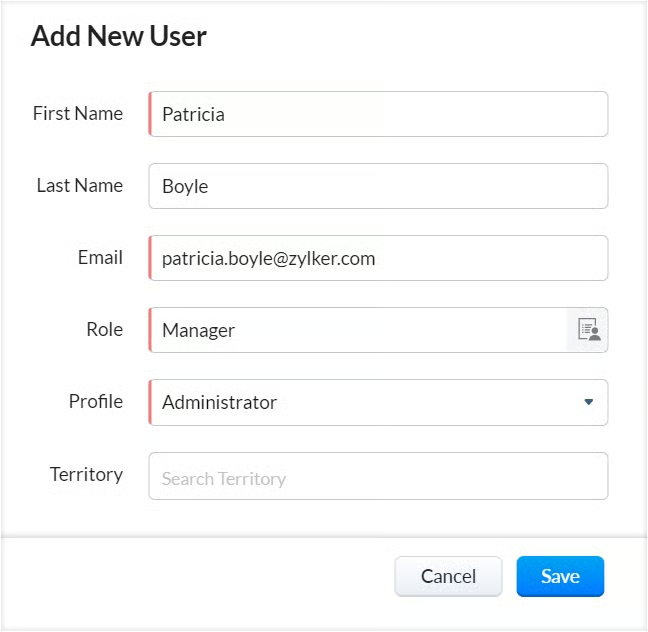
Adding a new user on Zoho CRM (Source: Zoho)
After the user is added, they will receive an email to complete their registration and gain access to the CRM. Like the system Administrator, they can customize parts of their system experience in terms of layouts and home page views. Furthermore, they can start using Zoho CRM features and collaborating on tasks and deals.
7. Learn Zoho CRM Feature Usage
The final step in learning how to use Zoho CRM is actively utilizing the available CRM features. We recommend slowly becoming familiar with the basic features like lead management and contact organization before experimenting with advanced automation and artificial intelligence (AI) tools. Additionally, you should play around with layouts until you are comfortable with your interface.
If you encounter problems in your configuration or implementation, you can ask Zoho CRM support for help. A CRM is only as valuable as the degree to which you use the features and adapt your system to your evolving small business operations. Some activities to consider as you start this stage of the Zoho CRM journey include:
- Constantly update records: As you go through your sales process, deploy marketing campaigns, and support your customers, keep deal and contact records updated with current information, tasks, and activities surrounding that record.
- Standardize feature utilization: Make using some of your built-in and integrated features part of the standard procedure within your business. Any time a new feature or a user is added, enforce comprehensive CRM training to keep adoption rates high.
- Integrate new applications: Each time a third-party application is added to your technology resource arsenal that has CRM integration capabilities with Zoho CRM, make sure it is integrated for your users to take full advantage of.
- Reconfigure automation: Play around with your workflow automation until you feel it’s been perfected. You can edit current workflows with triggers and additional conditions until it’s optimized.
- Report on progress: Use the CRM reporting and analytics features of Zoho to stay up to date on everything happening in your sales operation and within the platform.
- Try new features: Slowly learn and try new features that Zoho has to offer. The developers are constantly creating new CRM function capabilities and improving current ones that could benefit your sales team.
Bottom Line
Zoho CRM is a powerful tool businesses use to manage sales, marketing, and customer support operations. Using this system requires you to learn Zoho CRM characteristics and capabilities regarding features, customization, and integrations. Through this general Zoho tutorial, you can get the full CRM experience for you and your team to automate business processes, organize customer data, and increase sales revenue.