Cash wraps, also known as cash wells and checkout counters, are the areas in stores housing point-of-sale (POS) systems or cash registers where customers pay for their merchandise. A well-designed cash wrap can significantly impact your retail success and drive your business by increasing customer and employee satisfaction, driving sales, and building your brand.
No cash wrap is complete without a modern POS system that is low-cost and has powerful tools to help drive sales. Square is our top-recommended POS system because of its user-friendly interface including customer management and marketing tools. Visit Square to create your free account and see for yourself.
Follow the steps below to set up your cash wrap and maximize its potential.
Step 1: Place Your Cash Wrap Strategically
It’s important to position your cash wrap strategically in your store. For US businesses, place your cash wrap to the left of the entrance. Customers naturally turn right when they enter a store, then exit to their left. Placing your checkout area on the natural exit path will ensure you don’t disrupt customer flow in your store layout.
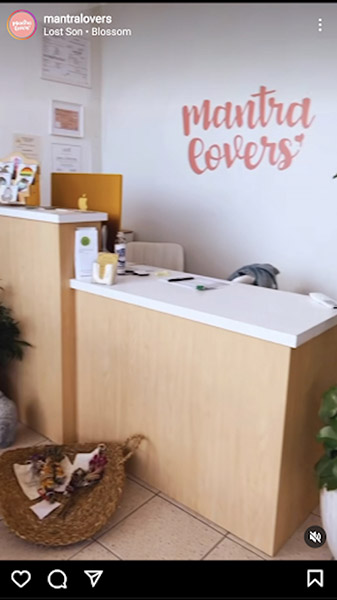
For example, Mantra Lovers has a well-designed space with strong visual branding. The boutique sells locally made products like jewelry, clothing, skincare, and other artisan goods. It conveniently placed its cash wrap to the left of the entrance, naturally guiding shoppers to explore the goods displayed to the right side of the store.
Make sure you have enough space for customers to check out, employees to do their work, and merchandise to be displayed. It’s also critical to meet—or exceed—ADA requirements.
Leave at least 2–3 feet of open counter space for customers to lay their selections. Leaving less space will make customers feel inclined to make smaller purchases—you want to encourage customers to pick out more products.
Additionally, checkout counters are usually 30”–36” deep and 38” tall. Stores designed with parallel counters should provide at least 3 feet of space between them for employees to work. These parameters also meet ADA standards.
Measure the amount of square footage your cash wrap needs, see what that looks like in your space, and then choose a cash wrap design that meets those parameters. A small storefront will likely want to choose something space effective, whereas a larger store might want to make a bold statement or accommodate more registers.
Step 2: Choose Your Design
Choosing the right cash wrap for your space will come down to available square footage, which tasks you need to do at the counter, and how many registers you need to accommodate. Every great cash wrap contains the elements listed above, illustrated in the image below:
All cash wraps contain some of the same key elements for functionality and aesthetic.
There are three main types of cash wraps, or you can choose from custom options:
Cost: Depending on the materials and dimensions, the average cost of a single-counter cash wrap can range from $400–$3,000. Most average around $600.
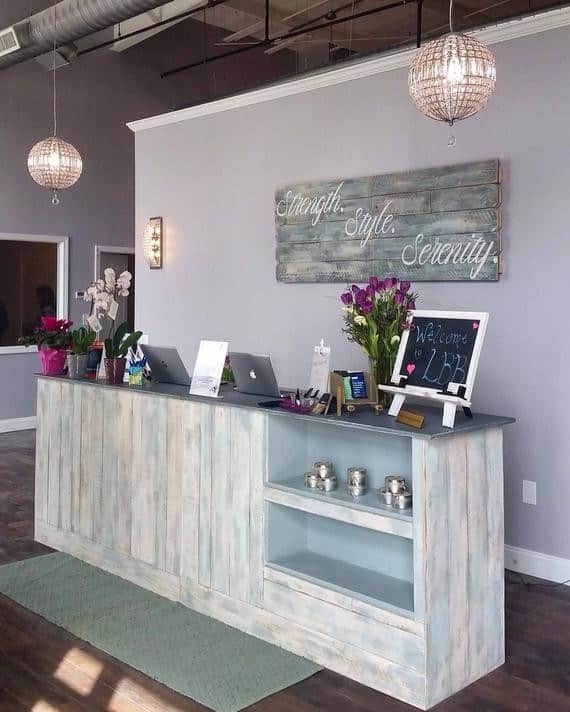
This salon’s single-counter cash wrap saves space and gives enough room for employees to work. (Source: Etsy)
The single-counter cash wrap has one counter that generally runs parallel to a wall. Of the cash wrap options, this one takes up the least space, making it ideal for smaller storefronts and those that don’t need much space behind their counter. With its smaller size, there’s also less storage and workspace behind the single counter configuration, making it best suited for limited activities.
Single-counter cash wraps can also be handy for large retailers needing a long checkout with multiple registers and for busy retailers needing multiple standalone checkout stations.
For example, grocery stores use single-counter cash wraps because scanning and packing groceries are the only tasks the counters need to host. Additionally, the single counter’s size allows grocers to fit more checkout stations in smaller square footage.
Related: Best Grocery POS Systems
Cost: L-shaped cash wraps can range anywhere from $1,000–$5,000, with most options coming in at around $1,700.
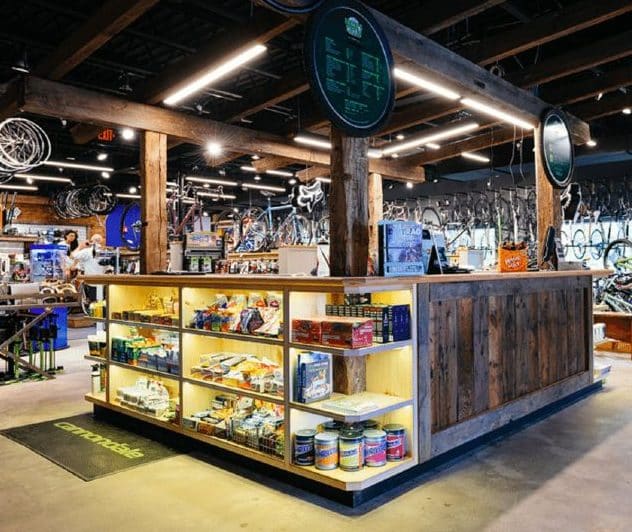
An L-shaped cash wrap gives this bike shop’s roomy space a spot for ringing orders up and working on gear. (Source: Raymond James Design)
The L-shaped or dual cash wrap has two separate counters: one typically used for displaying products or tasking and the other for checking out customers. For stores with heavier customer flow, you can also use both counters as checkout stations to move people out faster.
These counters are best suited for stores with more square footage, those with higher customer flow, and those requiring tasks at the register.
For example, you’ll find dual cash wraps at many coffee shops, as this gives one side of the counter for taking orders and the other for distributing them to customers. Or you might find this arrangement at a fabric store, where one side is used for ringing up orders and the other for cutting down samples to size.
Cost: Besides being the largest, U-shaped cash wraps are the most expensive, ranging from $1,200 to $10,000. Most counters come in at around $2,500.
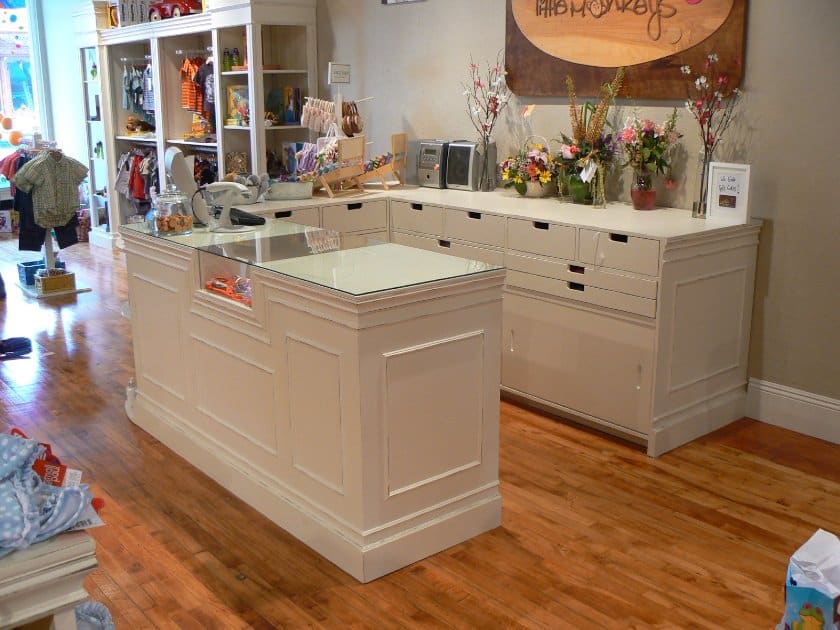
This shop uses a U-shaped cash wrap in its whimsical space. (Source: Pinterest)
The U-shaped cash wrap has three counters for tasks or multiple cashiers. This is ideal for stores that need multiple people behind the register either to check people out or perform other duties. It’s also great if you need to store a lot of items behind your register, as it provides the most space.
For example, jewelers will often have U-shaped counters, allowing multiple clerks to be behind the counter to help people look at jewelry. It also gives them maximum space to display pieces and store supplies.
You’ll also find U-shaped cash wraps in stores offering gift wrapping or shops needing space for tasks performed as part of the checkout process. These are the largest cash wrap option, so businesses will sometimes even use this type of checkout counter as an element of store design.
Cost: Custom-built cash wraps are usually quoted individually by a regional or local contractor.
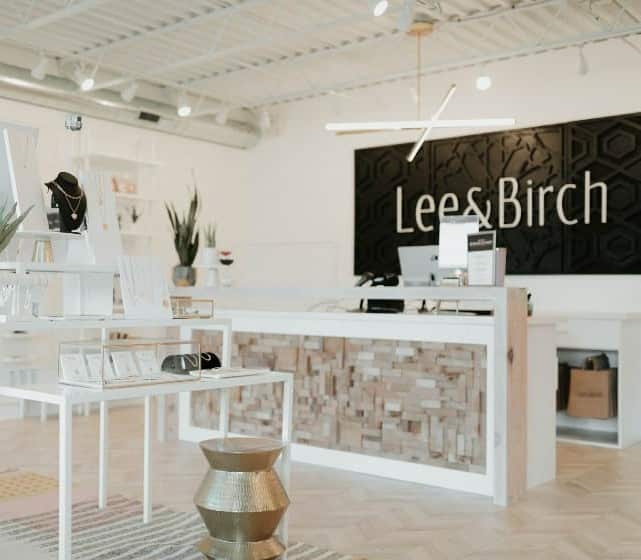
This boutique uses mosaic wood in a stunning custom cash wrap. (Source: Lee and Birch)
For some retailers, a custom cash wrap is the best option—whether because of an irregularly shaped space, specific tasking criteria that need to be accommodated, or a unique design desire.
When looking for a contractor, keep these things in mind:
- Fabrication can take three to 10 weeks.
- Total delivery and installation can take one to two months.
- Portability is a consideration in case you ever move the business.
Some retailers specialize in making custom cash wraps, so you can work with them if you’re not in the market for a contractor.
Step 3: Create or Buy Your Cash Wrap
While you’ll likely work with a custom provider if you want to go that route, you can find lots of cash wraps for purchase online or from local suppliers if you opt for something more traditional.
Here are some options for researching and buying cash wraps online:
Seek options that offer installation assistance and a guarantee or refund period. Always check customer reviews first. Conduct a simple Google search by entering “[company name] reviews” to see what others’ experiences have been.
Step 4: Stock Your Counter With a POS System
Now it’s time to stock your counter with a POS system, prepare the space for tasking, and introduce your employees to the tools and systems located at the cash wrap.
If you need a POS system, we recommend Square. It topped our list of the best POS systems for small businesses. Visit Square to create a free account.
The first activity your checkout counter needs to support is the actual checkout. Generally, POS systems are placed to a side of a counter, which includes space for a salesperson, a card reader, necessary signage (like return policies or loyalty program information), customer-facing displays, and receipt printers. You should also keep change refills and extra printer paper close to your POS system for ease of use.
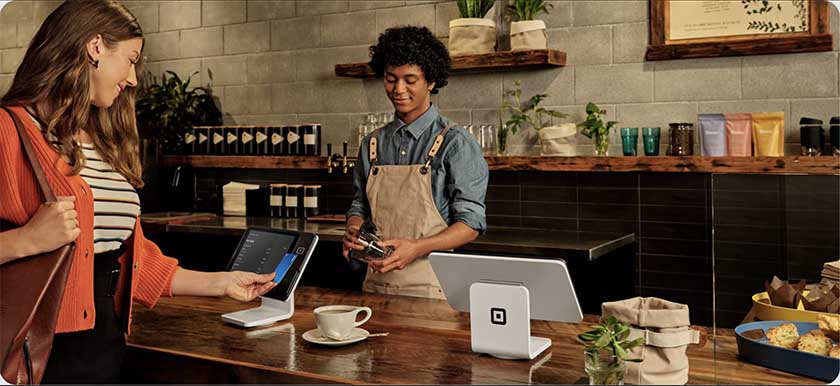
You can use contactless card readers, Square Register, Square Terminal, or Square Stand at your checkout counter. (Source: Square)
POS systems can be a huge asset for business. The best POS systems, like Square POS, track inventory, sales, customer engagement, and so much more. There’s an overwhelming number of POS systems on the market, and choosing the right one plays a huge role in starting your business. Square POS is affordable, easy to use, and works with a variety of payment types and integrations.
Learn more about using Square POS for your retail business.
Each business needs to accommodate different activities at their cash wrap. For example, at my boutique, we offered gift wrapping, so we needed space for folding, bagging, and storing different-sized jewelry boxes. We didn’t require a ton of tools, so we had simple shelving and organizational bins under our counter filled with bags, scissors, ribbons, jewelry boxes, etc.
A florist, on the other hand, might need supplies at its cash wrap to cut and arrange flowers. Or, a butcher might need tools to trim and measure meats. When stocking your cash wrap, consider which activities will be done behind the counter, the tools those activities require, and how you’ll store or display those tools.
In addition to tools for checkout tasks, you should also equip your cash wrap with things employees need to quickly grab without having to leave the floor and go to storage/backstock. Items they can offer to customers or need frequently for customer service are often stored behind the cash register for easy access.
For example, my cash wrap contained things like sewing scissors, lint rollers, and static spray—all things we could offer to customers if they needed them in their fittings.
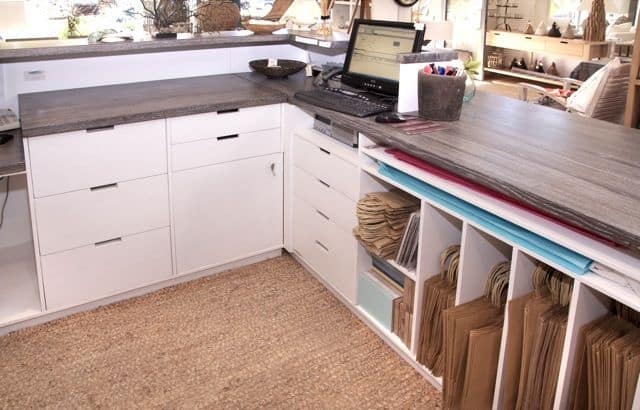
A well-equipped and organized cash wrap puts everything an employee could need at their fingertips. (Source: Pinterest)
It’s important to train your staff on how to operate, stock, and maintain your cash wrap.
Use binders for documents and bins for your supplies, make sure everything has a designated spot, and label like crazy. This will help employees use all the tools at the cash wrap and make their jobs easier and more efficient. This will also help associates keep track of supplies inventory—and you should have a system in place for them to request additional supplies.
Step 5: Merchandise Your Cash Wrap
Once your cash wrap is set up with supplies, it’s time to make it beautiful (and sales-driving) through merchandising.
Merchandising: The practice of displaying your product and organizing your store to drive sales and provide a stimulating and enjoyable shopping experience. See our merchandising guide to learn more.
A well-merchandised cash wrap will turn a simple checkout counter into a locus for upselling and curating customer loyalty by encouraging impulse buys, reinforcing your brand, advertising loyalty programs, and showcasing products with proper lighting:
Consumers spend $3,312 a year on impulse purchases, so you want to capitalize on them whenever you can. Your cash wrap is one of the best places to do exactly that. Place small, inexpensive items—like snacks, jewelry, and cards—around the counter, so shoppers are surrounded by enticing merchandise while they’re waiting to check out.
Did You Know?
Nearly three-quarters of shoppers who’ve made an impulse purchase have experienced a positive shift in their mood as a result.
When determining which items to place around your counter, remember impulse-buy items should do at least one of these things:
- Complement merchandise people already have. My boutique placed jewelry at the counter to put the perfect accessories for customers’ outfits right at their noses.
- Offer a great price. A local brewery might place clearance T-shirts around its kiosk so that customers see a great deal and are more likely to add it to their carts.
- Remind a customer of need. A liquor store might place bottle openers at the checkout counter to remind customers they need one after they have selected their bottles.
- Be inexpensive. A grocery store might place $3 lip balm packs in its checkout aisle, making it easy for customers to mindlessly toss one in their cart.
Impulse purchases are more frequent depending on the type of product.
You want to keep customers stimulated by merchandise while they wait. But don’t overcrowd your cash wrap with products. Give plenty of space for people to wait—you want them to be able to take in the items you have on display. A good rule of thumb: The more expensive your impulse buy items are, the fewer you should have around the counter.
You’ll also want to plan to switch out these products frequently. You don’t want to fatigue shoppers with the same items repeatedly. Keep it fresh and exciting to encourage regular purchases. Consider seasonal products as well.
Here are some ideas to get you started:
- Small items shoppers have trouble finding in the store
- Inexpensive gifts
- Cards, stickers, keychains, and similar branded items
- Small or sample-sized products
- Items priced under $10
- Hand sanitizer, lip balm, and other small wellness or personal care supplies
- Chocolate, candy, and small packaged snacks
- Special deals or promotional items
- Bundles
- Small accessories for other products in your store
- Seasonal or timely products
- Items you have too much of or which are expiring soon
Your cash wrap will be one of the first and last impressions your business will leave on customers, so you want merchandising to be in line with your brand. The materials, language, and decor you use are all tools to strengthen your brand.
For example, this funky coffee shop uses recycled materials, colorful task lighting, and fun shapes to turn its cash wrap into a design element that strengthens its brand image as a whimsical and “hipster” spot.
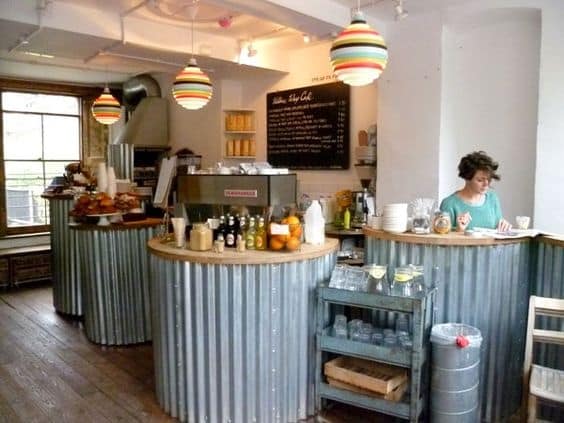
A very on-brand coffee shop cash wrap. (Source: Pinterest)
Had it used a slick, modern design, its cash wrap would not only have lost its power as a design element but would also have been a distraction from this business’s brand. Consider how you can use your cash wrap as a branding element. Use decor in line with your aesthetic and consider what impression you’re leaving on customers.
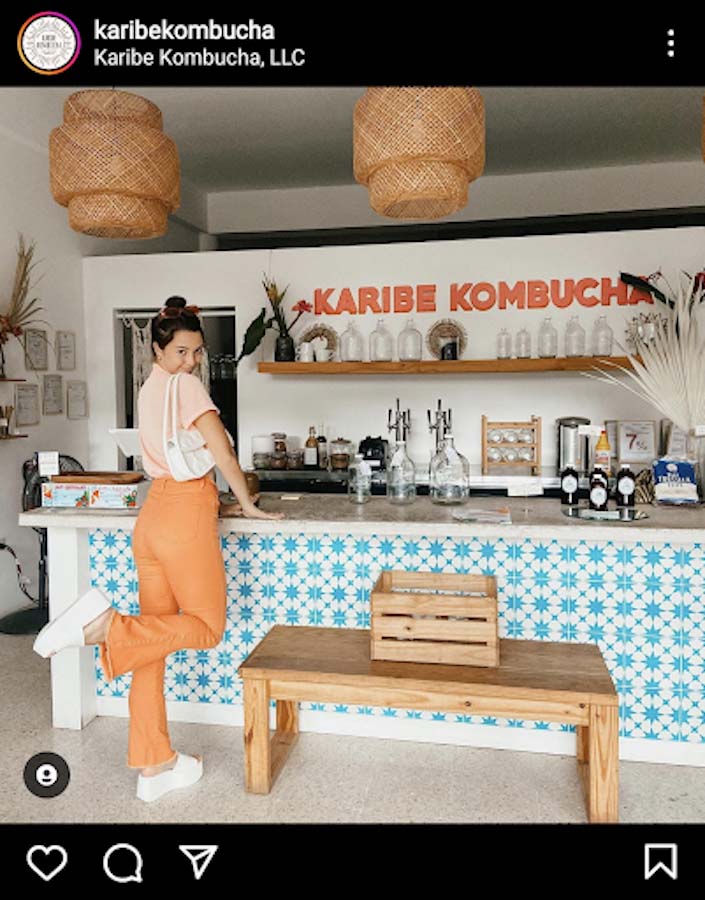
Karibe Kombucha sells its kombucha and other plant-based products at its storefront/cafe, as well as at local markets and in select grocery stores. It created a cash wrap that doubles as a wellness bar—and an appropriate extension of the visual brand.
A rewards and loyalty program is a great way to build brand loyalty and create a consistent customer base, and your cash wrap is a great place to promote them. At this point, customers have already decided that they like your business enough to make a purchase. This, plus the natural excitement of buying something, makes customers at the checkout counter poised for a loyalty program pitch.
Did you know?
According to the Pareto Principle, approximately 80% of revenue comes from just 20% of your customers. Focusing on that 20% and maintaining their loyalty is how you will keep your bottom line in the green.
Use signage around your cash wrap to advertise your rewards program, offer sign-up deals that people can use on their purchases, and (on top of an associate signing them up at checkout) leave a physical sign-up sheet that people can fill out as they wait. Make signing up as easy as possible and offer an incentive to get people on your list.
Like everywhere in your store, lighting creates the backdrop where all purchases are made and can enhance your cash wrap. Ensure you have enough—and the right kind of—lighting to perform all the activities at your checkout counter.
Generally, cash wraps have their own light sources, known as task lights, that create extra brightness in the checkout area. This area tends to need bright lighting to facilitate the reading of tags and other checkout activities.
Task Lighting: Light sources used to illuminate an area for a task or purpose.
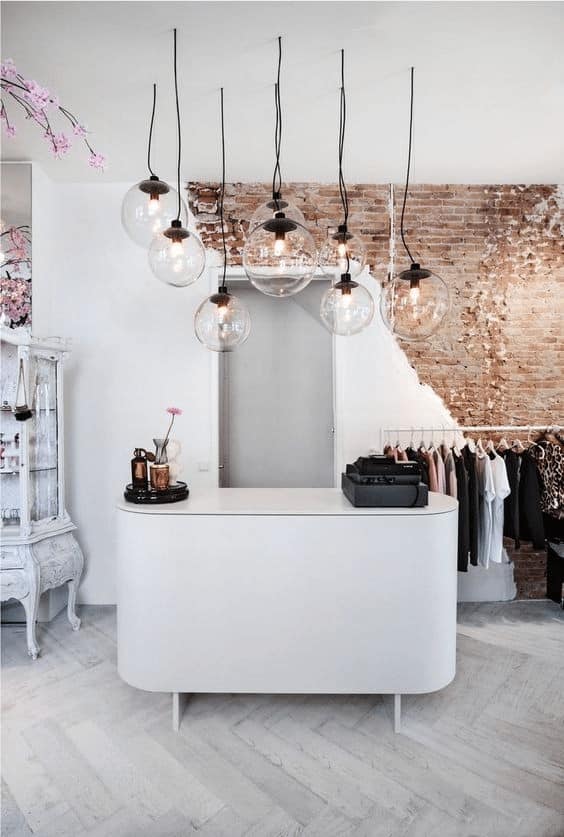
This boutique uses a cluster of decorative pendant lights to create task lighting over its cash wrap. (Source: Pinterest)
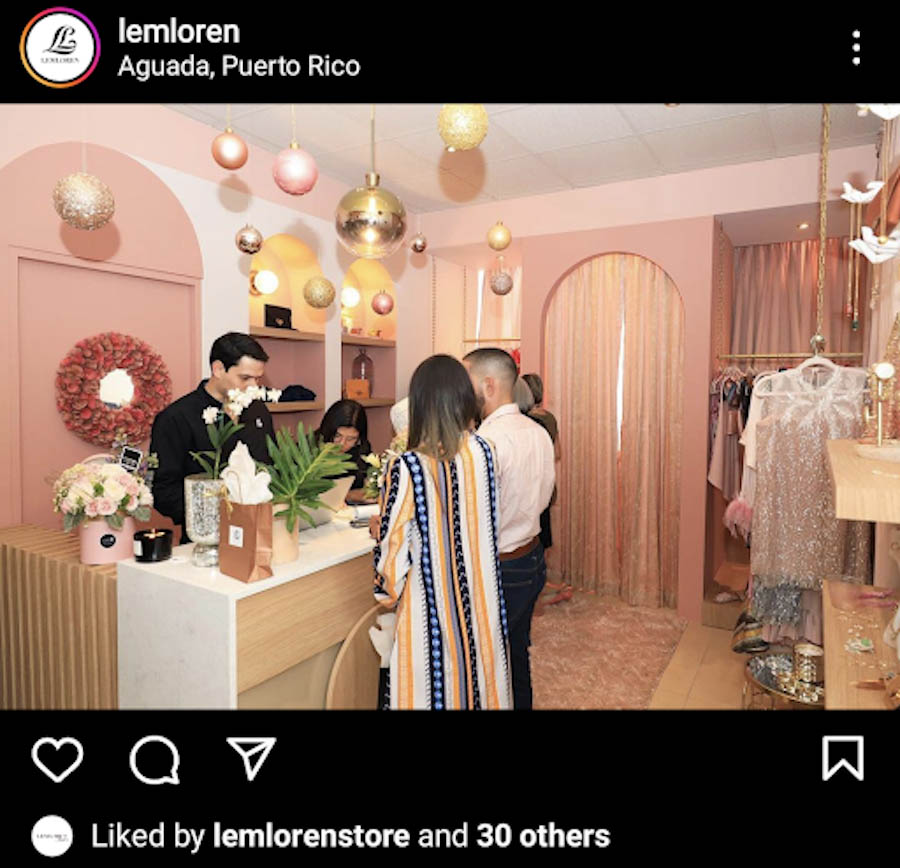
The cash wrap also presents a great opportunity to use more creative light fixtures to create a focal point at your counter and further define your brand. That’s the approach fashion boutique LEMLOREN takes with its cash wrap. Prominently placed as customers enter the small store, it reinforces the brand using creative lighting that matches its overall aesthetic.
Common Cash Wrap Mistakes
A lot of pieces go into making a well-designed and fully functional cash wrap. If you follow these instructions, you’re sure to create something great. There are, however, pitfalls to avoid.
Dim Lighting
As your cash wrap will host several tasks that require visibility, you need enough light. A dimly lit cash wrap makes tasks harder to perform and can lead to inefficiencies and errors. Also, a poorly lit cash wrap can interrupt your customer flow, making the natural end point to their shopping path harder to find when they’re ready to check out.
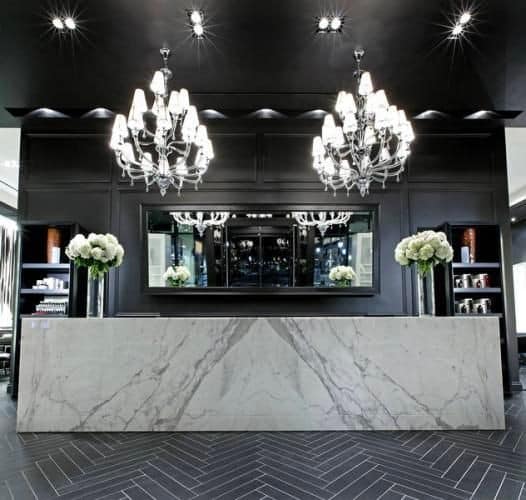
Be sure to provide lots of lighting around your cash wrap to make it easy to find and to facilitate daily tasks. (Source: Pinterest)
Too Much Clutter
When setting up your cash wrap, create separate zones free of clutter: one where customers can place their items, and another where you can perform tasks like folding, wrapping, and bagging.
A cash wrap that has too much going on will become a distraction and deter impulse purchases. Plus, customers will feel your brand is sloppy or careless. While you want to add branding and add impulse, you also want to avoid displaying too much product or decor.
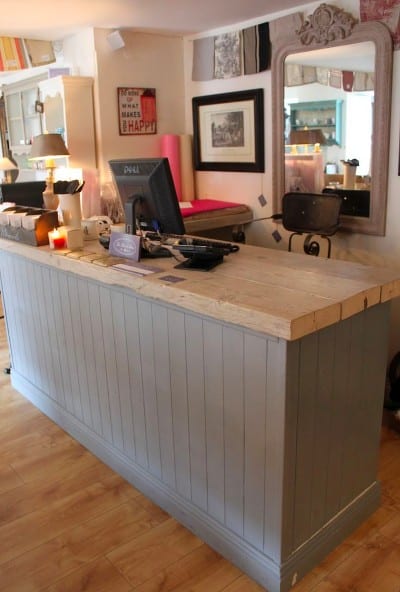
This store displays a number of impulse items while still leaving space for a wrapping station in the back corner and a spot for customers to drop their things. (Source: Pinterest)
Disorganized Storage
The best way to ensure smooth checkout operations is to have an organized storage space behind or underneath your cash wrap. A disorganized cash wrap storage space can lead to longer checkout times, frustrated customers, and unhappy employees.
Implement an organization system for the things you keep behind the counter and train your employees on how the system works so they can maintain it.
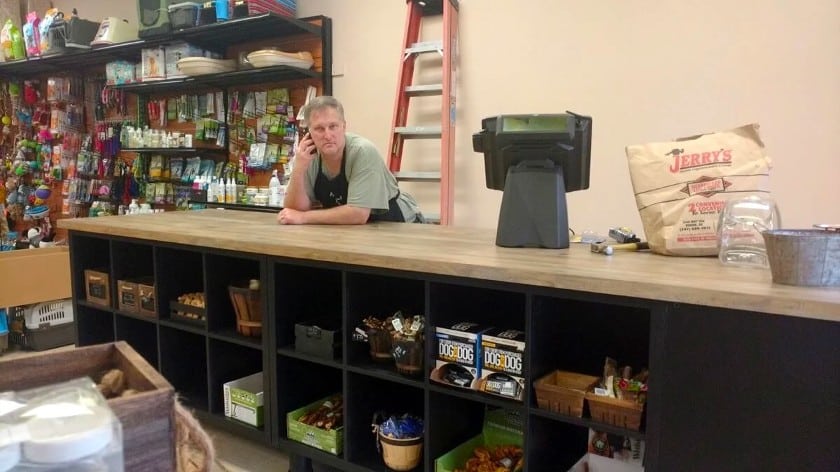
Keep your checkout operations running smoothly and avoid frustration by keeping your storage organized. (Source: IKEA Hackers)
Oversized Counters
While you certainly want to leave enough space for a smooth checkout, avoid a cash wrap that overwhelms your space. This will make the checkout area unnatural in your store, crowding the area and making your shop feel cramped. An oversized cash wrap counter also takes away valuable floor space you could use to display more products.
In general, your entire checkout area—your counter and the surrounding space—should be 15%–20% of your entire store floor plan.
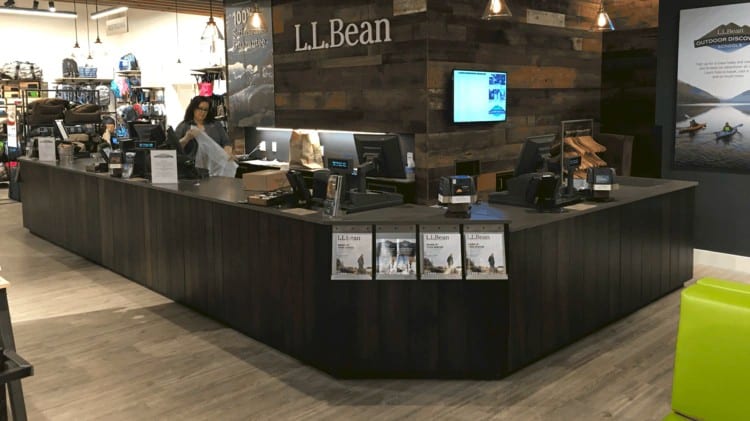
The size of your cash wrap is determined by the size of your space. (Source: ConnectPOS)
Cash Wrap Frequently Asked Questions (FAQs)
A cash wrap is an area in a retail store where customers check out and employees process transactions via POS system or cash register.
- Single-counter cash wrap
- L-shaped cash wrap
- U-shaped cash wrap
- Custom cash wrap
A cash wrap should be about counter height and under 36 inches high.
Bottom Line
More than payments happen at the cash wrap. From driving sales and creating customer loyalty to building your brand and having a happy and healthy business, your cash wrap is the hub for so many important aspects of growing your business. Done with the right considerations and care, as laid out in this article, you are ready to design a cash wrap that makes sense for your business and helps maximize its potential.
