

Inventory management is the process of maintaining the right products, in the right quantities, at the right time to sell to customers.
However, most merchants still find themselves either running out of stock of fast-moving products or losing inventory due to wastage, leading to operational headaches, overspending, and revenue loss. To remain sustainable, businesses should take a closer look at their inventory organization strategies.
If you want to save time, reduce waste, and keep your shelves stocked efficiently, here is a 9-step guide on how to organize inventory for small businesses that you can try without breaking the bank.

- Step 1: Choose an inventory management method
- Step 2: Organize product & vendor information
- Step 3: Create and submit accurate purchase orders
- Step 4: Receive orders accurately
- Step 5: Tag and label inventory
- Step 6: Organize your stockroom or warehouse
- Step 7: Track inventory in real time
- Step 8: Conduct regular inventory counts
- Step 9: Reconcile discrepancies
- Frequently asked questions (FAQs)
- Bottom line
Step 1: Choose an inventory management method
Before you begin working with your stock, you need to choose an inventory management method. As I mentioned earlier, the methods you choose should be ones that best allow you to maintain the right products, in the right quantities, at the right time to sell to your customers.
In my experience, combining a few different inventory management methods is the best way to successfully manage inventory. The appropriate method (or methods) that makes sense for your business will depend on a few factors, including:
- Product quantity
- Product value
- Cost of goods sold (COGS)
- Turnover ratio
- Product type (perishable vs non-perishable)
- Product size/weight
- Product quantities
- Product variations
- Carrying costs
Consider the following small business inventory management methods:
- First-in, first-out inventory management (FIFO): Lets you assign costs to ending inventory. FIFO assumes that the first items you purchase from suppliers are the same items you will sell first to customers. At the end of the year, you’ll assess your remaining inventory and assign a cost to it. FIFO is suitable for businesses that sell perishable goods or those wanting a simple inventory management method.
- Last-in, first-out inventory method (LIFO): Assumes the most recently purchased inventory (“last in”) as the cost of goods sold. In other words, recently purchased goods are expected to be expensed first or transferred to the COGS.
This is the most popular small business inventory management method in the US, and many proponents believe it most closely matches the replacement cost of inventory. If a company wants to reduce income tax obligations or change the net income it reports, LIFO is a good fit.
- Average cost method (AVCO): Used to determine the cost of inventory at the end of the year and the COGS during the year. Under AVCO, the cost of inventory is based on the weighted average cost of inventory purchases during the year.
Because it uses an average cost of goods in inventory rather than tracking individual units, it is typically simpler to use than FIFO or LIFO. However, this method can result in rounding errors or other inaccuracies because average unit costs don’t always reflect current costs accurately, and very cheap or very affordable items can skew averages.
- Perpetual inventory system: Calculates your COGS after each sale, as opposed to periodically. In a POS system, this is also called live sales tracking and simply means that your inventory information will update itself automatically as transactions happen. A good POS system will update all your sales channels, including online and additional locations.
A perpetual inventory system works well for businesses with high-value or fast-moving inventory. These businesses need real-time inventory data and quick updates about stock levels and transactions.
- Periodic inventory system: Calculates your COGS periodically — for example, whenever you perform physical inventory counts. With a periodic inventory system, you won’t get real-time updates on inventory levels and COGS balances, but your record-keeping and accounting will be much simpler, and you won’t need inventory or accounting software.
This is a more common practice for businesses managing their inventory manually, but is also used less frequently in conjunction with automated perpetual inventory management systems.
- Specific identification inventory method: Identifies each individual unit of inventory and assigns its actual cost. This inventory management method doesn’t use assumptions like the FIFO, LIFO, or AVCO methods. The COGS and ending inventory are determined by the actual cost assigned to each physical unit of inventory and what is actually sold and unsold.
This means that you’ll get very accurate inventory information with the specific identification method; however, you’ll also need to perform detailed and exhaustive bookkeeping. This method is also not suitable for fast-selling goods or products that are sold by weight.
Once you have chosen your inventory management methods, you can implement them by programming ordering cadences, automations, and alerts on your inventory management software. If you prefer to manage your inventory manually, you will need to monitor your books and item quantities to ensure implementation.
Related:
- What is The Average Age of Inventory Formula? + Calculator
- Inventory Turnover Ratio Defined: Formula, Calculator & Examples
- What is Inventory Planning? Guide for Retailers
Step 2: Organize product & vendor information
The next step to organizing inventory is to set up your stock and supplier information in a reliable and accessible system.
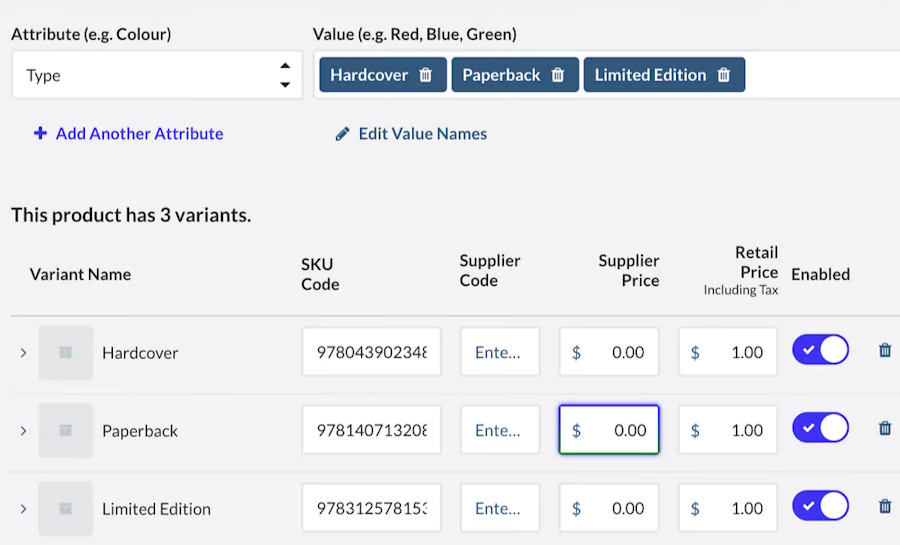
To organize your products, you’ll first need to record information about each item and file it on a product page. Product-specific information should include:
- Product name
- Quantity
- Your internal product stock-keeping unit (SKU) number
- Manufacturer’s Universal Product Code (UPC)/European Article Number (EAN) or other unique identifiers
- Short description
- Product category, class, or family
- Wholesale cost
- Regular retail price/MSRP
- Your selling price
- Colors or sizes
- Vendor, supplier, or manufacturer name
- Reorder quantities
- Shipping details: size, weight, box pack, cost, dispatch time, etc.
- Picture or product image
In addition to creating a log of your products and their information, you will need to file your vendors’ information into your inventory system. That information should include:
- Vendor name
- Vendor contact name
- Vendor billing information
- Vendor phone
- Vendor email
- Vendor website
- Order volume
- Payment terms
- Line rep or showroom contact
- Fulfillment and shipping times
- Top products from vendor
The best option for retailers is to use a POS system that features searchable vendor and product directories.If you’re not ready to invest in a POS system with inventory management capabilities, there are several free inventory management software available.
💡Build relationships with your product suppliers
Even with the best small business inventory management plan, issues can still arise where you need products ASAP to fulfill an order. When this happens, retailers, especially those who import products from countries like China, are at the mercy of their suppliers.
For example: Based on interos.ai tariff simulator, recent tariff issues are affecting inventory movement for 166,000 local US companies that source toys from China, while more than 214,000 businesses that import apparel are hoping to find a local supplier that can meet their demands within budget in time for the holiday season prep that starts in June.
Also, if there is a quality control issue or a discrepancy with a purchase order, having a good relationship with your supplier can help resolve these issues quickly.
You can build strong relationships with product suppliers by sticking with the same suppliers when possible, meeting suppliers in person at trade shows, strategizing and collaborating with suppliers regularly, and, perhaps most importantly, paying invoices on time.
Also read:
Step 3: Create and submit accurate purchase orders
A purchase order (PO) is a buyer-created record of an order that is submitted to the vendor and serves as a legal contract for the sale of goods. You use POs to cross-reference actual goods and invoices received to those ordered and paid for. If there is a discrepancy between your PO and the goods received, you can use your PO to return to the vendor and settle up.
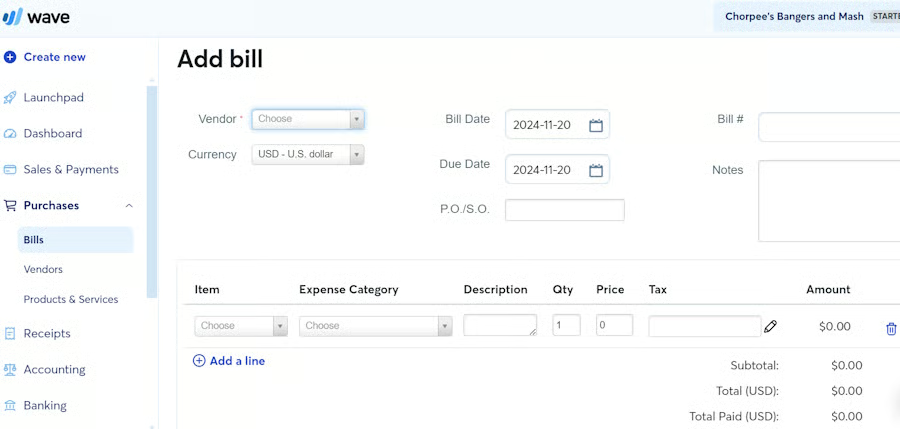
You can submit POs to vendors electronically through email or the vendor’s online ordering portal, as is preferred over any paper system.
Some POS systems, like Lightspeed, have PO features that let you create and manage POs right from your POS system. Other software even include vendor directories to manage vendor contact information, automated PO creation at set stock points, and receiving tools with POS data built in.
Step 4: Receive orders accurately
Next, you want to be sure that you receive your stock accurately. Supplier error is fairly common, and if you aren’t being systematic about receiving your inventory, you might get shorted, overcount, or underestimate your inventory levels, which can lead to inventory shrinkage (having less product than your records show) and a decrease in your margins.
To ensure the accuracy of your orders, follow these steps:
- Unpack shipment and organize items by product.
- Count/scan products.
- Compare the count to your PO.
- If the counts and products match, file as received.
- If you find errors like wrong, shorted, or missing items, note these on your PO and contact your supplier immediately to resolve them.
- Shelve or store all correctly received stock (tag or label first if needed for your system).
- Enter your invoice into your accounting system.
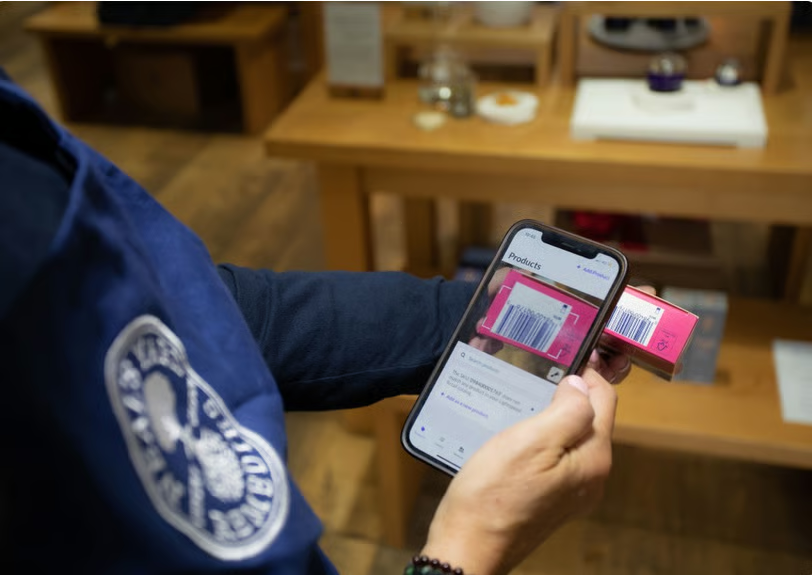
Some inventory management systems have an accompanying app that turns your smartphone into a barcode scanner; the app can then count and log shipments for you.
Step 5: Tag and label inventory
Once your products are physically on hand and accounted for, you will need to tag and label them so they are ready for the sales floor and organized internally. To ensure your tags are ready for both the sales floor and the stockroom, they should include the following information:
- Item selling price: All your inventory will need this before it can go out on the floor and be customer-facing. (Learn how to price a product in five steps.)
- Product labels: You should have some sort of labeling system for your inventory so you can easily organize and track it internally. I recommend using both a barcode label (you can generate your own barcode labels) so you can easily scan items in your inventory system and at checkout, as well as a descriptive written label, like “red shirt” or “child’s leggings” that corresponds with where the item goes in your store and in storage.
There are two ways to tag inventory. Universal product codes (UPC) are created externally for broad supply chain compatibility, while stock-keeping units (SKU) are product identifiers that a business uses to track its own inventory. Learn when to use each in our guide to UPCs and SKU numbers.
Regardless of the type of labels you use, a good time to tag and label inventory is during the stock receipt process. This ensures the task isn’t overlooked and prevents the unlabeled stock from being shelved or displayed for sale.
Once printed, labels should be fixed directly to the product. Some inventory might even arrive prelabeled with the manufacturer’s barcodes, description, and price. If you aren’t using an internal labeling system, this makes your job easy. You can just start organizing.
Also read:
Step 6: Organize your stockroom or warehouse
Consider taking the first week at your store to completely reorganize the stockroom to improve its functionality; this will make things much smoother for you moving forward.
Having an organized stockroom will not only make things easier to find but will also allow you to fit more merchandise and keep better tabs on your inventory. In retail stores, tall storage shelves or double-tier hanging racks (ideally the type you can roll) can maximize your wall space while allowing movement and easy access.
Don’t forget to use vertical space in addition to horizontal space. However, storage bins, which are great for larger or heavier items that would take up too much space if hung, can be stacked and labeled on the ground to use floor space efficiently.
💡For small stockrooms, segment your inventory using the ABC method
The ABC method is an ideal approach for retail or inventory-heavy businesses, such as fashion boutiques, food vendors, and office supply shops, where there is limited shelf space and tight cash flow. It works by categorizing inventory according to value and quantity instead of separating by SKUs.
- A-items: High-value, low-quantity
- B-items: Moderate value and volume
- C-items: Low-cost, high-volume
For example: I briefly interned at a small store that sold a wide range of consumer electronics, and part of my job was to categorize the stock once a month. If I were to use the ABC method to organize their inventory now, it would look something like what you see below:
| A-Items (High-Value, Low Quantity) | B-Items (Moderate Value, Moderate Quantity) | C-Items (Low-Value, High Quantity) | |
|---|---|---|---|
| Product types | High-end noise-canceling headphones, smartwatches, gaming keyboards | Branded portable chargers, mid-range Bluetooth speakers | USB flash drives, charging cables, screen protectors |
| Objective | Prevent tying up too much capital while ensuring high-value items are available for loyal or high-spend customers. | Balanced approach that helps maintain availability without overstocking. | Efficiently manage fast turnover and drive impulse buys or “add-ons” at checkout. |
| Strategy |
|
|
|
💡Use a zoning method for large warehouse space
In larger warehouse settings, there is typically more room to store goods within aisles that have built-in shelving and hanging storage — which is why good organization starts with zoning your storage space.
For example:
- Zone A: Fast-moving items near the front
- Zone B: Overstock or seasonal items
- Zone C: Damaged or returned goods
Additionally, you will want to ensure that you choose storage devices that make sense for your merchandise and can change over time.
Whatever your method, your stored inventory needs to be well-organized, clearly labeled, and accessible for pulling and inventory counts. This can be done using the boxes goods come in, stacking bins, or even hanging separators for hung apparel.

If you use a warehouse to store your products, learn how to keep your operations efficient with our guide to warehouse layout design planning.
Step 7: Track inventory in real time
One major benefit of understanding how to set up an inventory system is the ability to track your inventory levels in real time. Having this visibility is key for keeping the right items on the shelves in the right quantities — i.e., good inventory management.
Whether by hand or through your POS system, a sound inventory management system records every sale in detail and adjusts inventory levels as each item is sold. You can use a spreadsheet for inventory tracking, or a POS system with integrated inventory management for a more reliable option.
A good POS system tracks inventory levels in real time and adjusts quantities with every sale. As your inventory numbers dip below the designated safety stock level, you’ll get automatic low-stock alerts and PO generation for the low-stock items.
💡Monitor inventory KPIs
Did you know? In the latest U.S. Census Bureau data, businesses are found to carry average inventory worth $1.37 for every dollar worth of sales. This is significantly higher than the ideal $0.15 to $0.30 for retail and ecommerce, which means there’s inventory not being moved and devaluing, while also taking up space.
Numbers don’t lie. Aside from real-time monitoring, tracking inventory-related metrics will also help you make better business decisions.
Here are some KPIs you need to watch:
- Inventory turnover ratio: How often you sell and replace inventory
- Shrinkage: Lost inventory due to damage, theft, or errors
- Days sales of inventory (DSI): How long items sit before selling
Step 8: Conduct regular inventory counts
Even if you have a POS system keeping tabs on your inventory levels, consider performing separate manual inventory counts regularly. Getting into your stock room and actually counting your products is the only way to know exactly what you have, allowing you to settle disparities between actual levels and those on your POS and manage your stock accurately.
Most small businesses do a full inventory count once each year for tax purposes, but will also perform smaller partial inventory counts, or cycle counts, throughout the year.
Here are the types of counts you should perform to ensure you have an accurate eye on your inventory:
Quantity on hand
The basis of both annual and cycle inventory counts is your current Quantity on Hand (QOH) or the amount of inventory you should have in stock for every item you carry. The formula for QOH is as follows:
QOH = (Previous QOH + Received Inventory) – Sold Inventory
Your QOH is the number you will measure your annual and cycle counts against. So, for example, if I thought I should have 272 packs of gum based on my QOH calculation, I would be looking for 272 packs of gum in my cycle or annual count. If I found a discrepancy, say only 250 packs of gum, that would indicate an error or theft that I could then look into further.
Annual inventory counts
- A complete inventory count
- Typically done at the close of each fiscal year for income tax purposes.
- Gives you an overall picture of how much inventory you have on hand at the close of your year.
- Uncovers inventory shortages due to miscounts, shrinkage issues, misplaced stock, and/or receiving errors.
Most retailers perform more frequent counts; however, some small businesses with limited staff or small inventories will only perform this type of inventory count each year.
Cycle counts
- Periodic spot counts
- Take inventory of specific categories or subsets of products.
- Check how specific products are performing and determine whether it’s time for a restock.
- Identify what stock is not moving and might need to go on sale
While annual inventory counts are a good practice regardless, by year’s end, it’s too late to fix most of the problems they reveal. To catch inventory issues before they become costly, you’ll also want to conduct cycle counts.
The goal here is to prevent inventory from staying longer in stock than it should, as this means incurring greater carrying costs (the expenses a small business must pay to hold and store unsold merchandise).
Schedule your cycle counts based on the speed with which you move through your inventory, with items that sell faster getting more frequent counts.
Manual vs automated counting
When it comes to how you count your inventory, you have two options. You can either do it manually or use a POS system to automate your processes. Here, we will look at both:
Manual counting
Manual counts are less accurate and more time-consuming than using an automated POS system. If you do decide to go the manual route, your first step will be tallying your QOH based on your purchase orders, last year’s inventory, and a sales tally of each item sold. From there, you’ll need to create inventory count sheets to record your physical counts and begin counting.
💡Implement a barcode or QR code system
Manual tracking is prone to human error. By using a simple barcode or QR system, you can:
- Speed up inventory intake and updates
- Improve accuracy in stock levels
- Simplify audits and product lookups
Affordable tools like smartphone scanners and apps (e.g., Orca Scan, Sortly) make this technology accessible to even the smallest businesses. My latest version of our free inventory management workbook works with a smartphone barcode scanner to improve your inventory count tasks.
Related: Free Inventory Templates + Instructions
Automated POS counting
I suggest a POS system to help reduce errors in your inventory management and make your business more efficient. While a POS system can’t count all the physical items in your inventory, it can place live QOH counts and inventory lists at the tips of your fingers to help accelerate and streamline your inventory counts.
If you do decide to go with a POS system to count and track your inventory, I recommend Lightspeed. It keeps live QOH counts as you receive and sell items, continuously tracks your inventory levels, alerts you to low-stock items, and provides reports and data to help you better understand and manage your inventory. Visit Lightspeed to learn more.
Step 9: Reconcile discrepancies
Ideally, your physical inventory counts will match your projected quantities on hand (QOH). However, this is rarely ever the case, and there are frequently differences you have to reconcile. If you count more or fewer of a product than you anticipated, you will need to investigate the discrepancy to figure out where things went wrong.
💡There are two primary reasons for inventory shrinkage — either there has been a clerical error, or theft has occurred.
Sometimes, clerical errors are not actual losses — an item could have been misplaced or a key mistyped. Other times, shrinkage indicates actual loss, and you should investigate where it happened so you can work on preventing shrinkage in the future.
If you determine that your missing merchandise is truly gone, you should adjust your QOH in your records or inventory management system/POS. After that, you need to record the dollar value lost due to the shrinkage in your inventory.
Learn how to prevent theft with our guide to retail theft prevention strategies.
Frequently asked questions (FAQs)
Expand the questions below to get answers to some of your most asked questions about inventory management.
What is inventory management?
Inventory management is the process of keeping the right products, in the right quantity, in stock at the right times. Inventory management also involves avoiding stockouts and having in-demand products in stock for your customers to buy when they want them.
What is the best inventory management system for small businesses?
Overall, our top pick for inventory management systems for small businesses is Zoho Inventory. For retailers specifically, however, we recommend Lightspeed.
How do you do inventory management?
You first need to organize your existing products and vendor info, place purchase orders, receive your orders, tag and label new inventory, organize it into your storage area, and then continually track and count inventory over time so you can monitor when it is time to place new orders or put items on sale.
How do small companies manage inventory?
Small business inventory management involves using a spreadsheet and tracking by hand or with an inventory management software solution to automate the process—and it isn’t very different for larger companies. We suggest Square as a free option that is perfect for small companies.
Bottom line
A good inventory management system means that you always have an accurate picture of your stock so that you can avoid waste and provide the merchandise and experience that your customers expect. Whether you’re looking to learn the basics of how to organize inventory for small businesses or reinvigorate an existing system that has become disorganized, these steps will help you set up and streamline your operations.