


For new small businesses, setting up a point-of-sale (POS) system can be as easy as downloading an app on a tablet. More complex businesses may require professional POS installation or specialized hardware. However, for most small storefronts, your POS setup process will be somewhere in the middle, requiring a few days of do-it-yourself (DIY) data entry, hardware setup, and setting configurations.
Factors like budget, business size and type, system capabilities, and hardware compatibility all impact how you set up your POS system.
Here’s a quick summary of the steps:
- Choose a POS system
- Decide between professional installation or DIY
- Set up your inventory management system
- Import customer data
- Create employee accounts & set permissions
- Train your staff to use the POS system
Follow along with our POS setup video guide as we discuss the steps in more detail below.
1. Choose a POS System
Before anything else, you’ll want to choose a POS system that suits your unique business needs. You can do this by answering a few basic questions:
- What industry-specific features do you need?
- Is the POS compatible with other software you use?
- Do you plan to lease or buy your POS hardware?
Evaluate Industry-specific Features
Each industry has specific needs, which you can explore in the tabs below:
- Inventory management: Track inventory in real time as it is sold, including variants and modifiers like different sizes and colors. The best POS systems will have fairly robust inventory management features, alerting you to low stock and allowing you to reorder items easily as needed.
- Multiple payment options: In addition to cash and credit cards, retailers need options to accept e-wallet payments, store credit, refunds, and alternative payment options like PayPal. Ideally, Buy Now, Pay Later would also be an option.
- Multichannel: Retailers that sell online or at events need a POS that can connect with other sales channels, such as social media sites.
- Customer relationship management (CRM): Create customer profiles with contact information and purchase history to use for email marketing and loyalty programs.
- Table mapping: Create floor plans for your dining room to track guests and open tables, including their servers, orders, and how long they have been seated.
- Menu management: Enter menus with pricing for different meals, days of the week, and special events or discounts like happy hour.
- Ingredient-level inventory management: Add recipes and track stock levels as you sell and prepare each dish. Vendor management with automatic purchase orders would make things even better.
- Split checks and tipping: Servers can split checks multiple ways and let guests add tips easily.
- CRM: Create customer profiles with contact information.
- Online ordering and delivery: Allow customers to place pick-up and delivery orders and pay online.
- Booking integration: Manage room reservations via native POS tools or integrate with third-party booking software.
- Event organization: Manage events and rentals for ballrooms and conference spaces.
- Guest feedback and surveys: Send and collect surveys after each guest’s stay.
Hotels need a POS or property management system (PMS) like Hotelogix, with reservation management, payment processing, and options for retail and restaurant sales. (Source: Hotelogix)
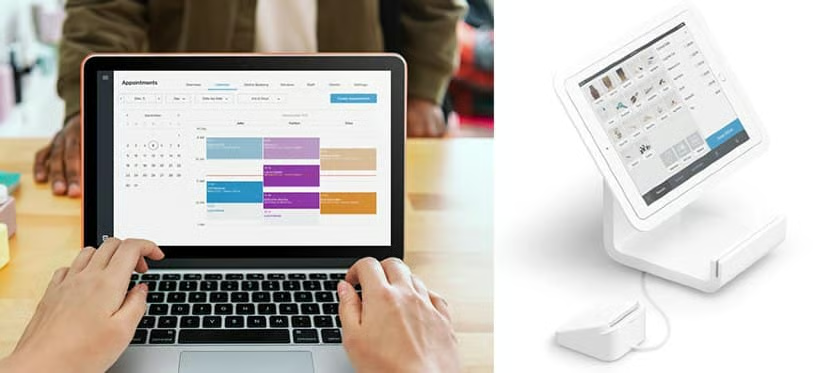
- Appointment management: Manage your calendar and staff schedules, allow customers to book appointments, and sync appointments to your payment processor.
- Retail sales: Many service providers, like spas and salons, also need to process retail sales.
- Online booking: Allow customers to create accounts and book appointments online.
- Invoicing: Some service providers, such as mechanics, cleaning agencies, and contractors, need to generate invoices for appointments.
Consider Hardware & Compatibility Issues
If you’re an established business, you’ve likely already made investments in other hardware and software to manage day-to-day operations. When it comes to setting up your POS system, you want one that will integrate seamlessly with the rest of your existing technology, so be sure to check for compatibility before you invest in a system.
For new businesses, make sure you choose a system with which you are comfortable. For example, if you’re familiar with the iOS operating system because you use an iPhone, you might be most comfortable with an app-based POS that runs on iPads. If you prefer a desktop computer, consider a browser-based POS system.

Should You Rent or Lease POS Hardware?
Leasing a POS system can look like an attractive option. It offers lower upfront costs and reduced ongoing fees, and you can return the hardware when you’re finished. However, renting hardware doesn’t always save money in the long run, and investing in your own equipment gives you more freedom and flexibility.
If you want to own your POS system but need lower upfront costs, there is a third option. Some POS companies offer payment plans or installment payment options, meaning you can pay for the product over time and still own the hardware. Square, for example, offers 12- to 24-month payment plans for most of its hardware. In rare cases, a POS brand may offer hardware at no upfront cost if you are willing to pay higher credit card processing fees, as restaurant POS provider Toast does. Make sure you understand all available payment options before committing to leasing or buying your POS.
2. Decide Between Professional Installation & DIY
In many cases, the decision to self-install your POS or use a professional installer is not really a choice. Complex POS systems like Revel Systems or Speedline, for example, simply cannot be self-installed. These systems include the cost of installation with your quoted fees. Others―like most iPad POS systems―are self-installable. Click through the tabs below to see examples of systems that are self-installable versus systems that require professional installation.
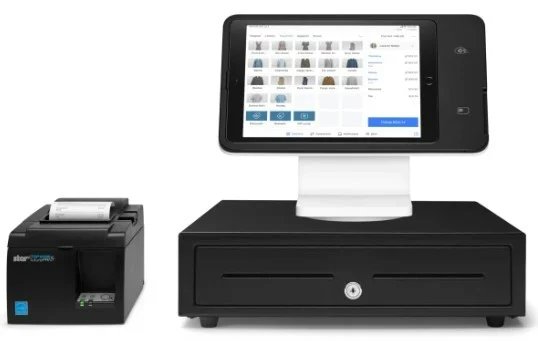
Example system: Square
Best for: Small retailers, restaurants, and service businesses that need one to two terminals
Required hardware: Tablet and Square Card Reader (One free reader available per account)
Optional hardware: Square Stand, Square Register, Square Terminal, cash drawer, kitchen printers, receipt printers, label printers, barcode scanners, KDS screens, and customer-facing displays
Monthly software fee: $0 to $60+
Installation fee: $0; see our guide to Square POS setup for self-installation instructions.
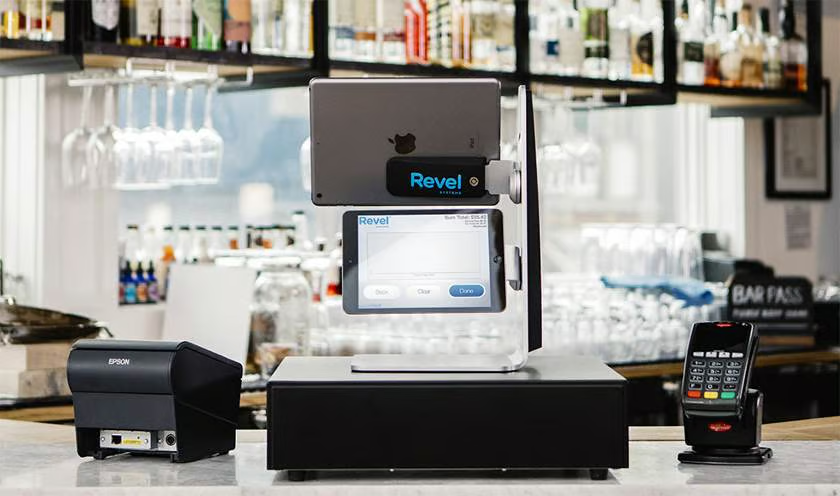
Example system: Revel Systems
Best for: Multilocation retailers and restaurants that need five or more terminals and strong offline functions
Required hardware: Revel-configured iPad with card reader and stand, router, and network switch
Optional hardware: Cash drawers, scales, barcode scanners, handheld iPad cases, receipt printers, kitchen printers, label printers, KDS screens, customer-facing displays, and digital menu boards
Monthly software fee: $99 per terminal
Installation fee: From $674
Some cloud and hybrid POS systems give you the option to self-install or professional installation (for a fee). In that case, choosing between installing the POS system yourself and hiring a professional to do it comes down to your resources, administrative bandwidth, and the system’s complexity.
Pros & Cons of Self-installation vs Professional POS Installation
| Self-installation | Professional Installation | |
|---|---|---|
| Pros | You’ll be more familiar with the POS from the beginning | You can rest assured that setup will be performed correctly |
| You’ll save money on installation fees | POS training for your team may be included (check with your provider) | |
| Significant time savings | ||
| Cons | It might take up lots of time | You’ll be paying for the installation—around $500 or more |
| You might set up the POS incorrectly | You may need to wait (up to weeks) for a professional to become available for installation | |
| You may overlook some features or functions of the system |
Configuring Your Software
Whichever installation style you use, the first step in your POS installation is configuring your software. Before you even look at your POS hardware components, you’ll need to input your basic business information. This includes your business name, banking information, and credit card processing information (if your POS doesn’t come with built-in processing).
If your business has a lengthy product list or detailed menus and you have chosen a POS system with included installation, you will generally send this information to the POS company to configure for you. Usually, the POS brand will provide you with forms to provide this information in its preferred format and connect you with a customer service―sometimes called “customer success”―representative to ensure that your installation stays on track.
If you are using a self-installable POS, you’ll typically add this information to the POS system’s management dashboard. You can wait to add your inventory items, but to configure your hardware and sync your system information, you’ll at least need to add your basic business information first so that you’ll have a central dashboard to add your hardware information in the next step.
Networking Hardware
Once your software is configured, you’ll need to link it to your hardware components. Depending on your business type, you may have many different types of hardware that need to communicate with one another.
All businesses will have terminals, card readers, receipt printers, and routers. Retailers may need integrated scales, barcode scanners, and label printers. Restaurants will need kitchen printers or a KDS. Food trucks and service businesses―along with some retailers and restaurants―may prefer handheld order and payment devices that can be used anywhere in their shop.
In self-installable systems, hardware connections may be through Wi-Fi, Bluetooth, or USB connections. More complex systems require routers or network switches with ethernet cabling. Generally, the more connections your POS hardware components have, the stronger your system’s offline functionality.
3. Set Up Your Inventory Management System
Once you’ve chosen and installed your POS system, you’ll need to complete the inventory management process. Tracking inventory is a crucial function and is thus one of the most valuable features of a POS system. Almost every POS system includes some level of inventory management. If you have a larger business, you’ll likely need a more sophisticated system—some businesses may also use third-party integrations to connect more robust or dedicated inventory management software to the POS.
To start, import your stock list. Depending on how you’ve been tracking products before implementing your new POS system, this might mean uploading data from an Excel spreadsheet or turning an integration with your existing third-party software on. While many POS systems can handle this process automatically, it’s still a good idea to do a manual review after importing to ensure the data looks clean.
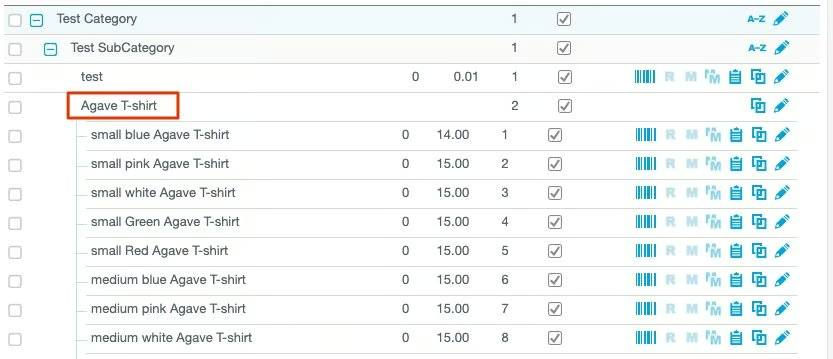
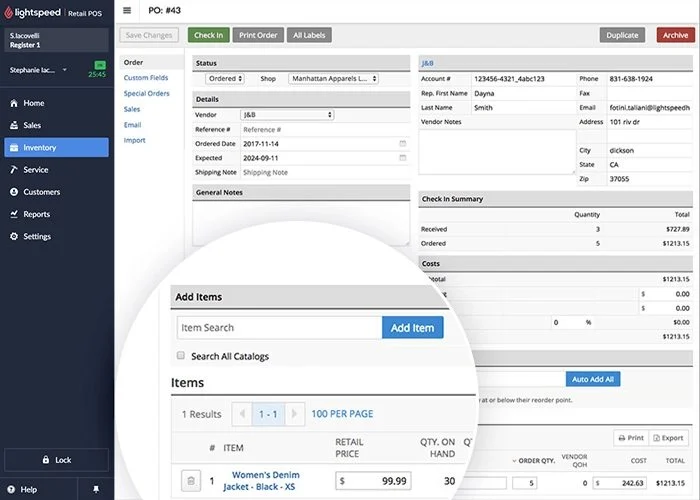
A POS like Revel makes it easy to see your products and variations so that you can make quick edits if something is wrong. (Source: Revel) 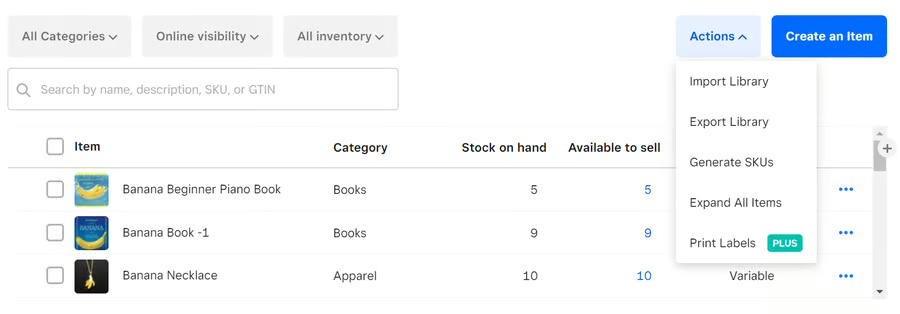
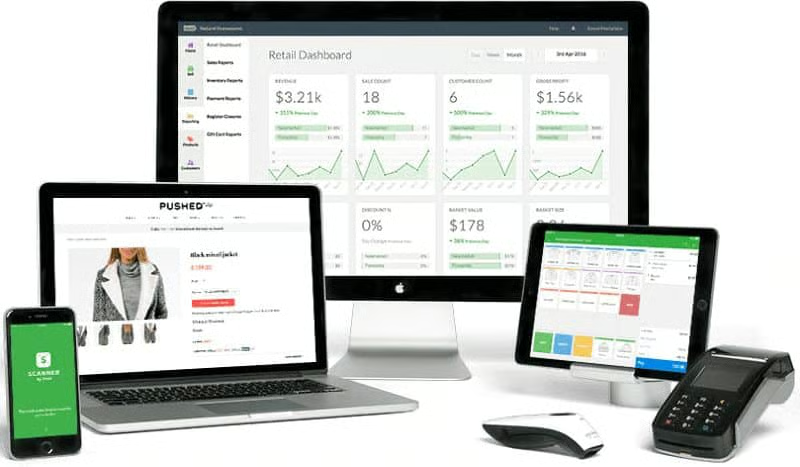
Square and other systems let you import inventory data from an existing spreadsheet to speed up your POS setup.


If you are a retailer and go through the professional installation route, that service often includes setting up your stock list for you. Some POS systems allow you to enter individual products manually but require support for importing product data in bulk. If you have large inventories, make sure to ask about how this process works before signing on with a POS provider.
However, if you have a restaurant, professional installation typically only includes importing and mapping your menu items and modifiers. Inventory tracking helps keep your restaurant organized, although it is not a requirement. Plenty of independent restaurants use their POS without any inventory tracking features. If you plan to use inventory tracking, you’ll most likely need to perform these tasks yourself. So, you should leave enough lead time before your POS goes live to complete this task.
Once your inventory data is in the POS system, it’s time to add more information for each item. Retailers will want to organize their item sizes and variations. Food and beverage businesses should arrange each ingredient and supply that they commonly order, including paper goods. For restaurants in particular, this is also a good time to set up your vendor management and automatic purchase orders (if your POS system supports this) to make sure that you never run out of key ingredients.
At this time, you can also:
- Set stock levels with the amount of each product you have on hand
- Categorize each item by product type―some businesses also add seasonal categories or note which area of the store or stockroom products are located
- Add descriptions to each product to help identify and locate items
- Add other necessary identifying data like vendor name, barcode and SKU information, wholesale pricing, and retail pricing and markup
Once you’ve input all your product data, make sure all of the automations surrounding your inventory data are in place. Most importantly, make sure settings are correct so that the system automatically adjusts on-hand stock levels when a product is sold. Some POS systems will also allow you to customize low stock alerts, so you get a notification or report when in-stock items reach a certain level.
4. Import Customer Data
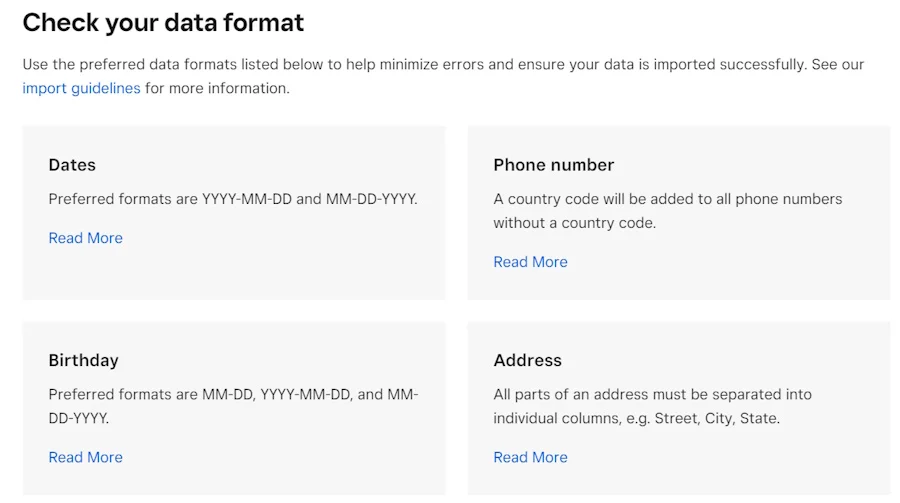
After setting up your products, you’ll need to import your customer data. If you have an existing customer database, even if it’s just a list of first names, you’ll want to import this into your POS system. Many systems can handle a basic Excel spreadsheet or comma-separated values (CSV) file import.
Update each customer profile with whatever information you have available, including email address, phone number, physical address, age, occupation, and purchase history.
After you’ve added your customers to your database, you’ll want to organize them to send targeted, personalized promotions. Identifying top spenders, frequent shoppers, and other key customer groups based on similarities will help you maximize your sales and profits over time.
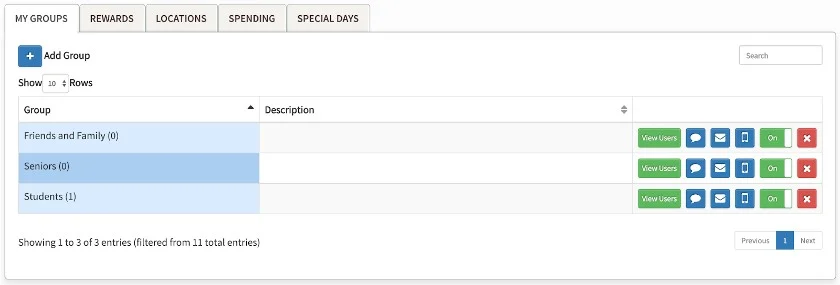
Some POS systems can generate reports or automatically segment your top-spending customers and most frequent visitors. You can also create lists based on the types of products each customer buys.
Use your customer segments to build automated marketing and customer relationship management (CRM) campaigns. Some POS systems have built-in features for email marketing, loyalty programs, social media promotions, and customer feedback collection. Other systems can integrate with popular third-party solutions for marketing. In either case, it’s best to allocate some funds for purchasing dedicated marketing features, such as automated campaigns, as these are not always free.
POS marketing campaigns with easy setup include:
- Customized email receipts: Many POS systems let retailers customize email receipts with contact information, social media handles, and coupon or promotional information.
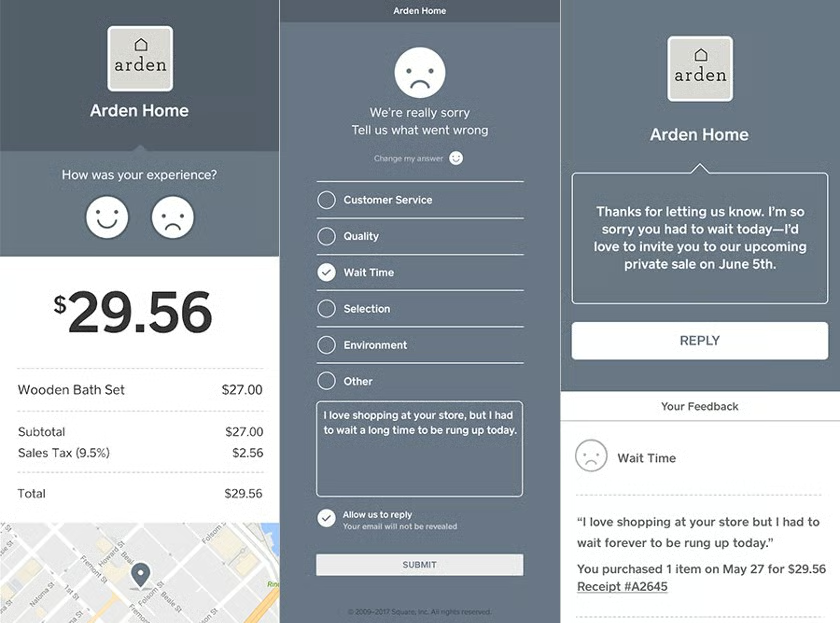
- Automated surveys: After a customer makes a purchase, send an automated email or text message with a survey on their experience.
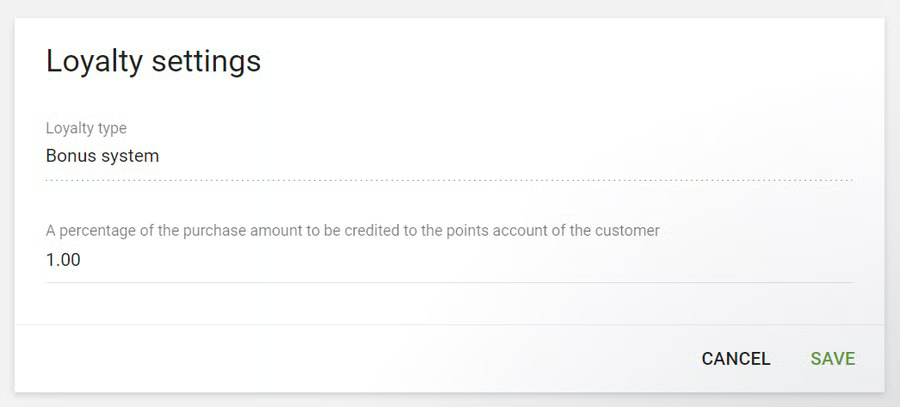
- Points-based loyalty program: Many POS systems can set up a points-based loyalty program where customers can earn points with each purchase automatically.
More advanced automated marketing campaigns can include new customer welcome emails, birthday coupons, and reminders for customers to come back. Many systems also sync with Facebook and Instagram, so you can create, share, and even boost social media posts right from your POS dashboard.
5. Create Employee Accounts & Set Permissions
If you have a team or staff, you’ll want a POS system that allows for employee profiles and permissions. Once your inventory and customer data are set up, the next step is to create your employee accounts. Start by designating yourself as the administrator and owner of the entire account.
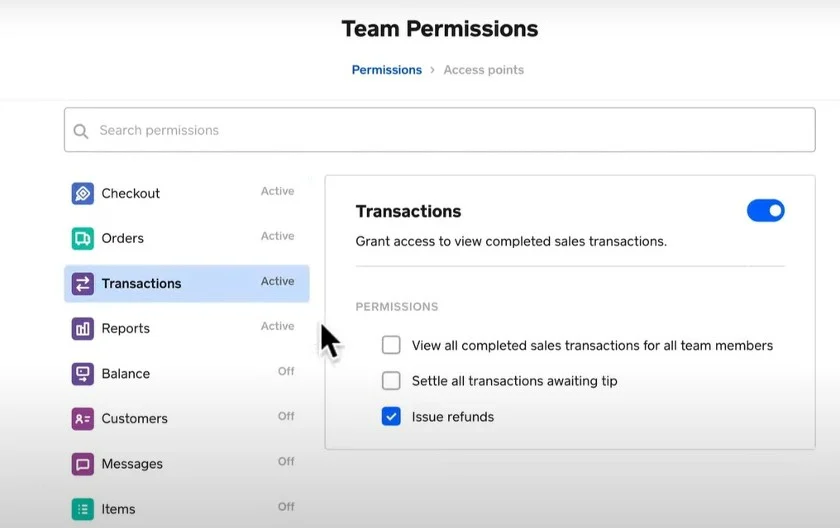
Next, think about the types of employee roles and permissions that you’ll need. If you have a retail store, you may just need an associate and manager level—one to handle sales and manage customer data, and another role to process returns, voids, and adjust inventory. Restaurants may need several different roles and permission levels for staff like servers, bartenders, and managers. Create each role and assign the appropriate permission levels.
Once you’ve created your employee roles and permissions, create an account for each staff member and designate the appropriate corresponding role. It’s important for each employee to have their own login so that you can track sales and run performance reports easily. It’s also a lot easier to solve issues with register or inventory discrepancies when a specific employee is assigned to each transaction.
Individual employee logins are also crucial for businesses in which different employees use the same register or terminal at different times—as might be the case with a convenience store POS system, for example.
Many POS systems also have time-tracking features or scheduling add-ons, so you can use your system to track work hours for payroll. Some systems can also generate payroll reports and include tools for employees to clock in and clock out.
6. Train Staff on How to Use a POS System
The final step in setting up a POS system is training your employees. Your business tools are only effective if your people are using them correctly, so it’s important to maximize your investment with proper training.
Your POS software provider should offer some sort of onboarding for new teams. This could include a video walkthrough, small group or one-on-one sessions, or even on-site training. Ask if your provider offers training for new hires as well.
Most POS systems have some combination of online libraries, knowledge bases, guides, frequently asked questions (FAQ), and video tutorials that you can use to train future new hires.
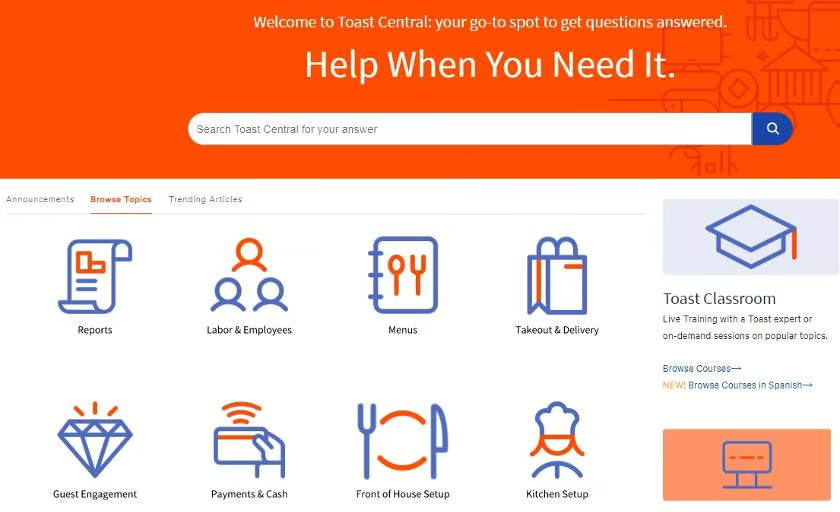
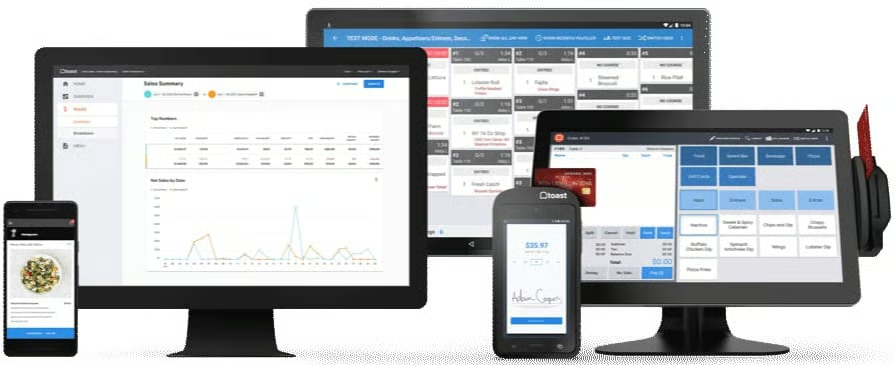
Toast POS’s Toast Central site is a great example of an online training site that provides information to train employees of all types. (Source: Toast) 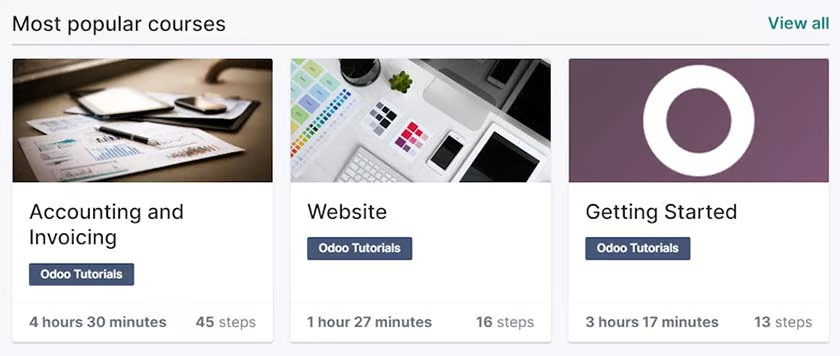
Open-source POS Odoo requires self-installation, but offers a comprehensive set of courses and documentation to help business owners get started. (Source: Odoo)


After your team has been trained to use the POS system, you’ll want to have technical documentation that’s easily accessible. Keep printed documents in the staff room, add notes to your workplace communication system, maintain a simple online manual, and remember to train all new hires on how to use the POS.
You might face technical difficulties with your POS after you’ve got it up and running, so find out what type of technical support your POS provider offers. Sometimes, support is included with every package—others may require higher-tier packages for complimentary support. For example, Square offers 24/7 live support for users who purchase software subscriptions, but free plan users may have a harder time reaching a representative by phone.
You should also determine how to contact support, such as by phone, email, ticketing system, and live chat, and know what their availability is.
POS System Setup Frequently Asked Questions (FAQ)
How much should I expect to pay to set up my POS system?
POS setup costs can range from $0 (for self-installable systems with free plans) to over $600 (for specialized systems that require professional installation and/or training).
My business isn’t retail or restaurant. What kind of POS should I use?
If you are offering scheduled services, look for a POS system with strong online booking and appointment management features; Vagaro or Fresha are good options. If you are selling regulated products like tobacco or alcohol, look for age-verification features; KORONA is a good choice.
I’m still undecided about which POS to use. Are there any good general-purpose options?
Try Square. It has a free plan and affordable paid subscriptions, many features and tools for general business needs, an intuitive and versatile dashboard, and it can be fitted with lots of integrations and add-ons for team management, payroll, invoicing, and more.
Bottom Line
Learning how to set up a POS system depends on the resources you have available, the type of POS you’re installing, and your small business type or needs. The essential steps are:
- Install your chosen POS yourself or hire a professional to do it for you
- Input or import data for inventory management, customer profiles, staff management, and other essential business operations
- Train your staff to be proficient with the POS system