You can create a restaurant website to promote your restaurant and reach more local customers in five easy steps. First, choose the content management system with the features and tools you want for your site. Then create an account, select a template, and customize it to fit your business. Once it’s ready to go live, upgrade to a paid plan and publish it on your chosen domain name.
Follow along step-by-step to learn how to build a restaurant website to increase sales:
1. Choose a Content Management System (CMS)
The first step in building a website for a restaurant is choosing a web content management system, such as Weebly, Wix, or WordPress. This decision lays the foundation for building your site, including how easy (or difficult) it’s going to be to design, build, launch, and manage, as well as how much it will cost.
Here are the best platforms for building websites for restaurants:
- Weebly: Best restaurant website builder, and best free site builder for online ordering, reservations, and payments
- Wix: Ideal for those wanting more design freedom and a great ecommerce package—get found, take online orders and reservations, and operate events
- GoDaddy: Excellent for managing Yelp and Google profiles, social media posting, and online ads management
- Squarespace: Best for those selling food and merchandise online (plugins or add-ons may be needed for some features)
- Bluehost: Top hosting and site builder for WordPress restaurant sites, including multilocation restaurants needing unique plugins
Best Platforms for Building Restaurant Websites at a Glance
Restaurant Site Builder | Free Plan | Starting Cost of Paid Plans (Monthly)* | Cost per Month to Take Orders, Reservations & Manage Events Online* |
|---|---|---|---|
✓ | $12 | $0 | |
✓ | $16 | $27 | |
✓ | $11.99 | $24.99 | |
✕ | $16 | $23 | |
✕ | $2.95** | $24.95** |
*With annual billing; most providers also offer monthly billing at a higher rate
**First year monthly cost with annual billing; renews at a higher cost
WordPress is the most-used content management system when it comes to building small business websites. Despite its fairly steep learning curve and time needed to build a site, it used to be far better than website builders for search engine optimization (SEO) and site functionality.
However, today’s all-in-one website builders (e.g., Weebly, Wix, and so on) have bridged those gaps to a large extent. Many now provide both basic and advanced SEO features and bundle tools and functionality restaurants need in easy-to-use site builder plans.
For restaurant websites, our top choice is Weebly. Starting with the free plan, you get all of the ecommerce capabilities of its parent company, Square, built into your site. Also, you can create a restaurant website and get it online in as little as an hour.
In fact, Weebly tops our list of the best website builders for restaurants. Startup businesses and small operations can start with its free version and get all the functionality needed for online ordering, reservations, and more.
If you’re looking for an alternative to Weebly, we recommend Wix. You won’t get all of the restaurant features Weebly provides in the free version, but you can access robust restaurant website features in Wix’s Basic Business ecommerce plan.
For little more than the cost of a meal each month, you’ll have all of the features a restaurant website needs (online ordering, reservations, event ticketing, and more). In addition, your site will enjoy Wix’s superior SEO site builder features to get found online, and far more design capabilities to boot.
If you want to use WordPress, use a WordPress-recommended web hosting company like Bluehost. Its plans come with a custom themes, plugins, and WordPress installation. This is great if you’re a web design beginner, as WordPress has a steep learning curve. WordPress doesn’t have an intuitive interface, and your cost to build on WordPress will likely include buying a premium theme, page builder, and plugins to get the functionality that comes in all-in-one site builders like Weebly.
For more details, read our step-by-step instructions on how to build a WordPress website. When adding plugins, be sure to add restaurant-specific plugins, such as Restaurant Menu by MotoPress or FoodBook, for online ordering. To see all that’s required to make a great restaurant website on WordPress, read our list of 30 WordPress tips and tricks.
2. Create an Account to Build a Restaurant Website
We will feature Weebly through the rest of this article as an example of what to expect as you complete the remaining steps. While the interface and prompts may look different depending on which content management system you elect to use, the process to set up your website will generally be the same for most site builders.
Shortcut: Weebly.com > “Create your Website” > “Try Square Online”

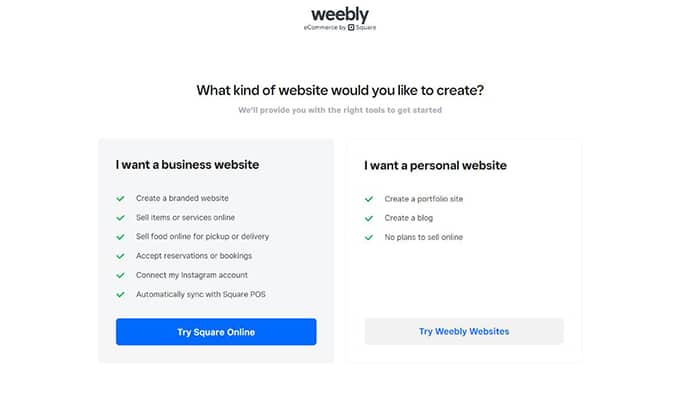
When you sign up for Weebly, you will be prompted to choose between Square Online and Weebly. You’ll need to choose “Try Square Online” to get Square’s robust, free ecommerce capabilities (Weebly’s parent company) for your website.
Among these tools are features you’ll need for online ordering (for pickup or delivery) as well as reservations, events, membership programs, and more. The Square Online editor has most of the tools restaurant websites need, but there are also third-party apps you can integrate to extend functionality even farther.
In the steps below, we outline how to create a restaurant website with the Square Online editor. The process is more straightforward than with the Weebly editor, and you can quickly build a restaurant website and get it online in under an hour. For a step-by-step guide on building a website with the Weebly editor, read our article showing how to use the Weebly website builder to create a site.
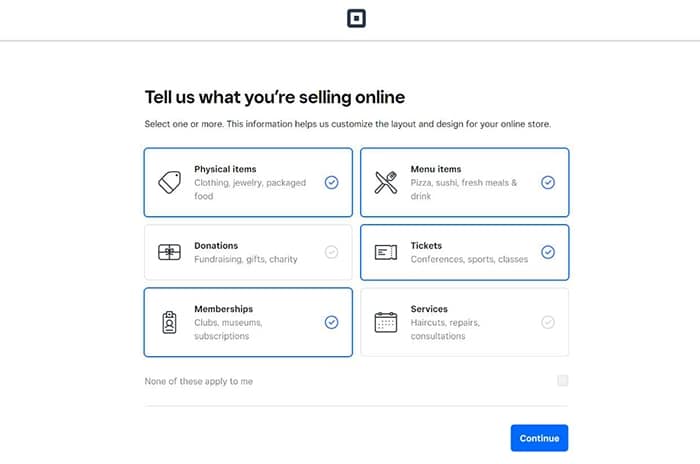
Go to Weebly.com, click on “Create Your Website” and input your contact information, then choose “Try Square Online.” From here, you’ll be asked a few onboarding questions about your restaurant business, including some of the features you know you’ll want to have right out of the gate.
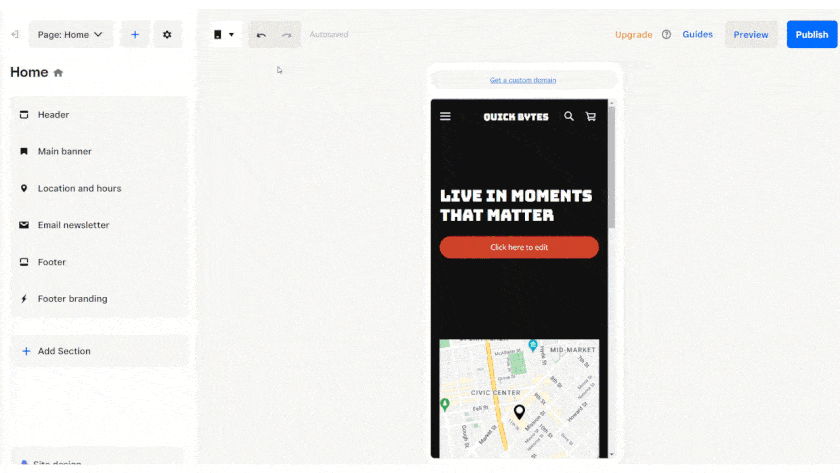
Example of a restaurant website dashboard on Weebly
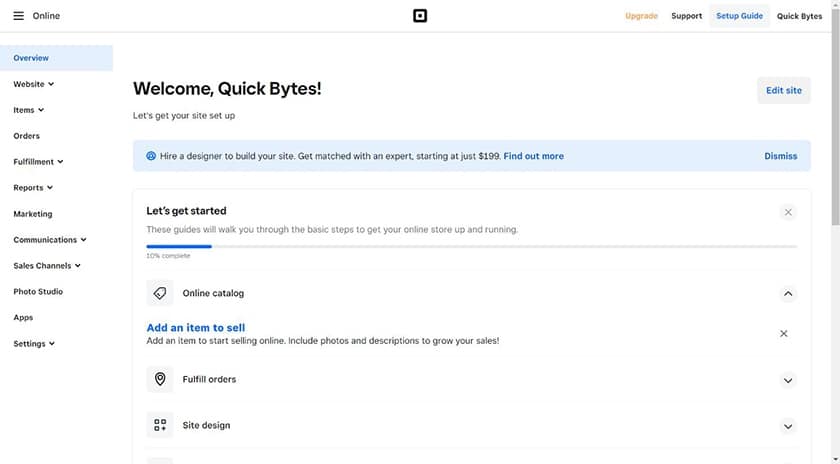
When the onboarding questions are finished, you’ll be taken to your dashboard. From here you can start entering your menu products for online ordering, access other features in the left-side menu, or click on “Edit site” in the top right corner to design your restaurant website’s pages. Let’s click on “Edit site” next to see how to edit the template that Weebly automatically built for your site based on your onboarding questions and answers.
3. Set Up Your Template
Shortcut: From the dashboard, click on “Edit site” in the top right corner
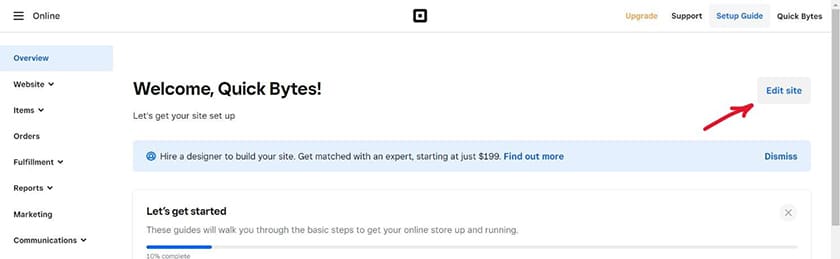
Click on Edit site from the Weebly dashboard to edit your template.
Click on “Edit site” in the top right corner, and Weebly will build your site’s template based on your answers to its onboarding questions. While you can’t choose a template from a library, your next step will include being able to choose and customize the visual theme you prefer.
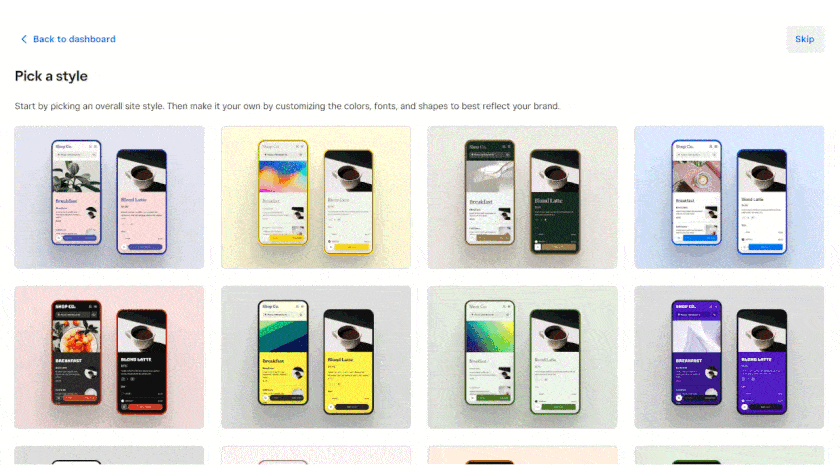
Choose the visual design you prefer for your restaurant template in Weebly.
After choosing a visual design style, you’ll see a pop-up inviting you to choose a domain for your restaurant website. You can do this now by selecting a paid plan, as Weebly gives you the domain free your first year. Alternatively, skip this step for now and build your restaurant website for free. You’ll have the option to upgrade to a paid plan at any time, including when you launch your site.

For now, click “Use a Square subdomain” and then “X” out of the window. You’ll be able to customize part of the subdomain, though keep in mind that on the free version your website will be on a Square subdomain and display Square/Weebly branding. If you opt for a paid plan, which is recommended for building your brand presence online, you can start for as little as $12 a month and get a free domain and remove all Square ads.
Alternatively, you can shortcut this step by going with a CMS like Jimdo. Instead of making you sift through dozens of potential templates, its artificial intelligence (AI) gets your website started based on your business info and preferences. If you’re a beginner in search of an easy and fast solution, it’s a good option.
4. Edit Your Template to Create a Restaurant Website
Shortcut: Click on “Edit site” from the dashboard, then edit various sections of your template

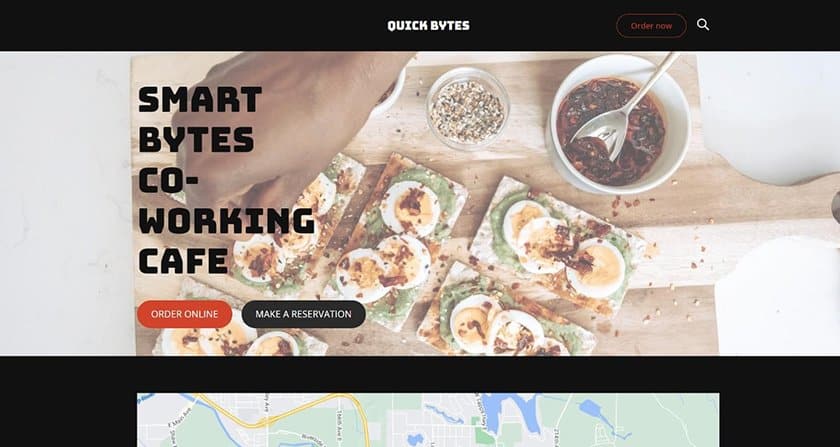
Now it is time to build a restaurant website by editing the template set up for you by Weebly (with the Square Online editor). As you start to customize your site, you might notice that by default, your template is shown in mobile device mode.
As a restaurant business, most customers will likely find and explore your site on mobile devices. But you can toggle back and forth between the mobile and desktop versions easily by clicking on the device icon in the top bar. You can edit your site in either mode, so choose the one that works best for you, but keep in mind that you’ll want to verify how your site looks and works on both mobile and non-mobile devices.
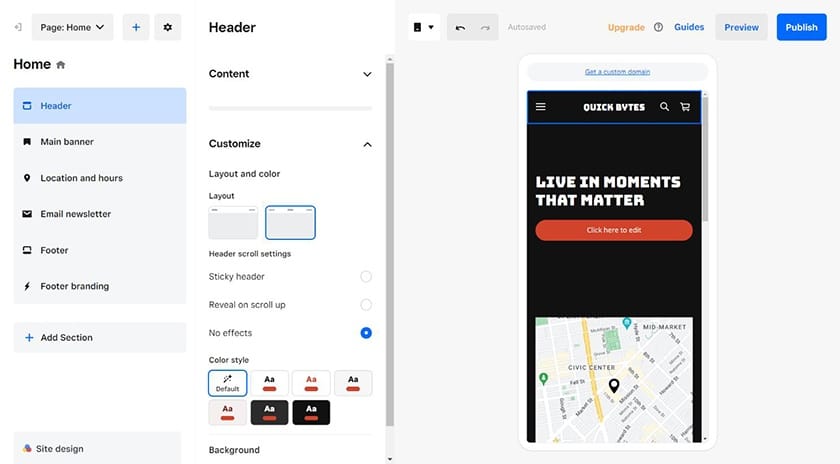
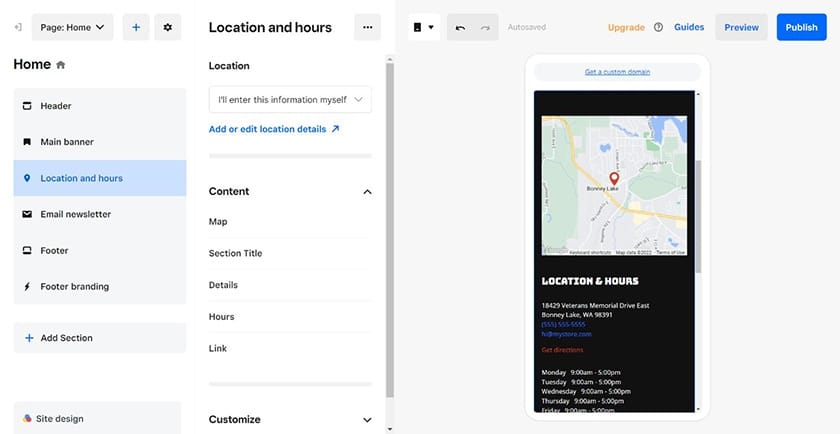
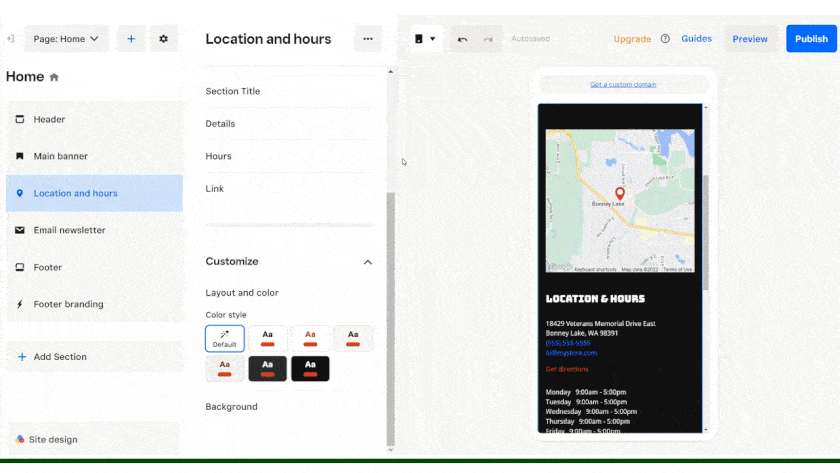
When editing your template to create a restaurant website with Weebly, there are several things to customize. You’ll be able to add your logo, update the header and footer, add and remove pages (like for your locations, hours, and menu), and add integrations like GloriaFood’s Restaurant System, OpenTable, or ChowNow.
Here are the major elements you may need to customize when you create a restaurant website:
- Header
- Logo
- Footer
- Menu(s)
- Online ordering
- Online reservations
- Events or group reservations information
- Catering options
- Job openings and applications
- Contact information
- Location details
- Hours of operation
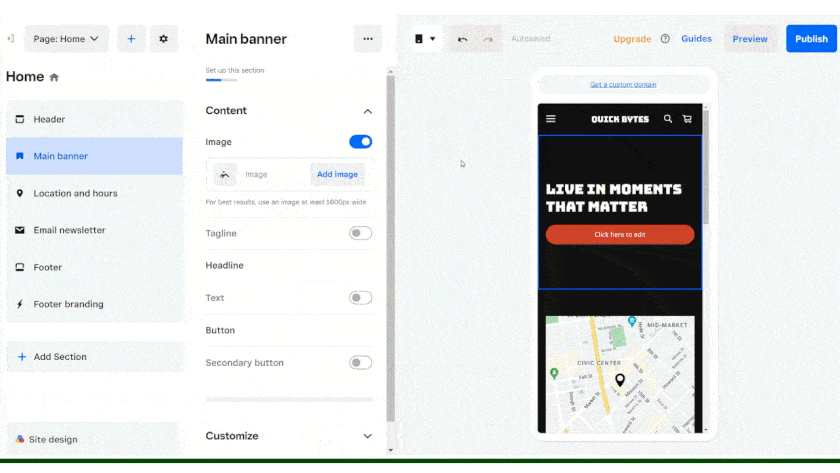
The Square Online editor makes it easy to add pages to support any of the content above as well as edit your site’s header, footer, location, and hours. Simply click on any of these elements in the left-side menu to start the process. To add your menu or additional pages, click on “+ Add Section” at the bottom of the left side menu.
At this point, your site may have all of the features needed to get your brand online. But you can extend your site’s functionality even further with apps from the Square App Marketplace. For example, you can integrate apps to sell gift cards, extend a Groupon offer to attract new customers, or make it possible for your patrons to order right from their table.
When building a website for a restaurant, here are some of the top Square Apps to consider:
- SalesVu POS: Lets customers open bar tabs and split checks
- ChowNow: Full suite of online ordering and marketing tools branded to your restaurant
- PeachWorks: Restaurant inventory management
- Waitly: Waitlist and reservations management
- Ritual: Online marketplace for local takeout customers where they can browse menu items, order online, and prepay in the app
- Spoonfed: Catering sales management, including online ordering
- Craver: A mobile app branded to your restaurant for ordering, loyalty, push notifications, and curbside pickup
- TripleSeat: Guest and event management tools
- Bring Me That: Online ordering app for local delivery management
- InfiKiosk: Self-ordering kiosk for quick service restaurants
- Tap Table: Contact-free table ordering and click-and-collect
- TheGiftCardCafe.com: Add instant gift certificates and daily deals to your website
Like any other business, restaurant websites must be visible online to attract customers. The best way to do this is by optimizing your website for search engines like Google. For each page of your website, you can access search engine optimization (SEO) settings by clicking on the gear icon in the top bar to get to page settings, then clicking on SEO. Make sure to add a page title and description to each page of your website to make it search-friendly and more likely to get found online.
Adding keywords to your website’s content and SEO settings is an easy way to optimize it for online search. To find out what types of restaurants or restaurant-related keywords people in your area are looking for, use a free keyword research tool like Semrush. It will help you hone in on keywords people are searching for in your area that you can add to your site’s content. In turn, these keywords can place your website at the top of local search results.
You can promote your restaurant website online using local SEO tactics, from optimizing your website’s content with keywords to gaining positive reviews on your Google Business Profile and Yelp listings. In addition to SEO, you can also use social media, online business directories, and email marketing to reach more potential customers in your area.
5. Review & Publish Your Site
Before publishing your website, take a few minutes to review it and double-check that everything looks good and functions properly. Click on every page and every link, and edit all the text. Review our website basics checklist to make sure that all the essential elements are accounted for, and check how your site looks on mobile as well as desktop devices.
When you’re ready, click “Publish” in the upper right corner, and then in the pop-up that appears, click to upgrade to a premium plan. This will enable you to connect your domain (necessary for any professional website) to qualify to accept online payments. Select the plan that suits your needs and complete the checkout process. Alternatively, click on the link for your subdomain and see your site live on the internet.
As soon as you publish your site, it will be live on the internet.
What’s Next: Promote Your Restaurant Website
Now that you know how to create a restaurant website, you’ve completed the steps above, and your site is live, that doesn’t mean the work is over. You’ll need to maintain and edit it over time and employ promotional strategies to help customers find your site online.
After you build a site to market your restaurant, here are some post-launch tasks to complete:
- Create a Google My Business account to get found in local search results
- Employ search engine marketing (SEM) tactics to rank higher on Google
- Create a Facebook business page and add your website URL to Facebook and all of your social media profiles
- Add your website to relevant online business directories (Yelp, TripAdvisor, and so on)
- Use local SEO tools to get found online by local patrons
- Consider Facebook advertising to increase regional brand awareness of your restaurant
- Put online and offline local advertising ideas into place (free and paid) to keep your restaurant top of mind
- Leverage cheap and free small business marketing ideas to grow your customer base
- Implement a customer loyalty program to foster customer loyalty and generate word of mouth marketing
- Develop a restaurant marketing plan that includes website marketing strategies
- Use platforms like Podium to get more reviews so you can rank higher on Google
Frequently Asked Questions (FAQs)
What’s the best site builder for restaurants?
We rate Weebly (by Square) as the best restaurant website builder. Create a restaurant website for free, then upgrade to the Pro plan for $12 a month. It comes with a free domain, SSL, and tools to set up and process online orders, take reservations, and promote your restaurant business. Get the full story by reading our Weebly website builder review.
Is Wix good for restaurants?
Wix’s ecommerce plan is especially good for restaurants. While it costs more than Weebly, it has better design editing tools, templates, and customization capabilities. Plus, nearly all of Wix’s restaurant tools are in its lowest-tier ecommerce plan, including online ordering, reservations management, custom menus, and even ticket and event sales. Read our Wix review to learn more or see how to use Wix to build a website.
How much will it cost to create a restaurant website?
Building and hosting a full-featured site for a restaurant costs as little as your time and the monthly cost of a site builder, such as Weebly ($12) or Wix ($27), or a WordPress hosting-with-site builder plan from Bluehost ($2.95 per month). These all include your domain, hosting, SSL security, and all the tools you’ll need to take and process orders online, set up custom menus, and manage reservations.
Alternatively, you can hire a freelance web designer on Fiverr to build your website for about $50 to $200 (plus your costs for web hosting or an all-in-one site builder). Professional web development with an agency can run anywhere from a few thousand dollars into the tens of thousands. Learn more about all that goes into website costs for small business web design and development.
Bottom Line
Building a website for your restaurant doesn’t need to be difficult or expensive. With all-in-one site builders like Weebly, it’s super-easy and affordable. You can also start using Weebly for free (no credit cards required) to get your site all ready to go before subscribing to a paid plan to get your custom domain and publish your site.
Why wait? Build your restaurant website and start building your online brand presence today.
You Might Also Like…
- Navigate to the right solution in our list of the best online ordering systems.
- Save money with the best restaurant payment processors.