

In this tutorial, we’ll walk you through the process of how to pay bills in QuickBooks Online by printing checks. You’ll also learn how to submit electronic payments for free through the Online Bill Pay feature.
Pay Bills by Check
Click the + New button at the top of the left menu bar and then select Pay Bills in the second column under Vendors, as shown below.
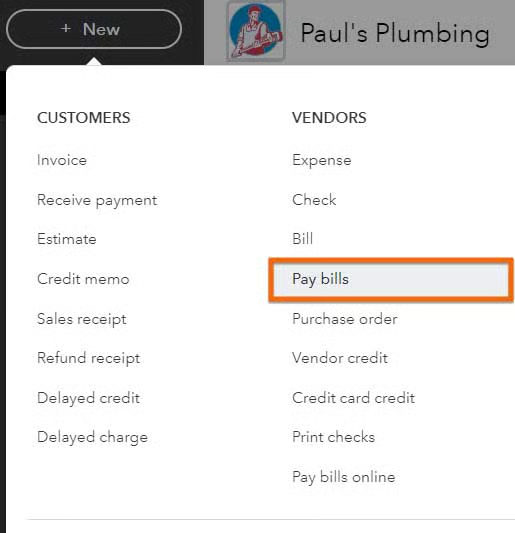
Navigate to QuickBooks Online bill payments
The Pay Bills screen shows a list of all bills that are due and enables you to select the bills you want to pay. If you haven’t recorded bills in QuickBooks yet, you can check out our tutorial on how to enter bills in QuickBooks Online.
To process bill payments, you have to complete several fields on the Pay Bills screen, such as:
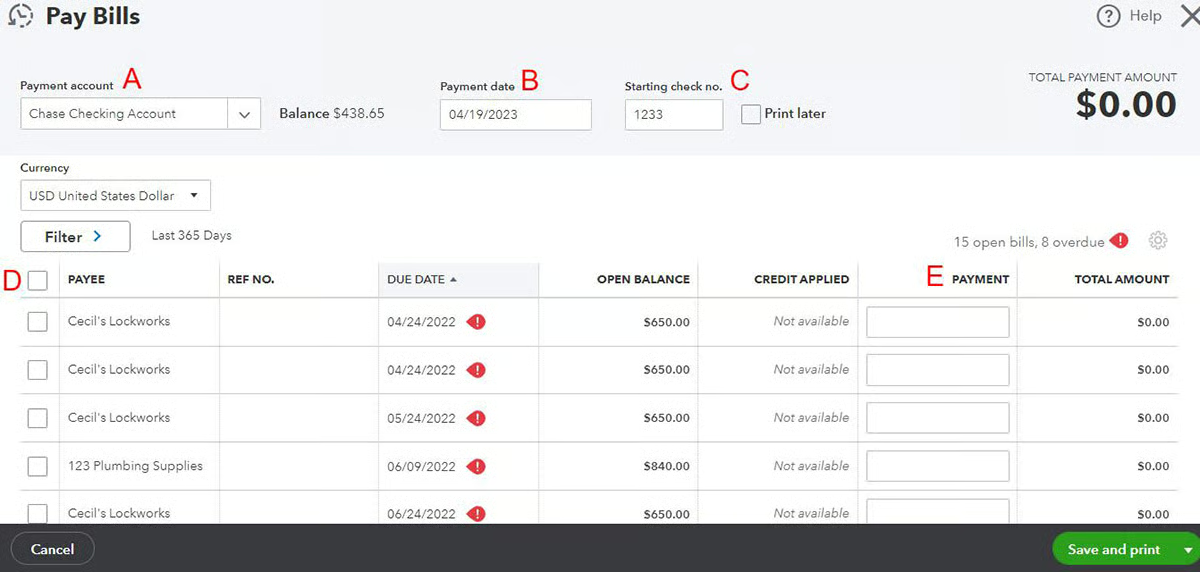
Select bills for payment in QuickBooks Online
- A. Payment account: Select the checking account that you wish to use to make the payments. If you haven’t set up a bank account, you’ll need to do so before you can pay bills in QuickBooks. Refer to our tutorial on how to import bank transactions to QuickBooks Online, which also covers connecting bank and credit card accounts.
- B. Payment date: Enter the date to print on the checks. This is usually the current date.
- C. Starting check no.: Provide the starting check number. Alternatively, you can place a checkmark next to Print later to save the checks and print them at another time.
- D. Select bills: Select bills to pay by placing a checkmark in the box to the left of the bill.
- E. Payment: After you select a bill to pay, QuickBooks will default the payment amount to the entire open balance. However, you can change the payment to a lesser amount if you want to make a partial payment.
After completing all the required fields and selecting the bill/s to pay, click the green Save and print button on the lower left corner of the screen (shown in the image in Step 2). The bills will be marked as paid, and QuickBooks will take you to the Print Checks screen.
The Print Checks screen displays a list of all the checks that have been written from the specified checking account. To print the check/s, place a checkmark next to the check/s you wish to print, provide a starting check number, and click the green Preview and print button. Finally, follow the on-screen instructions to preview and print your checks.
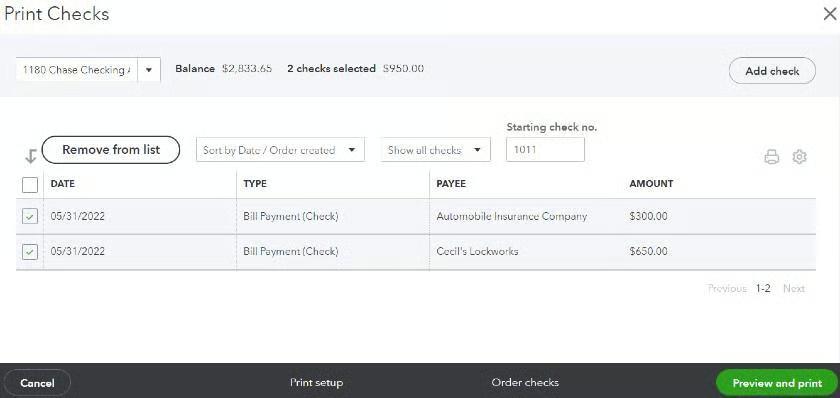
Print checks in QuickBooks Online
Pay Bills Electronically
Click on the + New button on top of your QuickBooks screen, and then select Pay bills online, as shown below.
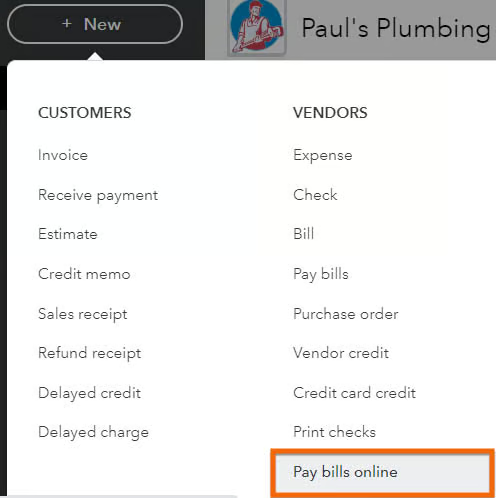
Pay bills online in QuickBooks Online
Next, QuickBooks Online will display a list of your outstanding bills. Select the checkbox of the bills you wish to pay and then click on the Next button (not shown) on the Pay Bills window.
Click on the vendor name for each bill to open a screen to input the necessary information to make an online payment. Provide the necessary payment details, as indicated below.
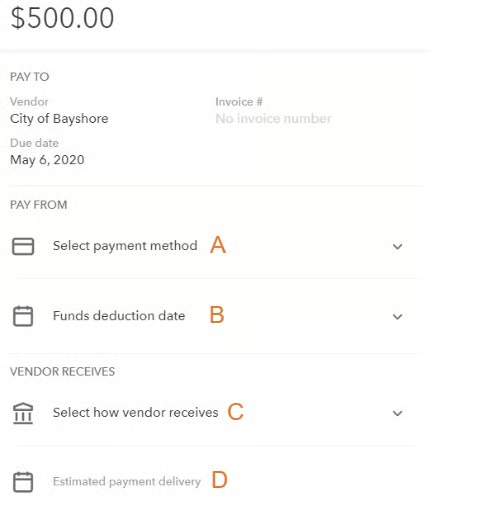
QuickBooks Online bill payment details
A. Select payment method: Choose the method you want to use to make the payment. After clicking in this section, you’ll have the following options:
- Bank account (free)
- Debit card (free)
- Credit card (2.9%)
The first time you use each of the payment options, you’ll need to provide the details for your payment account.
B. Funds deduction date: Select the date you want the funds deducted from your account. Generally, transfers aren’t instantaneous, so you might need to choose a deduction date a few days before the due date.
C. Select how vendor receives: Specify how you would like the vendor to receive your payment. Both options are free:
- Bank transfer, or automated clearing house (ACH) in one to four business days
- Paper check in five to seven business days
D. Estimated payment delivery: QuickBooks will provide an estimated date that the vendor will receive your payment. If this is after the due date, you’ll need to specify an earlier deduction date or faster delivery method.
Once you have provided the details for each bill payment, click the Submit payment button to submit your scheduled payments.
Why You Should Use Online Bill Pay in QuickBooks
Online Bill Pay is one of QuickBooks’ standout features that makes it our overall best small business accounting software. It is ideal for businesses wanting to pay their bills electronically through their QuickBooks account. It is a convenient and efficient way to manage bills and payments as it eliminates the need for manual checks and paper-based processes.
Frequently Asked Questions (FAQs)
Yes, QuickBooks Online allows you to track bill payments and view the payment history for each bill from the Expenses tab.
Yes, you can set up recurring payments for bills that are due on a regular basis, such as rent or utilities. To do this, select the bill you want to pay and click the Make Recurring button. Then, choose the frequency, start date, and end date for the payments.
Wrap Up
You’ve just learned how to pay bills in QuickBooks Online. You can now pay bills by either printing checks or using the free QuickBooks Online bill payments feature. The next tutorial in our QuickBooks Online Training Course is how to enter bank transactions in QuickBooks Online manually.