


In this tutorial, you’ll learn how to set up email messages for your customers in QuickBooks Online. First, we’ll cover how to set up your company-wide default email message to accompany invoices and other sales forms. Then, we’ll show you how to override the default message with a custom message for your invoices, estimates, and sales receipts.
Step 1: Navigate To Your Sales Options
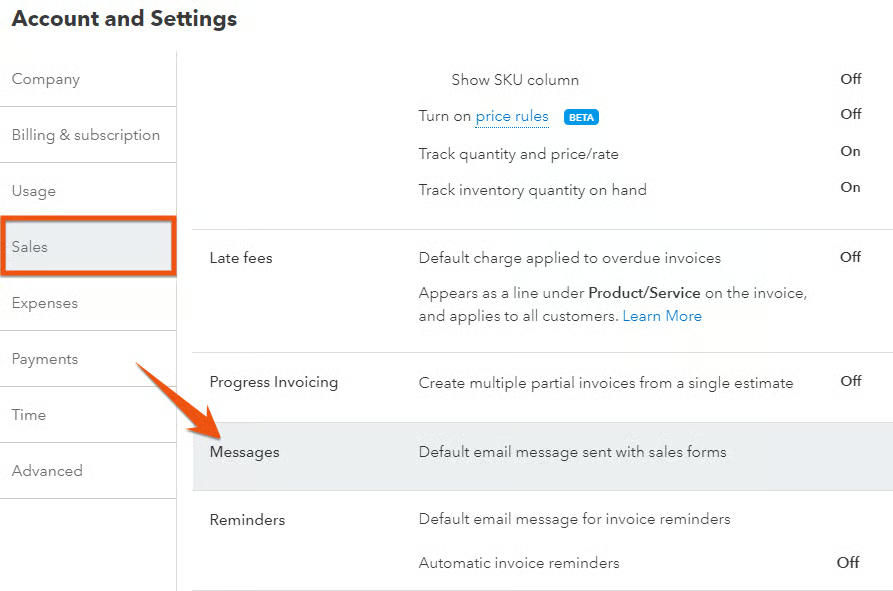
From your QuickBooks Online company dashboard, click on the gear icon on the top right of the page, select Account and settings in the popup window, and then choose Sales in the left menu bar.
Step 2: Select Messages
From the Sales tab, scroll down to Messages and click anywhere on the grayed section.
Step 3: Set Up Your Default Email Settings for Each Form
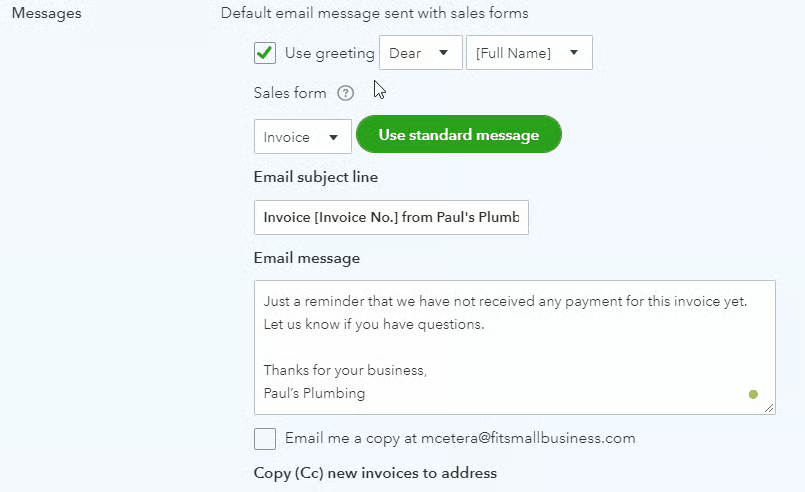
From the Messages section, you will see the following options:
- Greeting: You can select either “Dear” or “To:” as the salutation and determine how you want the customer’s name to appear in the greeting.
- Sales form: You can change the suggested email message for each of the following customer forms:
- Invoice
- Estimate
- Credit memo
- Sales receipt
- Statement
- Refund receipt
Each form can have a completely different email message.
- Email subject line: You can change the standard email subject line provided by QuickBooks, but we recommend keeping the form number for customers that might receive multiple invoices in a short period of time.
- Email message: Your email should be customized for your business, but not personalized for any particular customer. If you have a client that you would like to treat special, we recommend you create a custom invoice just for them, which can include a custom email message that we will discuss later in this tutorial.
If you’ve modified the message and want to return to the original message suggested by QuickBooks, click the green Use standard message button next to the Sales form.
- Email copies: You can check the box to send a copy of every email automatically to the QuickBooks Online administrator, plus provide a list of additional email addresses that should receive copies. These email addresses will receive copies anytime a client is sent this form, so make sure the person wants and needs all these emails.
- Sales form: Select the type of form that will use the message you customized (i.e., estimates or invoices and other sales forms).
When you’re satisfied with your email settings for all six customer forms, click the green Save button at the bottom of the Messages section.
Step 4: Customize Your Email Message for Each Sales Form Template (If Needed)
When creating and sending a sales form, you will see the default message that you just created on your form. Often, the default message is sufficient; but if you opt to customize your email invoice―or any other sales form―you can do so with the following steps.
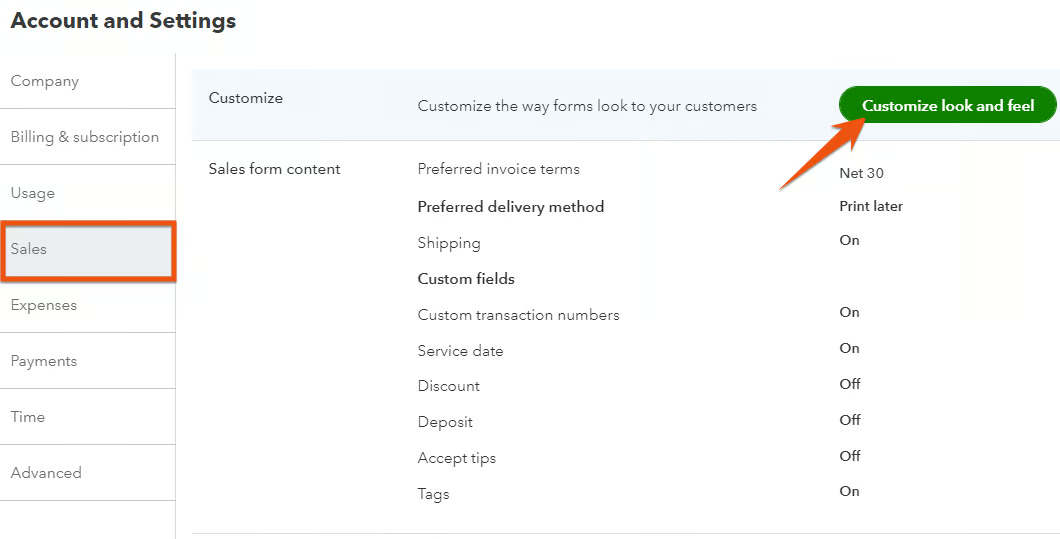
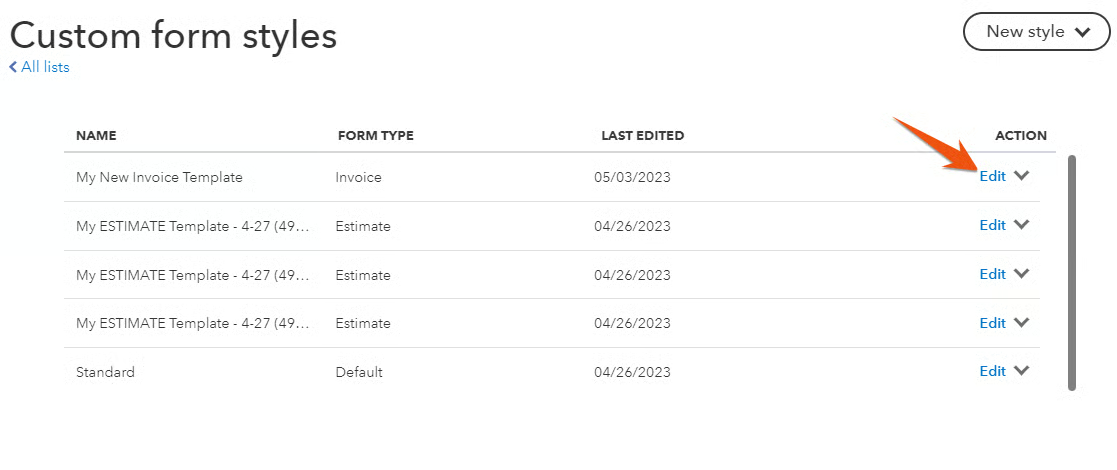
Select an invoice or any other form from the Custom form styles list and click Edit.
You might’ve learned to design your custom estimate template in our lesson on how to customize invoices in QuickBooks Online and to designate the content in your estimate template from our guide on how to set up sales form content in QuickBooks Online. Now, we’ll work with the third tab in the design window, Emails, to customize the email that will accompany your estimate.
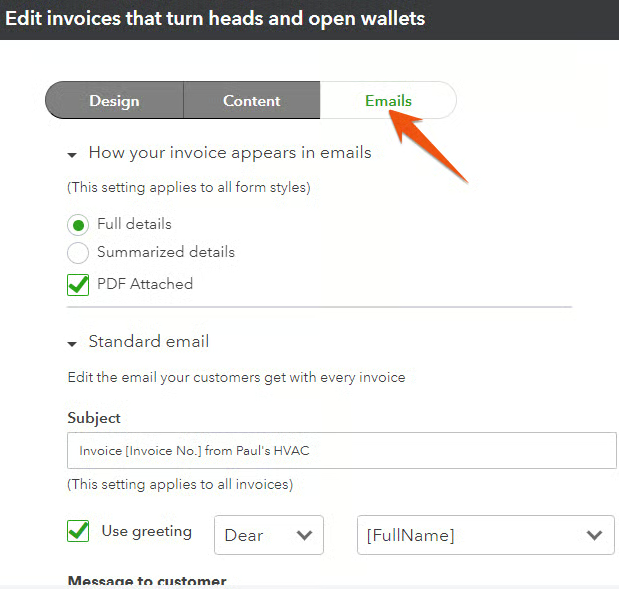
The default options in this screen should match the options you selected in the prior section for your estimates. The changes you make here will only apply to this particular estimate template. This could be very useful if you want to customize your email messages to a particular set of your customers. To do so, create a custom template for each set of customers and apply that template when you generate a sales form.
Changing the default email message for custom invoices and sales receipts follows the same procedure. From the Custom forms style window, create a new invoice or sales receipt or edit an existing one and go to the Emails tab.
Frequently Asked Questions (FAQs)
Can I send email messages directly from within QuickBooks?
Yes, QuickBooks has a built-in email feature that lets you send email messages directly from within the program.
Does QuickBooks Online allow me to personalize email messages?
Yes, it does. As our best small business accounting software, QuickBooks Online offers excellent message customization options for different sales forms, including invoices and estimates.
Wrap Up
You’ve learned how to set up messages in QuickBooks Online, including creating emails for invoices and other sales forms. You also learned how to customize the default email settings for custom invoices, estimates, and sales receipts. The next guide in our course is how to set up customer statements in QuickBooks Online. This will cover a few options that are available for formatting the statements you send to customers.