


In this lesson, we’ll teach you how to run a statement of cash flows in QuickBooks Online. You’ll learn how to set up general options for your cash flow statement and how to customize it using the different elements available in QuickBooks.
Step 1: Locate ‘Statement of Cash Flows’
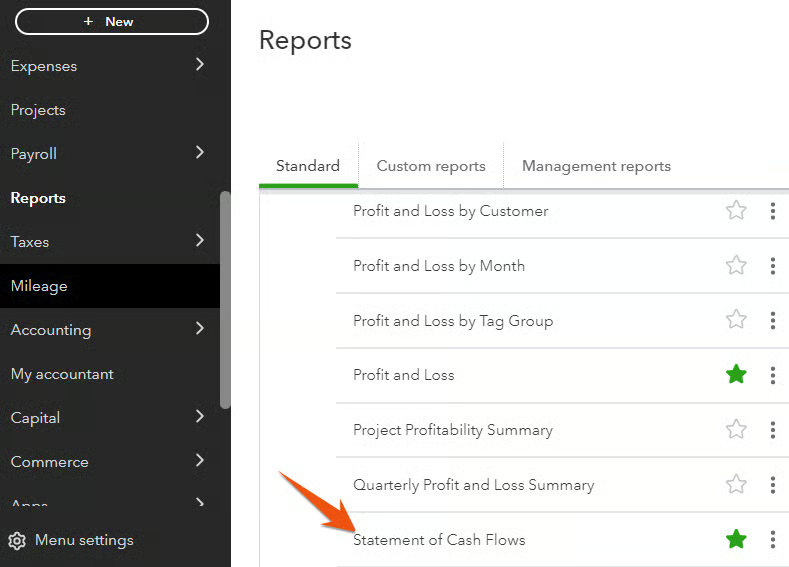
Click Reports in the left menu bar and then click on the Business overview section. From there, you’ll find different types of reports—select Statement of Cash Flows.
Seeing a Different Left-side Navigation Menu?
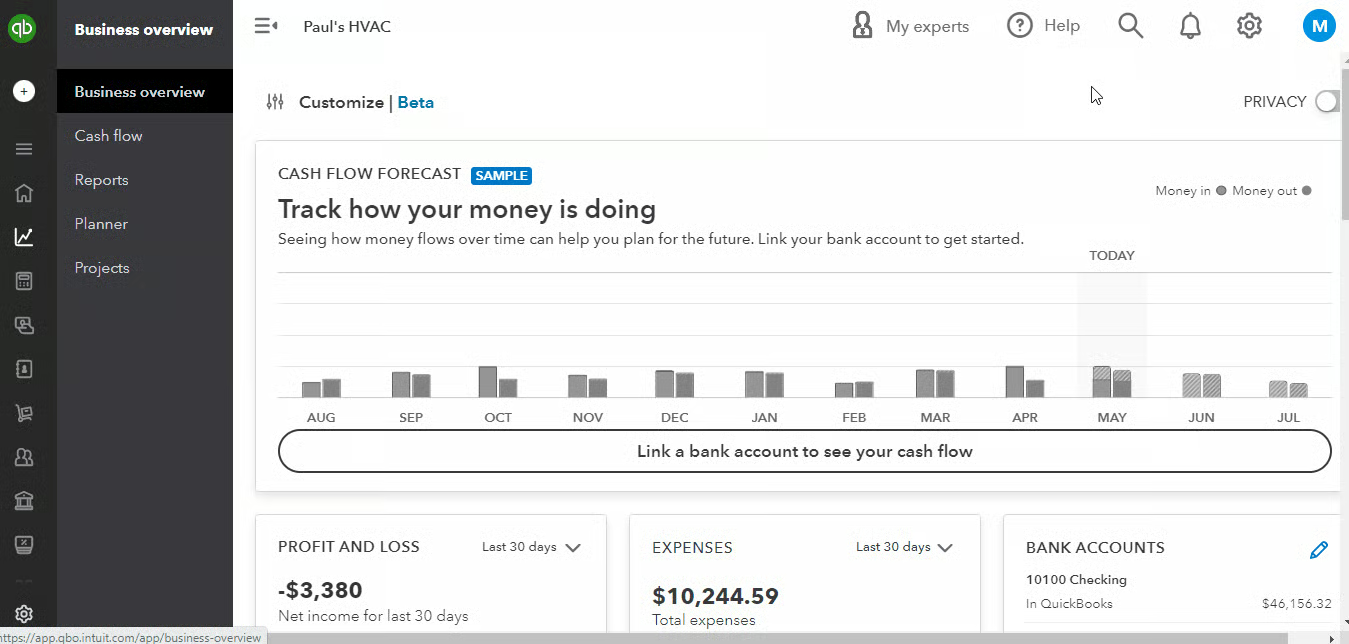
QuickBooks has two user views: Business View and Accountant View. Your left-side navigation menu may look different depending on the user view you are in.
If your sidebar menu is not what is shown in our tutorial, it means that you are on Business View. We prefer and recommend using the Accountant View because it shows a full range of business accounting features and tools that you can use in QuickBooks.
To verify whether you’re using the Business View, click on the cogwheel at the top right-hand corner of your QuickBooks dashboard, and check whether the button on the lower right hand says Switch to Accountant view, as shown below. If so, then it means you are on Business View.
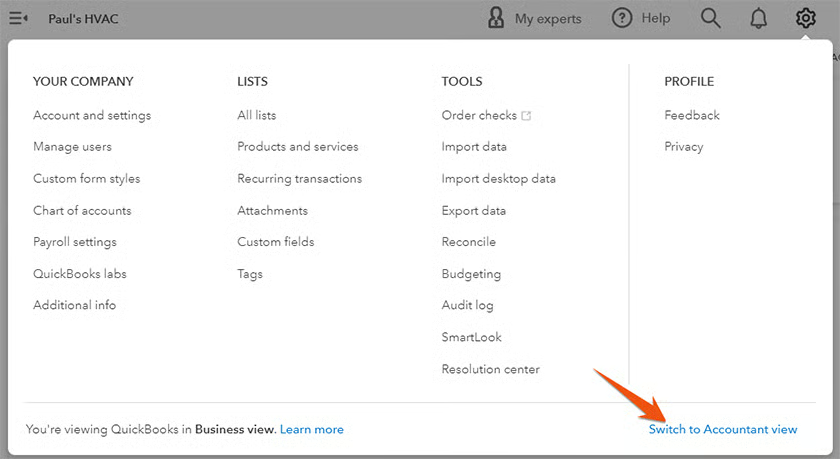
Once you verify that you are on Business view, click on Switch to Accountant view to update the appearance of your sidebar menu. In a few seconds, you should see the same left-side menu bar illustrated in this tutorial.
Step 2: Adjust Basic Options for Your Report
Scroll toward the menu bar above the statement of cash flows and provide some general options to adjust your report.
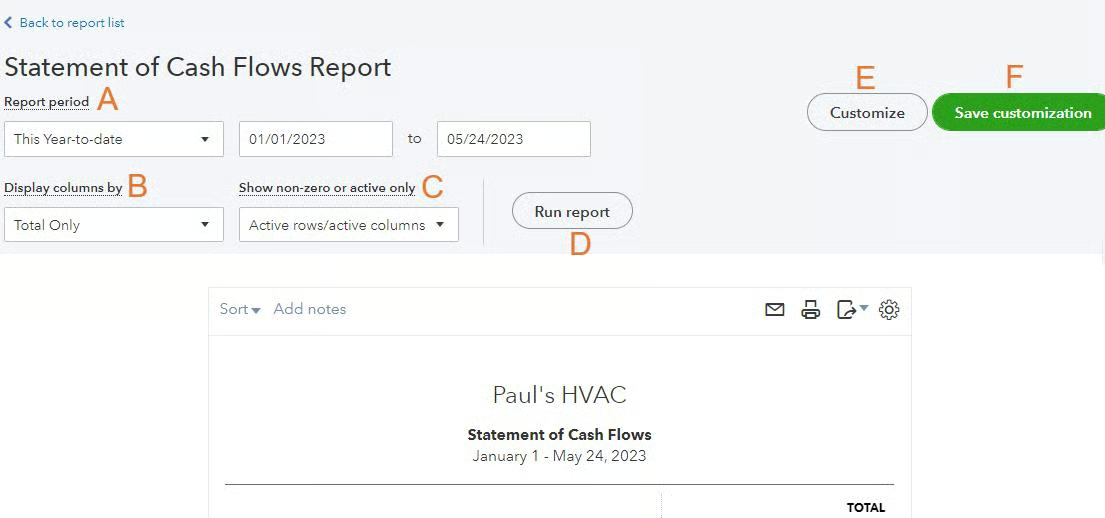
Complete the following fields to adjust basic options for your report.
A. Report period: Choose the reporting period for which you want to run a Statement of Cash Flows. You can select a predefined period by clicking on the drop-down box or entering the beginning and ending dates for a custom period.
B. Display columns by: The default statement of cash flows in QuickBooks has one column that displays the total for the reporting period. However, you can add additional columns for interim periods, or columns to split the total into categories such as classes, locations, or vendors.
C. Show nonzero or active only: This setting allows you to customize the visibility of accounts on your cash flow statement report. You can choose from three options:
- Active: Only active accounts with nonzero balances will be displayed on the cash flow statement. This helps you focus on the accounts that are currently in use and have financial activity.
- All: This will display all accounts in your cash flow report, regardless of their activity status or balance. It can be useful when you want to analyze the complete set of accounts and their impact on the cash flow, regardless of their current status.
- Nonzero: Only accounts with nonzero balances will appear on the cash flow statement.
D. Run report: Click this button to apply your changes.
E. Customize: Choose this option to customize your statement of cash flows even further (as we’ll look at in the next section, Step 3).
F. Save Customization: You can save your customizations to a new report by hitting this button and naming your report.
Step 3: Customize Your Statement of Cash Flows Further
You can select additional options for your statement of cash flows by clicking the Customize button (item E in the prior section).
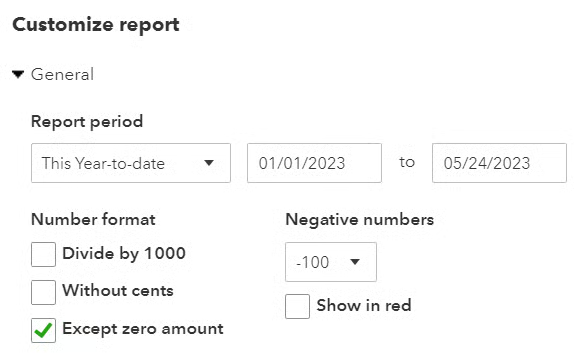
General
Set up general options, such as the report period and number format. You may choose to report all values in thousands of dollars and eliminate cents on your report. You may also choose how to format negative numbers.
Rows/Columns
Select which column, such as total only, days, weeks, or months, and which rows you want to appear in your report.

Filter
The setting allows you to filter the report based on several variables.
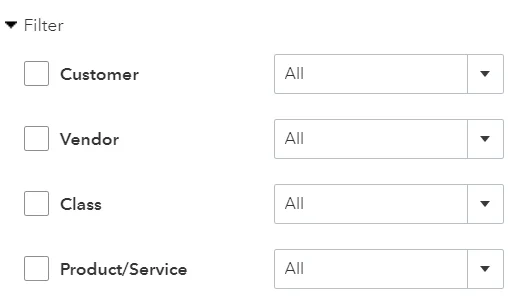
- Customer: This is useful if you want to analyze the cash flow related to particular clients or track the cash transactions associated with individual customers.
- Vendor: This helps you understand the cash flow impact of your payments to a particular vendor or supplier.
- Class: Classes can represent departments, projects, locations, or any other custom classification you’ve set up in QuickBooks. Filtering the cash flow report by class provides insights into the cash flow specific to each class, which helps you with cost allocation and performance evaluation.
- Product/Service: This filter is particularly useful for businesses that sell multiple products or services and want to assess the cash flow generated by each one individually.
Header/Footer
In the last set of options, you can choose which information to display in the Header and Footer of the statement of cash flows.
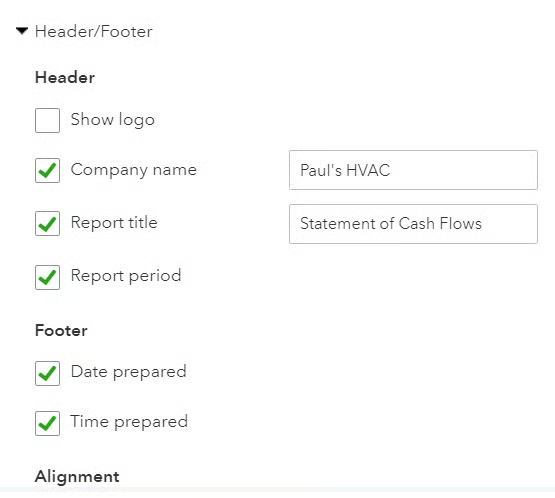
You can change the name of the company or the report that will appear in the header by adding text to the box next to the fields. You can also choose to show your logo at the top of your statement of cash flows by ticking the box next to Logo.
When you’re through customizing your statement of cash flows, hit the green Run Report button at the bottom of the Customize report screen.
Step 4: Print, Email, or Export Your Statement of Cash Flows
You can print, email, or export your statement of cash flows by clicking the icons in the top right corner of the report.
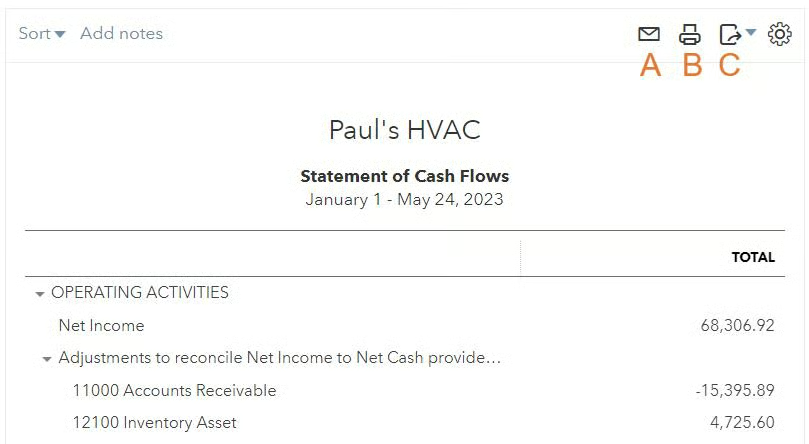
A. Email: Select the envelope to email a copy of your statement of cash flows.
B. Print: Hit the printer icon to print a copy of your statement of cash flows.
C. Export: Click the drop-down arrow next to the export icon to choose between exporting your statement of cash flows as a PDF or an Excel file.
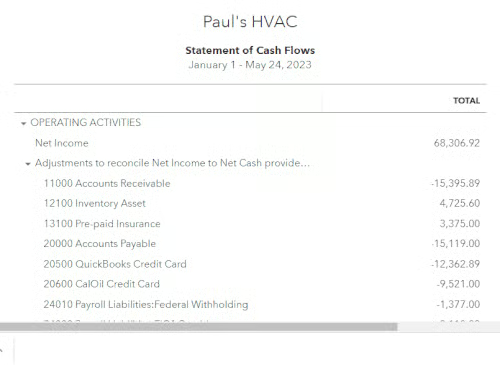
Check out this sample statement of cash flows in QuickBooks Online:
What Is a Cash Flow Statement & Why It Is Important
A statement of cash flow is an essential financial report that shows the inflows and outflows of cash of your business. It tracks the movement of cash in three main areas: operating activities, investing activities, and financing activities. It is one of the most useful financial statements as it helps you figure out how money is generated and spent, allowing you to make necessary adjustments to your financial strategies in the future.
Also, you can use a cash flow report to identify if you still have enough money on hand to perform certain tasks or transactions, such as paying the bill or your employees. Simply put, it can help you manage short-term cash needs. For instance, if your company anticipates a temporary cash shortage due to upcoming expenses or slow-paying customers, the cash flow statement can help you plan accordingly.
Frequently Asked Questions (FAQs)
Can I customize cash flow reports in QuickBooks Online?
Yes, you can. QuickBooks Online, our overall best small business accounting software, lets you customize any type of report, including cash flow statements. You can customize various aspects of the report, including data range, columns, and headers.
Can I compare multiple periods on my cash flow report in QuickBooks Online?
Yes, QuickBooks Online allows you to compare multiple periods on your cash flow report. When customizing the report, you can adjust the date range to include multiple periods you want to compare.
Wrap Up
You’ve just learned how to create a cash flow statement in QuickBooks Online. The next guide in our training series is how to run an accounts receivable aging (A/R) report in QuickBooks Online.