


In this article, you’ll learn how to run a profit and loss (P&L) statement in QuickBooks Online. A P&L report, also called an income statement, consists of income, expenses, and net profit over a specific period. This guide will teach you how to set up basic options for the P&L report and how to customize it further by setting up filters and adding specific rows and columns and special headers and footers.
- Step 1: Navigate to Profit and Loss
- Seeing a different left-side navigation menu?
- Step 2: Set Up Basic Options for the Profit and Loss Report
- Step 3: Customize Your Profit and Loss Report Further
- Step 4: Print, Email, or Export Your Profit and Loss Report
- Why Is the Profit and Loss Report Important?
- Frequently Asked Questions (FAQs)
- Wrap Up
Step 1: Navigate to Profit and Loss
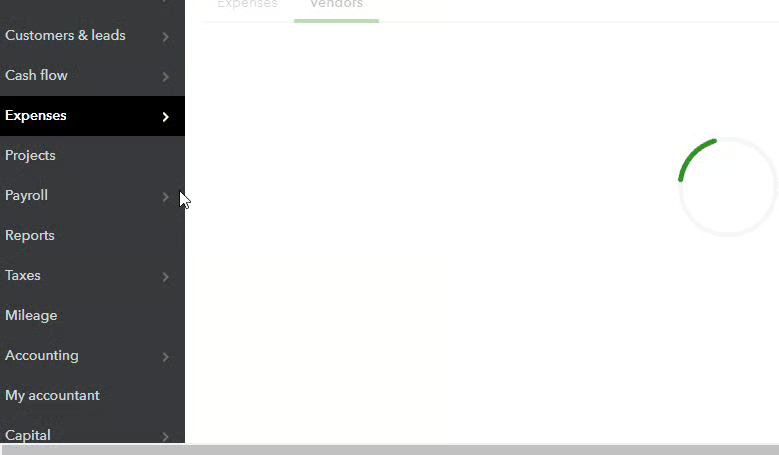
To create a new P&L report, click Reports in the left menu bar. Standard reports are separated into 10 groups, so open the Business overview group and click on Profit and Loss, as shown in the GIF below.
Seeing a different left-side navigation menu?
QuickBooks has two user views: Business View and Accountant View. Your left-side navigation menu may look different depending on the user view you are in.
If your sidebar menu is not what is shown in our tutorial, it means that you are on Business View. We prefer and recommend using the Accountant View because it shows a full range of business accounting features and tools that you can use in QuickBooks.
To verify whether you’re using the Business View, click on the cogwheel at the top right-hand corner of your QuickBooks dashboard, and check whether the button on the lower right hand says Switch to Accountant view, as shown below. If so, then it means you are on Business View.
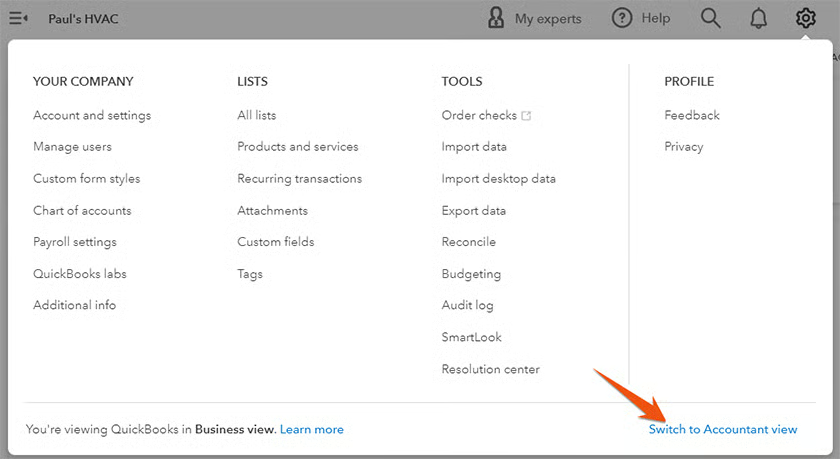
Once you verify that you are on Business view, click on Switch to Accountant view to update the appearance of your sidebar menu. In a few seconds, you should see the same left-side menu bar illustrated in this tutorial.
Step 2: Set Up Basic Options for the Profit and Loss Report
Scroll to the top of the Profit and Loss Report screen to view the top menu bar with basic options that can be changed for your report.
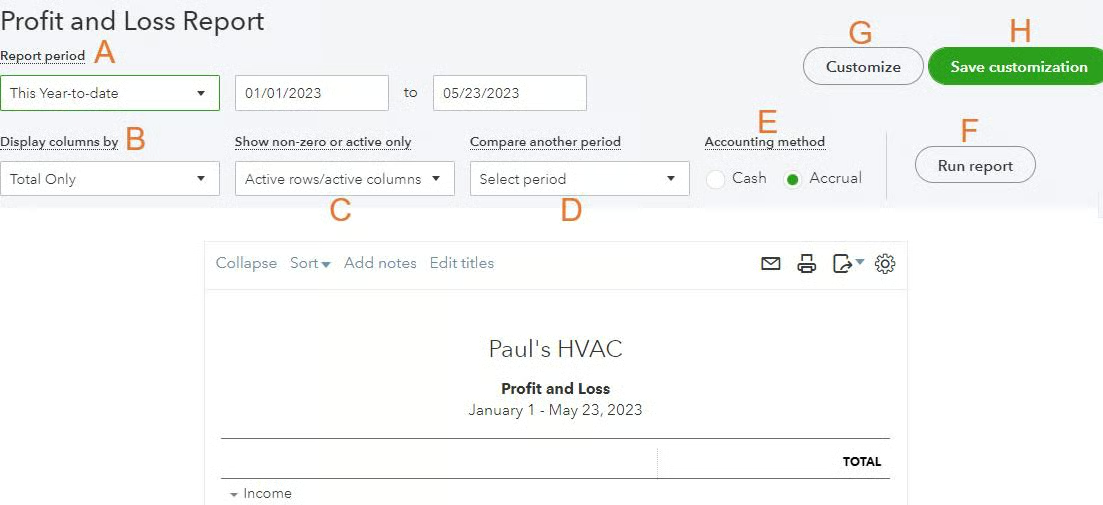
Choose the following options for your report.
A. Report period: Indicate the period that you want income and expenses to be accumulated. You can either click the drop-down box to choose a predefined period or enter the beginning and end dates for a custom period.
B. Display columns by: By default, the QuickBooks Profit and Loss report displays only one column for the period total. Click the drop-down box to choose any subtotal columns you want to display. You can display subtotals for time periods, customers, vendors, classes, locations, and other categories.
C. Show nonzero or active only: This setting lets you select which rows or columns to include in your report. The default is set to show only rows and columns that have activity during the period. You can opt to select rows or columns of all data, only active data, or zero-only data. If you want to remove zero-value transactions or accounts that don’t contribute to your financial picture, applying this filter can streamline the report and make it easier to analyze.
D. Compare another period: You can compare your P&L report to another period, such as previous year or year-to-date (YTD). It allows you to analyze how your financials have changed over time by providing a side-by-side comparison.
E. Accounting method: Choose whether the Profit and Loss Report should be prepared on the cash or accrual basis of accounting. Accrual accounting includes accounts payable (A/P) as expenses and accounts receivable (A/R) as revenue.
F. Run report: Click this button to apply your changes.
G. Customize: Hit this button if you want to customize your report further (we’ll show you how to do this in Step 3, the next section).
H. Save Customization: If you’ve made many changes that you’ll want to duplicate frequently, select this option and name your report. In the future, you’ll be able to choose this customized report from the Reports tab.
Note that your changes won’t be reflected until you click the Run report button (item F).
Step 3: Customize Your Profit and Loss Report Further
In addition to the basic options selected at the top of the page, you can customize the Profit and Loss report further by clicking the Customize button (item G in the prior section). The Customize report window includes the following sections:
General
The first group of options in the Customize report menu is general options.
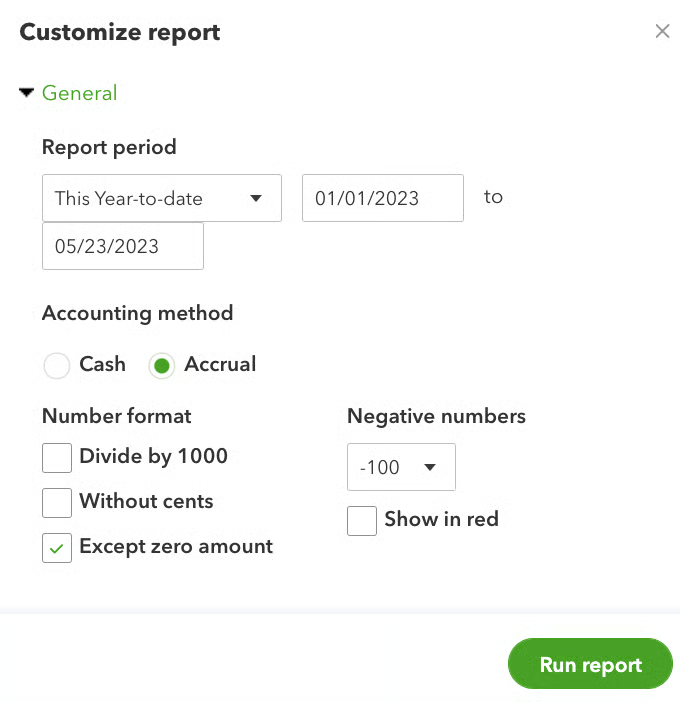
In addition to setting the reporting period and accounting method, you can specify how numbers will be formatted. You can state numbers in thousands of dollars by ticking the box Divide by 1000, suppress cents, or exclude zero amounts. By clicking on the drop-down menu for Negative numbers, you can choose a format for displaying negative numbers.
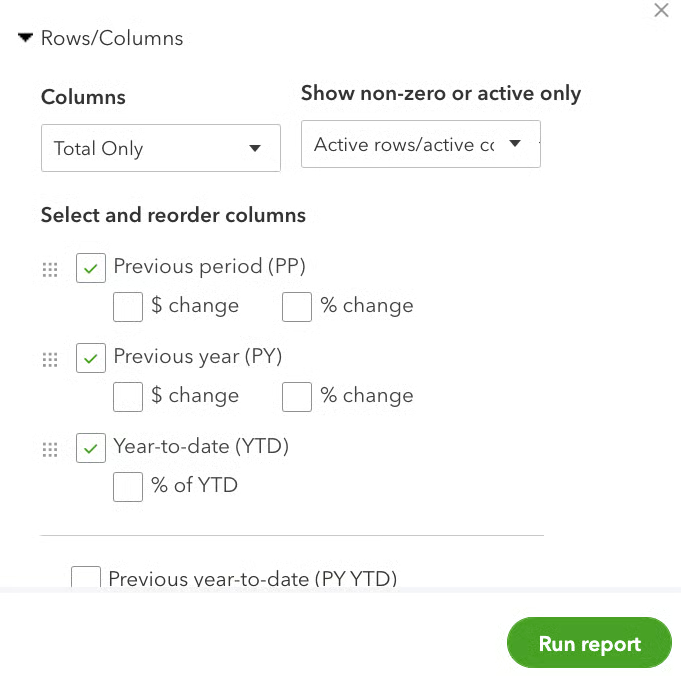
Rows/Columns
In the Rows/Columns section, you can select columns to include and change the order of the columns in your Profit and Loss report.
Filter
These options allow you to filter the report based on seven variables, as shown below.
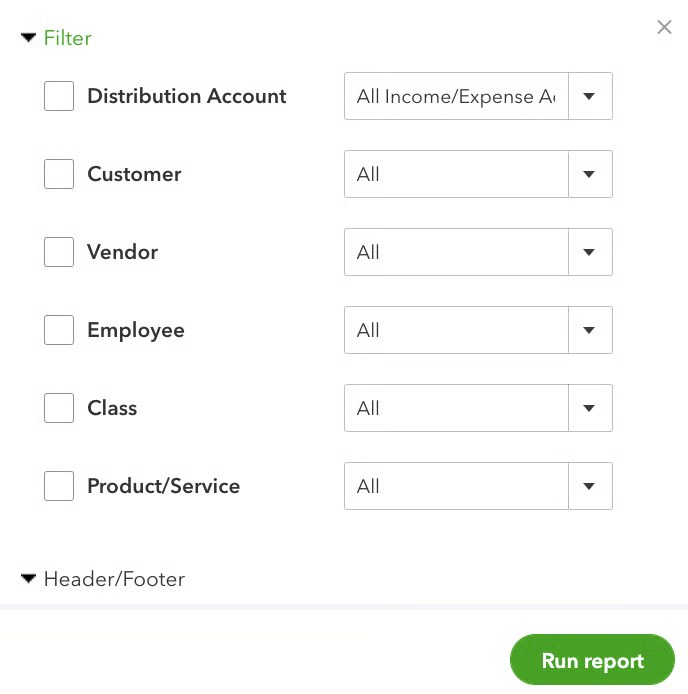
- Distribution Account: This allows you to include or exclude specific accounts from the report. You can choose to include multiple accounts to narrow the report down to specific income or expense categories that you want to analyze.
- Customer: This enables you to filter the report data by specific customers or clients. This filter is particularly useful when you want to analyze the profitability or financial performance of individual customers. You can select one or multiple customers to view how their transactions contribute to the overall profit and loss of your business.
- Vendor: This lets you filter the report based on specific vendors or suppliers. You can select one or multiple vendors to view their transactions.
- Employee: This allows you to focus on specific employees or staff members in the report. It’s beneficial when you want to track the impact of individual employees on revenue or expenses.
- Class: This enables you to categorize transactions by specific classes you have set up in QuickBooks. Classes are a way to categorize transactions based on departments, locations, product lines, or any other relevant divisions within your business.
- Product/Service: This filters your P&L report data based on particular products or services you offer—helping you evaluate the performance of individual products or services in terms of revenue and expenses.
If you track income and expenses by class or location, you’ll probably want to print reports filtered by these items. If Location or Class doesn’t appear in your Filter options, you need to turn on Class and Location tracking, as illustrated in Step 4 of our tutorial on how to set up advanced settings in QuickBooks Online.
Header/Footer
In the last set of customization options, you can choose what information to display in the header and footer of the report.
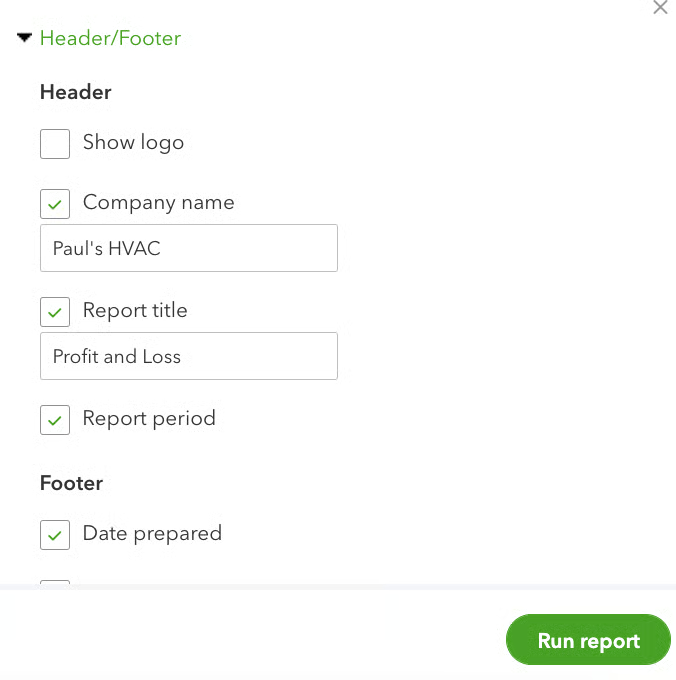
You can exclude a line from printing on the report by removing the checkmark next to its name. In addition, you can change the name of the company and the report that will appear in the header by indicating the text you want in the appropriate fields. If you uploaded a logo when you created your account, as discussed in our tutorial on how to set up company information in QuickBooks Online, you can click the Show logo box so that it appears in the header of your P&L report.
When you are done customizing your P&L report, hit the green Run Report button at the bottom of the list of customization options.
Step 4: Print, Email, or Export Your Profit and Loss Report
If needed, you can print, email, or export your Profit and Loss report via the icons in the top right corner of the report.
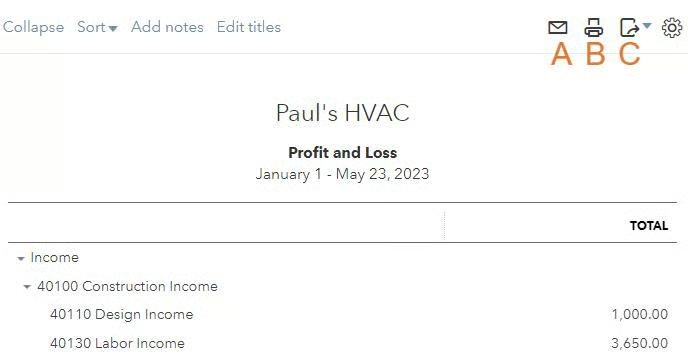
A. Click the mail icon to email a PDF copy of your report.
B. Select the printer icon to print a copy of your report.
C. Click the drop-down arrow next to the export icon to export your report as either a PDF or an Excel file.
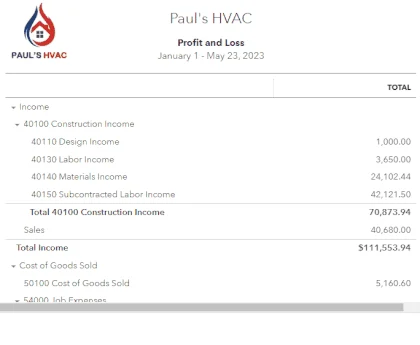
Look at this sample Profit and Loss report in QuickBooks Online:
Why Is the Profit and Loss Report Important?
A P&L report provides insights into your company’s income and expenses, resulting in either net profit or net loss, which provides a basis for financial forecasting and planning. You can find out crucial information by regularly reviewing your P&L report. For instance, you can compare your current statement to the previous year to determine if your business is making money or if something needs your attention.
A P&L report is run better on an accrual basis than cash flow because it includes revenue and expenses that you’re either owed or owe, regardless of whether cash has exchanged hands. For instance, your net income is reduced by materials used in a particular job, even if you haven’t paid for the materials yet. This provides a much better matching of revenue and expenses than looking at cash flow.
Frequently Asked Questions (FAQs)
Can I customize profit and loss reports in QuickBooks Online?
Yes, you can. As our best small business accounting software, QuickBooks provides a range of customization options to tailor your P&L report to your specific needs. For instance, you can customize the date range and select specific accounts to include or exclude.
Can I export profit and loss reports in QuickBooks Online?
Yes, you can export P&L reports in PDF or Excel format.
Wrap Up
You’ve completed another one of our lessons and now know how to run an income statement. Our next tutorial looks at how to create a balance sheet in QuickBooks Online using the basic setup options and how to customize the sections further.