

In this tutorial, you’ll learn how to set up multiple users in QuickBooks Online. You’ll learn how to add standard users, company administrators, reports-only users, and time-tracking-only users. You’ll also learn how to invite your accountant to your QuickBooks account so that they have real-time access to your most current data.
Click on the gear icon in the upper right-hand corner of the QuickBooks Online screen and then select Manage users under the first column, as shown below.

Navigate to “Manage users” in QuickBooks Online
On the Manage users screen under the Users tab, click on the green Add user button.
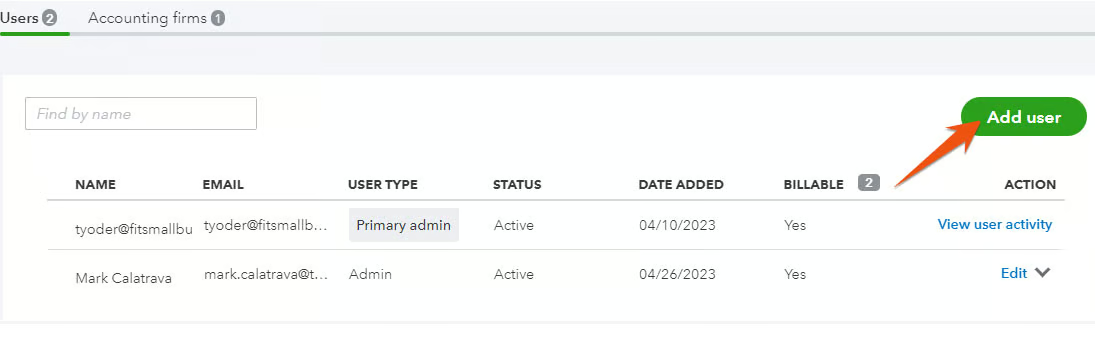
Click on Add user in QuickBooks Online
If this is the first user you’re adding, you’ll be taken to the add a new user screen automatically. If you’ve already added users, you’ll see a list of users and need to click the green Add user button.
There are four types of users to choose from when granting someone access to your QuickBooks Online company (labeled below).
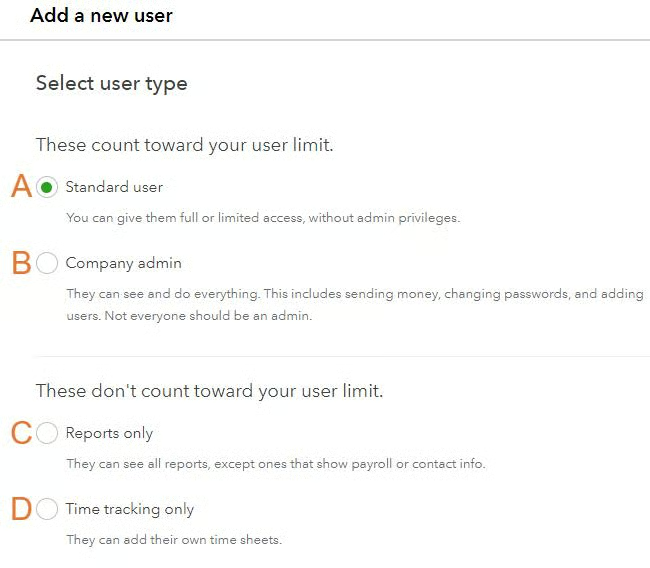
User types in QuickBooks Online
A. Standard user: Most QuickBooks users should be set up as Standard users. You’ll be able to customize their access in the next step.
B. Company admin: The QuickBooks Online master administrator is the person that purchased the subscription to QuickBooks. If that’s the company owner, then they probably want to give their controller or head bookkeeper Company admin rights so that they can manage QuickBooks users and the QuickBooks account.
In QuickBooks Online, only users with the admin role have the ability to add new admins to the account. Also, note that phone number verification may be required to add a new company admin user.
C. Reports only: Reports-only users can view all QuickBooks reports except for payroll or employee contact information. This user type is great for employees that aren’t involved in inputting data into QuickBooks but are interested in tracking data like cost reports for projects they’re managing.
D. Time tracking only: Employees and contractors can be set up as Time tracking only users so that they can input their hours worked, service code, and customer or project. Reported employee hours flow into the payroll system. Employee and contractor hours are available to add to invoices.
Reports-only and Time tracking-only users have very limited access to QuickBooks and don’t count toward your company’s maximum number of users. Simple Start subscribers will need to upgrade to Essentials for time-tracking-only users or Plus for reports-only users.
If you’re adding a standard user, you’ll need to assign them access rights in this step. If you’re adding any other type of user, you can skip to the next step. Select Standard user from the add a new user screen shown above and click the green Next button (not shown).
As you select different access levels on the left of the screen, a description of the access rights assigned to each level is given on the right of the screen.
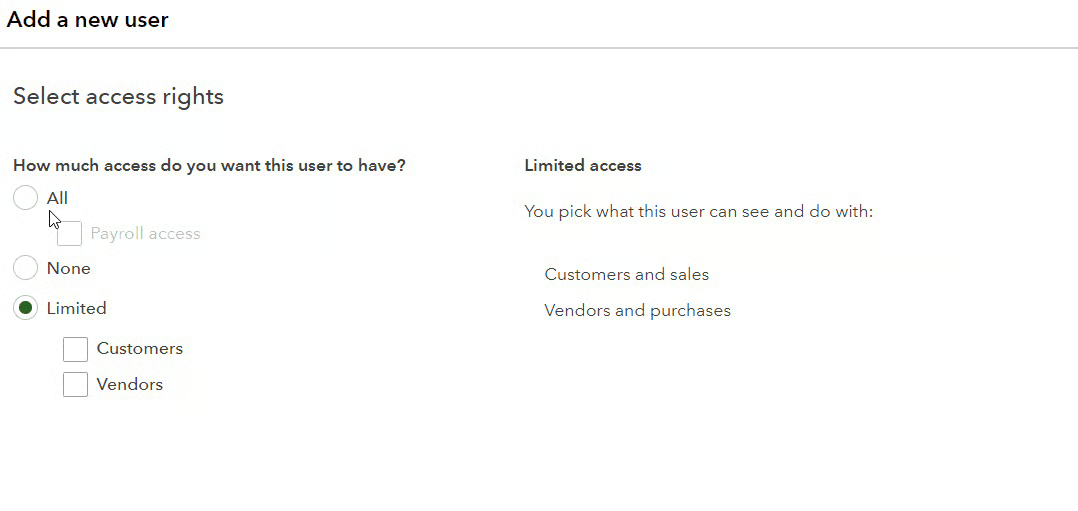
Set user access in QuickBooks Online
- All: These users have unlimited access to all QuickBooks data. This includes adding, editing, and deleting transactions related to all vendors, customers, sales, and purchases. If you place a checkmark next to Payroll access, they also have access to employee and payroll information. The only access not included is administrative rights, which you can assign in the next step.
- None: The purpose of creating a user with no access rights is to allow someone to perform some administrative tasks without giving them access to the accounting features. You also have the option on the following screen to provide these users with access to input their own time.
- Limited: You can provide limited access rights to members of the accounting team that don’t require access to everything. If you select Limited, you must then select access to Customers, Vendors, or both. Customers is appropriate for an employee that generates invoices and collects payments from customers, such as an accounts receivable (A/R) clerk. Vendors is best for an employee who inputs and pays bills, such as an accounts payable (A/P) clerk.
After you have selected the level of access rights to provide the new user, click the green Next button (not shown) to assign administrator rights.
A user needing full administrator rights should be designated as a Company admin user in Step 3. However, you can assign different administrator rights to any standard user.
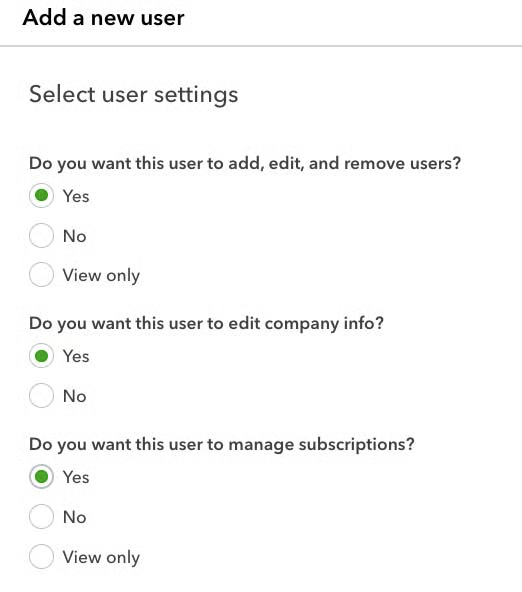
Assign administrator rights to Standard users in QuickBooks Online
After deciding which administrator rights the new user should have, click the green Next button to provide the user’s contact information.
Provide the new user’s first name, last name, and email address, and then click the green Save button (not shown).
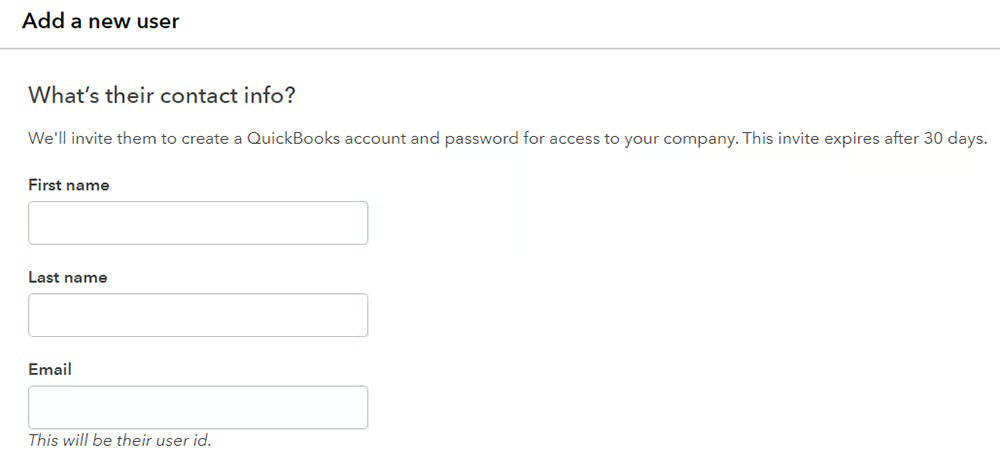
Provide user contact information in QuickBooks Online
The user will receive an email inviting them to your QuickBooks Online company. Their user ID is their email address. The new user will generally be prompted to create a password. If they aren’t prompted to create a password, then there’s already an Intuit password associated with that email address.
How To Give Your Accountant Access to Your QuickBooks Online Account
Step 1: Send Invite To Your Accountant
On the Manage users screen, click on the Accounting firms tab. Click on the Invite button, and you’ll be prompted to enter the accountant’s contact details. Once done, click the Save button.
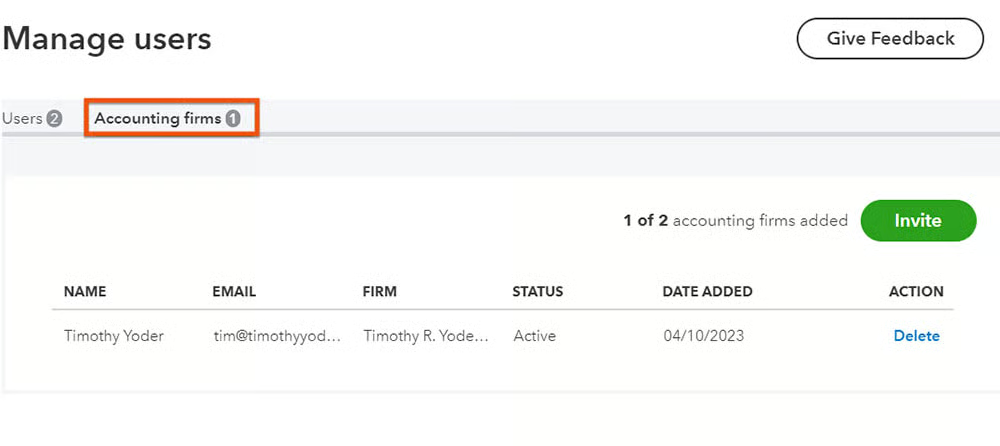
Invite an accountant in QuickBooks Online
Your accountant can share their access with other bookkeepers in their firm, so there’s no need to invite two accountants from the same firm.
Step 2: Your Accountant Is Notified and Setup Is Complete
After you send the invite:
- Your accountant will receive an email that contains a link to sign in to your QuickBooks Online account.
- Once your accountant signs in, their status on the Manage users page will change from Invited to Active.
- Your accountant will be given administrator privileges to all areas of your QuickBooks Online company.
How Many Users Can You Set Up in QuickBooks Online?
One of the reasons QuickBooks Online is awarded our best small business accounting software is its scalability. It offers four subscription options, each of which has a different user limit. This allows you to select a plan based on the number of users you need.
The user limits are as follows:
| Simple | Essentials | Plus | Advanced | |
|---|---|---|---|---|
| Standard & Admin Users | 1 | 3 | 5 | 25 |
| Accountants | 2 | 2 | 2 | 3 |
| Time Tracking Only Users | 0 | Unlimited | Unlimited | Unlimited |
| Reports Only Users | 0 | 0 | Unlimited | Unlimited |
Frequently Asked Questions (FAQs)
Yes, multiple users can access the software simultaneously from different devices. Each user can log in to their own account using their own unique login credentials, and they can perform tasks and access information based on the permissions granted to them by the administrator or owner of the account.
Yes, you can. On the Manage users screen, select the user you want to remove and click Delete under the Action column.
Yes, you can limit a user’s access to specific areas and features of QuickBooks by customizing their user role.
The main user roles available in QuickBooks are standard and admin. The admin role has full access to all areas of QuickBooks, while the standard role has limited access to sensitive financial data. You may also add reports-only users and time-tracking-only users, and they won’t count toward the standard user limit.
Wrap Up
Congratulations on learning how to set up QuickBooks Online multiple users’ function. The next tutorial in our library is how to set up the chart of accounts in QuickBooks Online. Customizing the chart of accounts for your business is an important step to simplifying your bookkeeping and getting the most out of QuickBooks.