


This tutorial shows how to set up a customer statement in QuickBooks Online—which can be a helpful way to remind your customers of their outstanding invoices. We’ll explain the different types of QuickBooks statements and how to customize your statement before sending it to your customer.
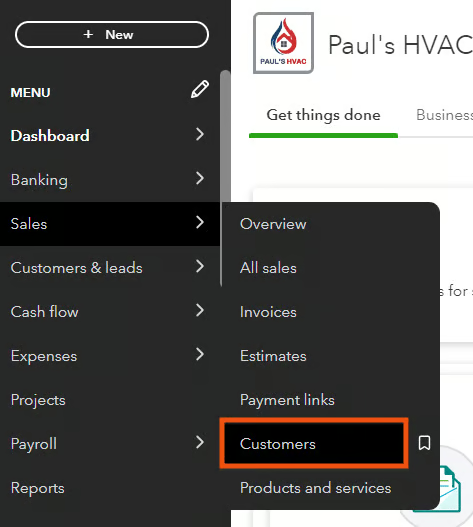
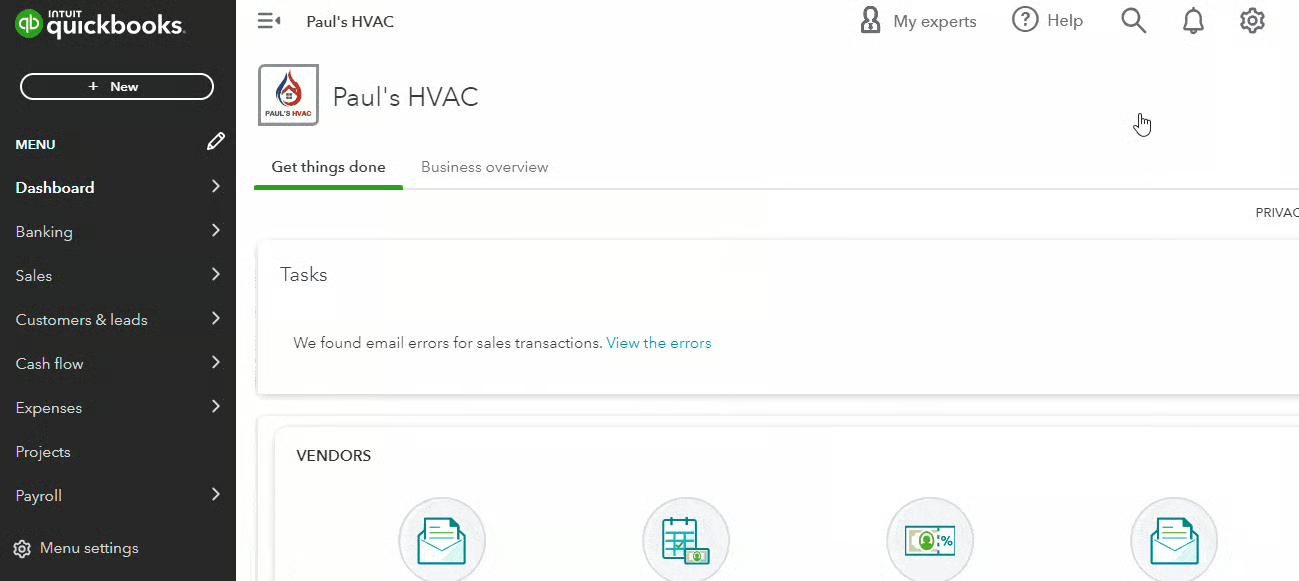
From your company dashboard, click on Sales in the left menu bar, and then select Customers from the drop-down menu, as shown below.
Seeing a different left-side navigation menu?
1. Check User View
QuickBooks has two user views: Business View and Accountant View. Your left-side navigation menu may look different depending on the user view you are in.
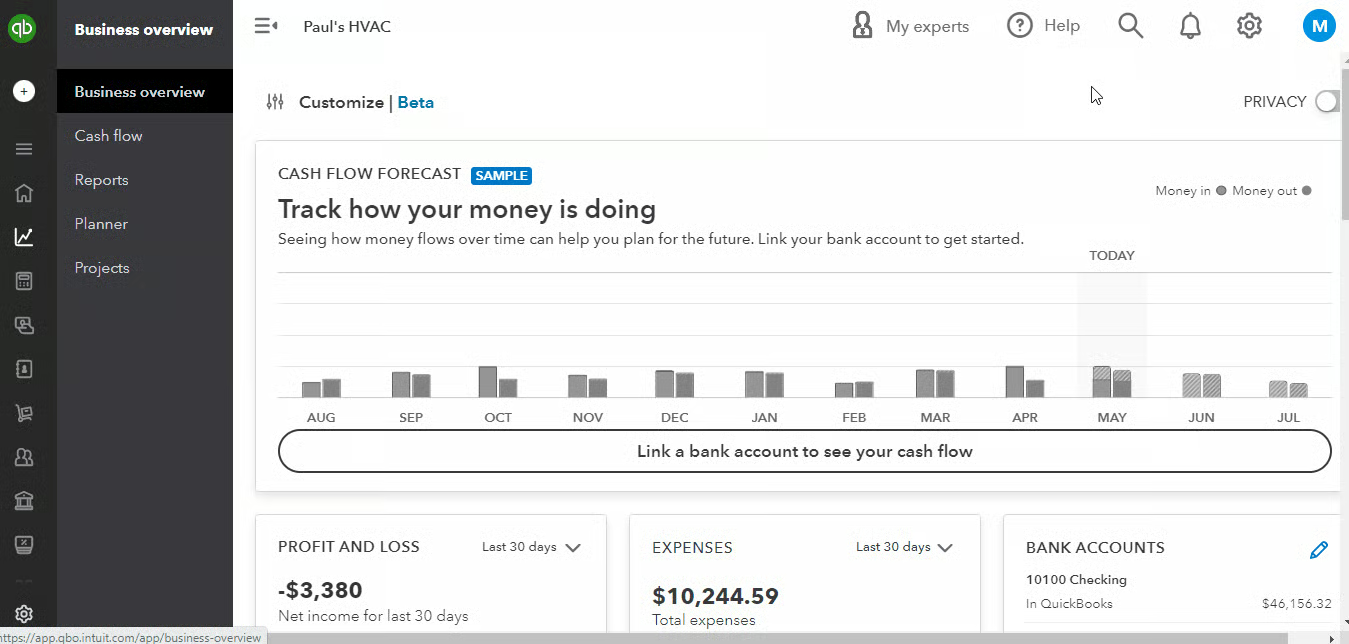
If your sidebar menu is not what is shown in our tutorial, it means that you are on Business View. We prefer and recommend using the Accountant View because it shows a full range of business accounting features and tools that you can use in QuickBooks.
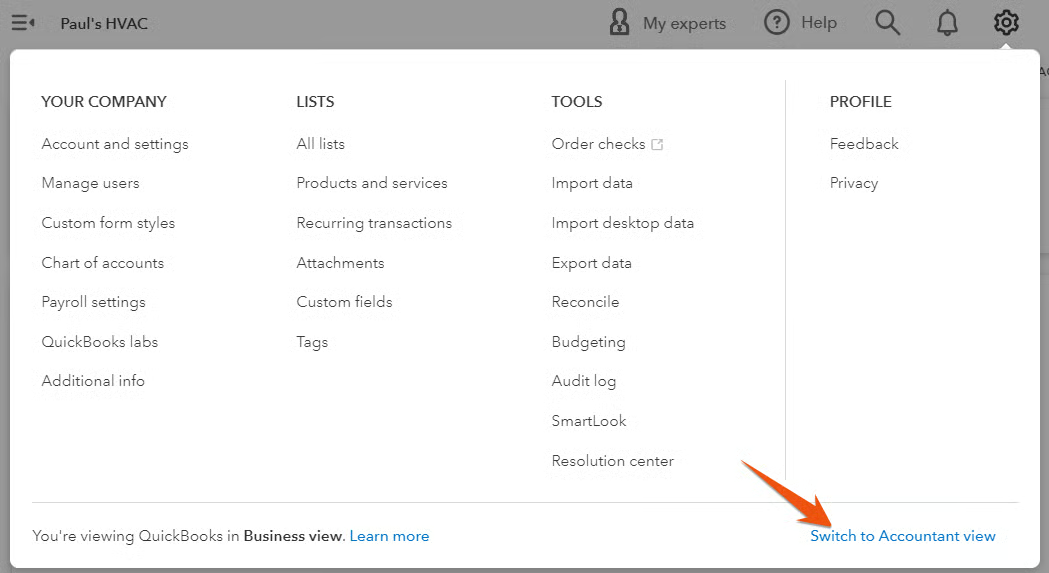
To verify whether you’re using the Business View, click on the cog wheel at the top right-hand corner of your QuickBooks dashboard, and check whether the button on the lower right-hand says Switch to Accountant view, as shown below. If so, then it means you are on Business View.
2. Switch to Accountant view
Once you verify that you are on Business View, click on Switch to Accountant view to update the appearance of your sidebar menu. In a few seconds, you should see the same left-side menu bar illustrated in this tutorial.
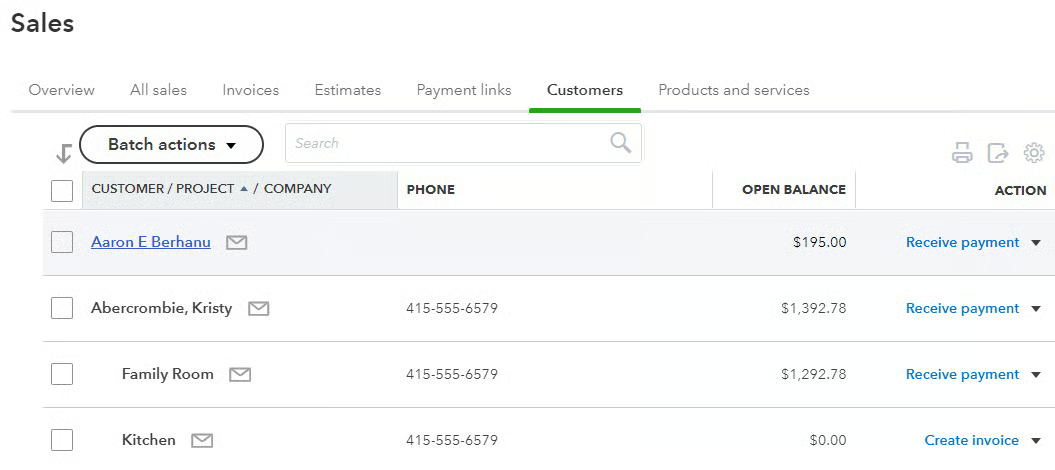
A window displaying your customer list and their invoice and payment activities appears. From here, select the recipient of your customer statement by clicking on the name. You may choose multiple customers to receive statements by clicking on the checkbox before their names.
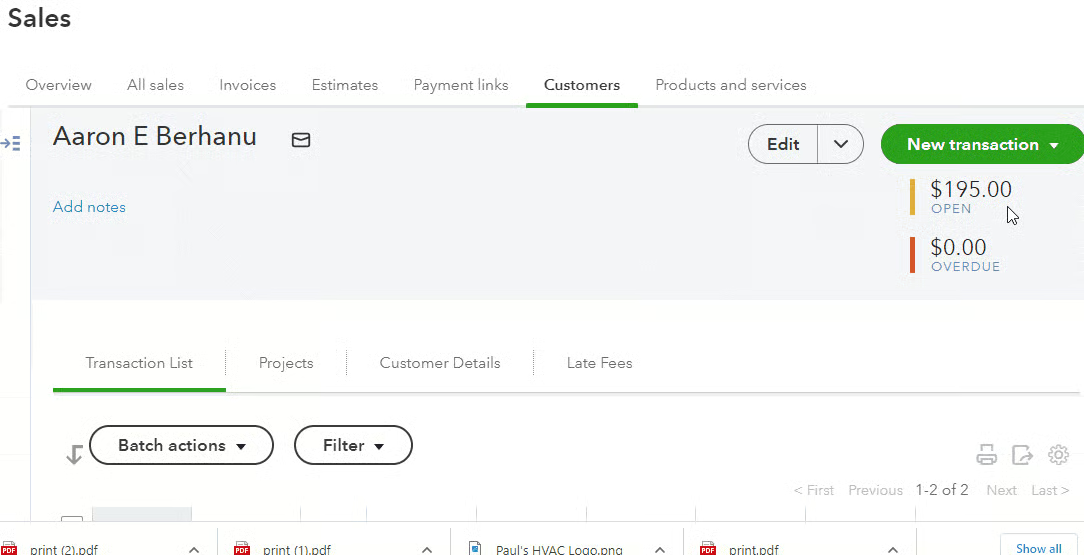
After clicking on the customer, a list of all payments and outstanding invoices appears. From here, you’ll see which invoices are overdue and when they’re due instantly. To create a statement, click on the New transaction menu on the top right of the screen, and select Statement from the drop-down list.
Step 3.1: Choose the Customer Statement Type
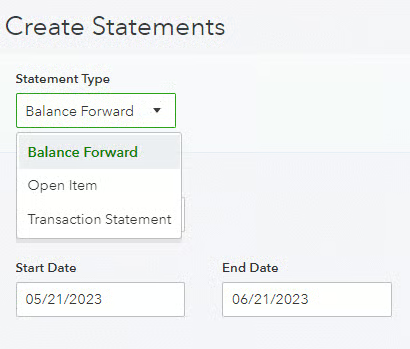
From the Create statements window, choose from three different types of statements in QuickBooks Online:
- Balance forward: This type shows all invoices and payments with outstanding balances for a specific date range you selected. It also includes the amount that your customer owed prior to the chosen date range as the balance forward at the top of the statement. When you include the balance forward, it helps provide context to the customer and enables them to understand the overall outstanding balance carried forward from previous transactions.
- Open item: Use this when you want to provide customers with a detailed breakdown of individual transactions, including open invoices, payments, and credits. It displays all open, unpaid invoices from the last 365 days, and it allows your customer to see the specific details of each transaction, such as the invoice numbers, amounts, and due dates.
- Transaction statement: A transaction statement displays the total amounts billed and received for every transaction within the period you specify, without showing any balance forward amount and amount due.
After selecting the type of statement, fill in the statement date and specify the date range for the statements you wish to create. You may leave the statement date as-is to use the current date.
Click Apply to continue.
Step 3.2: Review the Recipient’s Email Address
Make sure that the email address is accurate. This will be populated automatically based on the contact information you entered when you added the customer, as covered in our tutorial on how to set up customers in QuickBooks Online.

You can adjust the level of details you set in your customer statement from your company dashboard Account and settings. This can be executed in the following steps:
Step 4.1: Navigate To Sales Under Account and Settings
Click on the gear icon on the top right of your company dashboard, select Account and settings, and click on Sales.
Step 4.2: Customize Your QuickBooks Statements
Scroll down to the Statements section to reveal three options available for QuickBooks statements, which allow you to adjust the level of detail provided in the document.
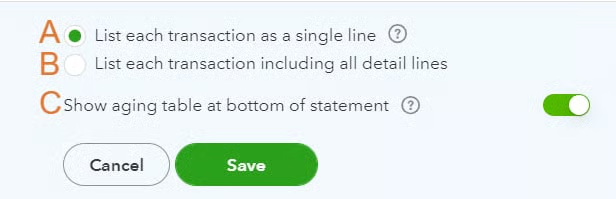
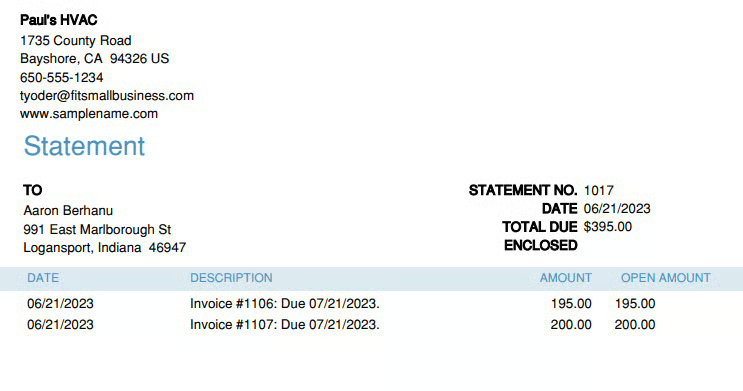
A. List each transaction as a single line
If you select this option, the statement will only show a summary of the invoice, including the invoice date, number, and amount. Here’s an example of a statement from our fictitious company, Paul’s HVAC, with a summary of the invoices.
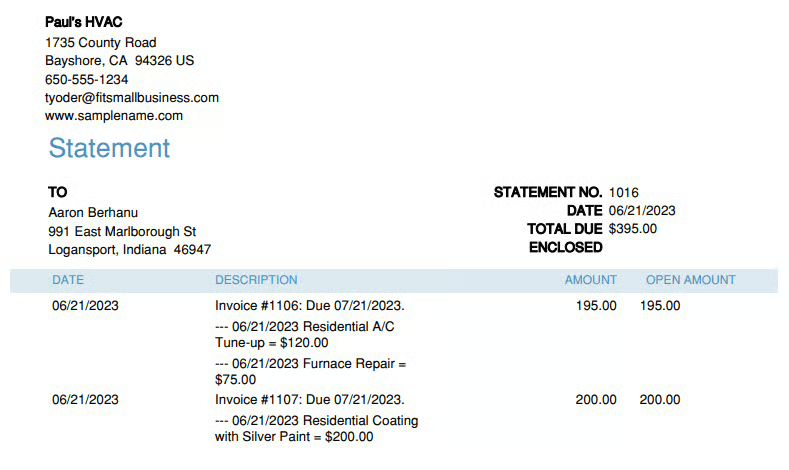
B. List each transaction, including all detail lines
This option will provide a complete recap of the transaction. Each line item on an invoice will be summarized and shown separately. This is what a QuickBooks customer statement looks like when all detail lines are included:
C. Show aging table at the bottom of the statement
By selecting this option, a summarized accounts receivable (A/R) aging report will print at the bottom of the statement showing any amounts that are past due. We recommend showing this table to alert customers of any overdue amounts. The aging table for our sample invoice looks like this:

Click the green Save button once you have selected your statement options.
Once you’re satisfied with your statement, click on Save (if you wish to record the statement as a draft) or Save and send (if you want to send it right away). If you want to see what your statement looks like when printed, select Print Preview at the bottom of the statement form.
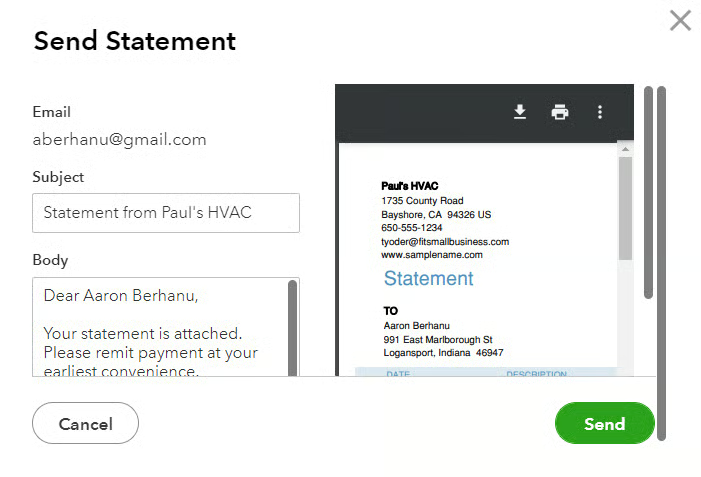
When you click on Save and send, QuickBooks will display a preview screen showing the email content and a preview of the statement. You can edit the email content and subject if needed. Finally, click Send to proceed.
Frequently Asked Questions (FAQs)
What are customer statements in QuickBooks Online?
Customer statements in QuickBooks Online are documents that display the transactions and outstanding balances for a specific customer. They provide a snapshot of the customer’s account, including invoices, payments, and any open balances.
When do I need to set up and send customer statements in QuickBooks Online?
You may need to create and send customer statements in QuickBooks if you want to remind them of their outstanding balances or overdue payments. Also, some customers may specifically request statements for reconciliation purposes.
Can I send customer statements directly from within QuickBooks?
Yes, you can. After creating the statement, you can send it to your customer directly from QuickBooks.
Can I customize QuickBooks statements?
Yes, you can. QuickBooks Online has strong customization options for various sales forms and documents, including invoices and statements. This is one reason why QuickBooks is our overall best accounting software.
Wrap Up
You now know how to set up a customer statement in QuickBooks Online. The next tutorial in our training course is how to set up expenses in QuickBooks Online. That covers your available options for tracking and billing expenses to customers and the level of expense detail to provide on expense and purchase forms.