

Employers are liable for paying their own employment taxes (Social Security, Medicare, and unemployment) in addition to withholding and paying payroll taxes for their employees. All three QuickBooks Workforce (formerly QuickBooks Payroll) plans (Core, Premium, and Elite) make it easy to calculate and pay these taxes. In this tutorial, we discuss how to set up payroll tax in QuickBooks Workforce, followed by how to connect your bank account to easily pay taxes.
If you’d prefer to watch a video, here’s a brief run-down of how to set up your QuickBooks Workforce taxes:
Otherwise, here are the nine steps you’ll want to follow to set up payroll tax payments in QuickBooks.
You’ll need to provide QuickBooks with the basic information you would need to provide any payroll service to get started:
- Birth date and hire date for every employee
- Your business contact Info (legal name, mailing address)
- Company type (LLC, Sole Proprietorship, Corporation)
- Federal Employer Identification Number (FEIN)
- Payroll tax form you are required to file (941 or 944)
- Payment or deposit schedule for federal tax payments
- Employment training tax (ETT) or other state rates
- Your bank account # and routing # for e-pay
- Online user id and password used to access your bank account
- Payment/deposit schedule for state tax payments*
- State account number*
- SUI Rate*
*These items only apply if your state has income and/or unemployment tax.
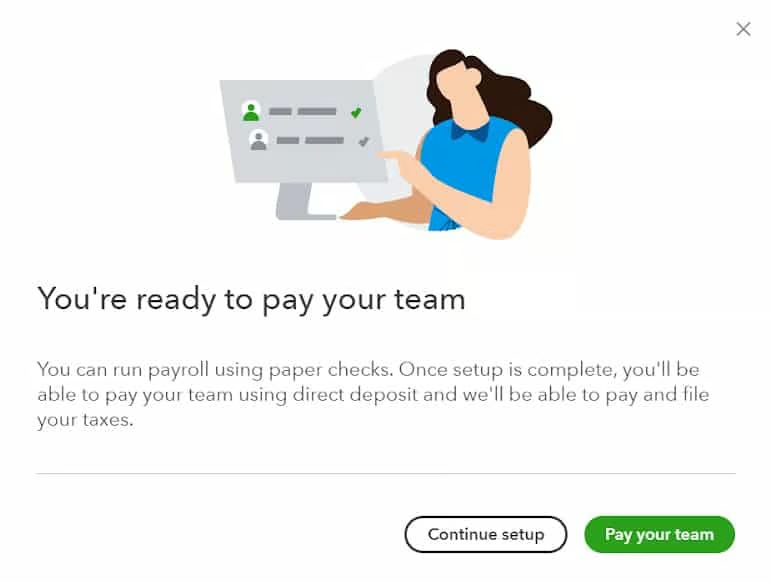
Once you’ve set up your employees, you will see the option to continue the setup or pay your team. Select “Continue setup” to enter the information required to pay your payroll taxes.
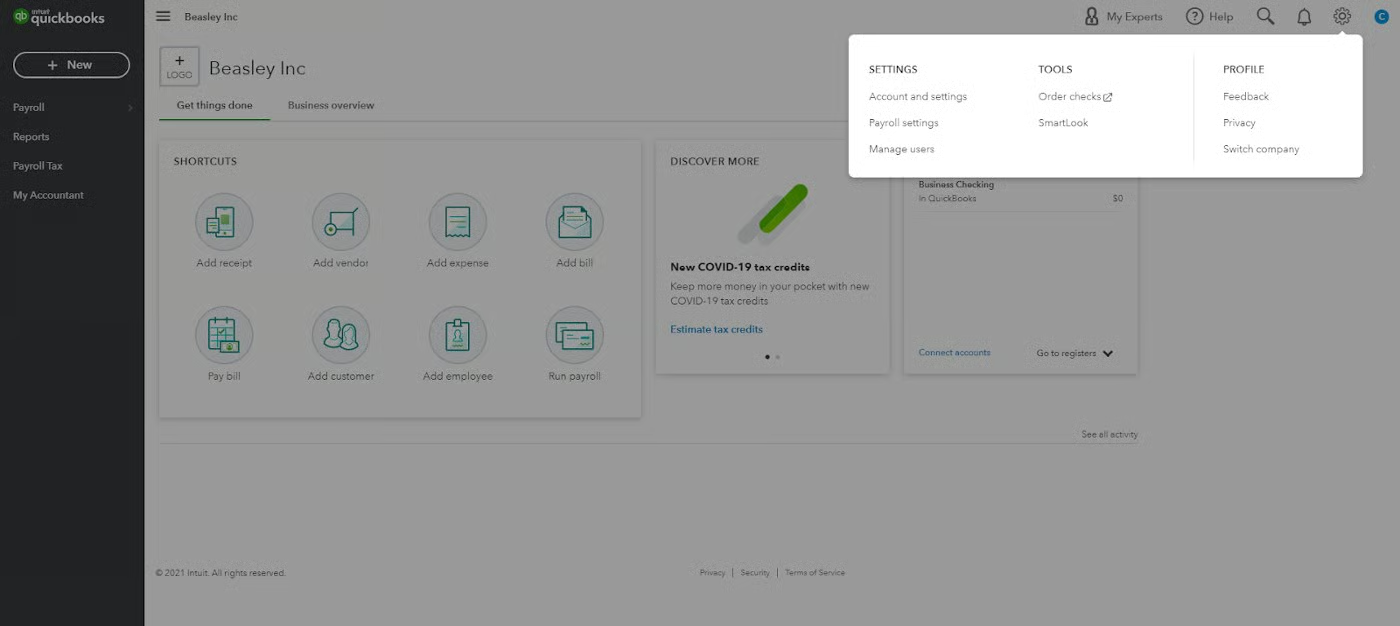
Meanwhile, if you set up your employees a while ago and are returning to finish the remaining payroll setup, you’ll need to navigate to the gear button on the far upper right, and click on “Payroll Settings,” as indicated in the screenshot below.

Below is a screenshot and a brief explanation of the information about your company that you need to enter:
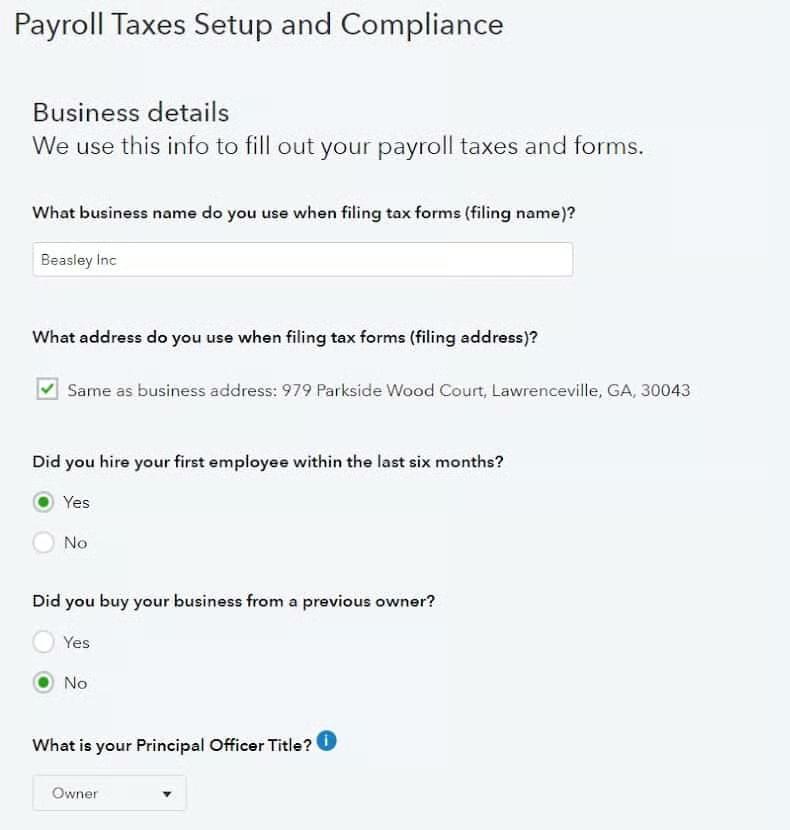
- Business name: Enter the legal name of your business that you use on all tax return filings.
- Business address: The address you entered for your business during payroll setup will automatically populate here; if you use a different address, then instead of putting a checkmark, you will see fields where you can enter the correct address info.
- The date you plan to run the first payroll: Provide the date that you plan to run your first payroll. This information is key for tracking payroll tax payments. Your date options will be based on the current month and year that you are in.
- The date you hired your first employee: If you hired your first employee within the last six months, select “yes;” otherwise, select “no.”
- New or existing business: If you purchased the business from a previous owner, select “yes;” otherwise, select “no.”
- Company type: Select the correct company structure (Sole proprietorship, Corporation, Limited Liability Company, Limited Liability Corporation, etc.)
- Principal officer title: Enter the name of the person you’re putting in charge of communicating with your bank and federal tax agencies like the IRS.
- Workers’ comp: If your state requires that you provide workers’ compensation insurance, you’ll see a notice at the bottom of this page with an option to get a quote from AP Intego. Select “no” if you already have a workers’ comp plan.
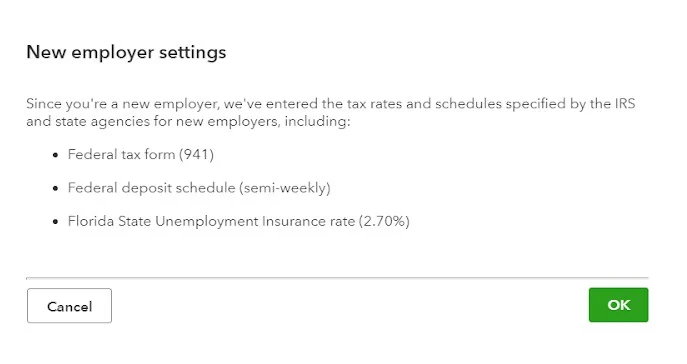
Another useful setting QuickBooks Workforce implements is setting your tax rates to the default percentages based on the most current information released by federal and state tax agencies. This saves you from having to figure out the current tax rates you need. It also includes applicable deposit schedules.
To input information on this screen, you will need to have the birth date and hire date of each employee on hand. You should be able to obtain this information from the I-9 form or other new hire paperwork completed by employees.
Below is a screenshot, along with a brief explanation of the required information for federal taxes.
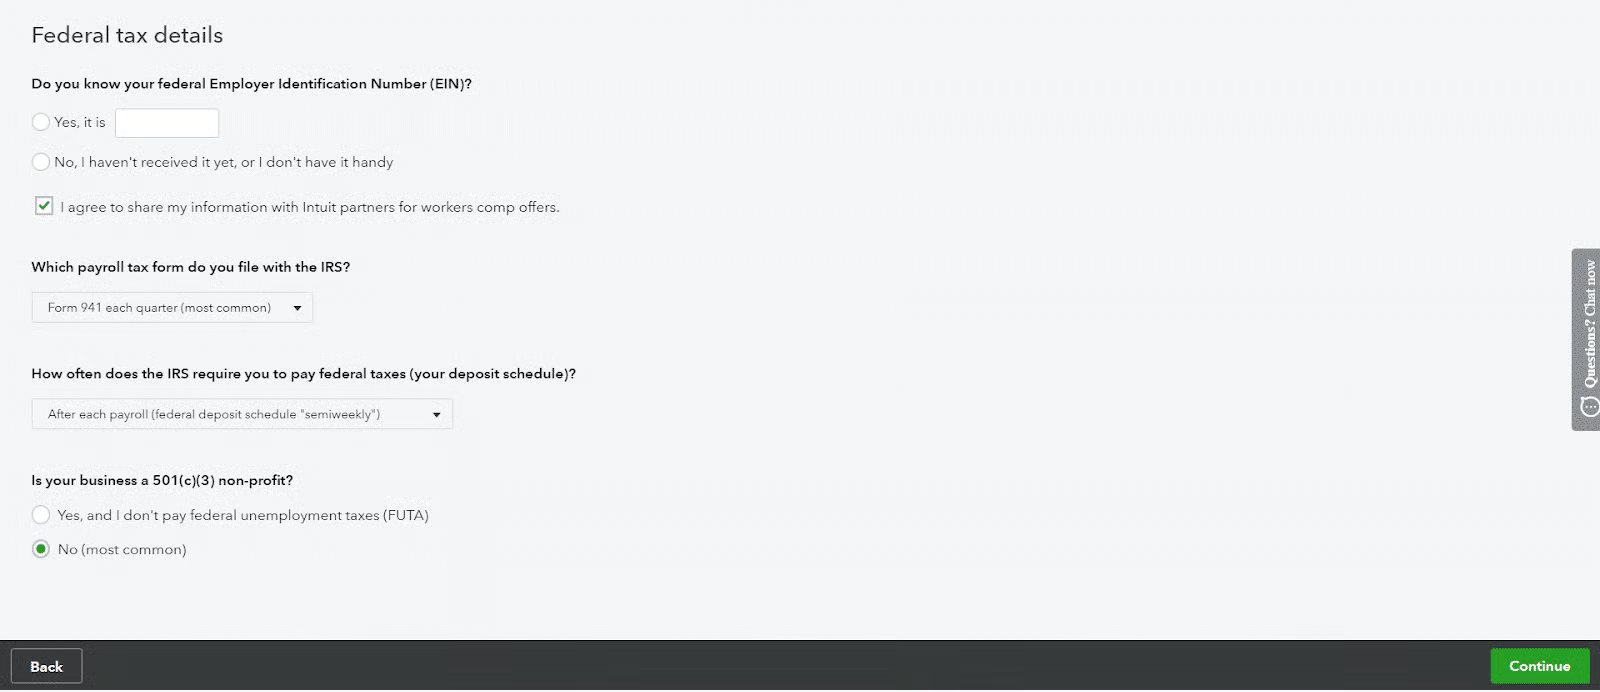
- EIN: Enter your federal tax id in this field. You can select “No” if you have not received it yet, or if you don’t have it handy. If you’re interested in signing up for workers’ comp for the first time or receiving offers that may be cheaper than your current plan, check the box to share your information with Intuit workers’ comp partners.
a. While you can run payroll without a federal tax id #, you cannot submit your payroll tax payments to the IRS without one. Having this number ensures that your business will receive credit for all tax payments made. - Payroll Tax Form: Select the payroll tax form that you are required to file with the IRS. The options here are Form 941, which is filed quarterly, or Form 944, which is filed annually. If you’re unsure which form you should file, check out our article on payroll tax forms to find out.
- Federal Tax Payments: From the dropdown, select how often you are required to pay federal payroll taxes. The options here are semiweekly, monthly, or quarterly. If you’re unsure how often you should file, check out our Form 941 guide or contact the IRS.
- Nonprofit Status: If you are a 501(c)(3) nonprofit business that does not pay FUTA, select “Yes;” otherwise, select “No.”
Below is a screenshot, along with a brief explanation of the required information for state taxes, if applicable. The layout will vary depending on the state where you do business and your employees reside, so skip the sections below that don’t apply to you.
If you are lucky enough to live in one of the nine states without a state income tax (AK, FL, NH, NV, SD, TN, TX, WA, and WY), then you will not see an option to enter your state withholding account number option on the setup screen; however, you will likely need to answer a question about your state unemployment insurance rate.
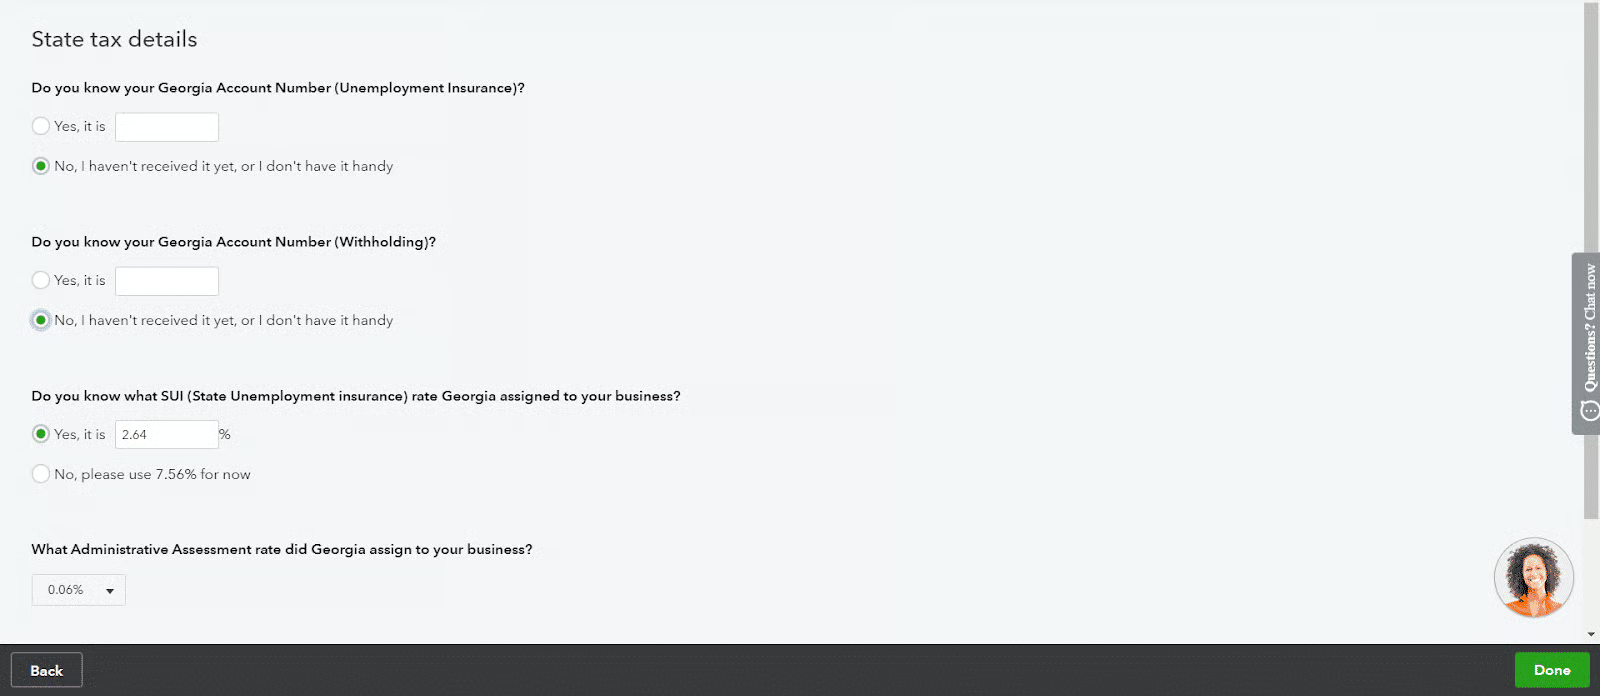
- State Employer Account Number: This is a unique number issued by the state to employers. Similar to the FEIN, it is used to keep track of payroll tax payments made by employers. If you don’t have a state account number, you need to contact the Employment Development Department (EDD) for your state and request one.
a. It’s not a good idea to file tax returns or make tax payments without this number. If you do, you run the risk of not receiving credit for the payment because it will be difficult for the EDD to identify you without an account number. - State Withholding Number: This number is used on state forms that you use to report the state income taxes you withhold from employee paychecks.
- State Unemployment Insurance (SUI) Rate: Each year, around November or December, you will receive a letter from the EDD for your particular state; it will include the SUI rate that has been assigned to your business for the coming year. If you have not received this info, contact the EDD to obtain this information.
a. To ensure your payroll taxes are calculated correctly, ensure you have the correct SUI rate before processing your first payroll. The average rate for new employers is 2.7%; if you’re concerned you may be responsible for paying a higher percentage, select 5.4% for now, and you can update it later. - Administrative Assessment Rate: This fee is unique to Georgia. The rate is 0.06% for all employers with an unemployment rate between the range of 0.04% and 8.1% The administrative assessment rate is 0% if your unemployment rate is equal to the minimum or maximum rate of 0.04% or 8.1%.
- Deposit Schedule: Based on the amount of your payroll taxes, the state will require you to pay (deposit) your taxes on a monthly, semiweekly, or quarterly basis. This information should be included with your employer account number, but if it is not, you will need to contact the EDD for your state to obtain this information.
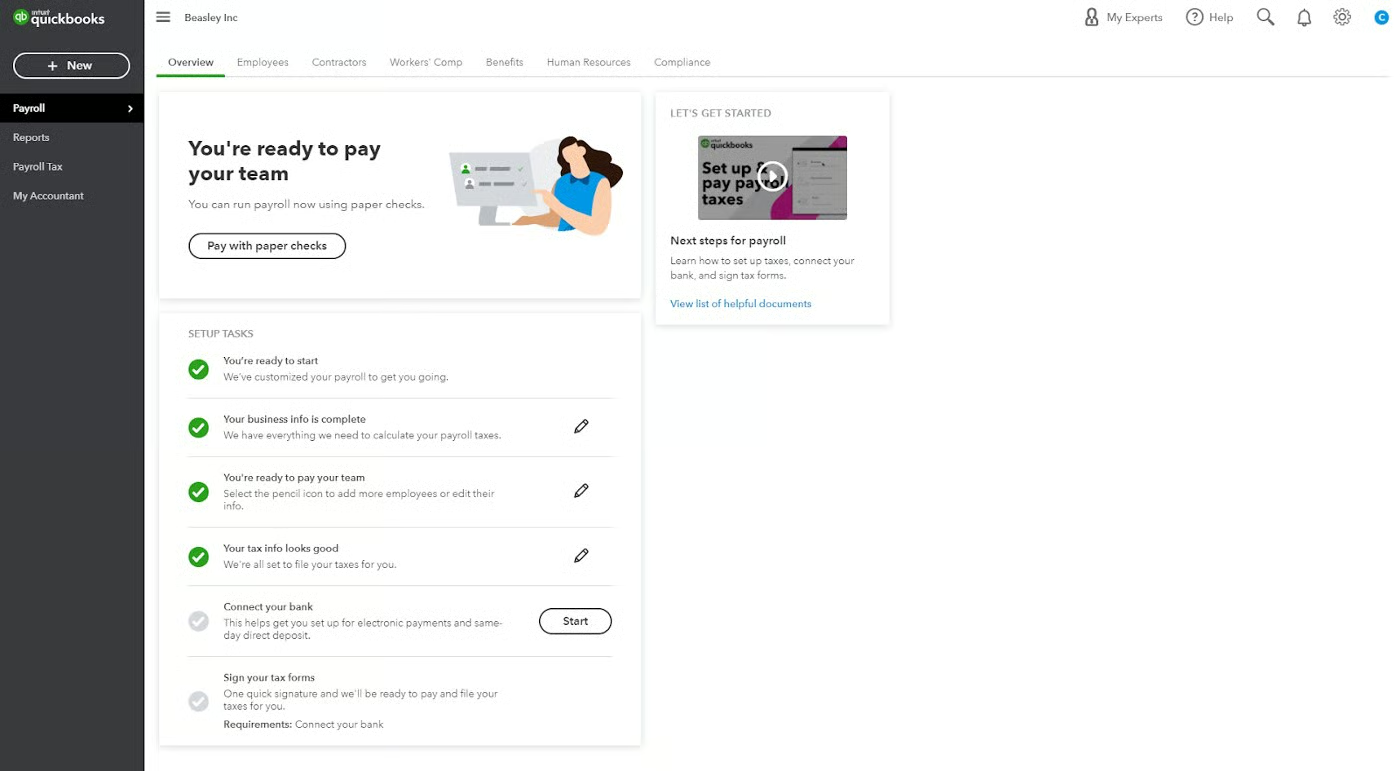
All QuickBooks Workforce plans come with e-file and e-pay. When you e-pay and e-file, you receive a confirmation that your tax forms or payments have been submitted immediately after you have made them. If, for some reason, there was an issue with the receipt, then you will have a confirmation with a date and time stamp to prove that you filed and paid on time.
To e-file and e-pay your taxes, you’ll need to provide bank information for the account you want to use for payroll tax payments. Click the button that indicates “Start” beside “Connect Your Bank” to get started.
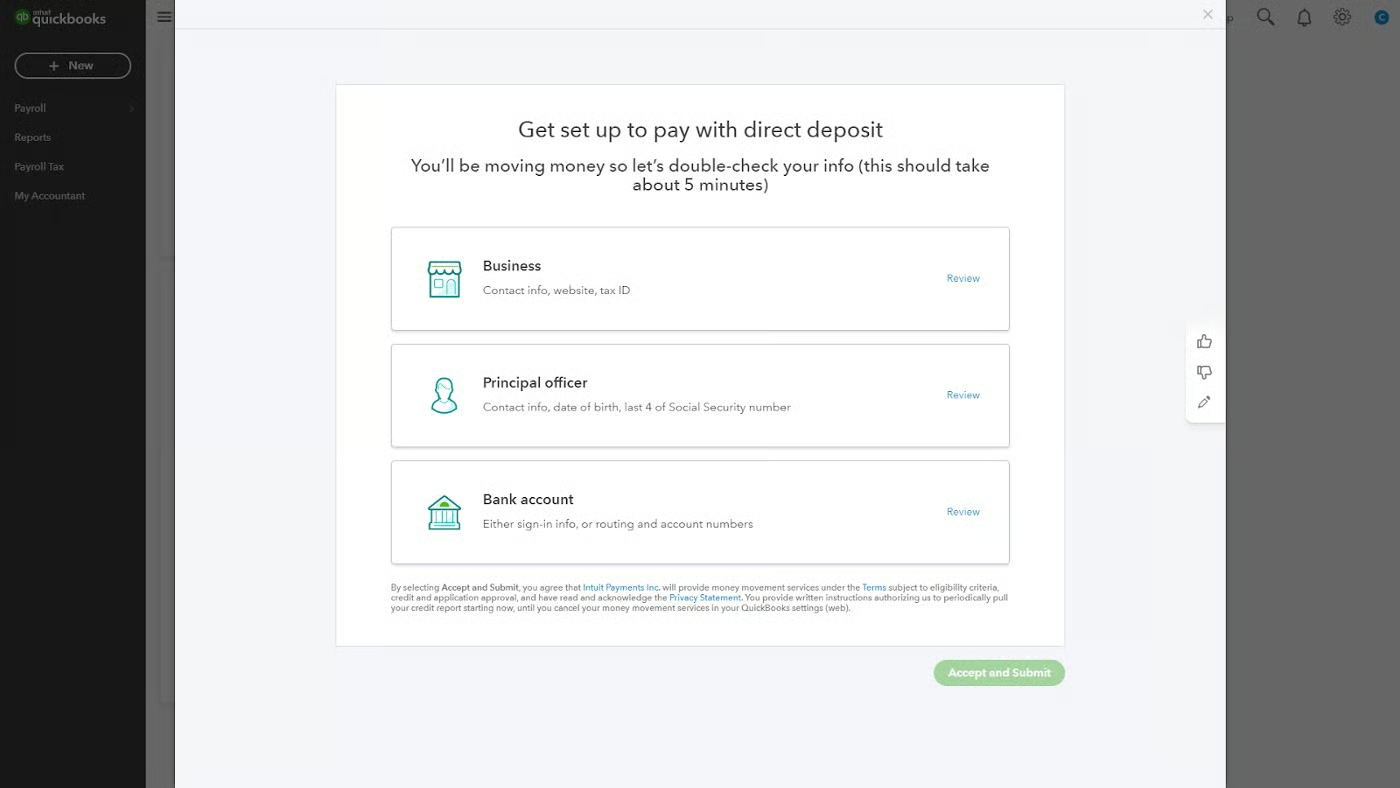
You’ll get the opportunity to review the business and principal officer information you entered earlier in the setup process. When you’re ready to add your bank account details, click “Review” beside “Bank account,” and then click the plus sign in front of “Add new bank account” to enter your business checking account details.
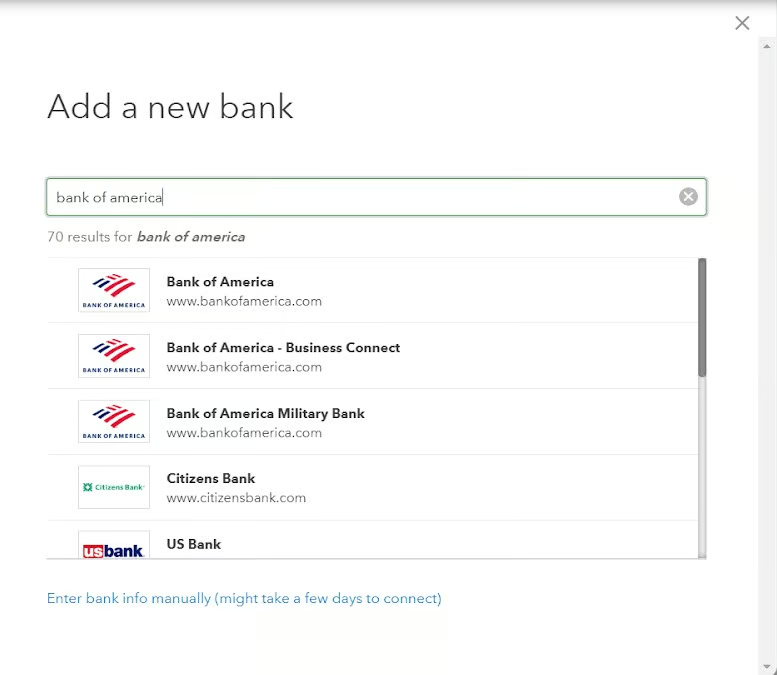
You’ll see a screen that lists different banking institutions. If you don’t see yours listed, enter it in the search box, where “Bank of America” is shown below. Then, select the corresponding result.
Enter the username and password you use to log in to your online banking account. This will form a secure connection between your bank and QuickBooks Workforce and will allow it to verify you’re really authorized to use the account.
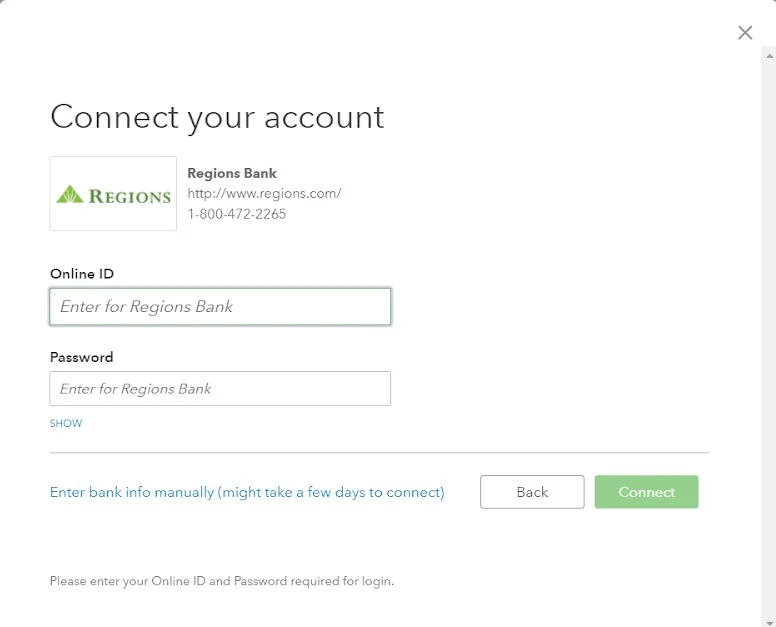
Once the account successfully connects, it will pull up a list of all bank accounts connected to that online banking ID. Select the account you want to use for payroll transactions (employee paychecks and taxes).
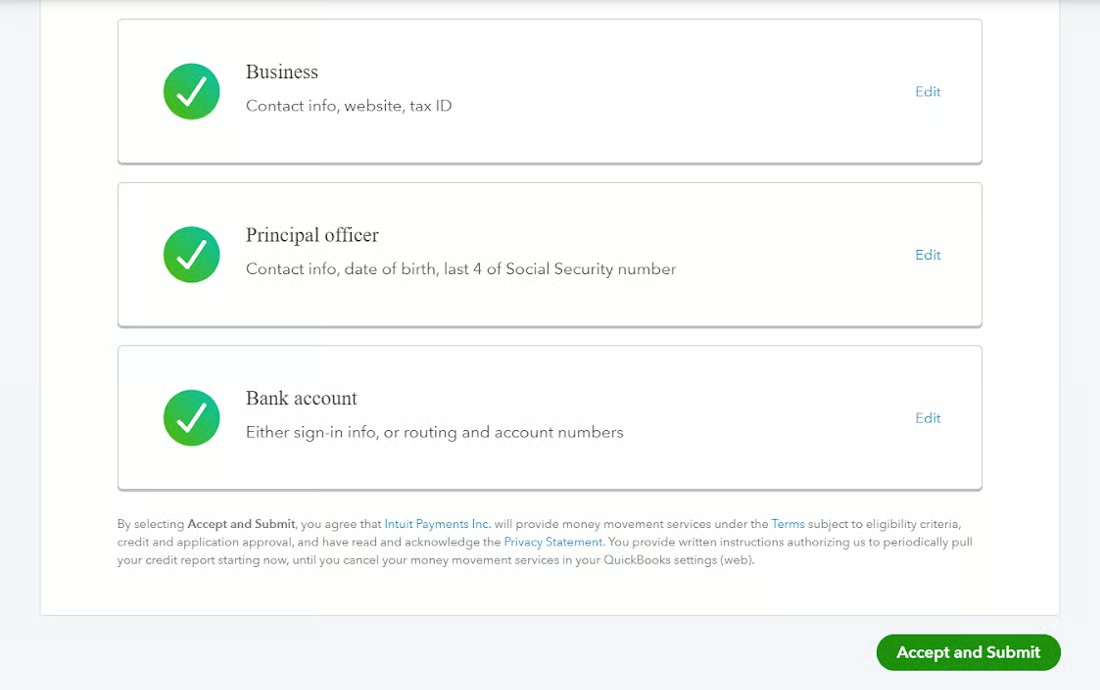
Then, you’ll return to the screen with your business, principal officer, and bank account information summary. As long as you’ve entered all the information required, you’ll be able to select the green “Accept and Submit” button in the bottom right corner.
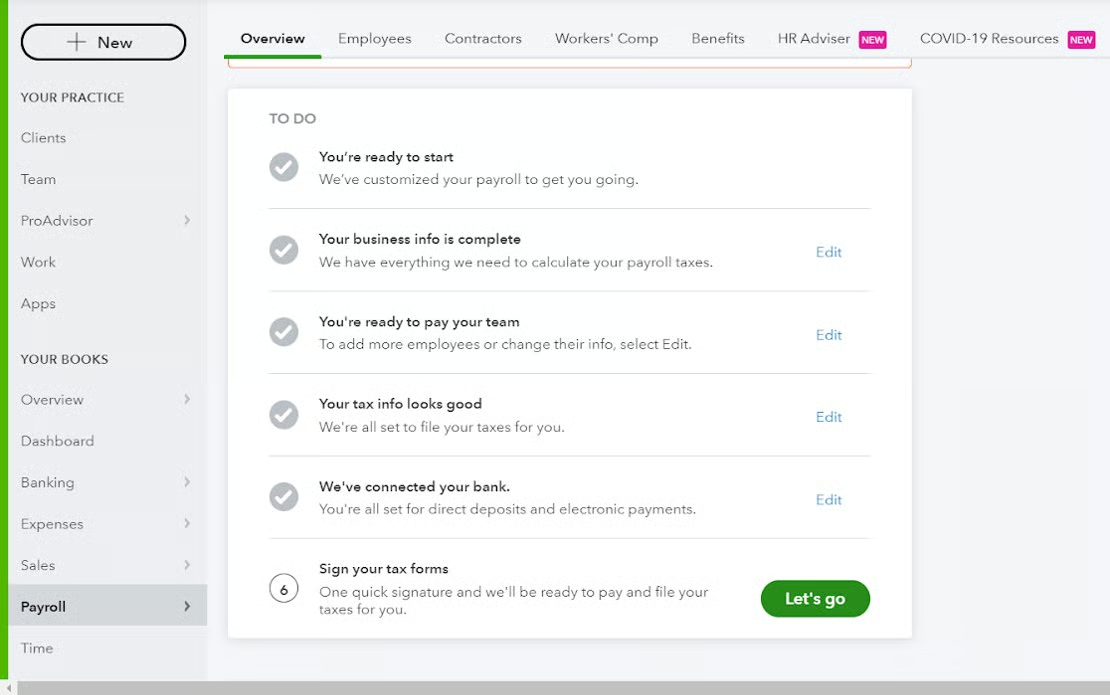
Now that your bank account is successfully connected and ready to make payroll tax payments, you just need to provide your e-signature so QuickBooks Workforce can legally file your payroll tax forms.
Select “Let’s go” to get started.
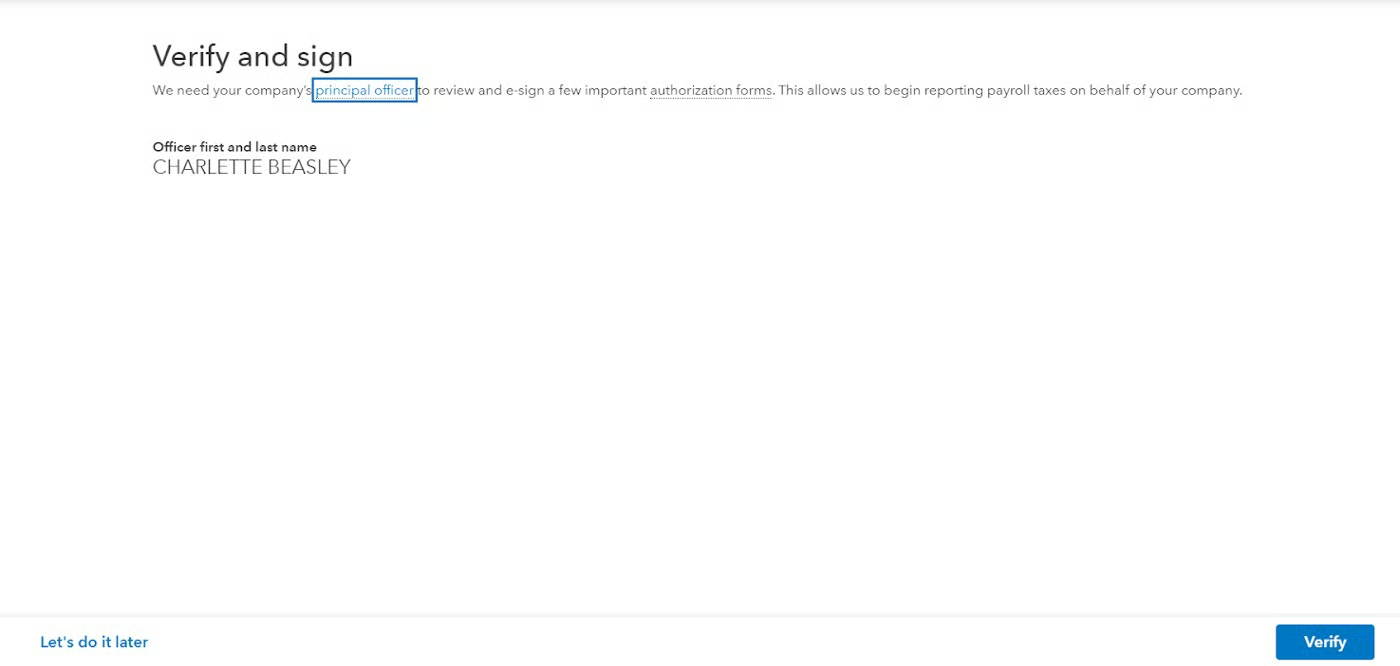
The Principal Officer’s first and last name will automatically populate if you entered it earlier in the setup process. Select “Verify” so the system can confirm contact information.
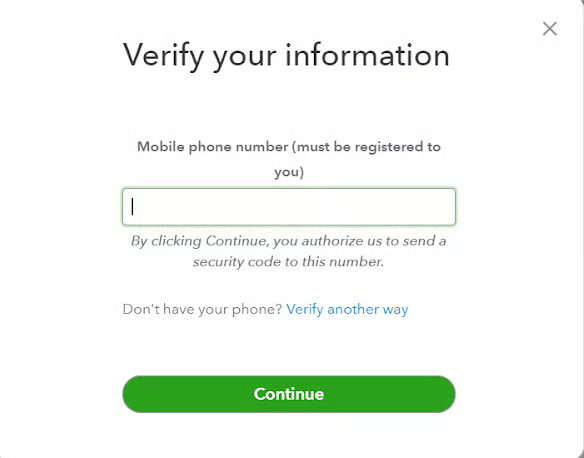
Enter your mobile phone number and select “Continue.”
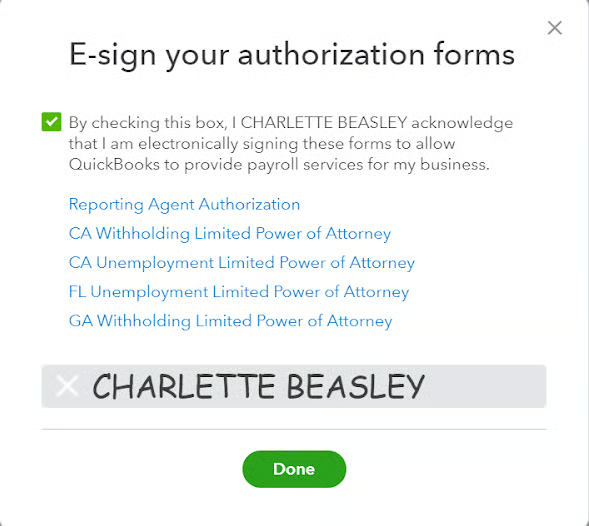
You should receive a text message with a six-digit code you’ll need to enter. After you enter the correct confirmation code, you’ll be able to e-sign your authorization forms. Check the box shown below to give QuickBooks Workforce permission to provide payroll services on your business’s behalf. Then, select “Done.”
Congratulations! Your payroll account is now ready to e-file and e-pay your payroll tax payments.
How To Edit or View Payroll Taxes & Forms
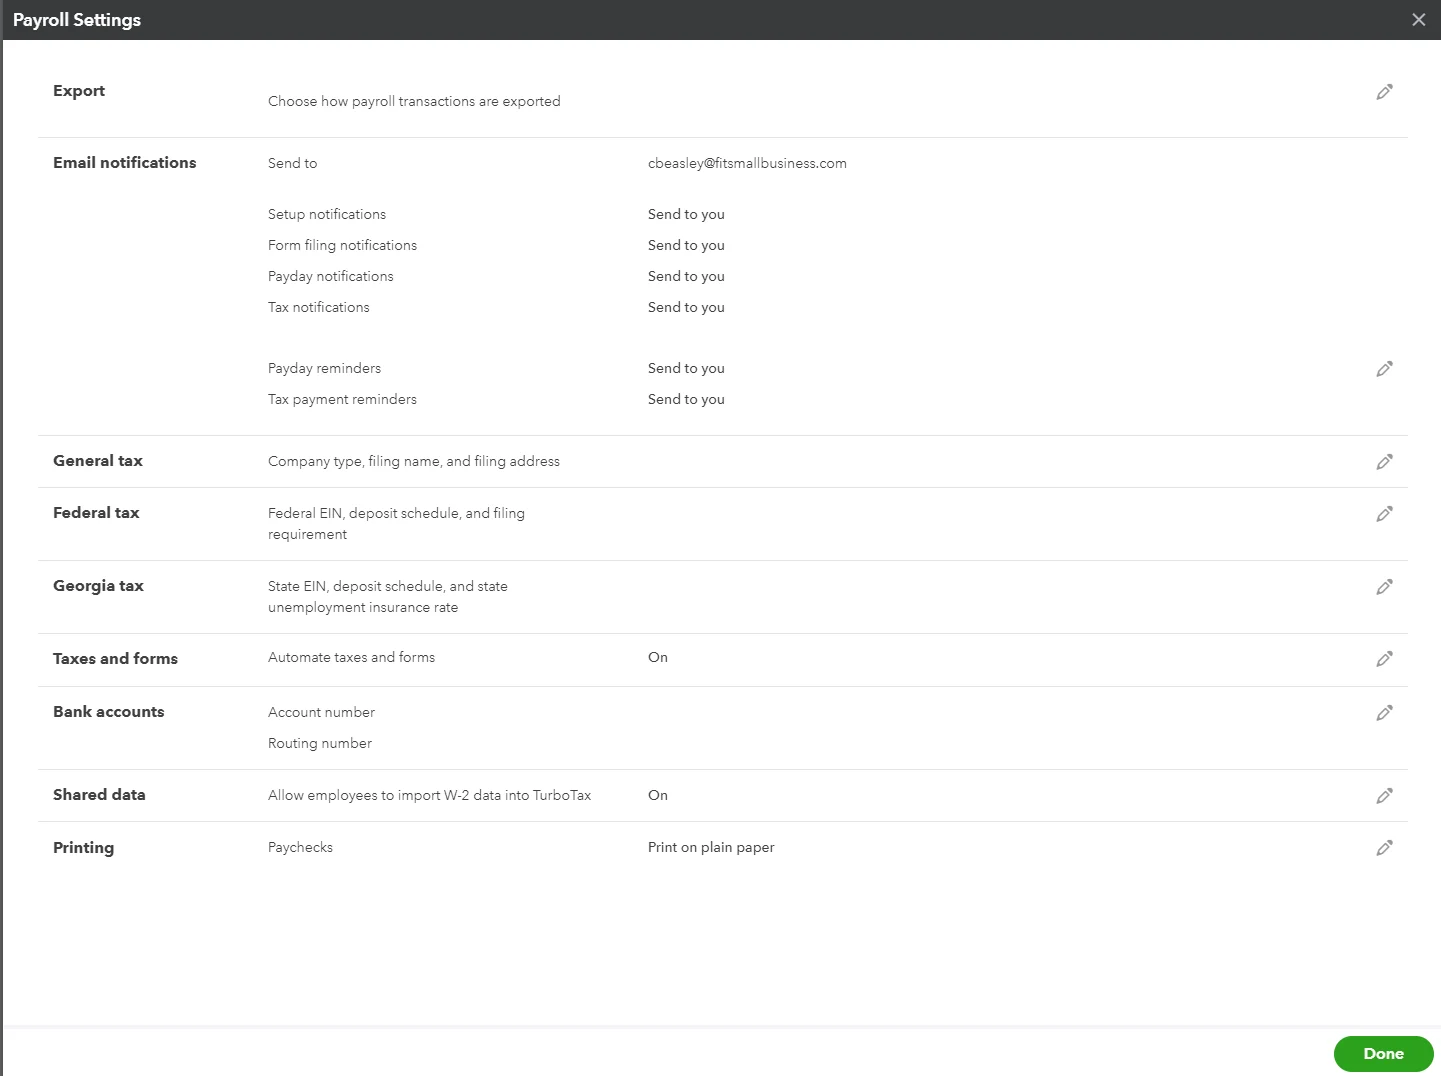
Now that you know how to set up payroll tax payments, there may be times when you need to make changes to your tax setup or you may just want to look at tax forms that you have previously filed. Click on the Gear icon in the upper right-hand corner of the home page and select “Payroll Settings.”
The Payroll Settings will display as indicated below. Let’s discuss in detail what info you can find here.
- General tax info: Make changes to your company name, filing name, and filing address.
- Federal tax info: Make changes related to your FEIN, state account number, tax forms you are required to file, and your payment (deposit) schedule.
Scroll down and you’ll see other information you can view or edit.
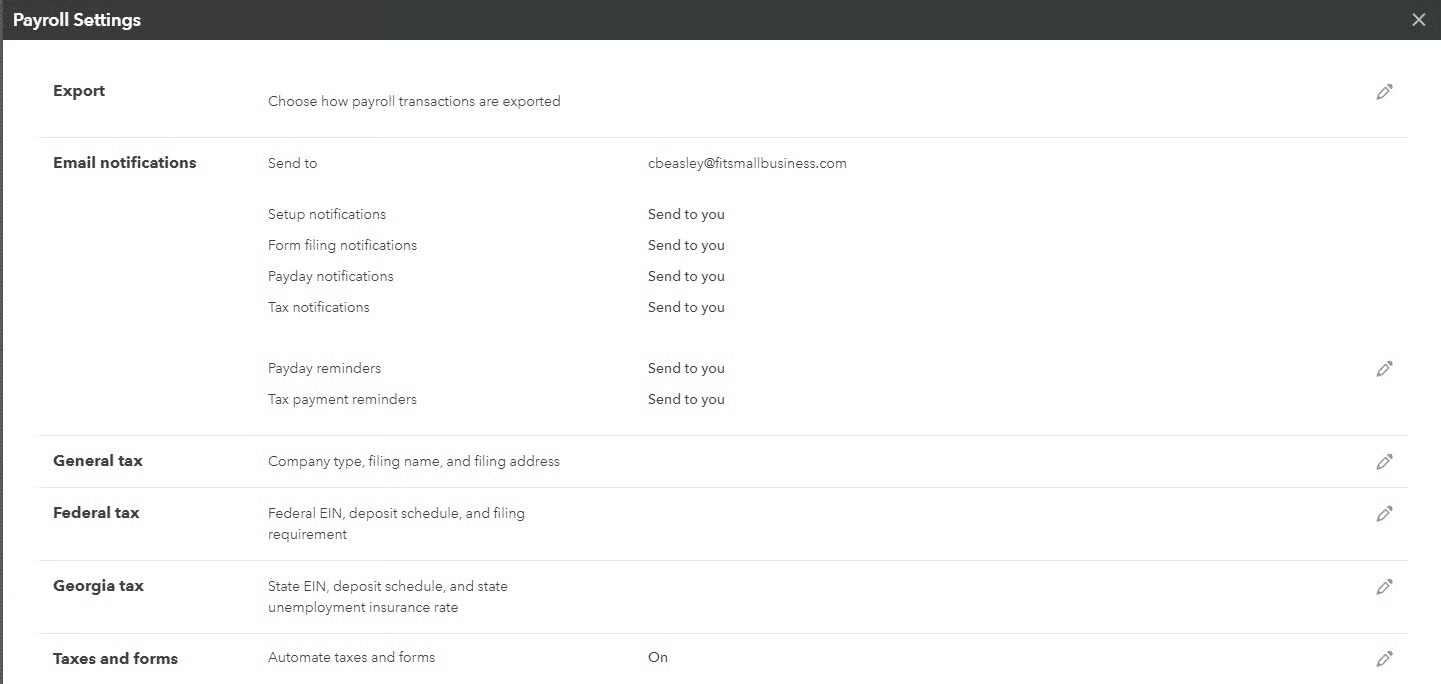
- Email notifications: If you want tax payment reminders and notifications emailed to you, leave this on the default “Send to You” setting. If not, you can turn it off.
- Shared data: You can opt to allow employees to import their W-2 tax information into TurboTax, or not. This is a benefit to employees who file their taxes since they won’t have to enter the information themselves.
There are also sections for you to change bank account information, direct deposit funding time, paycheck printing options, and designated payroll general ledger accounts.
Bottom Line
Now that you know how easy it is to set up and make your payroll tax payments using QuickBooks Workforce, you’re ready to run your first payroll! If you haven’t set up your employees, then head over to our QuickBooks Workforce guide for step-by-step instructions. You can also head on to the next step in our QuickBooks tutorials, which is How To Add Historical Data to QuickBooks.
If you haven’t yet started a QuickBooks Workforce account, you can sign up for a free 30-day trial. You can start paying employees using direct deposit shortly after. And the system will withhold, file, and pay all payroll taxes accordingly.
You May Also Like
- Learn how to process payroll in eight easy steps
- Find out how to choose the right payroll solution for your small business