


This tutorial will show you how to process credit card payments in QuickBooks Online using QuickBooks Payments. First, we’ll go over how to set up QuickBooks Payments, as you’ll need an account to process payments. Then, we’ll look at how to accept credit card payments in QuickBooks Online using a sales receipt and a customer invoice.
How To Set Up QuickBooks Payments in QuickBooks Online
Click on the gear icon in the upper right corner of your QuickBooks Online screen, then select Account and settings under Your Company, the first column, as shown below.
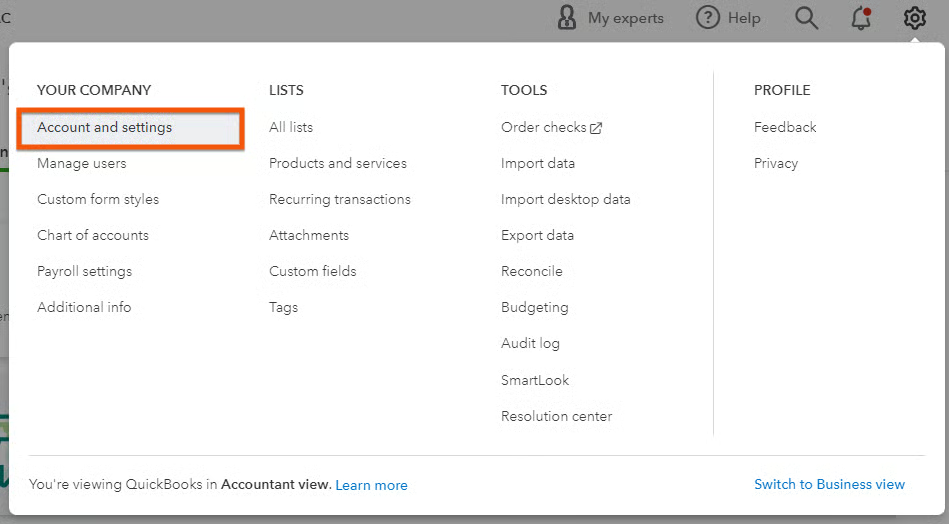
Navigate to Account and settings in QuickBooks Online
From the Account and Settings screen, click on Payments in the left menu bar.
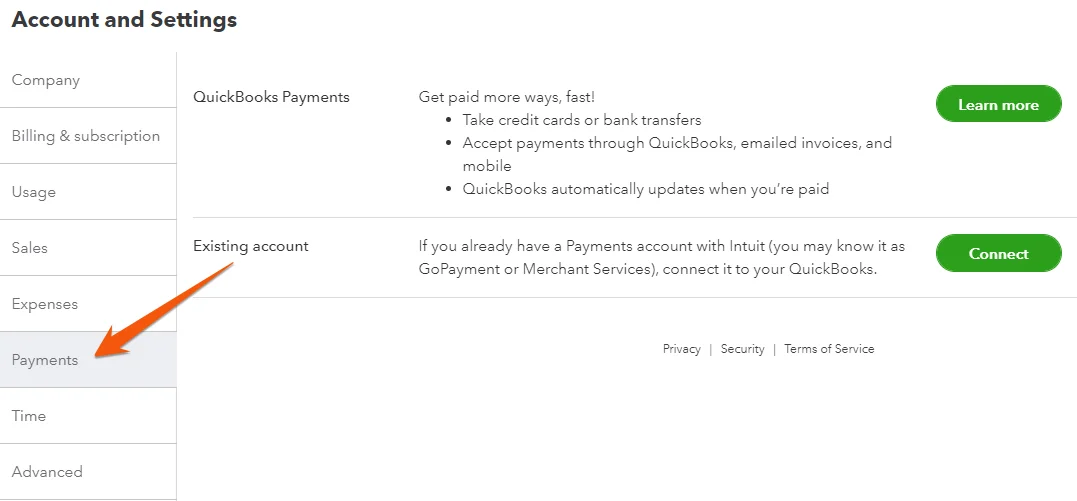
Navigate to Payments settings in QuickBooks Online
If you already have a QuickBooks Payments account, you should proceed to Step 3. If you don’t have one, you need to apply by clicking on the green Learn more button in the Payments settings screen (shown in the image above). Next, you’ll be taken to the QuickBooks Payments account application window consisting of three sections, as shown below.
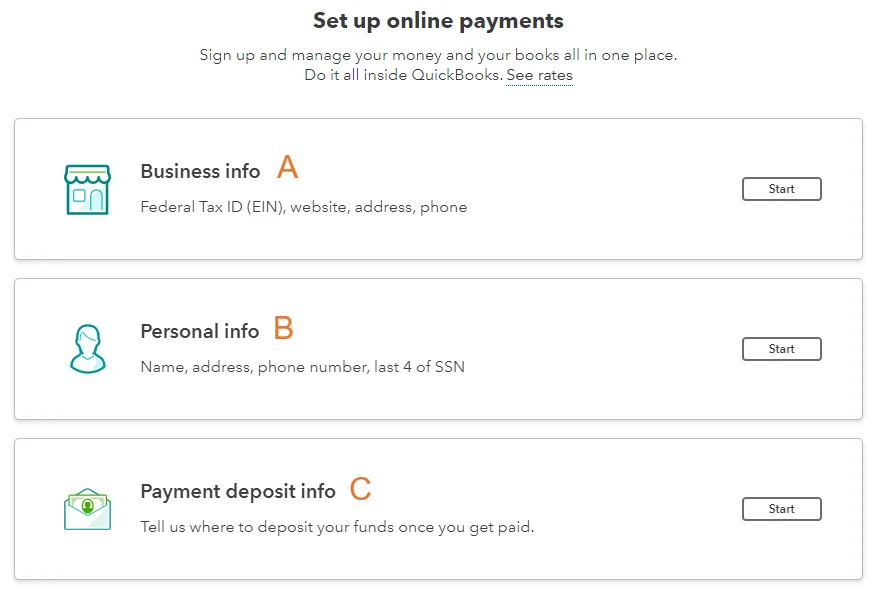
QuickBooks Payments account application
- Business info: You’ll be asked to provide business information, such as company name, business type, and business address.
- Personal info: QuickBooks will prompt you to provide personal information, including your full name, address, and phone number.
- Payment deposit info: QuickBooks will ask which of your bank accounts should receive your credit card deposits and be charged credit card fees. If you haven’t already added a bank account to your chart of accounts, you must do so before you can set up QuickBooks Payments.
If it is your first time setting up QuickBooks Payments, then you should see a start button next to each section, just like in the screenshot above. Otherwise, you should see a View button.
When all three sections are complete, click the green Get set up button at the bottom of the screen (not shown in our image).
Navigate to the payment settings screen as you did in Step 1. Now that you’ve signed up for QuickBooks Payments, your Payment settings screen should look like this:
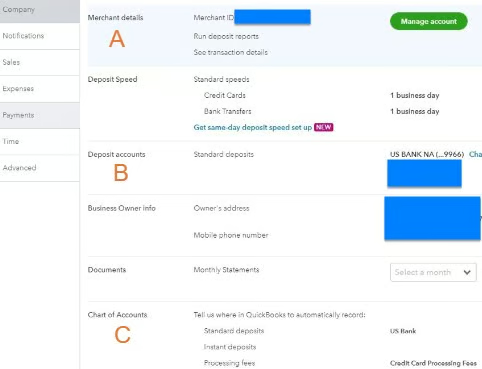
Review payment settings in QuickBooks Online
- Merchant details: Click the green Manage account button to go to your QuickBooks Payments account.
- Deposit accounts: The bank account listed in this section will be used to deposit your credit card proceeds and withdraw processing fees. Changing the bank account here will not affect the QuickBooks account wherein the transactions are recorded.
- Chart of Accounts: This field identifies
- the QuickBooks bank account to record deposits; and
- the QuickBooks expense account to categorize the processing fees.
To designate an account to record processing fees, click anywhere in the Chart of Accounts section.
Next, click on the drop-down menu next to Processing fees (under Charts of Accounts) and choose an expense account to charge your credit card processing fees. If the account is not yet in QuickBooks, you can create a new account by clicking on + Add New from the drop-down list that shows up when selecting an account. After selecting an expense account, click the green Save button.
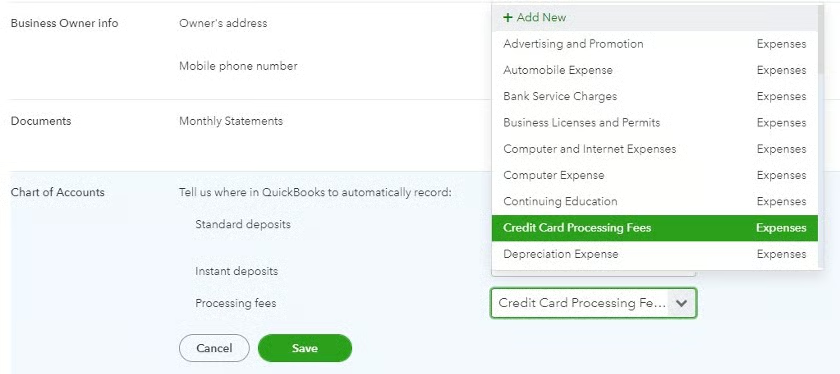
Select an account to record credit card processing fees
How To Record a Credit Card Payment Using a Sales Receipt
Now that you have a QuickBooks Payments account, you can issue sales receipts to record customer payments via credit cards, debit cards, and bank transfers. This process should be easier if you completed our tutorial on how to create and send sales receipts in QuickBooks Online.
Click + New at the top of the left menu bar and then select Sales receipt under Customers, the first column.
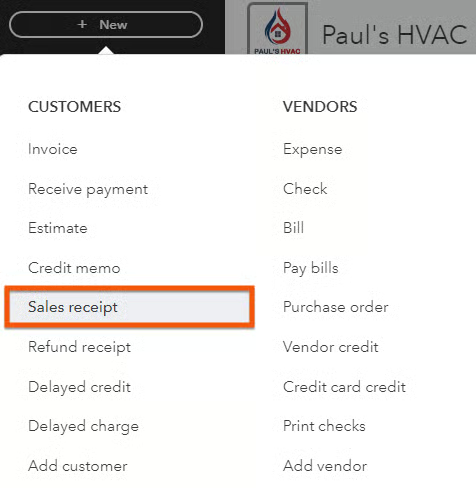
Create a new sales receipt in QuickBooks Online
To accept payment via a credit card, debit card, or bank transfer, click the drop-down box under Payment method and choose the form of payment.
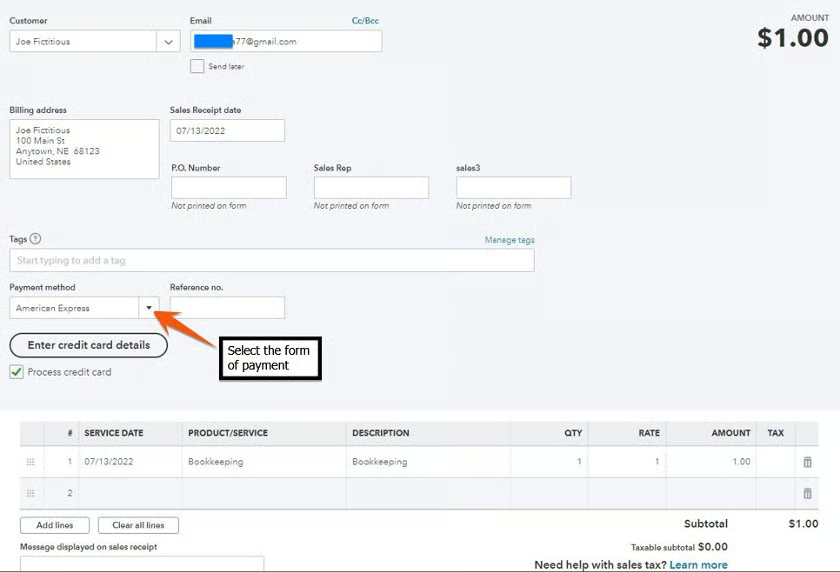
Process credit card payments with sales receipts
After selecting the payment method, click on Enter credit card details to input the customer’s credit card account information. The Enter credit card details field in the sales receipt only appears if you have a QuickBooks Payments account.
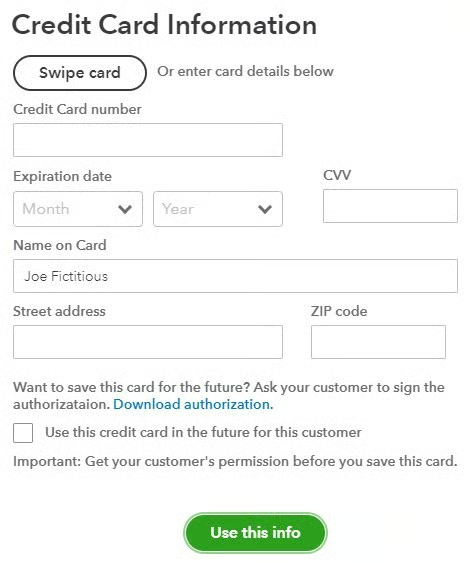
Enter customer credit card information
After inputting all the credit card information, hit the green Use this info button. The credit card transaction hasn’t yet been processed, and you’ll receive a message that you have 10 minutes to process the transaction before the credit card information is removed from the sales receipt. After acknowledging you have 10 minutes, you’ll be redirected to the sales receipt screen.
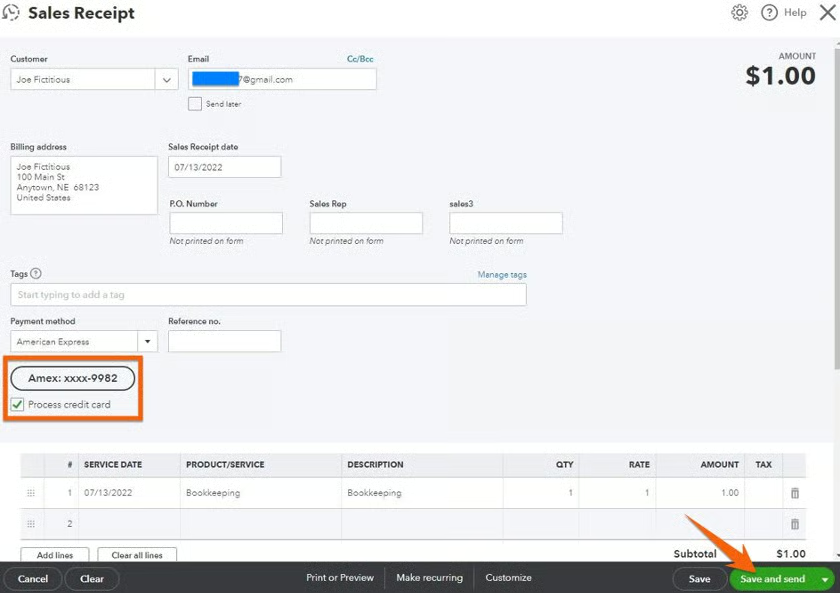
Sales receipt with credit card information
The Sales Receipt screen now shows the last four digits of the credit card number that will be charged. To process the transaction, click the green Save and send button.
Reopen the sales receipt by hovering over Sales in the left menu bar, clicking on All Sales, and then finding the sales receipt transaction you just created. After opening the sales receipt, verify that it reads “Transaction processed” under the Payment method.
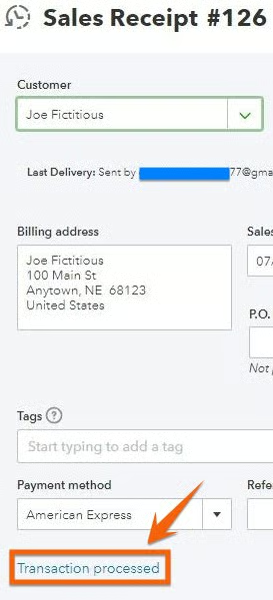
Verify the credit card payment processed on a sales receipt
Click on Transaction processed to view the details of the transaction.
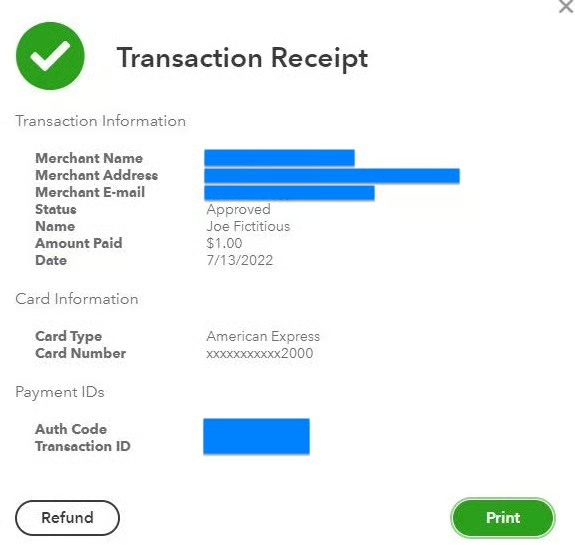
View the credit card transaction receipt
You can either print the transaction details by clicking the Print button or issue a refund to the customer by hitting the Refund button.
How To Record a Credit Card Payment on an Invoice
This process is unnecessary if your customer pays an invoice online by clicking Pay Invoice in the email sent to them. You can enable online payments by clicking the gear icon in the upper-right corner of the screen, selecting Company settings in the first column, and then clicking Sales.
Click on + New above the left menu bar and then select Receive payment in the first column.
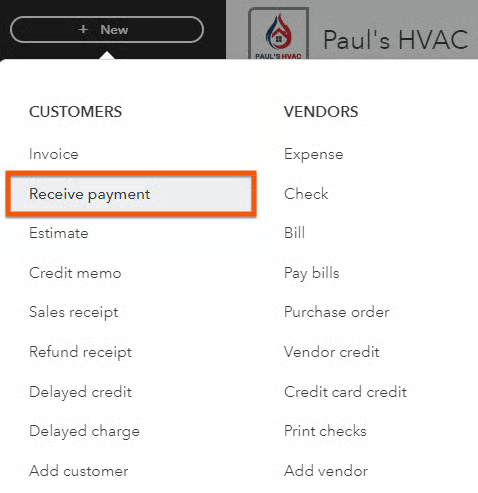
Open the Receive payment screen in QuickBooks Online
The Receive Payment screen should be completed, as shown in our guide on how to receive payments in QuickBooks Online—except the payment method should be changed to a credit card. Also, just like in the sales receipt form, you will now see an Enter credit card details option since you set up QuickBooks Payments.
Click the drop-down menu under Payment method and select the credit card processor.
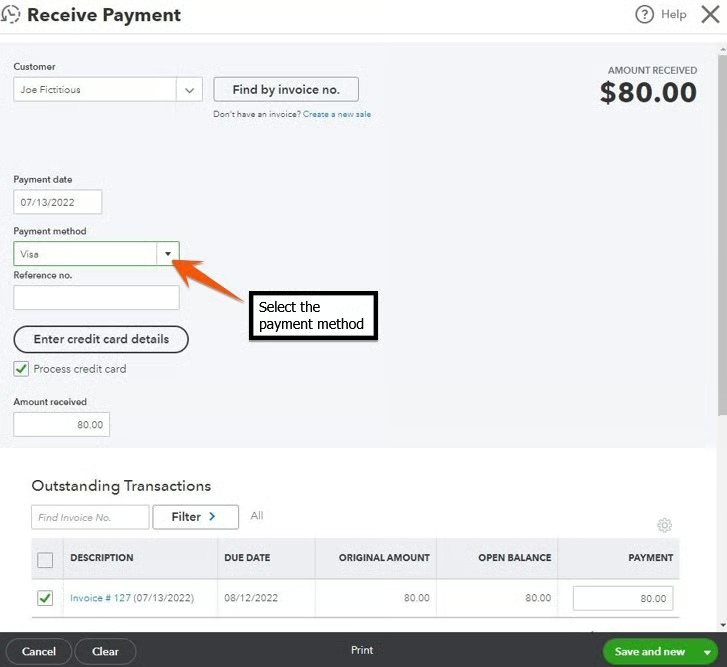
Enter payment method for an invoice payment
Click Enter credit card details to open a window to input the customer’s credit card account information:
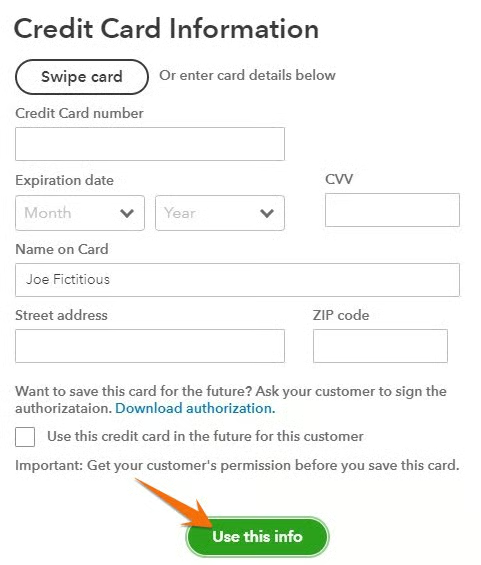
Enter credit card information to receive payment on an invoice
Once the credit card information is entered, click the green Use this info button to continue. The credit card hasn’t yet been charged, and you have 10 minutes to complete the transaction before the credit card information is removed.
The Receive Payment screen will now show the last four numbers of the credit card to be charged.
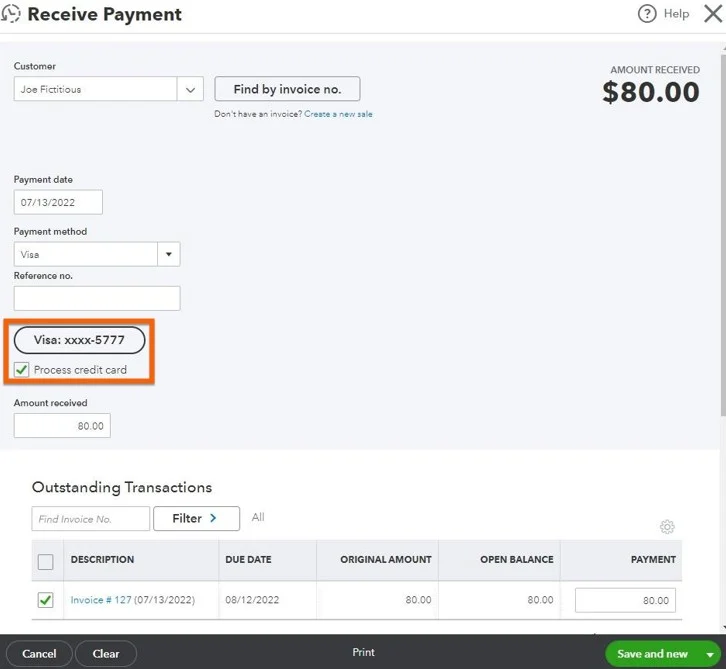
Receive Payment screen with credit card information
Click the green Save and close button to process the credit card transaction and charge your customer’s credit card
What Happens Next?
The credit card payments you received won’t be reflected in your bank account register until the funds are transferred from QuickBooks Payments. Once the funds are in your bank, QuickBooks will automatically record the deposits (matching them with the corresponding transactions) and update the account registers you specified in the QuickBooks Payments options earlier.
Additionally, QuickBooks will account for any processing fees associated with the credit card transactions—recording them separately in the respective account registers. This comprehensive recording process is one of the reasons QuickBooks Online is our overall best small business accounting software.
What Are the Benefits of Using a QuickBooks Payments Account?
- There’s nothing to install for QuickBooks Payments to work with QuickBooks Online.
- Your accounts and financial statements are always up-to-date since QuickBooks Payments is integrated into QuickBooks.
- Your customers can make payments online by clicking the Pay Now button on their emailed invoices.
- You can accept payments using your mobile device via the QuickBooks Online mobile app.
- Payments are deposited to your bank account, on average, within two or three business days after the transaction date.
- You get competitive rates for payment processing, helping you minimize transaction costs.
Frequently Asked Questions (FAQs)
You will need to provide business information. such as your business name, industry type, and company address. You will also have to provide personal details, like the owner’s full name and personal address, and enter your payment deposit info, such as bank account details.
Yes, there are. The fees vary depending on factors such as the type of transaction and the payment method used.
Typically, funds are deposited into your bank account within two to three business days. However, if you have a QuickBooks Checking account, you can get free instant deposits.
Wrap Up
Congratulations on completing another QuickBooks course. You just learned how to process credit card payments in QuickBooks Online through QuickBooks Payments. The next guide in our series of free QuickBooks tutorials is how to record credit card sales with a third-party credit card processor, which will teach you how to enter credit card sales when using a non-QuickBooks-integrated processor.