

This guide will cover how to manage downloaded credit card transactions in QuickBooks Online. You’ll learn how to match transactions to existing entries, add them as new transactions, or choose from multiple potential matches. Also, we’ll cover how to create a rule to help QuickBooks better remember similar transactions.
Step 1: Go to the Banking Center
Navigate to the banking center by hovering over Banking in the left menu bar and then clicking on the Banking drop-down menu, as shown below.
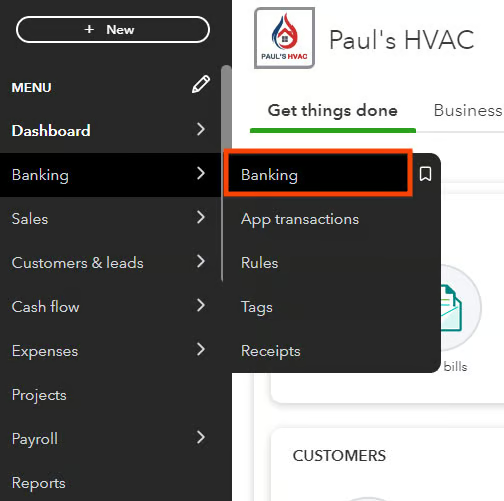
Navigate to the banking center in QuickBooks Online
Seeing a different left-side navigation menu?
QuickBooks has two user views: Business View and Accountant View. Your left-side navigation menu may look different depending on the user view you are in.
If your sidebar menu is not what is shown in our tutorial, it means that you are on Business View. We prefer and recommend using the Accountant View because it shows a full range of business accounting features and tools that you can use in QuickBooks.
To verify whether you’re using the Business View, click on the cog wheel at the top right-hand corner of your QuickBooks dashboard, and check whether the button on the lower right-hand says Switch to Accountant view, as shown below. If so, then it means you are on Business View.
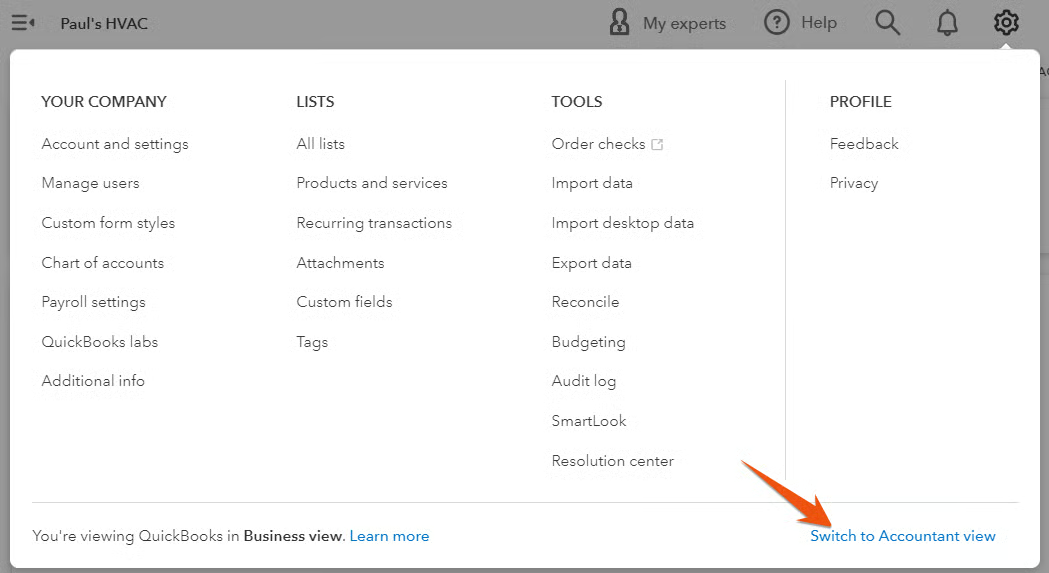
Verify whether you are using Business View or Accountant View in QuickBooks
Step 2: Select Your Credit Card
The top portion of the banking center displays each checking and credit card account that you have connected to your QuickBooks account. Click on the card you wish to use for importing the transactions. If you haven’t connected your credit card account, see our tutorial on how to import credit card transactions into QuickBooks Online.
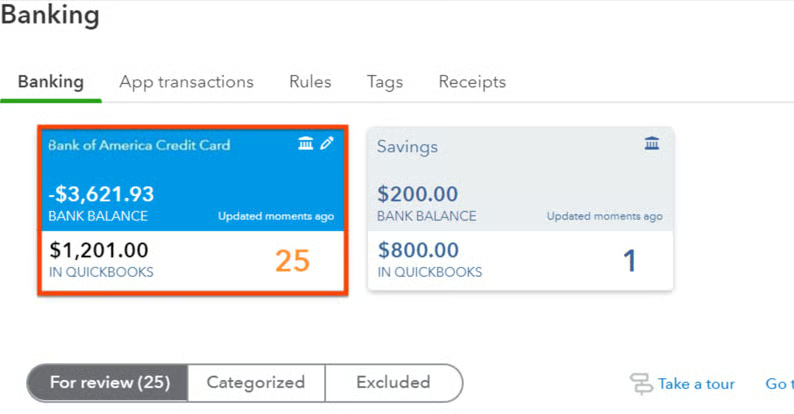
Select your credit card account in the banking center
The summary box (shown above) displays the account balance reported by your bank and the balance from your QuickBooks account register. The orange number is the number of transactions downloaded from your bank account that haven’t yet been reviewed and accepted, matched, or excluded. In the screenshot above, there are 25 transactions awaiting review in our Bank of America credit card account.
Note that transactions that are downloaded into QuickBooks are already reflected in the bank balance. However, downloaded transactions don’t affect your QuickBooks balance until you review and accept them.
Step 3: Navigate to the ‘For review’ Tab
You can see the list of transactions to review in the lower half of the banking center under the For review tab. Below, you can see a few of the 25 transactions awaiting review in our Bank of America credit card account.
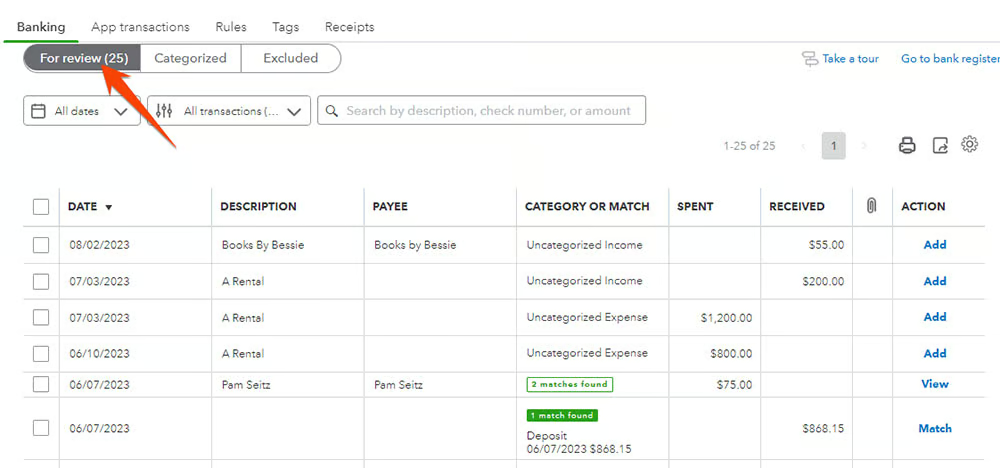
Credit card transactions to review are found in the For review tab
Step 4: Review and Manage the Downloaded Transactions
To review and categorize downloaded credit card transactions in QuickBooks Online, you may see either a Match, View, or Add button under the Action column. QuickBooks Online is smart enough to suggest a category for each transaction based on its details.
However, clicking on Match will connect the transactions immediately, and clicking on Add will automatically add the transaction as a new entry. Hence, we suggest that you first review the transaction by clicking anywhere on the entry line—except in the Action column.
When QuickBooks detects that a transaction already exists in QuickBooks, you’ll see a Match button under the Action column. You’ll see the potential match found under the Category or Match column. Click anywhere on the entry line to review the potential match.
In the screenshot below, QuickBooks found a potential match for a transaction made with Hicks Hardware. Once you confirm that the transactions match, click the green Match button.
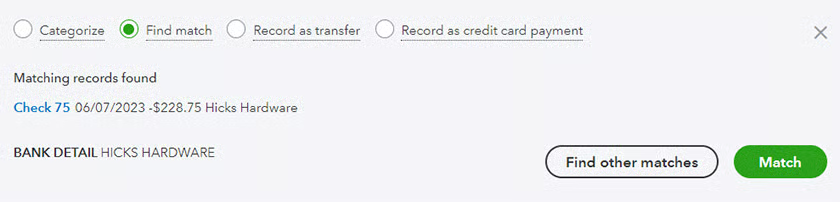
QuickBooks found a potential match for an imported transaction
The credit card transaction will move from the For review tab to the Categorized tab, but no transaction will be created in the QuickBooks register since the transaction already exists.
Find Other Matches
If you made a partial payment on an outstanding bill, QuickBooks won’t suggest a match automatically since the amount of the charge is different from the bill. Click Find other matches to open the list of outstanding bills and indicate which bill the credit card will be applied to.
You might also have to use the Find other matches button for matching transactions where the amounts are, in error, slightly different. You’ll need to correct the QuickBooks transaction amount to match the actual credit card charge before you can match the transactions.
In some cases, QuickBooks may detect more than one potential match. This can occur when there are multiple transactions in your account that share similar details, such as the date, amount, and payee. QuickBooks presents how many potential matches it found under the Category or Match column.
You can review the details of each potential match and select the one that best corresponds to the transaction you are reviewing. Click View or anywhere on the transaction line to review the potential matches. Once you select the appropriate match, click Match.
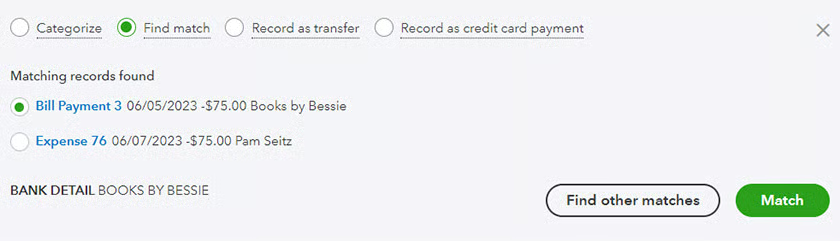
Two potential matches for an imported transaction in QuickBooks Online
If the imported transaction is new and not yet recorded in QuickBooks, click on the transaction entry line, and QuickBooks Online brings up a screen where you can record the transaction based on its suggestions. For instance, in the screenshot below, QuickBooks suggests the transaction to be recorded under Uncategorized Income. However, you have the option to adjust it based on the transaction. Once done, click the Add button.
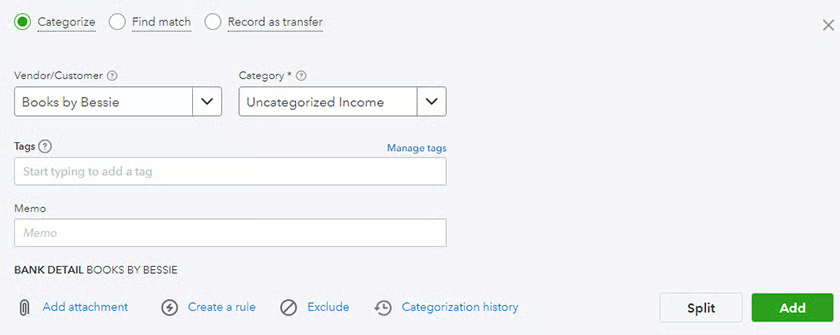
QuickBooks suggests recording an imported transaction as a new entry
Split
You may need to use the Split button If your transaction involves different expense categories. The ‘Split transaction’ screen allows you to allocate the amounts to the respective categories or accounts based on your needs.
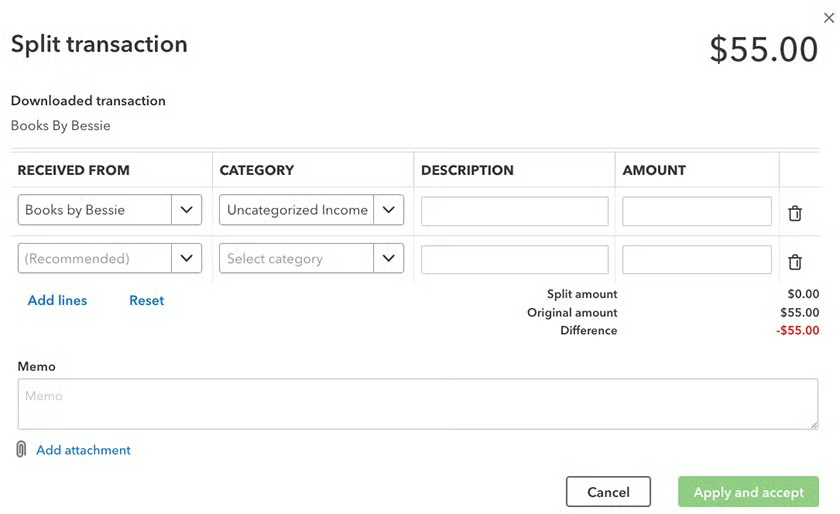
’Split transaction’ screen in QuickBooks Online
Create a rule
When adding a new transaction, you’ll see a Create a rule option at the bottom of the screen. This will help QuickBooks automate the categorization of similar transactions in the future. If you went over our tutorial on how to manage QuickBooks Online bank feeds, you’ll find the “Create rule” form familiar.
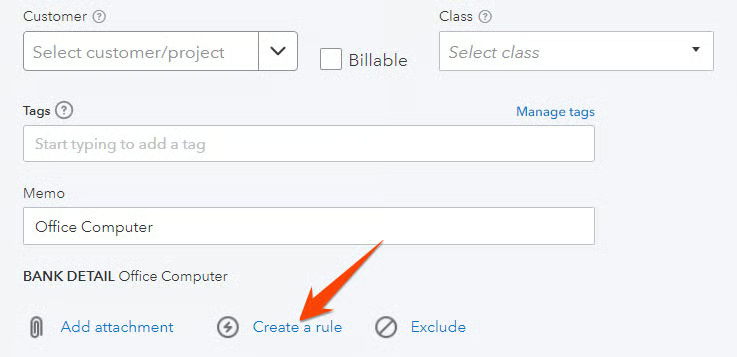
Create a rule to memorize credit card transactions
To create a rule, you must specify the conditions and select what happens when the conditions are met. For instance, you can create a rule where any books-related transactions made with Books by Bessie above $200 and containing the phrase “books by Bessie” in the description are automatically categorized as bookkeeping services.
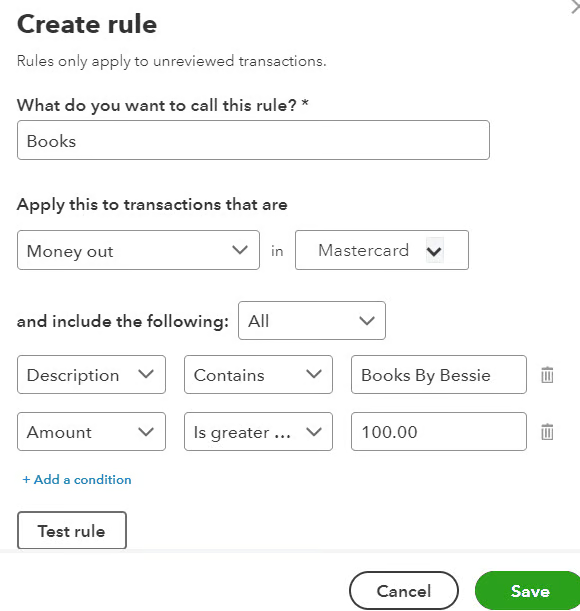
’Create rule’ form for imported transactions in QuickBooks Online
Why You Should Manage Downloaded Credit Card Transactions in QuickBooks
After you import credit card transactions into QuickBooks Online, our best small business accounting software, you must tell the platform how to classify the transactions. Imported credit card transactions don’t transfer into your account register automatically. Instead, they appear as transactions awaiting review in the banking center.
By properly categorizing credit card transactions, you can better monitor your expenses. For instance, you can categorize transactions as office supplies or travel expenses—allowing you to track where your money is being spent. More importantly, categorizing downloaded transactions helps you ensure the accuracy of your records and simplify the reconciliation process.
Frequently Asked Questions (FAQs)
Yes, you can. Rules can be created based on specific criteria, such as descriptions and transaction amounts.
Yes, you can. Click on the transaction entry to make the desired changes.
Yes, and you can do so by connecting your bank or credit card account to the platform.
Wrap Up
You successfully learned how to manage downloaded credit card transactions in QuickBooks Online and how to match them to existing transactions and apply them against unpaid bills. You also learned to create a rule so that QuickBooks can provide greater detail when suggesting new transactions. The next guide in our course is how to enter a credit card refund in QuickBooks Online when you receive one from a vendor.